

What this is
Emarsys is a marketing automation platform for personalised email, SMS, and multi-channel campaigns. The Zeotap CDP Emarsys destination sends contacts, attributes, and triggered events from your Zeotap audiences into an Emarsys account, where you can address them in Contact Lists or Automation (Interaction) Programs. This page walks you through gathering the Emarsys credentials Zeotap CDP needs, creating the destination, choosing an action (send-to-contact-list, triggered event, or the deprecated identifiers-only action), mapping Catalogue fields to Emarsys fields, and verifying that pushed audiences arrive in Emarsys.Prerequisites
Before you create the Emarsys destination in Zeotap CDP, gather these values from your Emarsys account:
- User name (API ID) and Secret for an Emarsys API user with the required permissions (see below).
- Key ID — the Emarsys Field ID of the primary identifier you want Zeotap to use. Standard system fields have predefined Field IDs (for example,
3for Email). - For the Send triggered event action: the Event ID of an External Event created in Emarsys.
- If your primary identifier is a custom ID, it must be activated by the Emarsys Support Team before the destination will accept it.
Supported identifiers and attributes
The Emarsys destination accepts:- Email address (raw)
- First Name, Last Name
- Gender
- Date of birth
- Phone, Mobile
- City
- Company, Company address
- City (office)
- Opt-in — accepted values are
Yes/NoorTrue/False. For other values, contact your Zeotap point of contact. - Custom Fields (identifiers or attributes)
Available actions
Sample accepted values for the Opt-in field:
Obtain the User name (API ID) and Secret from Emarsys
The User name (API ID) and Secret authenticate Zeotap’s API calls to Emarsys.1
In Emarsys, go to Management > Account Management > Security Settings > API.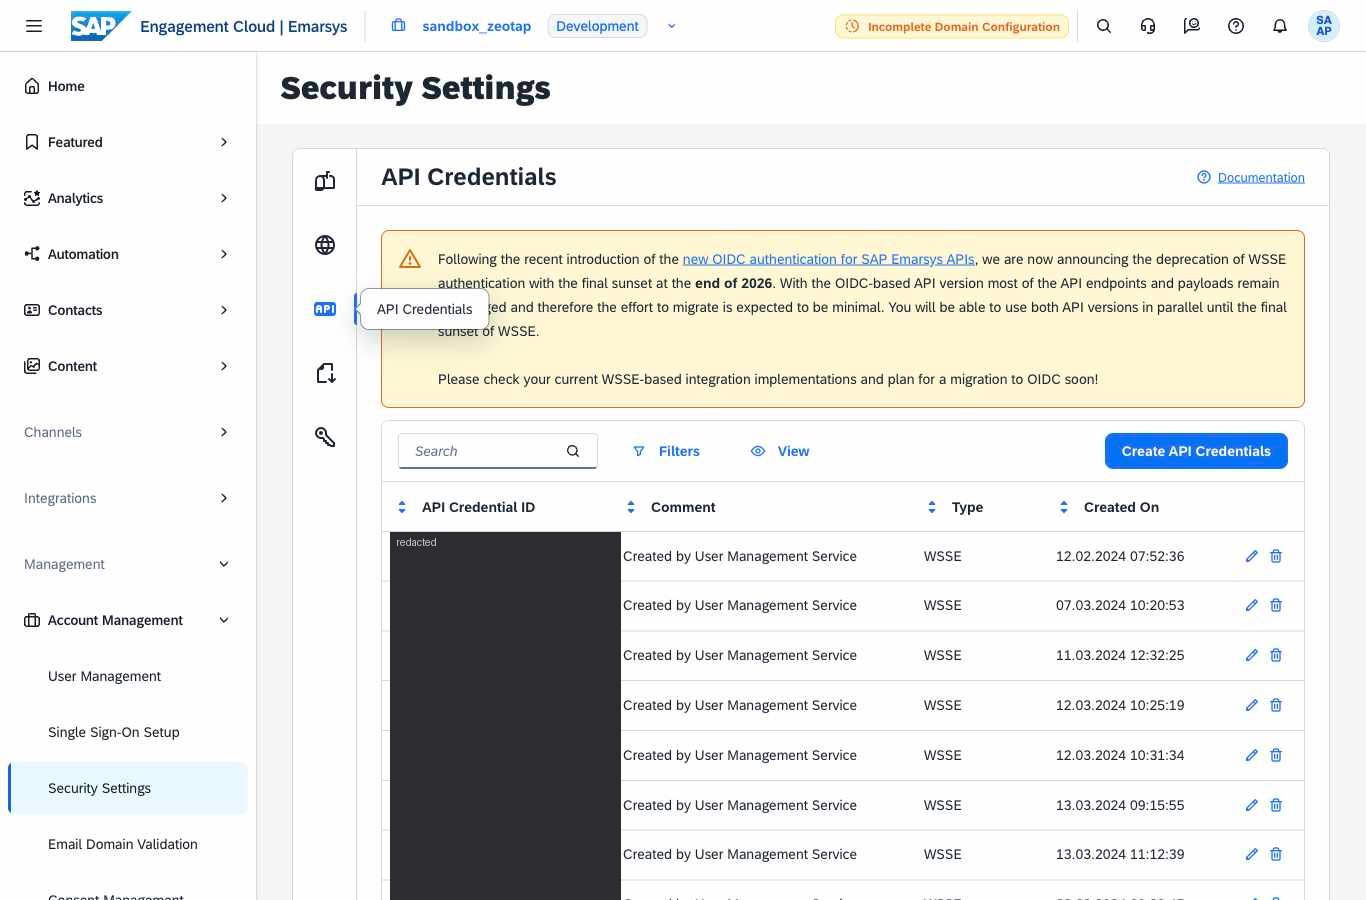
2
Under API Credentials, click Create API Credentials.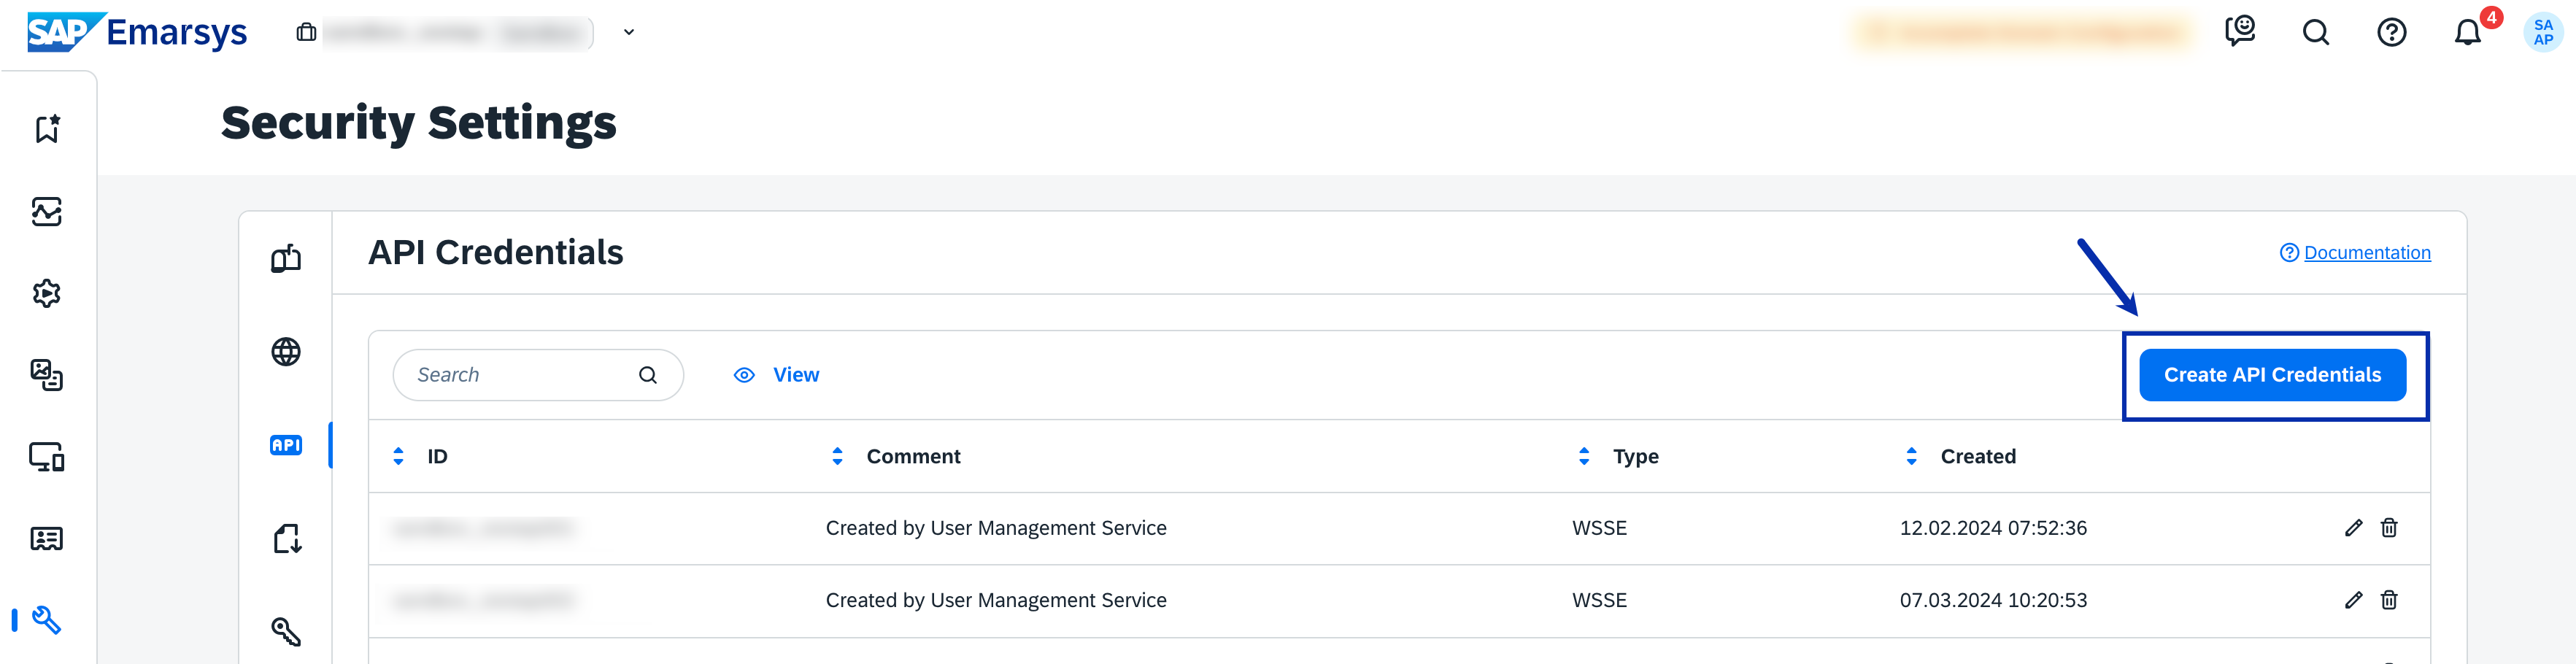
3
Under Create API Credentials, select WSSE (Deprecated) as the authentication method. WSSE (Web Services Security Extensions) creates credentials that use WSSE over SSL and require a custom 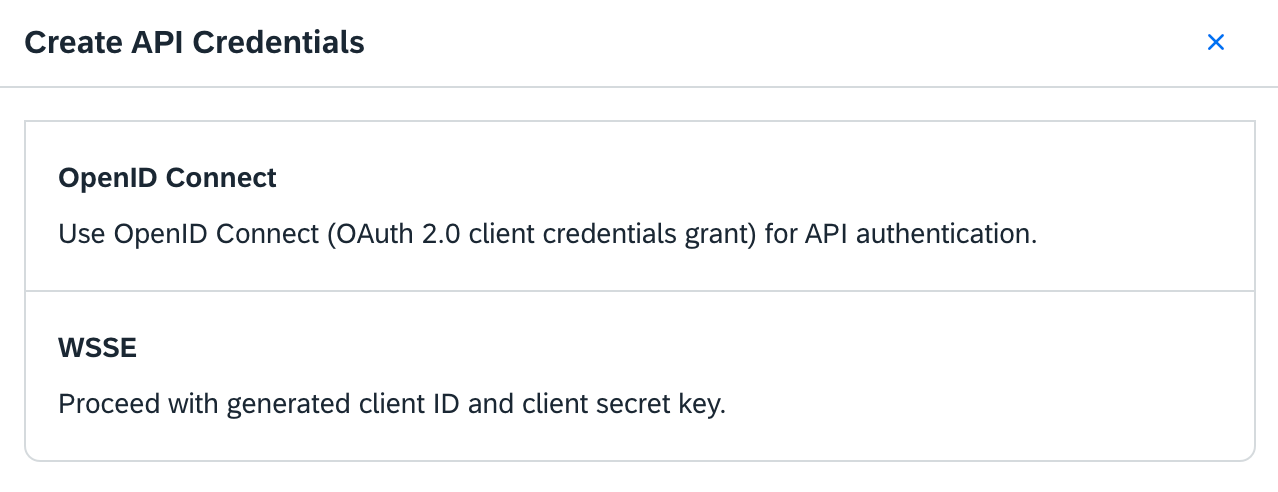
X-WSSE header on each request. Learn more.4
Enter the Password associated with your Emarsys account to complete credential creation.
5
Copy the ID (this is the User name in Zeotap CDP) and the Client Secret.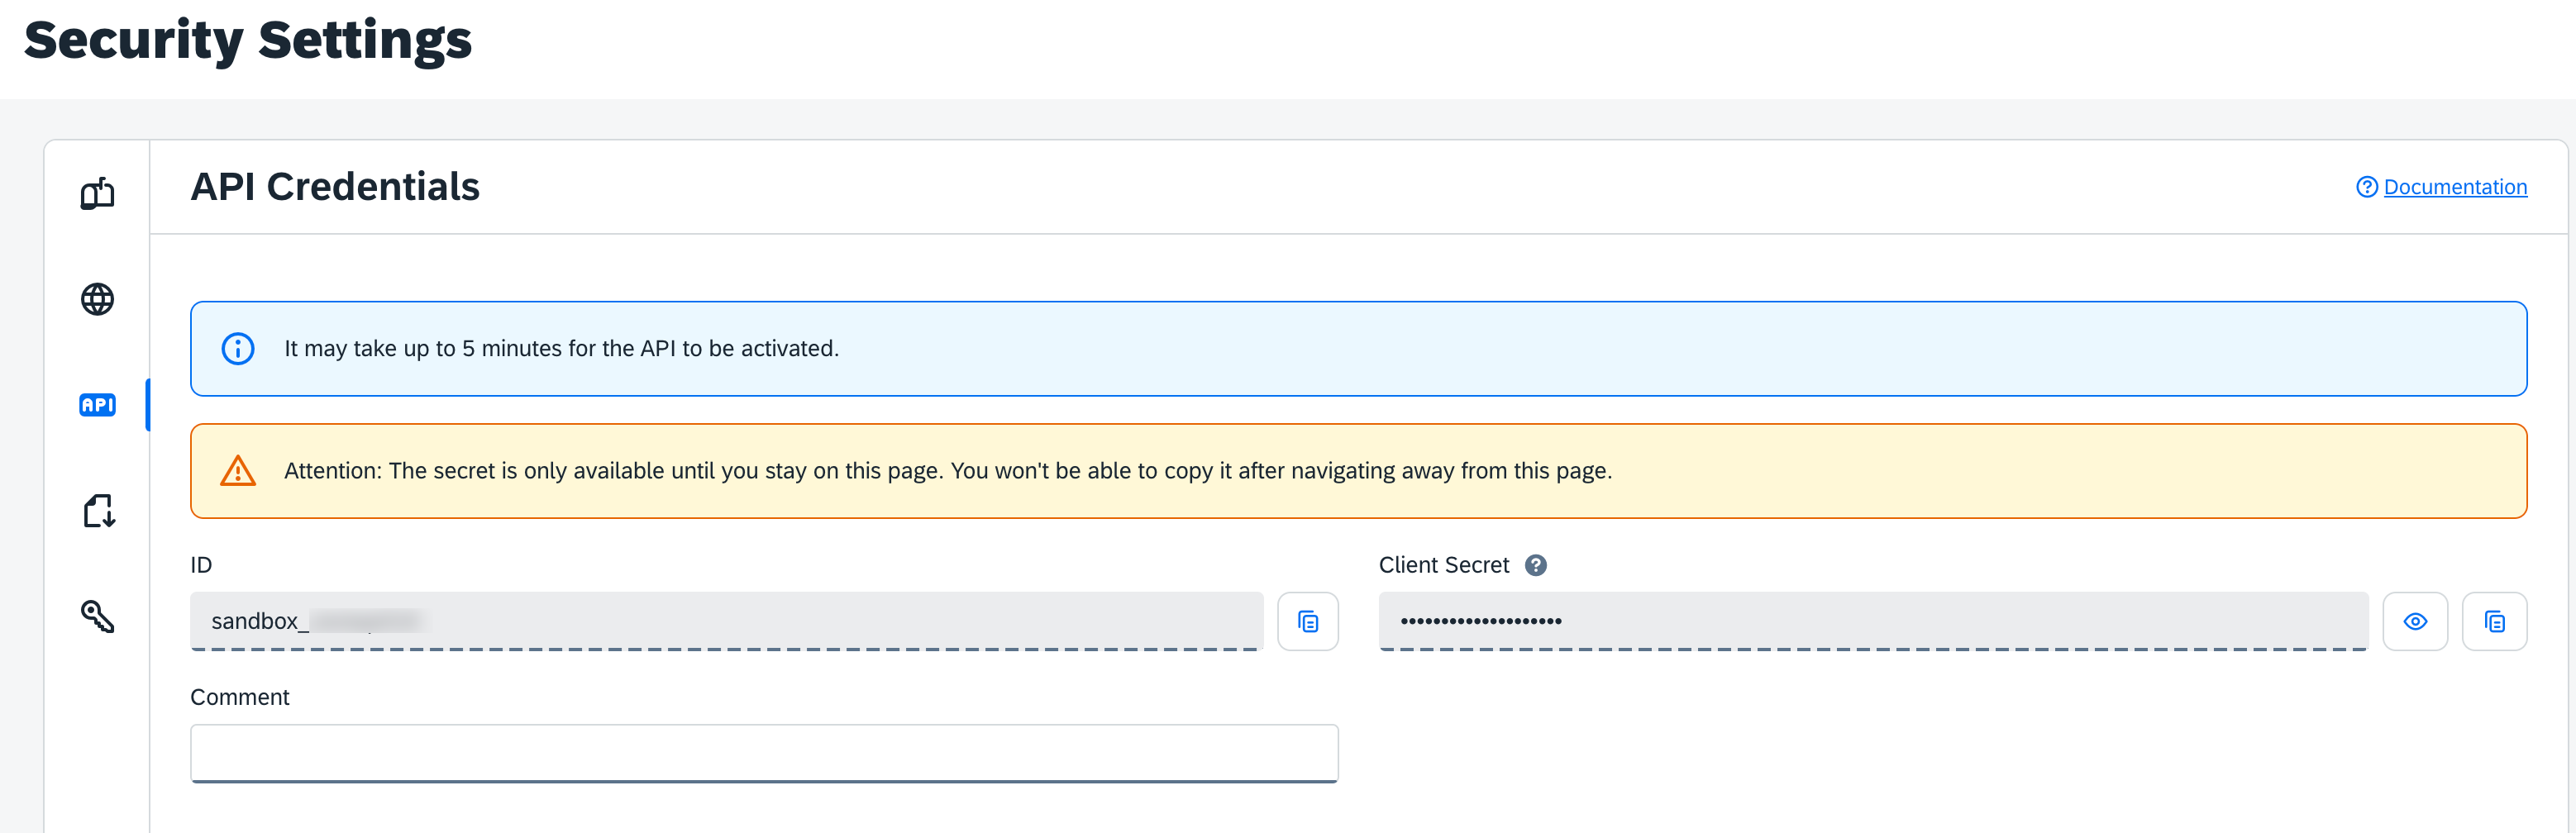
6
Scroll to Permissions and enable the following for this API user:
-
Under contact:
contacts.update.
-
Under contactlist:
contactlist.contact.add,contactlist.contact.delete,contactlist.create.
-
Under externalevent:
externalevent.create,externalevent.trigger.
Obtain the Key ID (Field ID) from Emarsys
The Key ID is the Emarsys Field ID of your primary identifier. System fields (raw email, first name, last name, and others) have predefined Key IDs — for example, the Key ID for Email is3. Use system-field IDs directly, or create a custom field for a custom identifier. See the Emarsys system fields reference.
To use a custom ID as the primary identifier, create a custom field in Emarsys and use its Field ID as the Key ID in Zeotap CDP. The custom ID must be activated by the Emarsys Support Team before Emarsys will accept it as a primary identifier.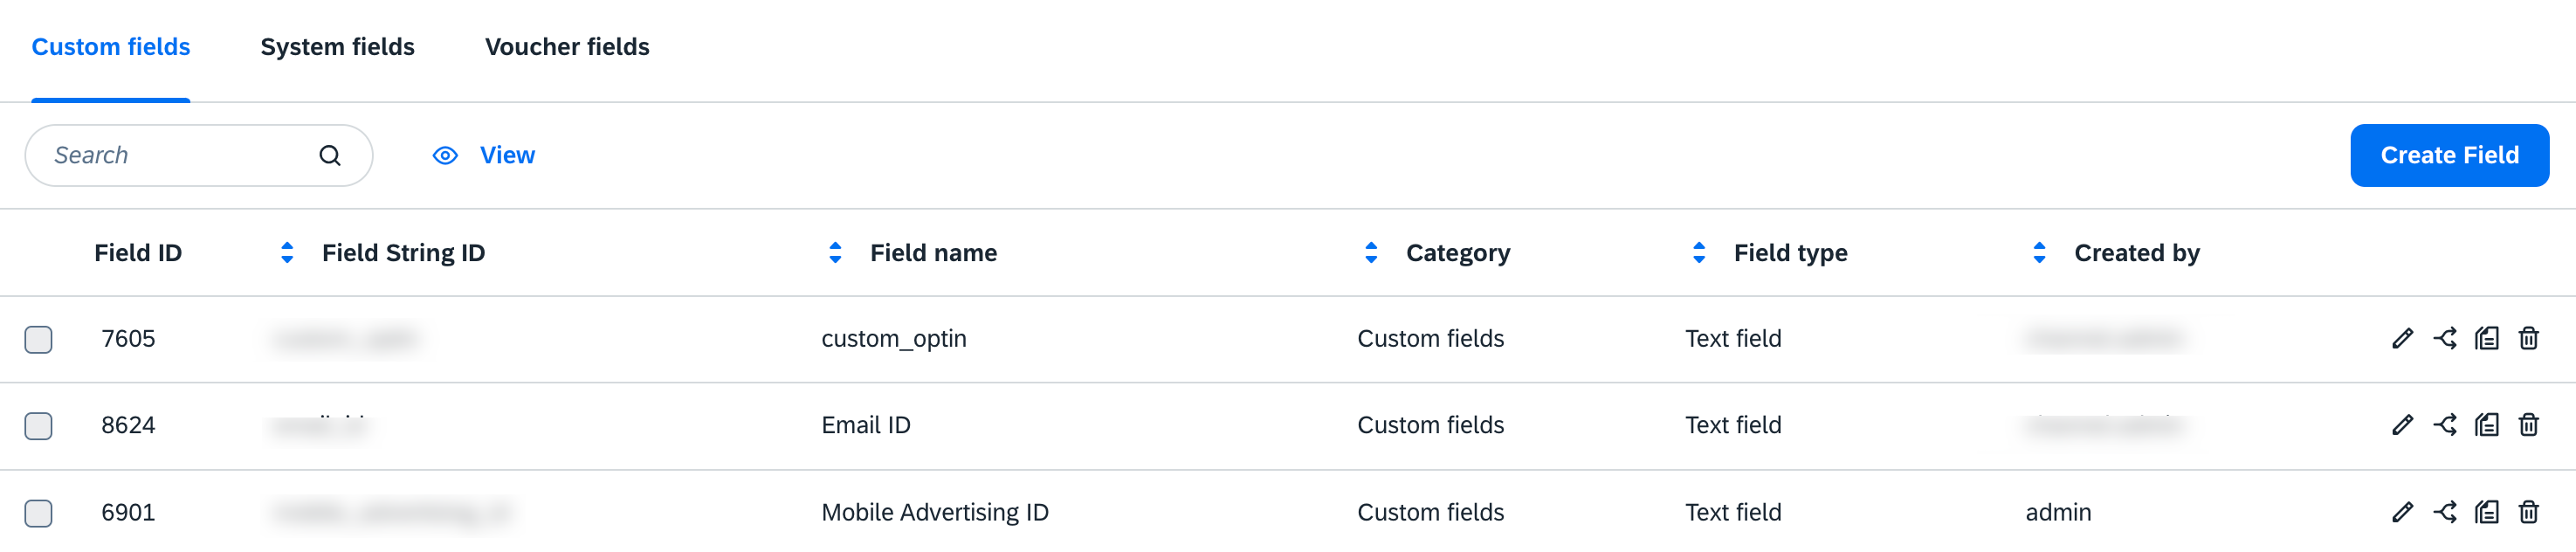
1
In Emarsys, go to Management > Data Management > Field Editor.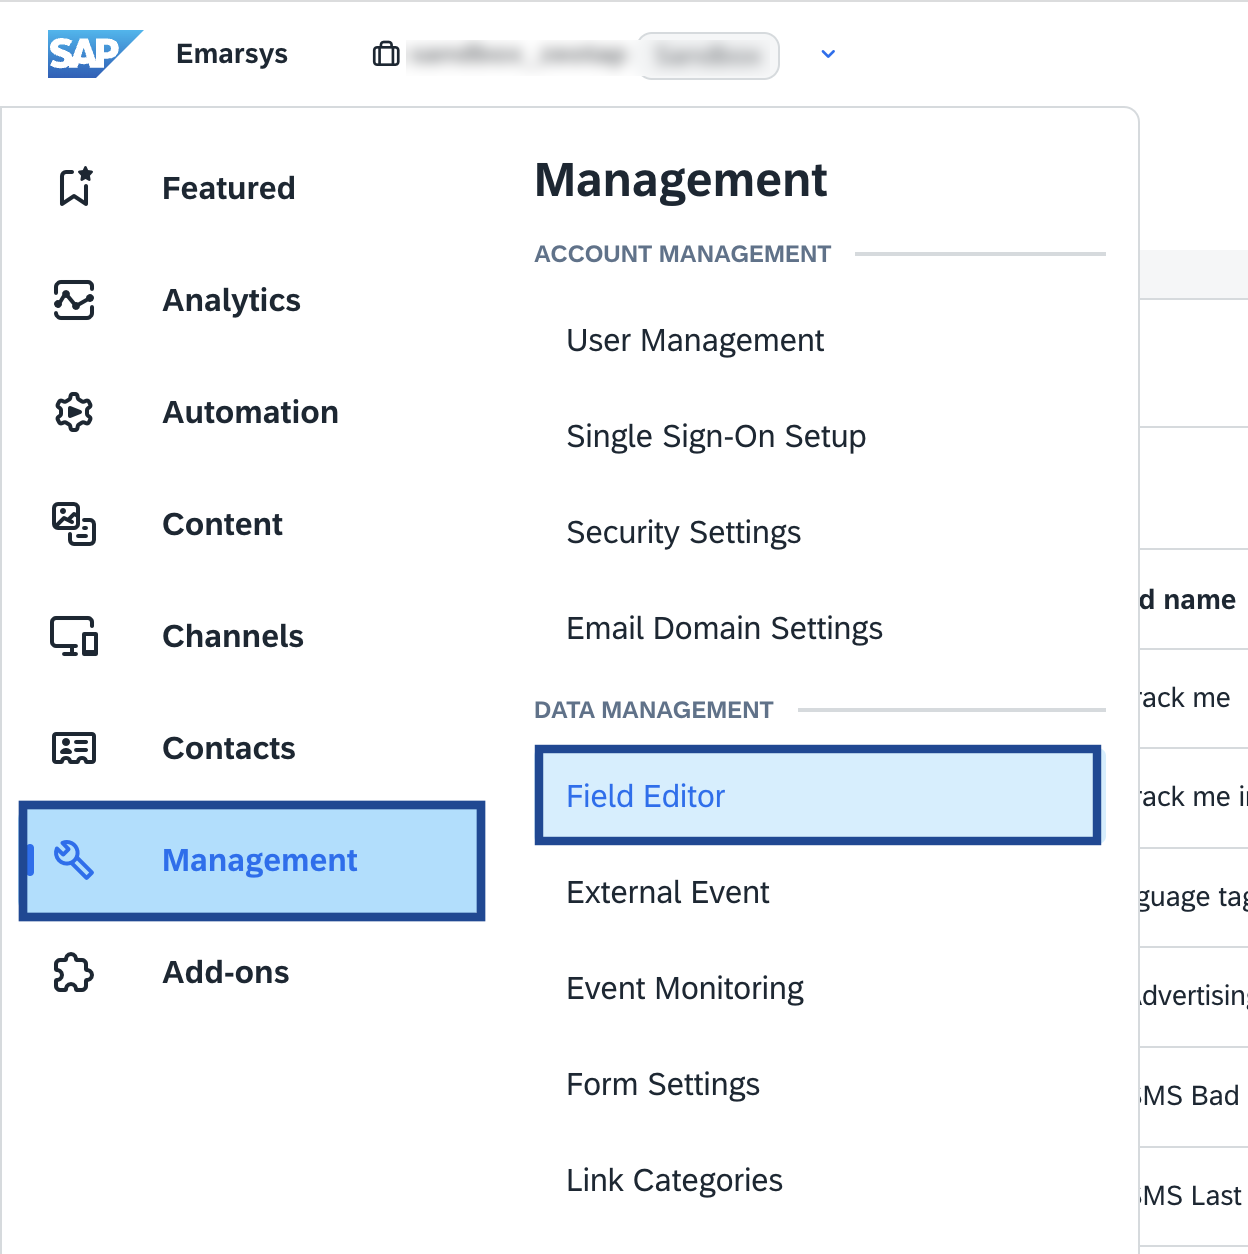
2
Click Create Field.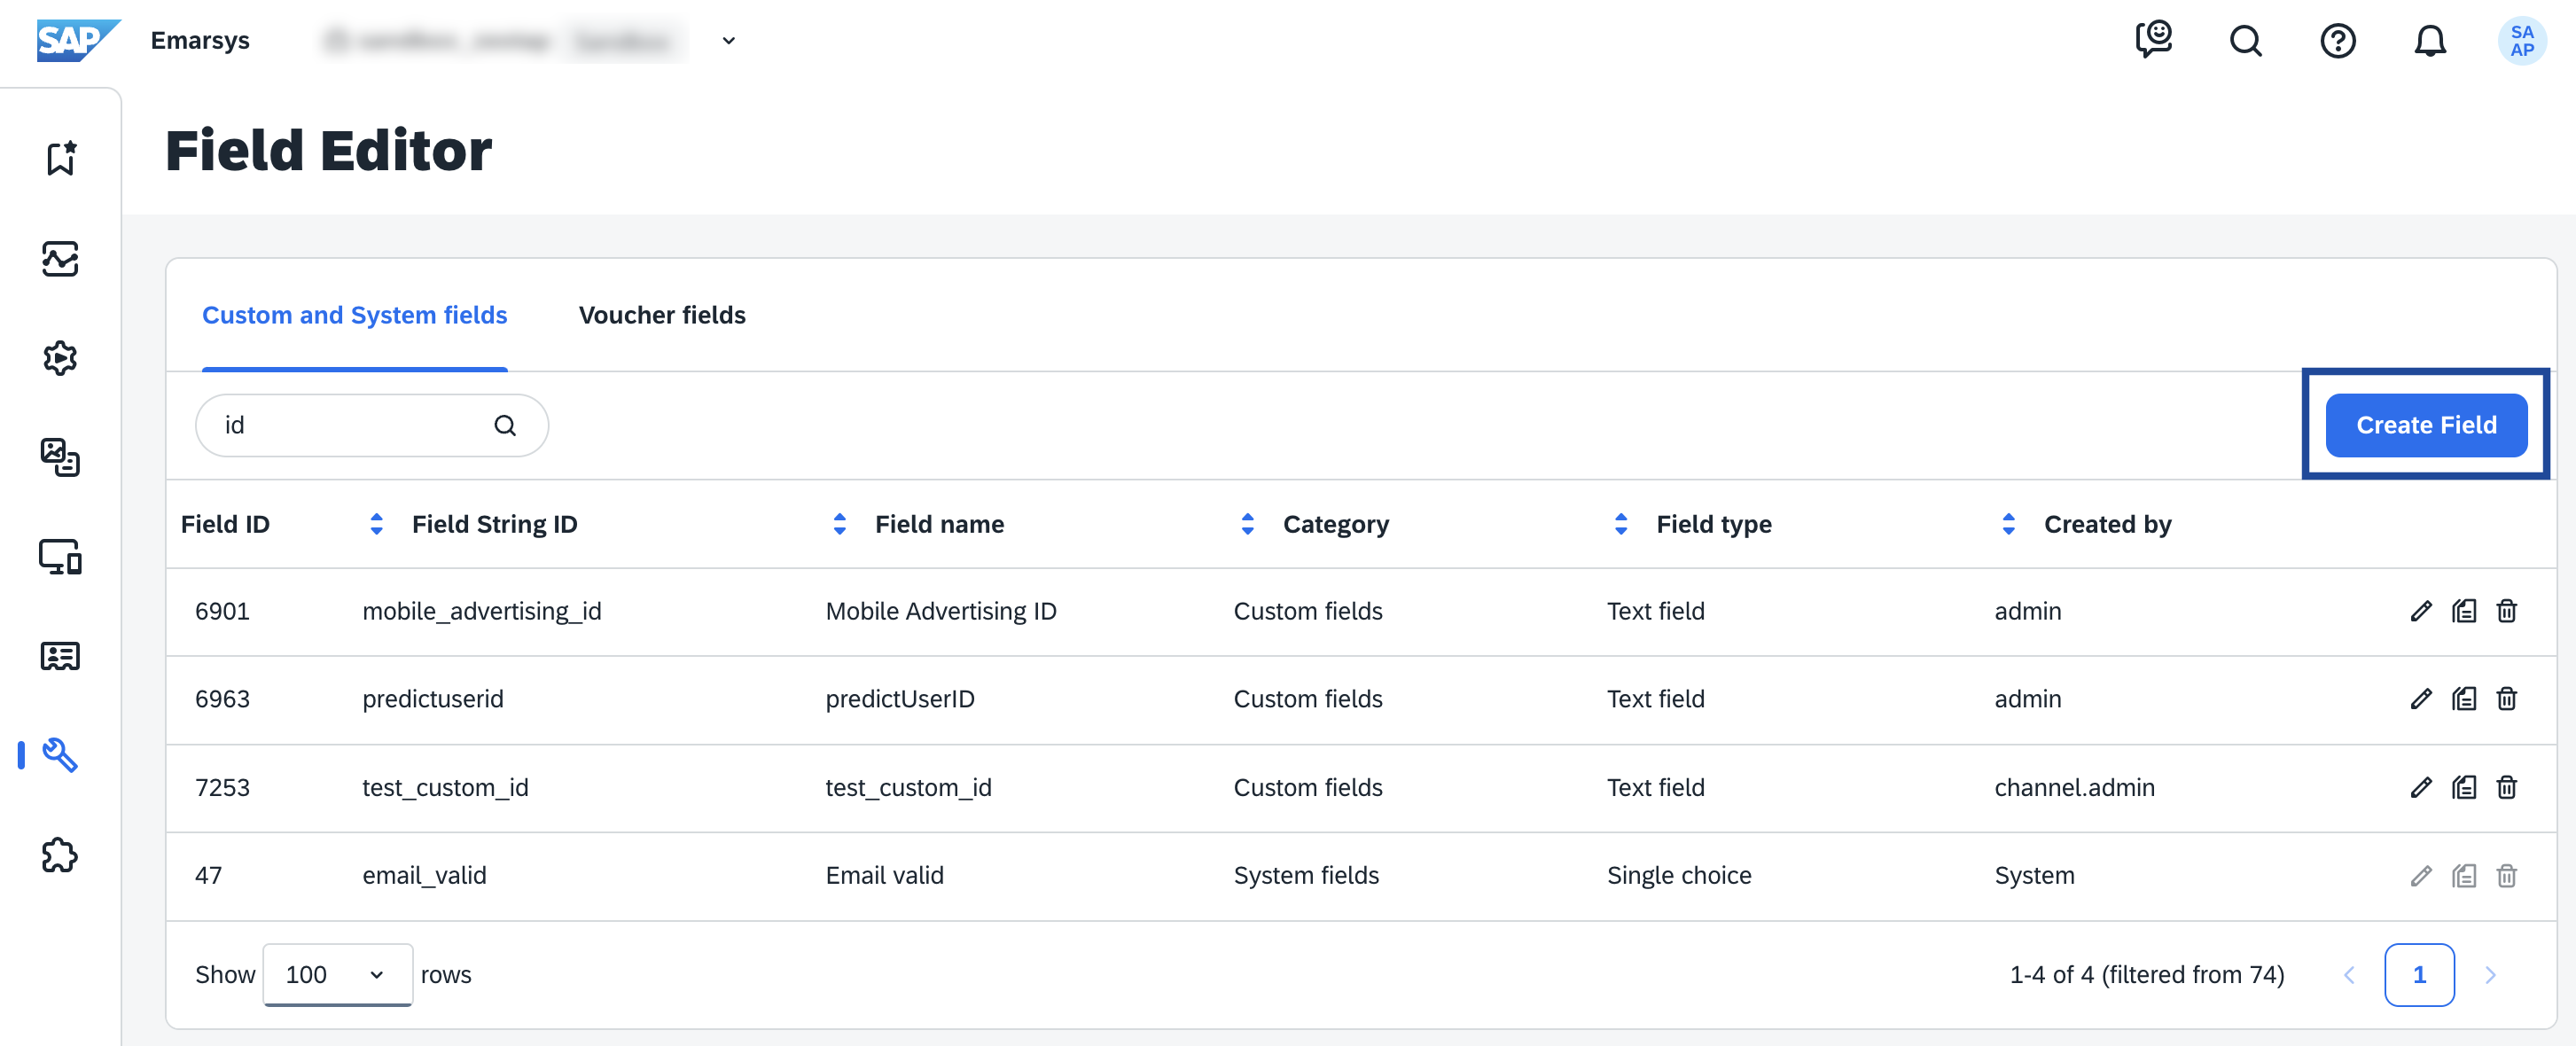
3
In the Field Generator page, enter a Name, a String ID, and a Type for your identifier, then click Save to generate a Field ID.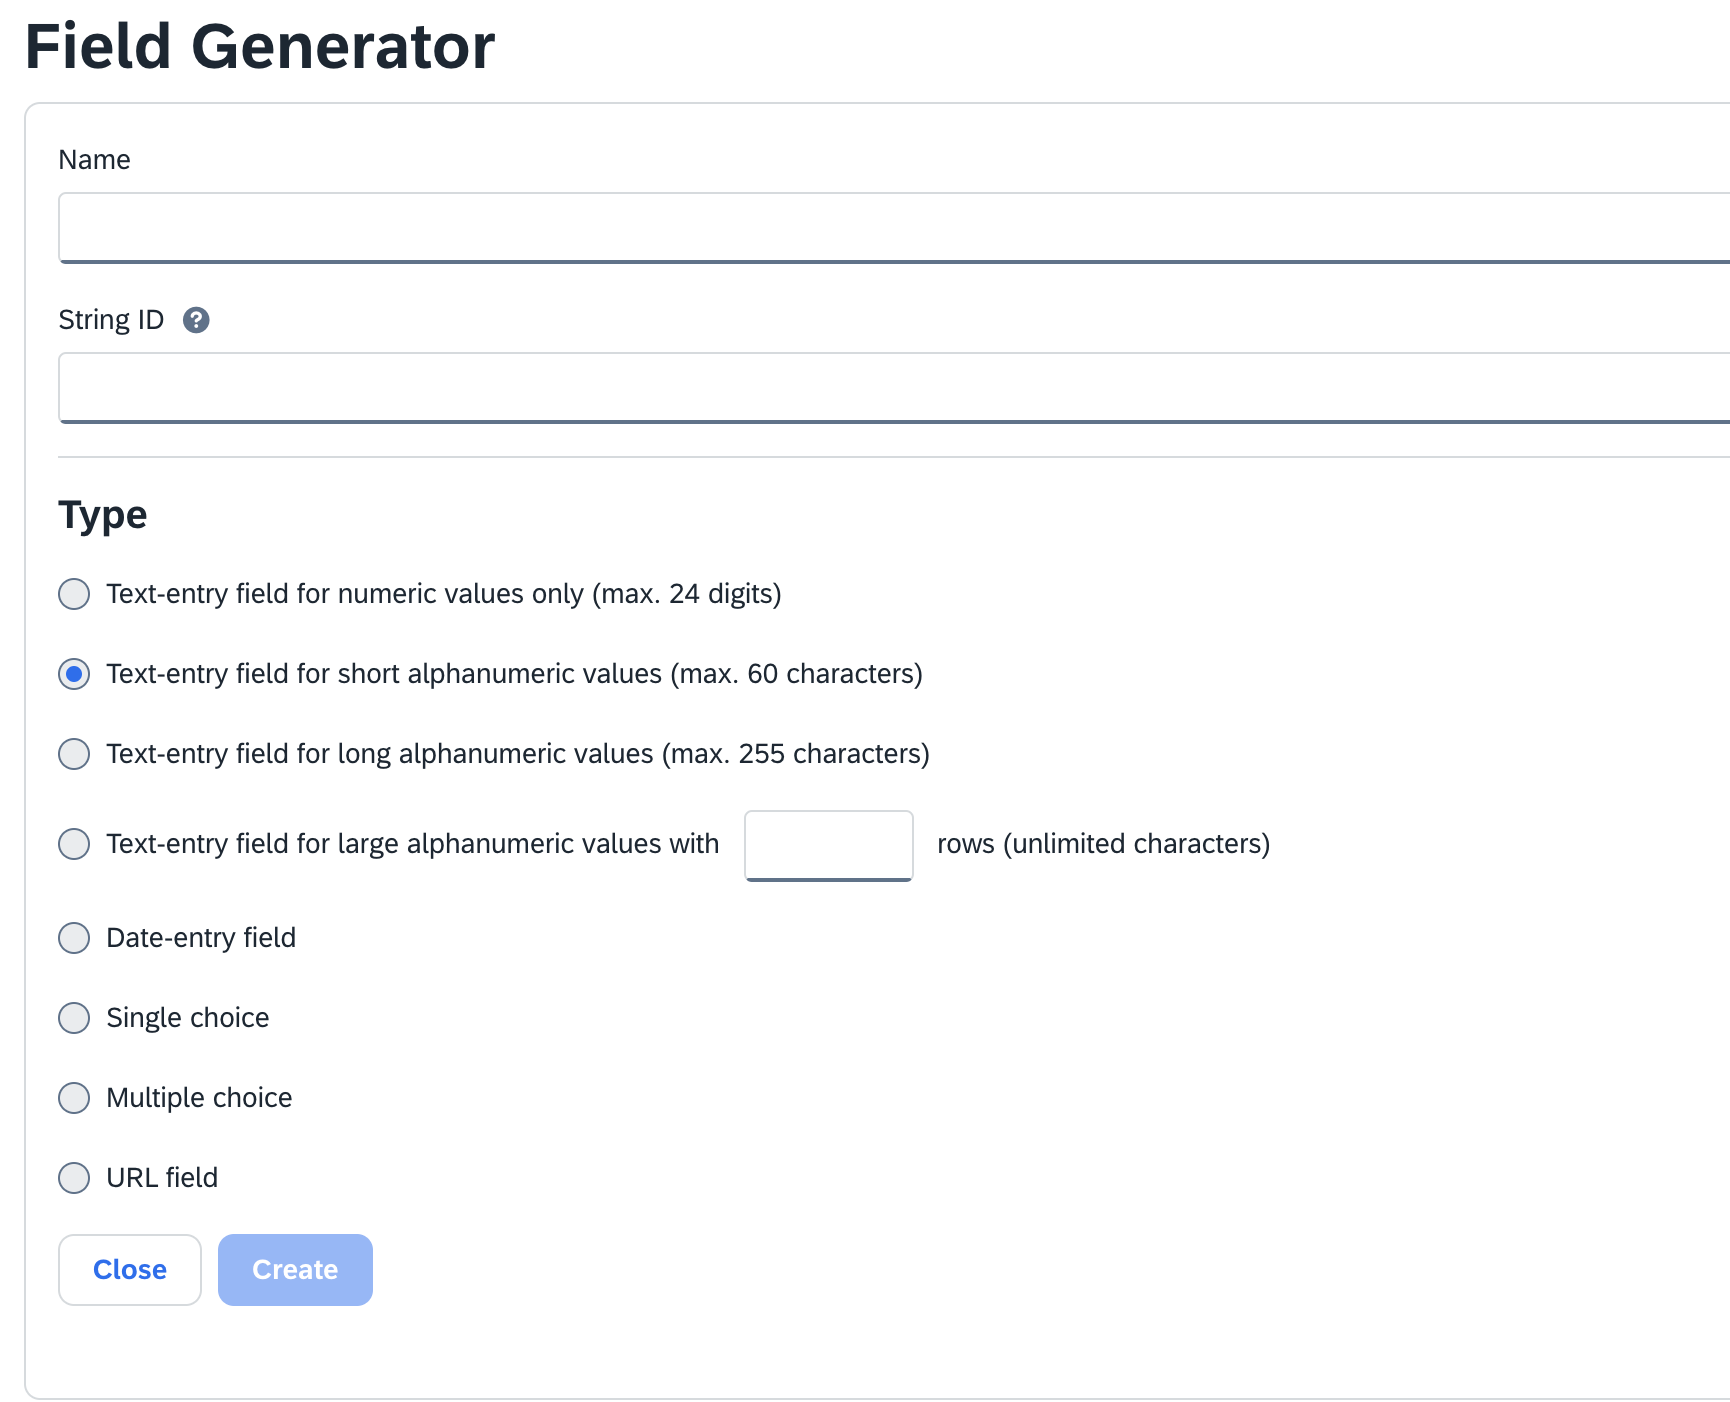
4
The new identifier appears in the Field Editor list. Copy its Field ID — you will paste it into the Key ID field when you create the destination in Zeotap CDP.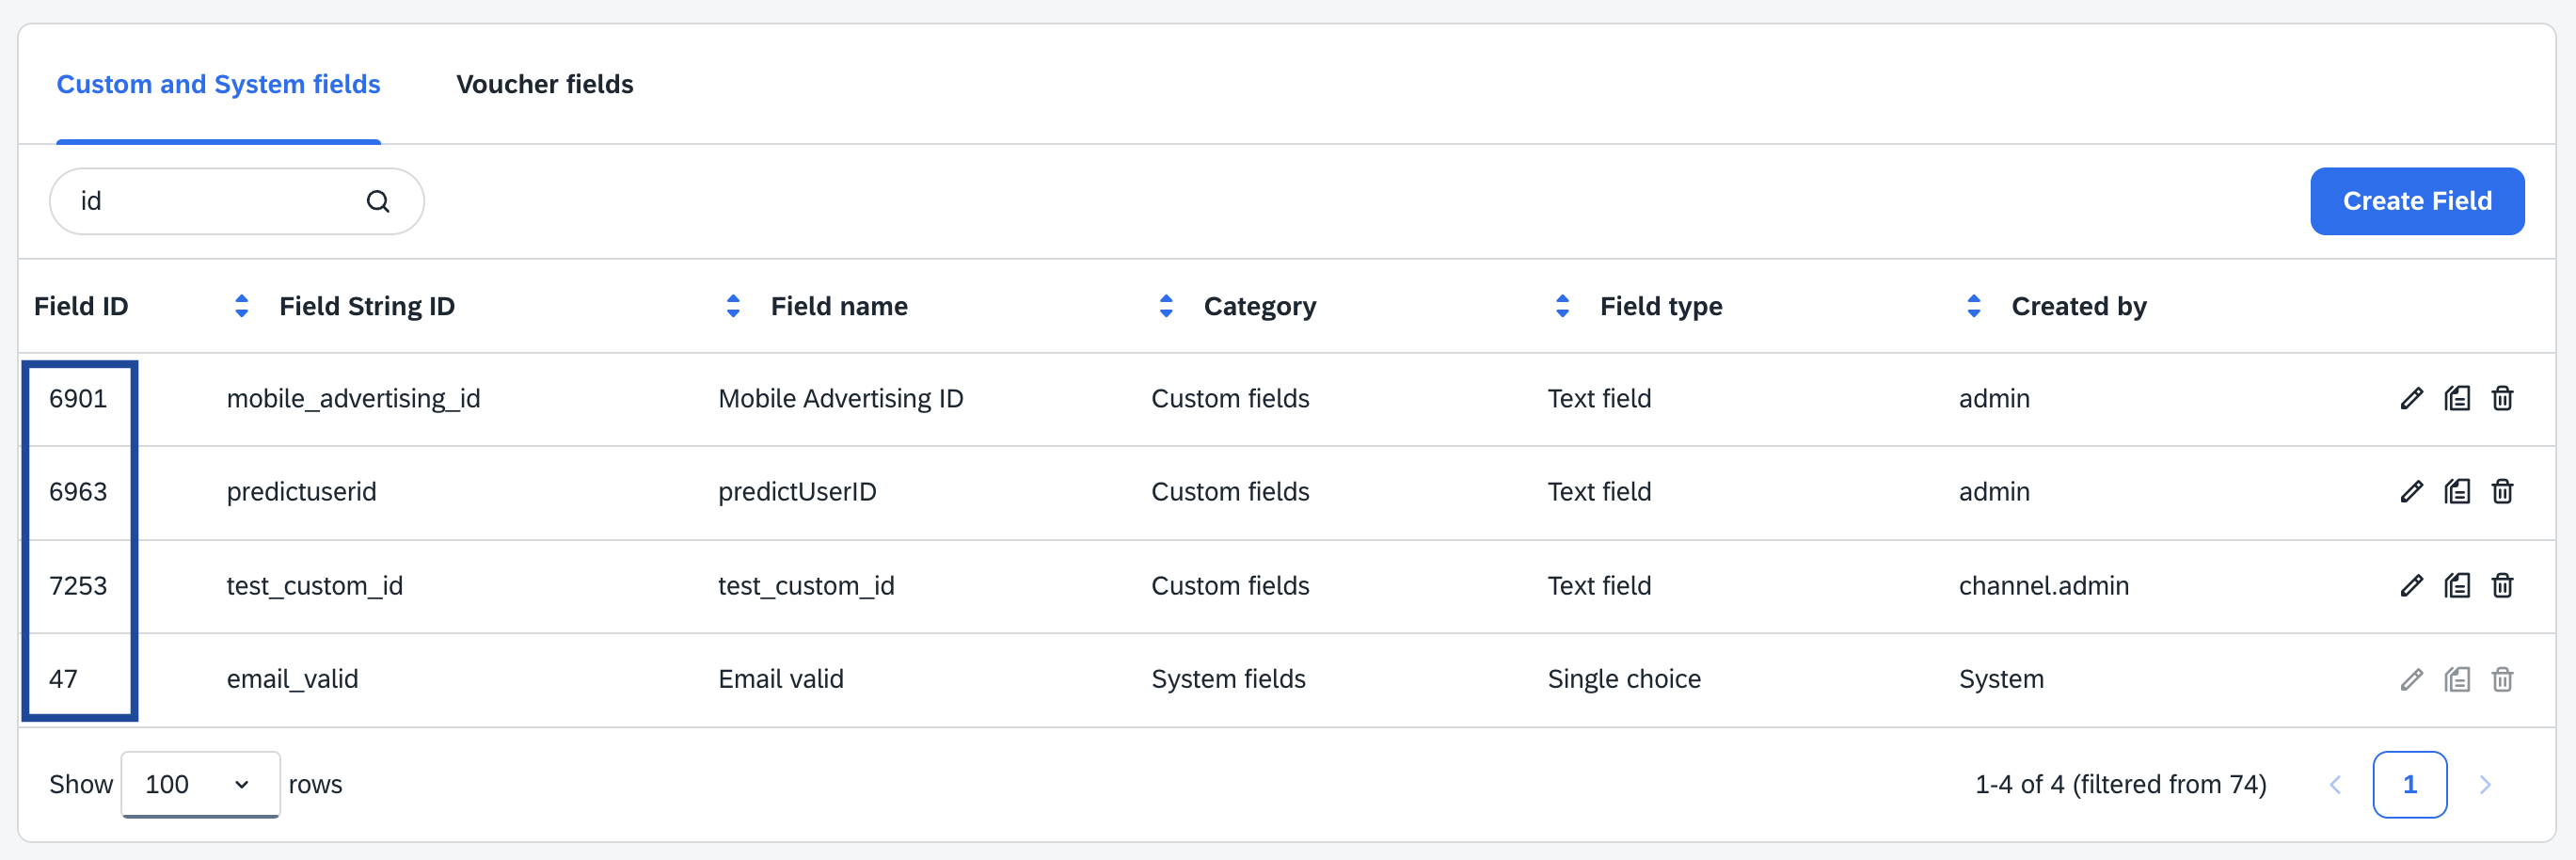
Create the Emarsys destination in Zeotap CDP
With the User name, Secret, and Key ID in hand, create the destination in Zeotap CDP.1
Log into Zeotap CDP and open the DESTINATIONS application.
2
Click + Create Destination.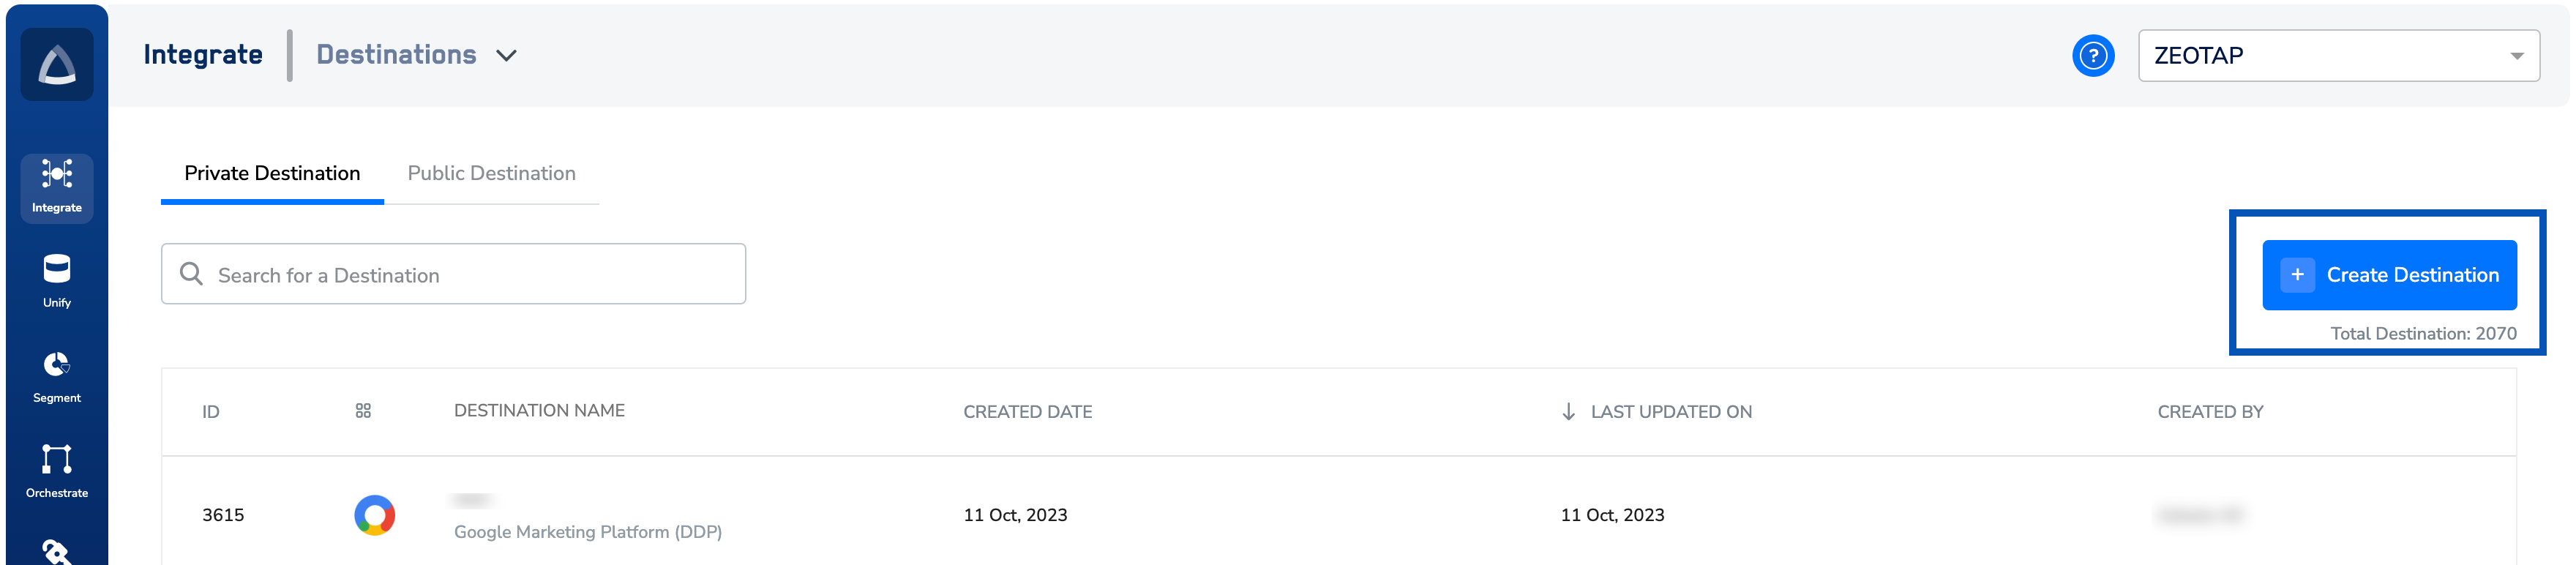
3
Under All Destinations, search for Emarsys.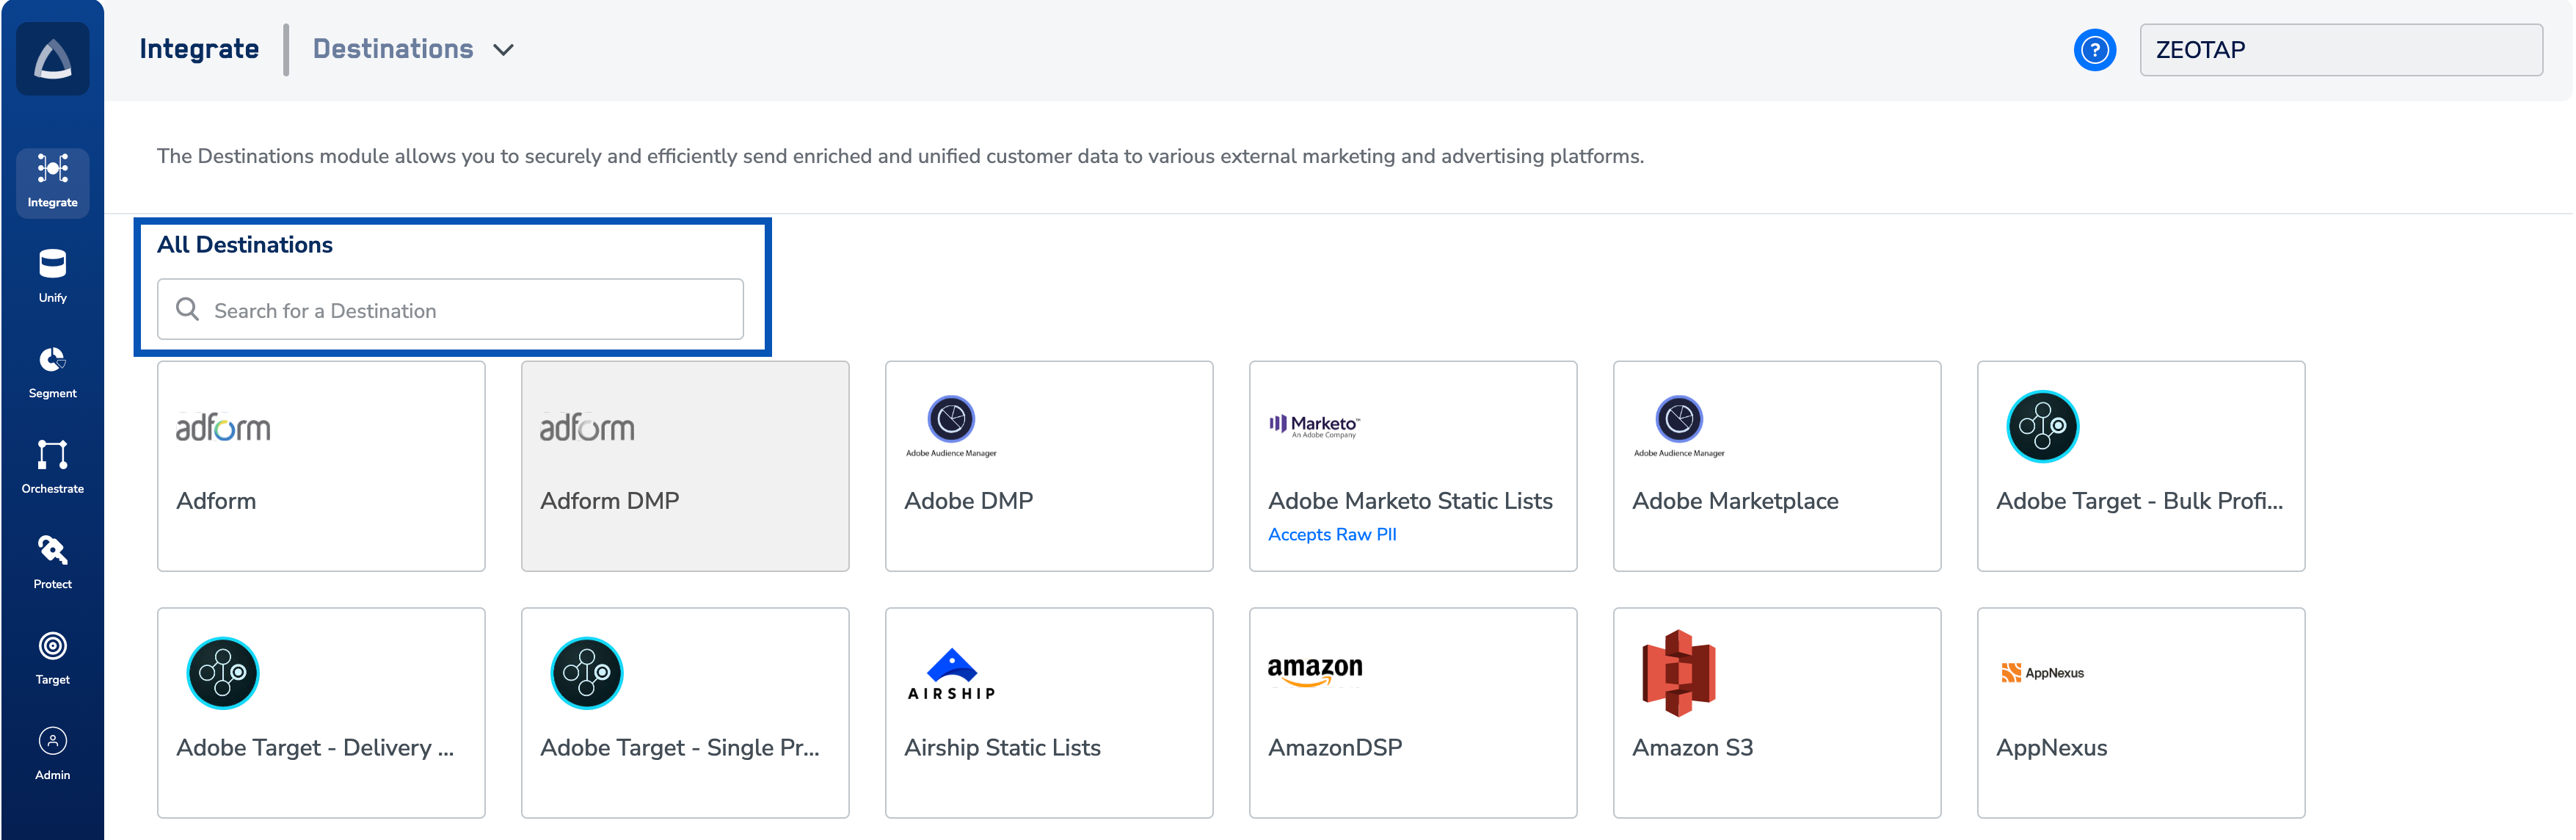
4
Click Emarsys and enter the connection details on the right-hand side:Review the values, then click Next.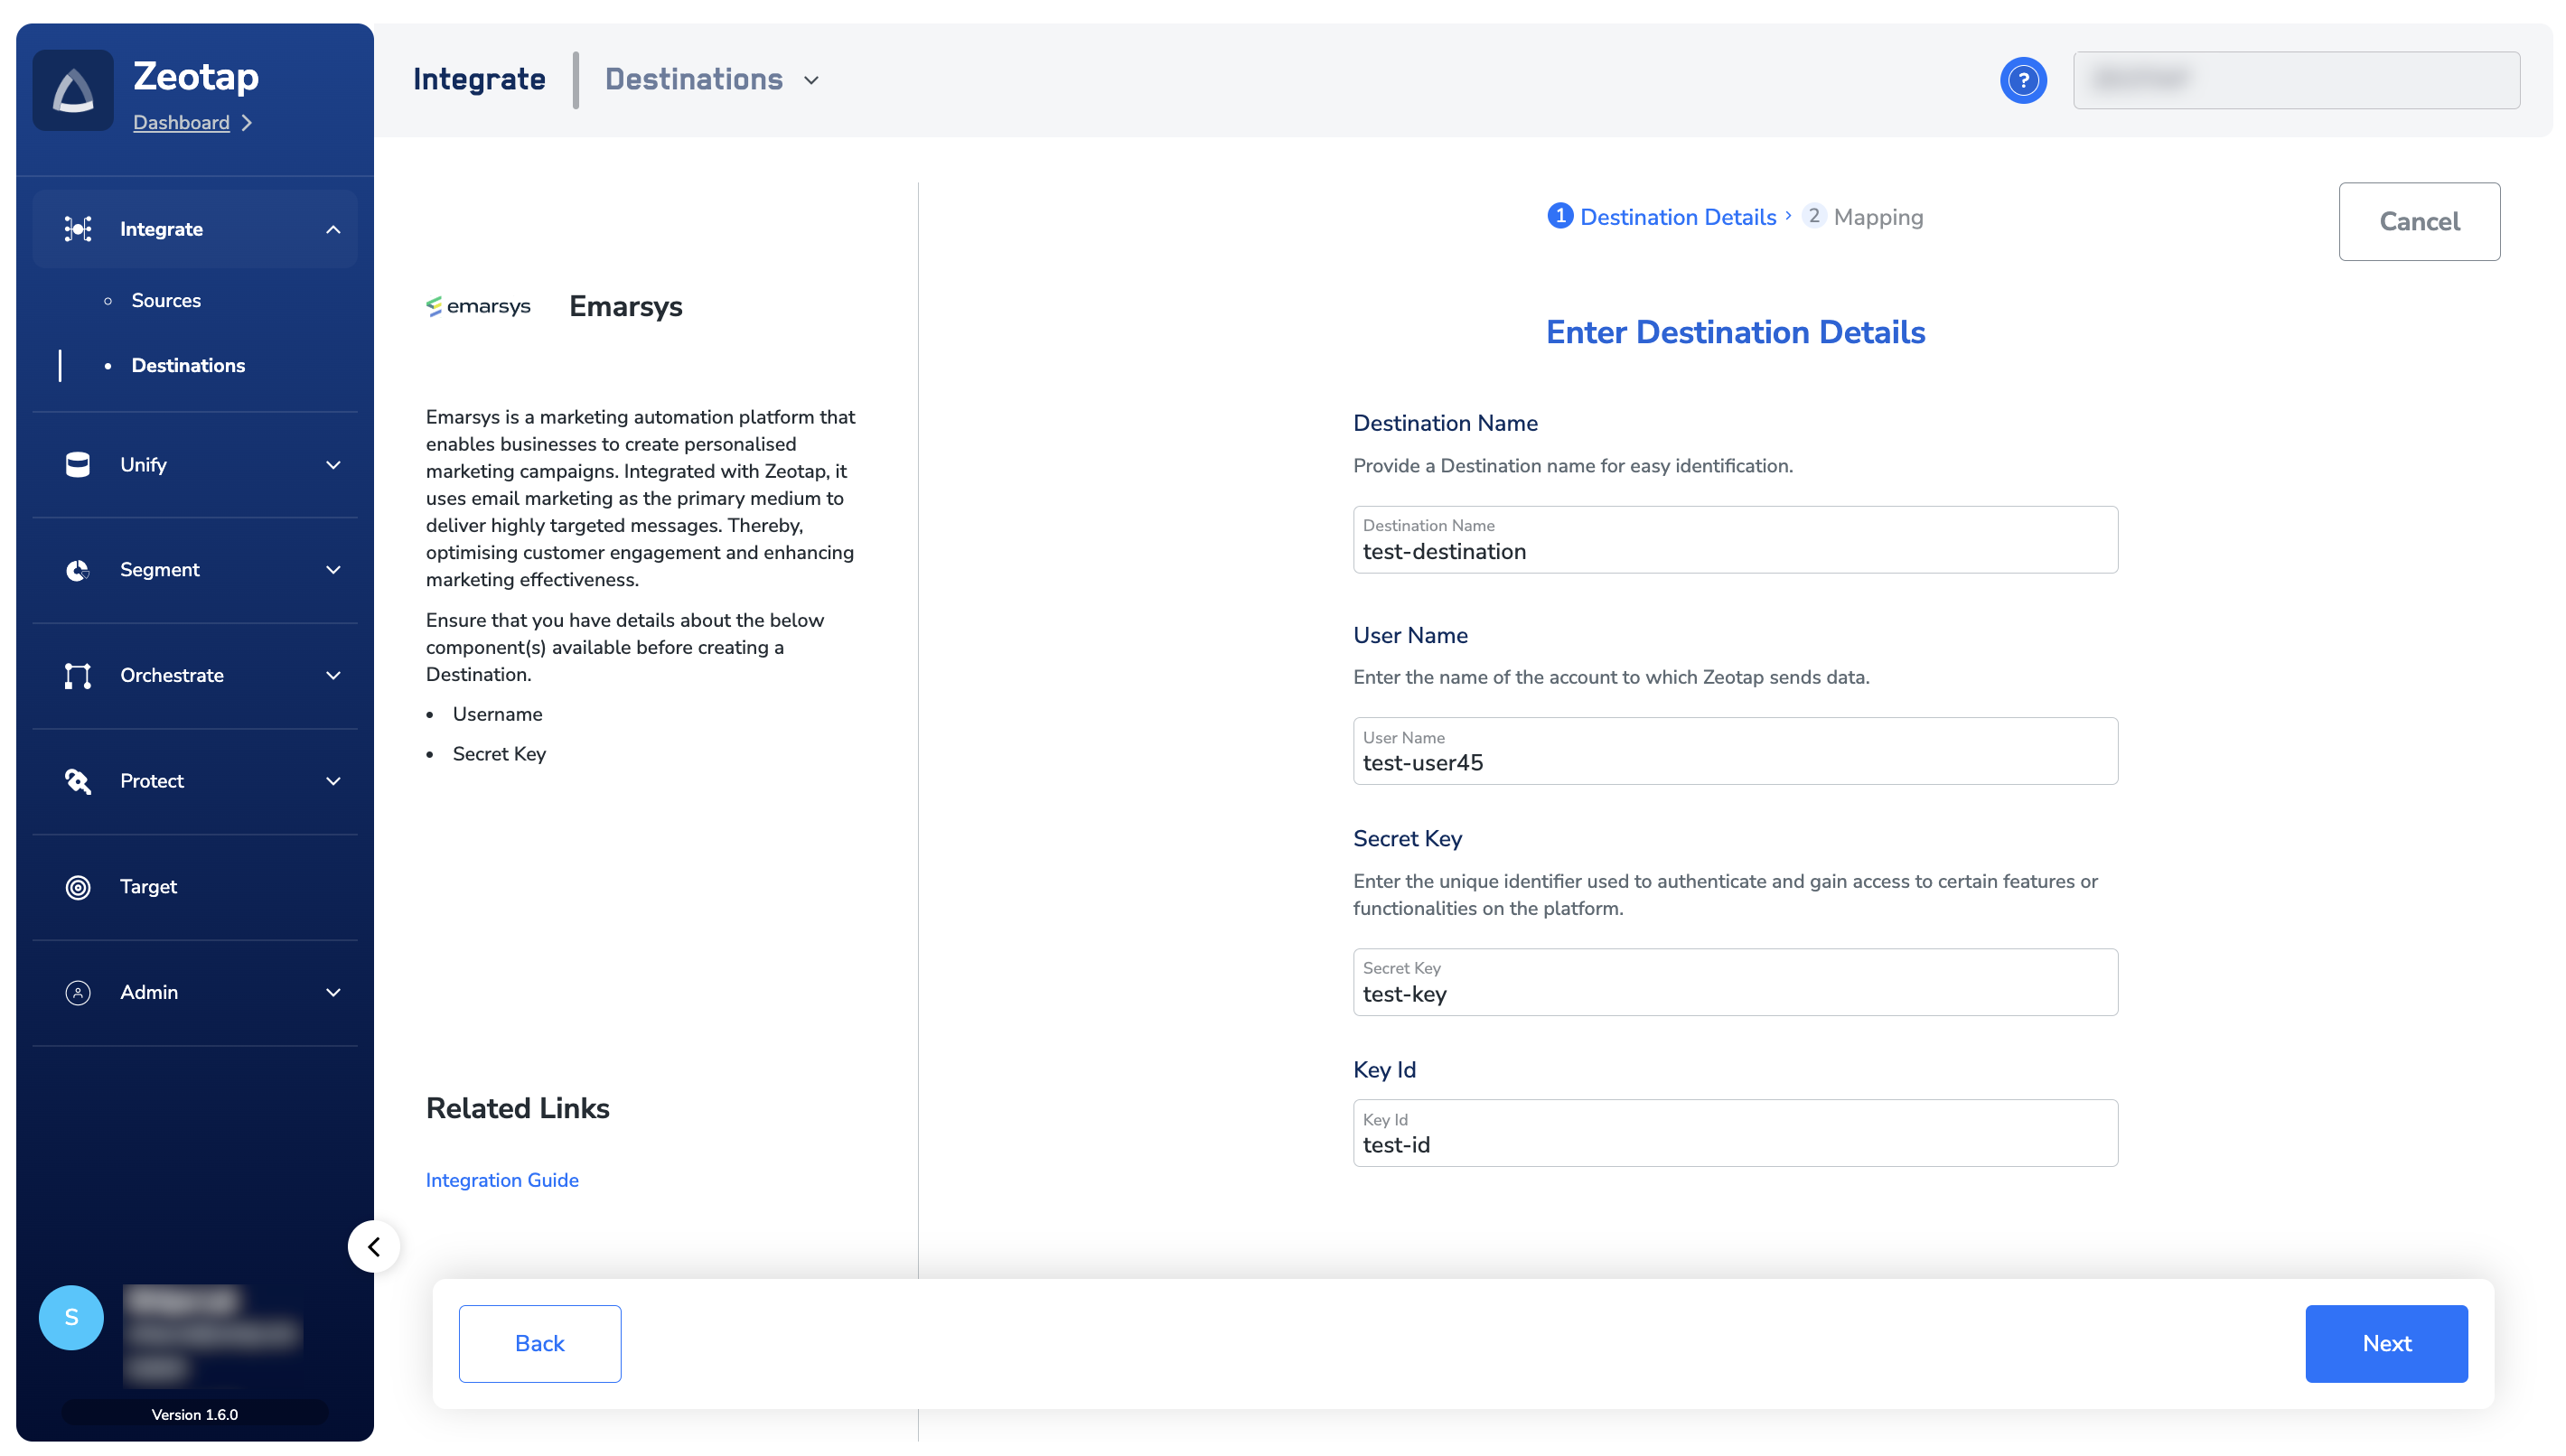
- A Name for the destination.
- User name — the ID from Emarsys API Credentials.
- Secret Key — the Client Secret from Emarsys API Credentials.
- Key ID — the Emarsys Field ID of your primary identifier.
To use a
custom_ID as the key_ID, first have Emarsys Support activate the custom ID on your account.5
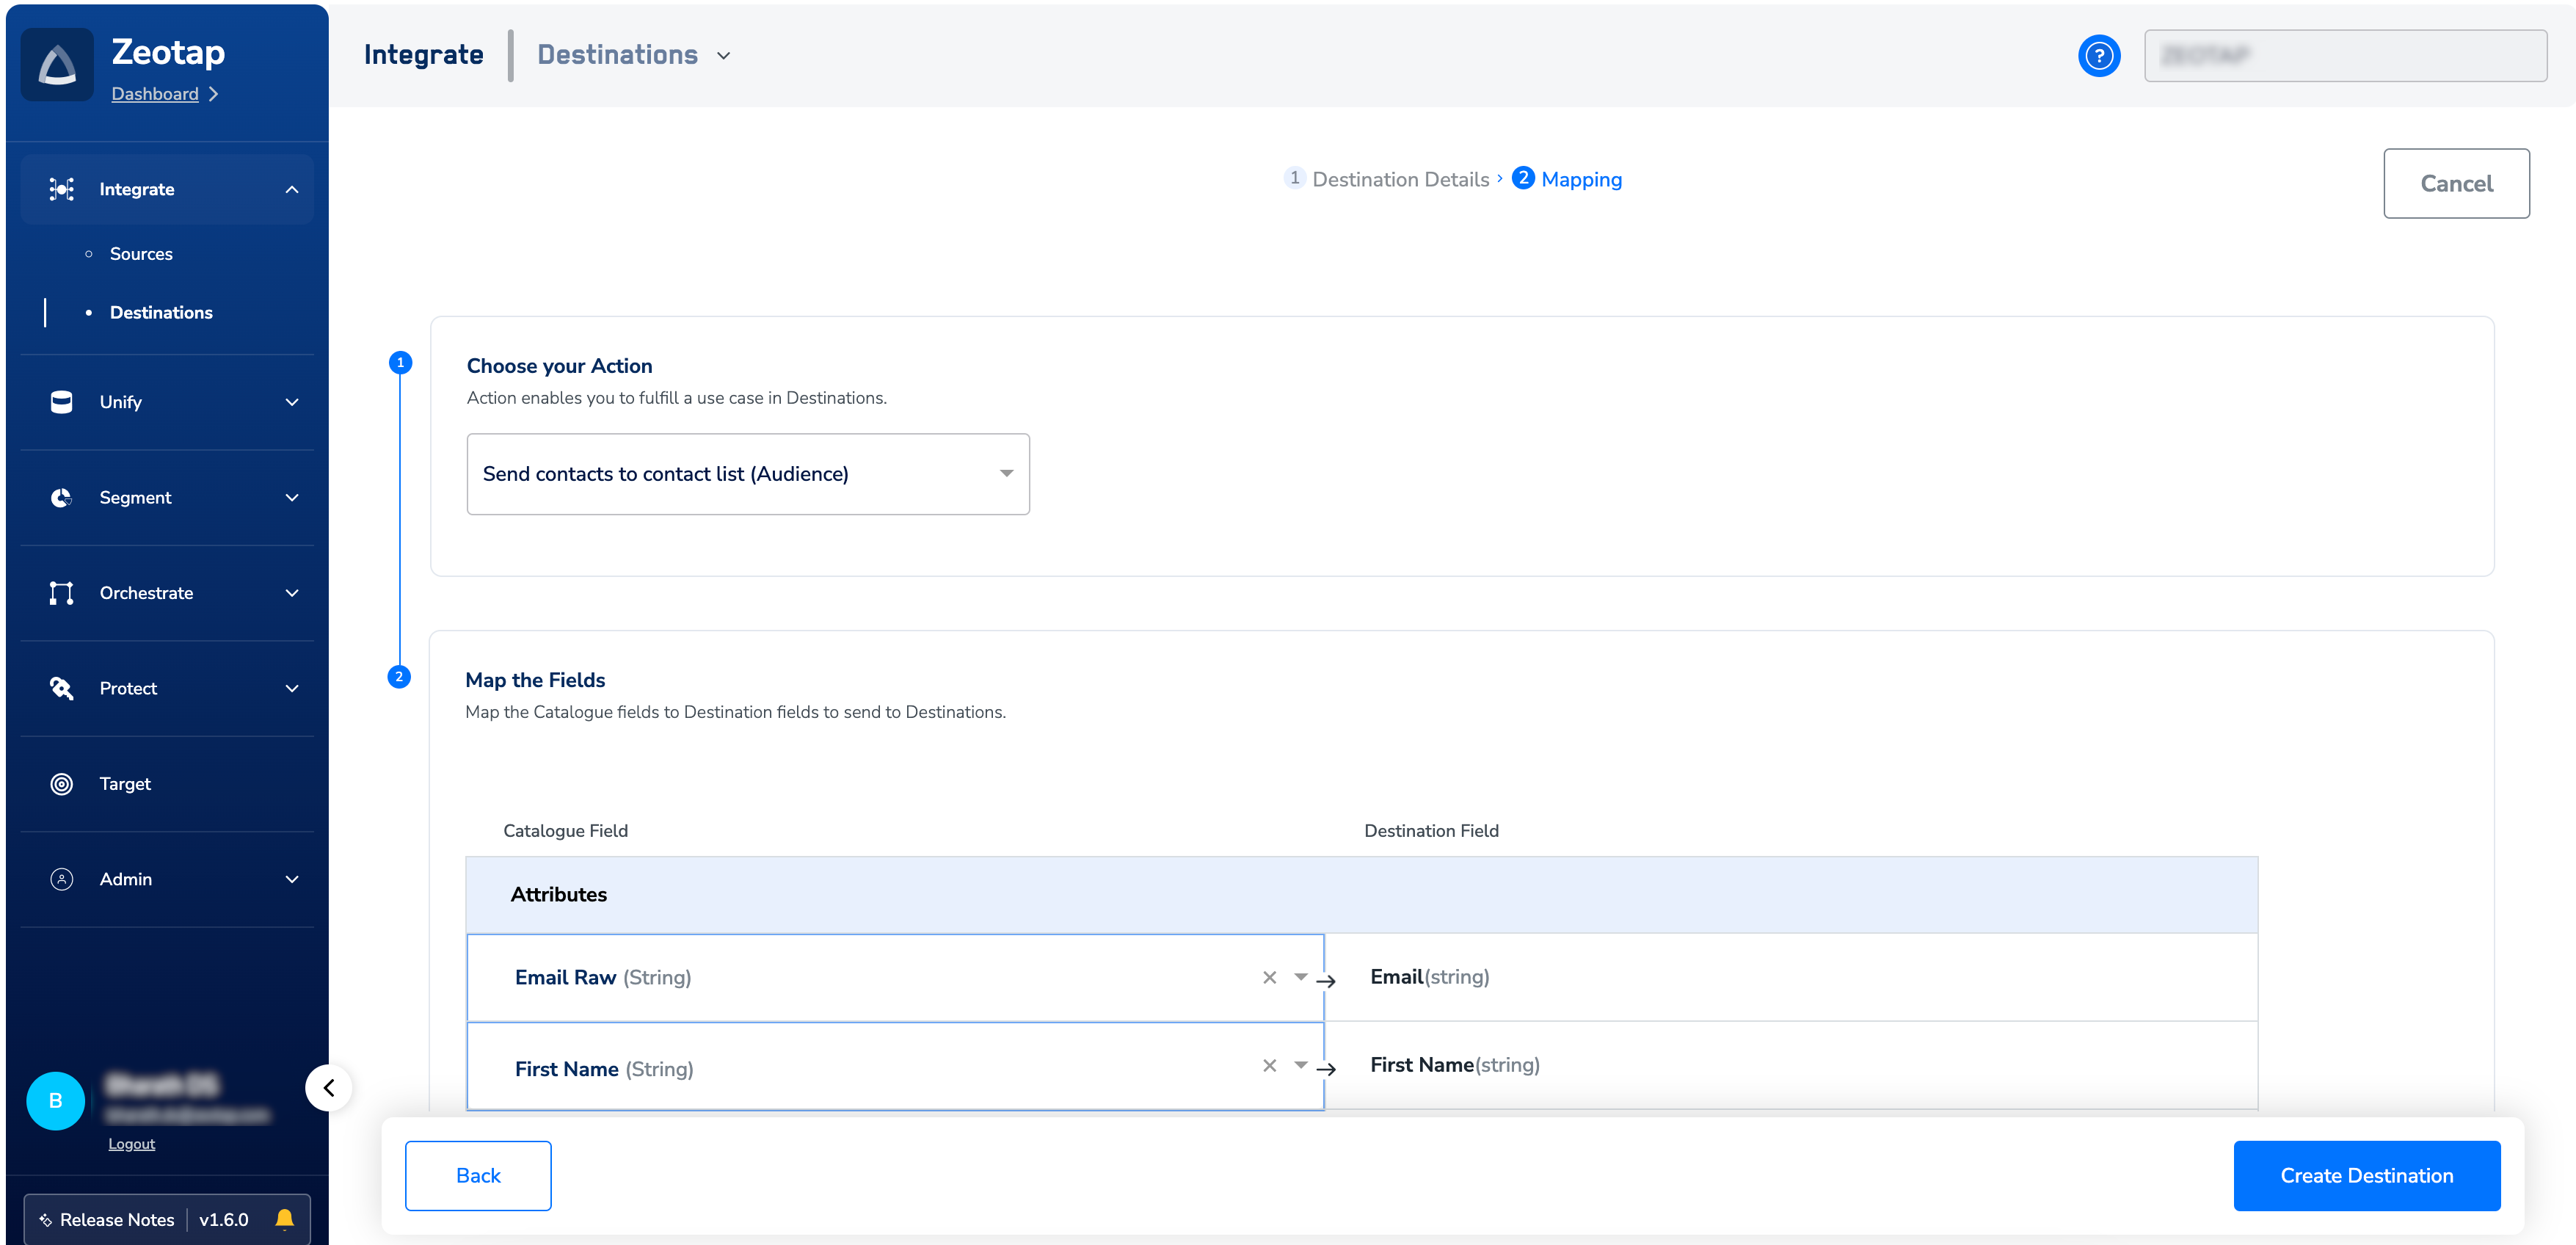
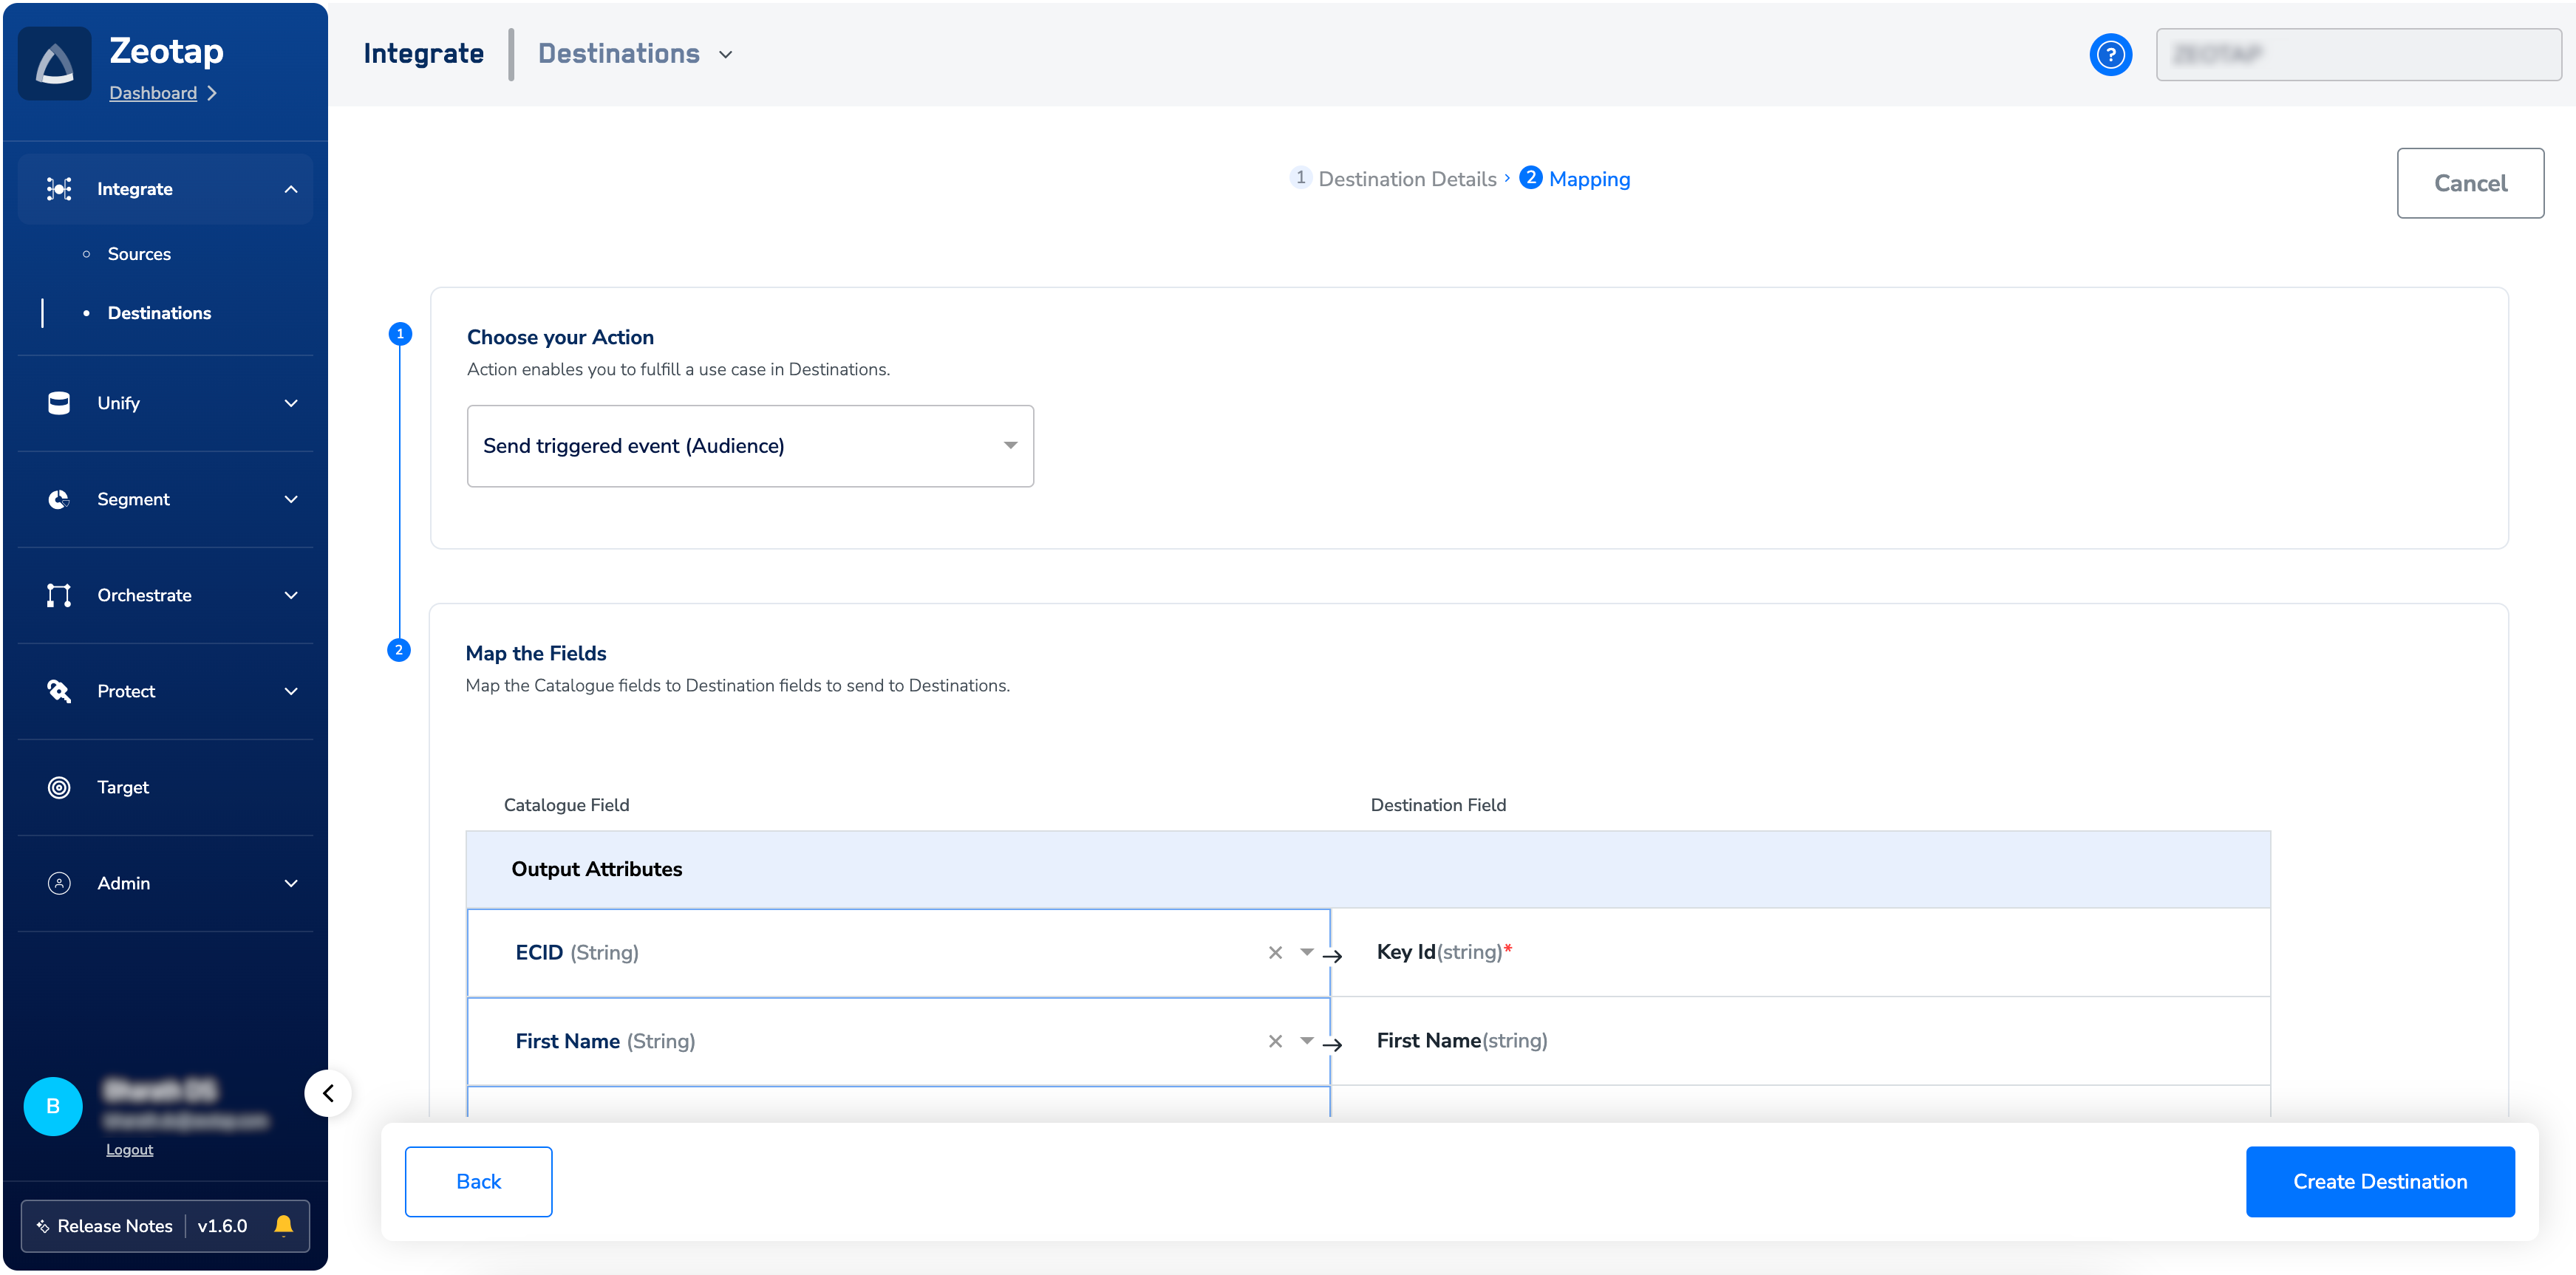
Under Choose your Action, pick the action that matches how the audience will be consumed in Emarsys.a. Send Identifiers to Emarsys (Deprecated) — sends only email addresses to Emarsys. Kept for legacy destinations; pick one of the actions below for new destinations.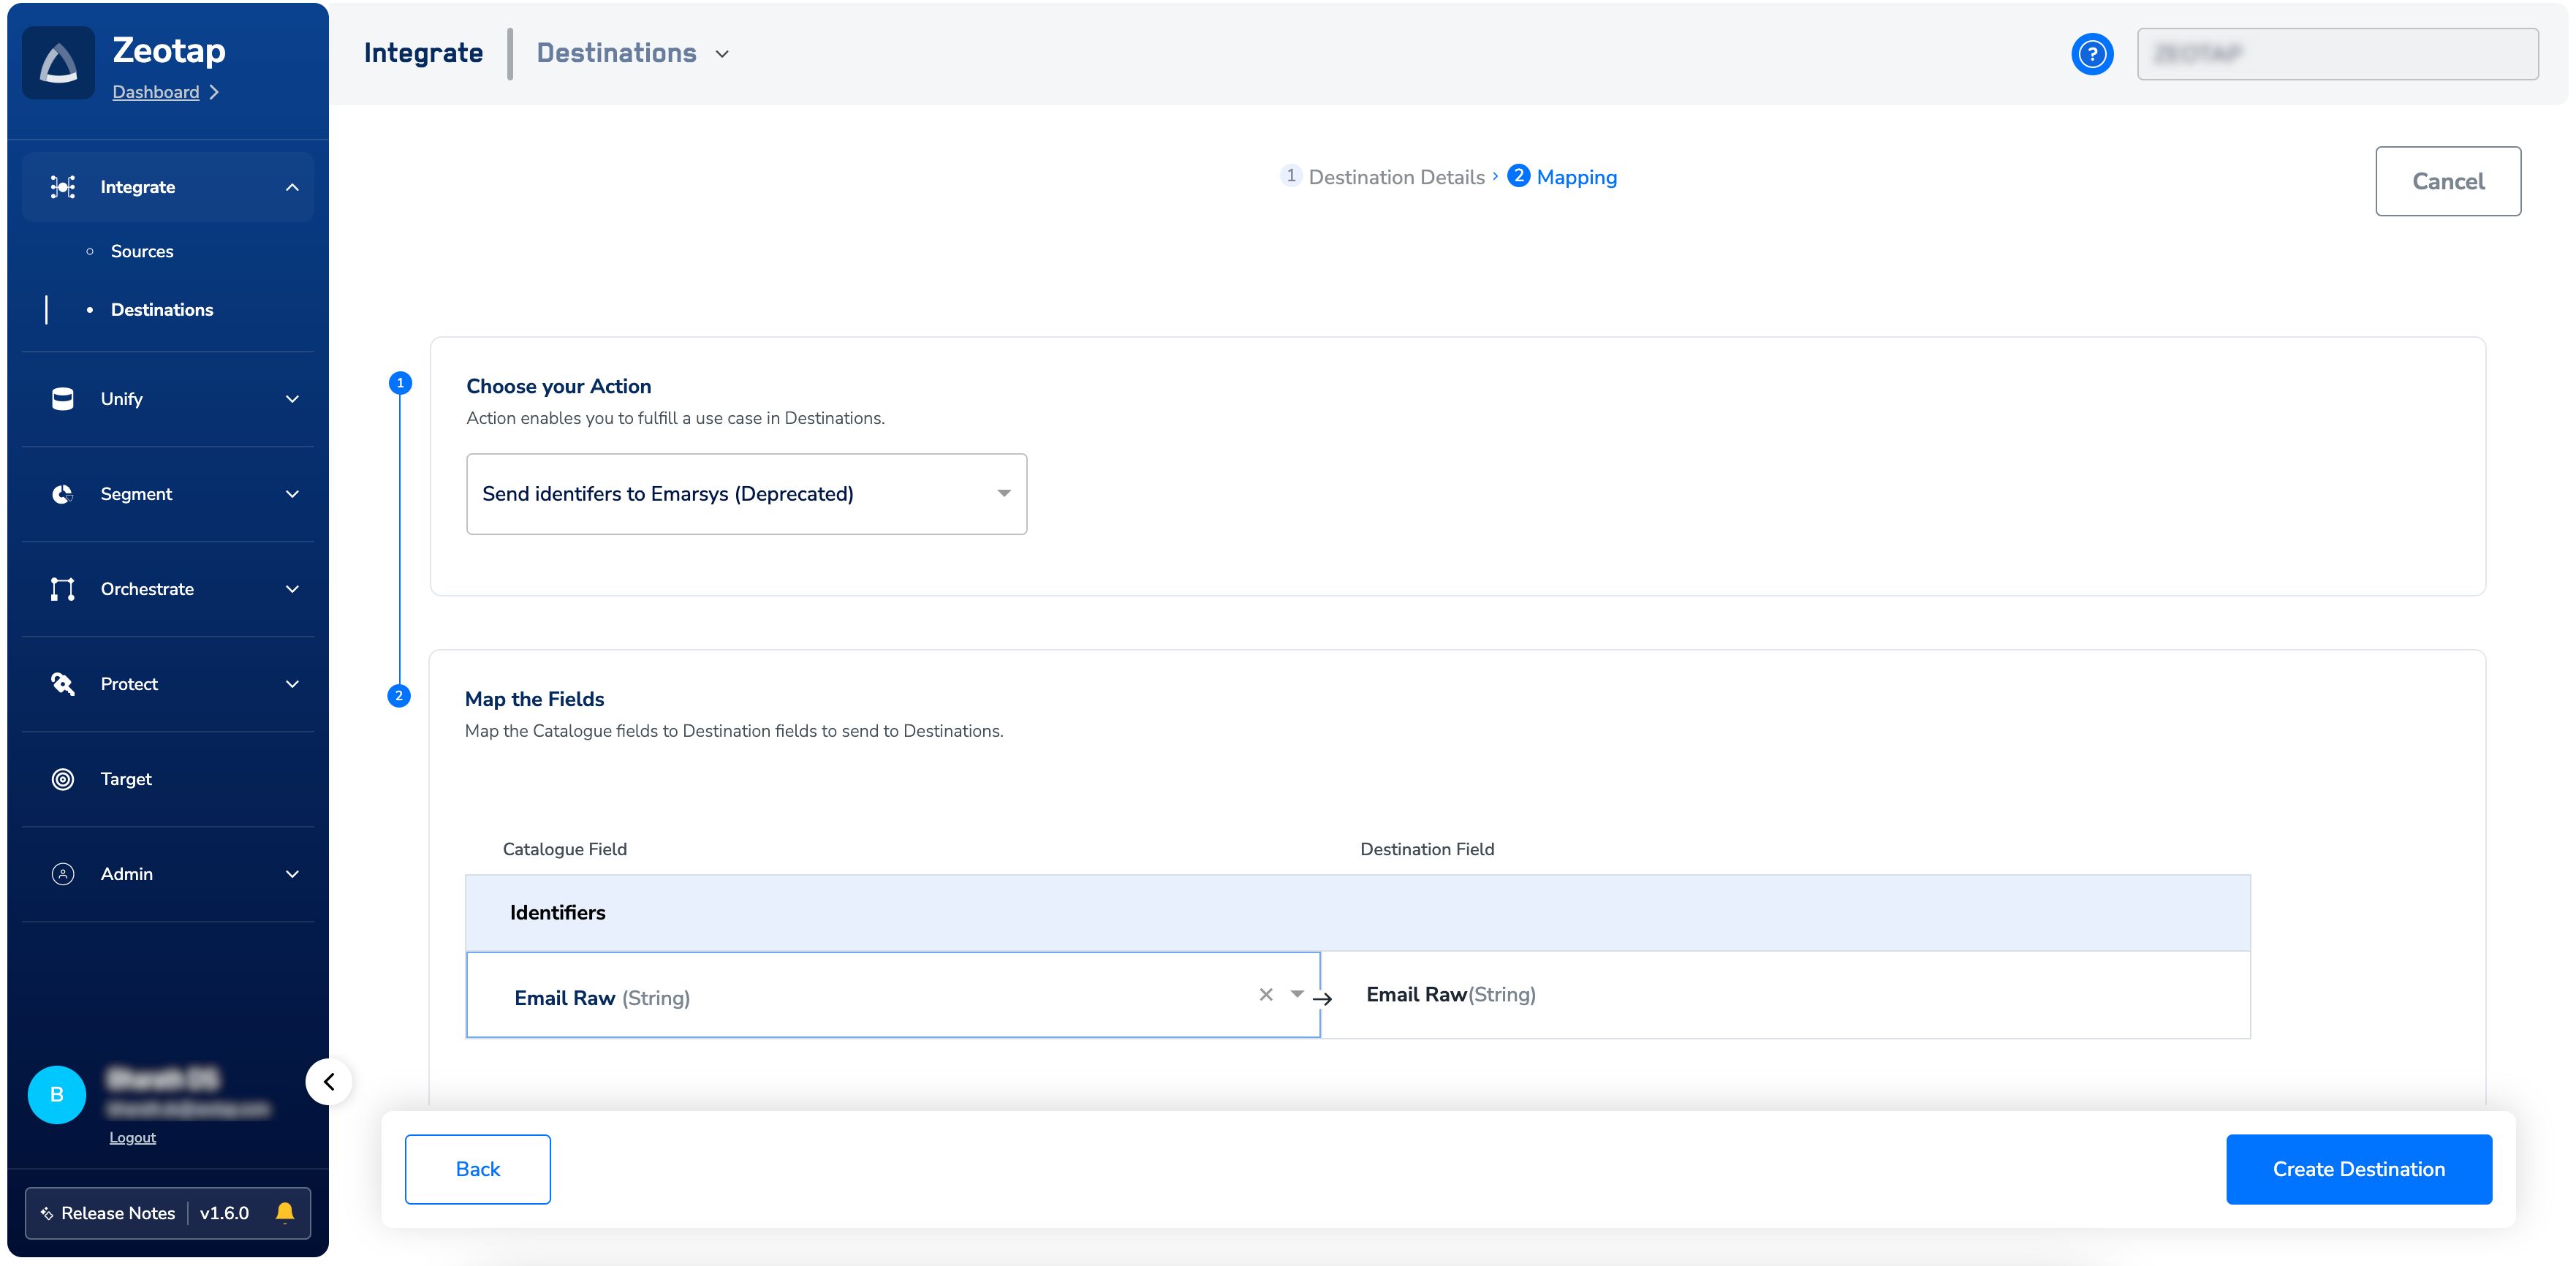
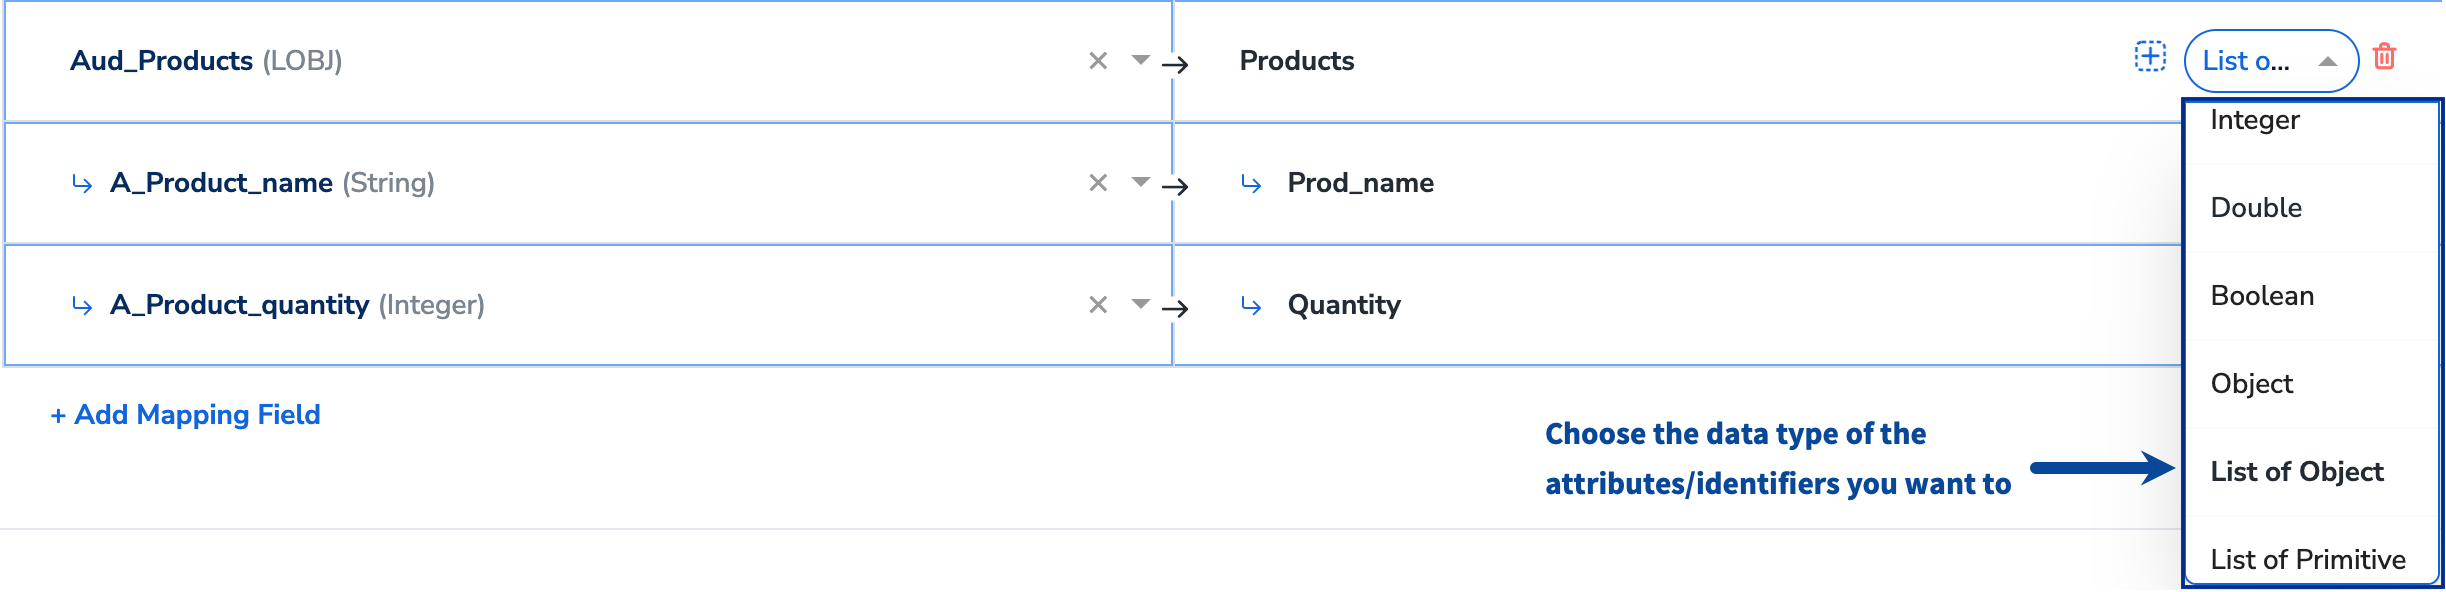
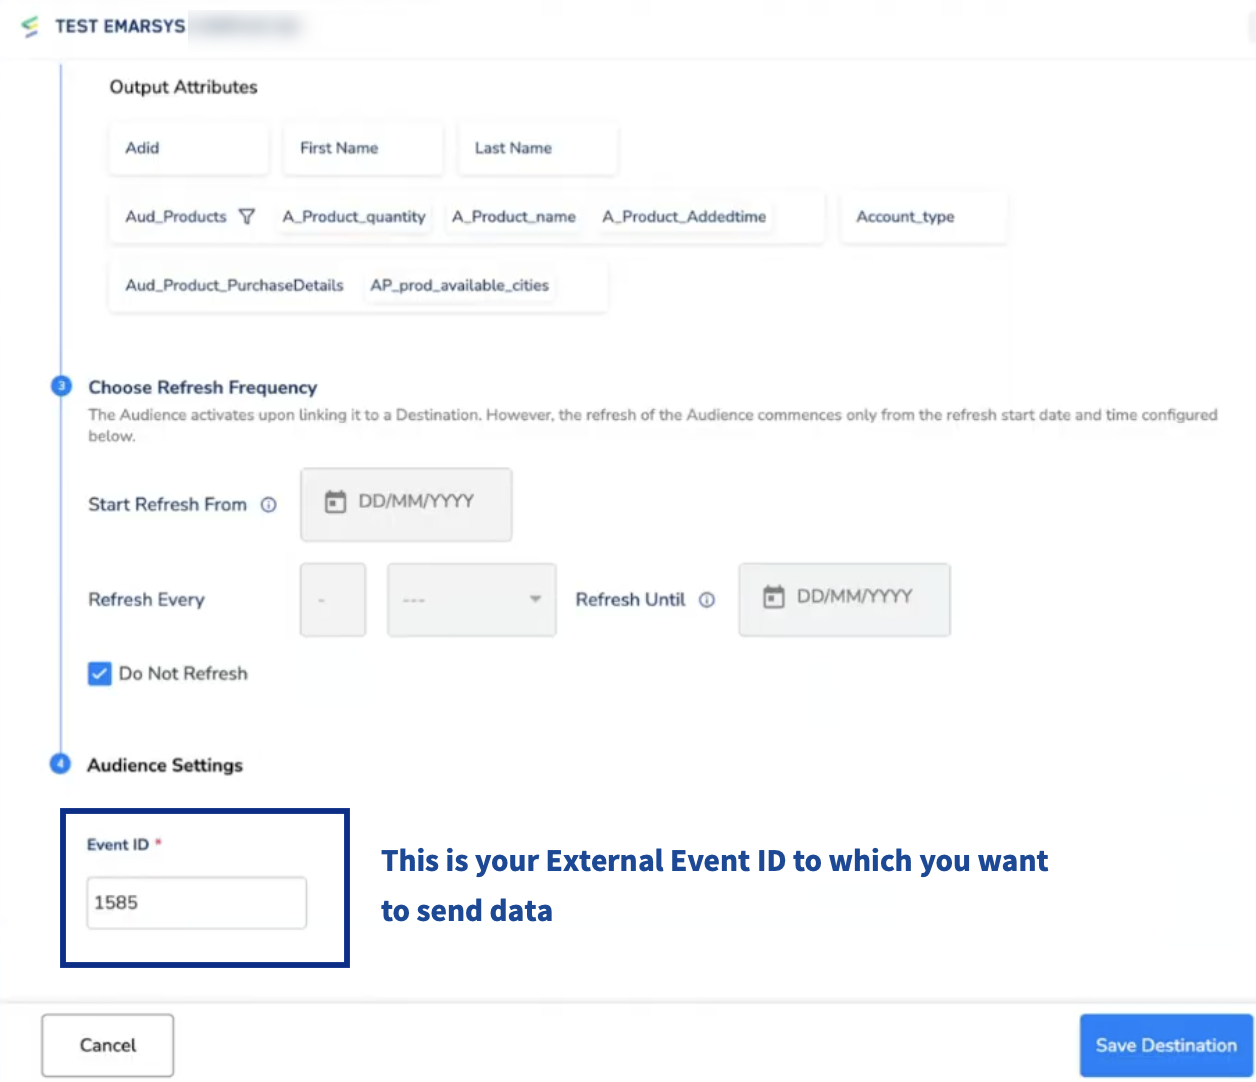
- Array/List of primitives (List of String / Integer / Double / Boolean), or
- Objects or Array/List of Objects.
In the Destinations Settings window, provide the Event ID of the Emarsys External Event that will receive the data. See Emarsys Real Time Integration for how to create an External Event and copy its Event ID.
6
Click Create Destination. The destination is now available in the Audiences application for linking to an audience or segment.
Link an audience to the Emarsys destination
For step-by-step instructions on linking an audience or segment to the destination in the Audiences application, see Link an Audience to the Destination.The terms Audiences and Segments refer to the same object — a customer cohort defined by criteria. For example, an audience or segment can be customers over 18 who performed an
addToCart event in the last 30 days.Verify the audience arrived in Emarsys
After you link an audience and it runs, confirm the data landed in Emarsys. For the Send contacts to contact list action:1
Log into Emarsys and go to Contacts > Contact Lists.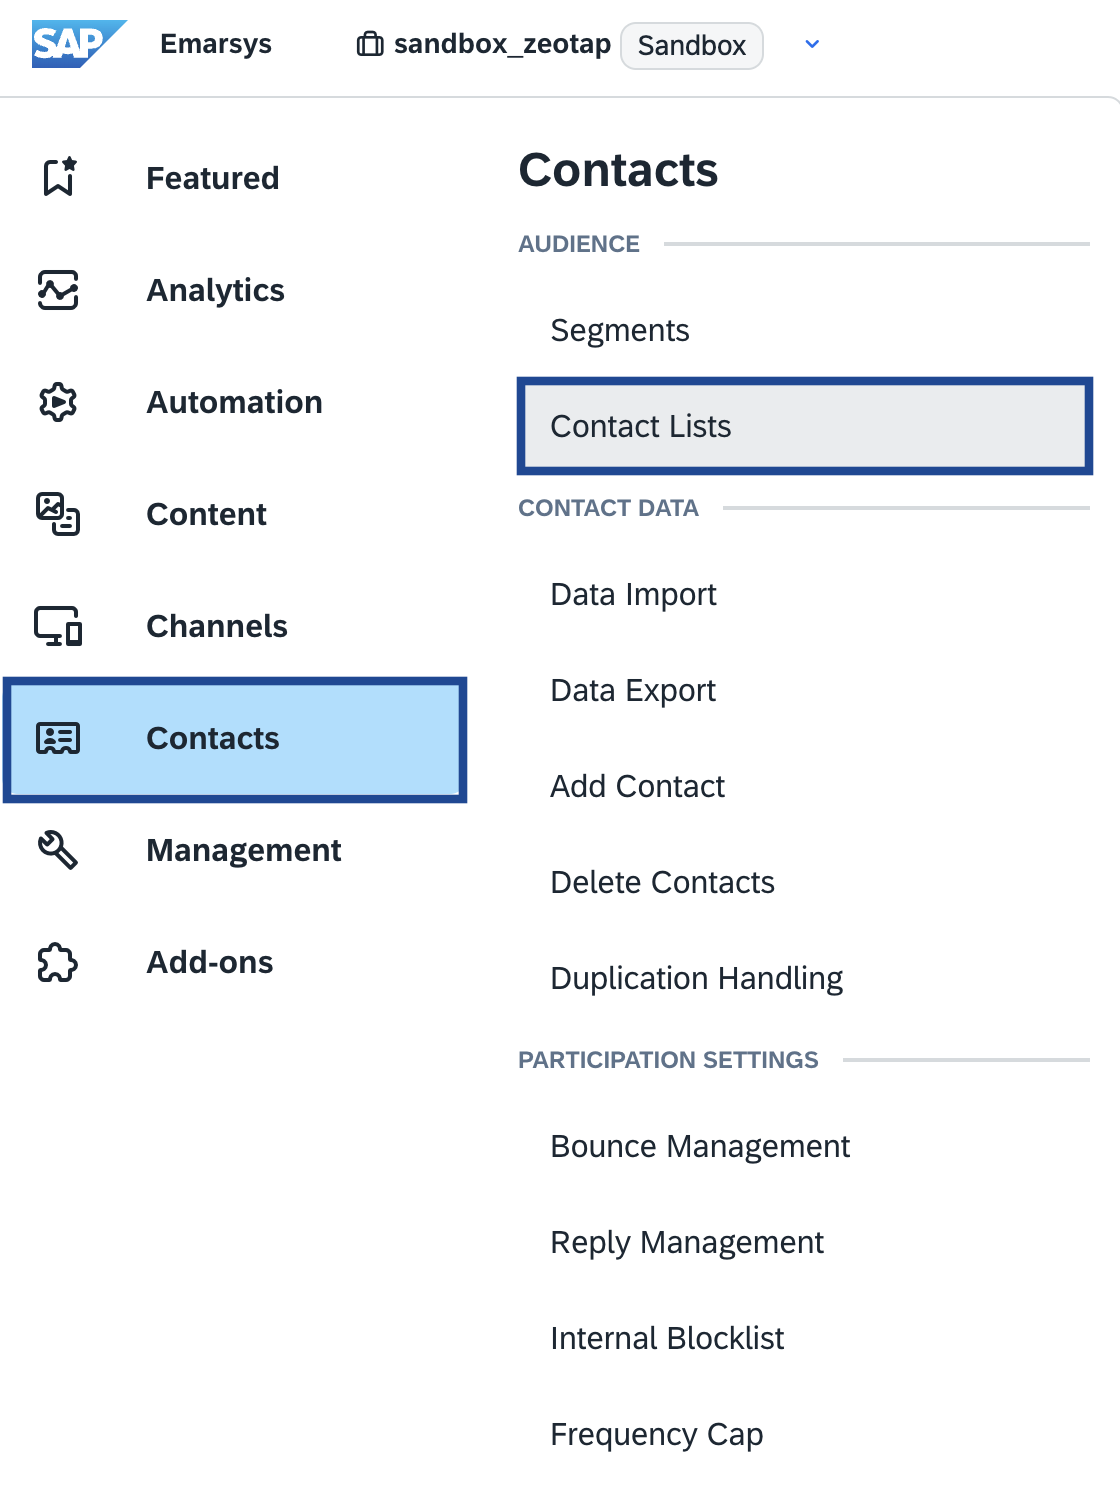
A Contact List in Emarsys is an audience (segment) created in the Zeotap CDP Audiences application and pushed through this destination.
2
Under Contact Lists, confirm your Zeotap CDP audience appears with the expected name and contact count.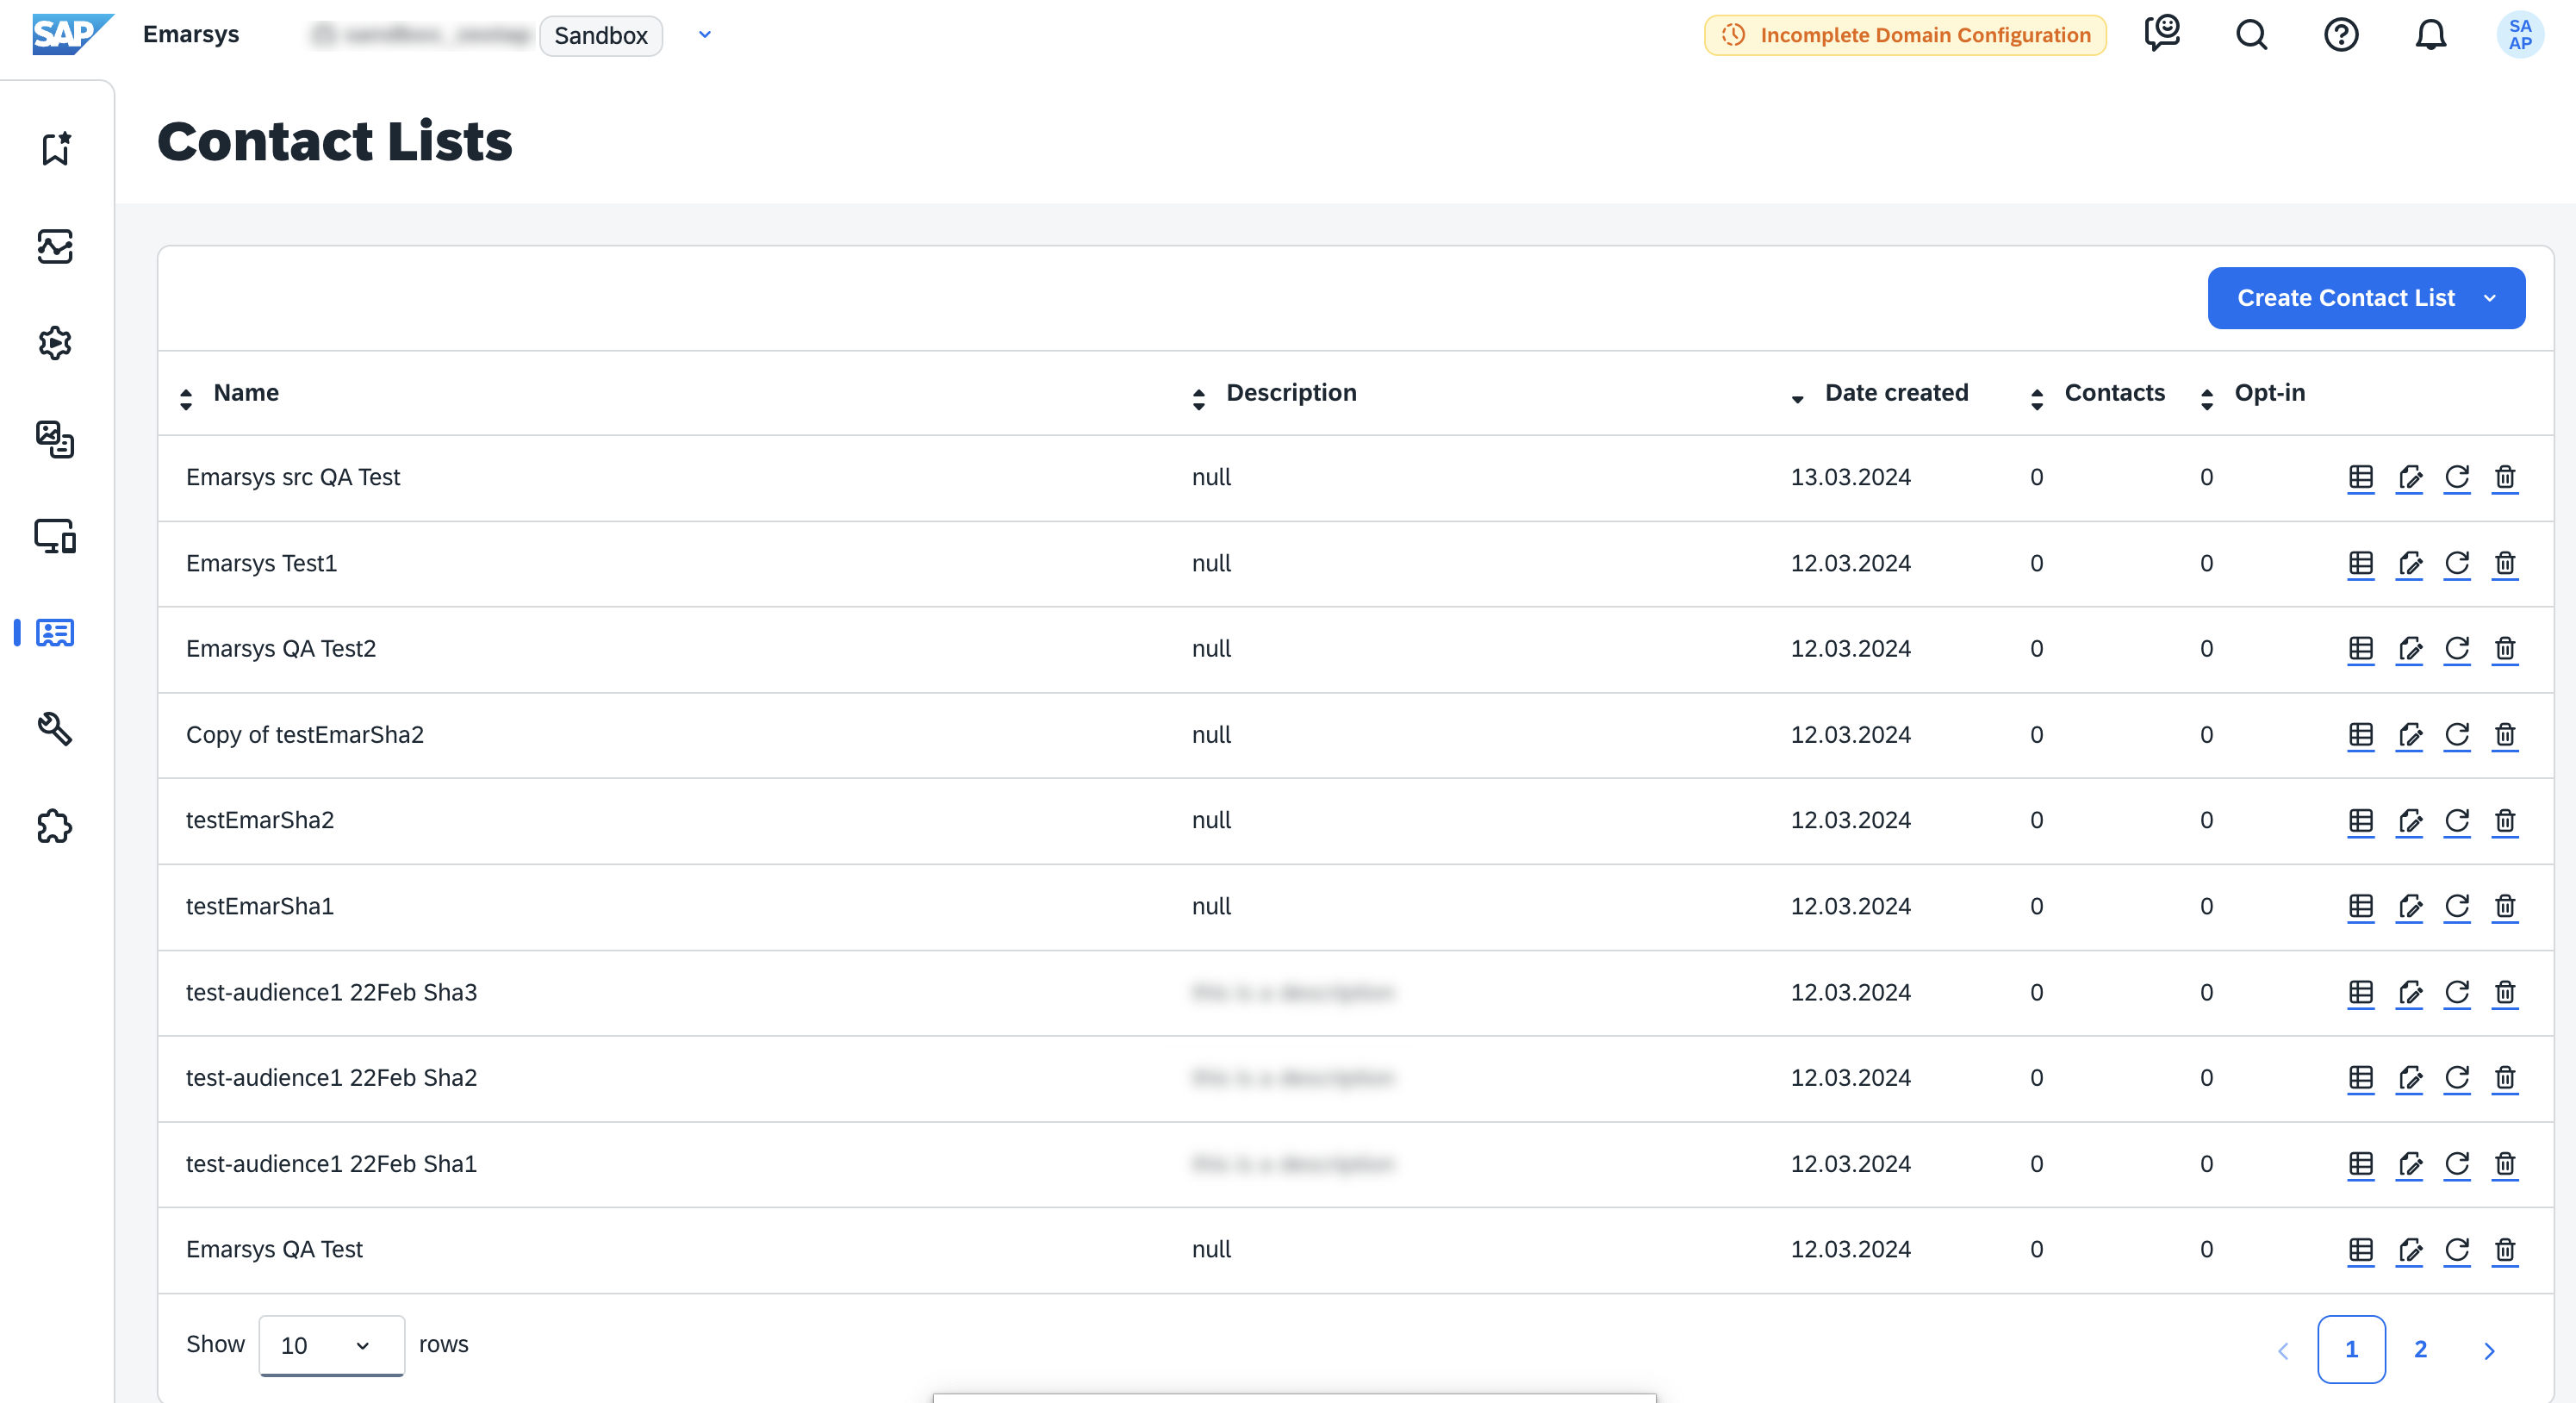
Troubleshooting
If the condition does not match any row above, contact your Zeotap point of contact. Include the destination name, the action selected, the mapping you configured, and (for triggered events) the Emarsys External Event ID.
FAQ
What is the difference between the three Emarsys actions?
What is the difference between the three Emarsys actions?
Send Identifiers to Emarsys (Deprecated) sends only email addresses and is kept for legacy destinations. Send contacts to contact list (Audience) sends all mapped identifiers and attributes into an Emarsys contact list. Send triggered event (Audience) sends identifiers or attributes as the payload of an Emarsys External Event, so an Automation (Interaction) Program can react to the audience in real time.
Where do I find the Key ID for standard fields like Email?
Where do I find the Key ID for standard fields like Email?
Standard Emarsys system fields have predefined Field IDs — for example,
3 for Email. See the Emarsys system fields reference for the full list. Enter the Field ID directly in the Key ID field when creating the destination — no new field is required in Emarsys.Do I need to create an Emarsys field for the triggered-event action?
Do I need to create an Emarsys field for the triggered-event action?
No. For Send triggered event (Audience), Emarsys does not require a pre-created field. The name you enter as the Destination Field in Zeotap CDP becomes the attribute name on the External Event payload in Emarsys.
Why can I not copy the Client Secret later?
Why can I not copy the Client Secret later?
Emarsys displays the Client Secret only once, on the same page where the API credential is created. After you navigate away, the Secret is not shown again. If you lose it, create a new API credential in Emarsys and update the destination in Zeotap CDP with the new Secret.