Overview
This integration sends audience segments from Zeotap CDP directly into Batch CEP, so you can power targeted mobile and customer engagement campaigns without manual file transfers. Once the destination is created and linked to an audience, Zeotap automatically creates a named audience in Batch and populates it with the user identifiers and attributes you map. You configure the connection, map your fields, link it to your segment, and Zeotap handles the rest — including batching for large audiences.Batch vs. Batch CEPTwo Batch destinations are available in the Zeotap catalogue:
- Batch — the original connector. See Batch.
- Batch CEP — a newer connector that reflects recent improvements to the Batch APIs and is recommended for new audience integrations.
Supported Identifiers
Batch CEP supports three audience types. Pick the one that matches the identifier you are sending:- Custom IDs — your own internal user IDs
- Emails — email addresses
- Install IDs — mobile app install IDs
How It Works
- You set up Batch CEP as a destination in Zeotap CDP by entering your API Bearer Token and Batch Project Key.
- You select the Send audiences to Batch action and configure the field mapping — telling Zeotap which identifier and attributes to send.
- You set the Audience Type in Batch (
Custom Ids,Emails, orInstall Ids) so it matches the identifier you are sending. - You link the destination to a segment in Zeotap and choose a refresh frequency.
- Once linked, Zeotap creates the audience in Batch and populates it with the user identifiers and any attributes you mapped — splitting large audiences into batches automatically.
Prerequisites
Make sure you have everything ready before starting the setup. In Batch:- An active Batch account with access to the Batch dashboard.
- Your REST API Key (also called API Bearer Token) — visible to account managers under Account Settings → Custom Settings. Keep this value secret and never expose it in client applications.
- Your Project Key — found in the Batch project settings.
- A clear understanding of which audience type you will use —
Custom Ids,Emails, orInstall Ids— based on the identifier you plan to send.
- Access to the Integrate module with permission to create new destinations.
- An audience segment ready to send to Batch.
- The user identifier you intend to send (e.g., email, custom ID, install ID) and any attributes you want to include.
Get Your Credentials from Batch
Before connecting Zeotap to Batch, collect two values from your Batch project: the REST API Key and the Project Key.Open Batch Account Settings
Log in to your Batch account. Click your profile avatar at the top right and select Account settings.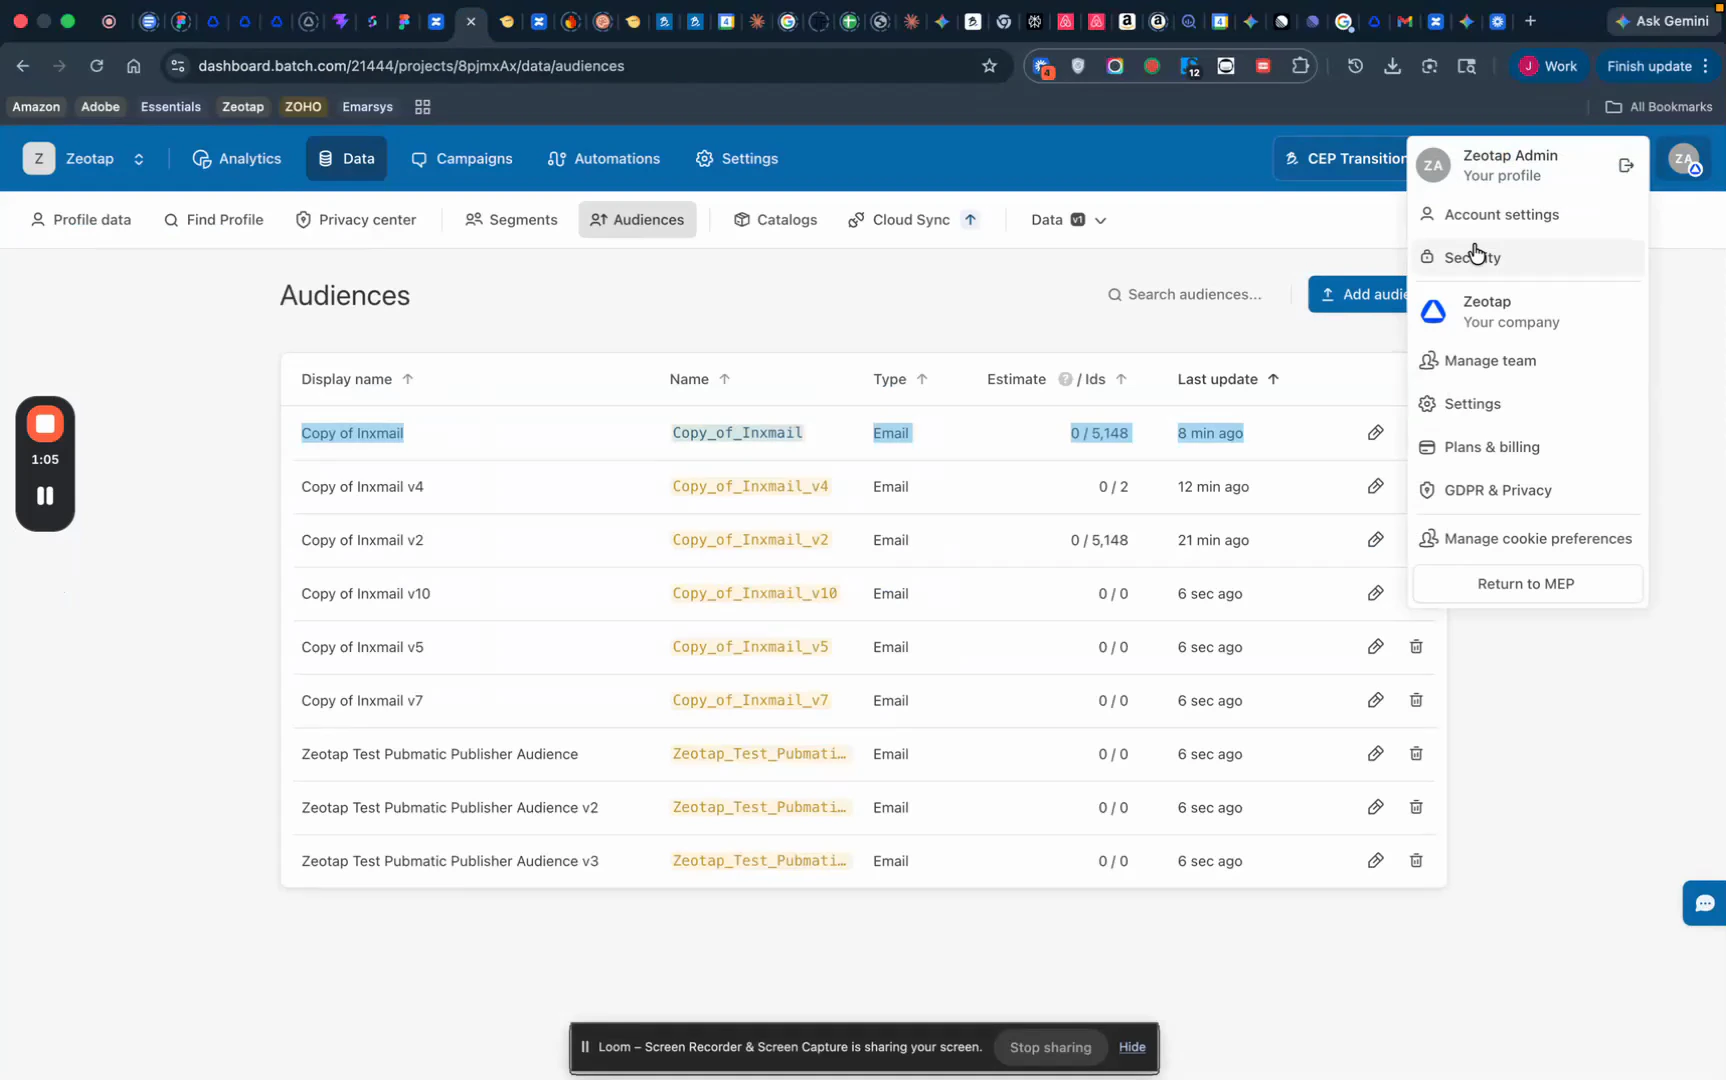
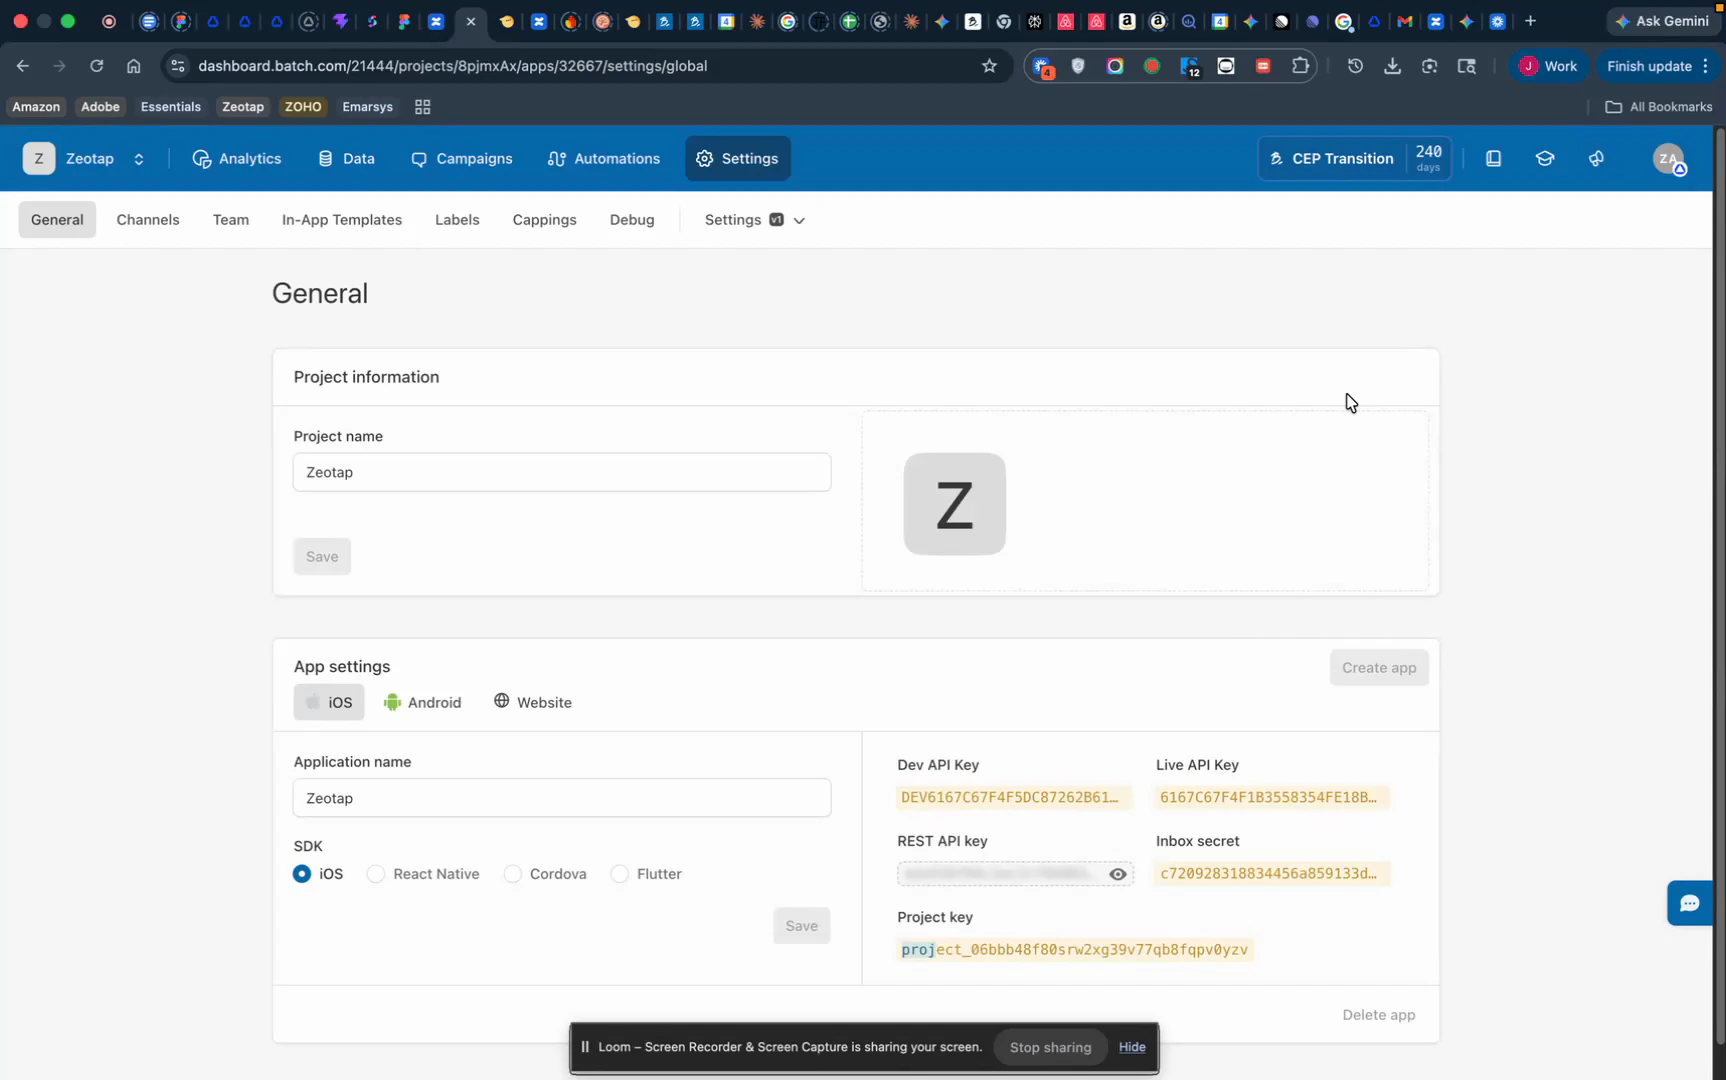
- REST API Key (used as the API Bearer Token in Zeotap)
- Project Key
Create the Batch CEP Destination in Zeotap CDP
Open the Destinations catalogue
Log in to Zeotap CDP and go to Integrate → Destinations. Click + Create Destination and search for Batch in the catalogue. Two cards appear — Batch and Batch CEP. Select the Batch CEP card.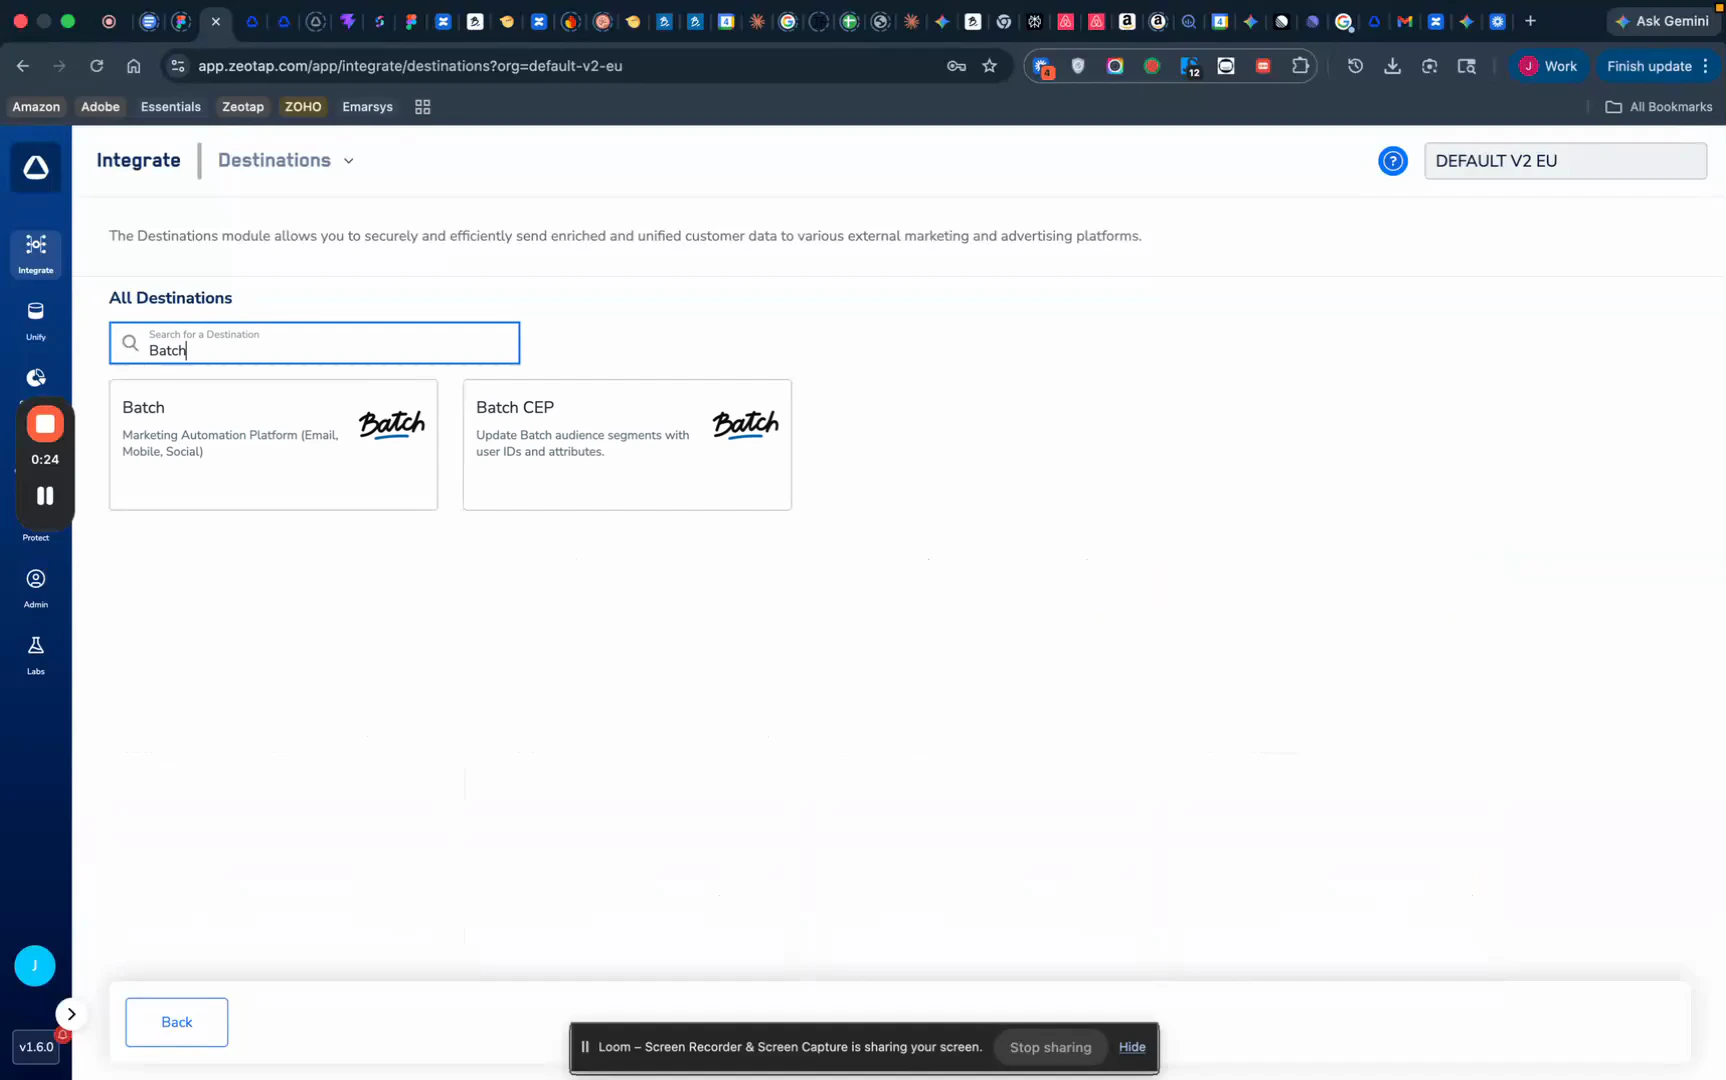
Enter the destination details
Fill in the configuration fields:
- Destination Name — a descriptive label (e.g.,
Batch — Q2 Mobile Audience Sync). - API Bearer Token — paste the REST API Key you copied from Batch.
- Project Key — paste the Project Key you copied from Batch.
Choose the action and map the fields
On the Mapping screen: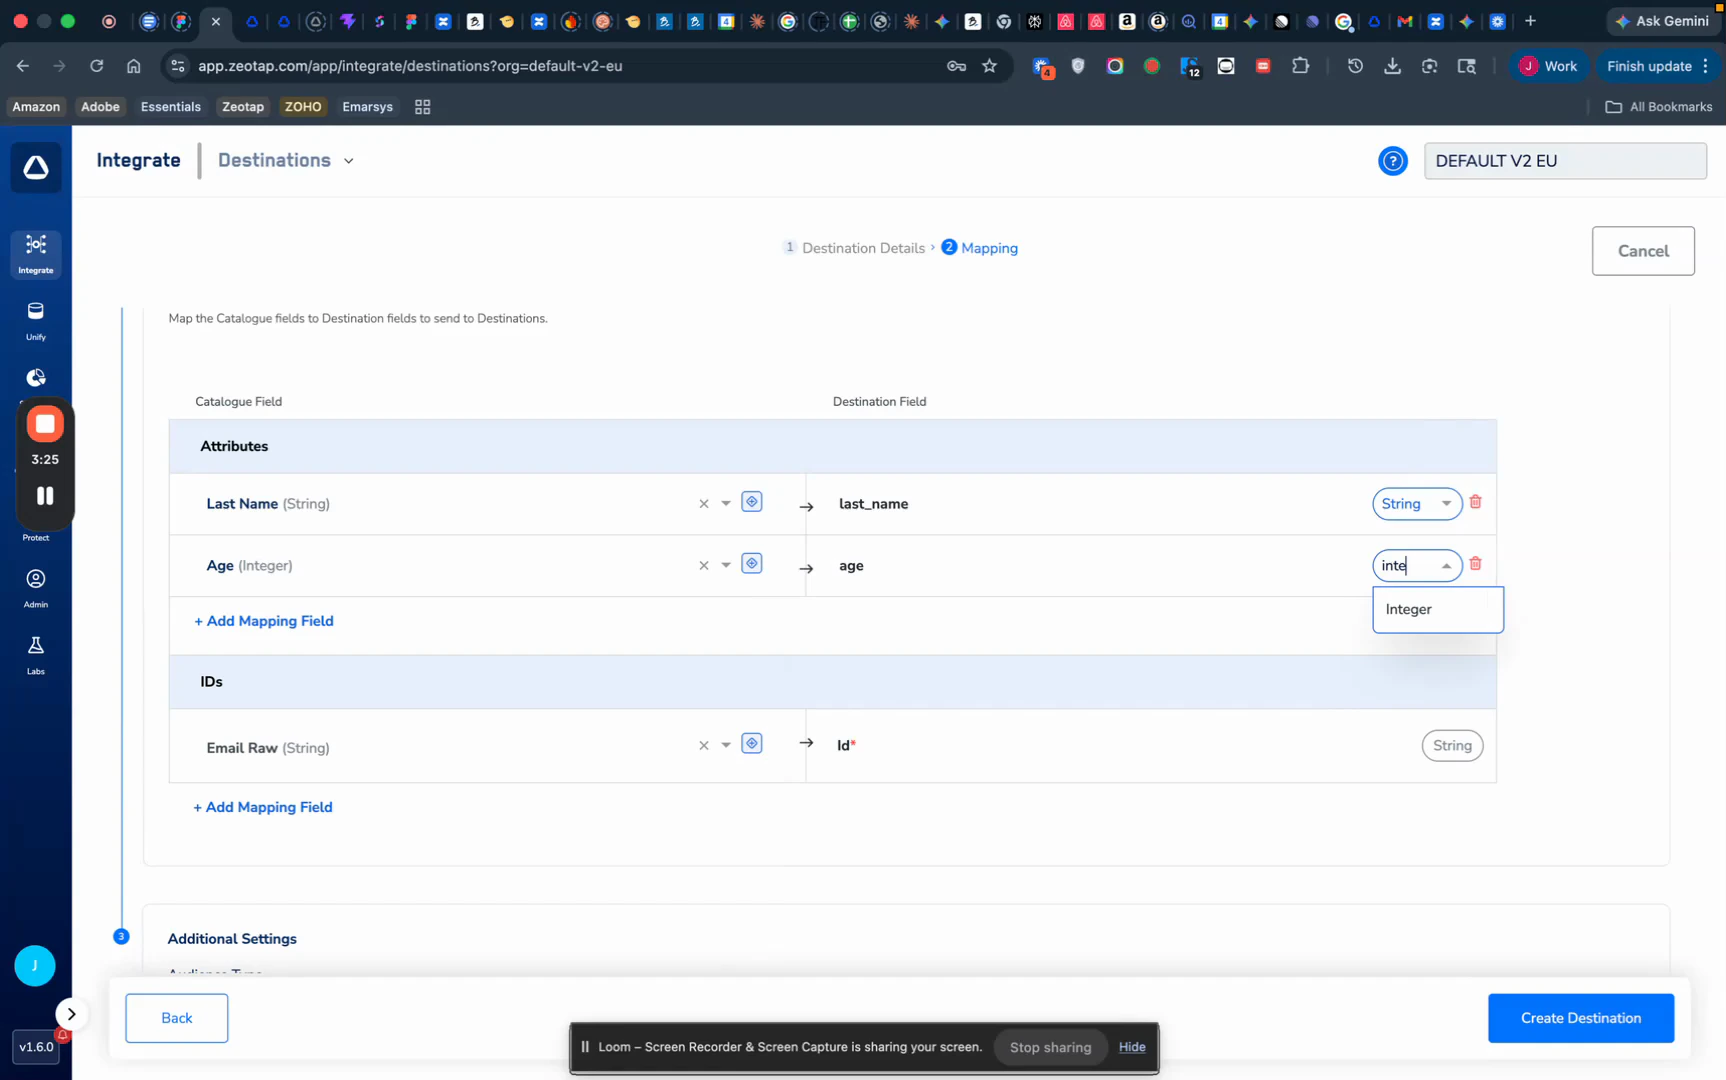
- Under Choose your Action, select Send audiences to Batch — the only action available for this connector.
- Under Map the Fields, map your identifier and any attributes:
- The ID field is the identifier each user will be added to the Batch audience under (e.g., Email Raw →
Id). - Optional Attributes are extra profile fields sent alongside the ID (e.g., Last Name →
last_name, Age →age).
- The ID field is the identifier each user will be added to the Batch audience under (e.g., Email Raw →
Set the Audience Type to match your identifier
Scroll to Additional Settings and pick the Audience Type that matches the identifier you mapped above:
In the example below, Email Raw is being sent, so the audience type is set to Emails.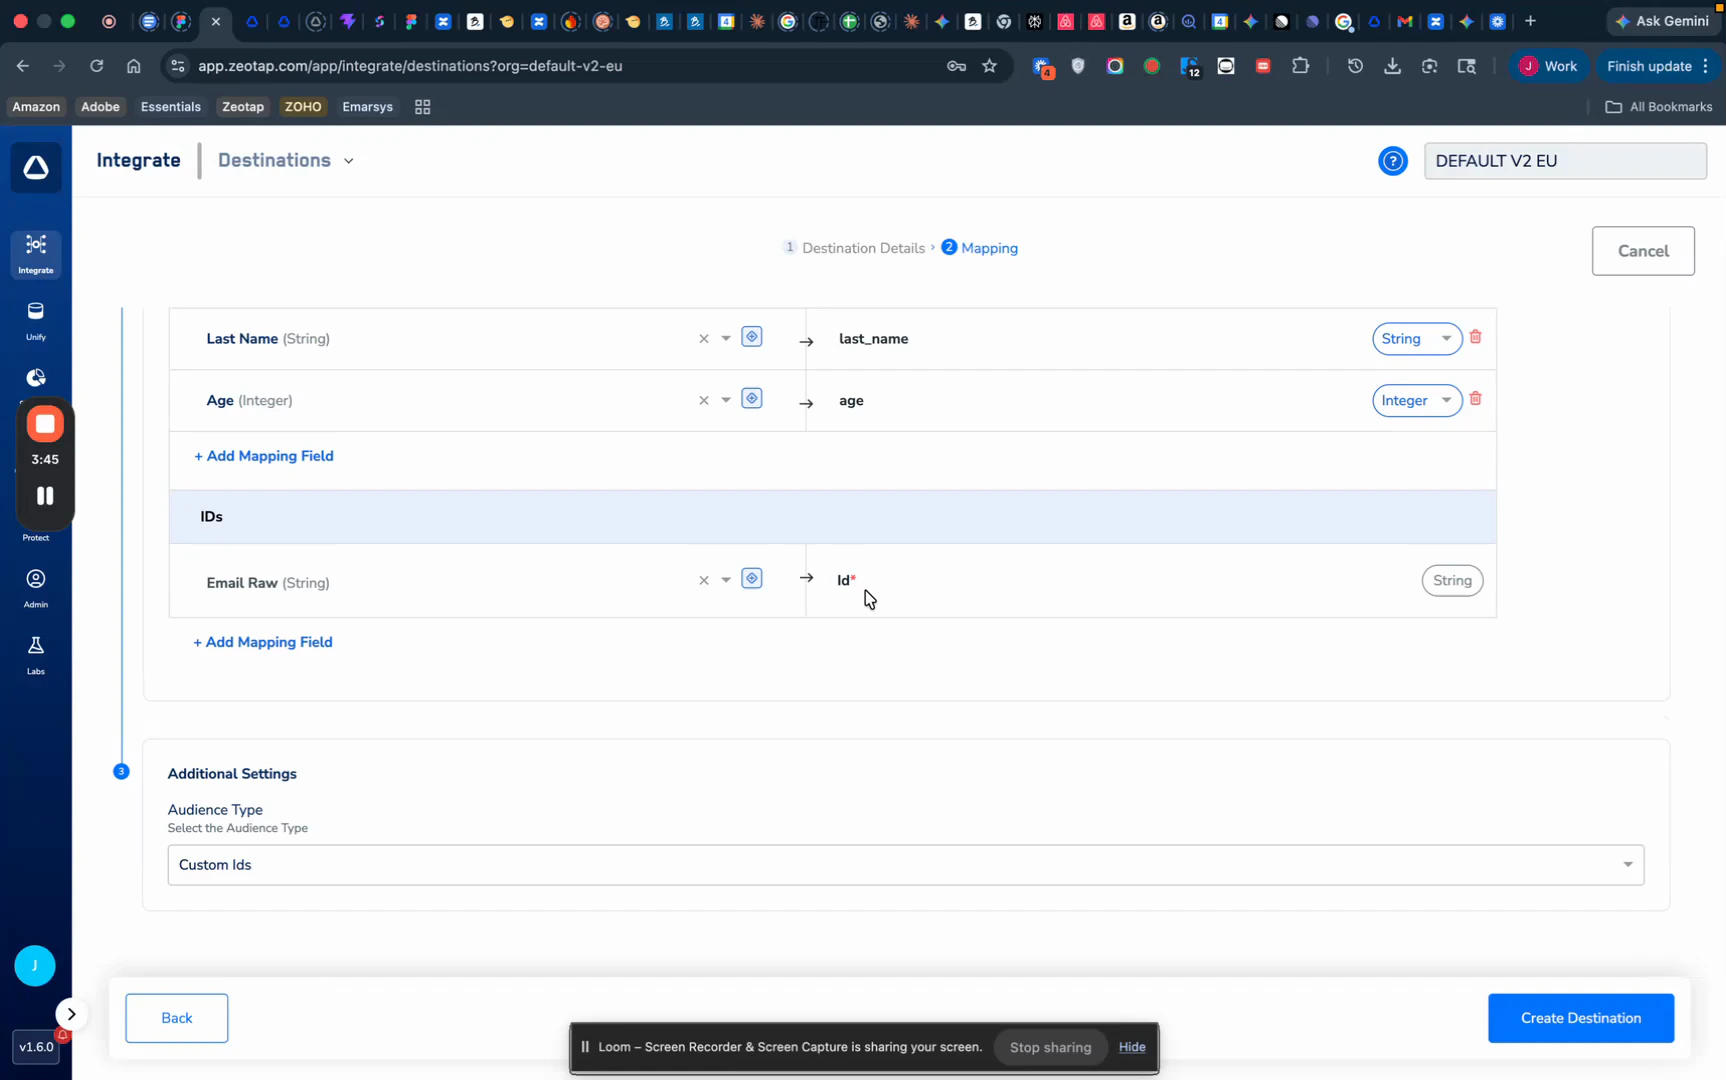
| Identifier you are sending | Audience Type to select |
|---|---|
| Email addresses | Emails |
| Your own internal user IDs | Custom Ids |
| Mobile app install IDs | Install Ids |
Review and create the destination
Review every value you entered:
- Destination name
- API Bearer Token and Project Key
- Action: Send audiences to Batch
- Field mapping (ID + any attributes)
- Audience Type matches the ID you are sending
Link a Segment to the Batch CEP Destination
With the destination created, link it to an audience segment so Zeotap starts populating Batch.Open the segment’s link menu
In Zeotap CDP, navigate to Segment → Audiences. Find the audience you want to send, click the three-dots (⋮) icon next to it, and select Link to Destination.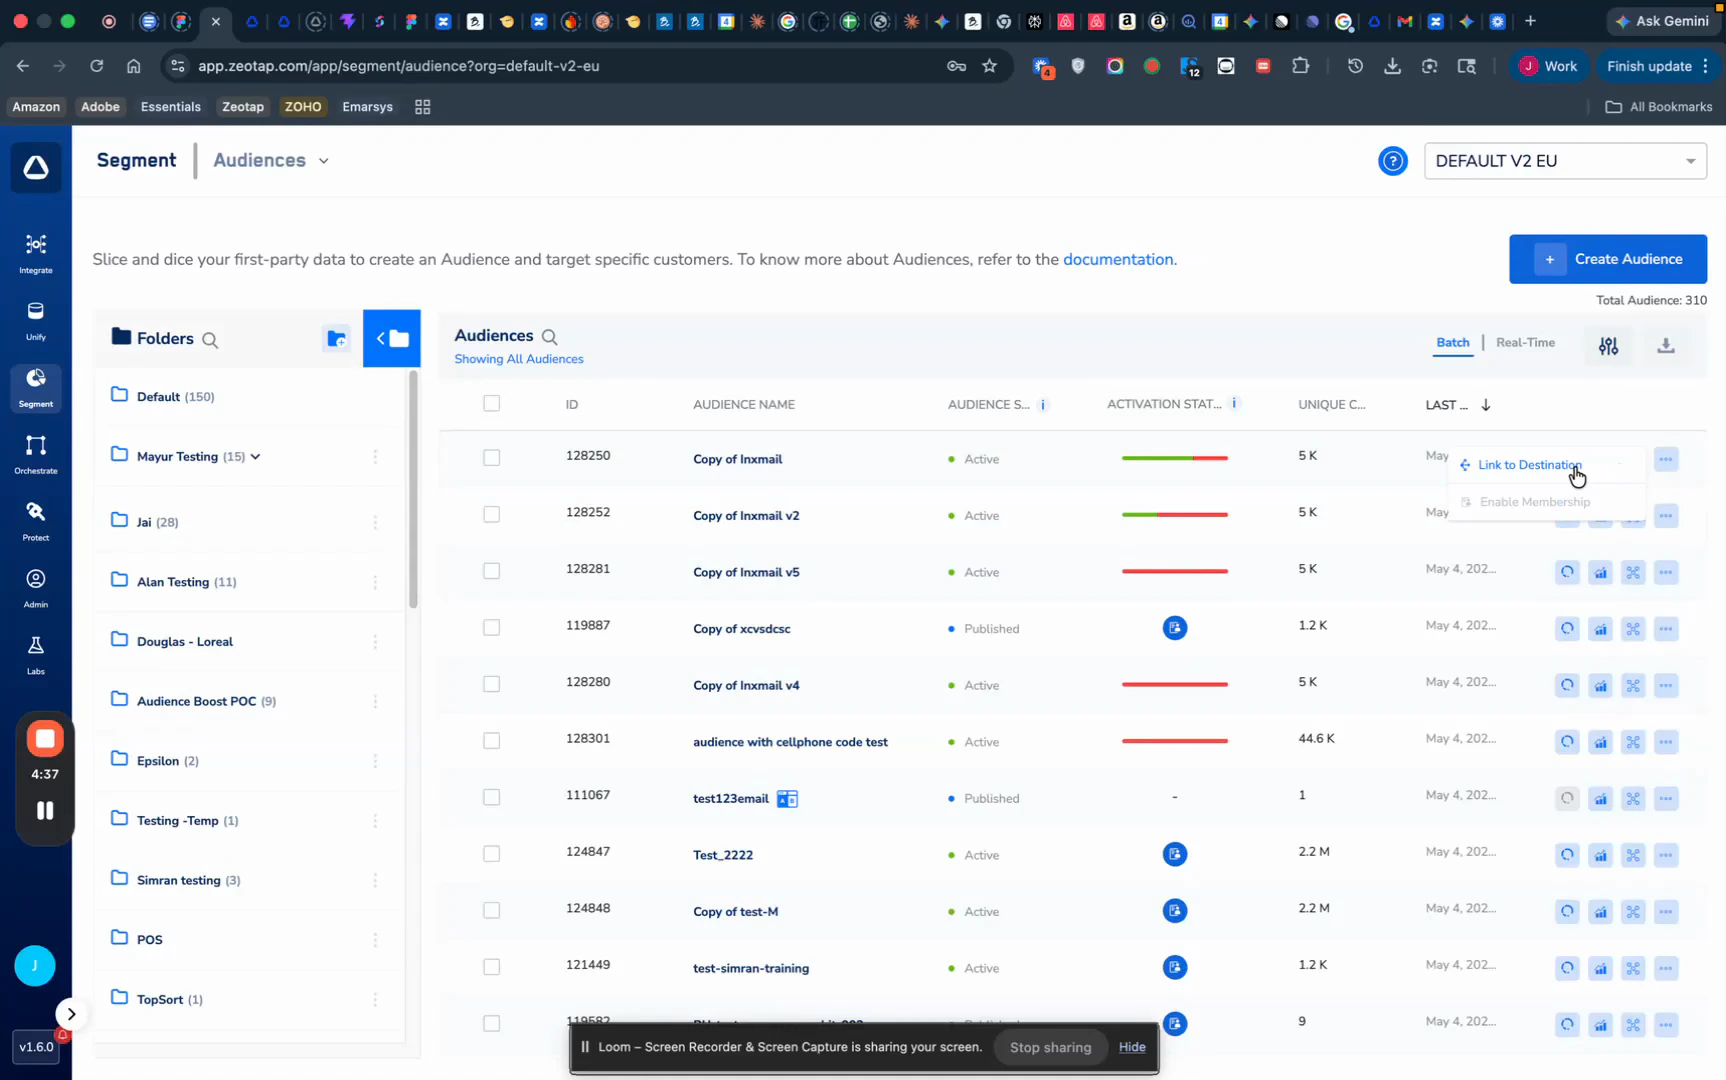
Select the Batch CEP destination, mapping, and refresh frequency
On the linking screen: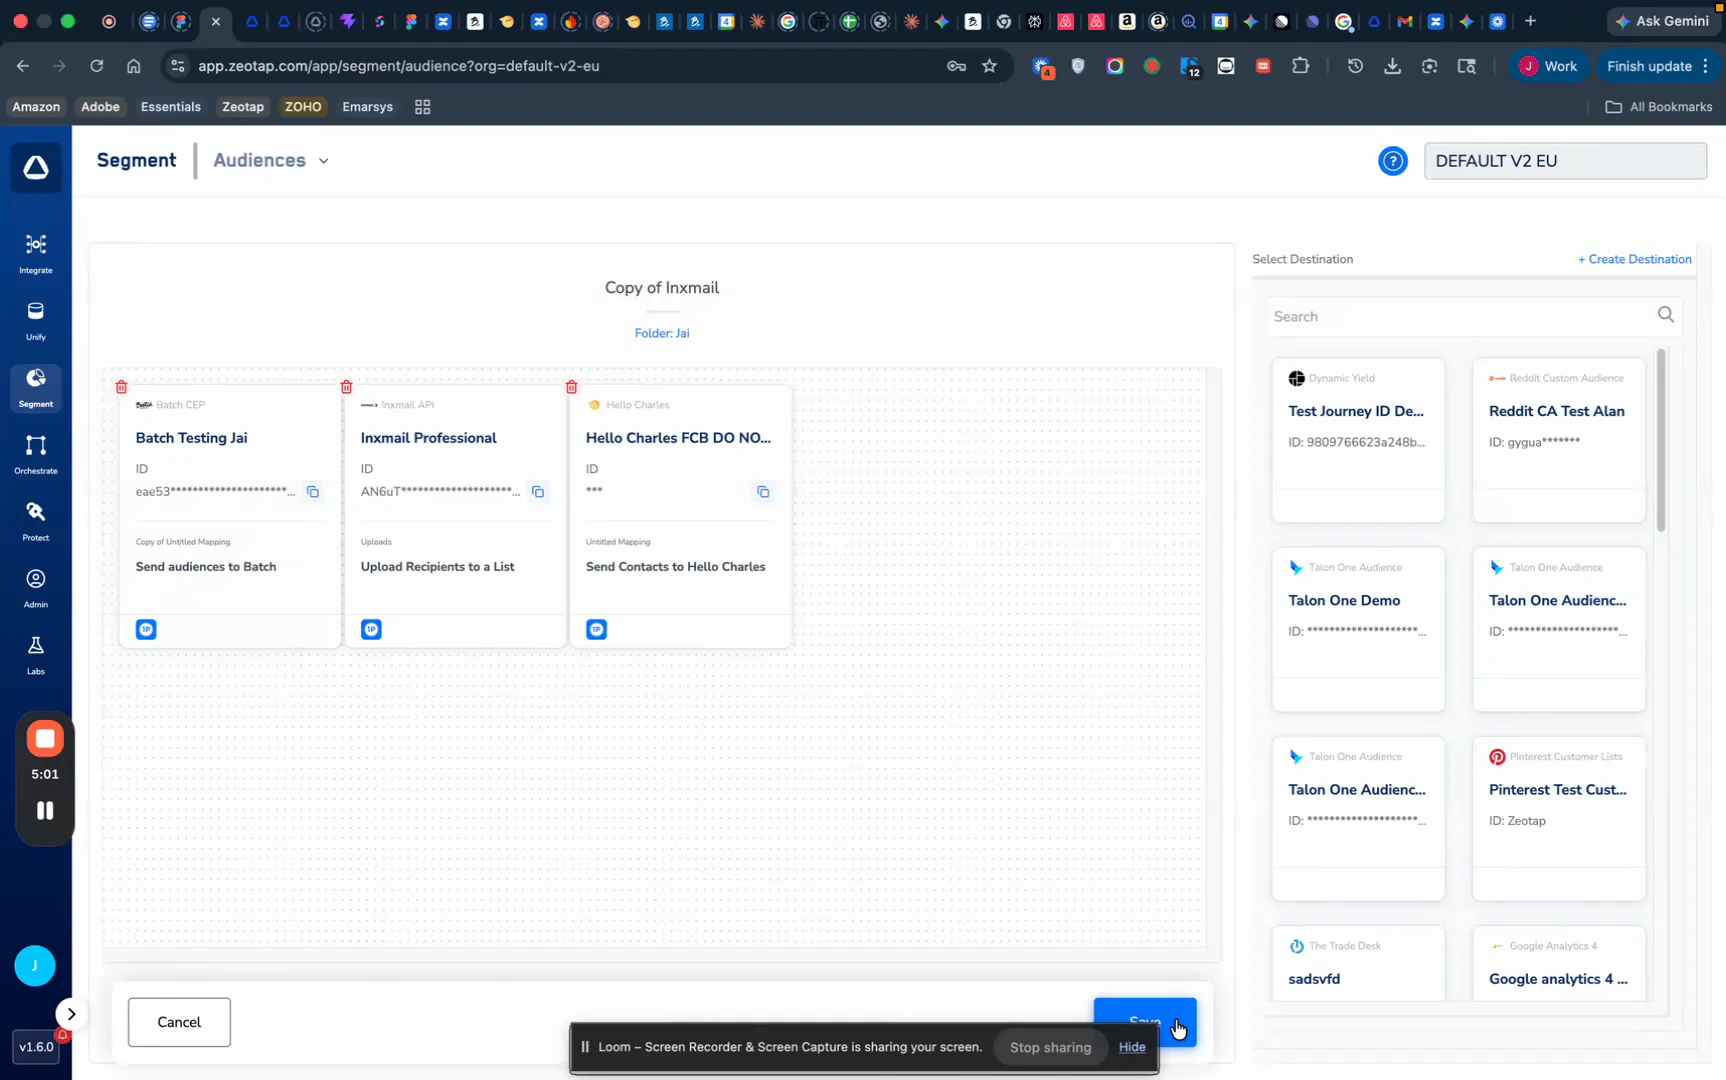
- Choose the Batch CEP destination you just created from the destination list on the right.
- Pick the mapping to apply to this audience.
- Pick a refresh frequency that suits your use case (e.g., one-time, scheduled, or continuous).
- Click Save Destination, then save the segment setup.
Field Mapping Reference
| Zeotap CDP field | Maps to (Batch) | Required / Optional | Notes |
|---|---|---|---|
| Audience Name (set by Zeotap) | name | Required | The name Batch uses to identify the audience. Letters, numbers, underscores (_), and hyphens (-) only. Maximum 255 characters. Case-sensitive. |
| Audience Display Name | display_name | Optional | Human-readable description shown in Batch. |
| Audience Type | type | Required | Must be one of custom_ids, emails, or install_ids, and must match the identifier you map. |
| Mapped ID field | audience identifier | Required | The user identifier each record is added under (e.g., email, custom user ID, install ID). |
| Mapped attribute fields | user attributes | Optional | Up to 15 attributes per user. Additional attributes beyond 15 are not sent. |
Activate and Test the Integration
Once the segment is linked and saved, verify the data has reached Batch.Wait for the sync
Zeotap encrypts and sends the audience data to Batch in the background, based on the refresh frequency you chose.
Verify in Batch
Log in to Batch, then go to Data → Audiences. The audience you sent from Zeotap appears in the list. Open it and check the identifier count — it should match (or closely match) the number of users in your Zeotap segment.In the example walkthrough, an audience of approximately 5,000 identifiers appeared in Batch shortly after the sync completed.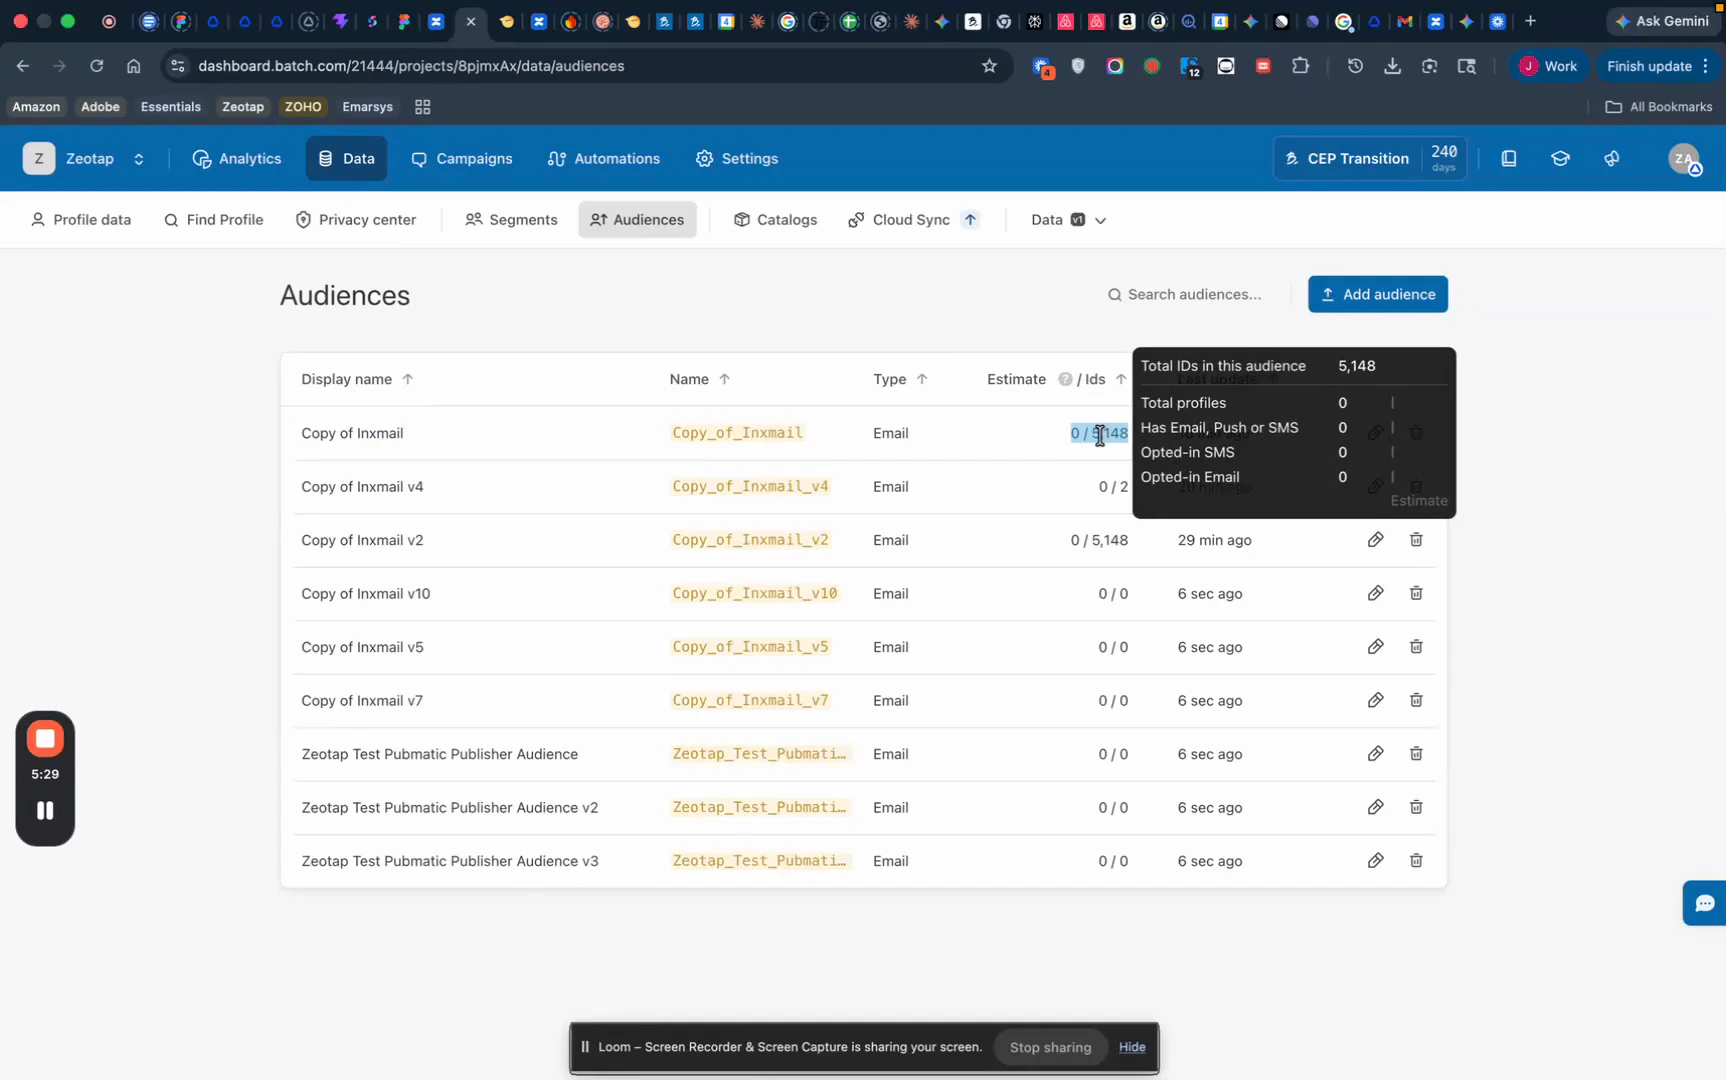
Batch processes the data asynchronously. After a successful send, Batch returns an
indexing_token and processes the records in the background — usually in real time, but no SLA is guaranteed. If counts do not appear immediately, wait a few minutes and refresh the audience view.Important Notes & Limitations
Audience names are case-sensitive and have character restrictions. Only letters (a–z, A–Z), numbers (0–9), underscores (
_), and hyphens (-) are allowed, with a maximum of 255 characters. Names with special characters, spaces, or accents will fail.Batching is automatic. Each Update request to Batch supports up to 10,000 IDs. For audiences larger than 10,000, Zeotap automatically splits the payload into multiple sequential requests against the same audience name — you do not need to do anything.
Maximum 15 attributes per user. If you map more than 15 attributes, the additional ones are not sent.