

What this is
Bird - Customer Lists sends data out of Zeotap CDP: it pushes the audiences you build in Zeotap to the matching customer lists in your Bird workspace, where those lists can be used in any campaign created in Bird. Bird (formerly MessageBird) is a cloud communications platform that lets businesses reach customers across channels such as SMS, Voice, WhatsApp and Email through a single API. Bird appears twice in the Zeotap destinations catalogue, and the two entries are not interchangeable:- Bird - Customer Lists — this page. A batch destination, linked to an audience in the Audiences application.
- Bird Trigger Events — a real-time destination that sends event data to Bird and is linked from a Send to Destinations node in a Journey.
Supported identifiers and attributes
This destination supports raw email address, Phone, and any other custom attributes you want to send to Bird.Event attributes cannot be sent through this destination. Bird Trigger Events is the Bird destination for event data.
Prerequisites
Have both of these to hand before you create the destination in Zeotap:- An Access token — the access key you generate in Bird. See Set up access in Bird.
- Your Bird Workspace ID. See Find your workspace ID.
Set up access in Bird
In Bird, HTTP requests are authorised with access keys. An access key takes its scope from an access role, and the role carries an access policy, so create the three objects in that order: policy, then role, then key. All three sit under Settings → Security in the Bird Admin console.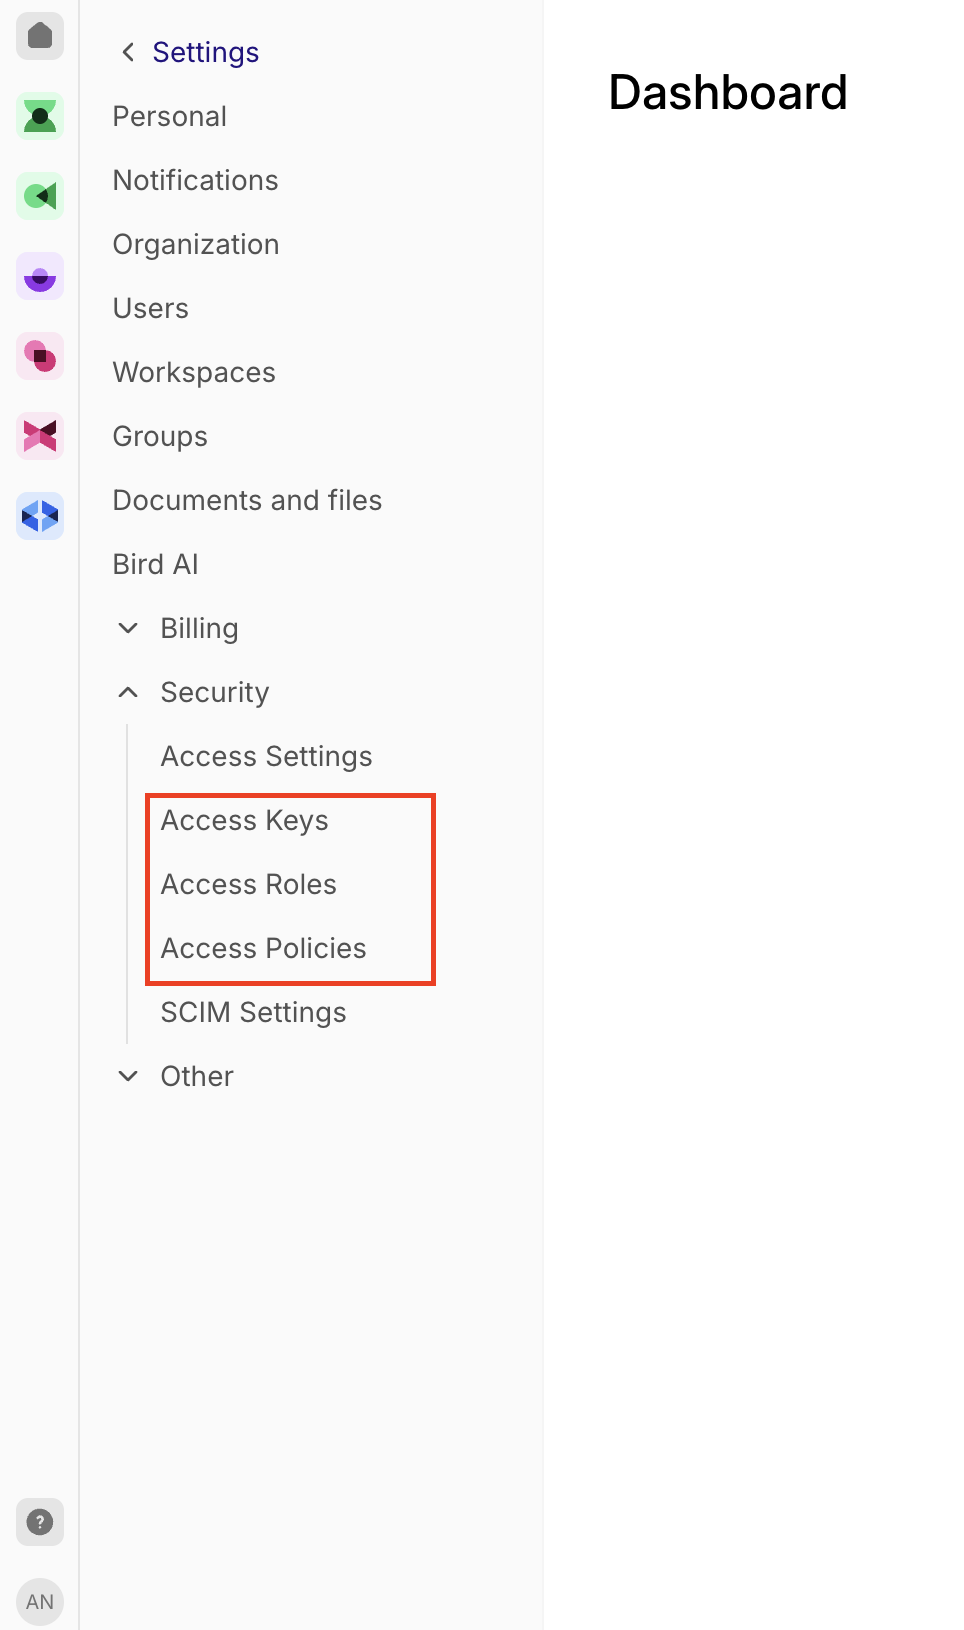
Create the access policy
Bird documents this flow in Creating an access policy.1
Log in to Bird. In the bottom left-hand corner, click your name, then click Admin console.
2
Go to Settings → Security → Access Policies and click Create custom policy.
3
Under General, set the name to
zeotapintegration.4
Under Definition, set:
- Effect — Allow
- Action — any
- Resource —
/workspaces/*/lists
/workspaces/*/contacts/identifiers/**, before clicking Save.Create the access role
Bird documents this flow in Access roles.1
In the Bird Admin console, go to Settings → Security → Access Roles.
2
Click Create Role.
3
Provide a Name for the role. In the Permissions section, scroll down to Other permissions, select the policy you created in the previous step, then click Create Role.
Create the access key
Create the access key only once the policy and the role exist.1
In the Bird Admin console, go to Settings → Security → Access Keys.
2
Click Add new access key.
3
In the Add new access key dialogue, enter a Key name and a Key description, select the role you created in the previous step from the Roles dropdown, then click Save.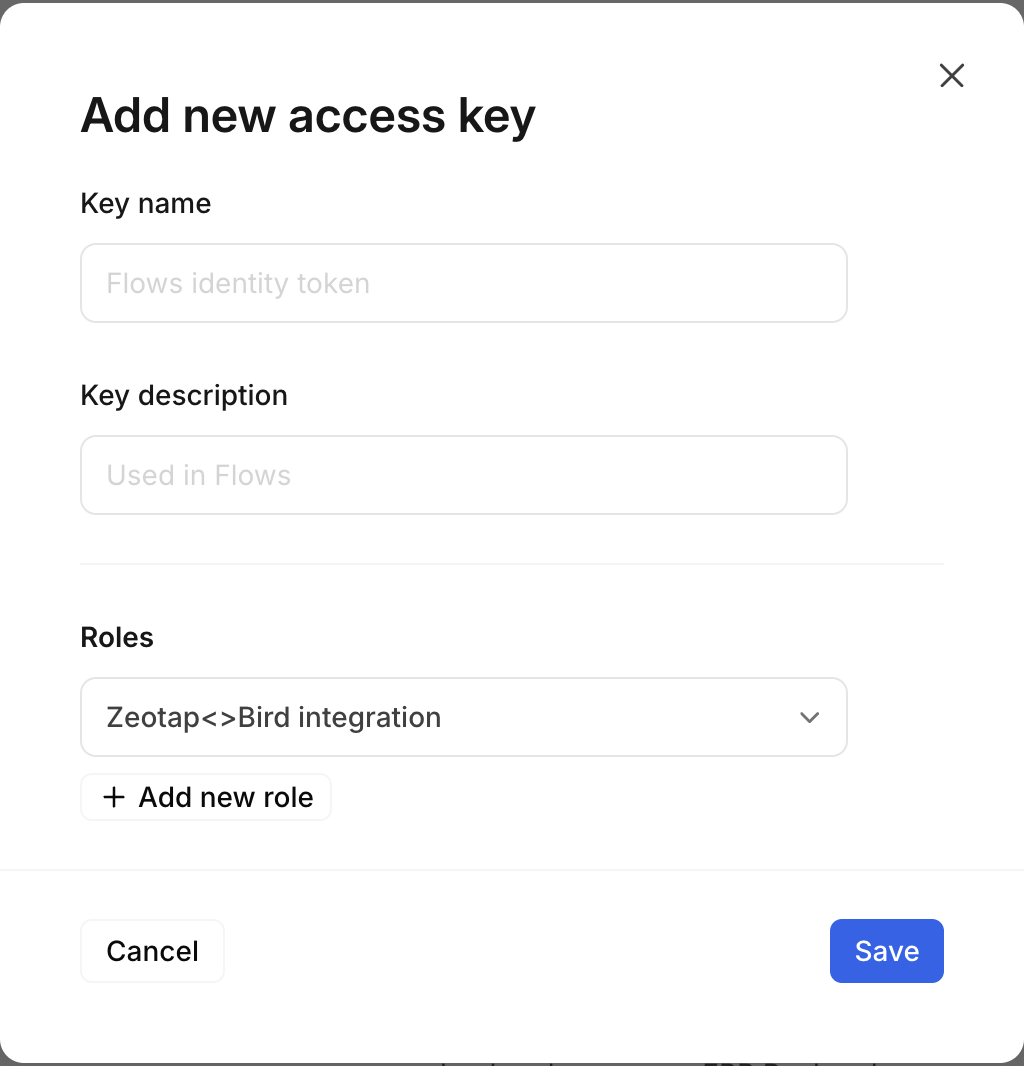
Find your workspace ID
The workspace ID is not an access object — it sits under Settings → Workspaces, alongside Security rather than inside it.1
Log in to Bird. In the bottom left-hand corner, click your name, then click Admin console.
2
Go to Settings → Workspaces.
3
Locate the workspace whose ID you need and click the workspace name.
4
Make a note of the Workspace ID.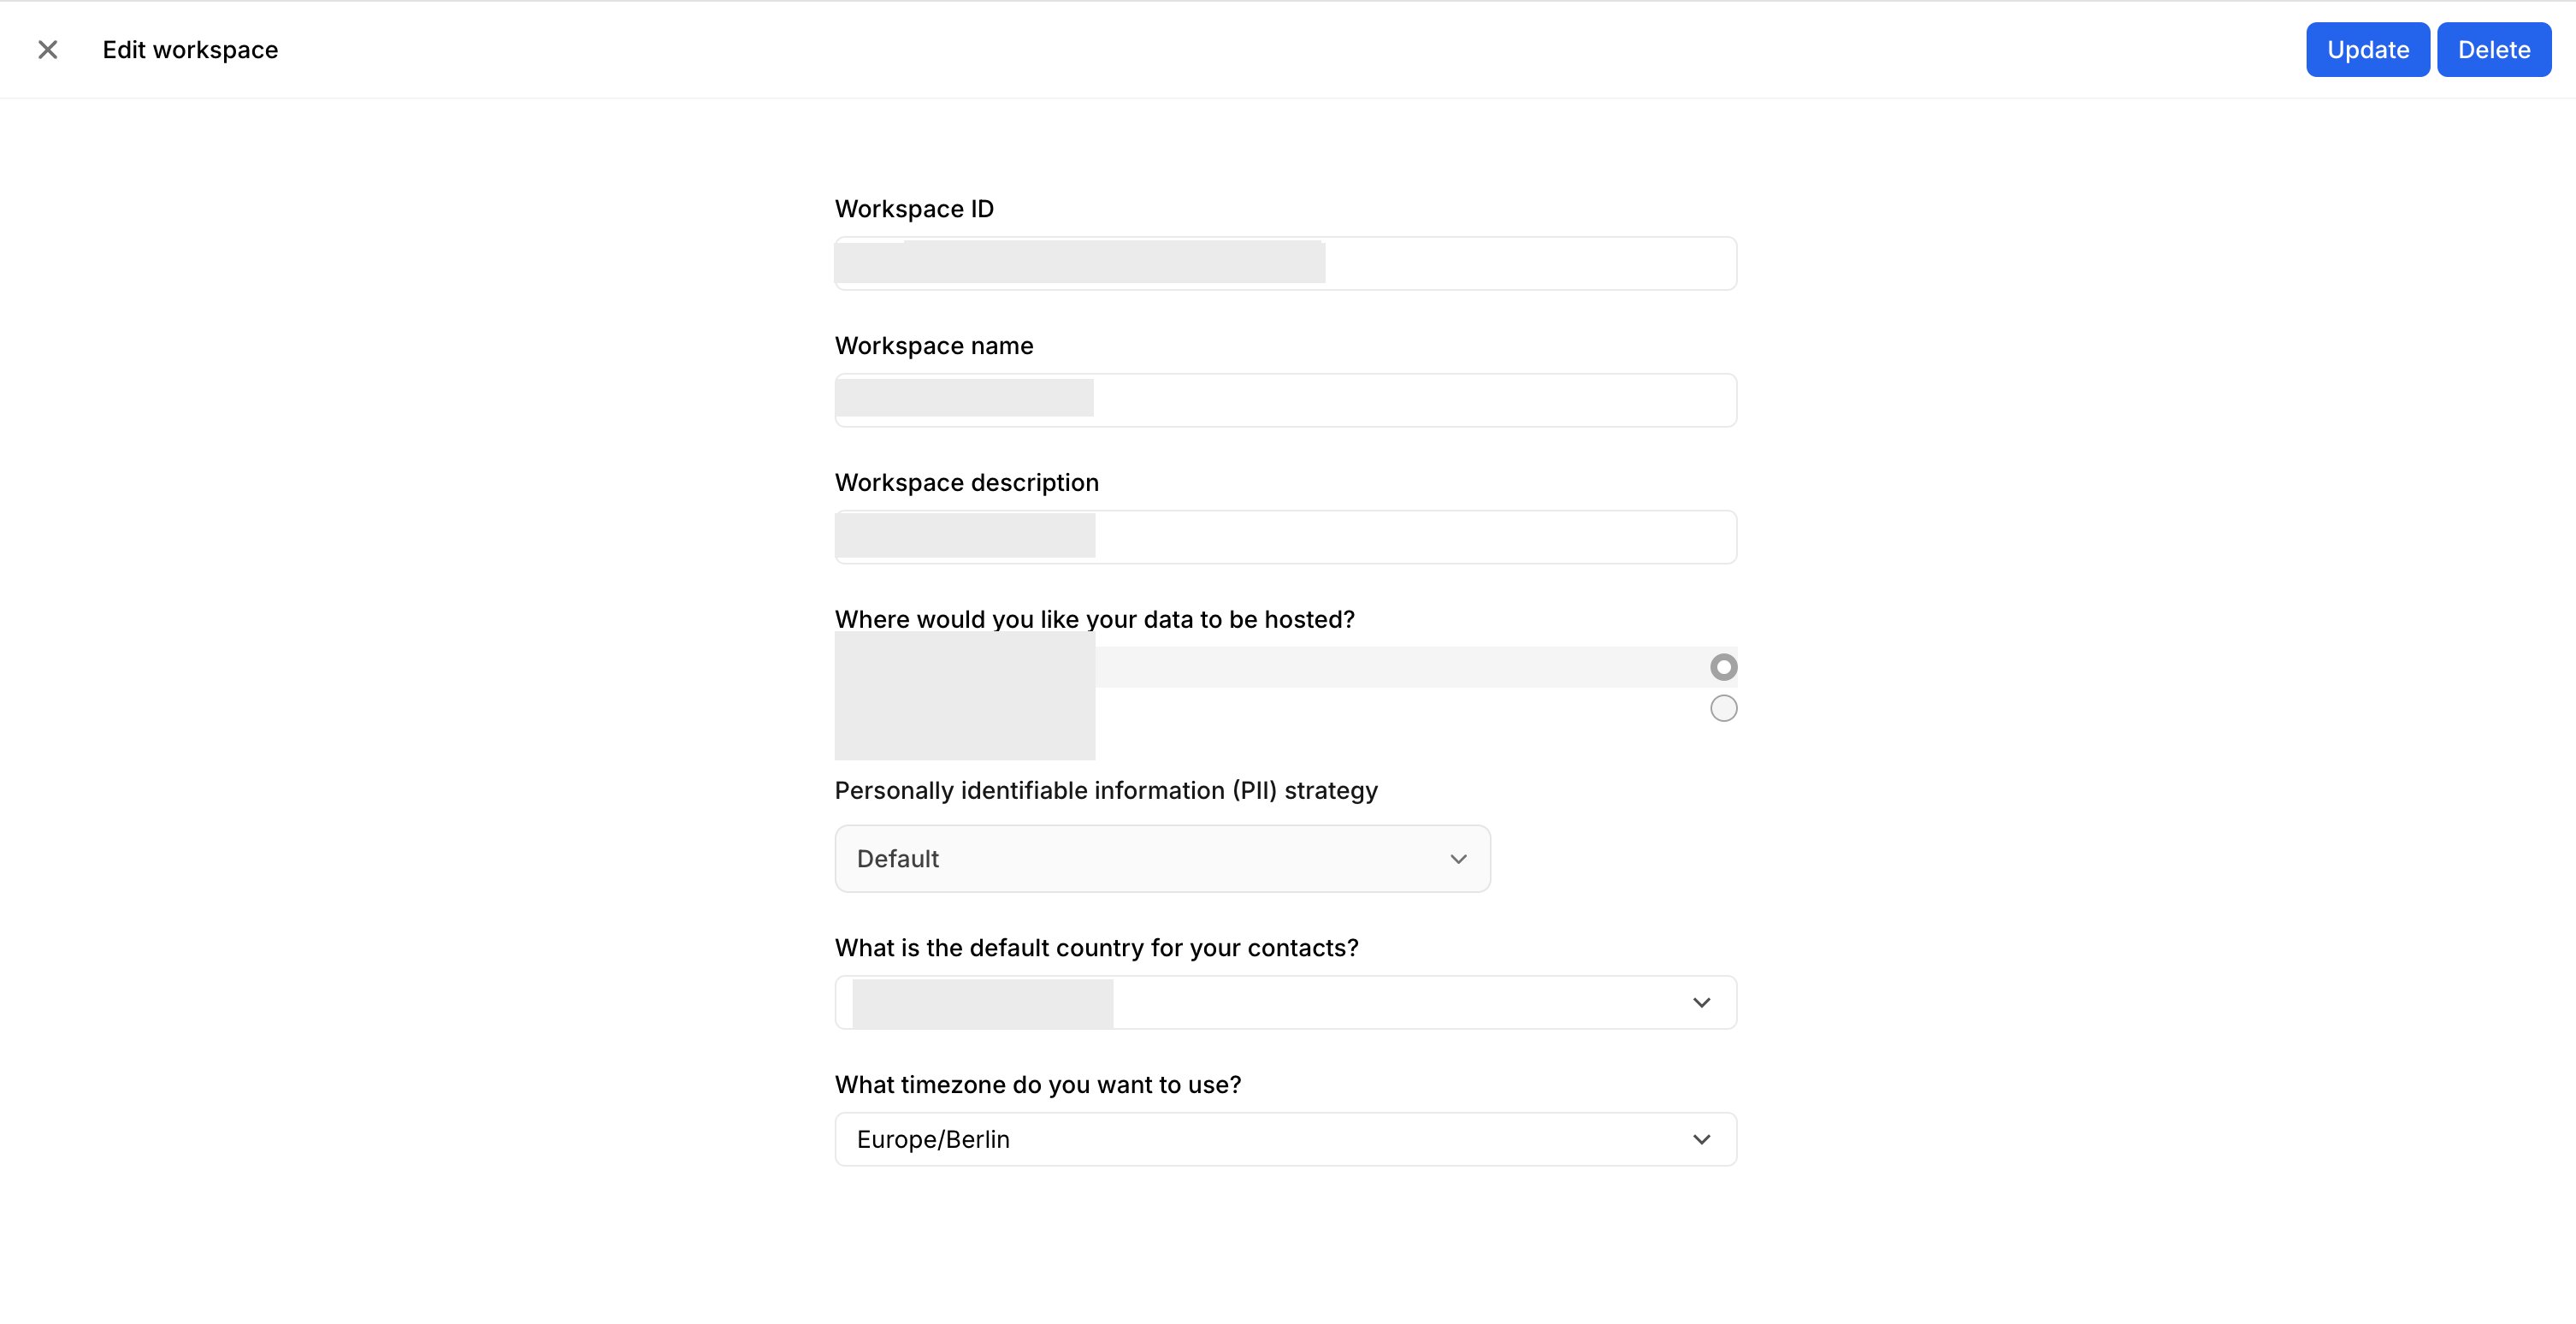
Create the Bird - Customer Lists destination
1
Log in to the Zeotap CDP App and open Integrate → Destinations.
2
Click + Create Destination.
3
Under All Destinations, search for Bird - Customer Lists.
4
Click Bird - Customer Lists. The Enter Destination Details screen describes the destination on the left and lists the fields the integration needs on the right:a. Destination Name — a name for the destination, for easy identification.b. Access token — the access key generated in Bird. See Set up access in Bird.c. Workspace ID — the workspace ID of your Bird account. See Find your workspace ID.Review the values, then click Next.
5
On the Mapping step, choose the action and the mapping. Under Choose your Action, choose Send identifiers and attributes as the action for activating your audience (segment) in the Audiences module.You can map the following fields:
- Identifier Value
- First Name
- Last Name
- Display Name and custom fields, using + Add Mapping Field
6
Under Additional Settings, choose the Identifier for the contact from the dropdown.a. You can select either Email or Phone.b. The mapping above must carry the value that corresponds to the identifier you select here.
7
Click Save Mapping. The created destination is listed in the Audiences application, where it can be linked to an audience or segment.
Link an audience to the destination
For how to link an audience or segment to the destination you created, see Activate your batch audiences. A destination is configured once with its credentials and can then be reused across several audiences — you do not need a separate Bird destination per audience.Note:The terms Audiences and Segments are used interchangeably to refer to customer cohorts belonging to a specific category. For example, an Audience or a segment could be a specific group of customers who are over 18 years of age and who have performed an addToCart event within the last 30 days.
Verify the delivery
Confirm the delivery from both sides, as described in Verify the activation worked:- In Zeotap — open the destination and review its activity. A successful delivery records a run with a non-zero qualified count and a completed status. A failed run records an error message.
- In Bird — open the corresponding customer list and confirm records are present.
Troubleshoot the destination
If the destination does not behave as you expect, check the following:- The access policy carries both resources. The second resource is only added after you click Add resource, so a policy saved too early carries
/workspaces/*/listsalone. - The access key carries the right role. The role selected in the Roles dropdown when you created the key must be the role built from the
zeotapintegrationpolicy. - The identifier and the mapping agree. Whichever value you choose under Additional Settings — Email or Phone — must also be mapped in the mapping section.
Next steps
- Bird Trigger Events — send real-time event data to Bird from a Journey.
- Activate your batch audiences — link this destination to an audience.
- Destinations — how destinations, actions and mappings fit together.