

What this destination does
This is a destination: it sends data out of Zeotap CDP. The Looker destination delivers an audience — the identifiers and attributes you map — as CSV files into a Google Cloud Storage (GCS) bucket you own, and you then connect those files to Looker Studio as a data source. Delivery runs in two hops: Zeotap CDP writes the CSV files to your bucket, and Looker Studio reads them from that bucket through its Google Cloud Storage connector. This page covers both hops: gathering the bucket details, creating the destination in Zeotap CDP, linking an audience to it, recognising the files that land in your bucket, and connecting one of those files to Looker Studio. Looker Studio (formerly Google Data Studio) is Google’s free business intelligence tool that builds interactive dashboards and reports from data sources such as Google Analytics, spreadsheets, and databases. It offers a drag-and-drop interface for customisable charts and visualisations that can be shared and worked on collaboratively in real time, which makes it a common choice for turning exported audience data into visual reports. To bring data the other way — into Zeotap CDP — use the Zeotap Google Cloud Storage source instead.The terms Audiences and Segments are used interchangeably to refer to customer cohorts belonging to a specific category. For example, an Audience or a segment could be a specific group of customers who are over 18 years of age and who have performed an
addToCart event within the last 30 days.Prerequisites
Before you create the destination, make sure you have:
- An account with Looker Studio.
- An account with Google Cloud Storage, and a bucket you can write to.
- The bucket name and the folder path inside that bucket where the exported files should land.
- The authentication you intend to use: either the Zeotap Service Account, which you whitelist on your bucket, or a client service account JSON file you upload during configuration.
Supported identifiers and actions
This is a batch integration that activates an audience. You can send any identifiers and attributes you have mapped in the Catalogue.Gather your Google Cloud Storage details
Collect the following three details from your Google Cloud Storage account before you start; you enter all of them on the destination configuration screen.Bucket
The name of your Google Cloud Storage bucket. You obtain it from your Google Cloud Storage account, as shown below.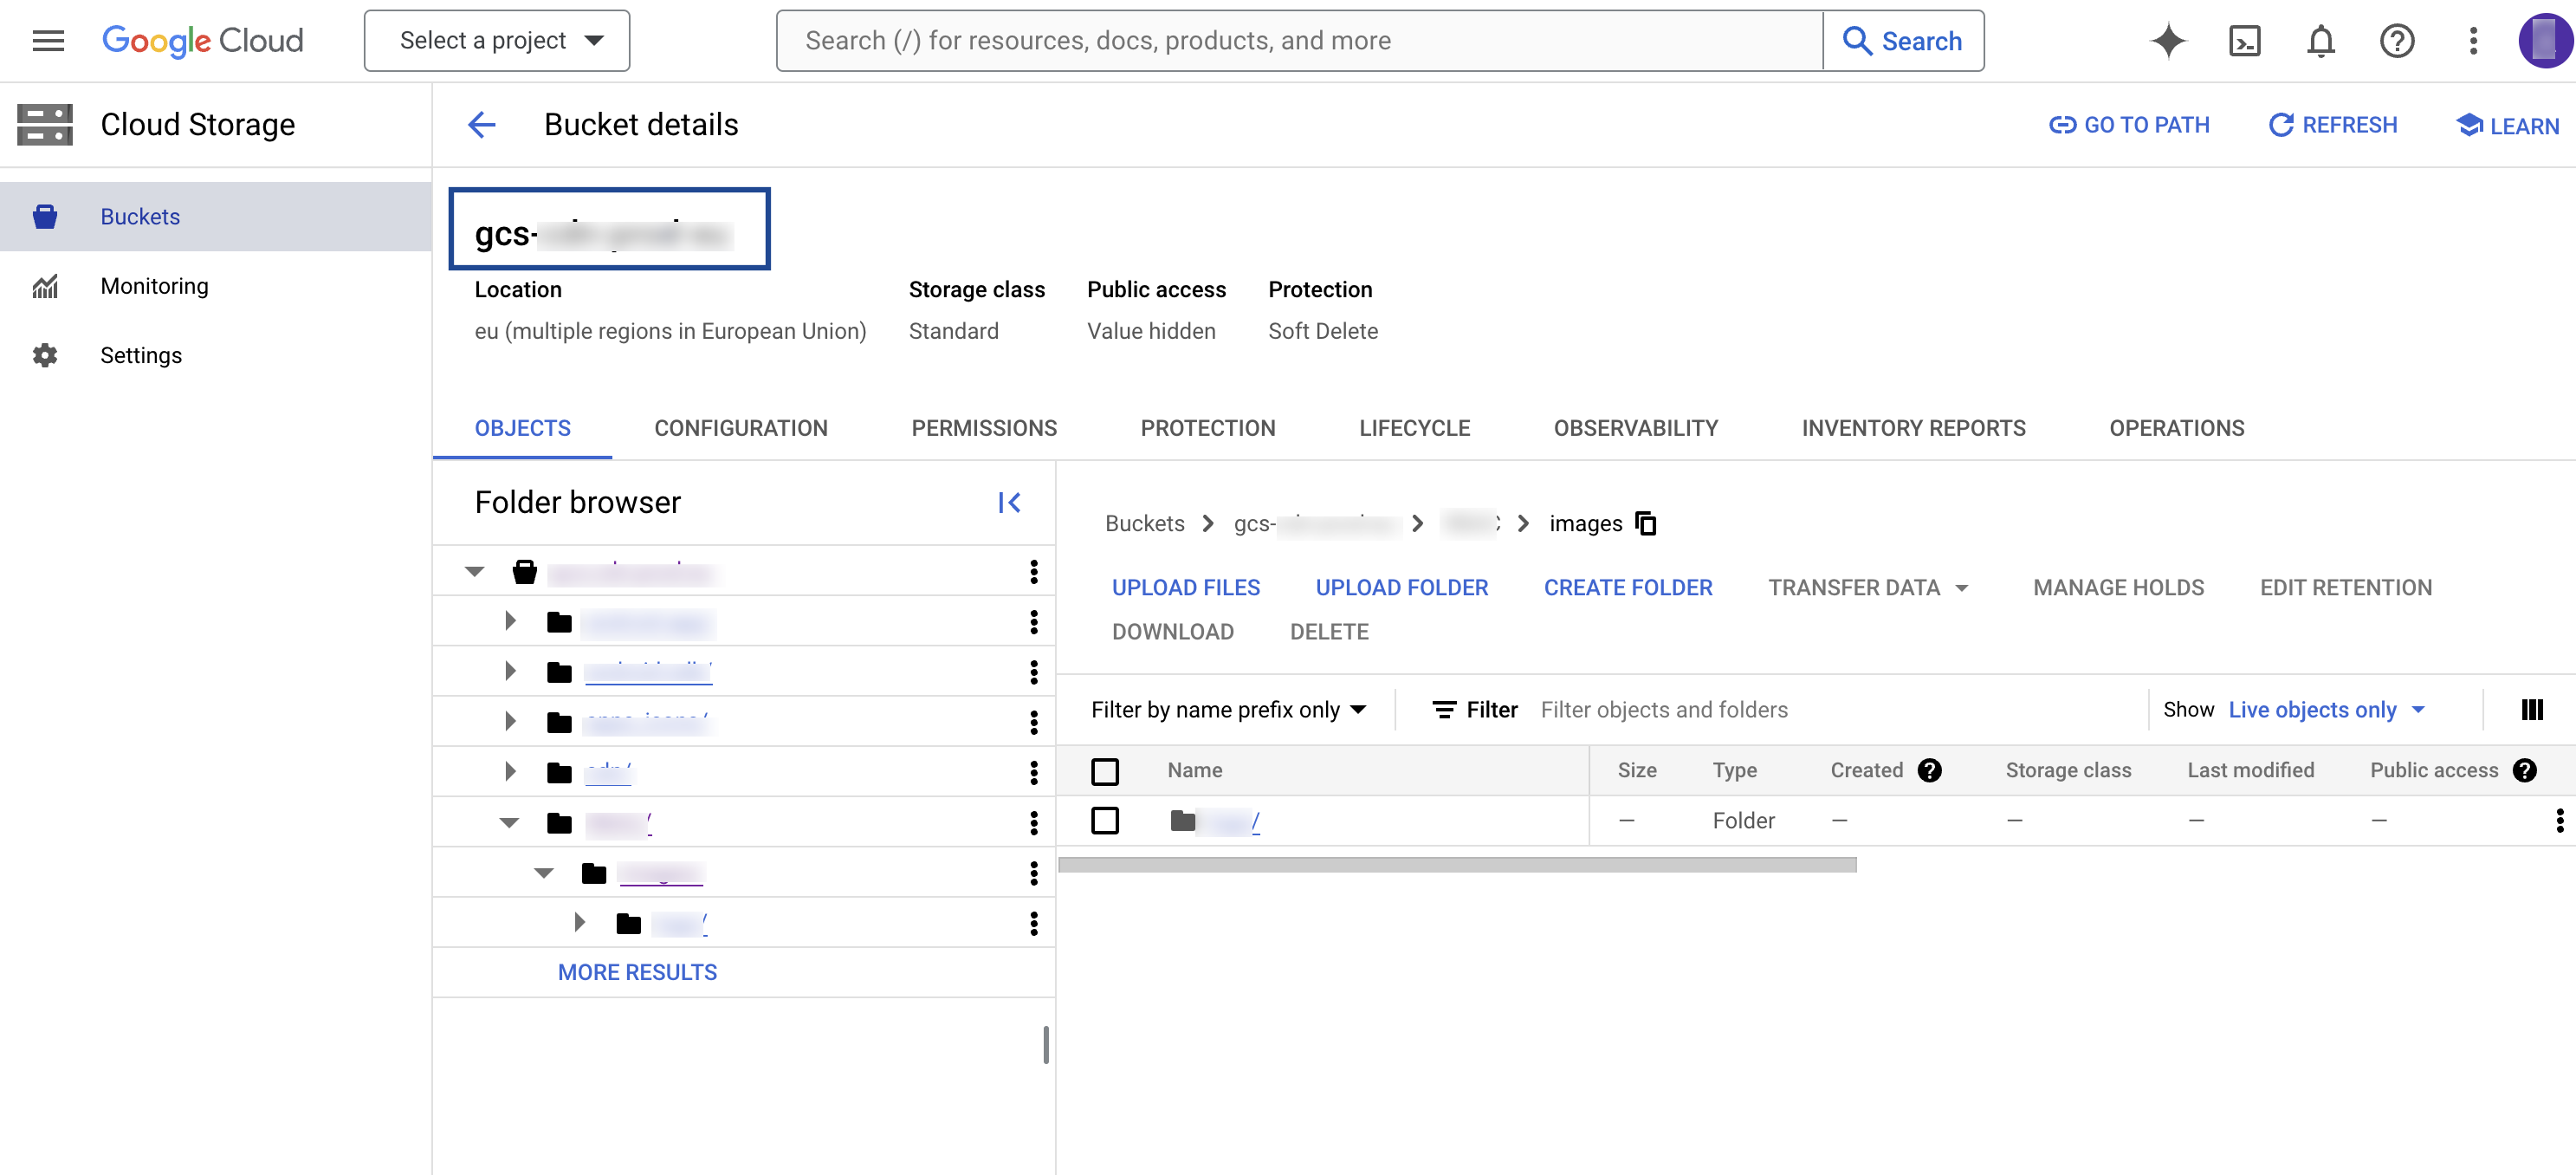
Folder
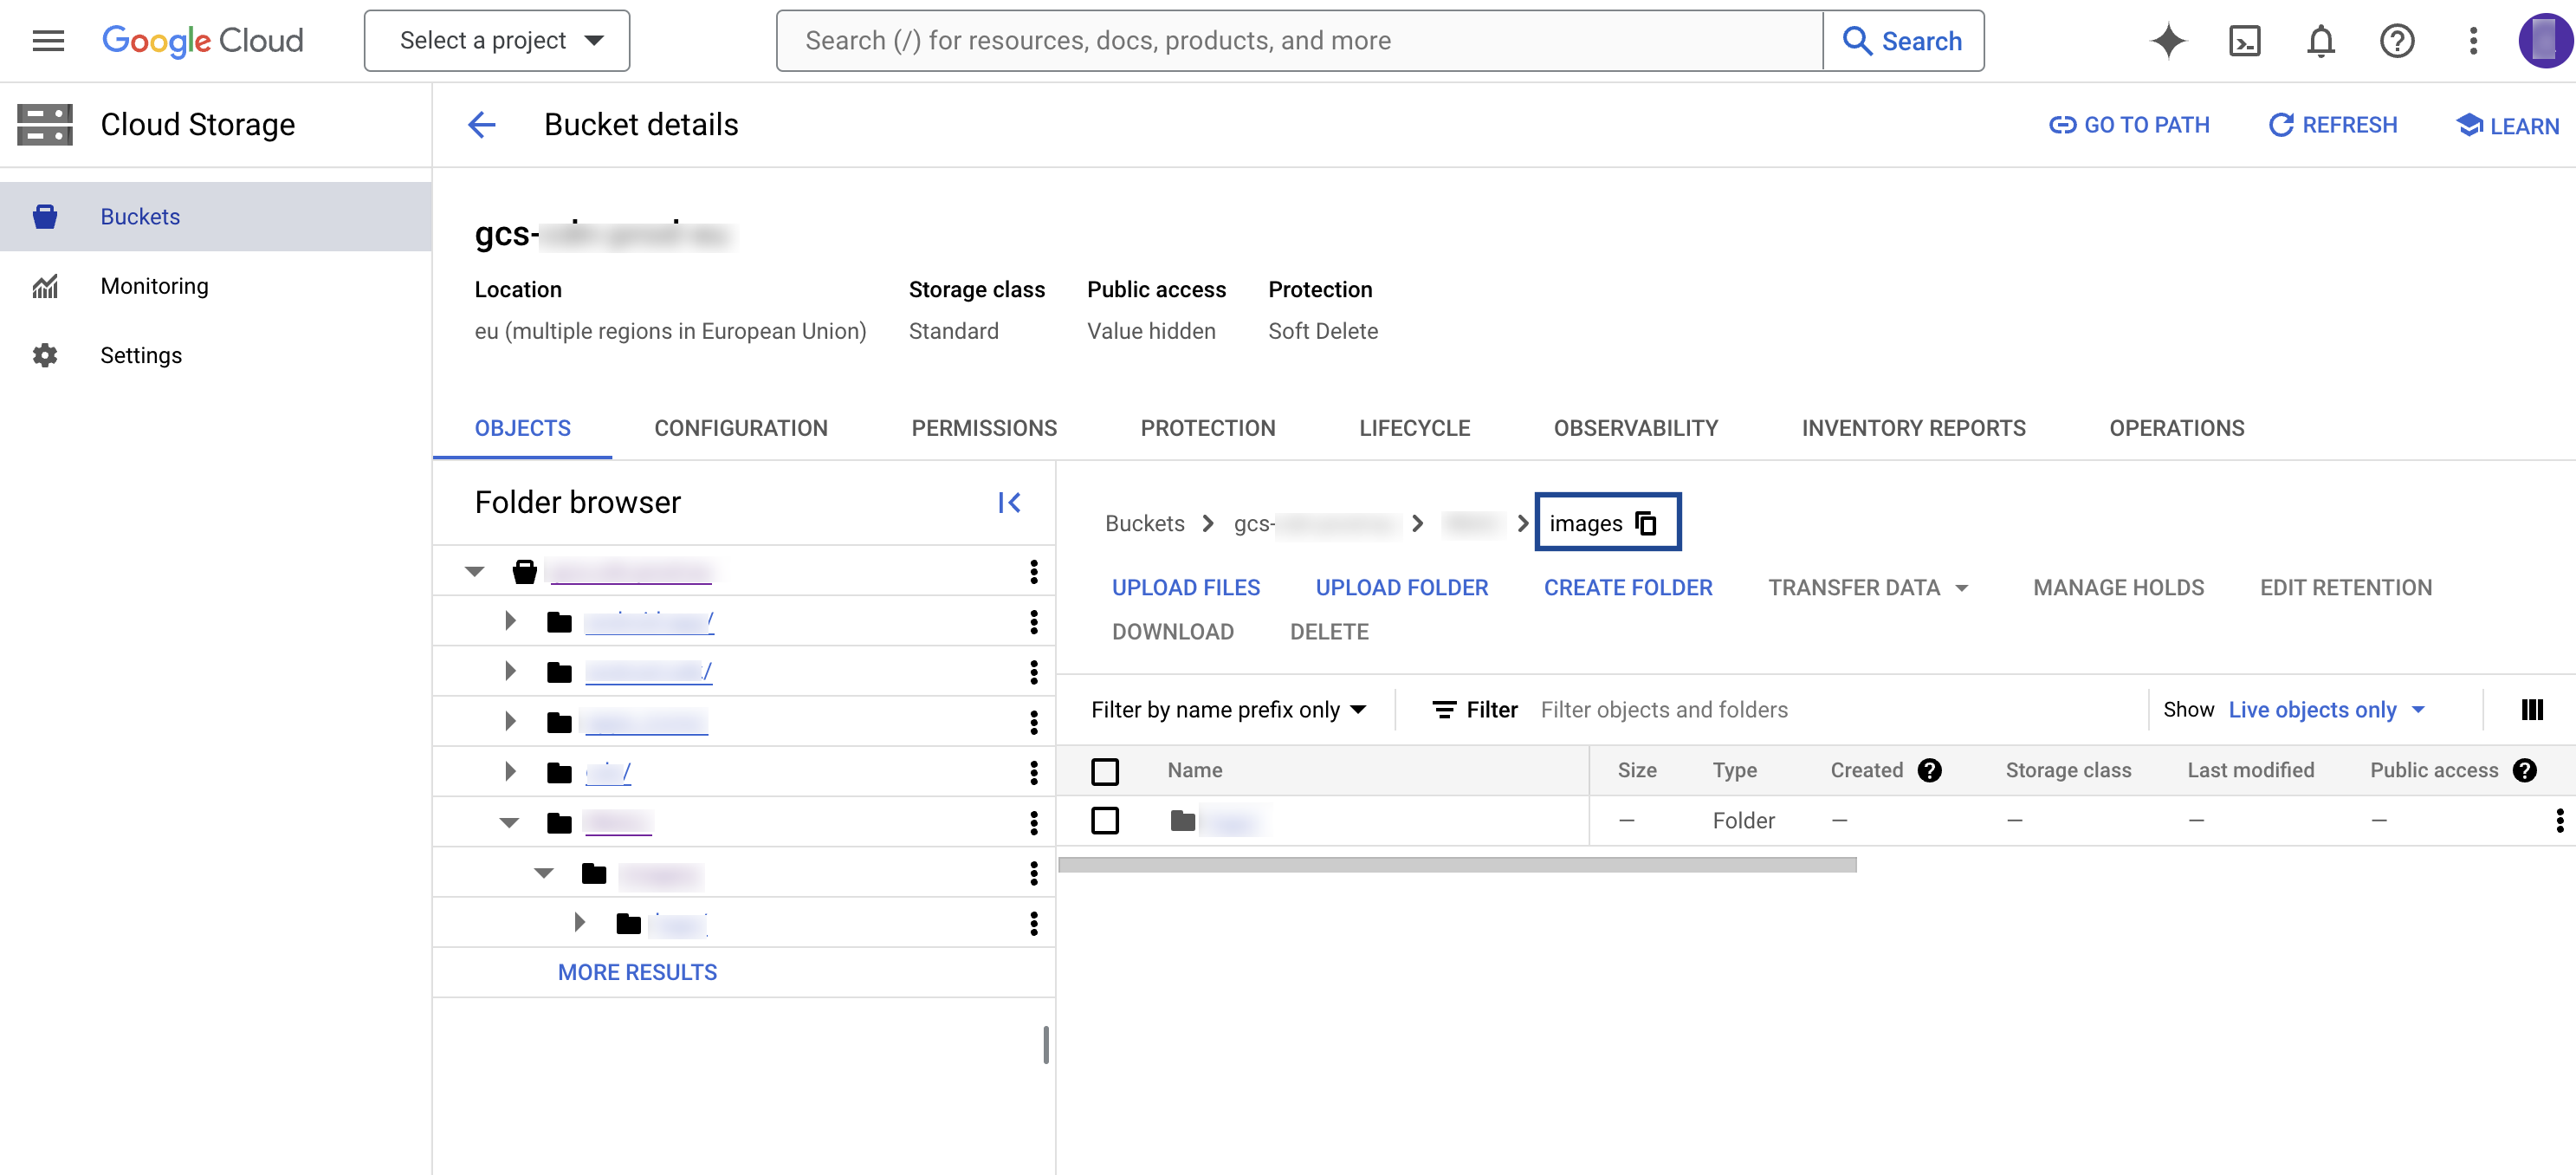
A folder serves as a logical container for organising stored objects within a bucket. In reality there are no actual folders in Google Cloud Storage — the folder concept is emulated by object key names containing slashes (/) to replicate a hierarchical arrangement. You obtain the folder path from your Google Cloud Storage account, as shown below.
Account
The account Zeotap CDP uses to write into your bucket. If you choose the Zeotap Service Account, whitelist that service account on your bucket so audiences (segments) can be pushed from Zeotap CDP to Google Cloud Storage.Create the Looker destination in Zeotap CDP
1
Open the Destinations application
Log into the Zeotap CDP App and go to the DESTINATIONS application.
2
Start a new destination
Click + Create Destination..png?fit=max&auto=format&n=UNwlFBI6l-jpipWP&q=85&s=562fa59a1a1e2b76442fa98f6e6f991e)
3
Select the Looker destination
Under the All Destinations section, search for Looker Audience and select it..png?fit=max&auto=format&n=UNwlFBI6l-jpipWP&q=85&s=653728565c7ed5863548171765d4086f)
4
Enter the destination details
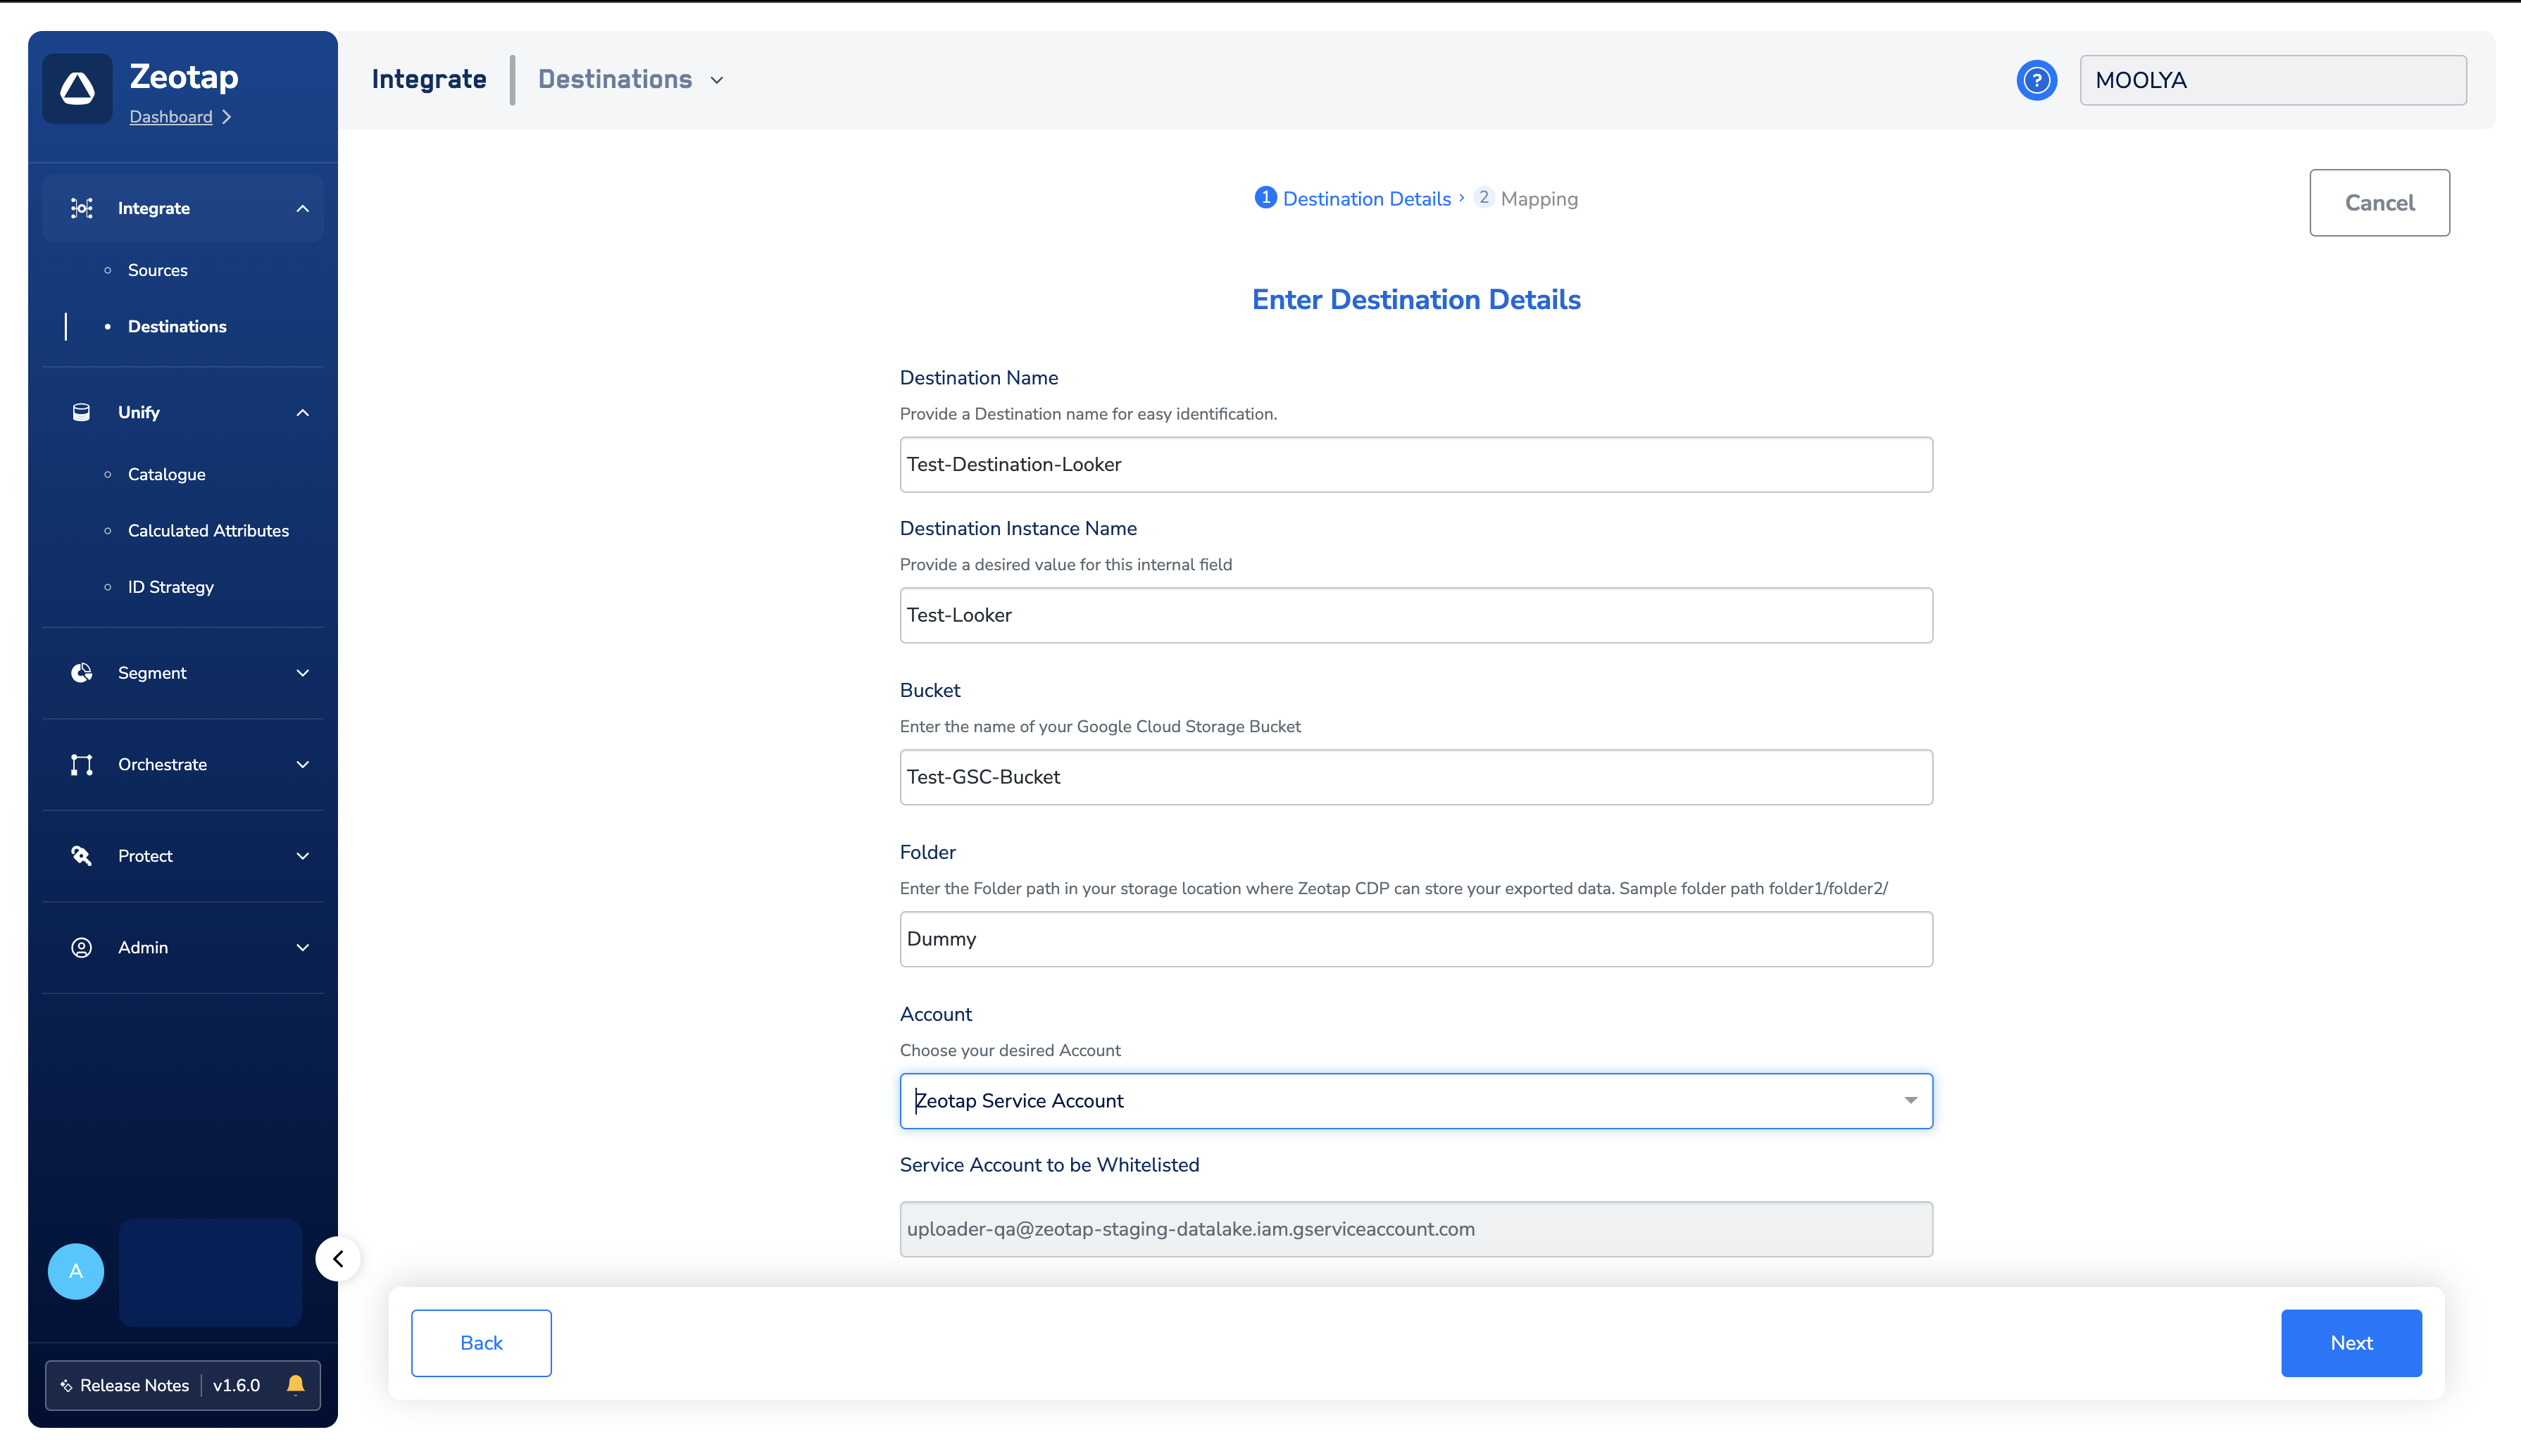
A screen appears showing details about the destination on the left, and on the right the fields required to establish the integration. Provide the following:a. Enter a name for the destination.b. In the Destination Instance Name field, provide a desired value for this internal field.c. In the Bucket field, provide the name of the Google Cloud Storage bucket.d. In the Folder field, provide the folder path in your storage location where Zeotap CDP can store your exported data.e. Under Filename Prefix, enter a text value without special characters, such as underscores (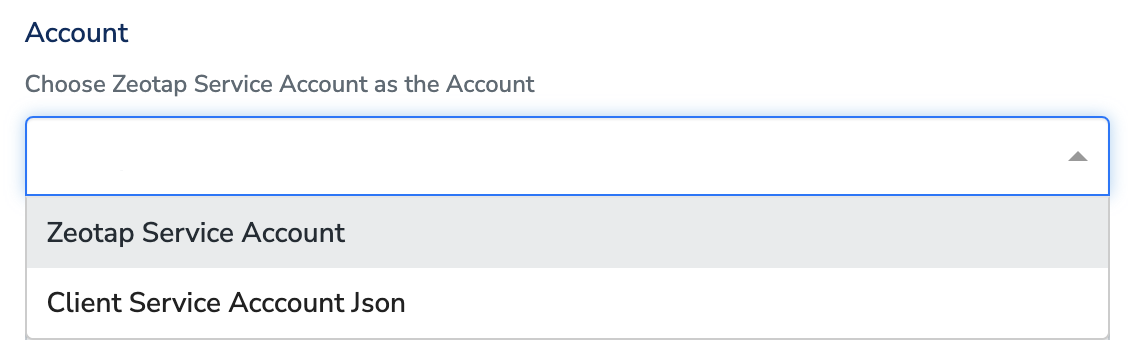
Follow these points when providing the folder path:
- The folder path should follow the structure
folder_name/sub_folder_name/. - The folder name should not start with a
/. - The folder name and sub-folder name should end with a
/.
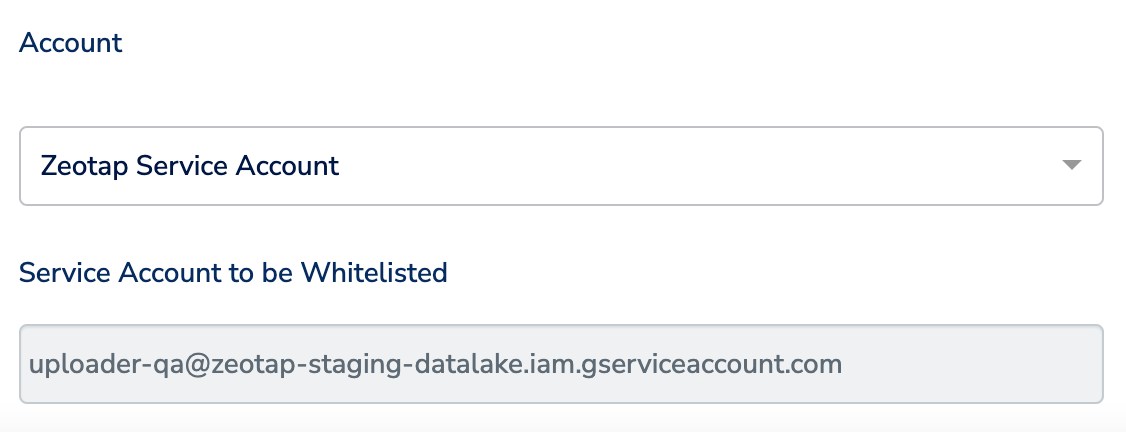
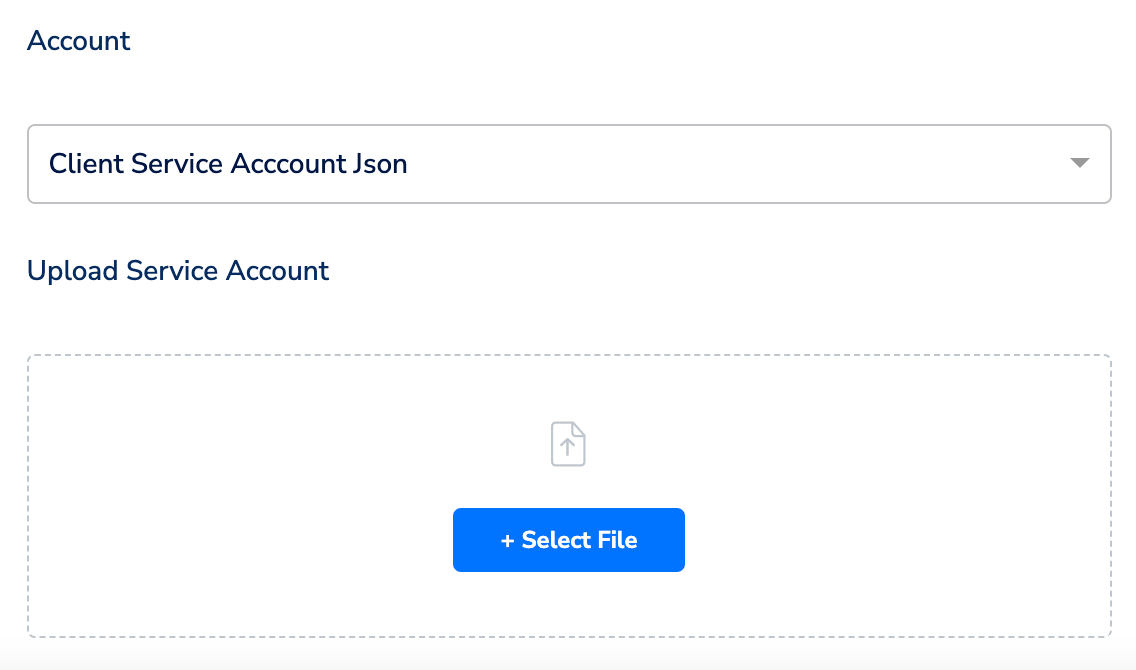
_), spaces, or symbols (# @ $ % & *). The prefix appears in the exported file name — see Understand the exported file names below.f. Under Account, choose either Zeotap Service Account or Client Service Account Json from the drop-down menu, based on the type of authentication you need.-
Zeotap Service Account — the service account provided by Zeotap CDP auto-populates under Service Account to be Whitelisted. Whitelist it on your bucket so that audiences (segments) can be pushed from Zeotap CDP to the Google Cloud Storage platform.
-
Client Service Account Json — upload the JSON file holding the required authentication information using the + Select File option, so that Zeotap CDP can push audiences to the Google Cloud Storage platform.
5
Choose the action and map the fields
On the mapping screen, under Choose your Action, select Send CSV to Looker as the action for activating your audience in Audiences. Under Map the Fields, map each Catalogue field you want to send to its destination field, adding rows with + Add Mapping Field.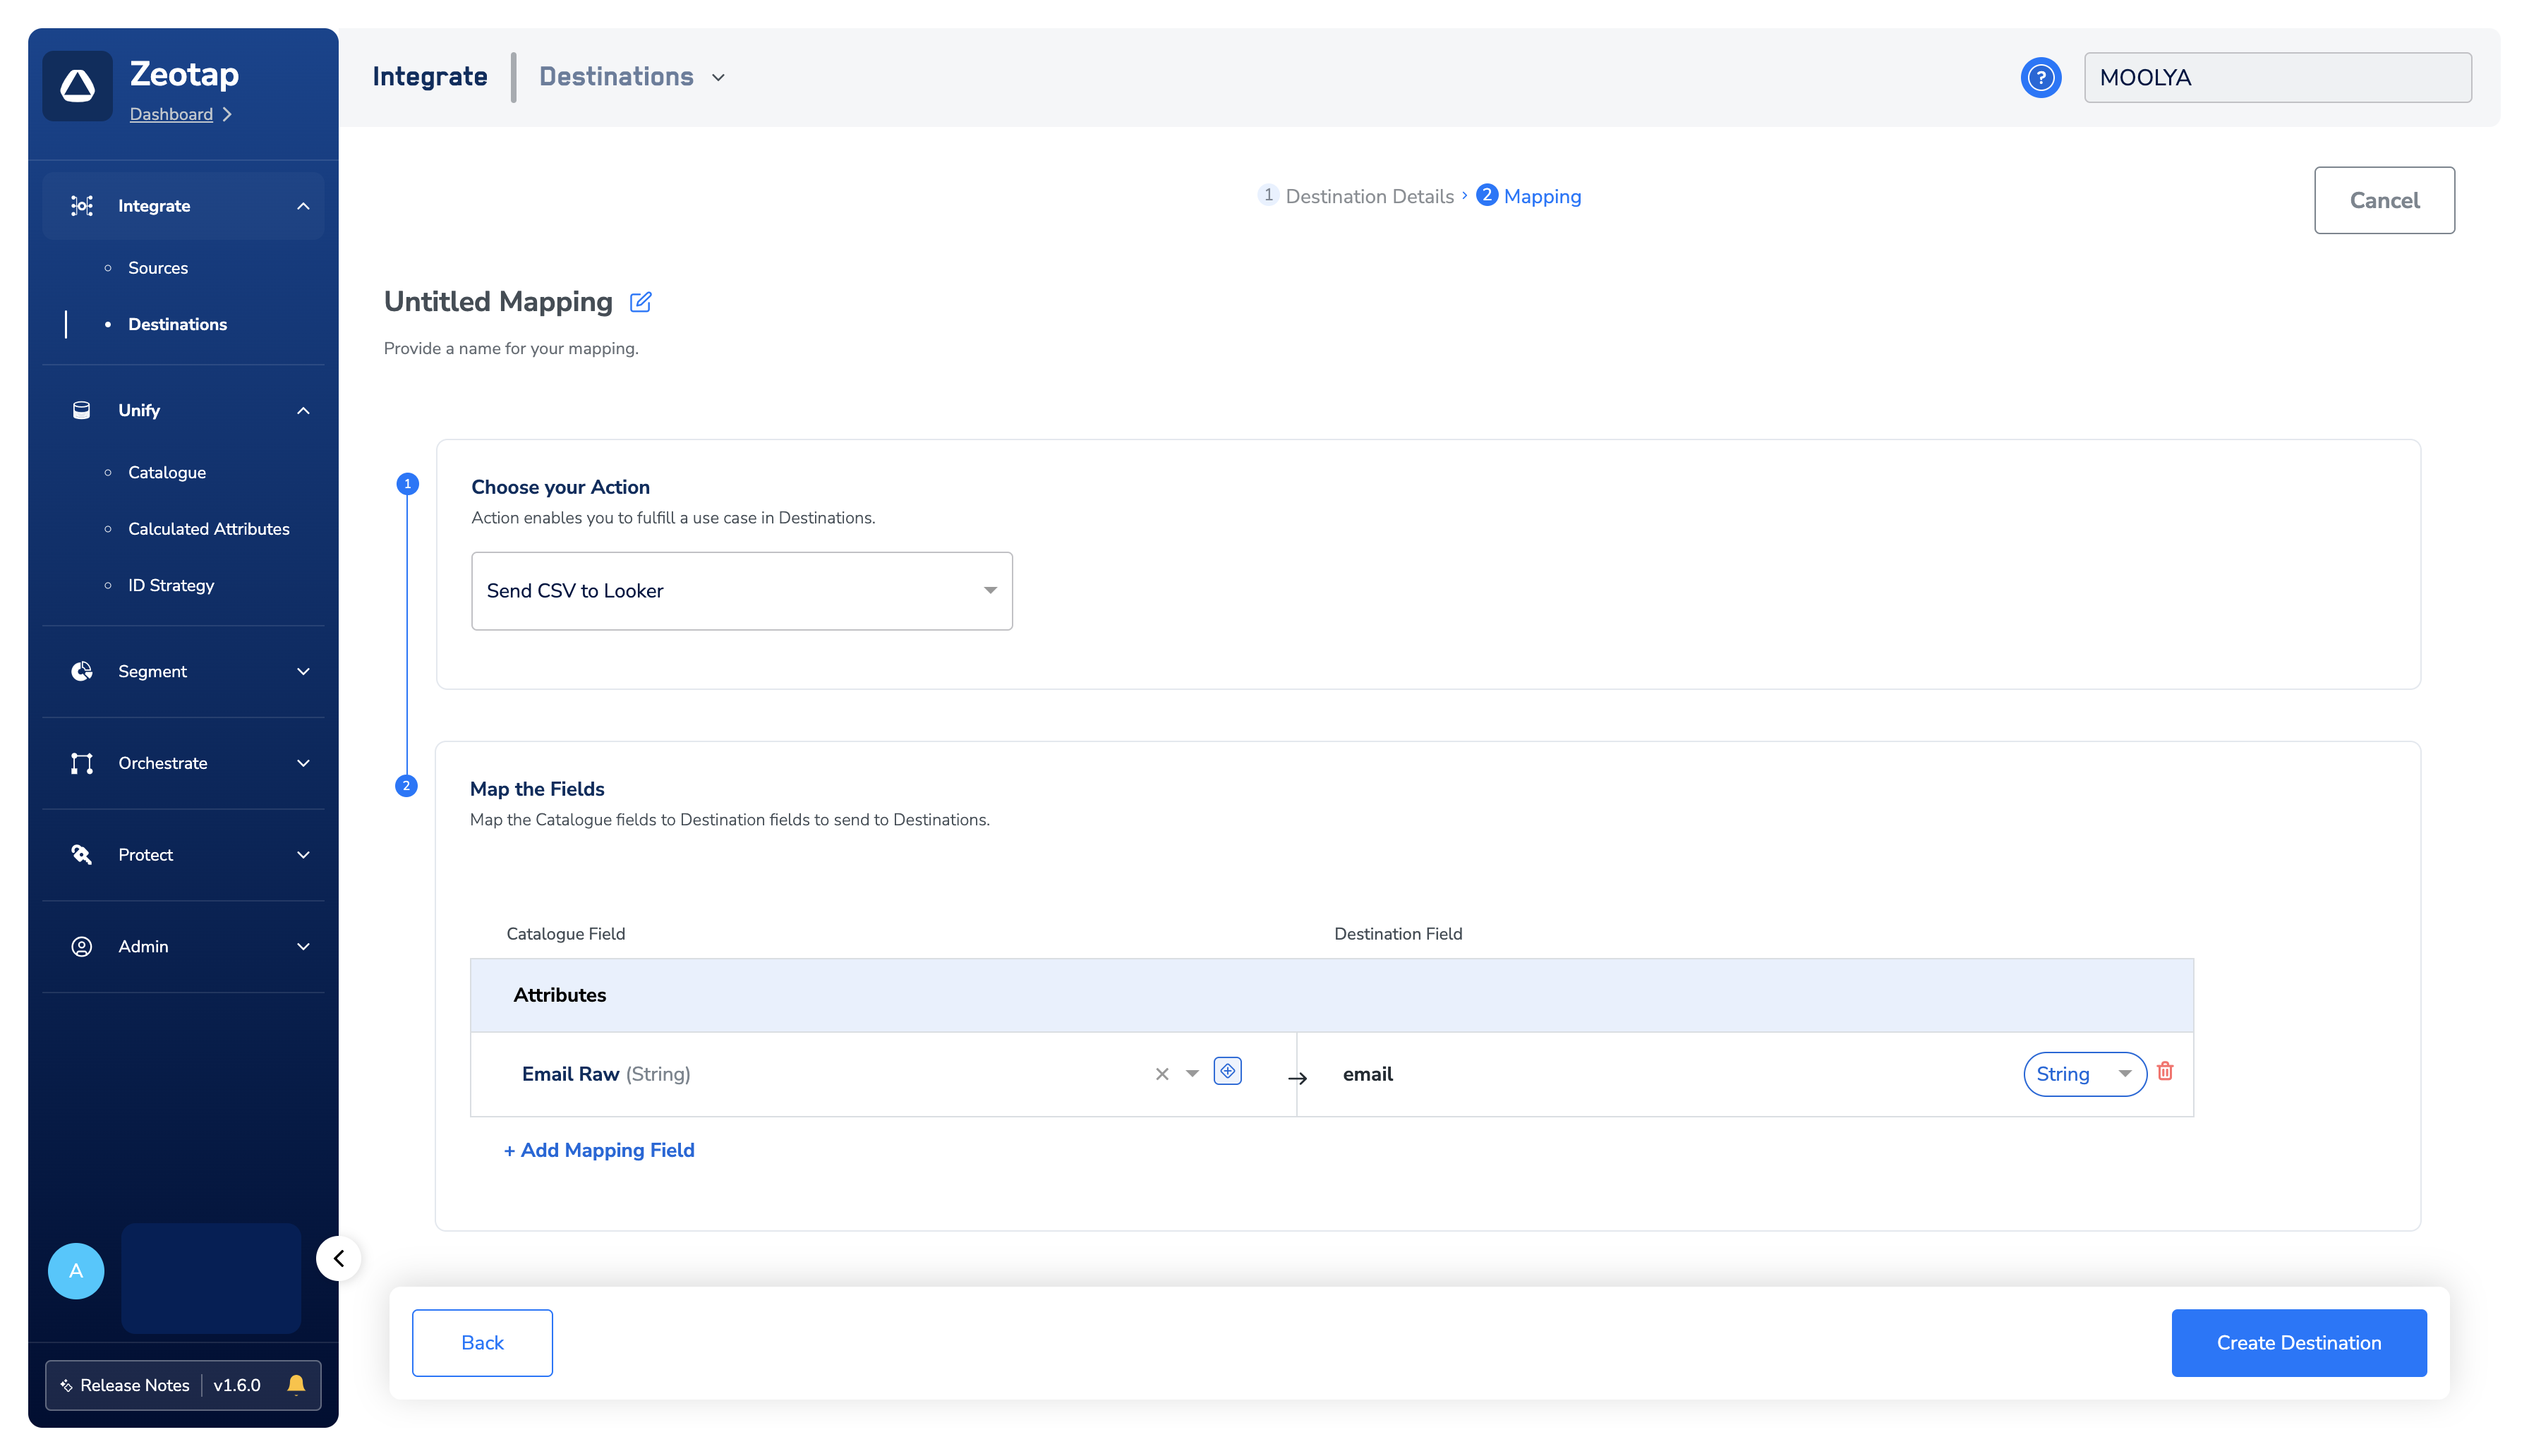
6
Create the destination
After finalising the attributes and identifiers to send, click Create Destination. The created destination gets listed in the Audiences application, where it can be linked to an audience.
Link an audience to the destination
For information about how to link an audience (segment) to the created destination in the Audiences application, see Link an audience to the destination.Understand the exported file names
After an audience is linked to the destination, Zeotap CDP generates segment files in CSV format in your bucket. Two naming patterns are documented for this destination. The destination configuration describes the file name as:yyyy-MM-dd format, and destinationAudienceId is the ID associated with your audience (segment) in Zeotap CDP, generated after the audience is linked to a destination. An example file name is:

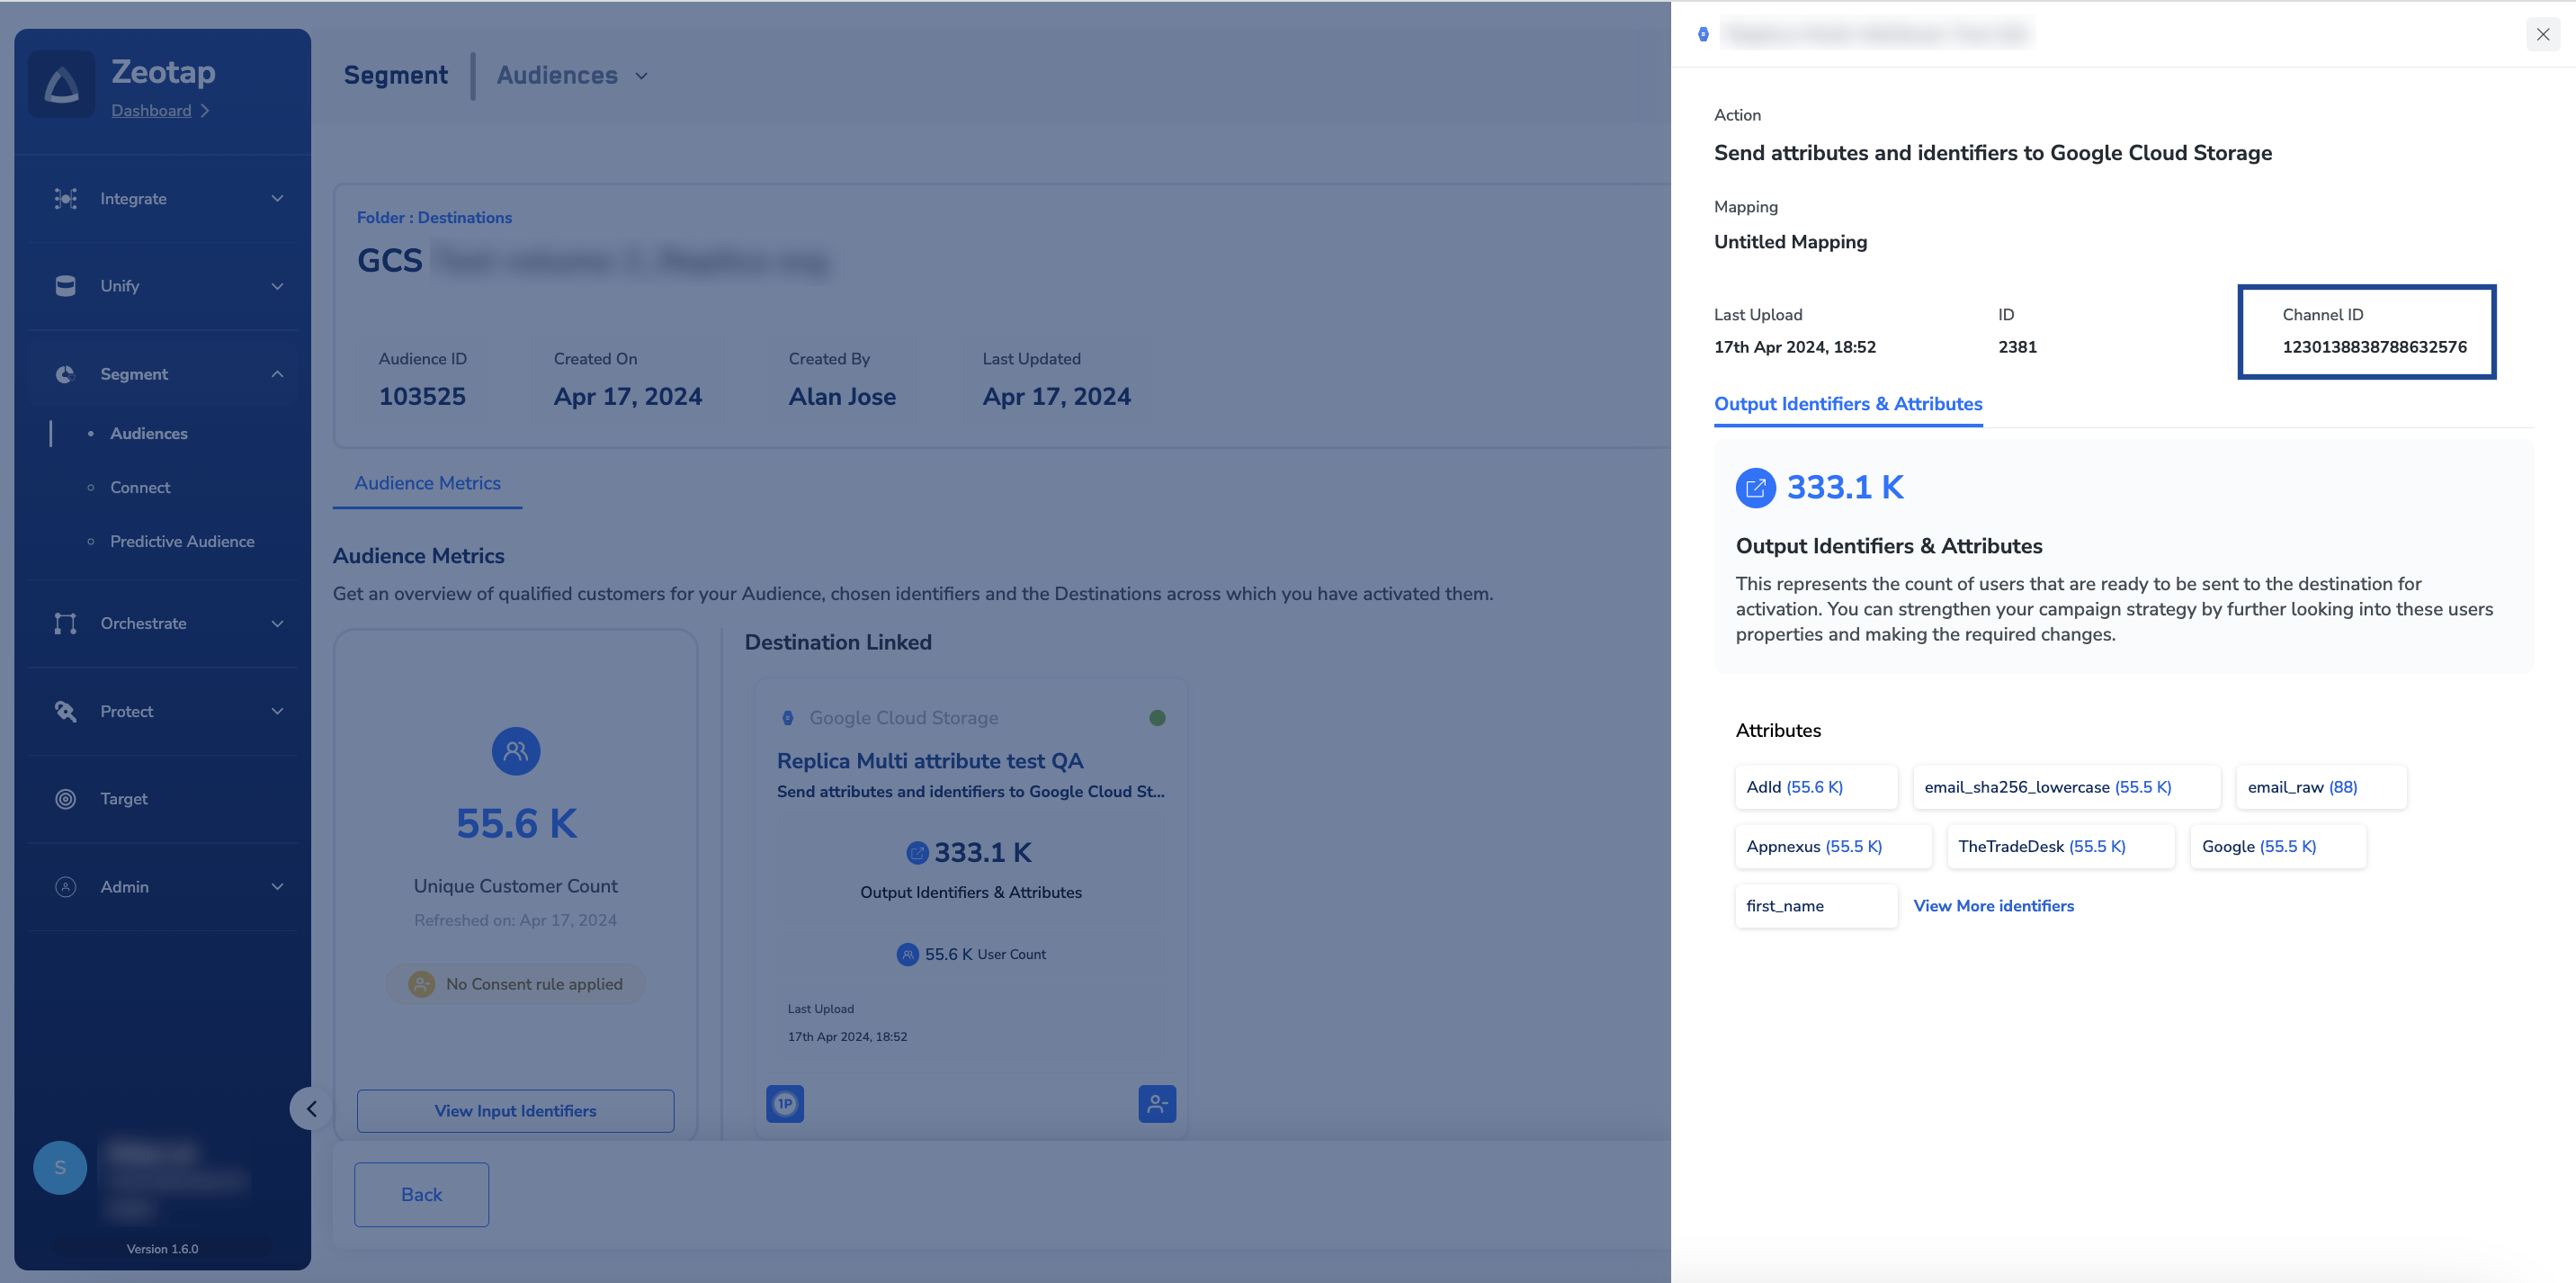
You can obtain the Channel ID from the audience details in the Audiences application, as shown below.
12345678, a filename prefix testprefix, and a file number 98765, uploaded to Google Cloud Storage as the first part of a multipart upload with the epoch timestamp 1625138600, is named:
Connect the CSV file to Looker Studio
To add a CSV file from your Google Cloud Storage bucket as a data source in Looker Studio, follow these steps.1
Navigate to Looker Studio
Open your Looker Studio dashboard.
2
Create a new data source
In the top-left corner, click + Create and then select Data Source.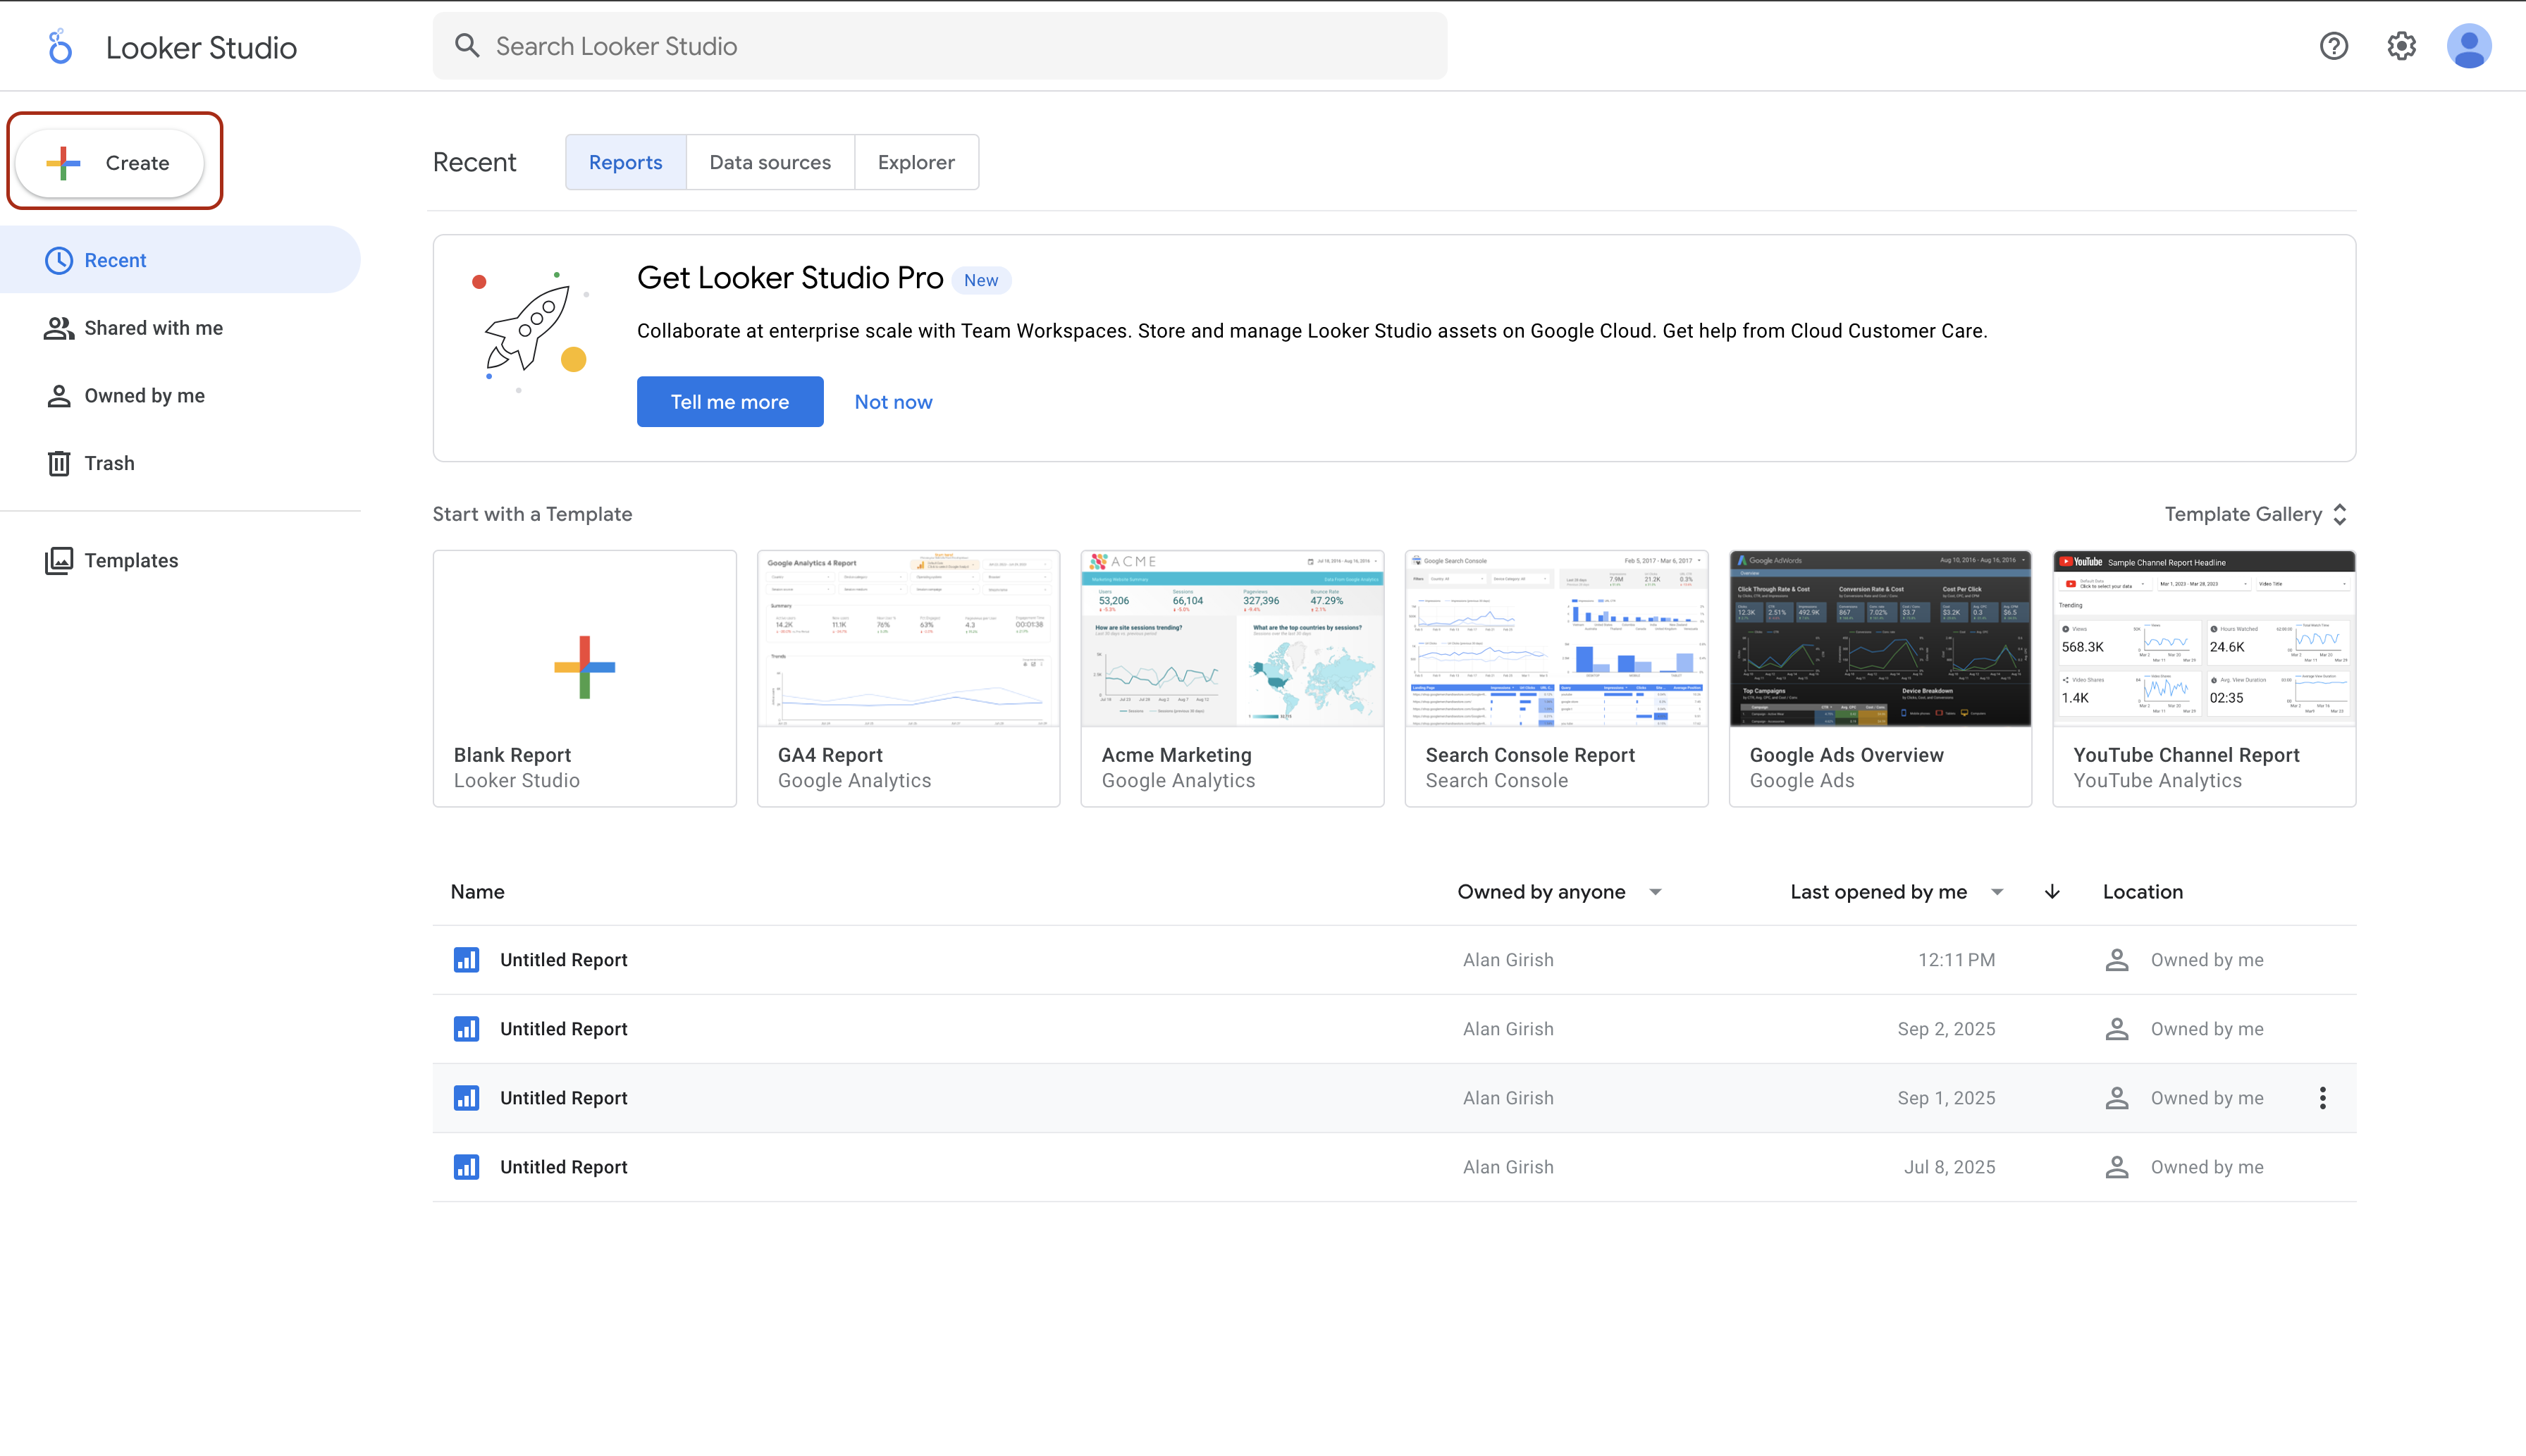
3
Select the Google Cloud Storage connector
From the list of Google Connectors, choose Google Cloud Storage.
4
Authorise access
If you are connecting to Google Cloud Storage for the first time, you are prompted to authorise Looker Studio to access your Google Cloud Storage data. Click AUTHORIZE.
5
Specify the file path
In the Select a data source panel, provide the full path to your CSV file in the bucket, in the format
gs://your-bucket-name/your-file-name.csv. You can also navigate to the file by selecting your project and then browsing through your buckets and folders.6
Configure data source options (optional)
Configure additional options such as the character encoding of your CSV file.
7
Connect
Click CONNECT in the top-right corner.
8
Configure the fields
Looker Studio displays the fields from your CSV file. Adjust the data type, aggregation, and other properties for each field.
9
Create a report or explore
Once you are satisfied with the field configurations, click CREATE REPORT or EXPLORE to start building your visualisations.
Verify the destination is working
Work through these checks in order:- After you click Create Destination, the destination appears in the destination list inside the Audiences application.
- After you link an audience to it and the next activation run completes, CSV files appear in your bucket under the folder path you configured.
- The file names carry the filename prefix you set and the Channel ID of the linked audience, matching one of the patterns above.
- In Looker Studio, after you point the Google Cloud Storage connector at one of those files and click CONNECT, the fields you mapped are listed on the field configuration screen.
Troubleshooting
FAQ
Which Google product does this destination work with?
Which Google product does this destination work with?
Looker Studio, formerly Google Data Studio. In the Zeotap CDP destination list it appears as Looker Audience, and its action is Send CSV to Looker.
Why do I need a Google Cloud Storage account as well as Looker Studio?
Why do I need a Google Cloud Storage account as well as Looker Studio?
Zeotap CDP does not write into Looker Studio directly. It writes the audience as CSV files into a Google Cloud Storage bucket you own, and Looker Studio reads those files from the bucket through its Google Cloud Storage connector.
Do I have to whitelist the Zeotap Service Account?
Do I have to whitelist the Zeotap Service Account?
Only if you choose Zeotap Service Account under Account. If you choose Client Service Account Json and upload your own service account JSON file, Zeotap CDP authenticates with that account instead.
Which identifiers and attributes can I send?
Which identifiers and attributes can I send?
Any identifiers and attributes available in your Catalogue. You choose them on the mapping screen with + Add Mapping Field.
Next steps
- Explore linking an audience to this destination → — activate an audience against the destination you just created
- Explore the Google Cloud Storage destination → — deliver audiences to a bucket without the Looker Studio step
- Explore Google Cloud Storage as a source → — bring data from a bucket into Zeotap CDP
- Explore how destinations work → — actions, mappings, and the activation layer of Zeotap CDP