

What this destination does
Microsoft Fabric is Microsoft’s unified analytics platform, backed by OneLake, that combines data engineering, data warehousing, real-time analytics, and Power BI in one SaaS surface. The Microsoft Fabric destination in Zeotap CDP activates an audience by writing its identifiers and attributes as JSON into a Fabric Lakehouse table. Delivery runs in two hops: Zeotap CDP writes the audience file to a Google Cloud Storage (GCS) bucket, and a Fabric Spark job reads from GCS and appends the records into the target Lakehouse table. Authentication uses an Azure service principal registered in Microsoft Entra. This page walks the full setup end to end: registering the service principal, enabling it inside Fabric, staging the GCS credentials in the Lakehouse, and creating the destination in Zeotap CDP.Supported identifiers and actions
Send any identifiers and attributes to your Fabric Lakehouse. Zeotap CDP writes the payload as JSON.Prerequisites
Gather the following before you begin. You configure the Microsoft Entra and Fabric prerequisites once; the Zeotap CDP destination reuses them for every audience you activate.- Service principal — an application registered in Microsoft Entra with a valid client secret. You obtain the Tenant ID (Directory ID), Client ID (Application ID), and Client Secret from this registration.
- Fabric workspace — the workspace that contains the target Lakehouse. You need its Workspace ID (the GUID in the workspace URL).
- Target Lakehouse — the Lakehouse acts as the destination Database. You supply its name and the Table Name where Zeotap CDP writes.
- GCP service account — either a client-owned service account with a JSON key, or the Zeotap CDP-managed service account whitelisted on your bucket. Required bucket-level permissions are listed under Stage the GCS service account key.
- GCS bucket — a Google Cloud Storage bucket dedicated to staging the audience files before Fabric ingests them.
Register the service principal in Microsoft Entra
1
Sign in to the Microsoft Entra admin center.
2
In the sidebar, select Identity → Applications → App registrations.
3
Click New registration, or reuse an existing app.
4
Enter a clear Name (for example
FabricAPIAccessApp) and select Accounts in this organizational directory only as the supported account type.5
Click Register.
6
Copy the Application (client) ID, Display Name, and Directory (tenant) ID from the app overview. You paste these into the Zeotap CDP destination later.
Create a client secret
1
On the registered app’s page, select Certificates & secrets in the left panel.
2
Under Client secrets, click + New client secret.
3
Enter a Description (for example
Fabric API Secret) and pick an Expires period. A shorter expiry is more secure; rotate before expiry to keep the destination working.4
Click Add.
5
Copy the secret Value immediately — Entra does not show it again. This is the Client Secret you enter in Zeotap CDP.
Assign API permissions
The service principal needs one Microsoft Graph scope and one Power BI Service scope (Power BI Service covers Microsoft Fabric APIs).1
From the same app, go to API permissions → + Add a permission.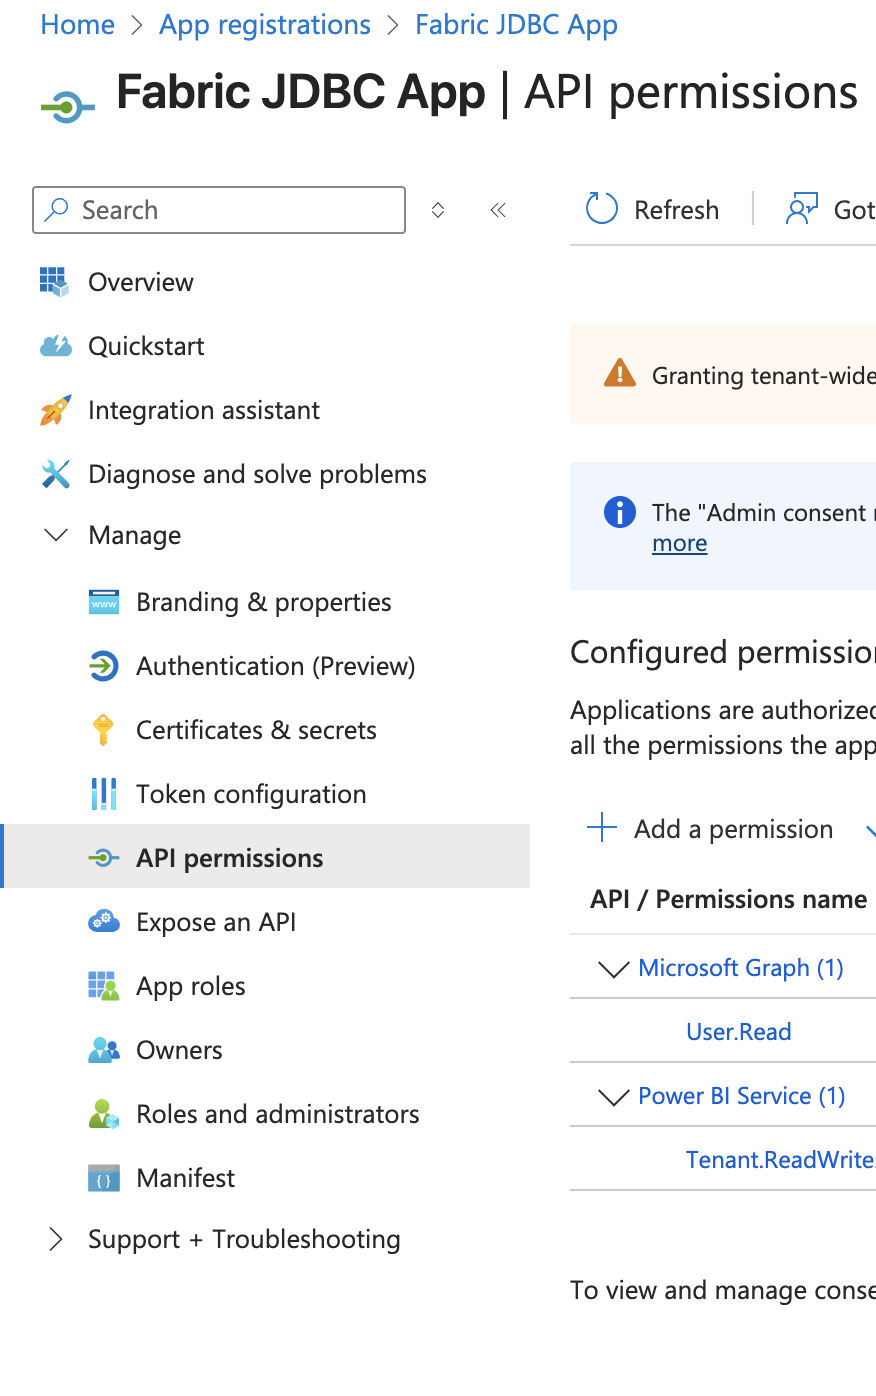
2
Select APIs my organization uses, search for Microsoft Graph, click Delegated permissions, and add: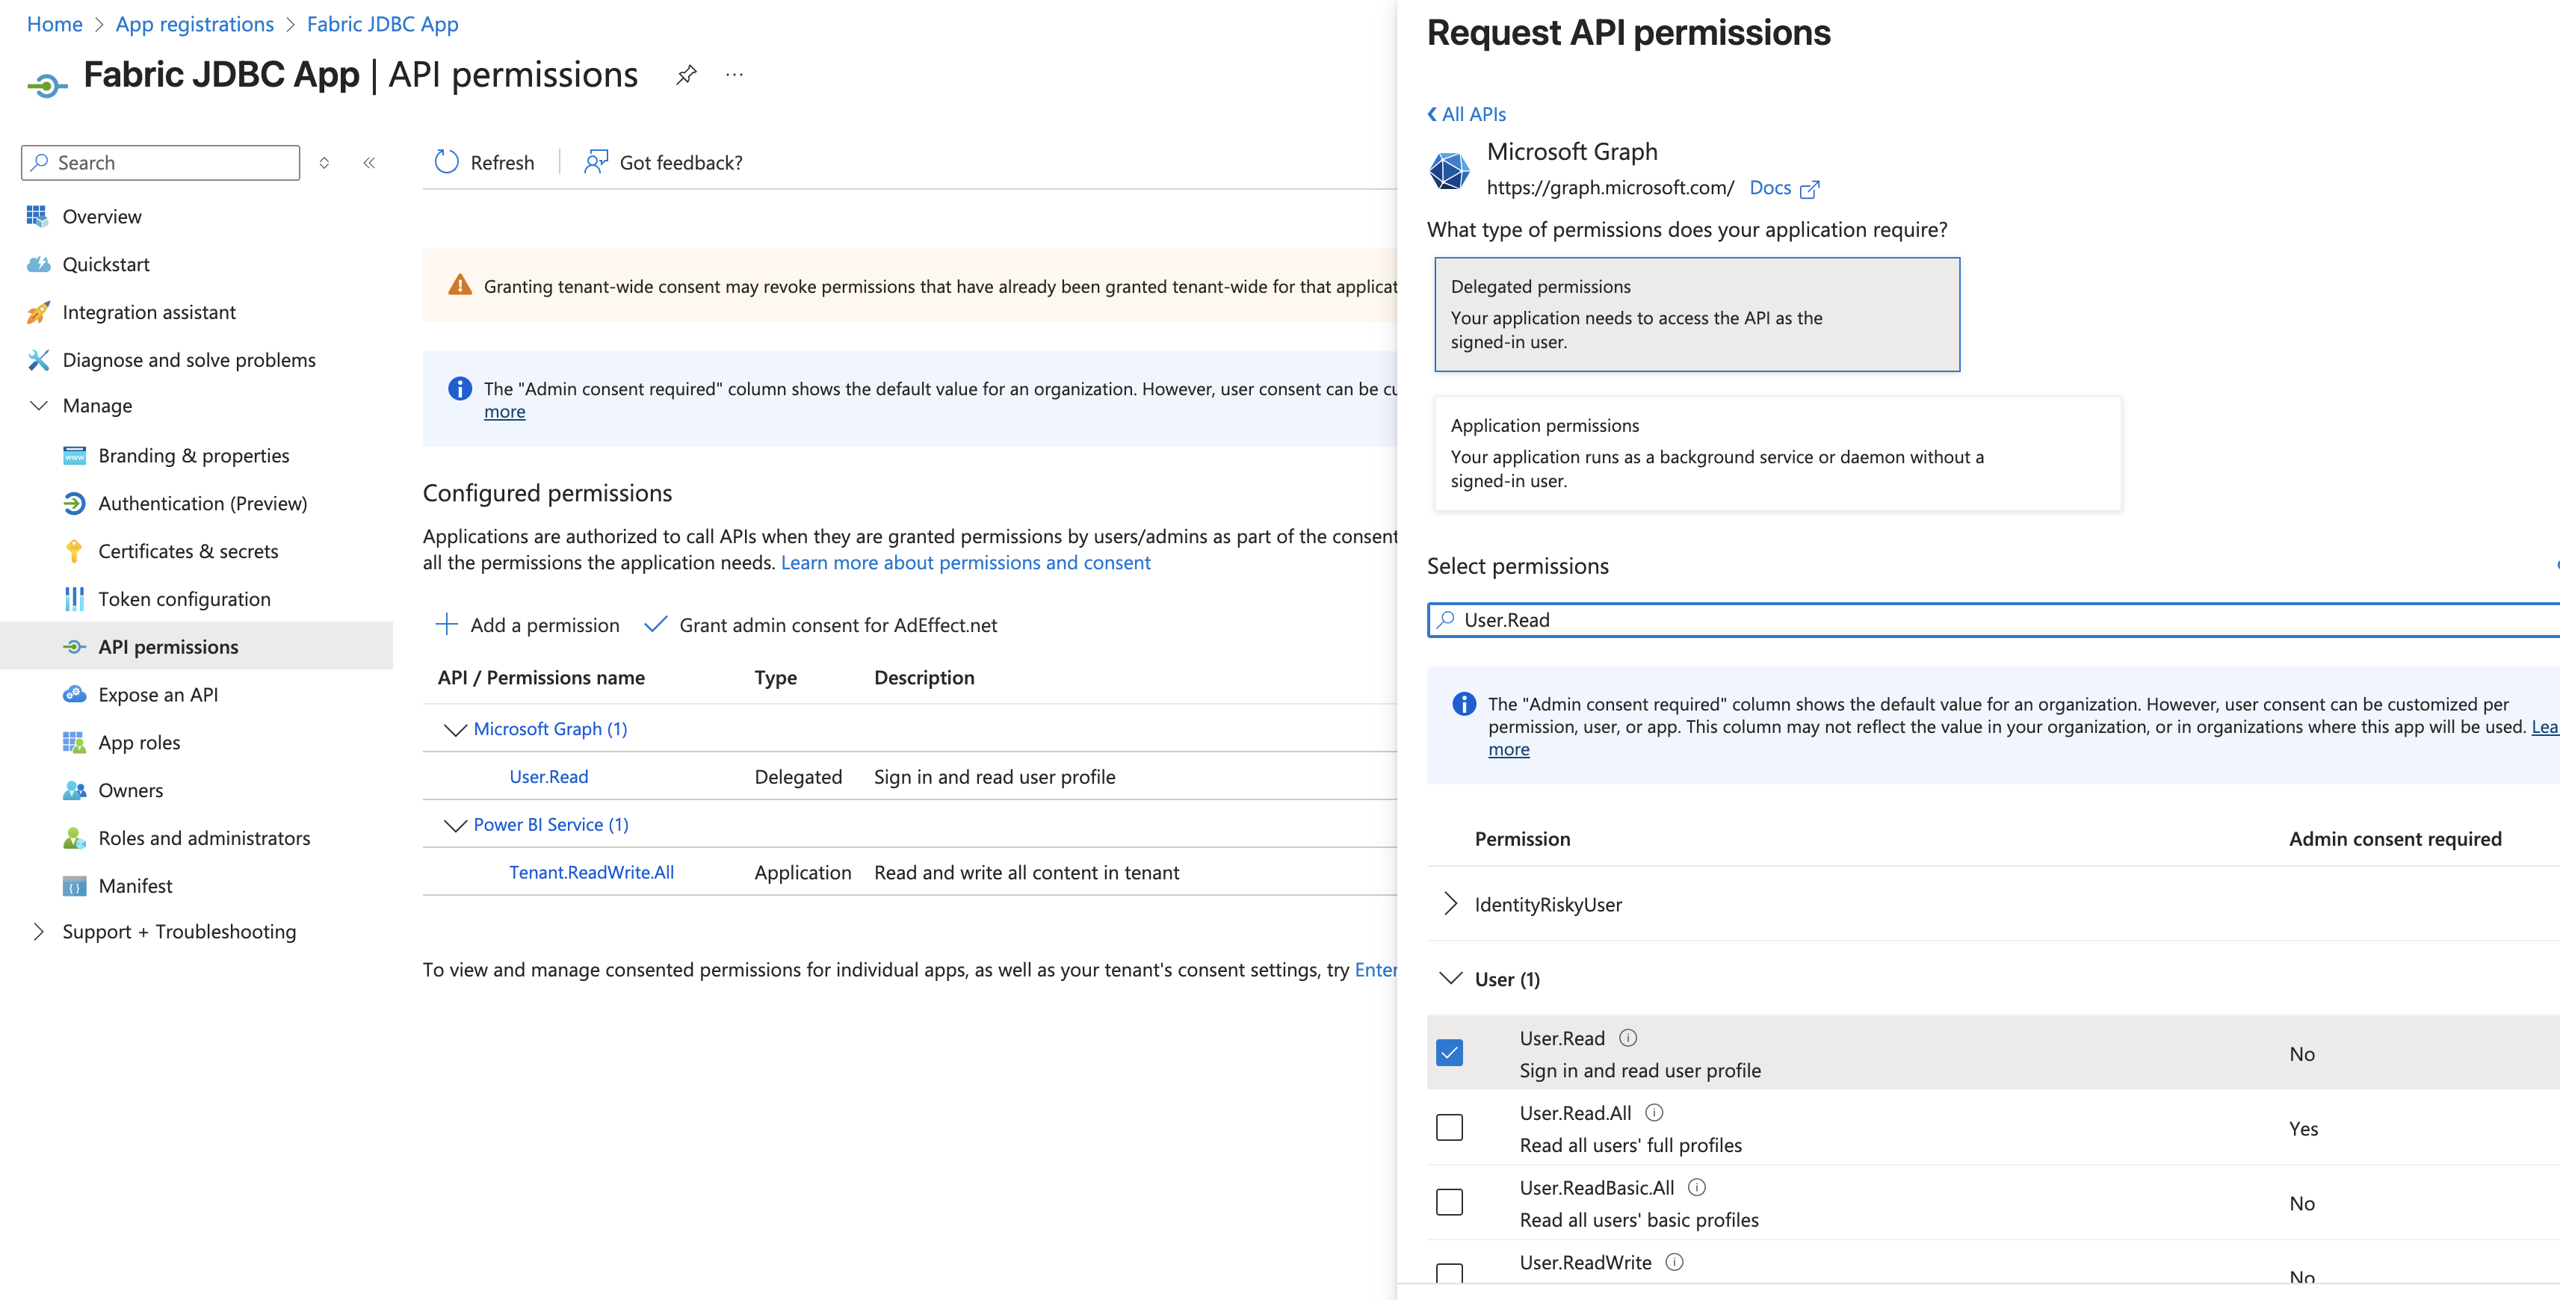
- User.Read — Sign in the user and get an access token
3
Click Add permissions.
4
Add another permission. Search for Power BI Service, click Application permissions, and add:
- Tenant.ReadWrite.All — Read tenant-level metadata
5
Click Add permissions.
6
Click Grant admin consent and confirm.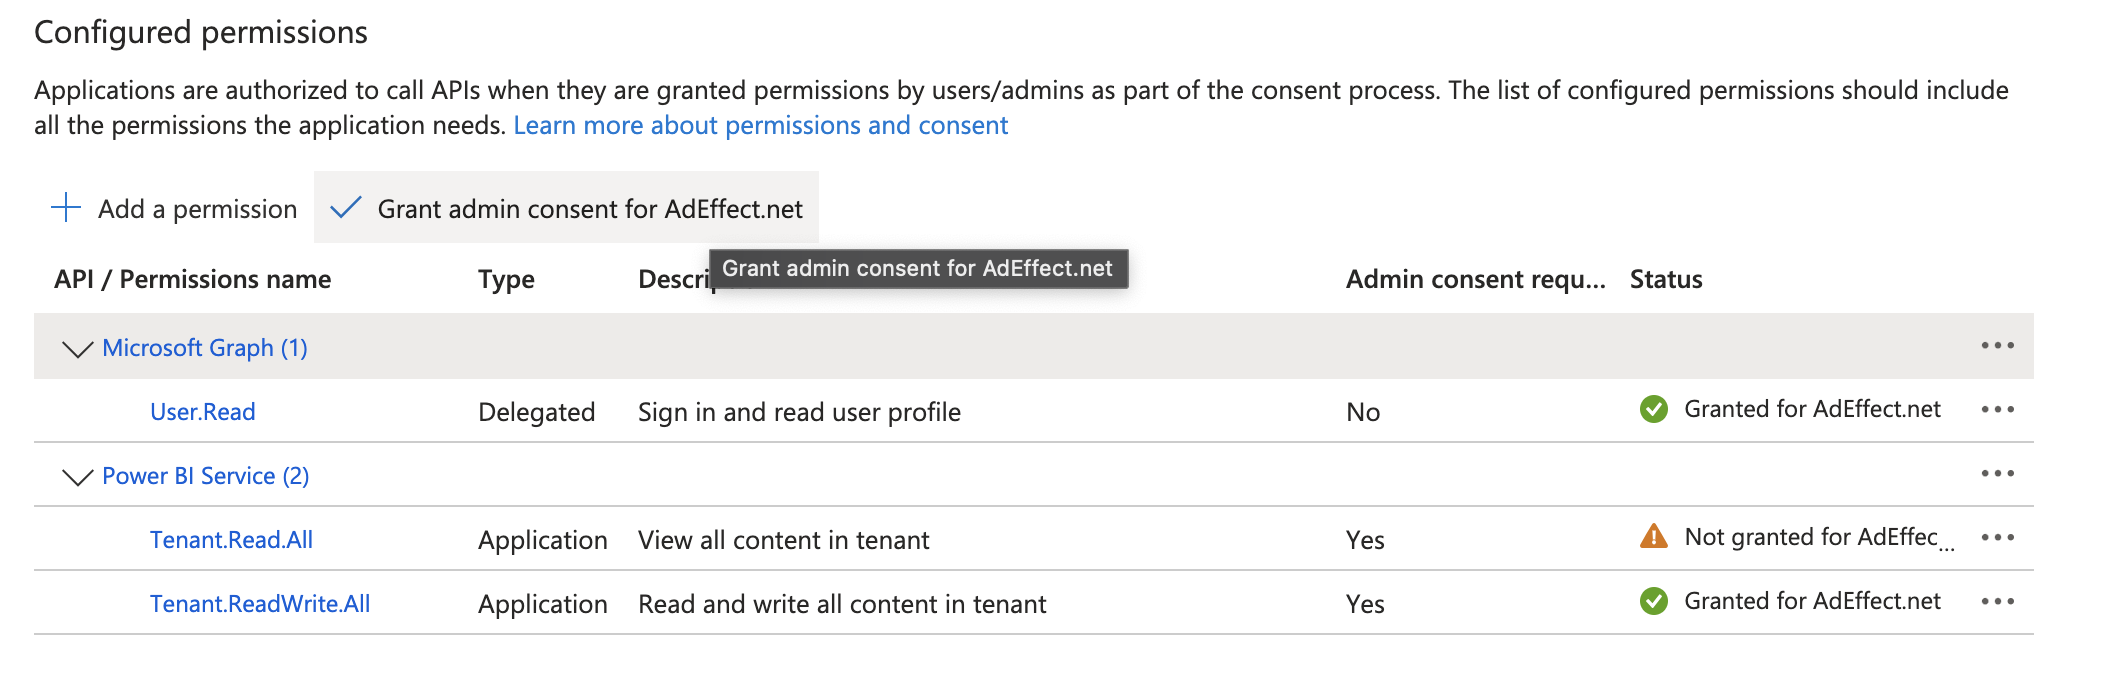
Enable the service principal in Microsoft Fabric
Microsoft Fabric blocks service-principal access by default. Turn on both tenant toggles before you assign workspace access.1
Log in to Microsoft Fabric.
2
Click Synapse Data Engineering.
3
In the top right, select Settings → Governance and insights → Admin portal.
4
In the sidebar, select Tenant settings.
5
Scroll to Developer settings and enable Service principals can call Fabric Public APIs. Confirm the toggle reads Enabled.
6
Scroll to OneLake settings and enable Users can access data stored in OneLake with apps external to Fabric. Confirm the toggle reads Enabled.
Grant the service principal workspace access
Tenant-level enablement is not enough. The service principal also needs the Admin role on the workspace that contains the target Lakehouse.1
Open the workspace that contains the target Lakehouse.
2
Click Manage access in the top right.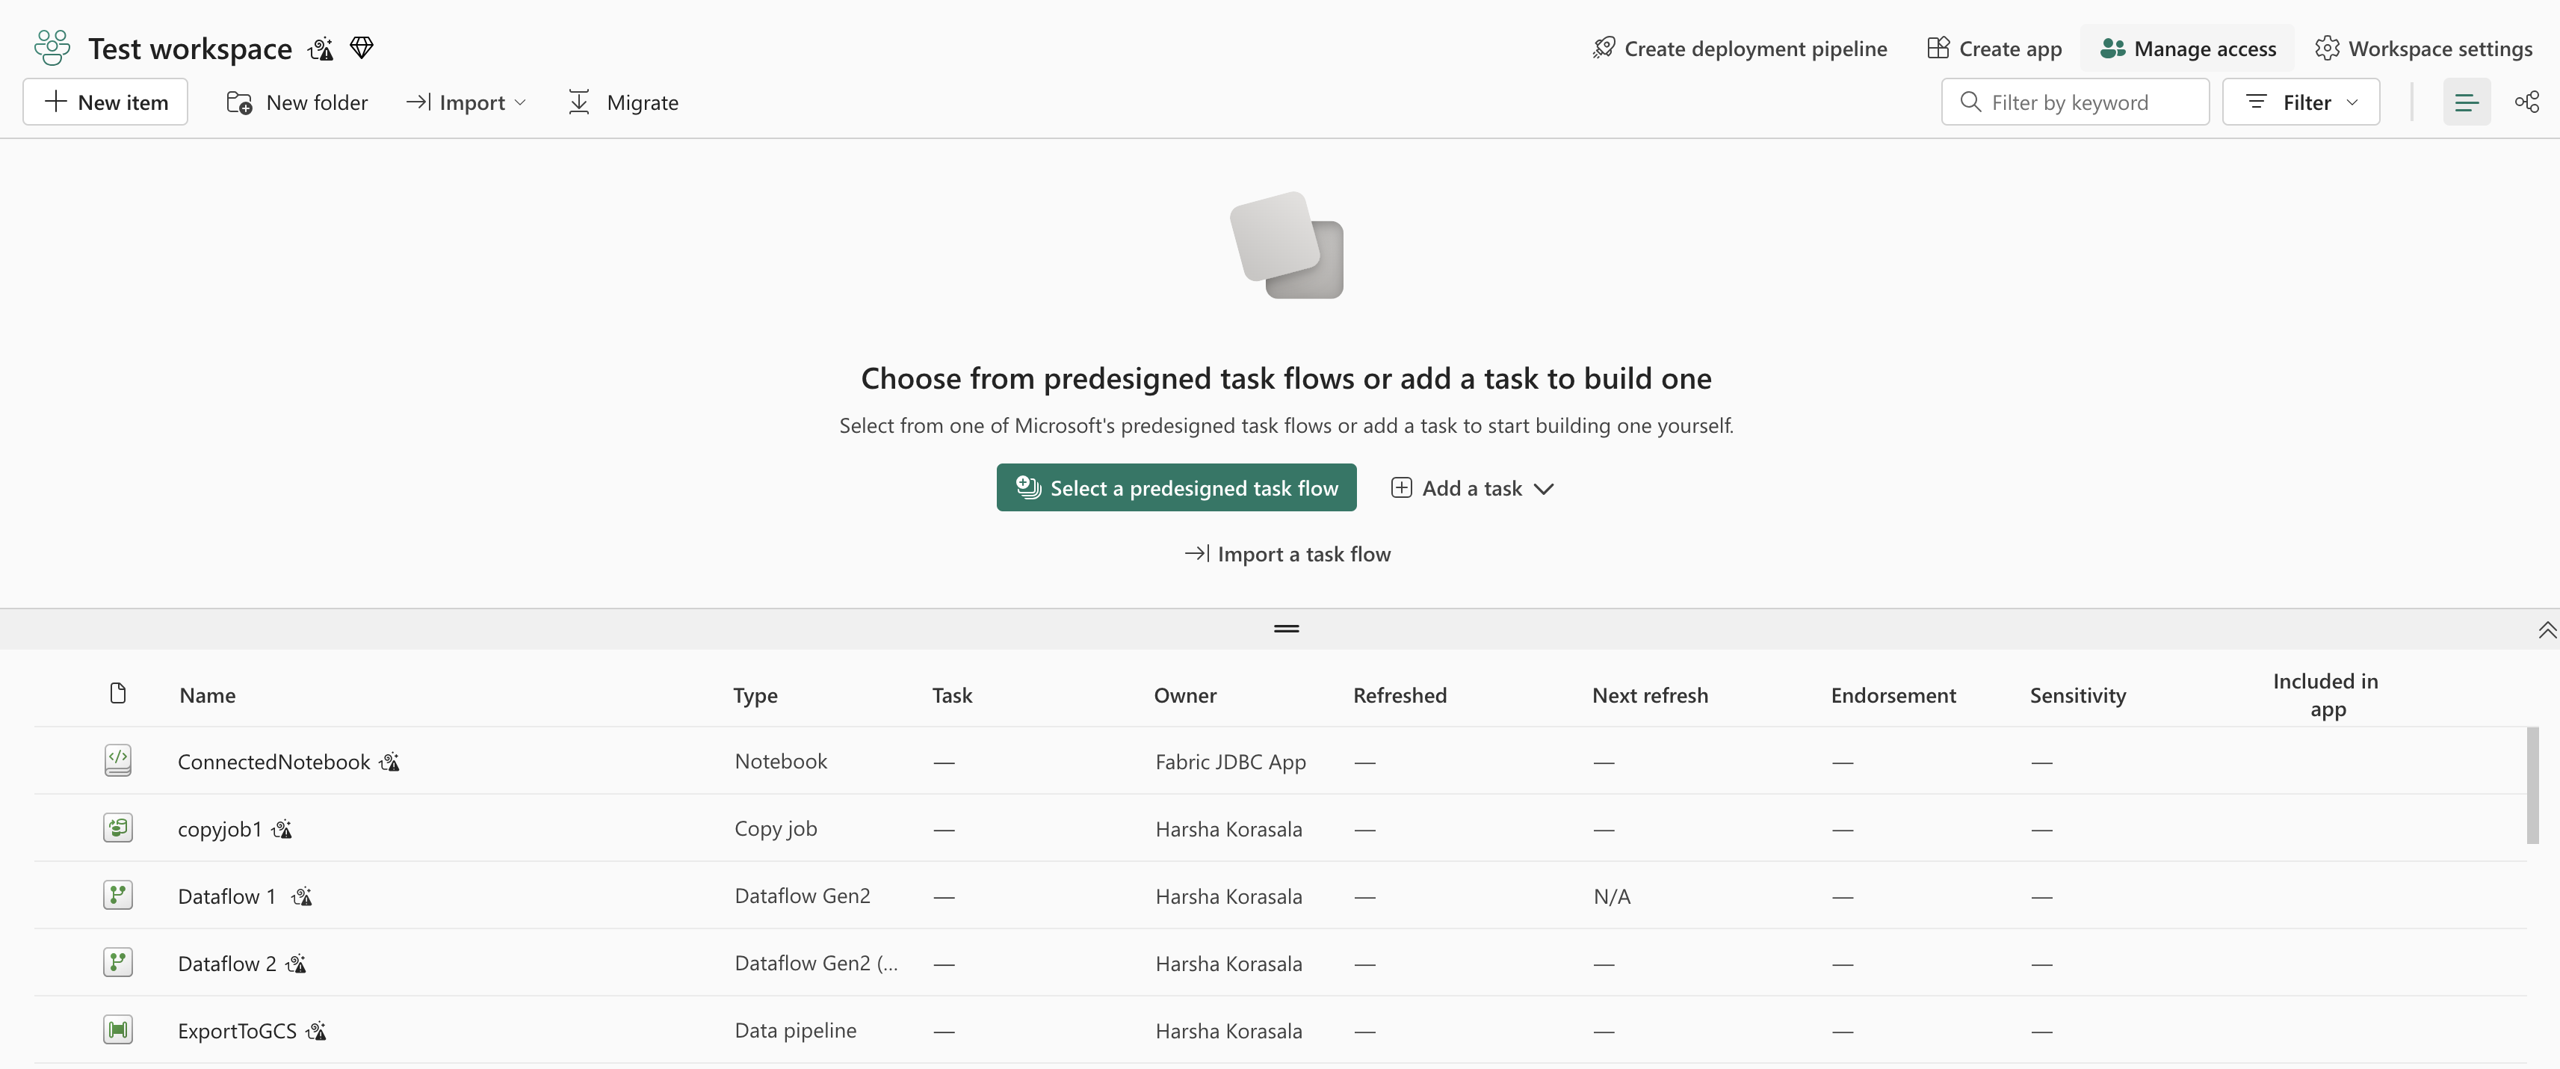
3
Click Add people or groups.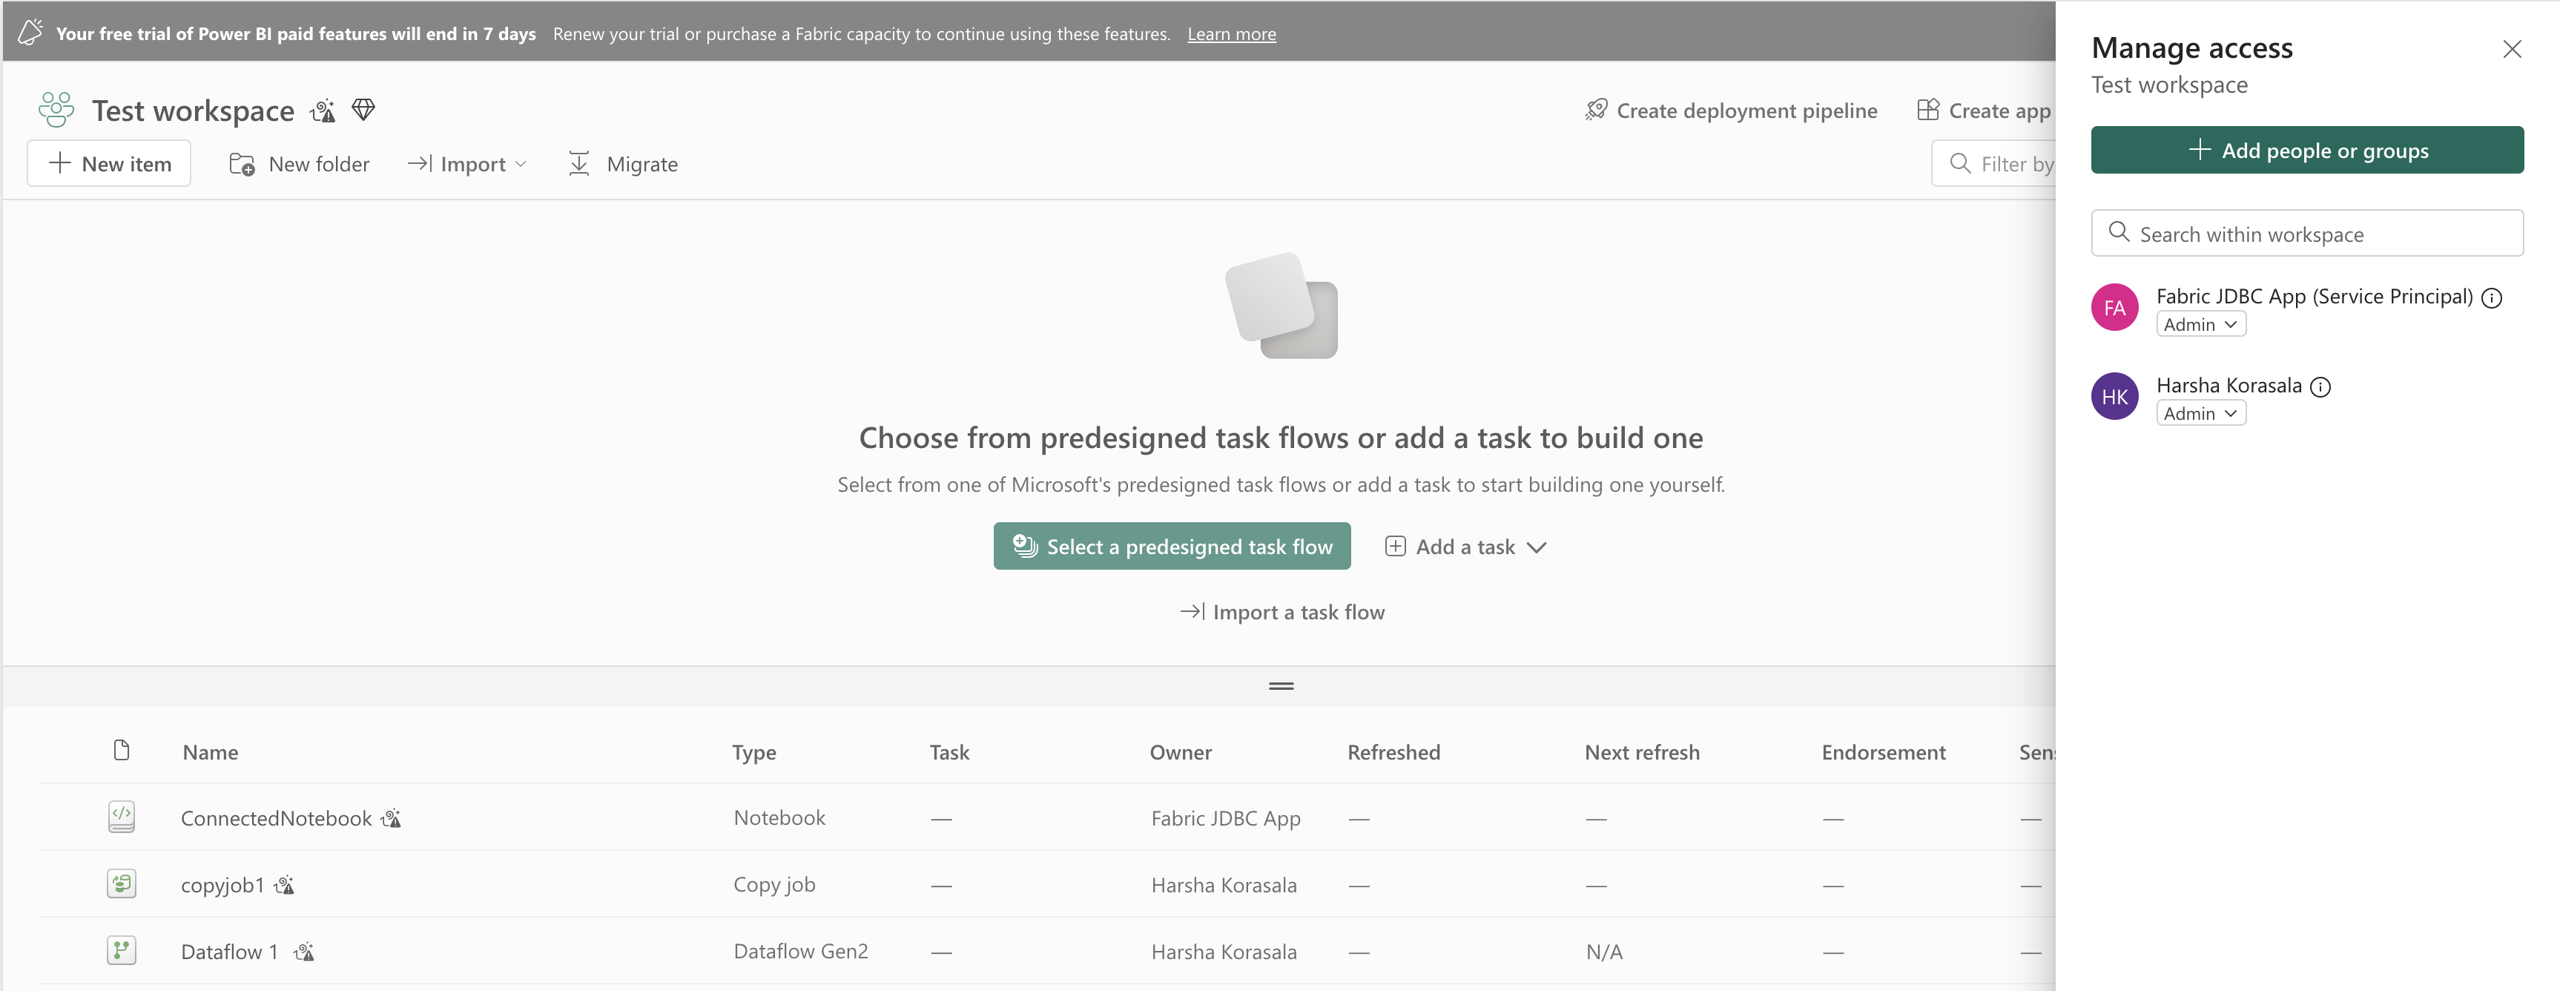
4
Type the client ID’s Display Name from Azure AD (the App registration name).
5
Assign the Admin role and click Add.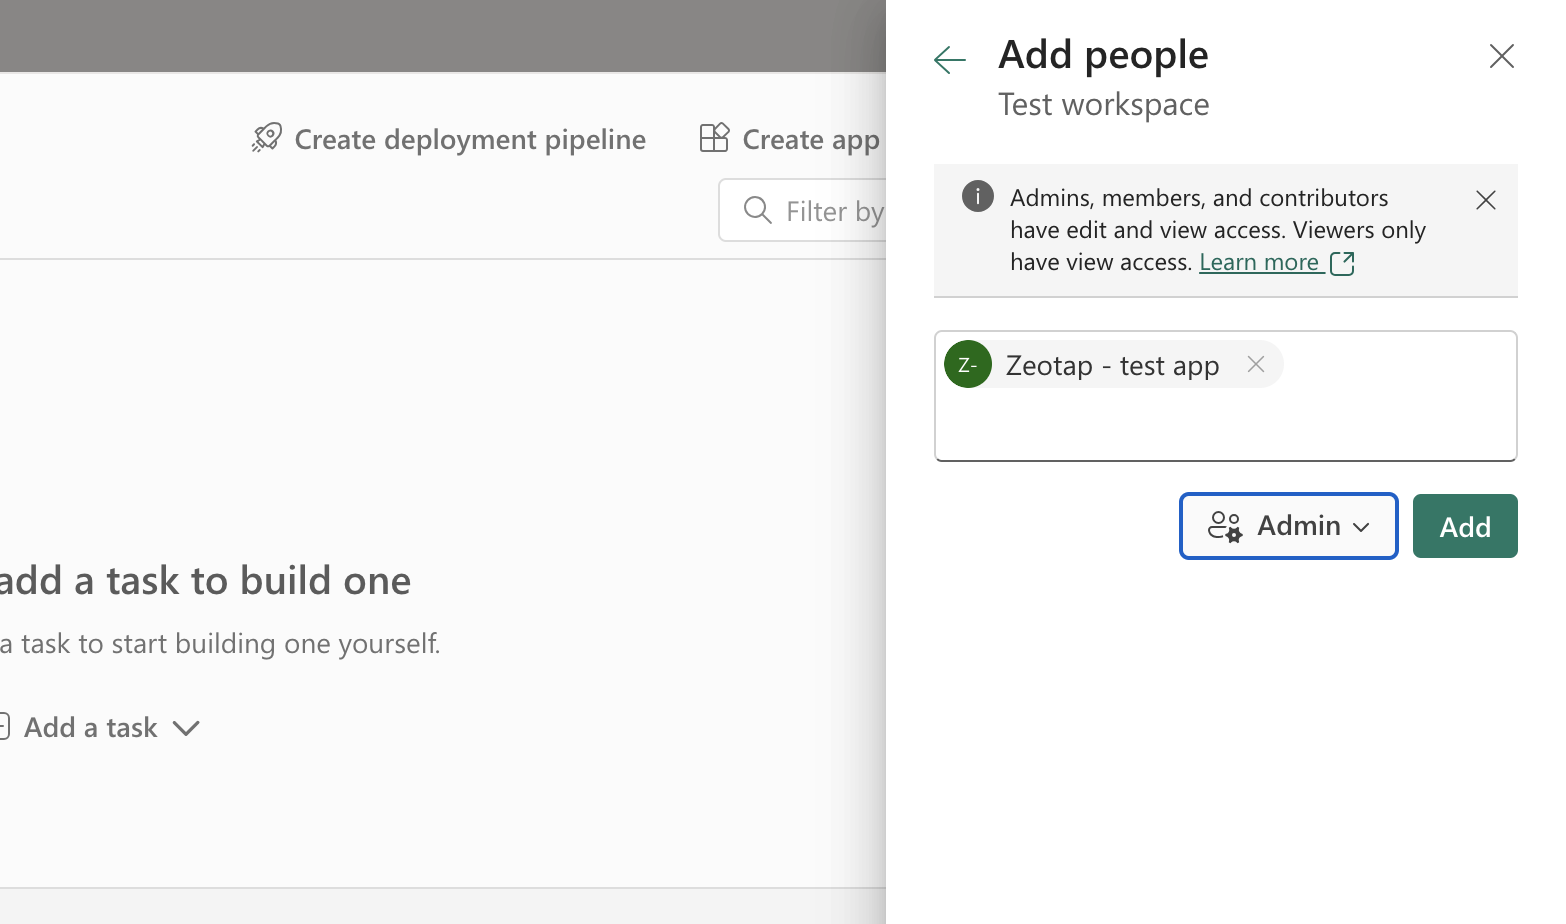
Stage the GCS service account key in the Lakehouse
Zeotap CDP writes the audience file to a GCS staging bucket first; a Fabric Spark job then reads from GCS and loads the records into the Lakehouse table. That Spark job authenticates to GCS using a JSON key file uploaded into the Lakehouse’s Files area.Prepare the GCP service account
Create a dedicated GCP service account for this integration and scope it to the staging bucket only. Grant these bucket-level IAM permissions, either through the predefined Storage Object Admin role or as a custom role:storage.objects.get— Read objects from the bucketstorage.objects.list— List objects in the bucketstorage.buckets.get— View bucket metadatastorage.buckets.update— Update bucket metadata
Upload the key to the Lakehouse
1
Open the target Lakehouse in Microsoft Fabric.
2
On your local machine, rename the downloaded service account JSON to
gcs_key.3
In the Lakehouse, click Files → Upload → Upload files.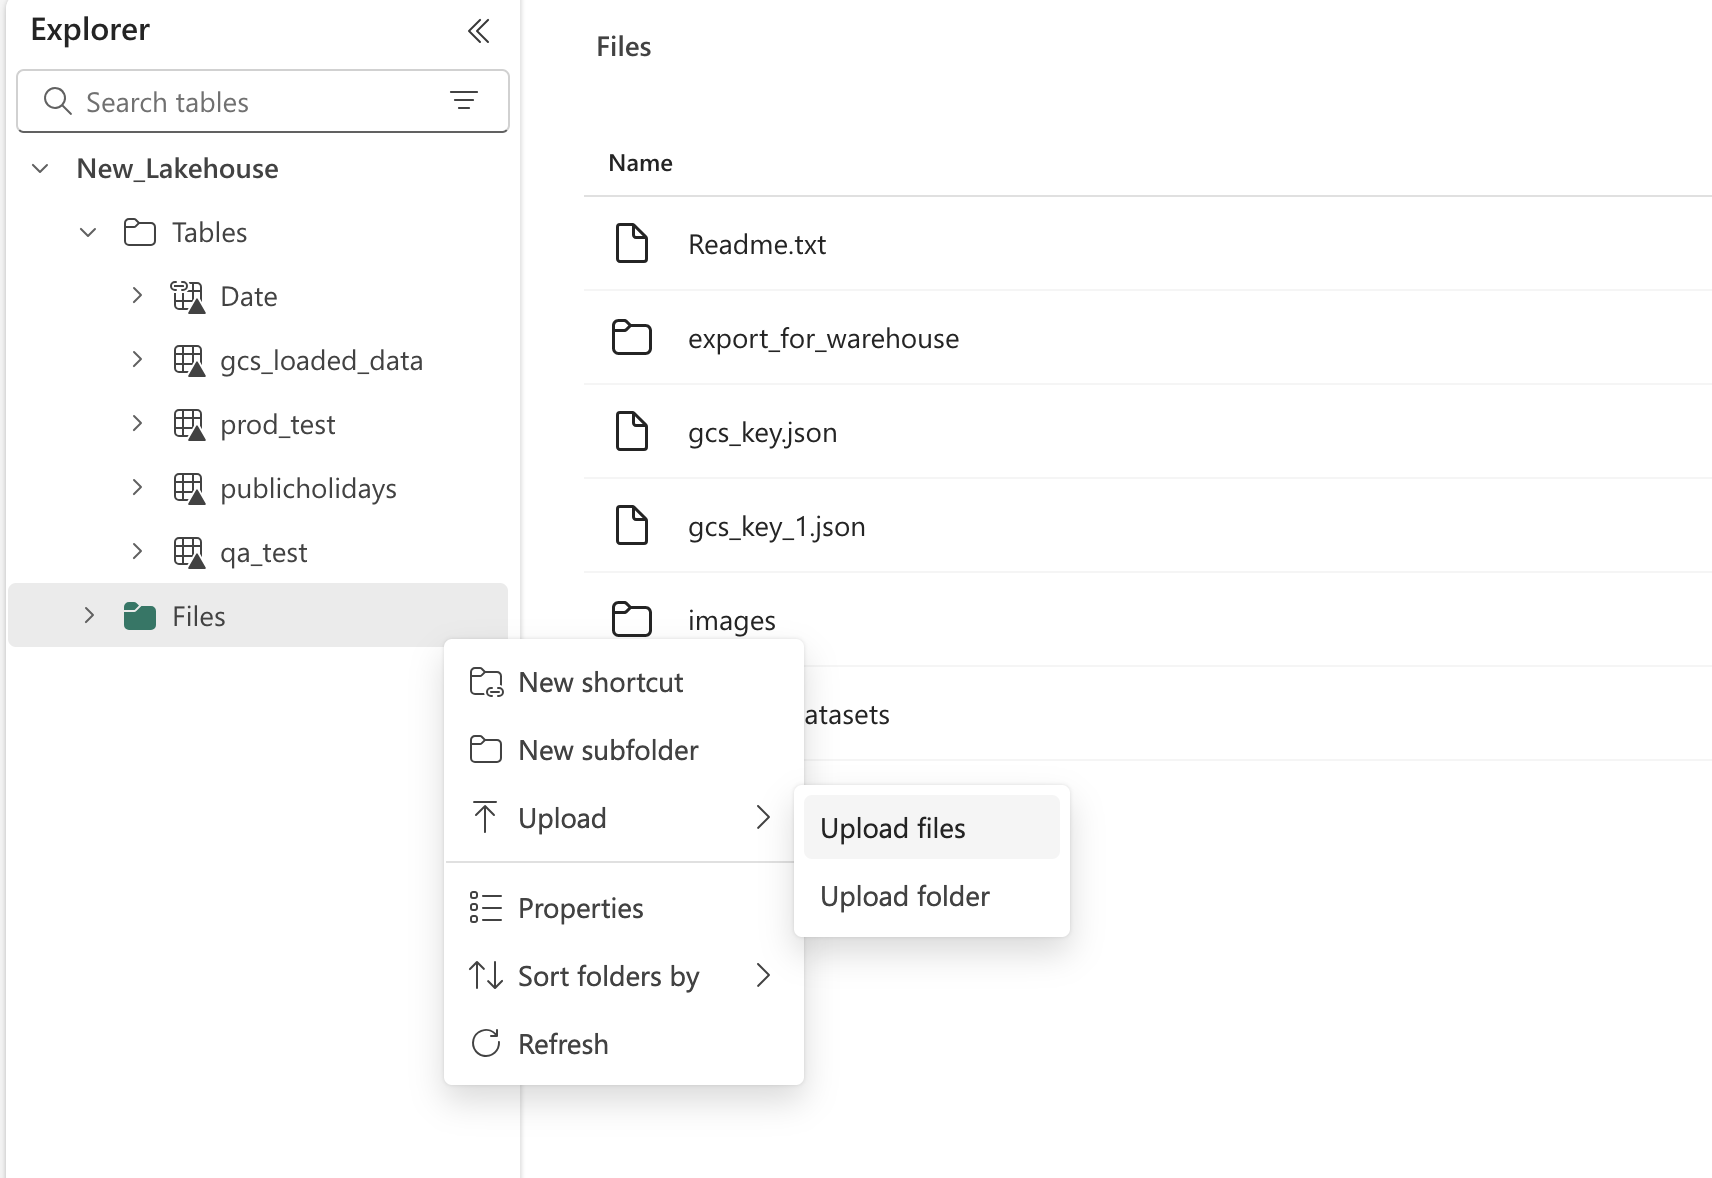
4
Upload the renamed 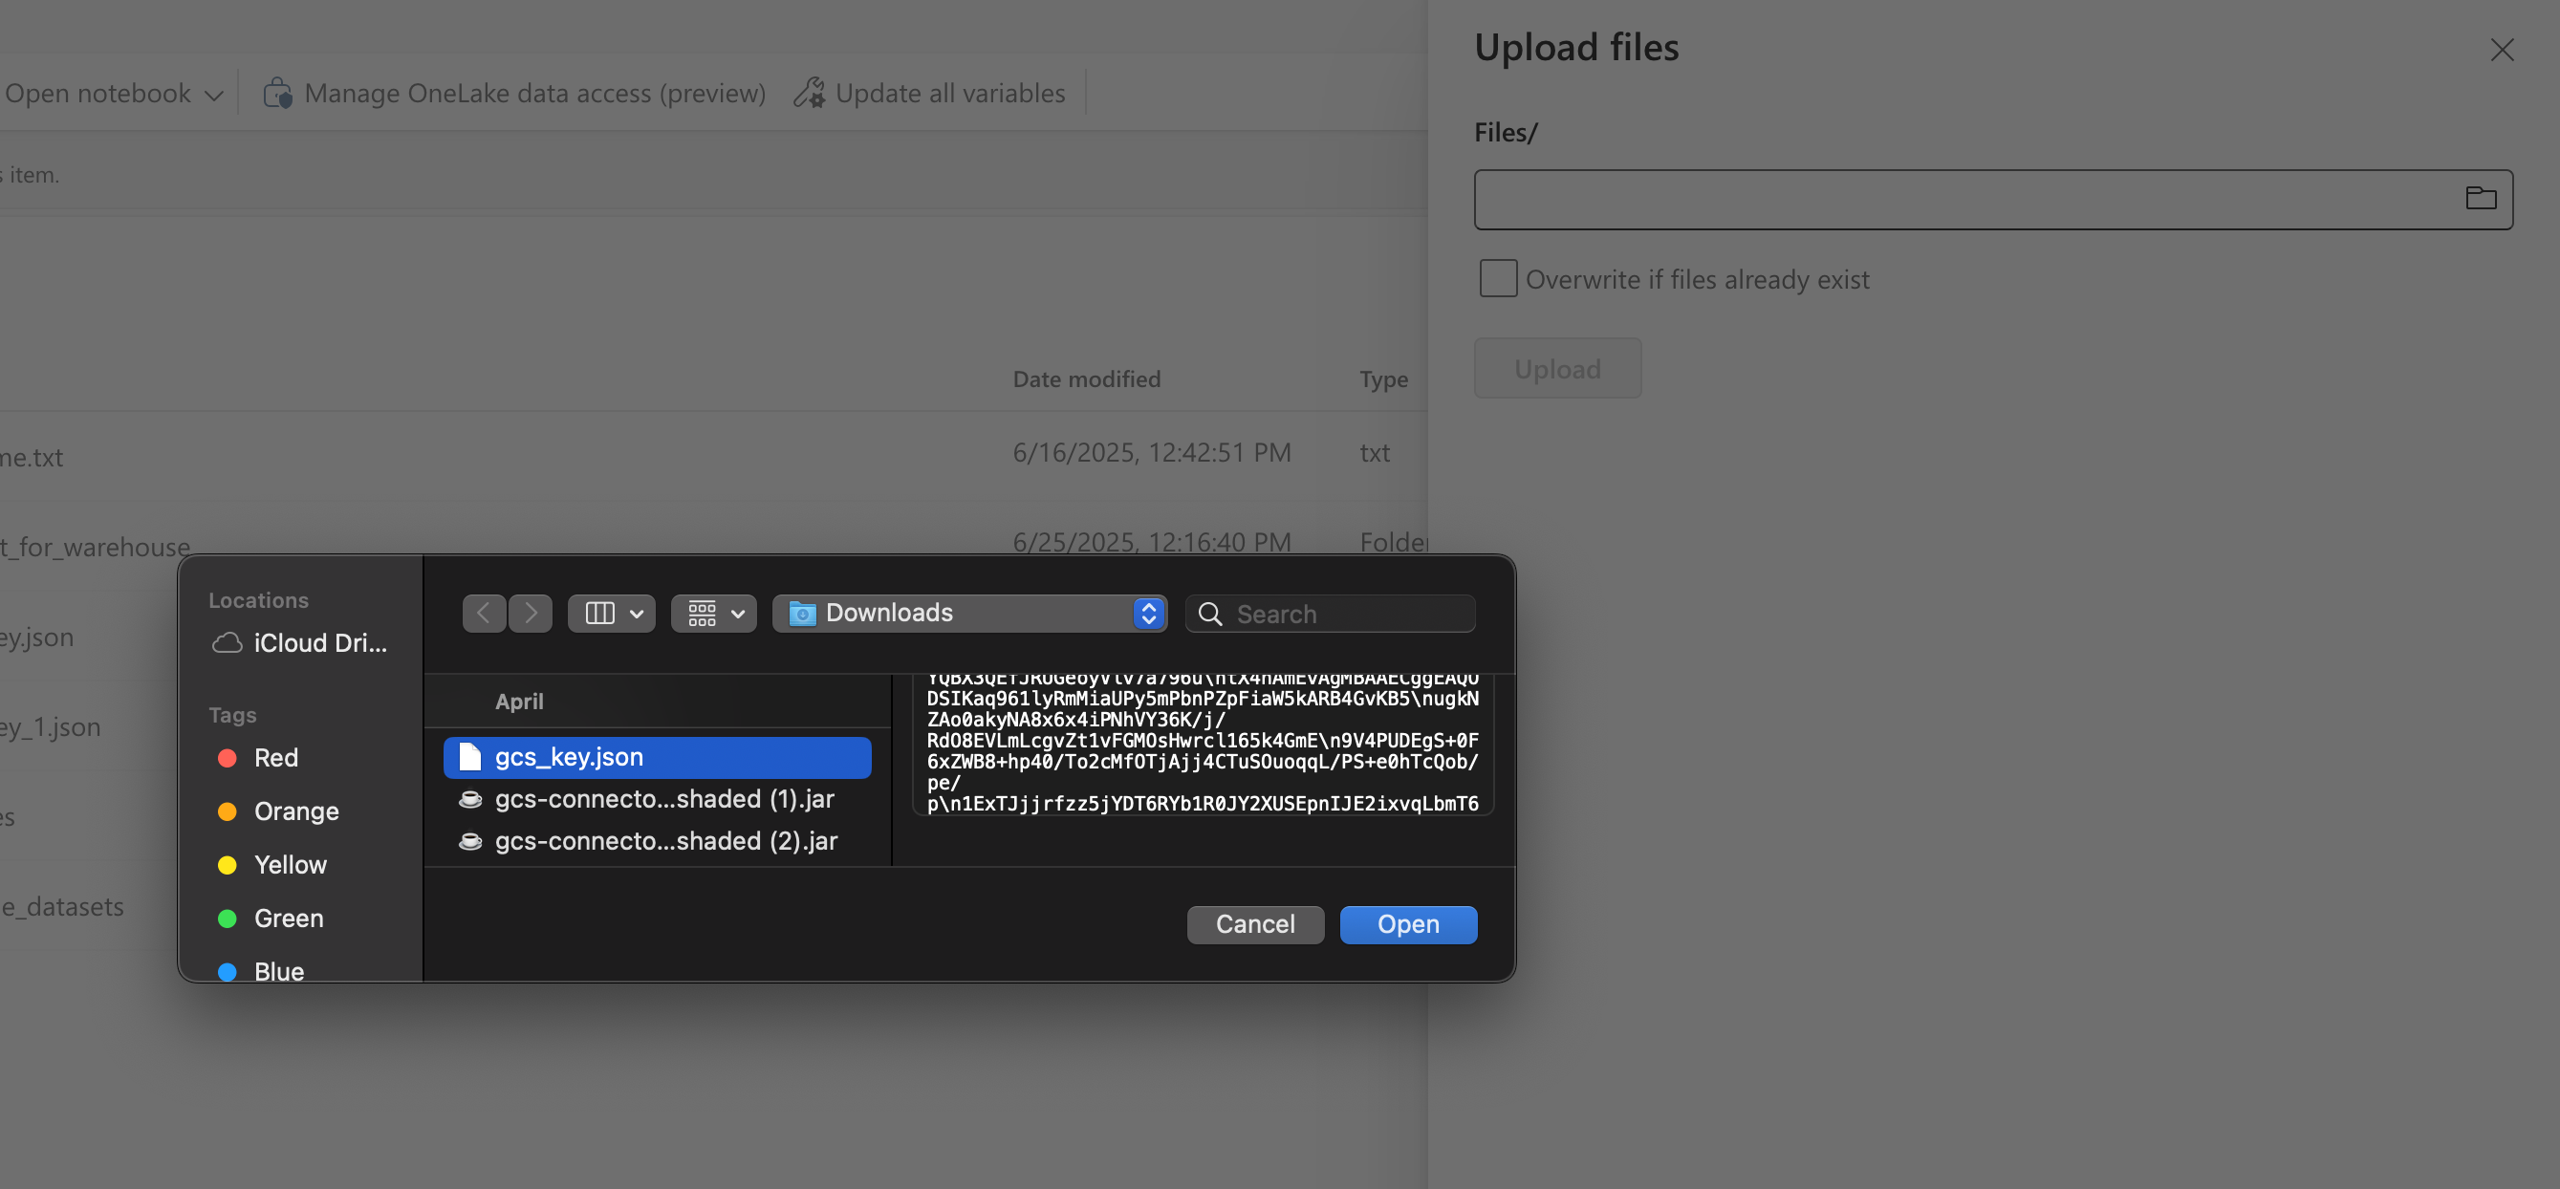
gcs_key file into the Lakehouse.Find the Workspace ID, Database, and Table
You need three Fabric values when you build the destination in Zeotap CDP.Workspace ID
Open your workspace in Microsoft Fabric (or Power BI Service) and read the GUID between/groups/ and /home (or /list) in the browser URL:
12345678-abcd-1234-abcd-9876543210abcdef.
Database
The Lakehouse (or Warehouse) name is the Database value. For a Lakehouse namedNew_Lakehouse, enter New_Lakehouse in the Database Name field.
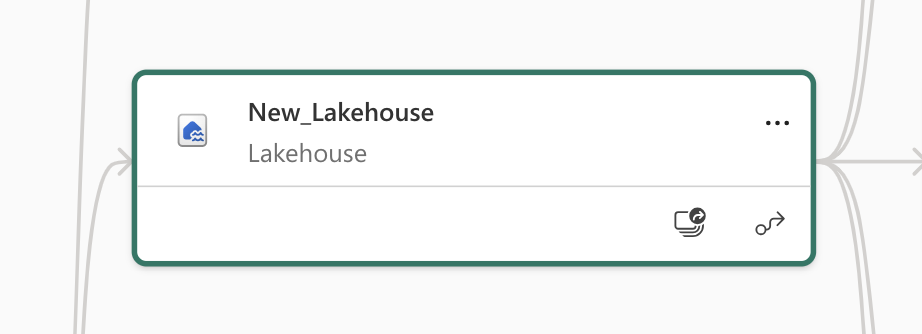
Table name
Pick a table name. If this is the first load to that Lakehouse and no table with that name exists, Zeotap CDP creates it. Read Table naming and schema rules before you choose — a bad name choice forces you to recreate the destination later.Table naming and schema rules
- Table name conflicts. Do not reuse the name of an unrelated existing table in the target Lakehouse. A name collision breaks ingestion. Use a fresh name unless you intend to append to the existing table.
- Schema mismatch fails the upload. If the incoming audience schema differs from the schema of the existing table (from a prior activation run), the data upload fails. Create a new destination with a new table name to handle a schema change.
- Schema merge behaviour. When the table does not exist, Zeotap CDP creates it. When the table exists and the schema matches, Zeotap CDP appends the new records. When the table exists and the schema differs, the upload fails.
-
GCS staging folder. The process creates a folder in your GCS bucket named
<Target_Lakehouse_Name>.<TableName>and stages files there before Fabric ingests them:
Create the destination in Zeotap CDP
1
Log into the Zeotap CDP App and open the DESTINATIONS application.
2
Click + Create Destination..png?fit=max&auto=format&n=99ae7Xt83Dkoy1LQ&q=85&s=8af304a0fb2280e517f24a4a2ad84e21)
3
Under All Destinations, search for Microsoft Fabric and click it..png?fit=max&auto=format&n=99ae7Xt83Dkoy1LQ&q=85&s=f6ada97715a2a4a0469fef53698ac3b9)
4
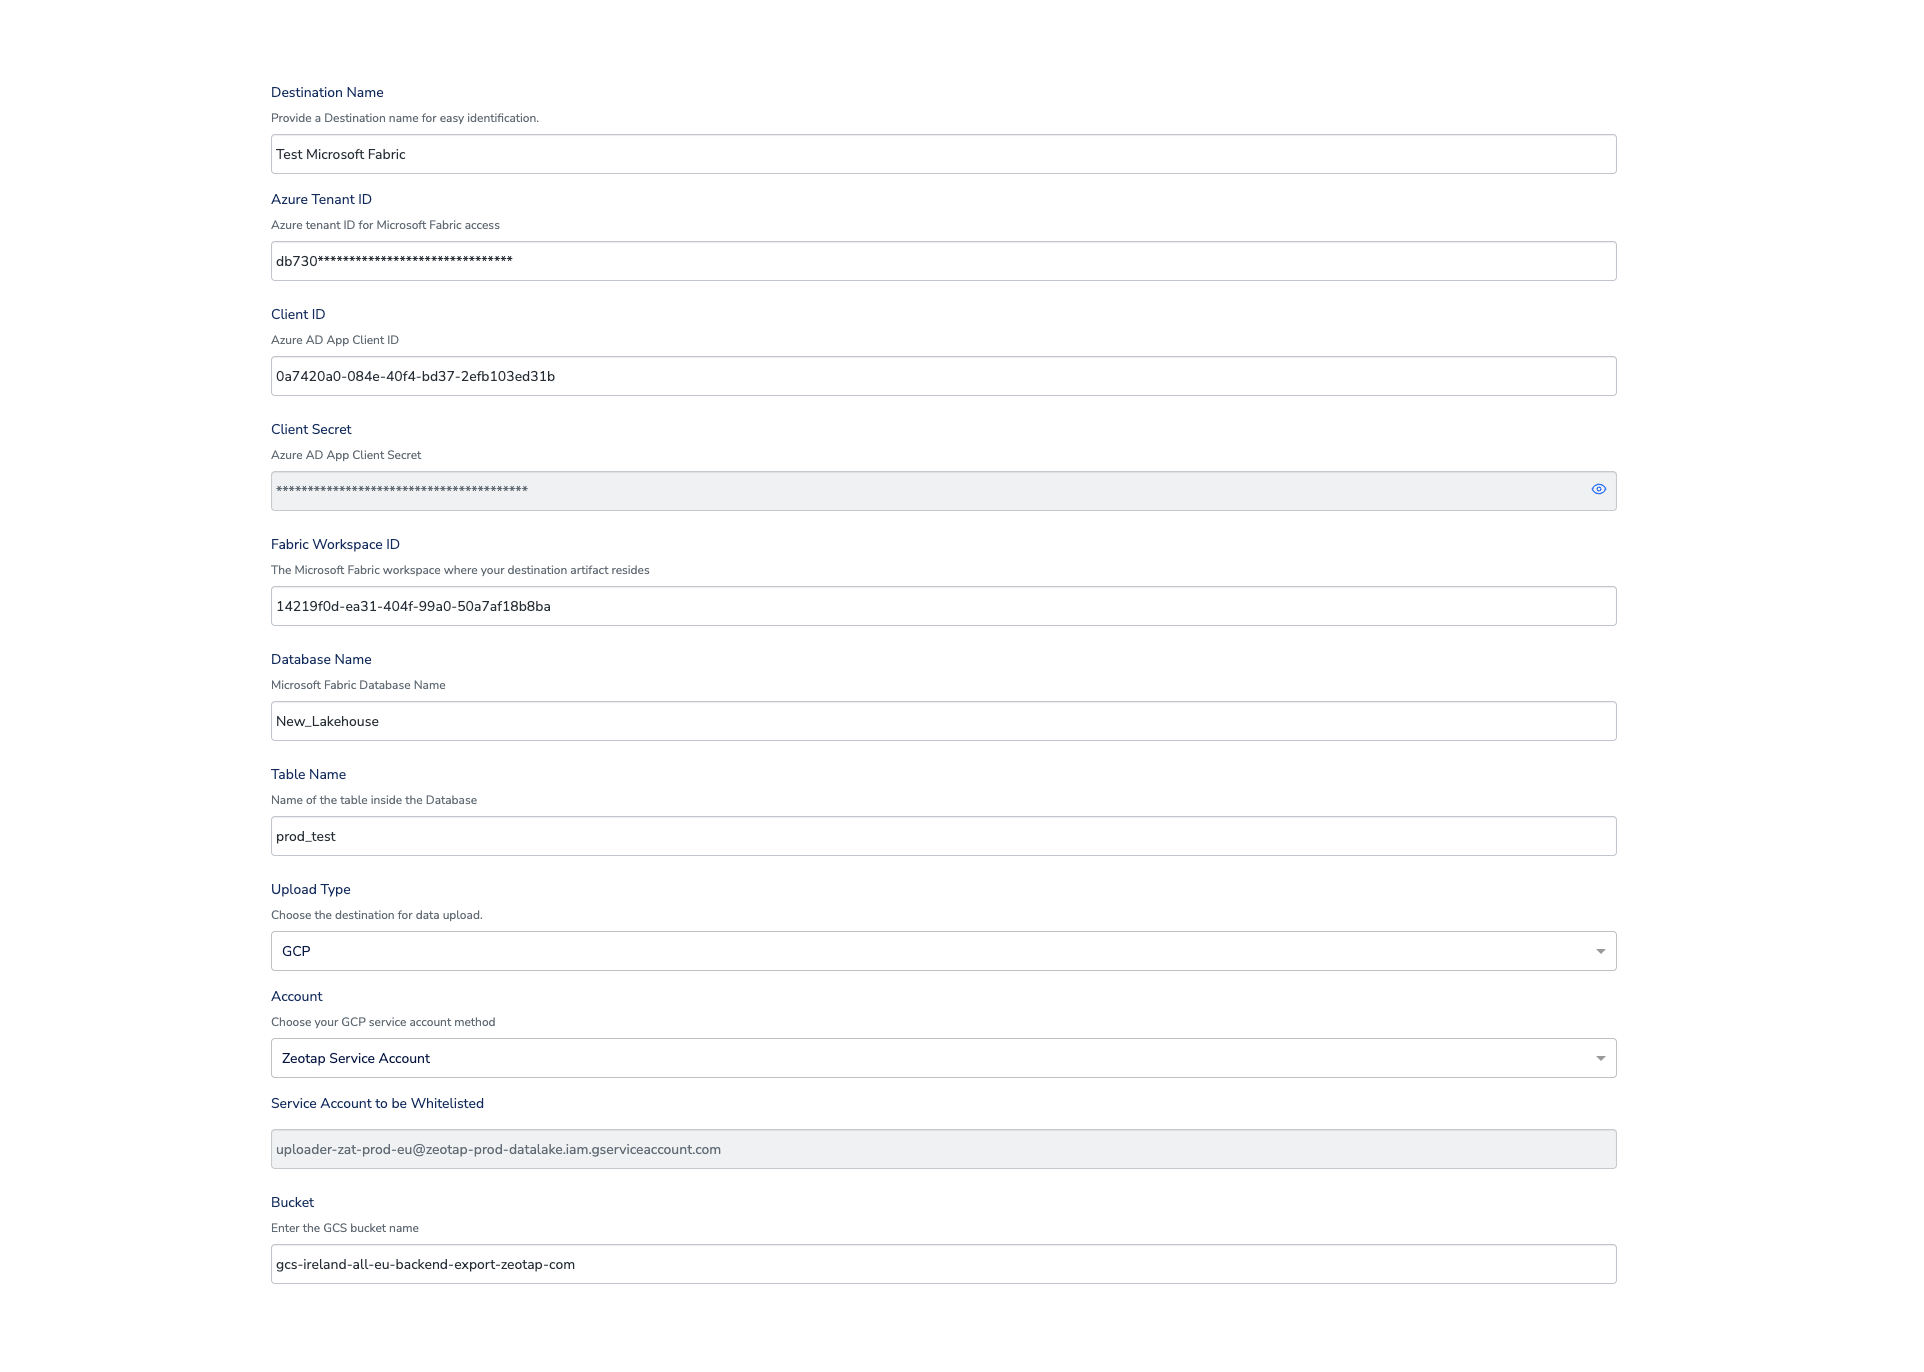
A screen appears with details of the destination on the left and the configuration form on the right. Fill in the form:a. Enter a name for the destination.b. In Azure Tenant ID, paste the Directory (tenant) ID from Entra.c. In Client ID and Client Secret, paste the values from the service principal.d. Enter the Fabric Workspace ID, Database Name (Lakehouse name), and Table Name.e. Select the Upload Type. Only upload to GCS is supported today.f. Under Account, choose one of: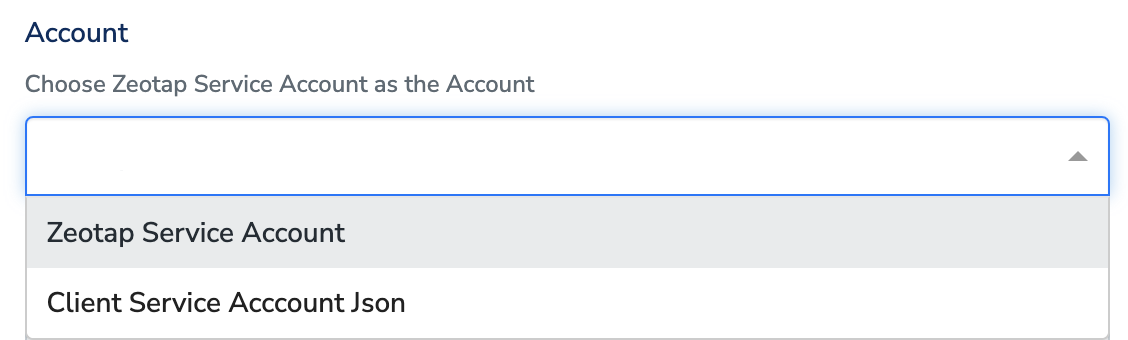
-
Zeotap Service Account — the service account shown under Service Account to be Whitelisted auto-populates. Whitelist that service account on your GCS bucket so Zeotap CDP can push audiences to it.

-
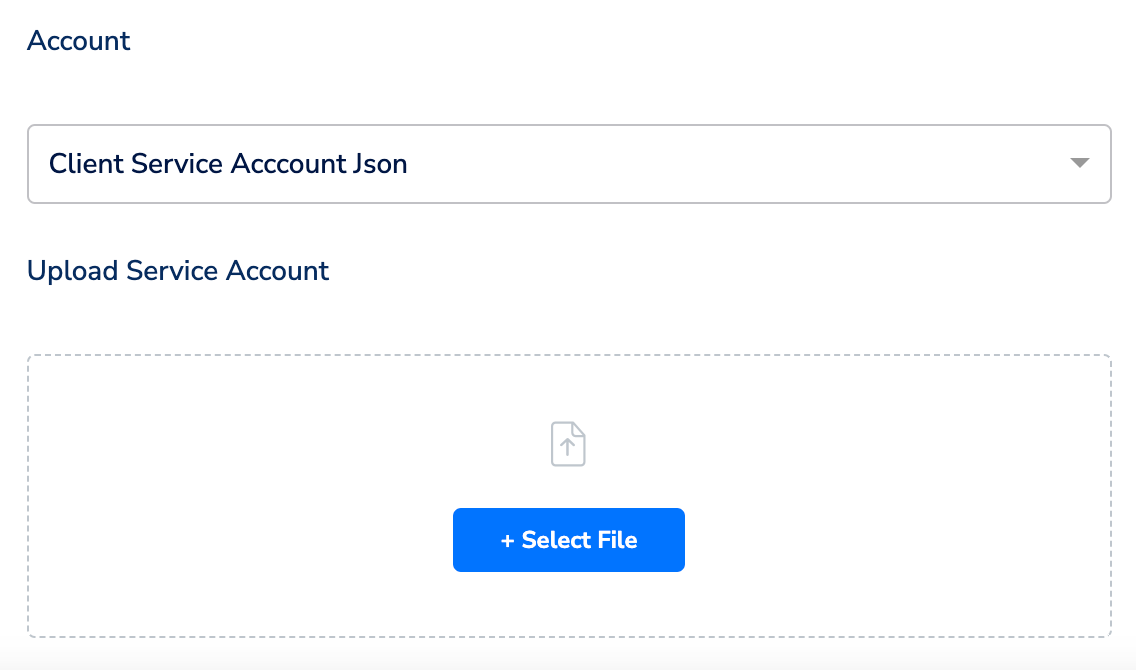
Client Service Account Json — click + Select File and upload your own GCP service account JSON with the bucket permissions listed above.
5
On the mapping screen, under Choose your Action, select Send Json File to MS Fabric. Click + Add mapping field and add each identifier or attribute you want to send. The value on the right of each mapping row becomes the column name in your Fabric table.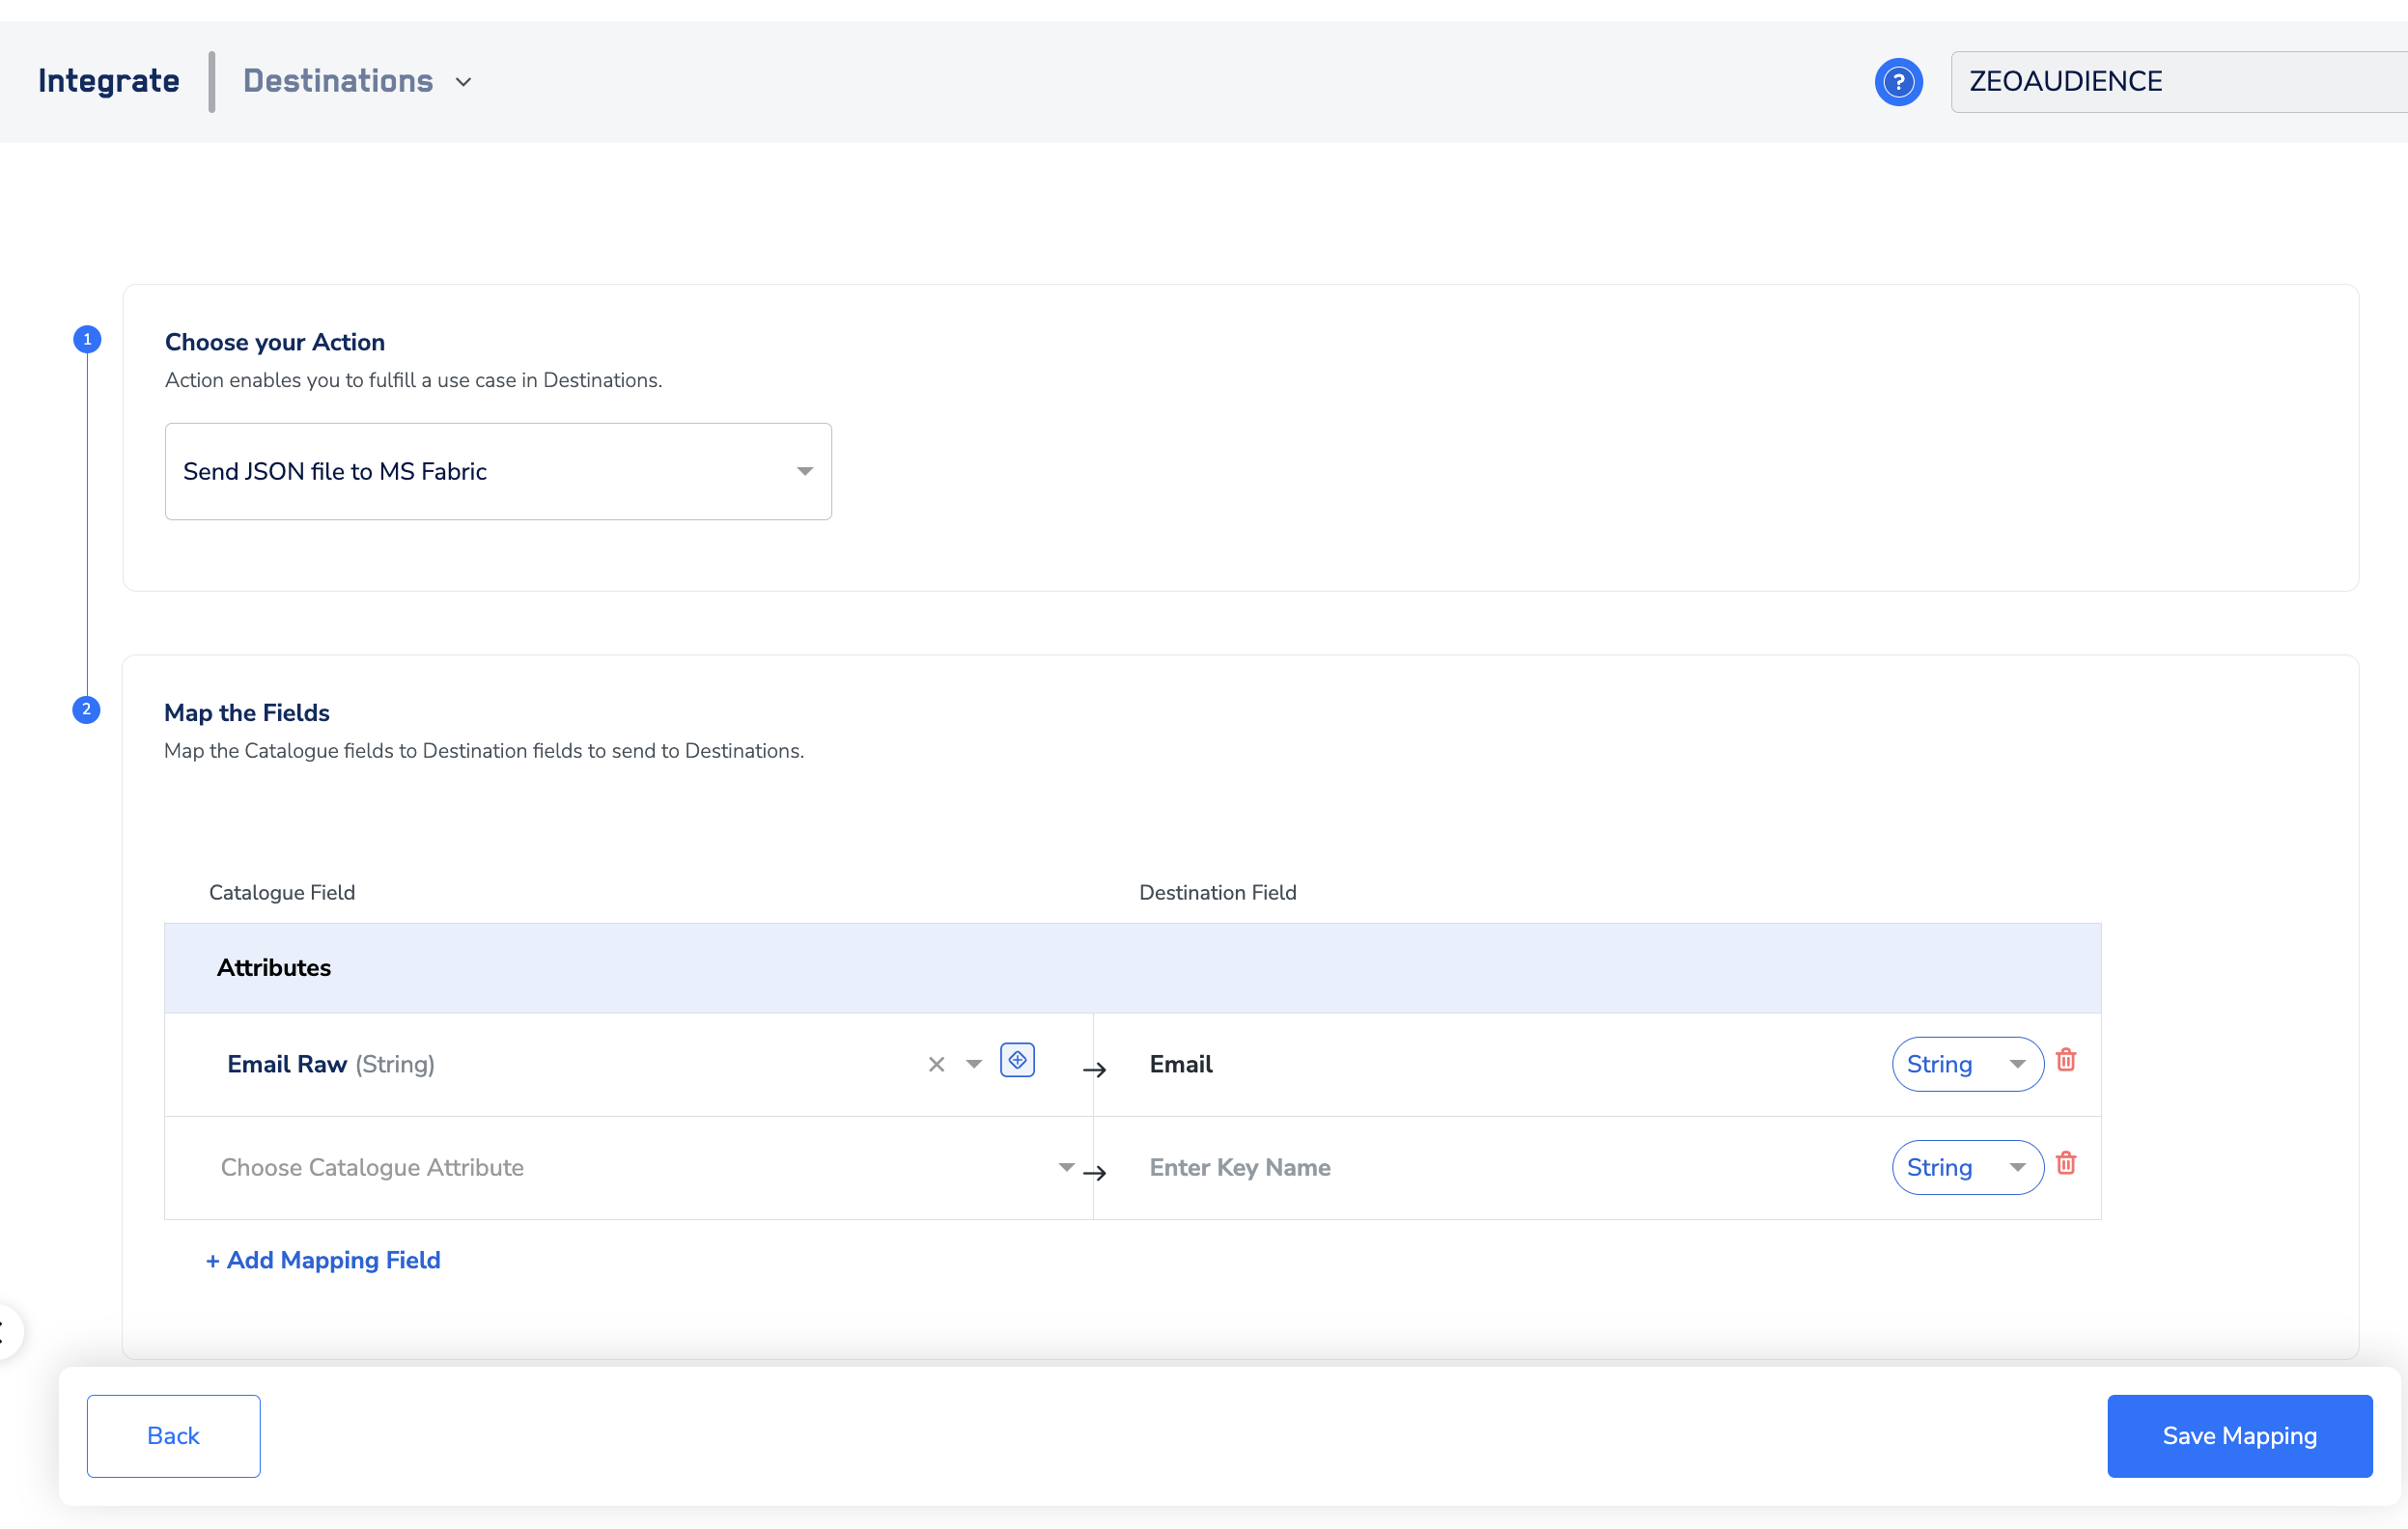
6
Click Create Destination. The destination now appears in the Audiences application and is ready to link to an audience.
The terms Audiences and Segments are used interchangeably to refer to customer cohorts that share a defined criterion — for example, customers over 18 who performed an
addToCart event in the last 30 days.Verify the destination worked
After linking an audience and triggering an activation, confirm end-to-end delivery in four checks:- In the GCS bucket, confirm a folder named
<Target_Lakehouse_Name>.<TableName>exists and contains the staged JSON file(s) from the activation run. - In the target Fabric Lakehouse, open the Tables view and confirm the table exists with the columns you mapped.
- Query the table from a Fabric notebook or the SQL endpoint and confirm the row count aligns with the audience size for that run.
- In Zeotap CDP, open the audience’s activation history and confirm the run status is successful.
Troubleshooting
FAQ
What identifiers can I send to Microsoft Fabric?
What identifiers can I send to Microsoft Fabric?
Send any identifiers and attributes you have in the audience. The payload is written as JSON, and the resulting Fabric table columns match whatever you configure on the mapping step. Hash values upstream in your audience if you require hashed identifiers in Fabric.
What happens when my client secret expires?
What happens when my client secret expires?
Audience deliveries fail as soon as the secret expires, because Zeotap CDP can no longer authenticate to Fabric. Generate a new client secret in Microsoft Entra before the expiry date, then update the Client Secret field on the destination in Zeotap CDP.
Can I change the Table name on an existing destination?
Can I change the Table name on an existing destination?
To send an audience to a different table, create a new destination with the new table name. If the schema of the audience changes, also create a new destination — changing the schema of the target table on an existing destination causes the next upload to fail.
Do I need my own GCS bucket, or does Zeotap provide one?
Do I need my own GCS bucket, or does Zeotap provide one?
You provide the GCS bucket. Choose whether Zeotap authenticates with its managed service account (which you whitelist on your bucket) or with a client-supplied service account JSON that you upload during destination creation.
Next steps
- Explore the Microsoft Fabric source → — pull data from Fabric into Zeotap CDP
- Explore linking an audience to a destination → — activate an audience against the destination you just created
- Explore ID extension for audiences → — expand your audience across identifier types before sending to Fabric