

What this is
The Responsys destination sends audiences out of Zeotap CDP to your Oracle Responsys instance, updating the profile list or profile extension table you nominate so that your Responsys campaigns can target that cohort. Oracle Responsys is a cloud-based marketing automation platform for running personalised, data-driven campaigns across email, mobile, web and social. This page covers the batch mode, where you link an audience to the destination and Responsys is refreshed on the schedule you set. To trigger a Responsys campaign on demand from a Journeys workflow instead, see Responsys real-time integration. Both modes use the same Responsys account credentials.Key concepts
- Profile list — the table that stores your recipient audience database records. Members of your audience might be leads, prospects, customers, contacts, consumers or visitors, depending on your terminology. Marketers use profile lists and related objects (such as profile extension tables and filters) primarily for campaign targeting and personalisation.
- Profile extension table (PET) — stores additional information for each unique recipient in your profile list, so a record in a PET must map to exactly one record in its parent profile list. As with data in profile lists, audience data in PETs can be used for segmentation and targeting in filters as well as programs.
Supported identifiers and actions
This integration supports customerId, phone number, emailAddress, emailMD5Hash, emailSHA256Hash and other custom attributes. The destination carries two actions:
Each action has its own mapping. Configure a mapping for every action you intend to use, then choose which action and mapping run when you link an audience to the destination.
Prerequisites
Collect the following details from your Oracle Responsys account before you create the destination in Zeotap:- Username — the username of your Responsys account.
- Password — the password of your Responsys account.
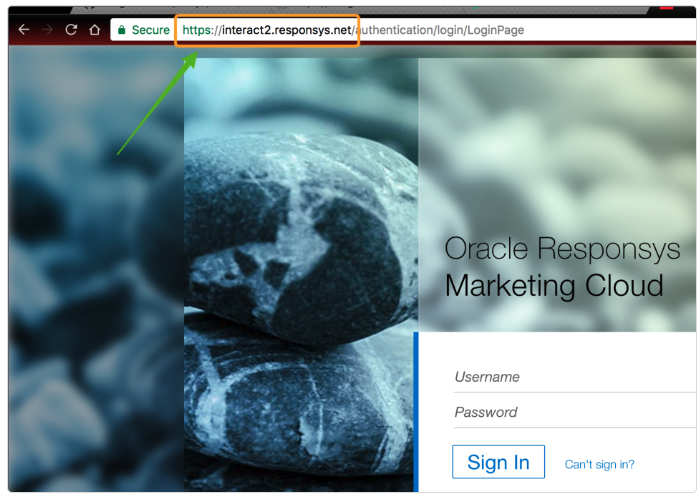
- URL — your account’s endpoint. Find it by going to your Oracle Responsys login screen and looking at the address bar of your browser. For example,
https://interact2.responsys.net. - Profile List name — the name of the profile list where the data sent from Zeotap is updated.
- Profile Extension table name — the name of the profile extension table where the data sent from Zeotap is updated.
- Folder — the folder in Responsys where the data sent from Zeotap is populated. The destination asks for the folder path (see Create the Responsys destination).
Create the Responsys destination
1
Log into the Zeotap CDP App and go to Destinations under Integrate.
2
Click + Create Destination.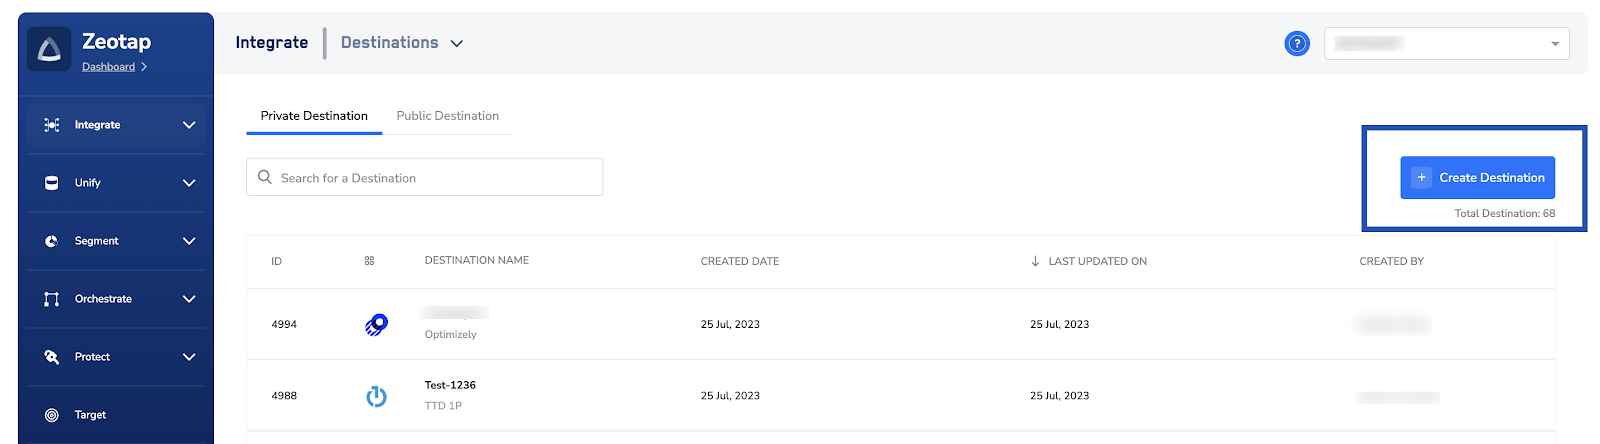
3
Under All Destinations, search for Responsys.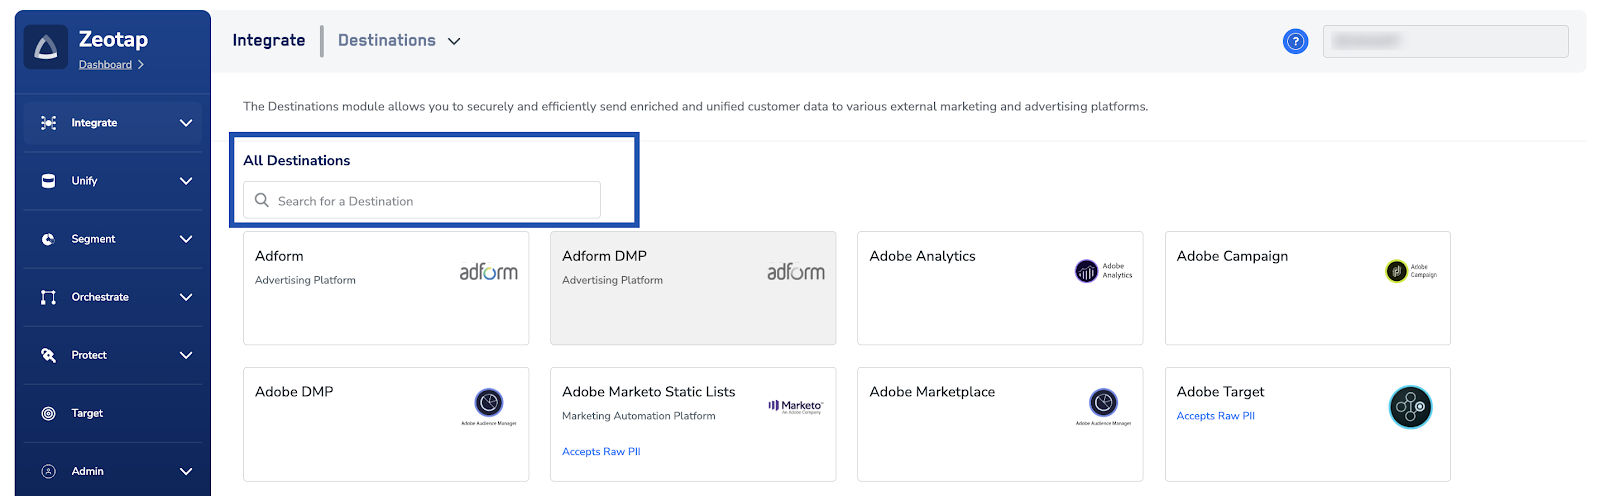
4
Click Responsys. Details about the destination appear on the left of the screen, and the fields required to establish the integration appear on the right. Provide the following: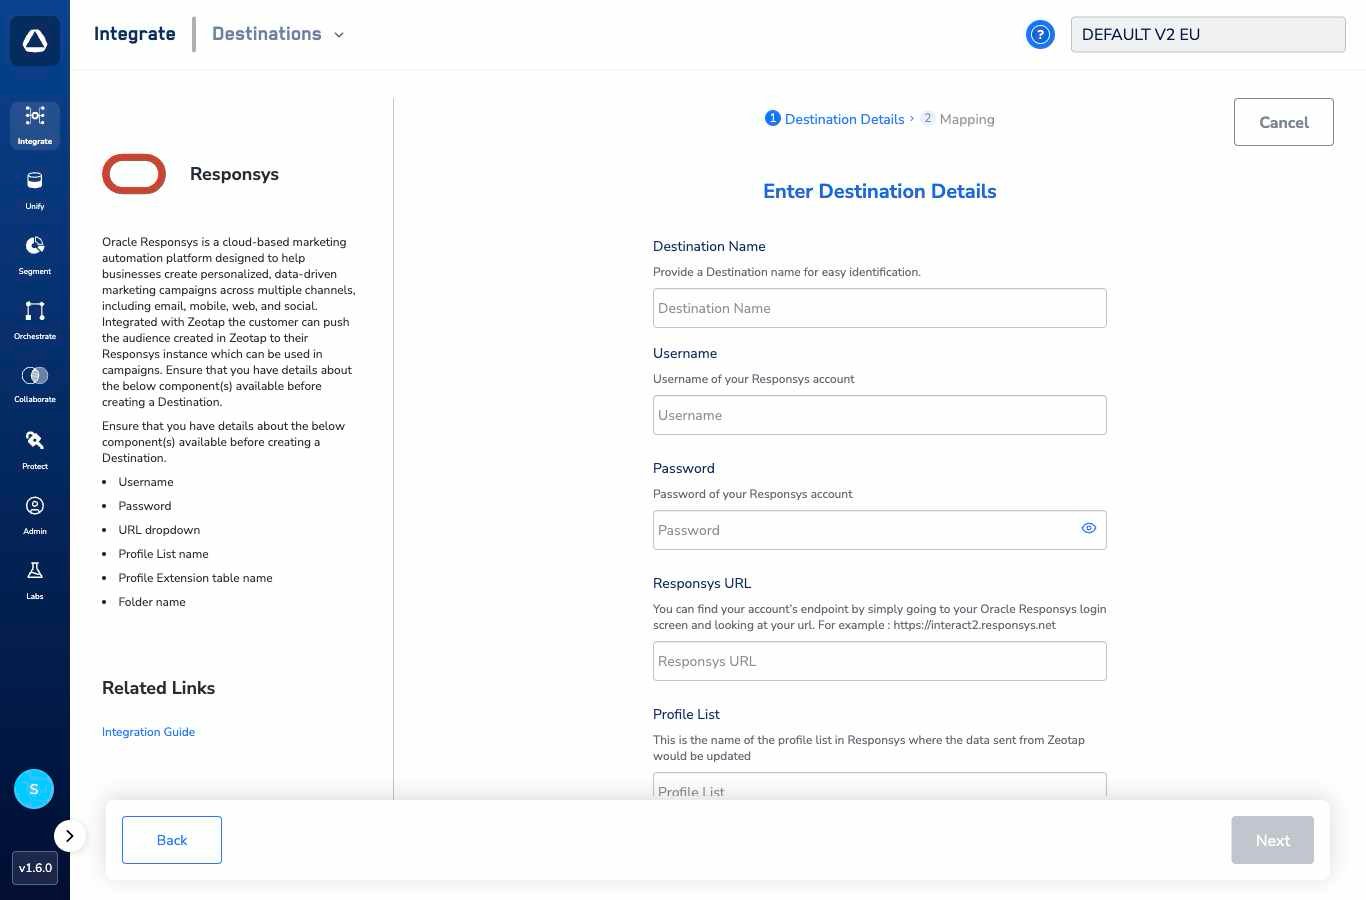
- Destination Name — a name for the destination.
- Username, Password and Responsys URL — the Responsys account details from Prerequisites. Enter the URL of your Responsys instance.
- Profile List and Folder — the Responsys objects from Prerequisites. The profile extension table is named on the mapping screen, not here.
5
On the Actions and Mapping screen that appears, choose the action you want to configure — Send data to Profile List or Send data to Profile Extension table — and map the Catalogue fields to the corresponding destination fields.Map every mandatory field: an unmapped mandatory field causes the destination to fail. For how mappings work, see Define the mapping.
6
Click Create Destination. The created destination is listed in the Audiences application, where it can be linked to an audience.
Link an audience to the destination
The action inputs that Responsys needs — the match columns and the insert and update behaviour — are set when you link an audience, not when you create the destination. For the full walkthrough of linking an audience or segment to a destination, see Activate your batch audiences; the Responsys-specific settings are below.The terms Audiences and Segments are used interchangeably to refer to customer cohorts belonging to a specific category. For example, an Audience or a segment could be a specific group of customers who are over 18 years of age and who have performed an
addToCart event within the last 30 days.1
Under Choose your Action and Mapping, choose the action this activation runs and the corresponding mapping.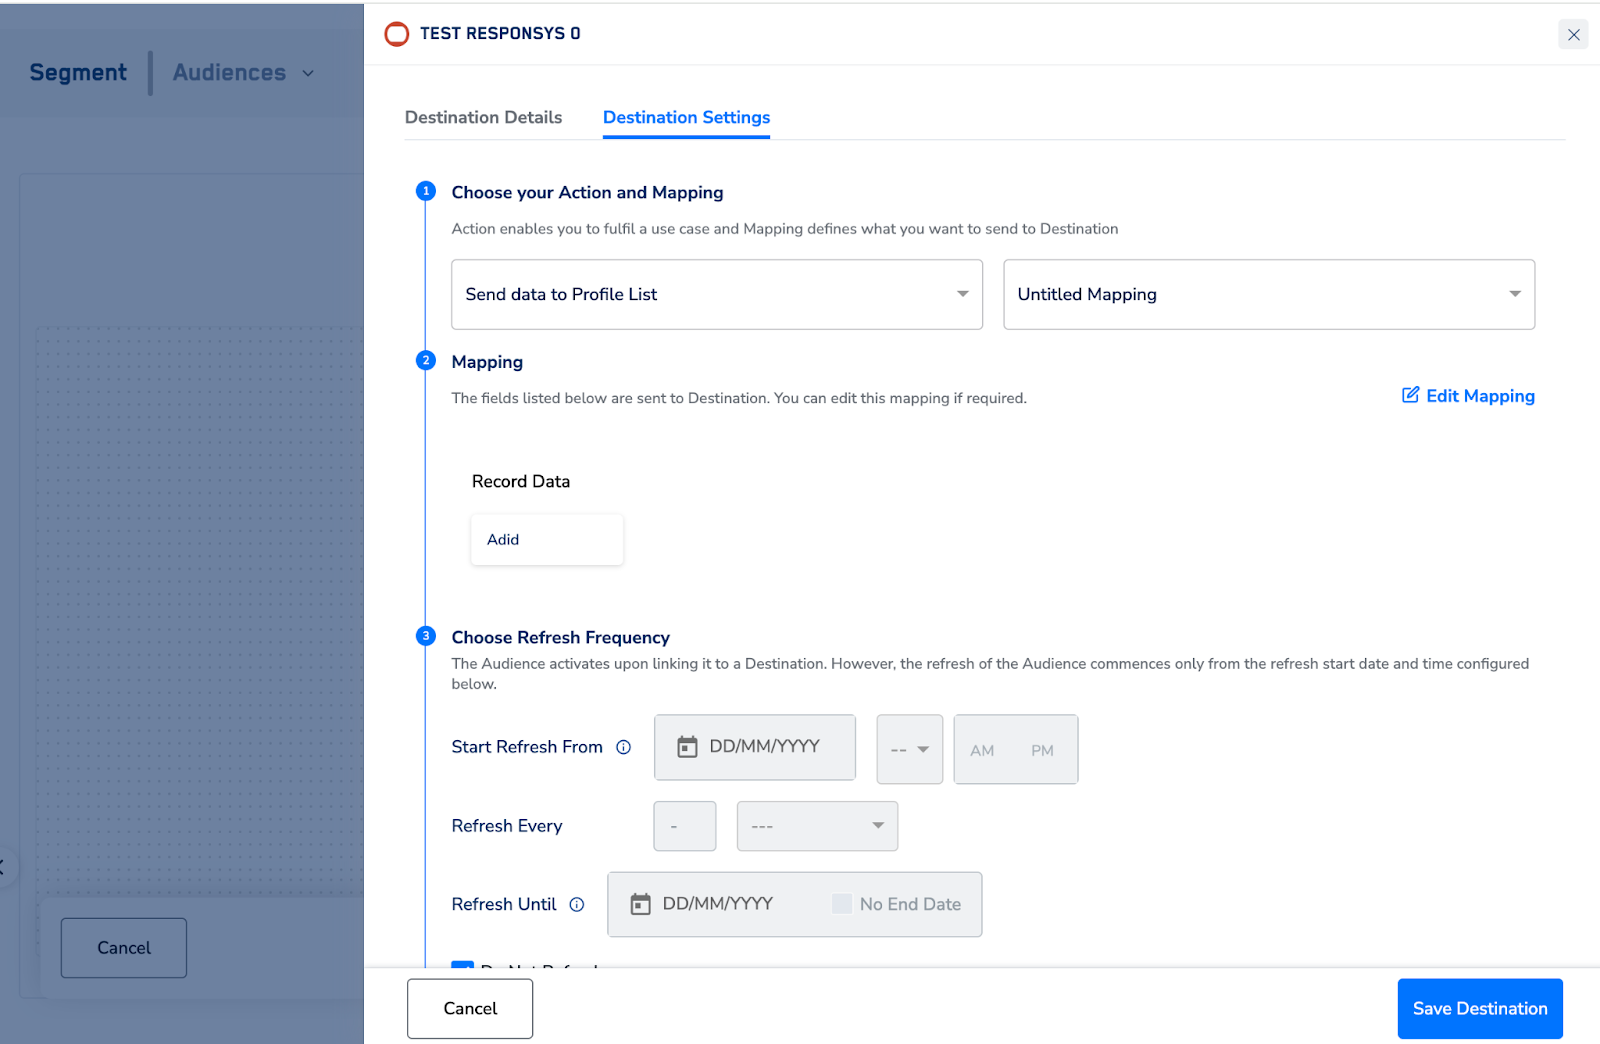
2
Under Choose Refresh Frequency, set the refresh schedule for the audience, or select Do Not Refresh.
3
Under Audience Settings, fill in the Action Inputs for the action you chose.For Send data to Profile List: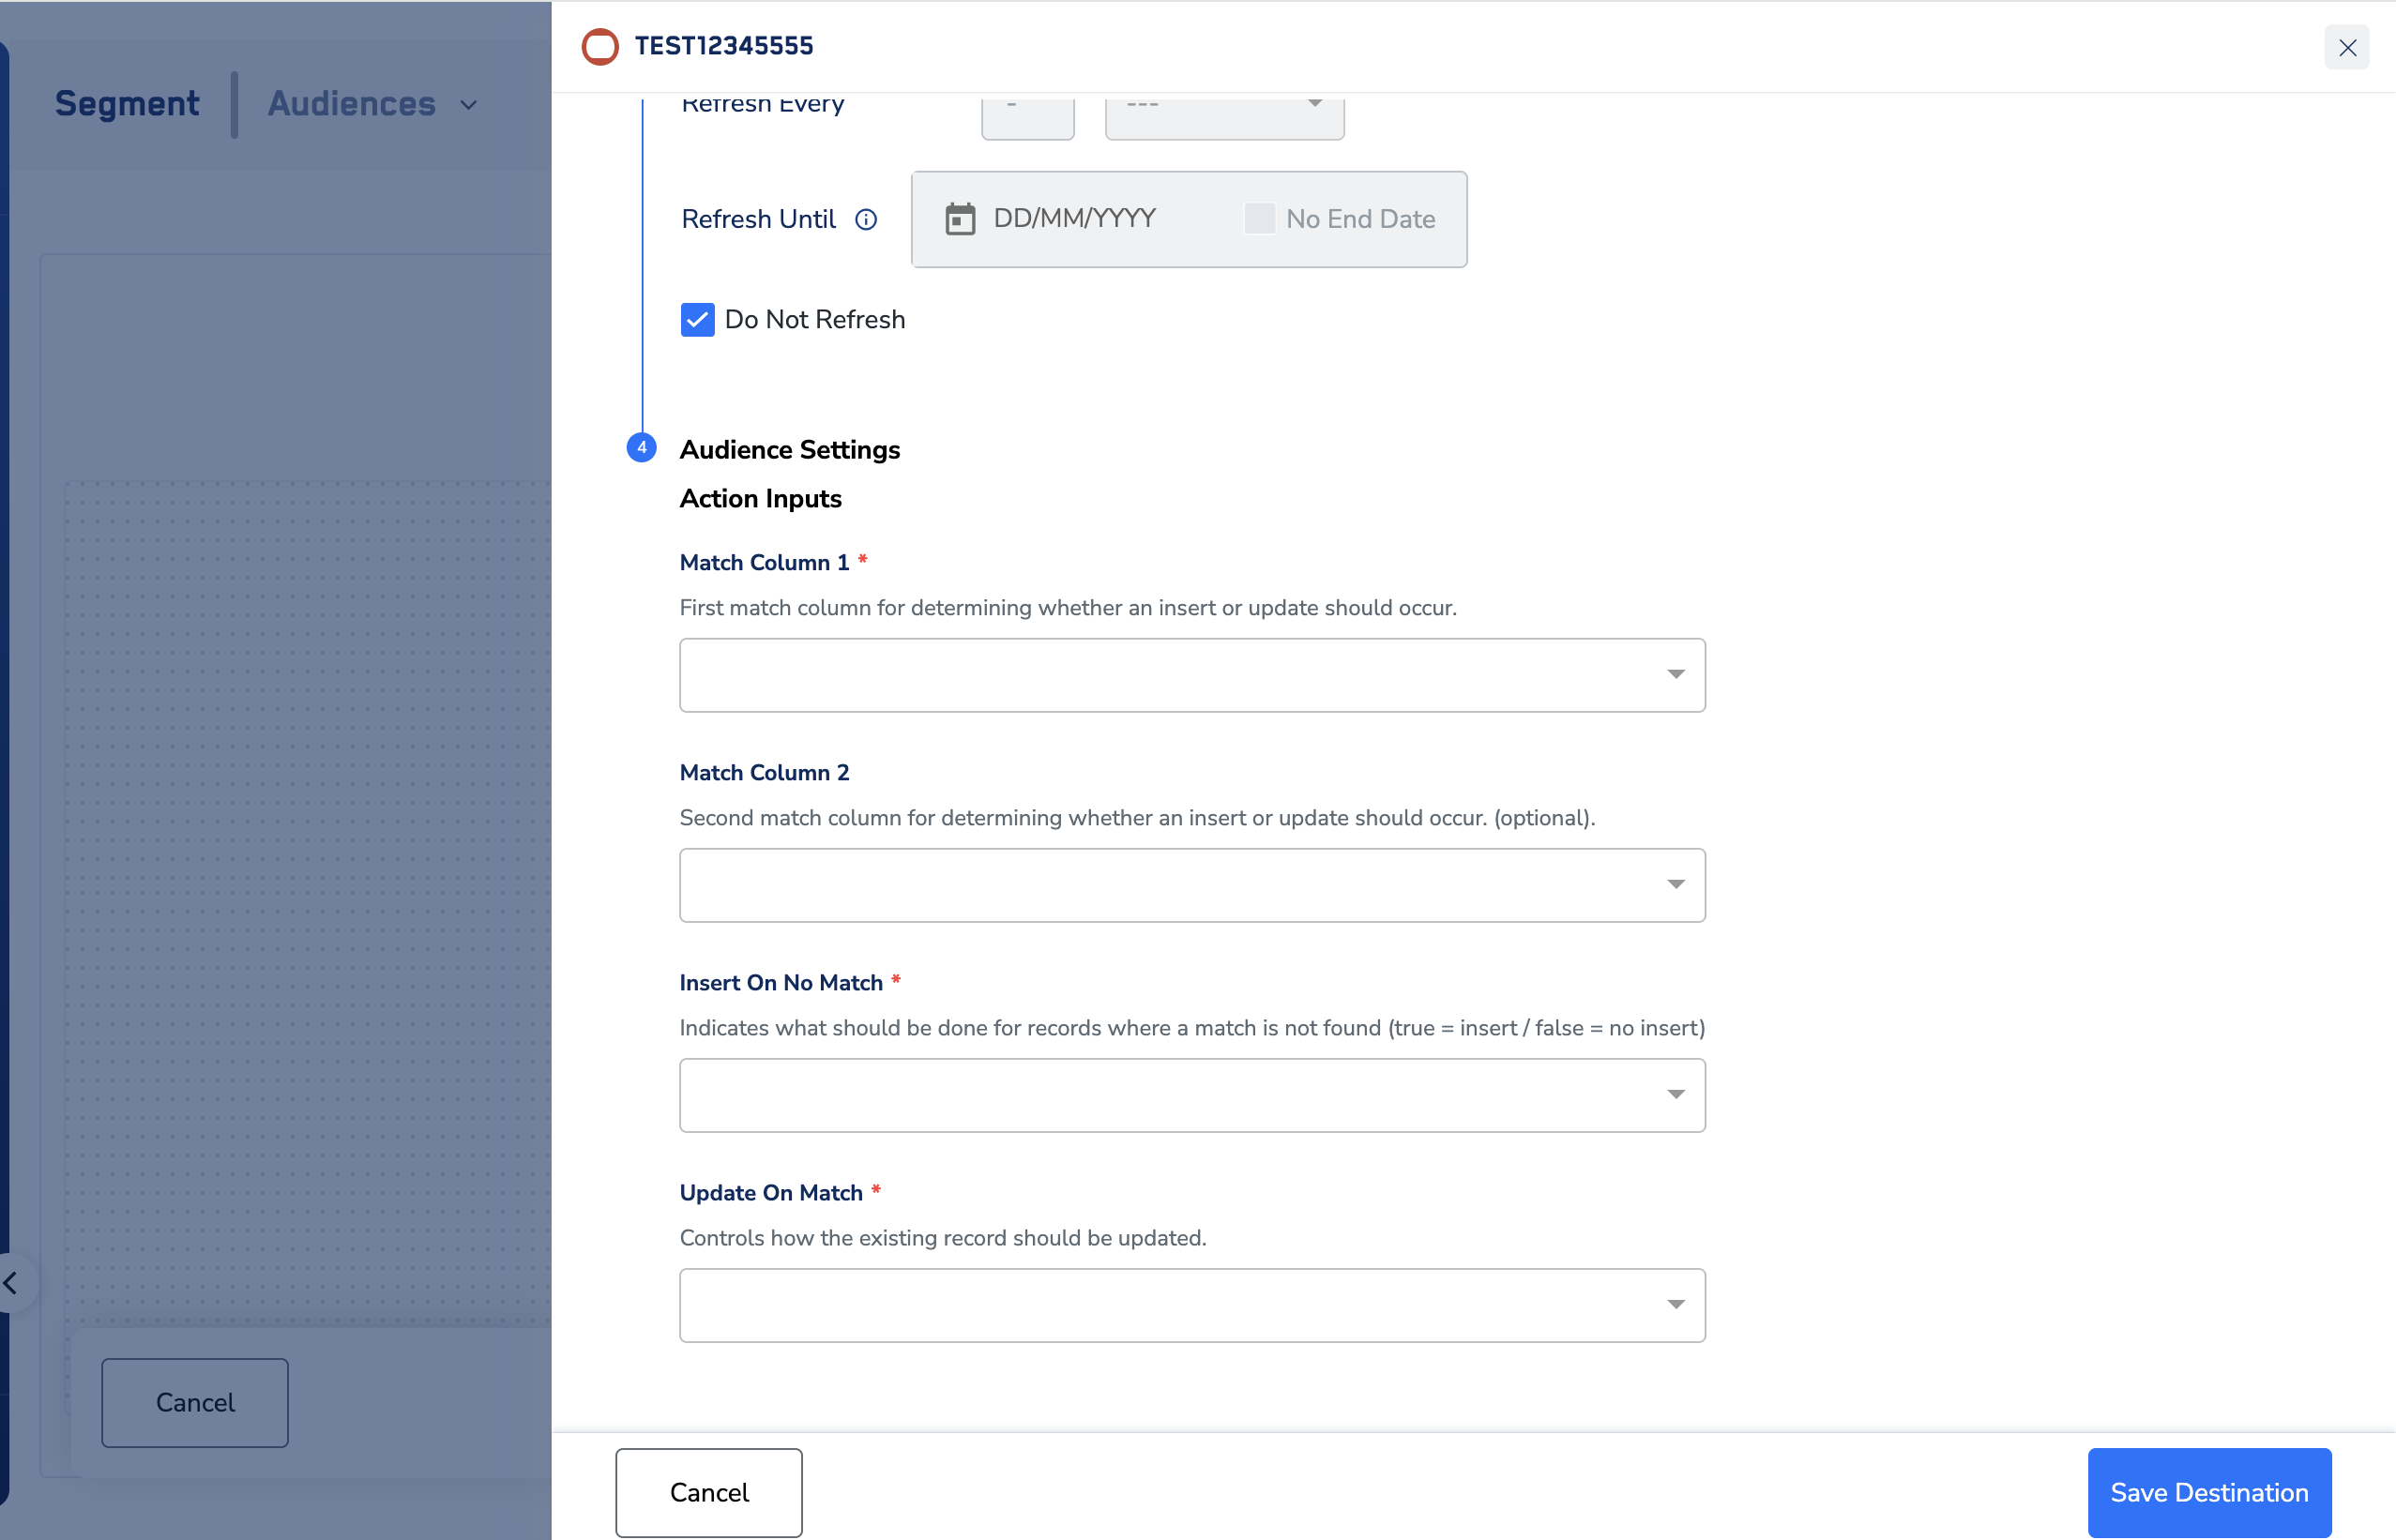
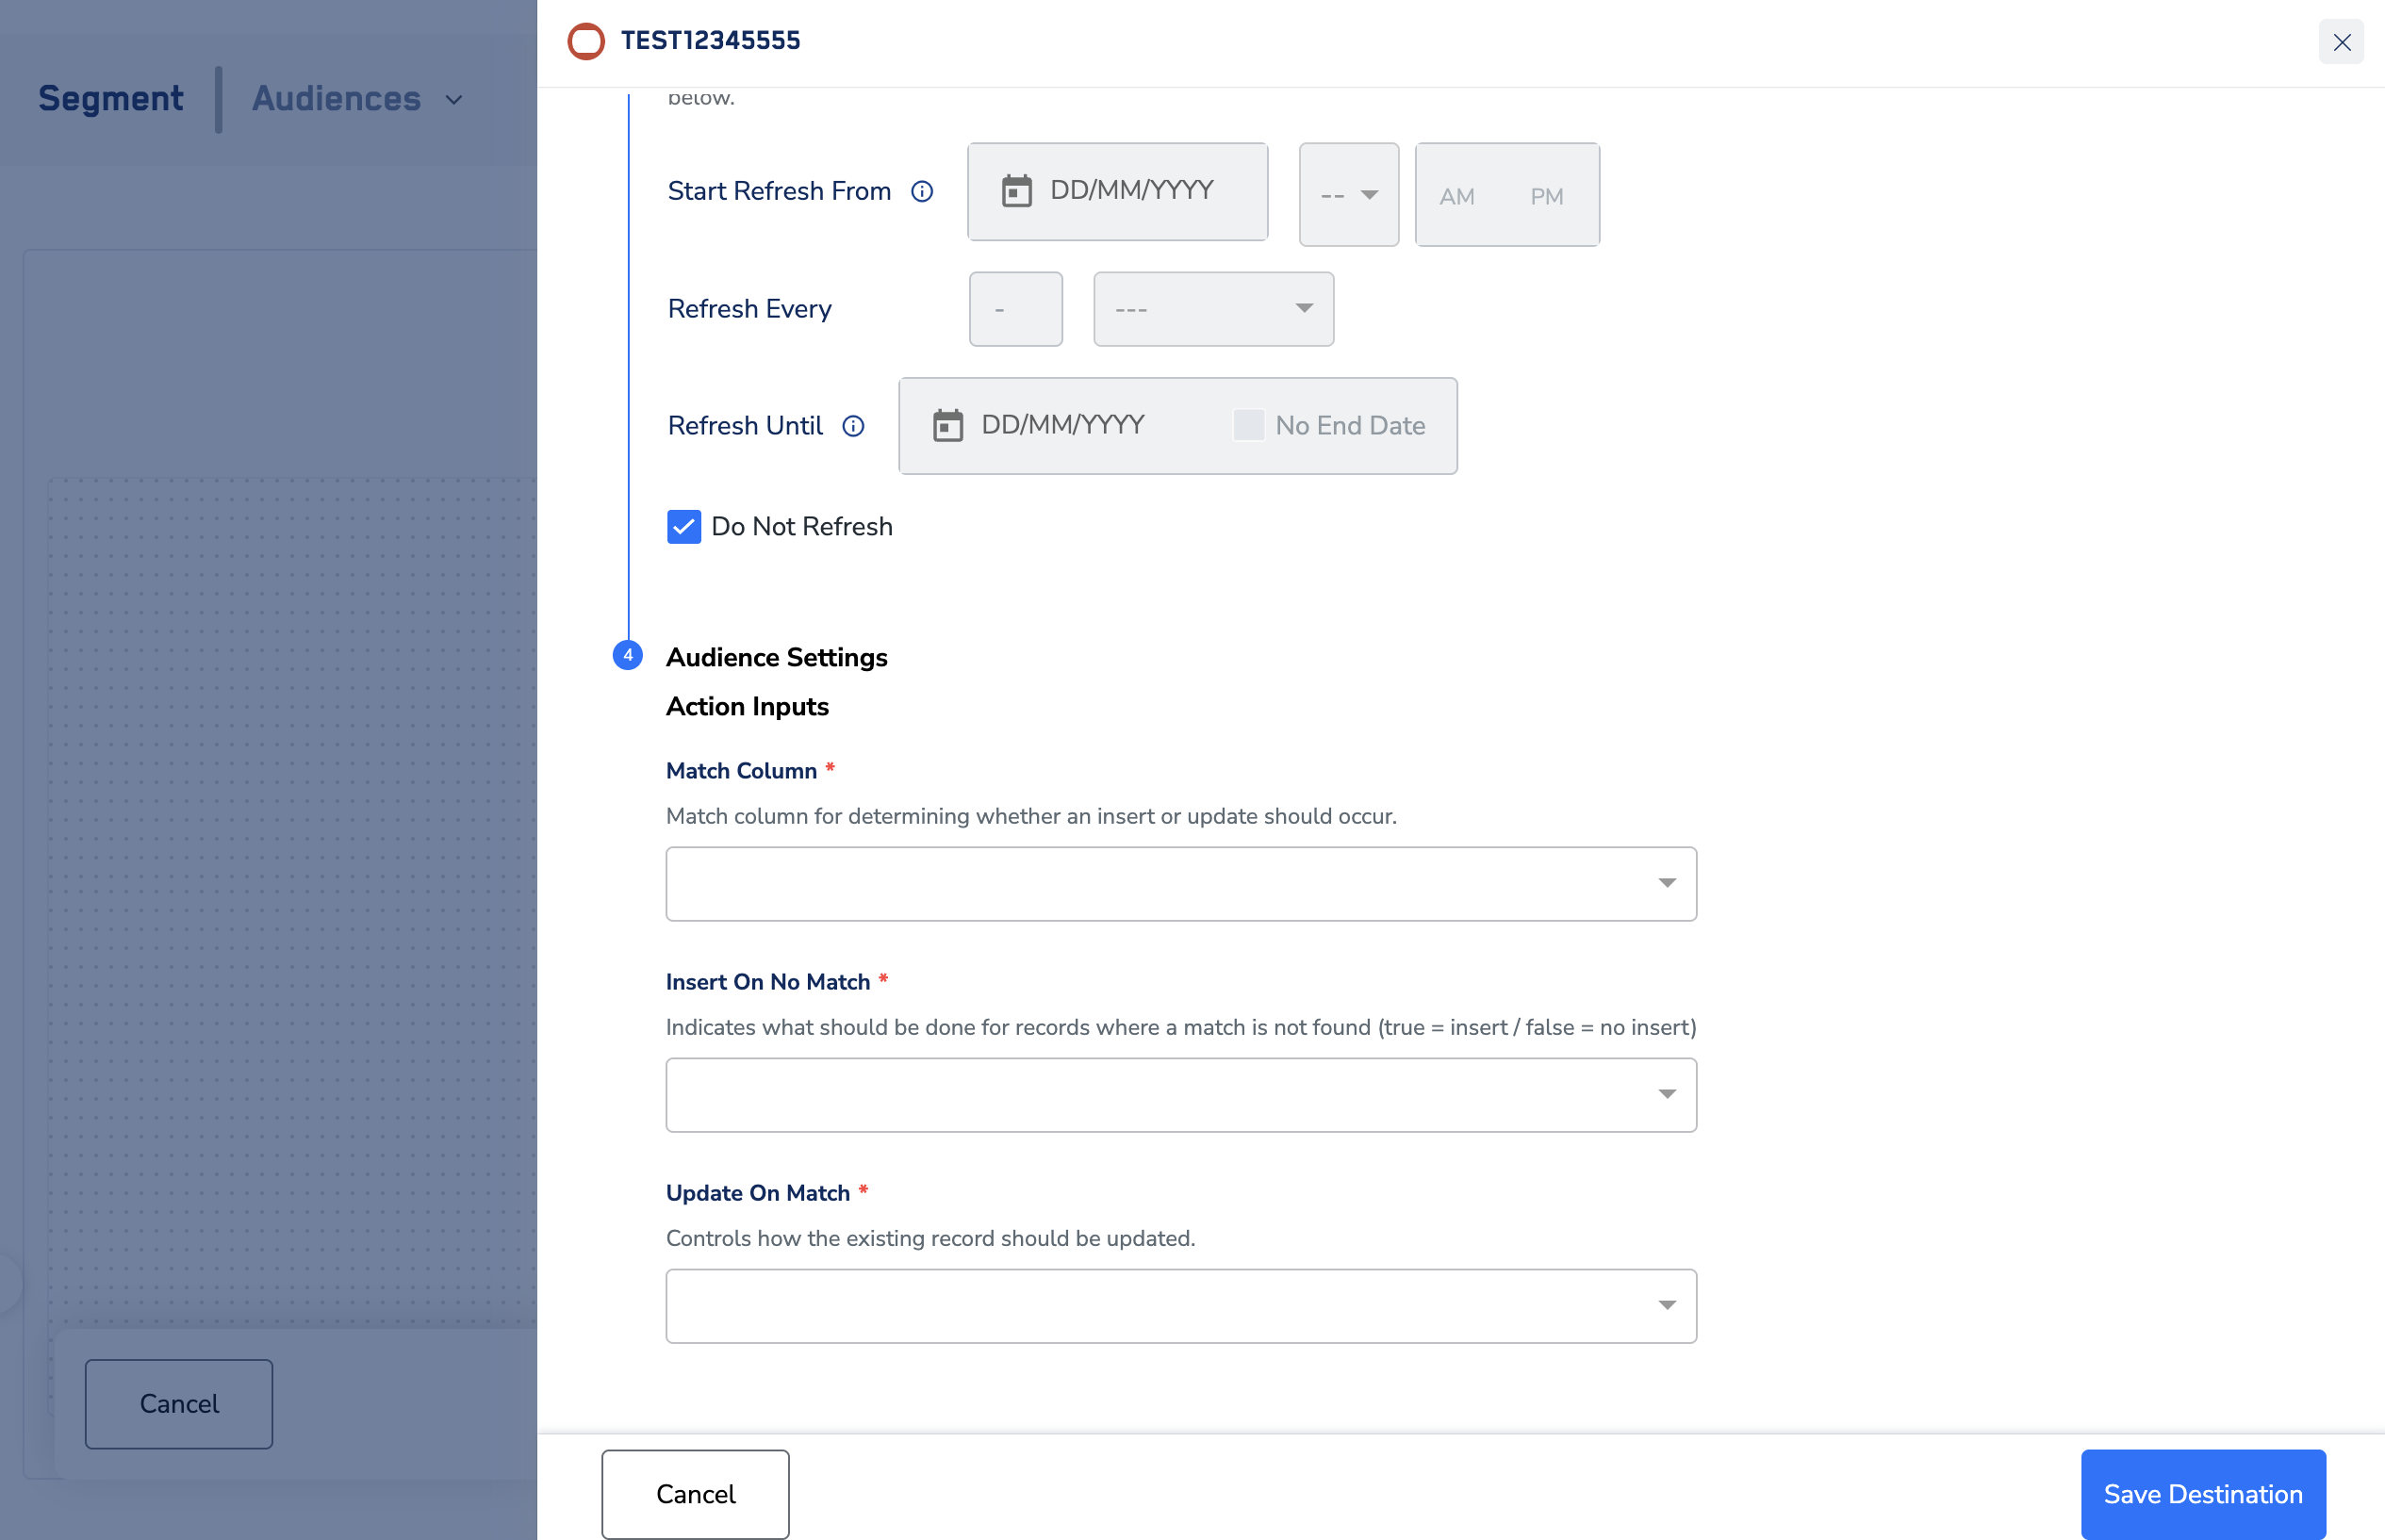
- Match Column 1 (required) — first match column for determining whether an insert or update should occur in Responsys.
- Match Column 2 (optional) — second match column for determining whether an insert or update should occur in Responsys.
- Insert On No Match (required) — indicates what should be done for records where a match is not found in Responsys (true = insert / false = no insert).
- Update On Match (required) — controls how the existing record should be updated in Responsys (values: Replace All, No Update).
- Match Column (required) — match column for determining whether an insert or update should occur in Responsys.
- Insert On No Match (required) — indicates what should be done for records where a match is not found in Responsys (true = insert / false = no insert).
- Update On Match (required) — controls how the existing record should be updated in Responsys (values: Replace All, No Update).
4
Click Save Destination.
Verify the activation
- In Zeotap — after you click Save Destination, the destination moves to In Progress while the IDs are uploaded, and changes to Success once all the IDs have uploaded.
- In Responsys — open the profile list or profile extension table you named on the destination and confirm the records are present. The record count in Responsys does not necessarily match the audience count in Zeotap, because Insert On No Match governs whether records with no matching Responsys record are inserted at all.
Troubleshoot the destination
For delivery errors that surface on the audience–destination pair after activation, see Why deliveries fail.
Next steps
- Activate your batch audiences — the full audience activation walkthrough.
- Responsys real-time integration — trigger Responsys campaigns from a Journeys workflow.
- Destinations — how destinations, actions and mappings fit together.