What this is
Facebook Product Catalog is a Zeotap CDP destination that sends product data out of Zeotap CDP to Facebook, where it lands in a catalogue held in your Facebook Business Manager account. A Facebook Product Catalog is a container that holds information about the items you want to advertise or sell across Facebook platforms. Once your product data reaches it, you can create dynamic ads that automatically promote relevant products to people who have expressed interest on your website, app, or elsewhere on the internet. The destination is a batch integration: you configure it in the Destinations application, then link a product feed to it from the Audiences application. Other Facebook destinations send different data to the same platform:- To send offline conversion data to Meta, see Facebook Enhanced Conversions API (Send Offline data).
- To send audience segments to Meta as Custom Audiences, see Facebook 1P (Meta).
Supported actions and fields
On the mapping screen, Choose your Action sets what the destination does with your data. Send Products to Facebook Catalogue sends product records to the catalogue you identified by its Catalog ID. Under Map the Fields, the destination fields that the platform accepts are listed by default under Product Attributes — product ID, title, description, price, availability, brand and more. ID and Title are marked as required. You can edit, add or remove an attribute in that list; for how the mapping screen works, see Define the mapping.Prerequisites
Have the following ready before you create the destination.- Facebook Business Manager account — an active account with a Product Catalog linked to it.
- Catalog ID — the unique identifier for your Facebook Product Catalog. Found in Commerce Manager at Assets > Catalogues, where each catalogue’s Catalogue ID is listed beneath its name.
- API key and permissions — a valid Facebook API key with the
catalog_managementpermission to create, edit and manage product catalogues, and theads_managementpermission for running dynamic ads with the catalogue. You enter this value in the destination’s Access Token field. - Commerce Policies acceptance — you must accept Facebook’s Commerce Policies terms. This is a mandatory step.
- Product data attributes — a product feed containing Product ID, Title, Description, Price, Availability, Image URLs, Brand, and other catalog-specific fields.
Create the Facebook Product Catalog destination
1
Sign in to the Zeotap CDP app and open Integrate > Destinations.
2
Click + Create Destination.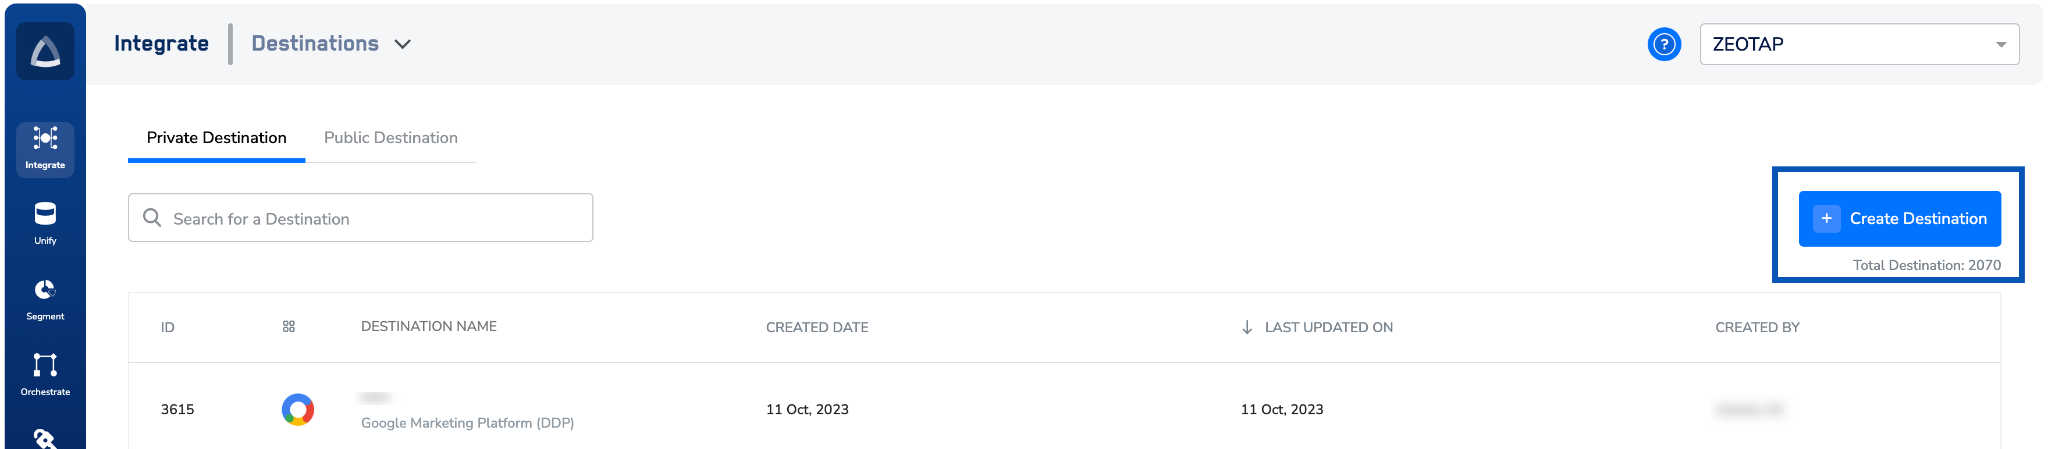
3
Under All Destinations, search for Facebook Product Catalog.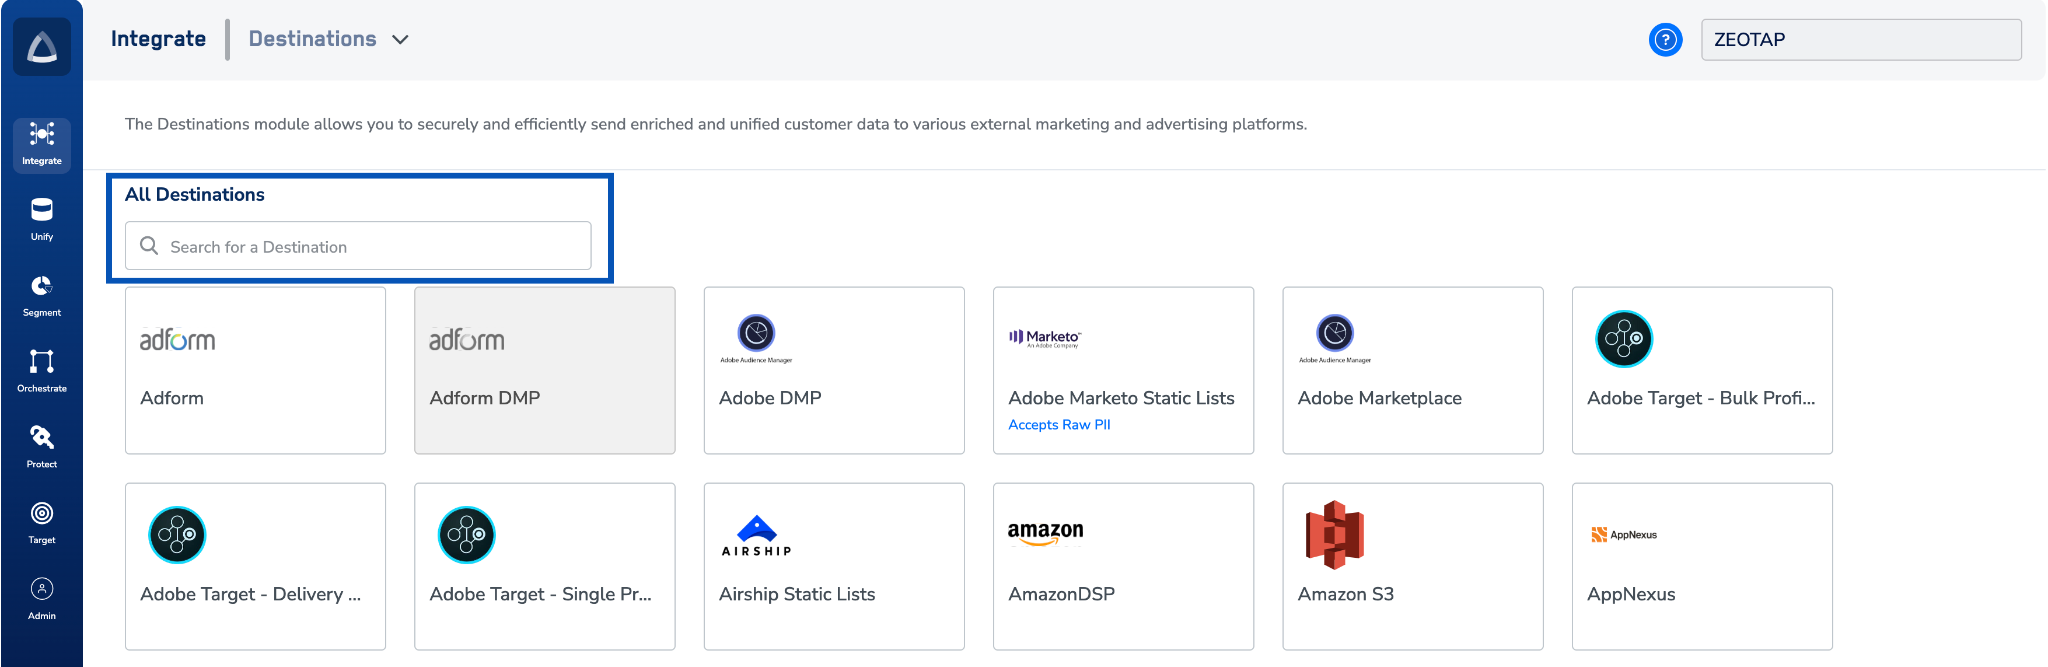
4
Click Facebook Product Catalog.A screen appears with details about the destination on the left. On the right-hand side is the list of fields required to establish the integration.
5
In Destination Name, enter a name for the destination.
6
In Access Token, enter your access token.
7
In Product Catalog ID, enter the Catalog ID number.
8
Review the values you entered, then click Next.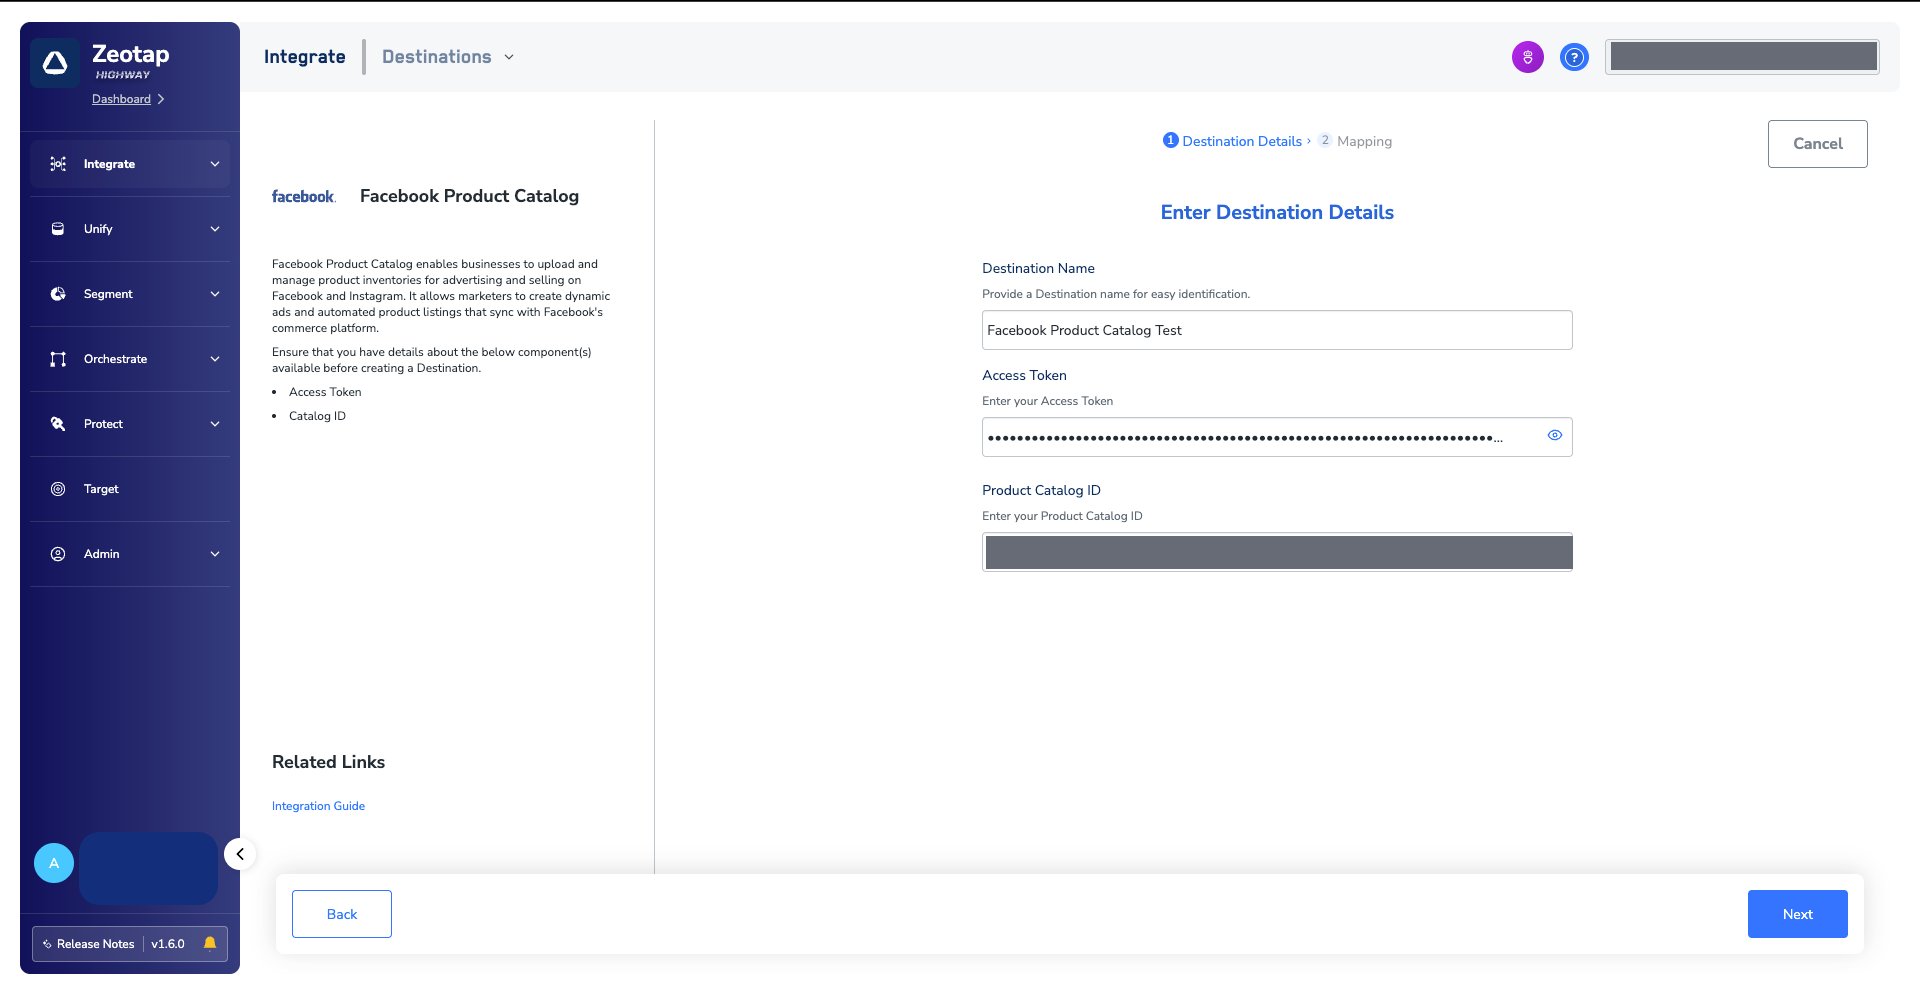
9
On the mapping screen, choose the action and the mapping: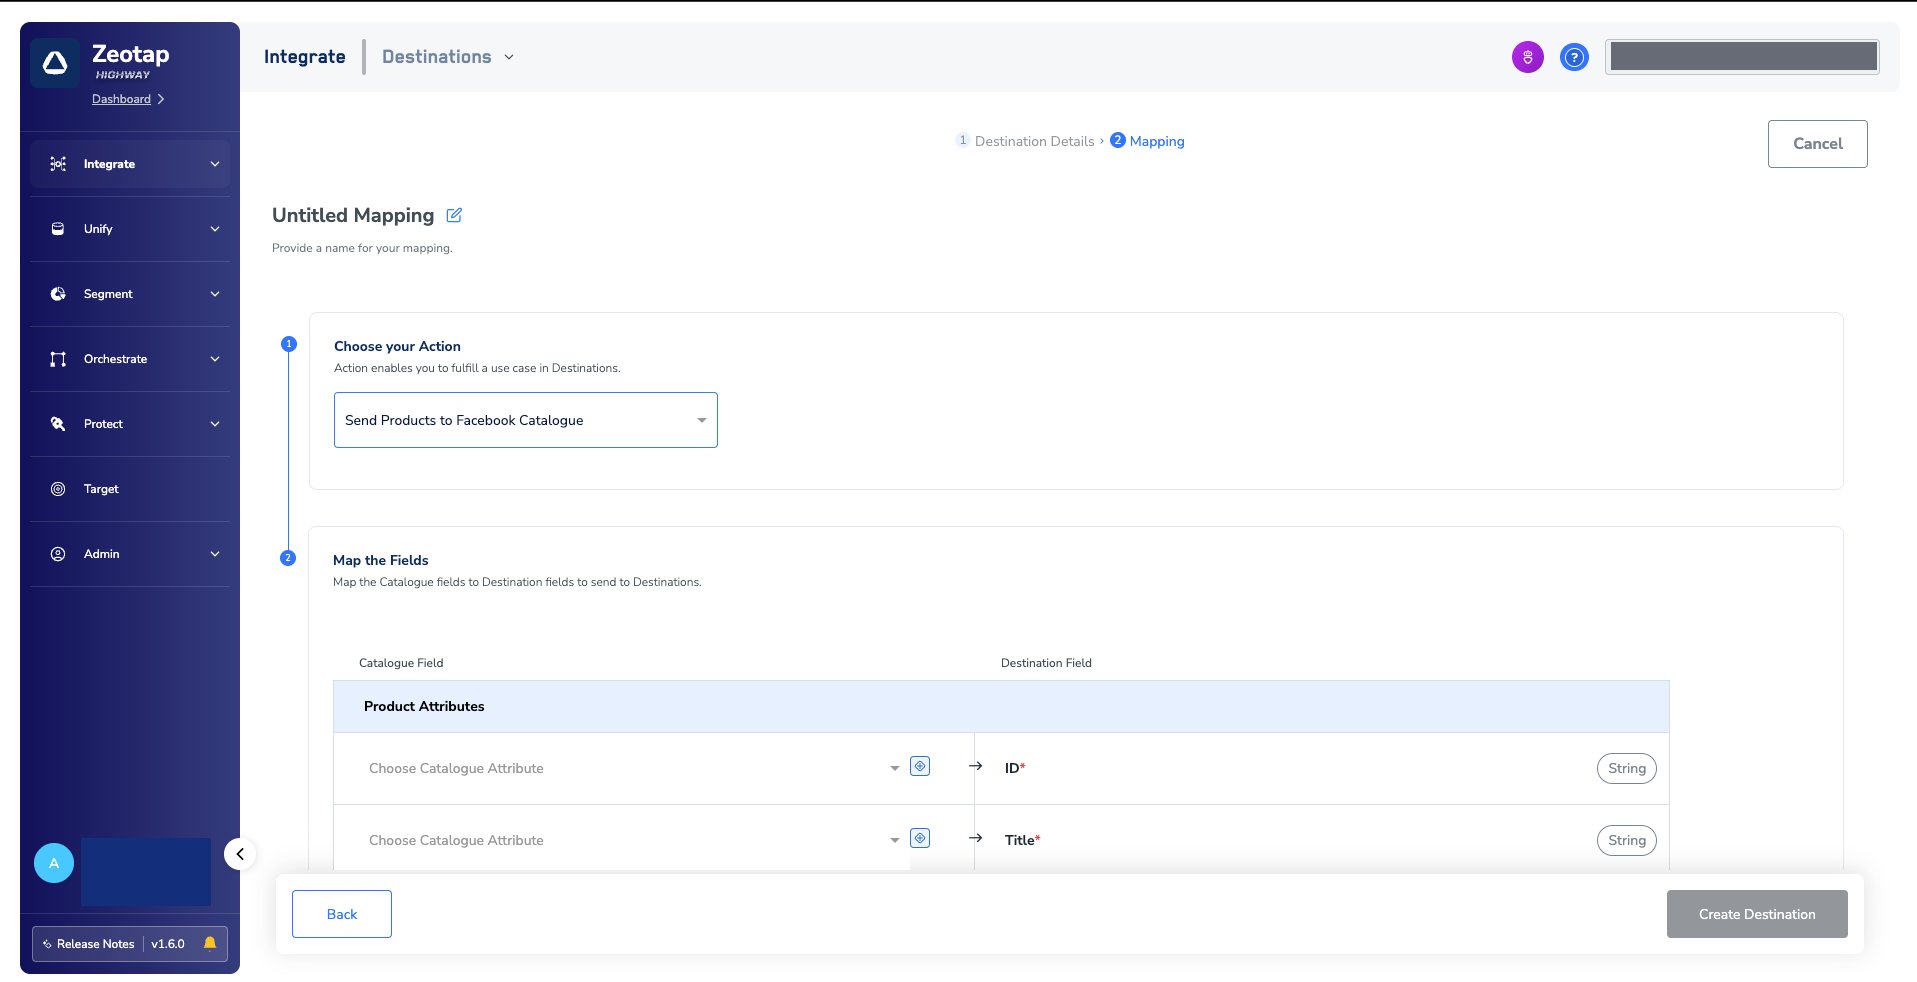
- Under Choose your Action, select Send Products to Facebook Catalogue, then pick the corresponding product attributes under Map the Fields.
- Click Create Destination. The created destination is listed in the Target and Audiences applications, where it can be linked to a product feed.
Link a product feed to the destination
For how to link a product feed to the created destination in the Audiences application, see Activate your batch audiences.Verify the products reached Facebook
1
Log into the Facebook console with the appropriate credentials.
2
Go to All tools and select Commerce Manager.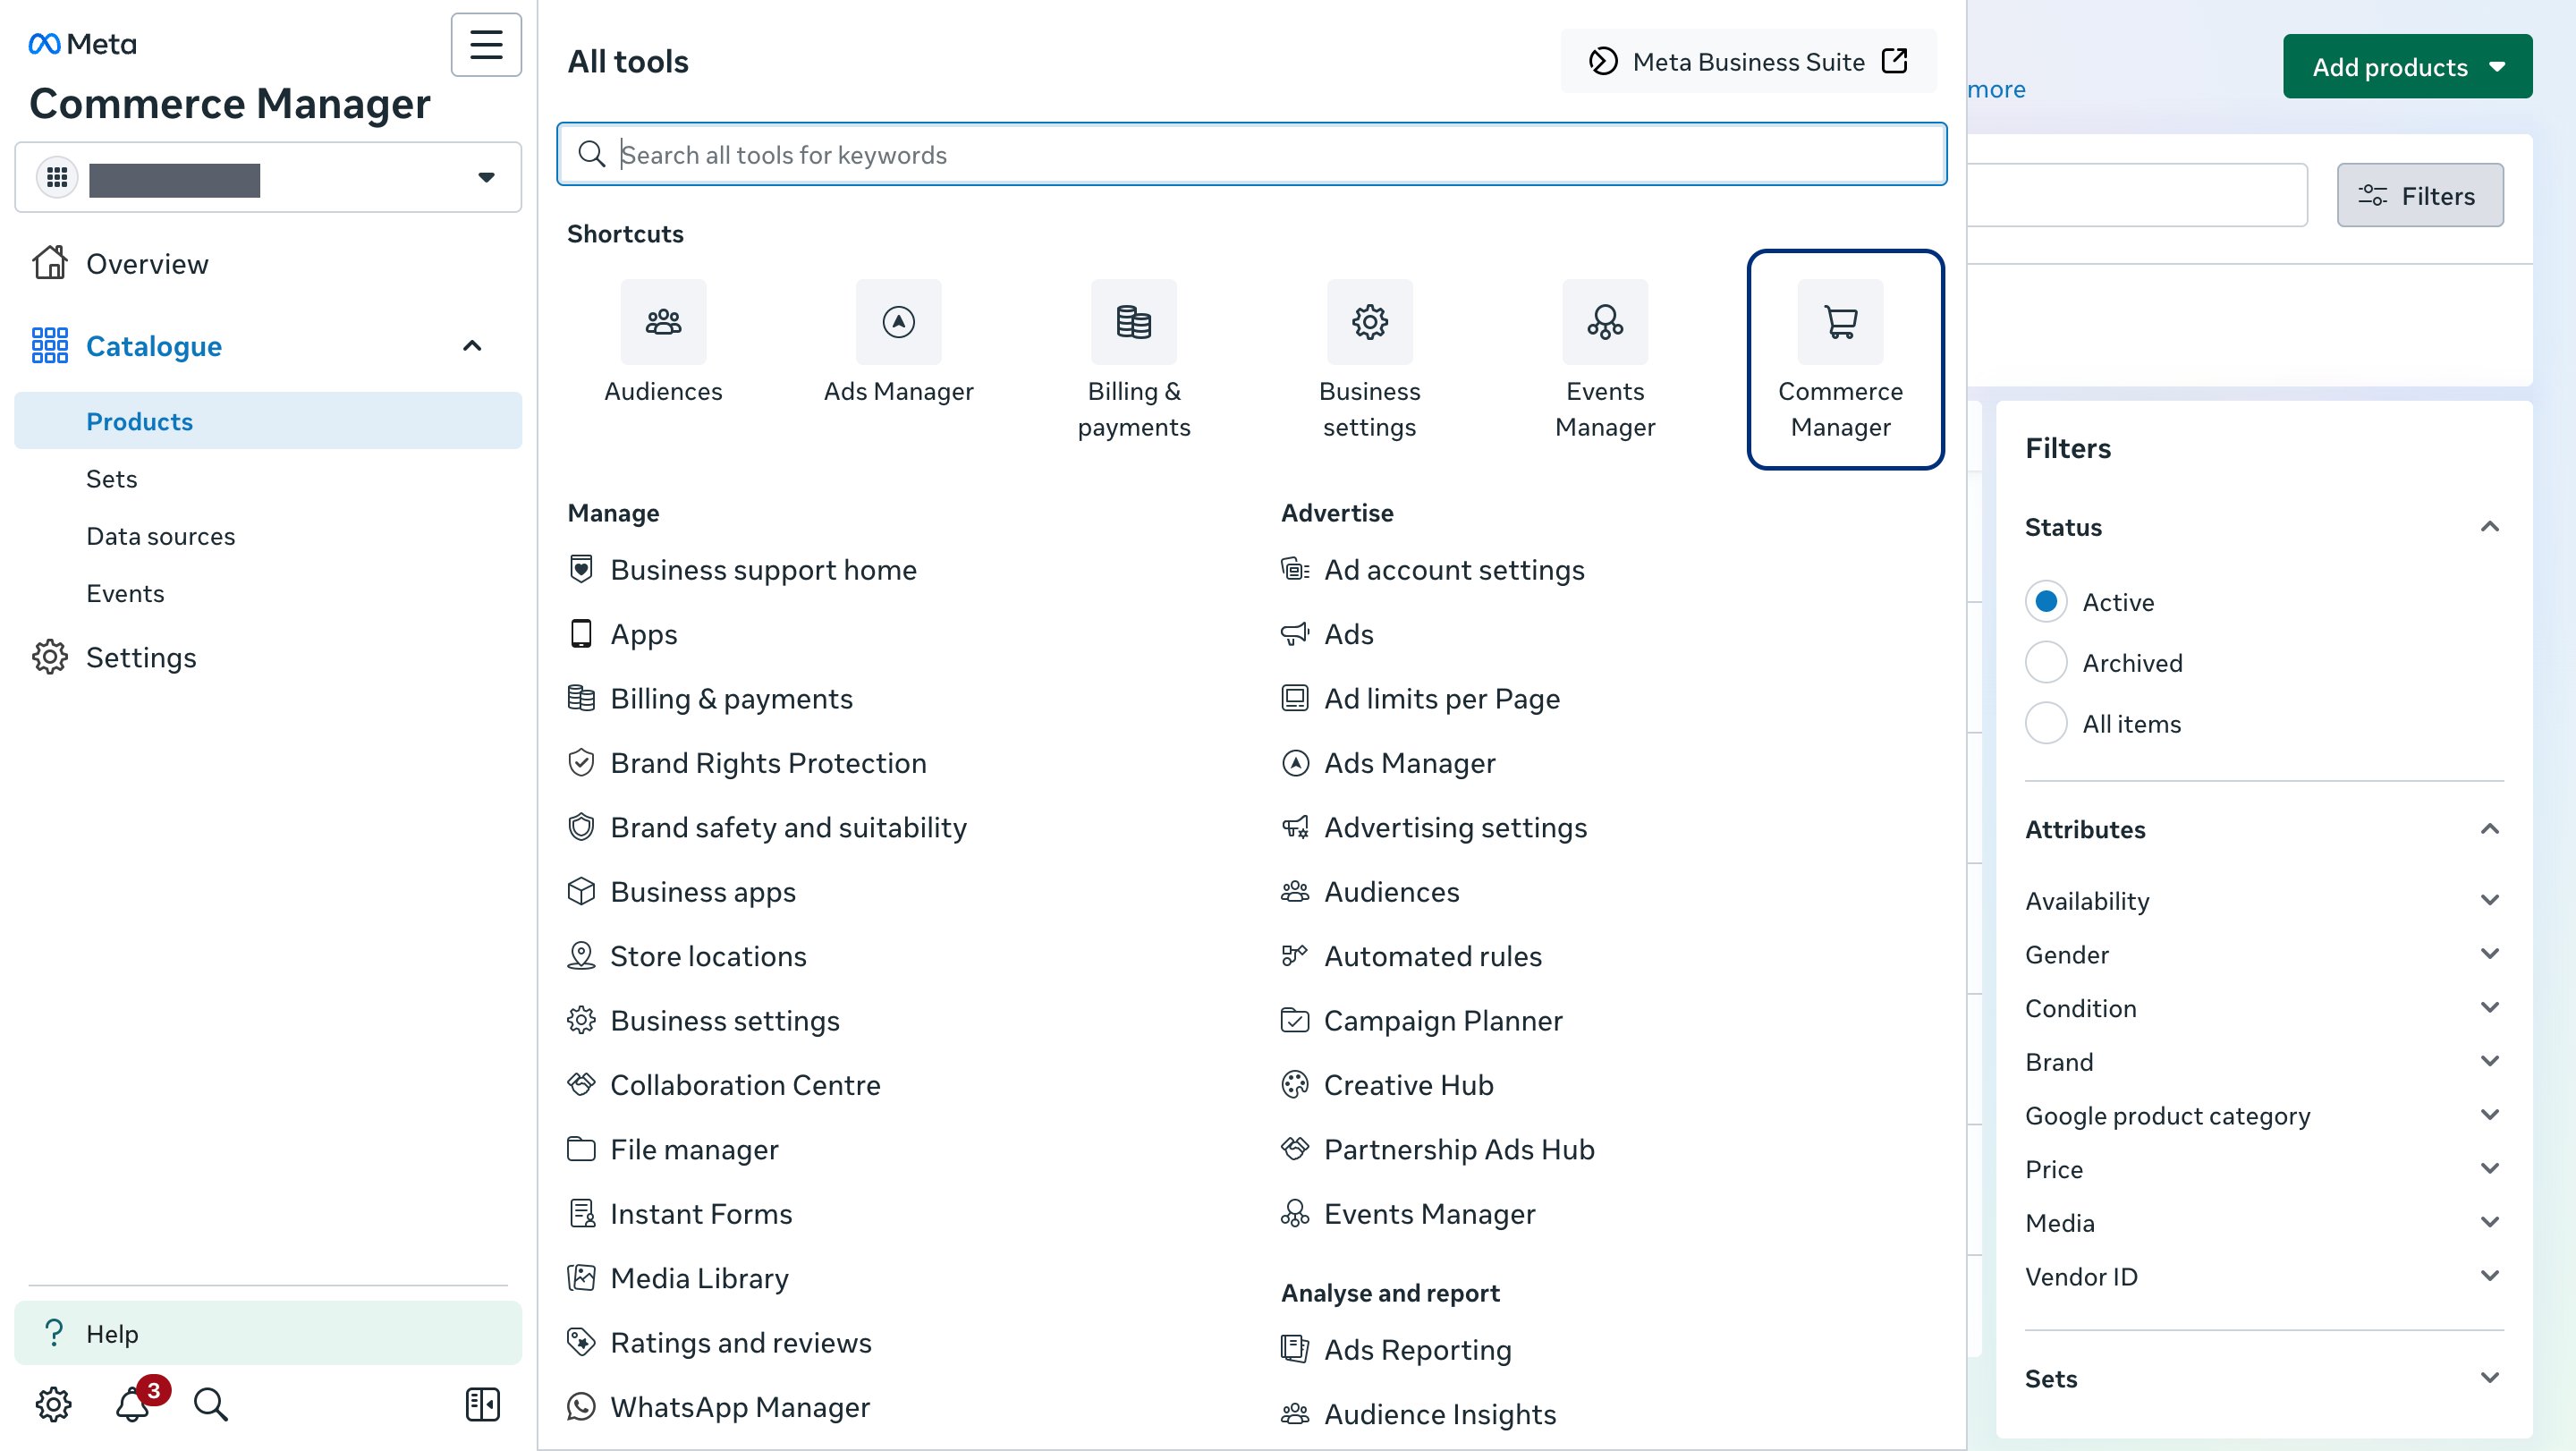
3
Select Catalogues and choose your catalogue.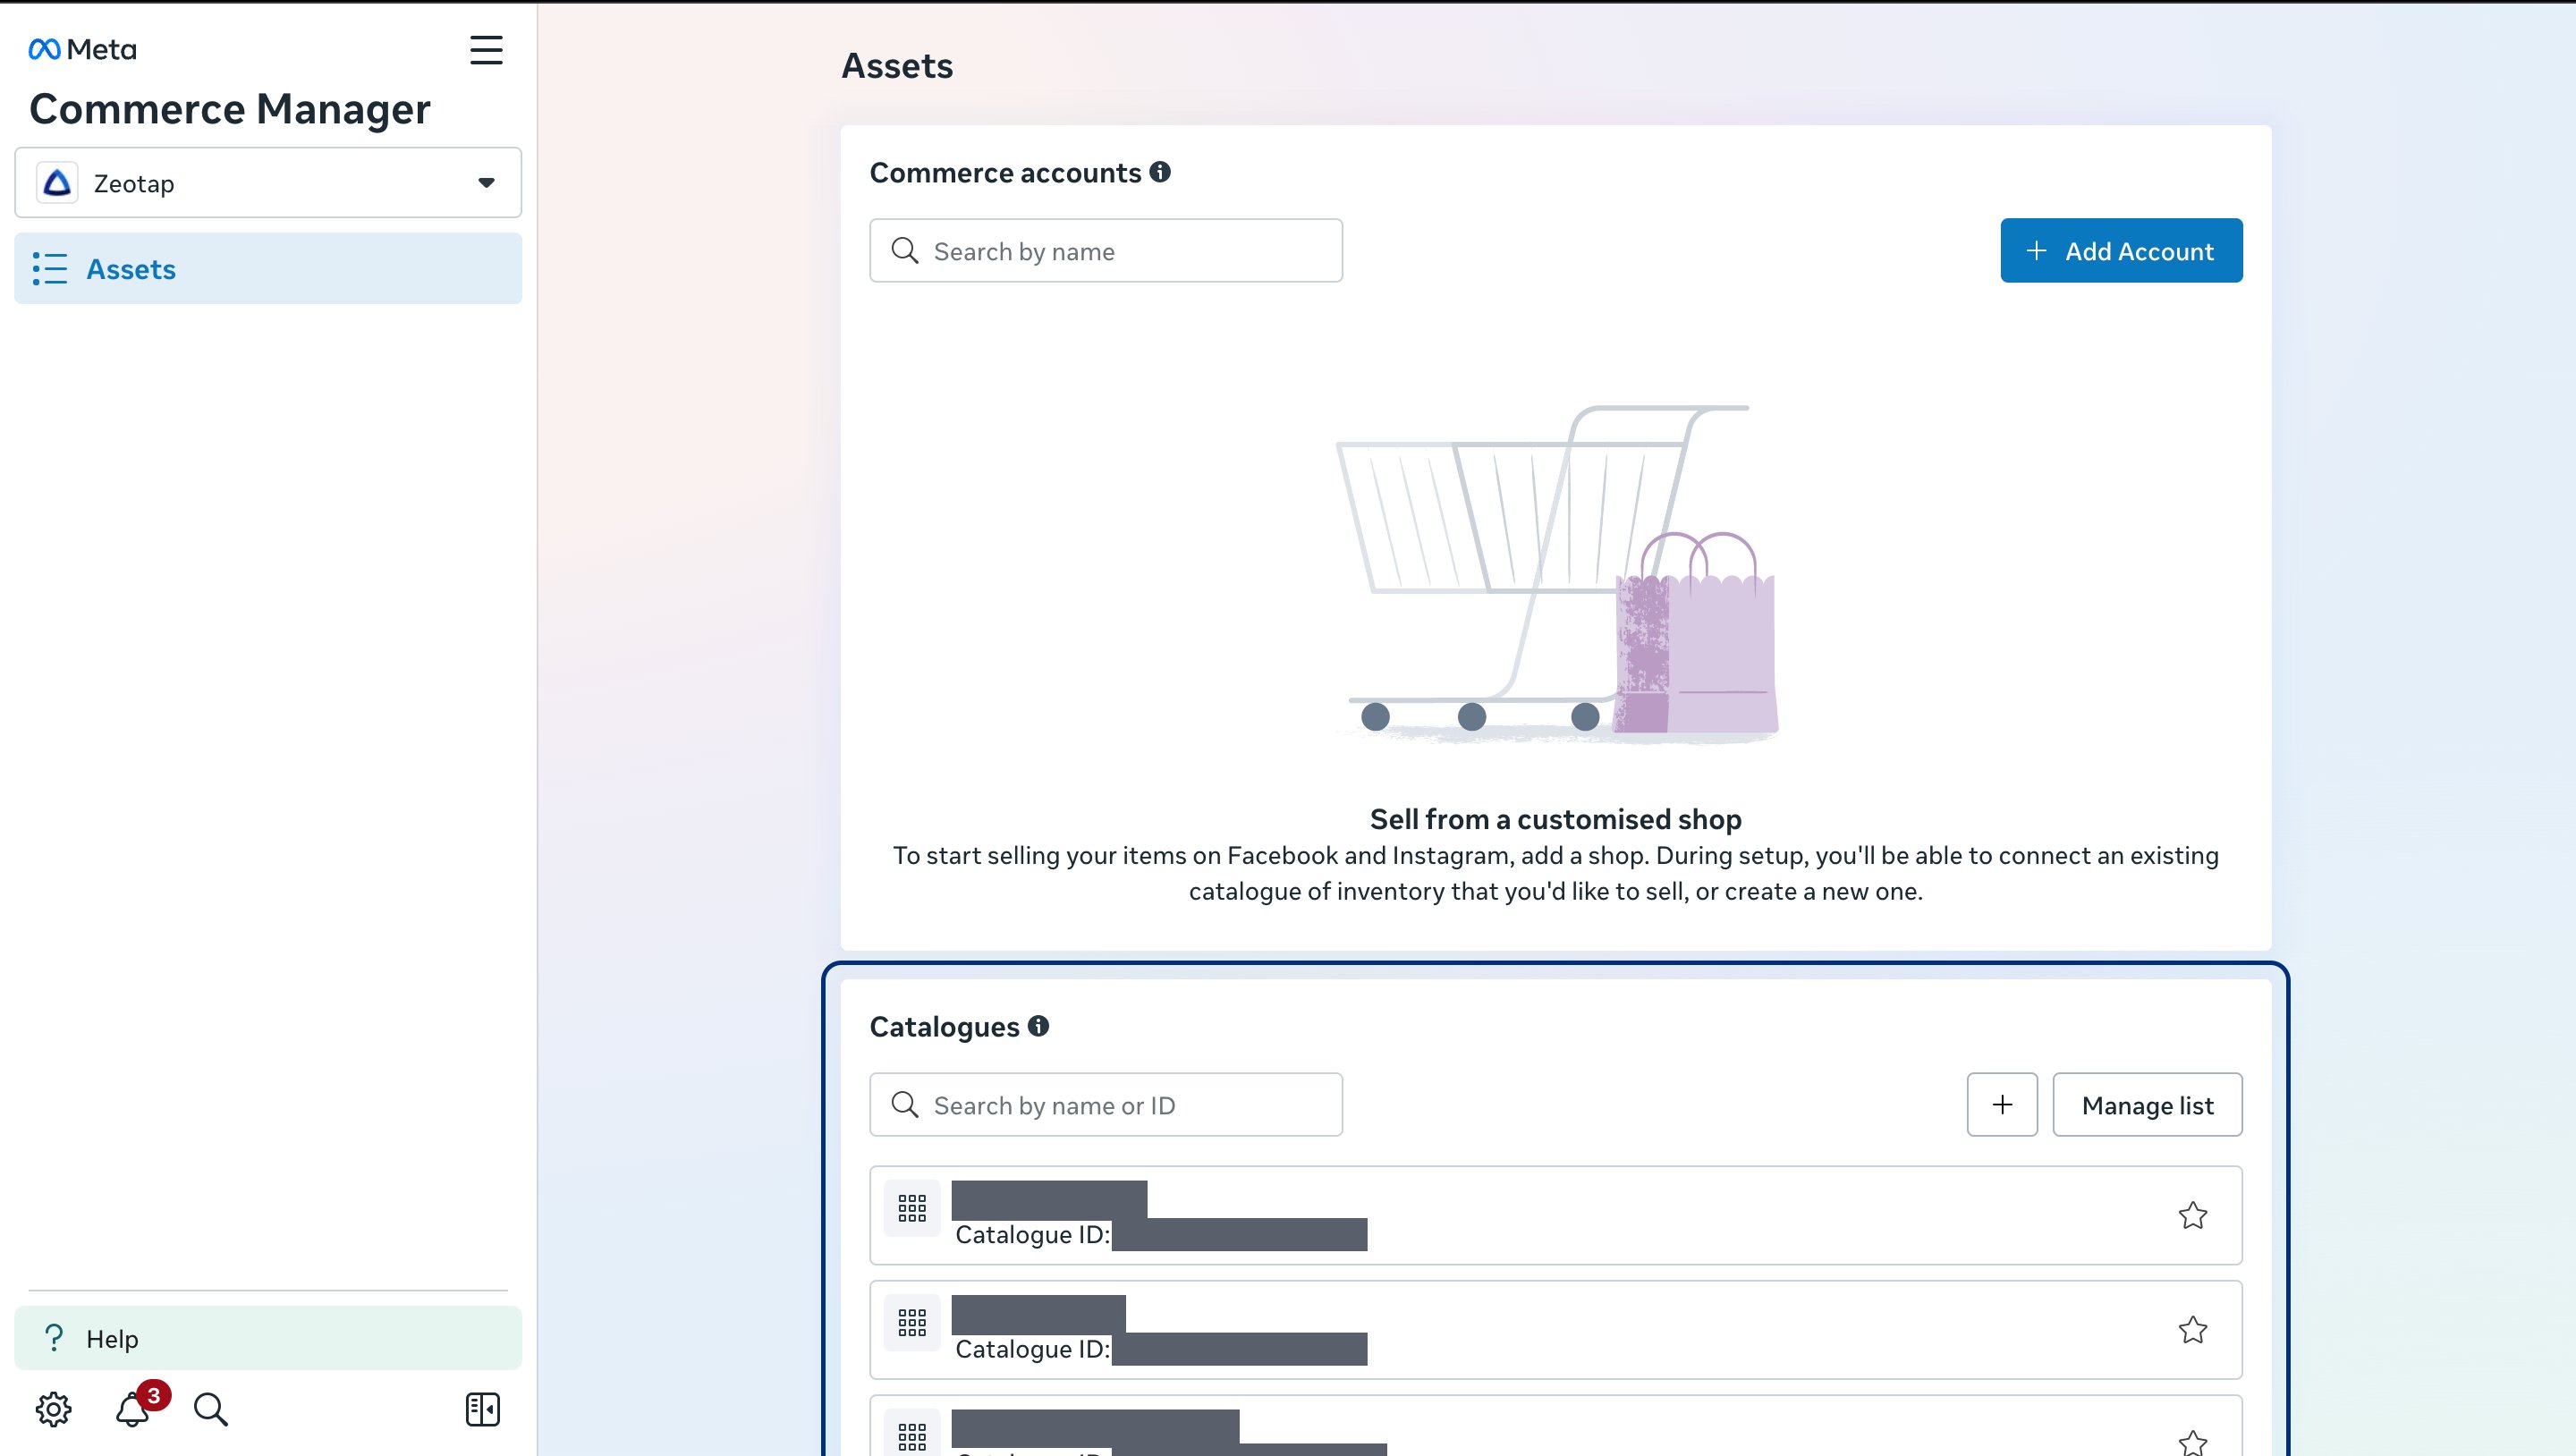
4
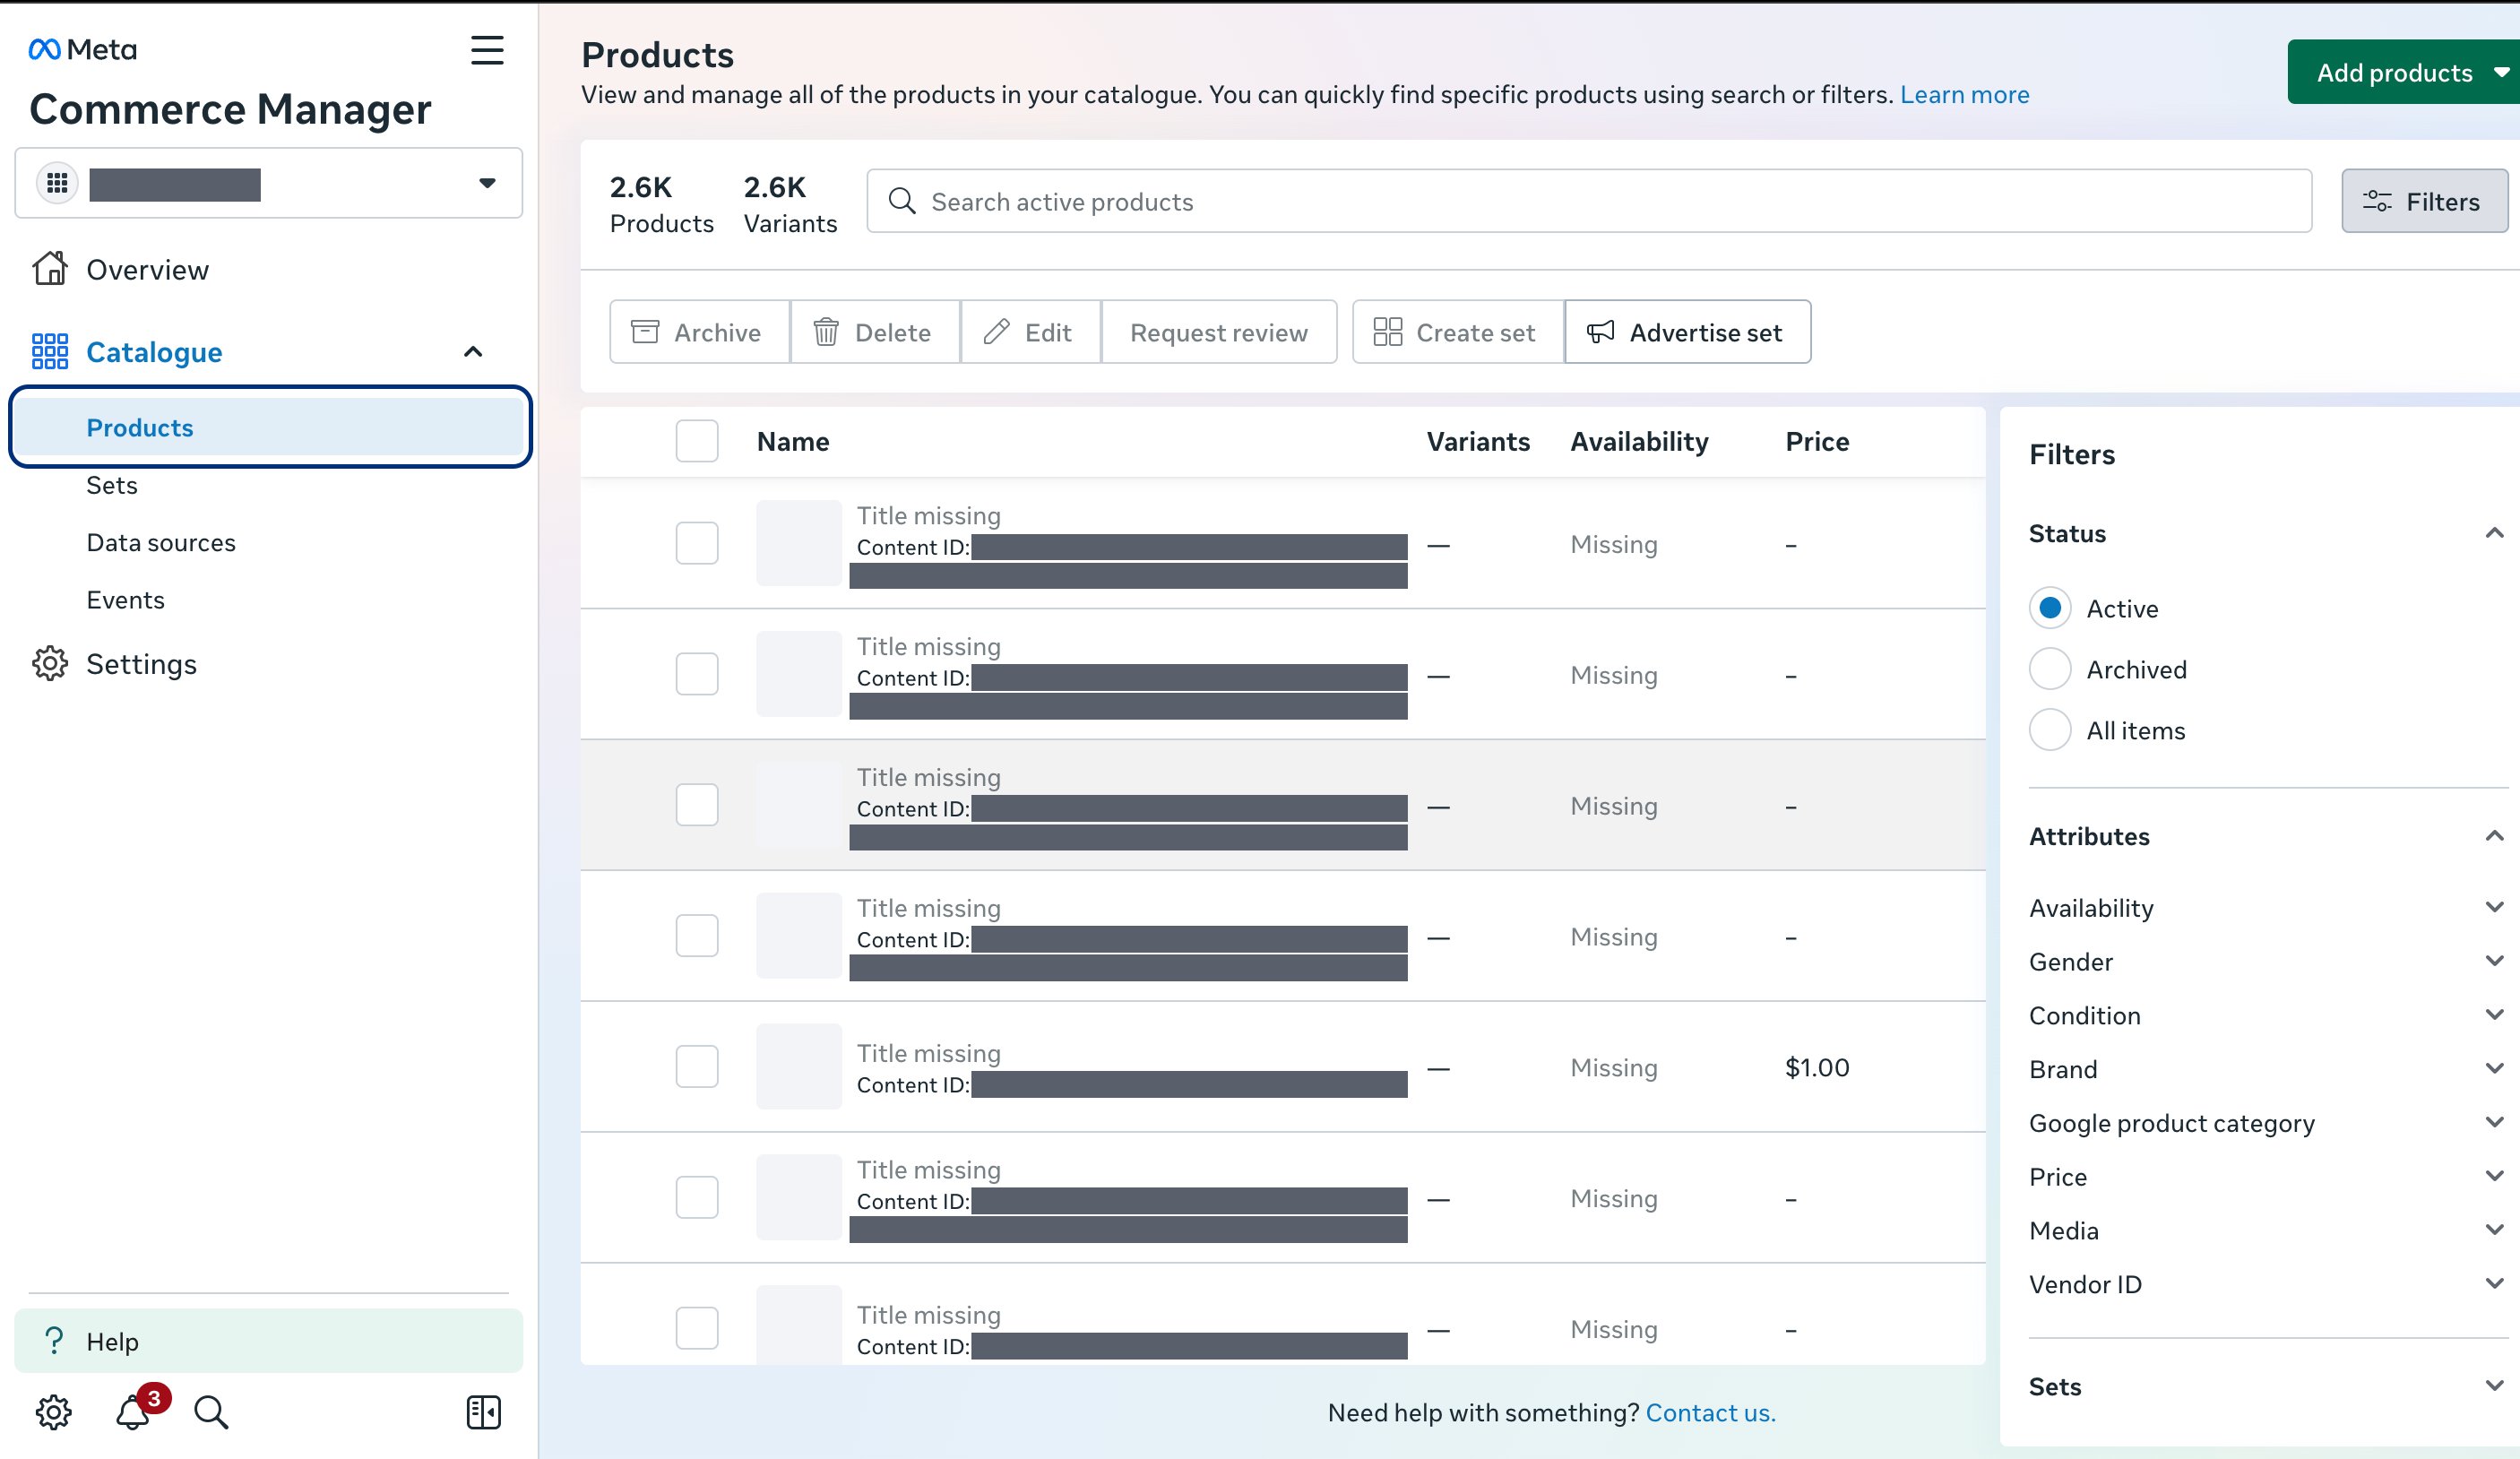
The list of products pushed appears.