

What Integrate is
Integrate is the Zeotap CDP module that connects your customer data end to end. It has two sub-modules: Sources, which brings data in from your websites, apps, files, warehouses, CRMs, and engagement platforms, and Destinations, which forwards audiences and profile updates to external platforms such as DSPs, DMPs, ad networks, and messaging tools. Everything else in the CDP — unification, calculated attributes, audience building, and activation — builds on the pipeline you set up here. Treat Integrate as a seven-stage pipeline: create a source, implement it, confirm data arrival, map fields to the catalogue, derive calculated attributes, build audiences, and activate them on destinations. Skipping a stage breaks the stages that follow.Prerequisites
Before you configure Integrate, complete the steps in the Get Started Guide Before you Begin section, and confirm that your role includes permission to view and create Sources and Destinations. See User Roles and Access for the built-in roles that carry these permissions.
- A prioritised list of use cases, sources, and destinations for your rollout — see Discovery.
- Your data model: the exact fields you plan to send from each source.
- Credentials for each destination platform (client IDs, API keys, service accounts, or SFTP details, depending on the destination).
- An identifier strategy — the identifiers you send (email, phone, mobile advertising ID, customer ID) determine what you can activate downstream, and drive the match rate you get on advertising destinations.
- A delta-load plan — send only new or changed records per run rather than full-file resends, to keep ingestion costs and duplicate-update noise down.
Set up your data flow
Work through the seven stages in order for each new source. Each stage produces an artefact the next stage consumes.1. Create the source
Open the Sources module and create a new source, choosing the source category and source type that match how the data arrives. Zeotap CDP supports website events, app events (Android and iOS SDKs), flat files (Google Cloud Storage, SFTP), server-to-server (HTTP API), tag managers (Adobe Experience Platform, Google Tag Manager), CRM data (Salesforce), data warehouses (Snowflake, BigQuery, Amazon S3), customer engagement channels (Braze Currents, Batch, Dotdigital, HubSpot, Airship, Cleverpush), and message queues (Pub/Sub Stream and Batch). See Creating a Source for the full list and per-type setup.2. Implement the source
Each source type ships with a per-type implementation guide describing exactly how to send data — a JavaScript snippet for websites, an SDK for mobile apps, a file layout for flat files, credentials and a query for data warehouses. Download this guide from the source’s detail page and follow it end to end. The source remains in its initial pre-ingestion state until it begins receiving records.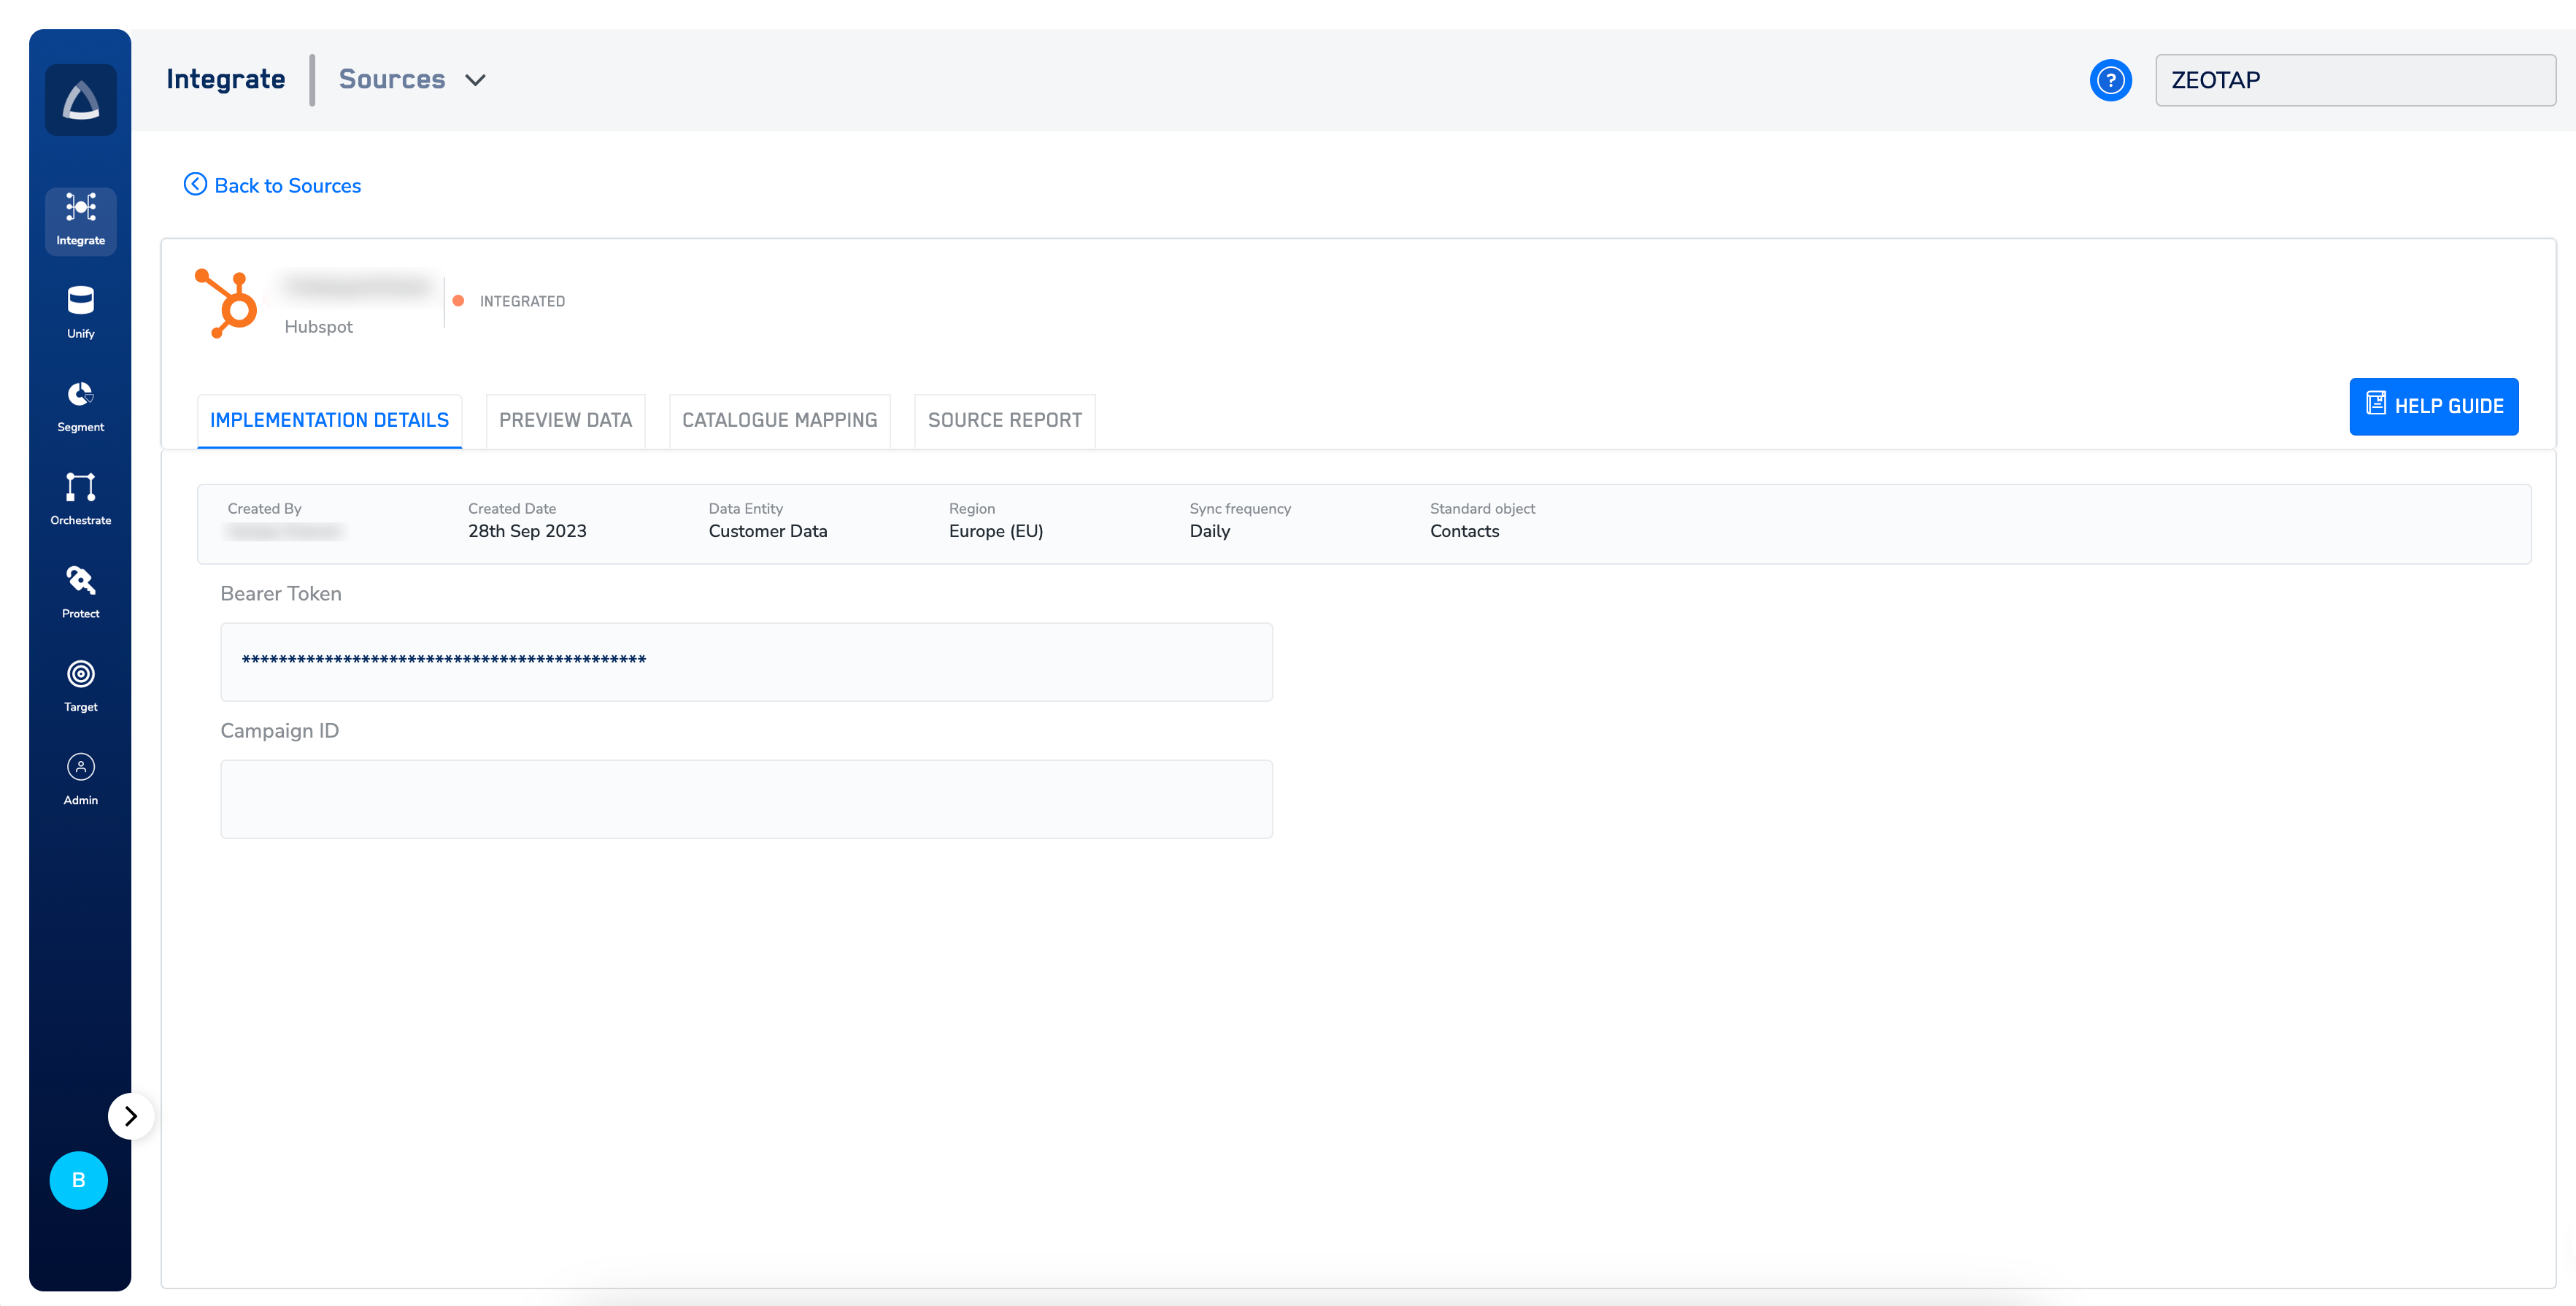
3. Confirm data is arriving
Return to the source’s detail page and open the incoming-data view. Verify the record volume, sample records, and field names match what you sent. Once records begin flowing, the source advances past its initial state and becomes eligible for catalogue mapping.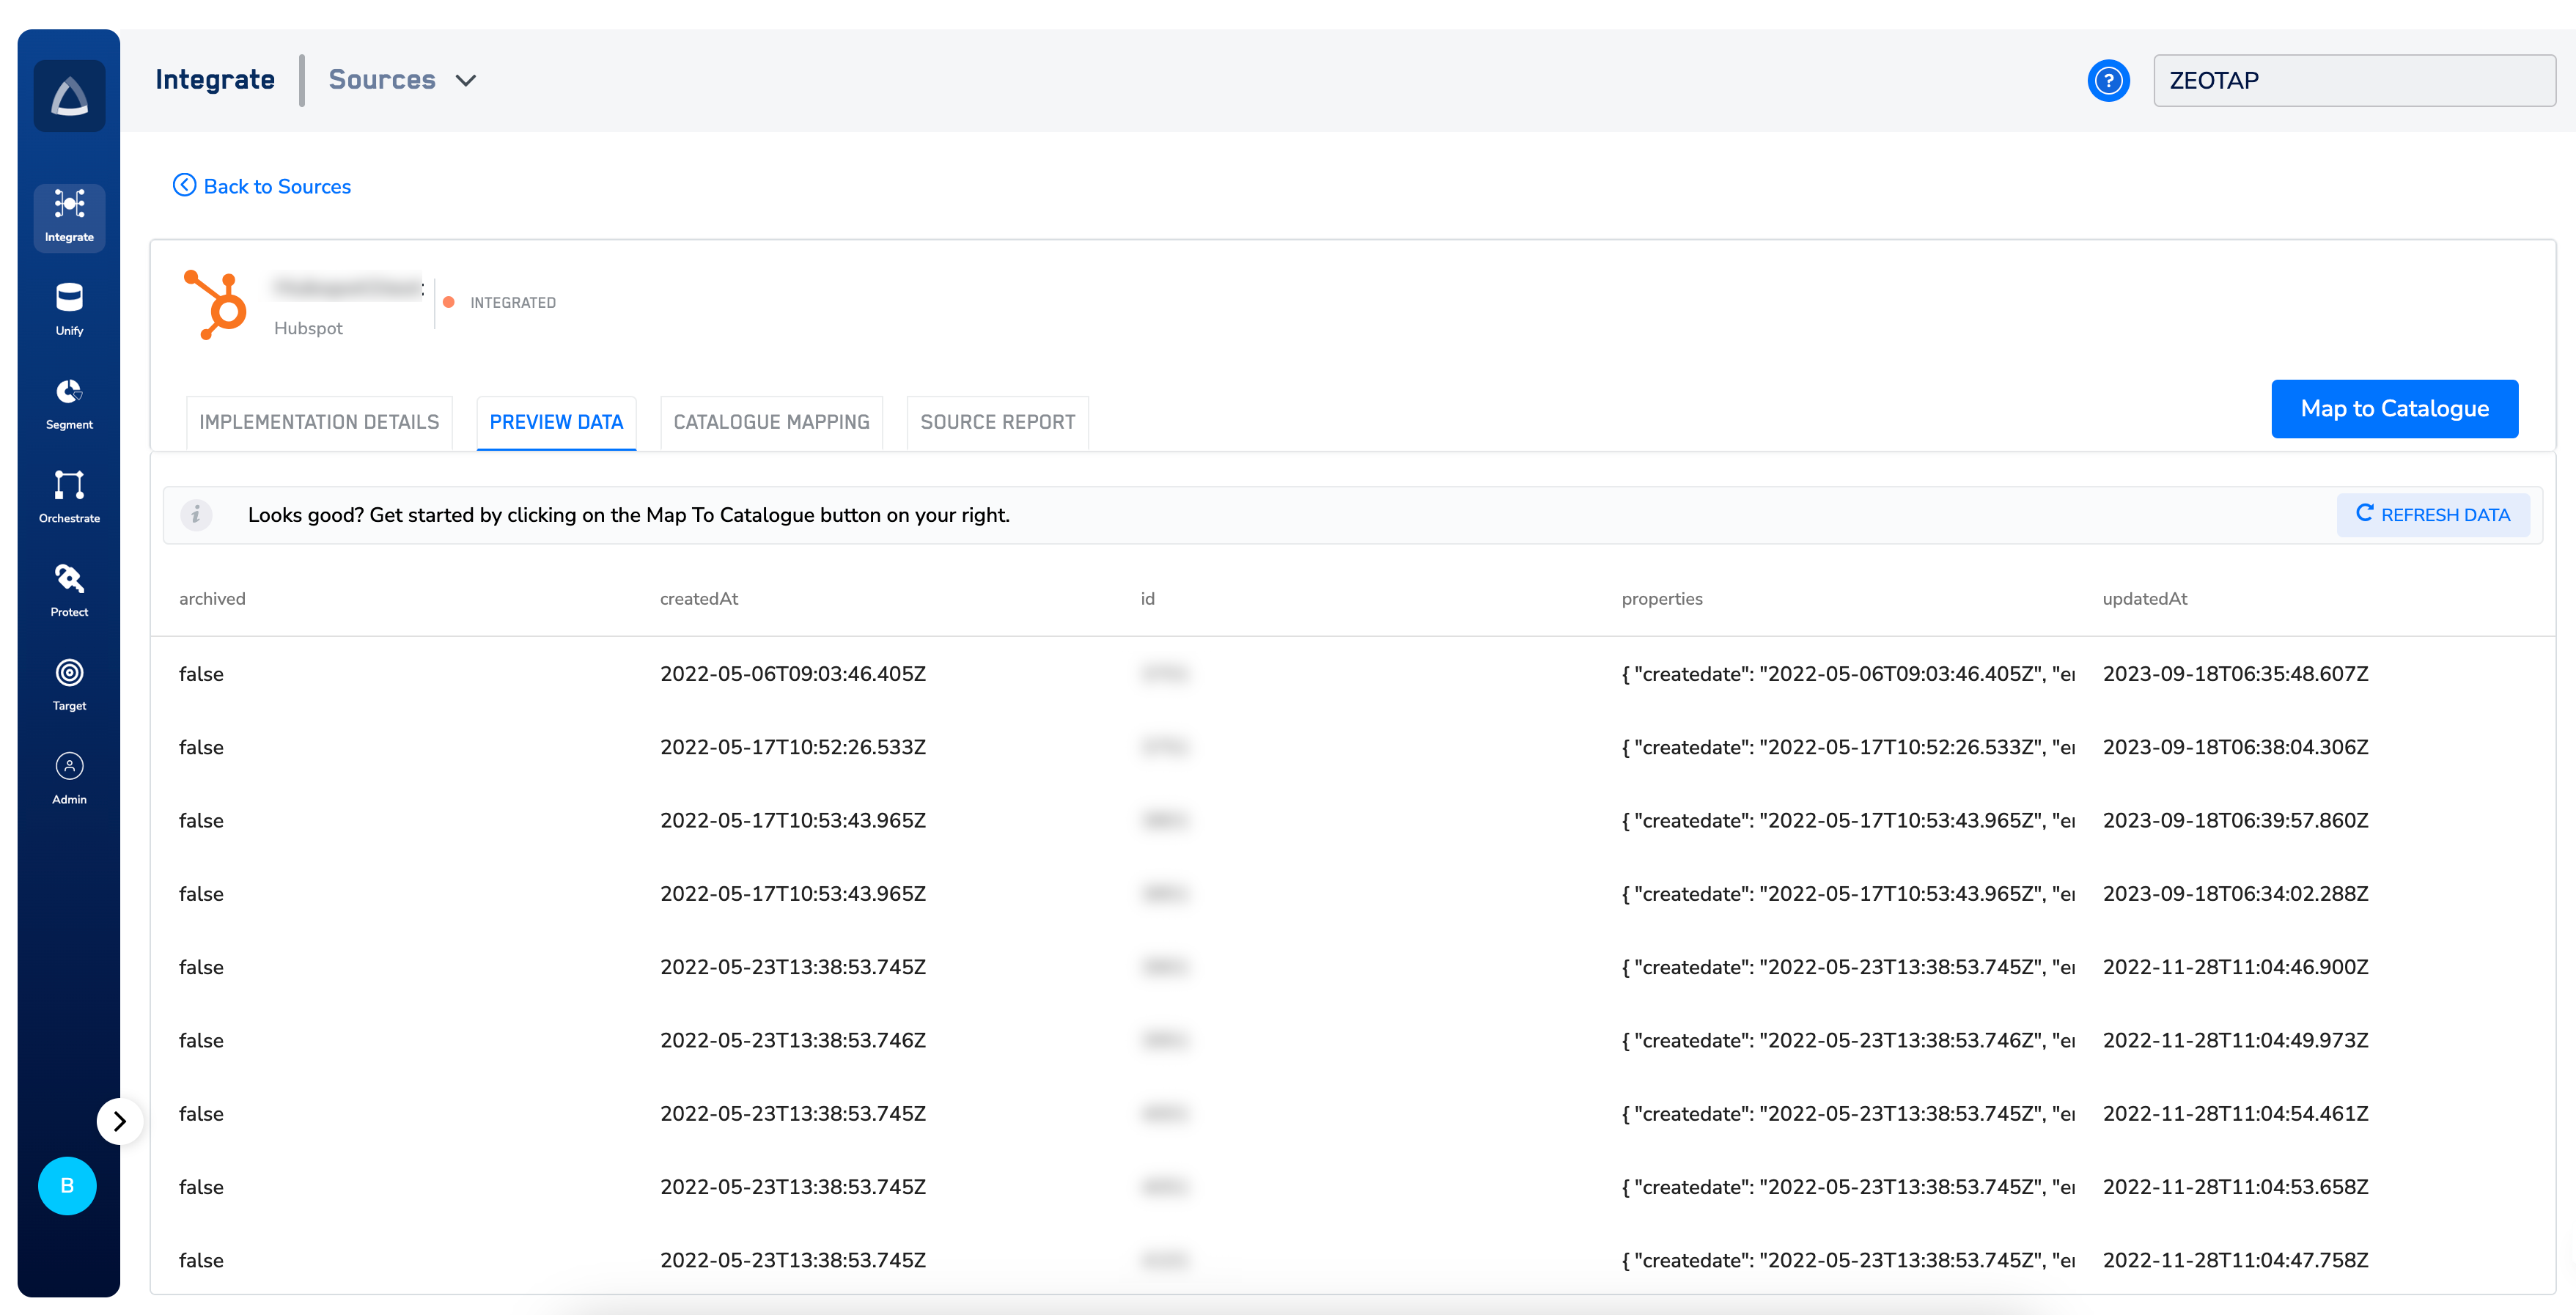
4. Map fields to the catalogue
Standardise incoming field names against the Zeotap catalogue so identifiers, traits, consent flags, and events resolve into unified profiles. Open the source’s mapping tool and align each ingested field with its catalogue counterpart — see Map the Catalogue for the mapping mechanics and the supported field types. A source that has not been mapped will not resolve into profiles and cannot be used in an audience.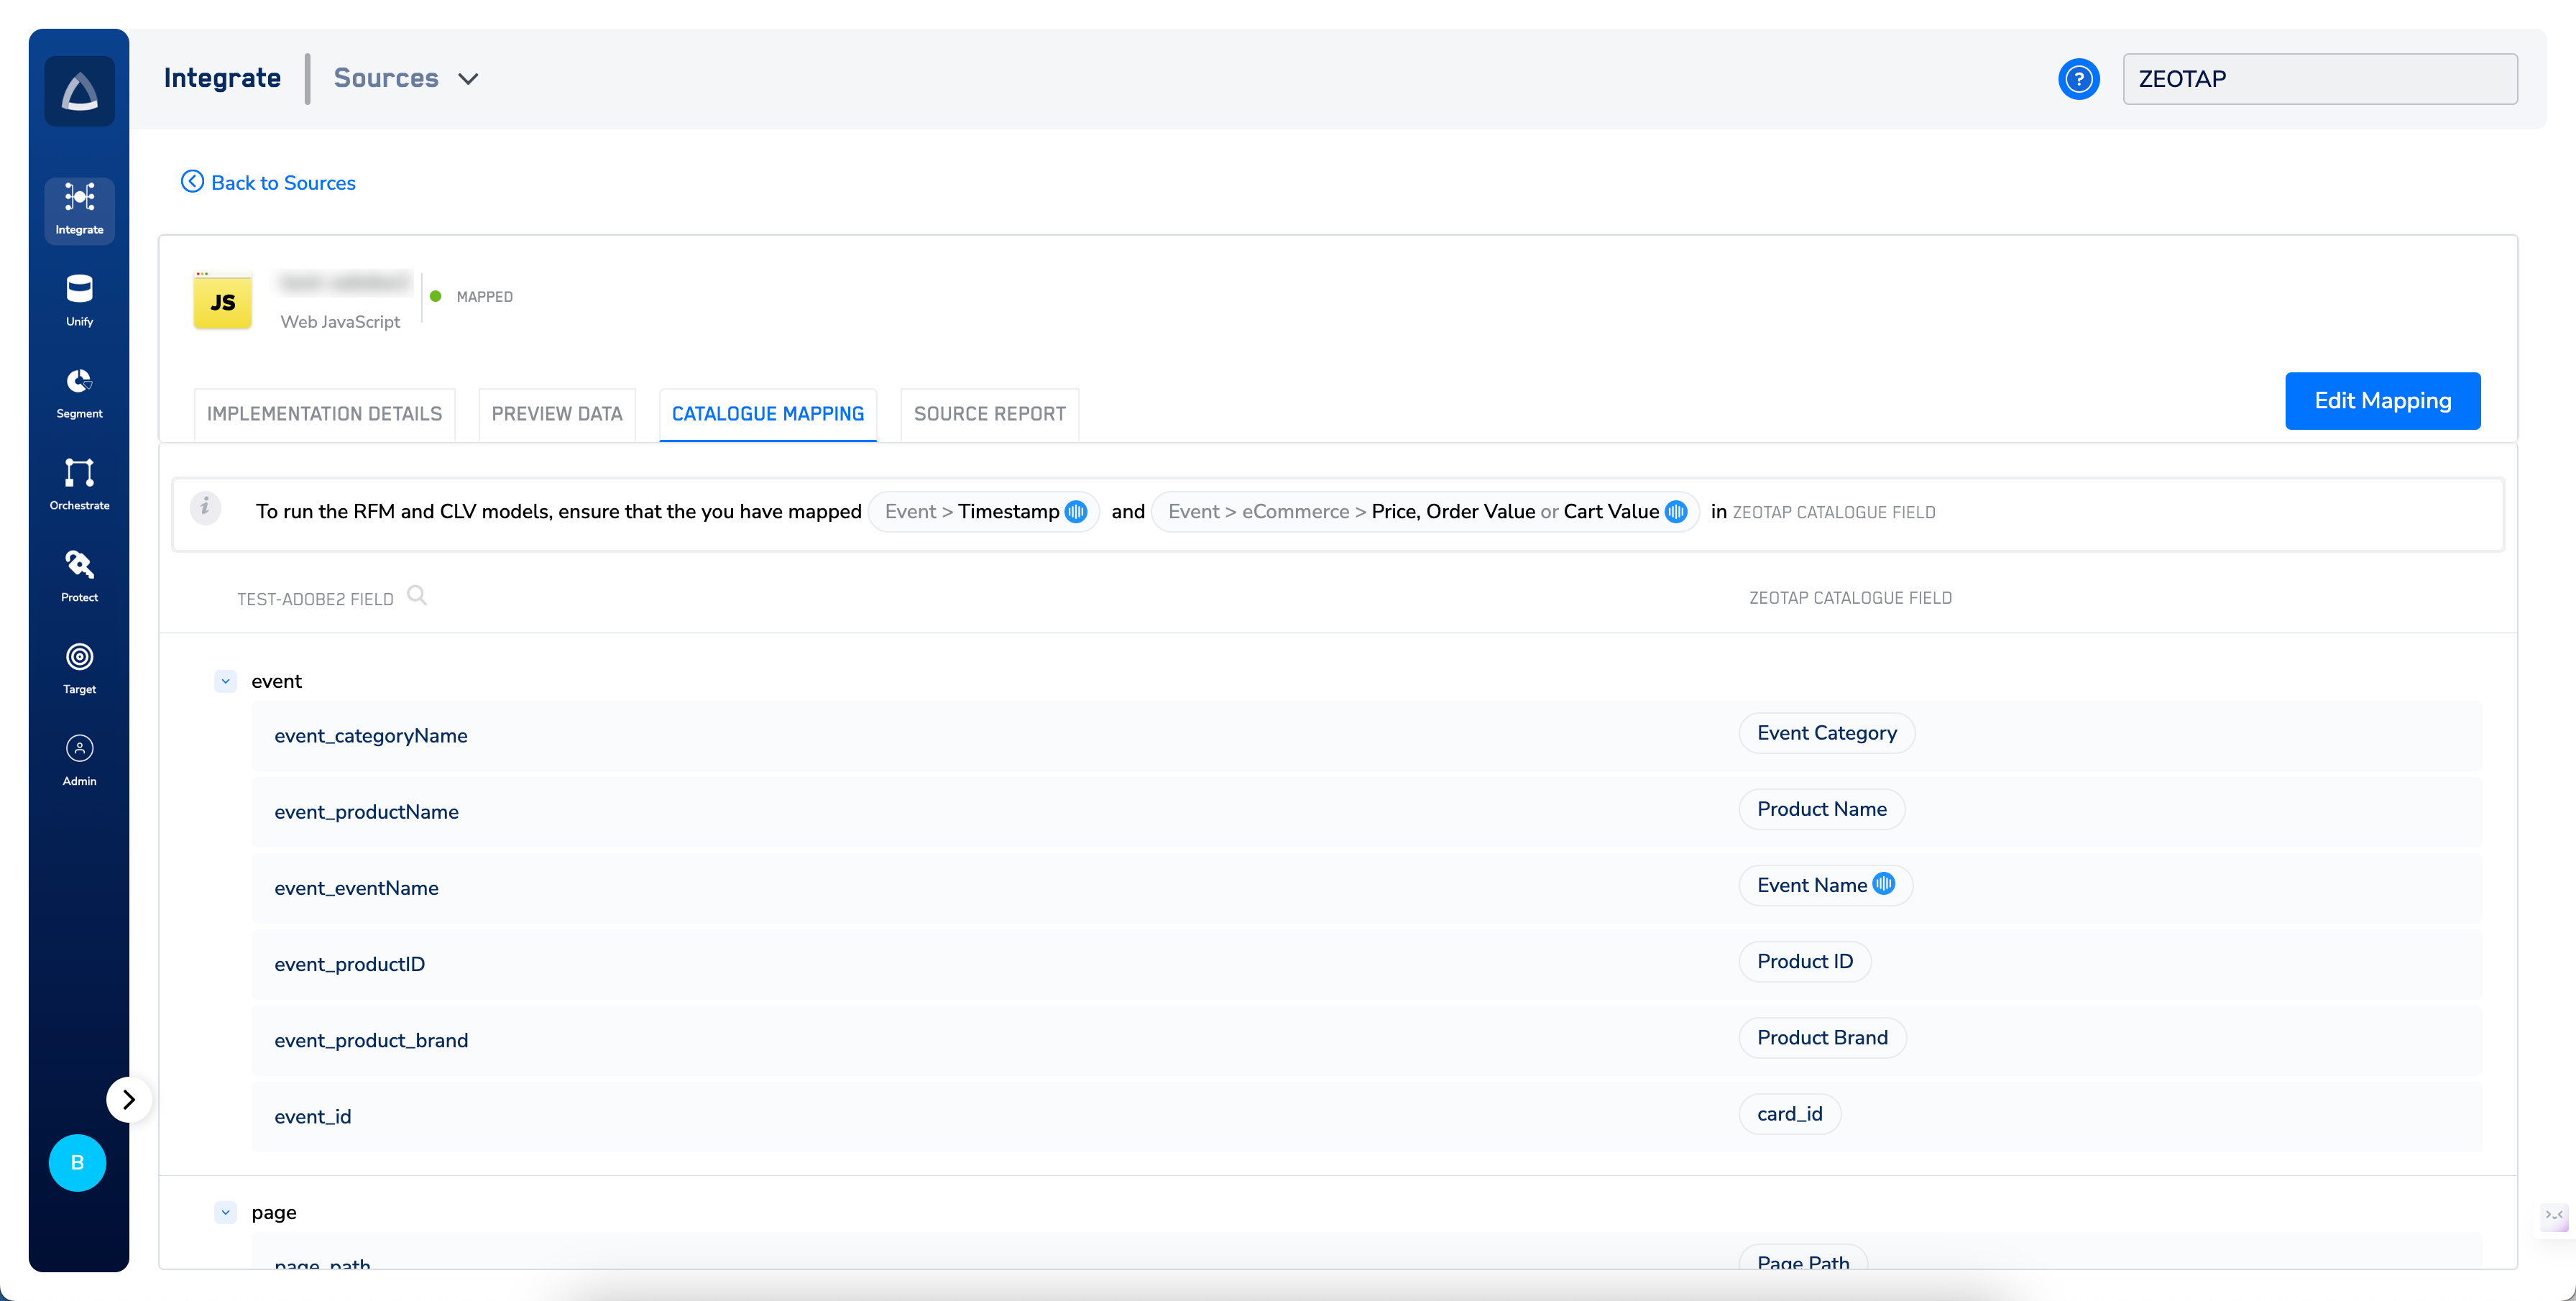
5. Build calculated attributes (optional)
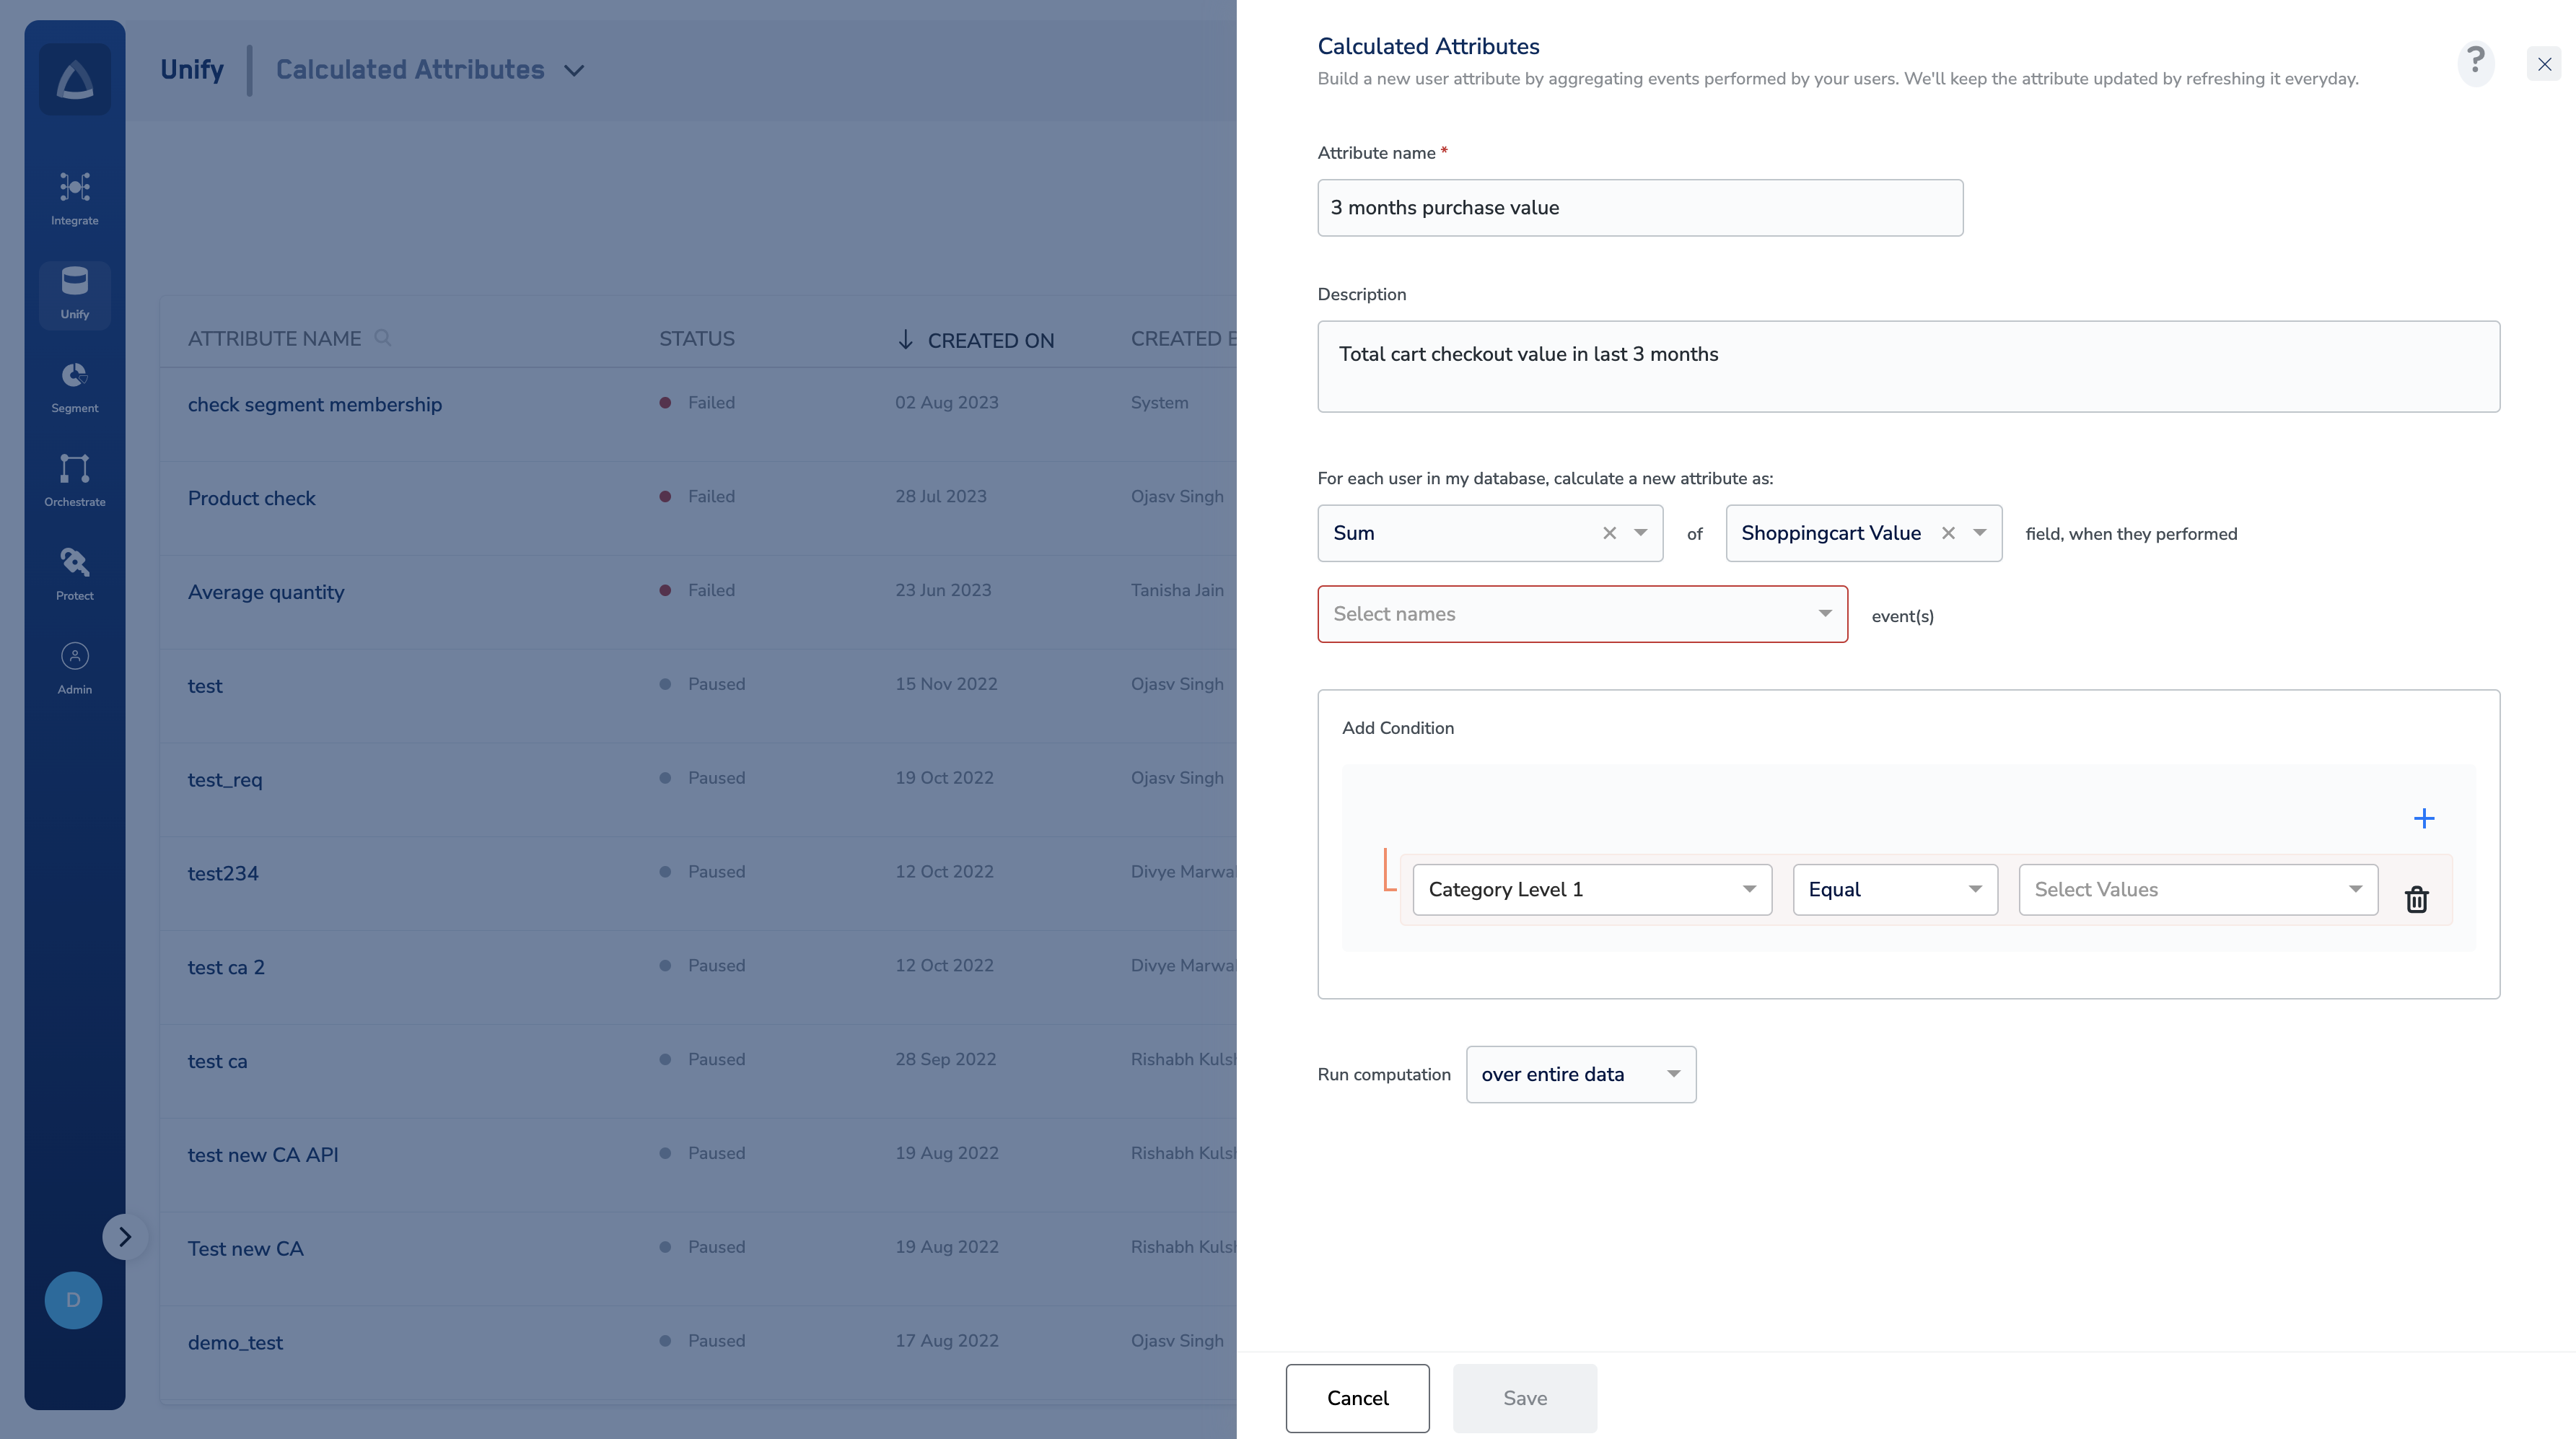
Derive user-level insights by aggregating events over a defined window — for example, a running 90-day revenue total, a 7-day page-view count, or units purchased in a category. Use these as segmentation criteria: a marketer can defineHigh Spenders as users with 90_day_revenue > 500 or Low Engagement Users as users with 1_week_page_views < 5. See Calculated Attributes for the aggregation options and refresh cadence.
6. Create an audience
Combine catalogue fields, calculated attributes, and consent flags to define a customer cohort. See Create your Audience for the criteria types available and how to combine them.7. Activate on a destination
Link the audience to a destination in the Destinations module and configure the mapping between catalogue identifiers and the destination’s expected payload fields. See Activate your Audience for the activation flow.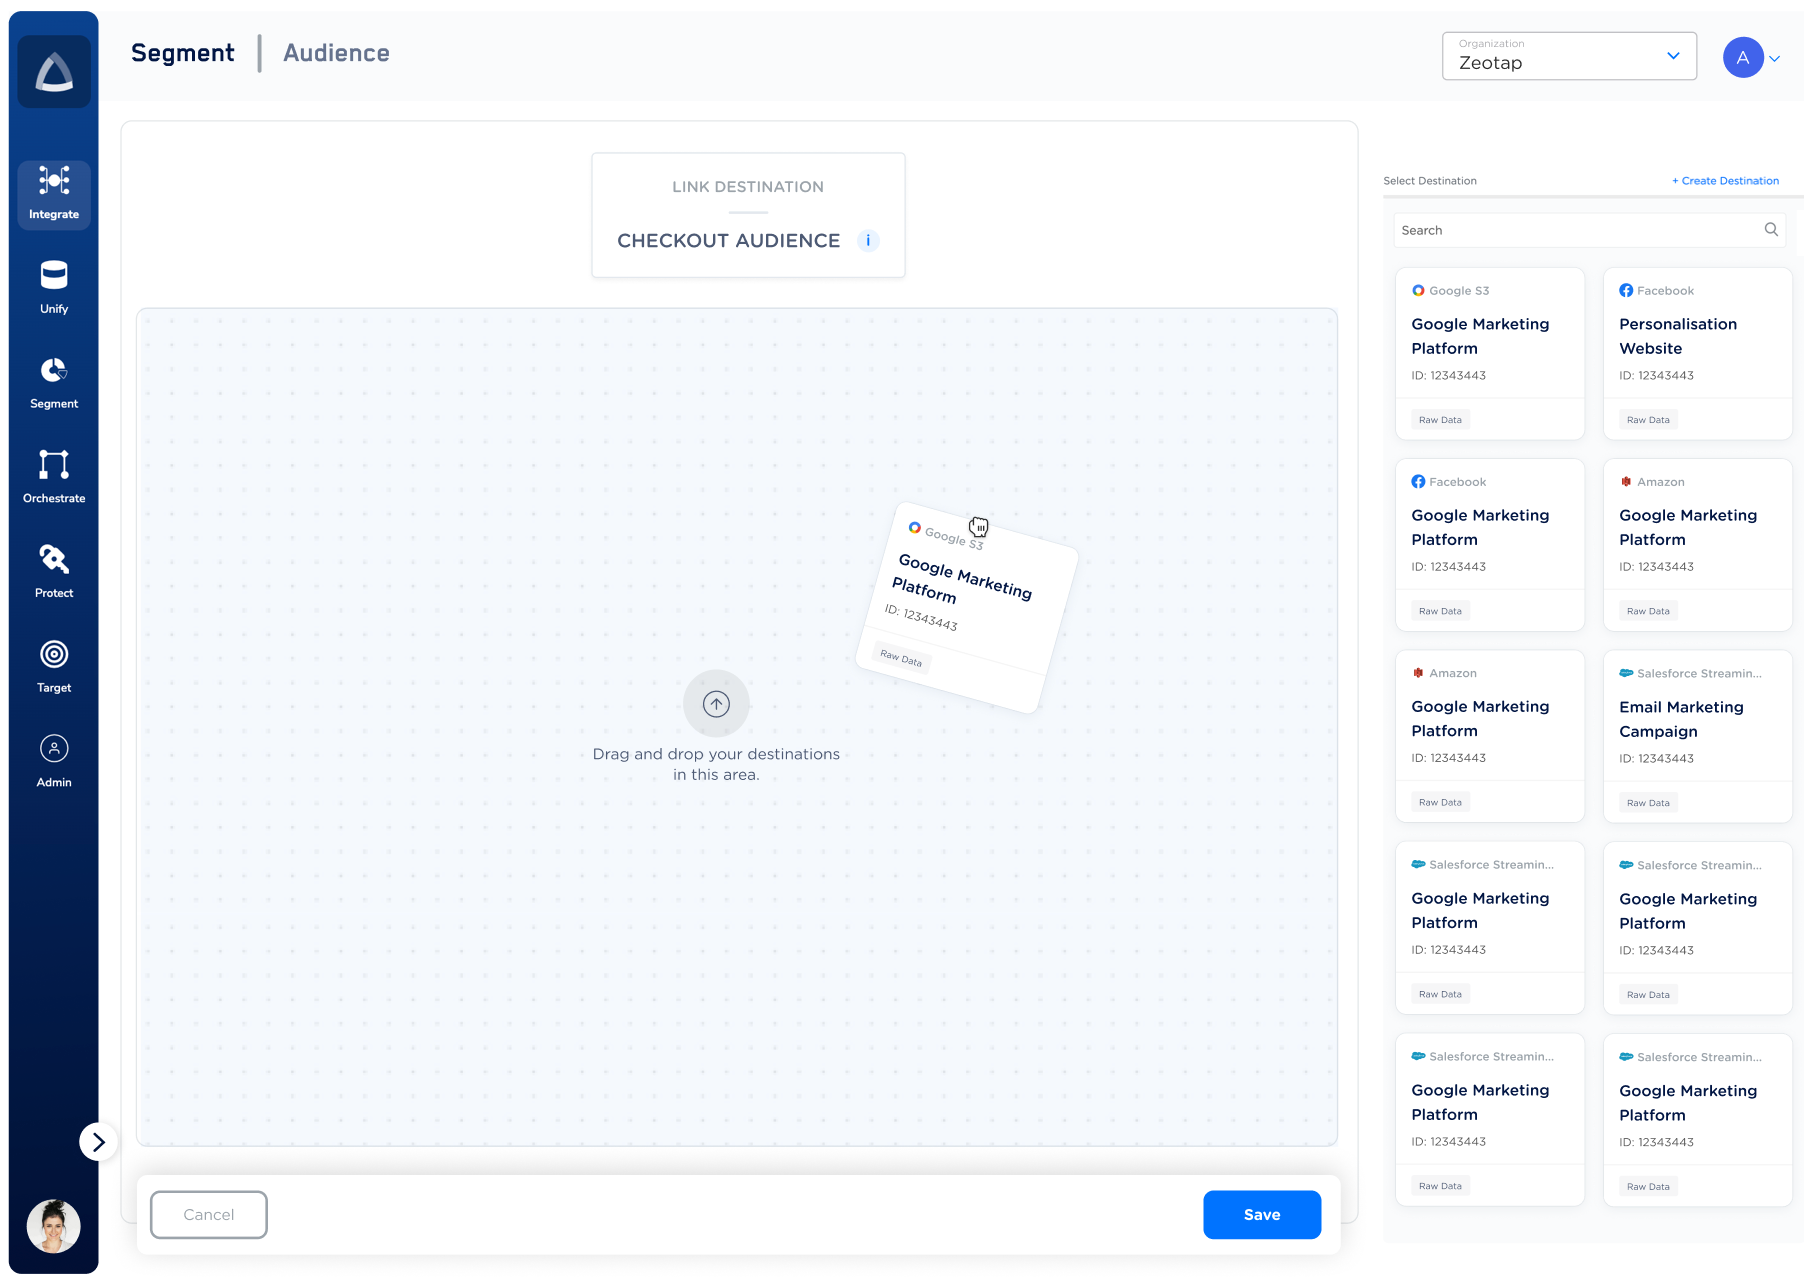
data.event_id, data.custom_data.value) require the mapping output field name to match the flattened internal path the connector reads, not the visible alias in the UI. A sample outbound payload for an offline-conversion destination:
required property error, the mapping is producing a field name the connector cannot find at the expected path.
Verify the pipeline works
Confirm each stage before moving to the next:- Source ingestion: the source detail page shows a non-zero record count and the source status has advanced from its initial state.
- Catalogue mapping: mapped fields resolve to their catalogue counterparts, and the source becomes selectable when you build an audience.
- Audience qualification: the audience estimate returns a non-zero user count that aligns with your expectations for the criteria you defined.
- Destination activation: the destination’s activity view shows the upload completed, and the destination platform reports receipt of the expected event or record volume.
Troubleshoot common integration issues
Integrate issues surface in one of three places: the source is not receiving data, the destination rejects the outbound payload, or the destination accepts the upload but the customer sees fewer records than expected. Identify which stage is failing, then match the observed error to the table below.
If the observed symptom does not match a row above, or if the fix in the “Where to look” column does not resolve the issue, contact your Zeotap customer success representative. Include the source ID or destination ID, the affected audience ID, the timestamp of the last successful run, and the exact error text from the destination activity log.
FAQ
Can I map fields for a source that has not received any data yet?
Can I map fields for a source that has not received any data yet?
No. Catalogue mapping requires the source to have moved past its initial state, which happens once records begin flowing. Confirm data arrival in the source’s incoming-data view before opening the mapping tool.
Do I need to send full data files every run, or only new records?
Do I need to send full data files every run, or only new records?
Send only delta updates. Full-file resends waste ingestion capacity and produce duplicate profile updates. This applies to flat files, database configurations, and every batch source — see Discovery for the source-onboarding checklist.
Which identifiers should I send to get the best match rate on ad-platform destinations?
Which identifiers should I send to get the best match rate on ad-platform destinations?
Match rate depends on the identifier types the destination accepts and the identifiers you have collected. For advertising destinations, sending multiple identifier types together (for example, hashed email plus hashed phone plus mobile advertising ID) increases the share of users the destination can resolve. See the individual destination pages under Destinations for each platform’s supported identifiers.
How do I control which teams can use a given source or destination?
How do I control which teams can use a given source or destination?
Use Access Rules to restrict sources, attributes, or destinations at the folder level. Rules work on a blocklist basis — every source and destination remains available across all folders until an admin explicitly blocks it for a folder. Rules on a parent folder propagate to all subfolders.