

What this is
Salesforce Marketing Cloud (SFMC) Journey Builder offers visibility into consumer interactions across various marketing channels, including email, mobile, social ads and more. By connecting these actions or conversations, you gain a deeper understanding of your customers, improve message building, design and automate campaigns, deliver a seamless customer experience, and secure customer loyalty. The Zeotap CDP integration is a real-time destination. You configure it once with the credentials of your Salesforce Marketing Cloud account, then attach it to a Send to Destinations node in a workflow. Each time a user reaches that node, Zeotap streams an event to one specific journey in Journey Builder — the journey identified by the Event Definition Key you supply. That journey’s entry source is a data extension you create in SFMC, so the fields you map in Zeotap have to line up with the columns of that data extension. This is what lets marketers base SFMC campaigns on real-time data sent from Zeotap.Supported identifiers and actions
This integration allows you to send any identifiers of your choice and custom attributes.Prerequisites
Before you start, make sure that:
- You have Admin access to Salesforce Marketing Cloud. Admin access is needed to reach all the features this integration uses.
- You have created a data extension table in SFMC with the relevant fields, to be used as the entry source in Journey Builder. See Create a Data Extension Table.
- You have created a package in SFMC and granted it the required API permissions. See Create a Package.
- The journey you want to push data into has been validated and saved in Journey Builder. Validation confirms that all elements of the journey design are complete and ready for testing. Journey Testing is unavailable for Single Send journeys.
- You have collected the SFMC values listed in Gather the SFMC details you need.
Gather the SFMC details you need
Six values move from Salesforce Marketing Cloud into Zeotap CDP. Four of them belong to the destination itself; the last two belong to the journey you are targeting, so you supply them when you link the destination in a workflow.Client ID, Client Secret and Sub Domain
1
Log in to your SFMC account and open the package you created, under Settings > Setup > Apps > Installed Packages.
2
Under Components, in the API Integration component, read off:a. Client Id
b. Client Secret
b. Client Secret
3
Sub Domain — your subdomain is a 28-character string that starts with the letters
mc in any of your base URIs. In a REST base URI of the form https://<subdomain>.rest.marketingcloudapis.com/, the subdomain is the part that precedes .rest.marketingcloudapis.com.Account ID
This is the member ID (MID) of your Salesforce Marketing Cloud account. You can obtain it in either of two ways. Option 1 — log in to SFMC, hover over your account name in the top right corner, and copy the MID value. This is youraccount_id.

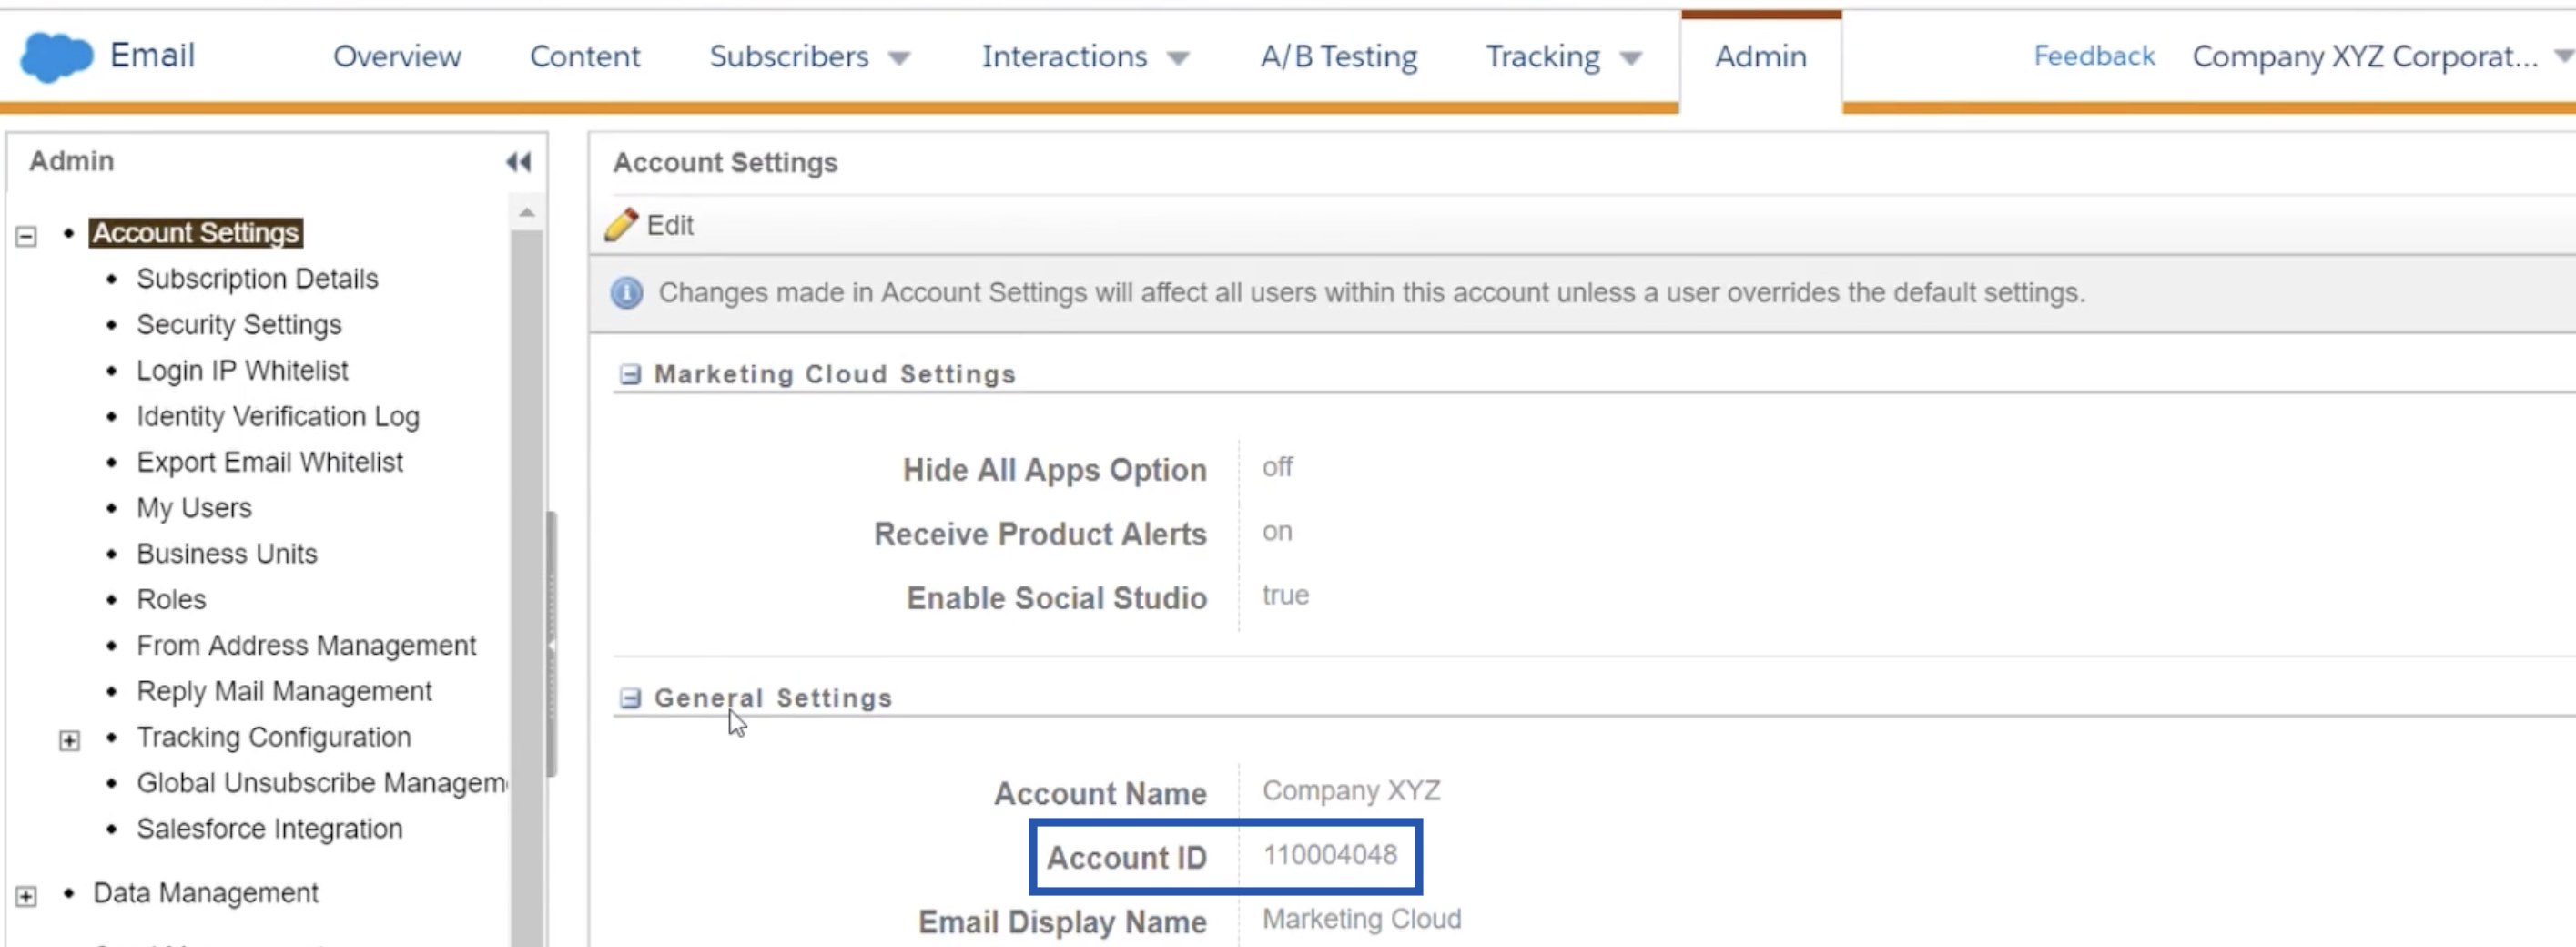
Event Definition Key
1
Log in to SFMC and navigate to Journey Builder.
2
In the top panel, click Events > Entry Source.
3
Select the entry source of the journey you want to send data to.
4
Find the event definition key under the Properties tab, as shown in the image below.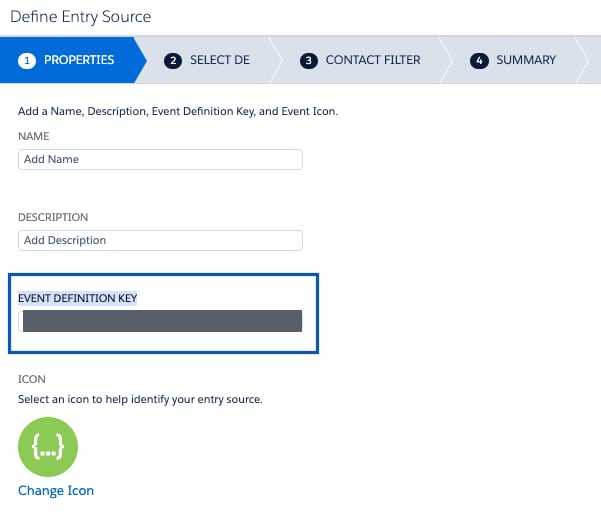
Create the SFMC Journey Builder destination
A destination can be set up ahead of time from the Destinations module with + Create Destination and reused, or created inline while you are building a workflow — both routes create the same object. The steps below take the inline route: after you have applied filters or added conditions for your users in Journeys, open Send to Destinations. A new window appears listing the destinations already available to you; pick one of those, or create a new one.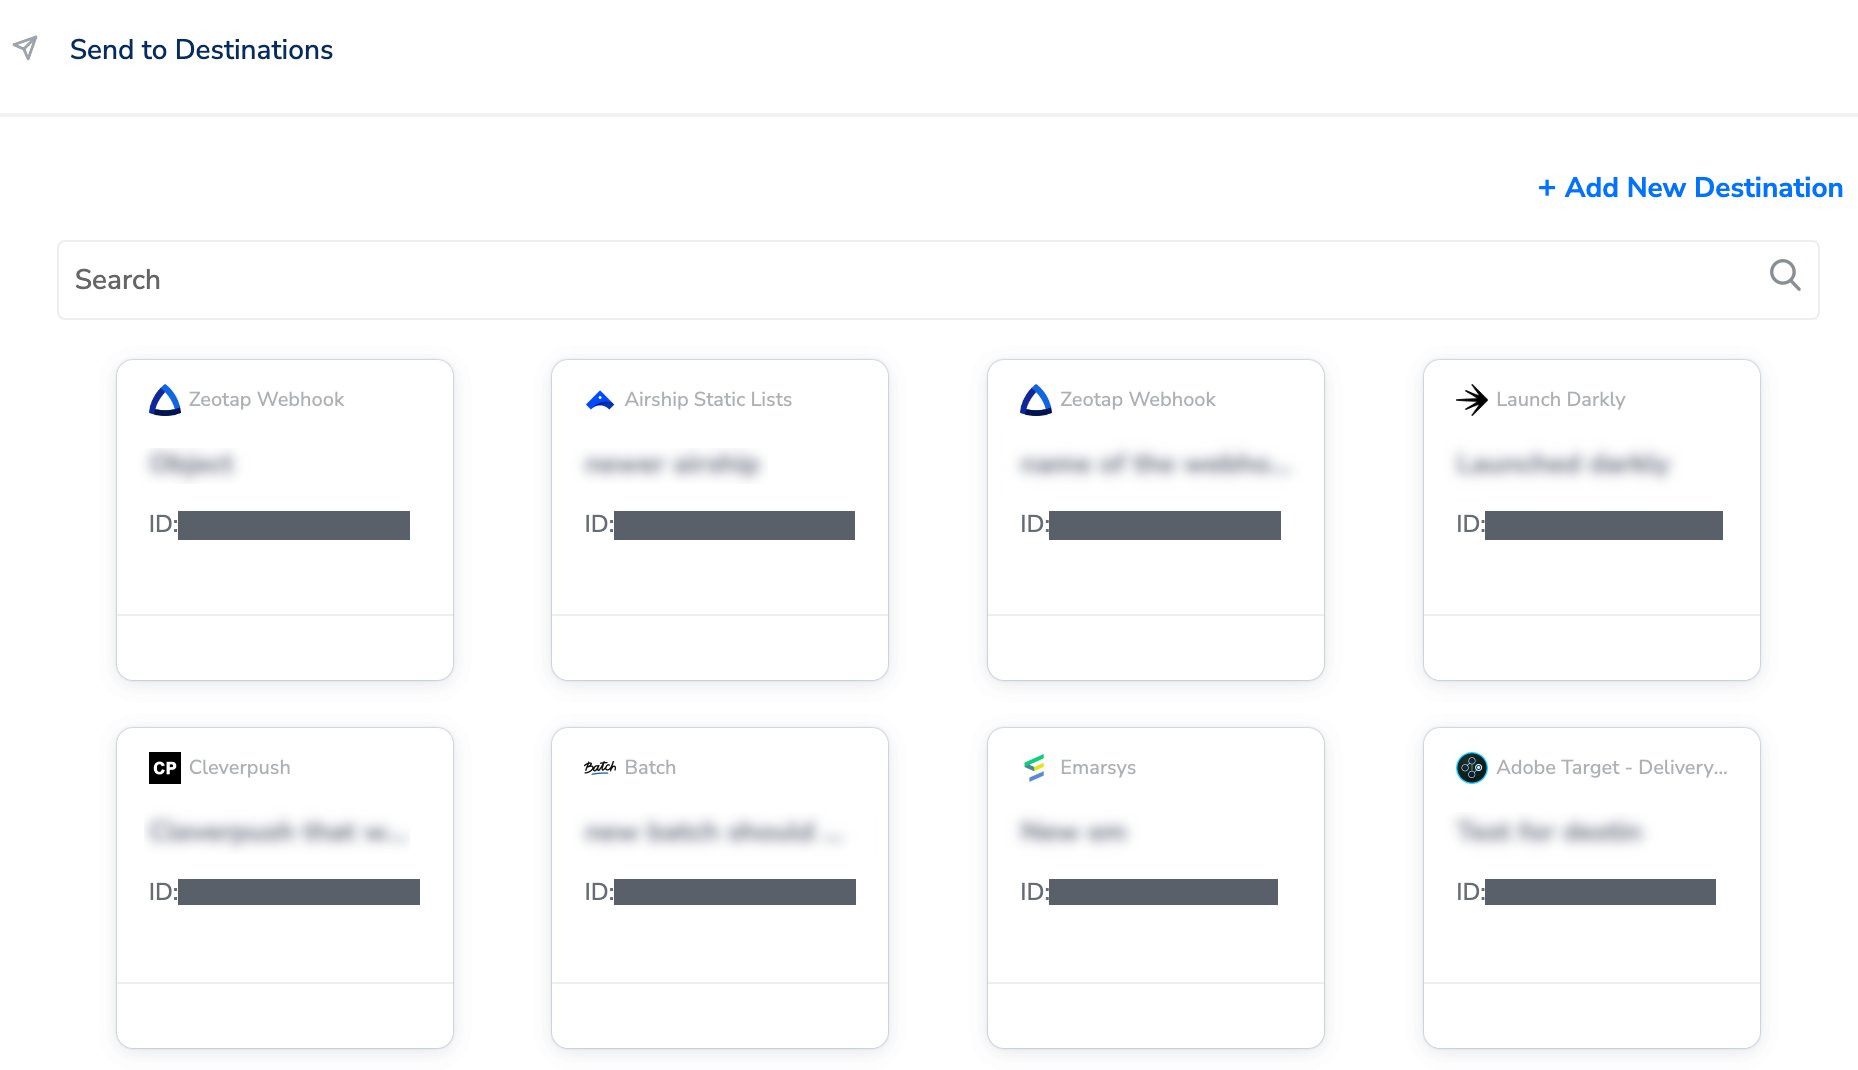
1
Click + Add New Destination.
2
Search for SFMC Journey Builder and select it.
3
On the Destination Details step, enter a Destination Name that will identify this SFMC account later, then enter the Client ID, Client Secret, Account ID and Sub Domain you gathered. Click Next.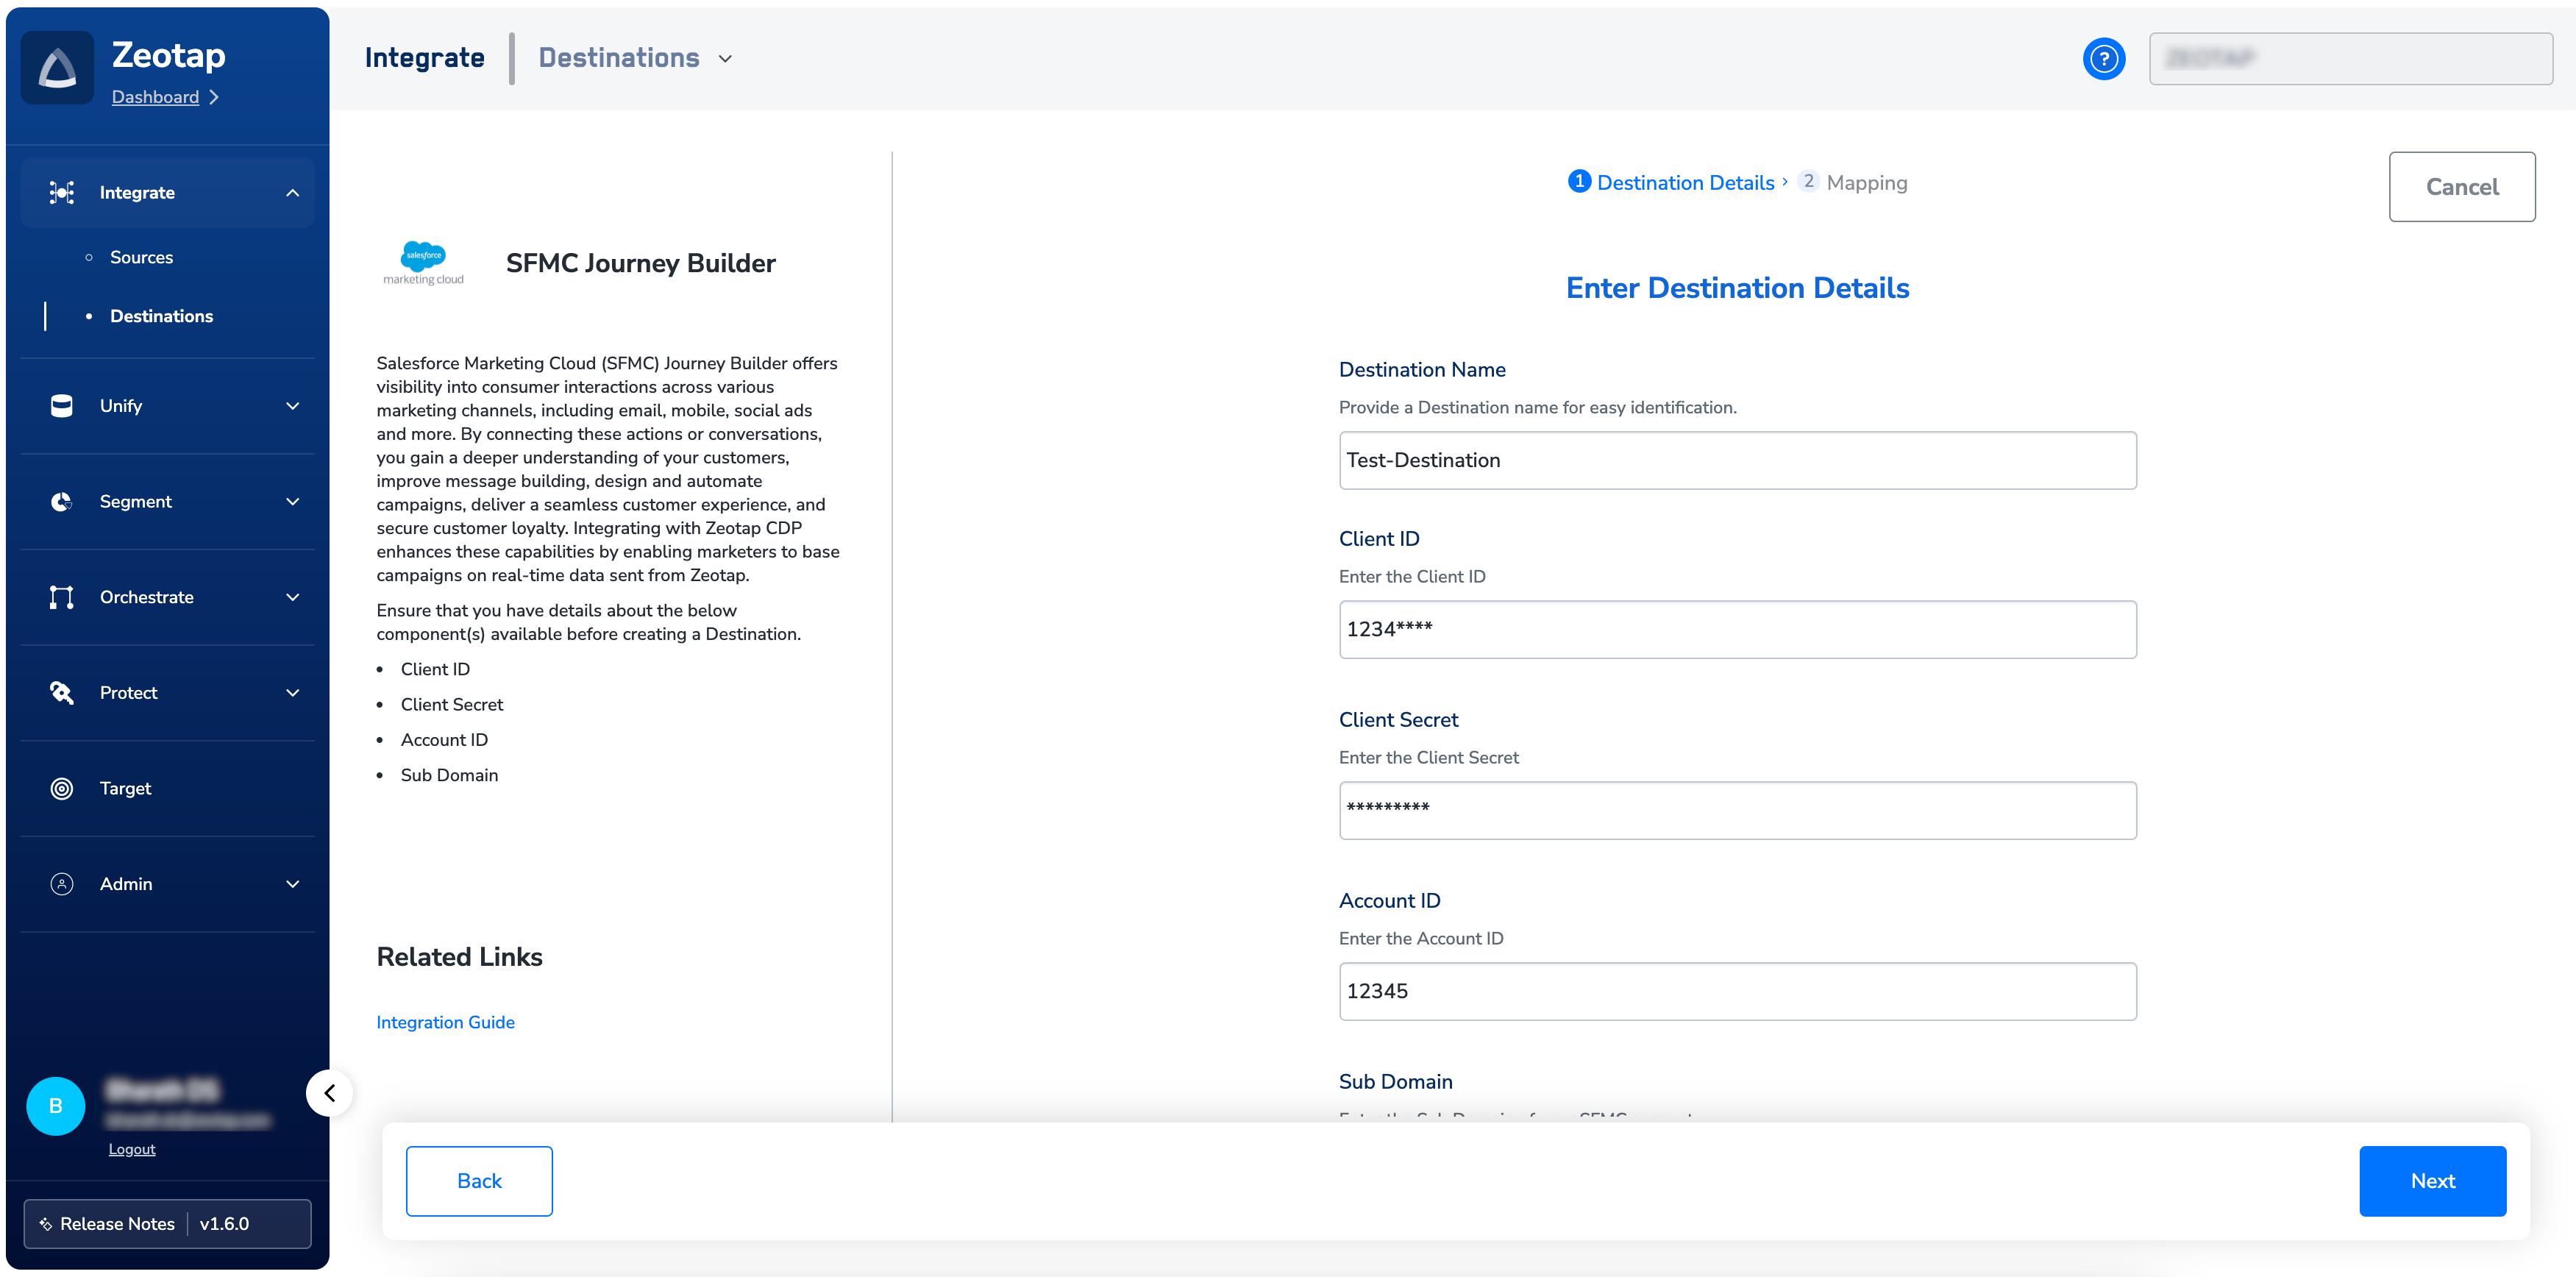
4
On the Mapping step, under Choose your Action, select Stream Events to SFMC Journey Builder (Legacy). Under Map the Fields, use + Add Mapping Field to add as many identifiers and attributes as you want to send, mapping each Catalogue field to the matching Destination field.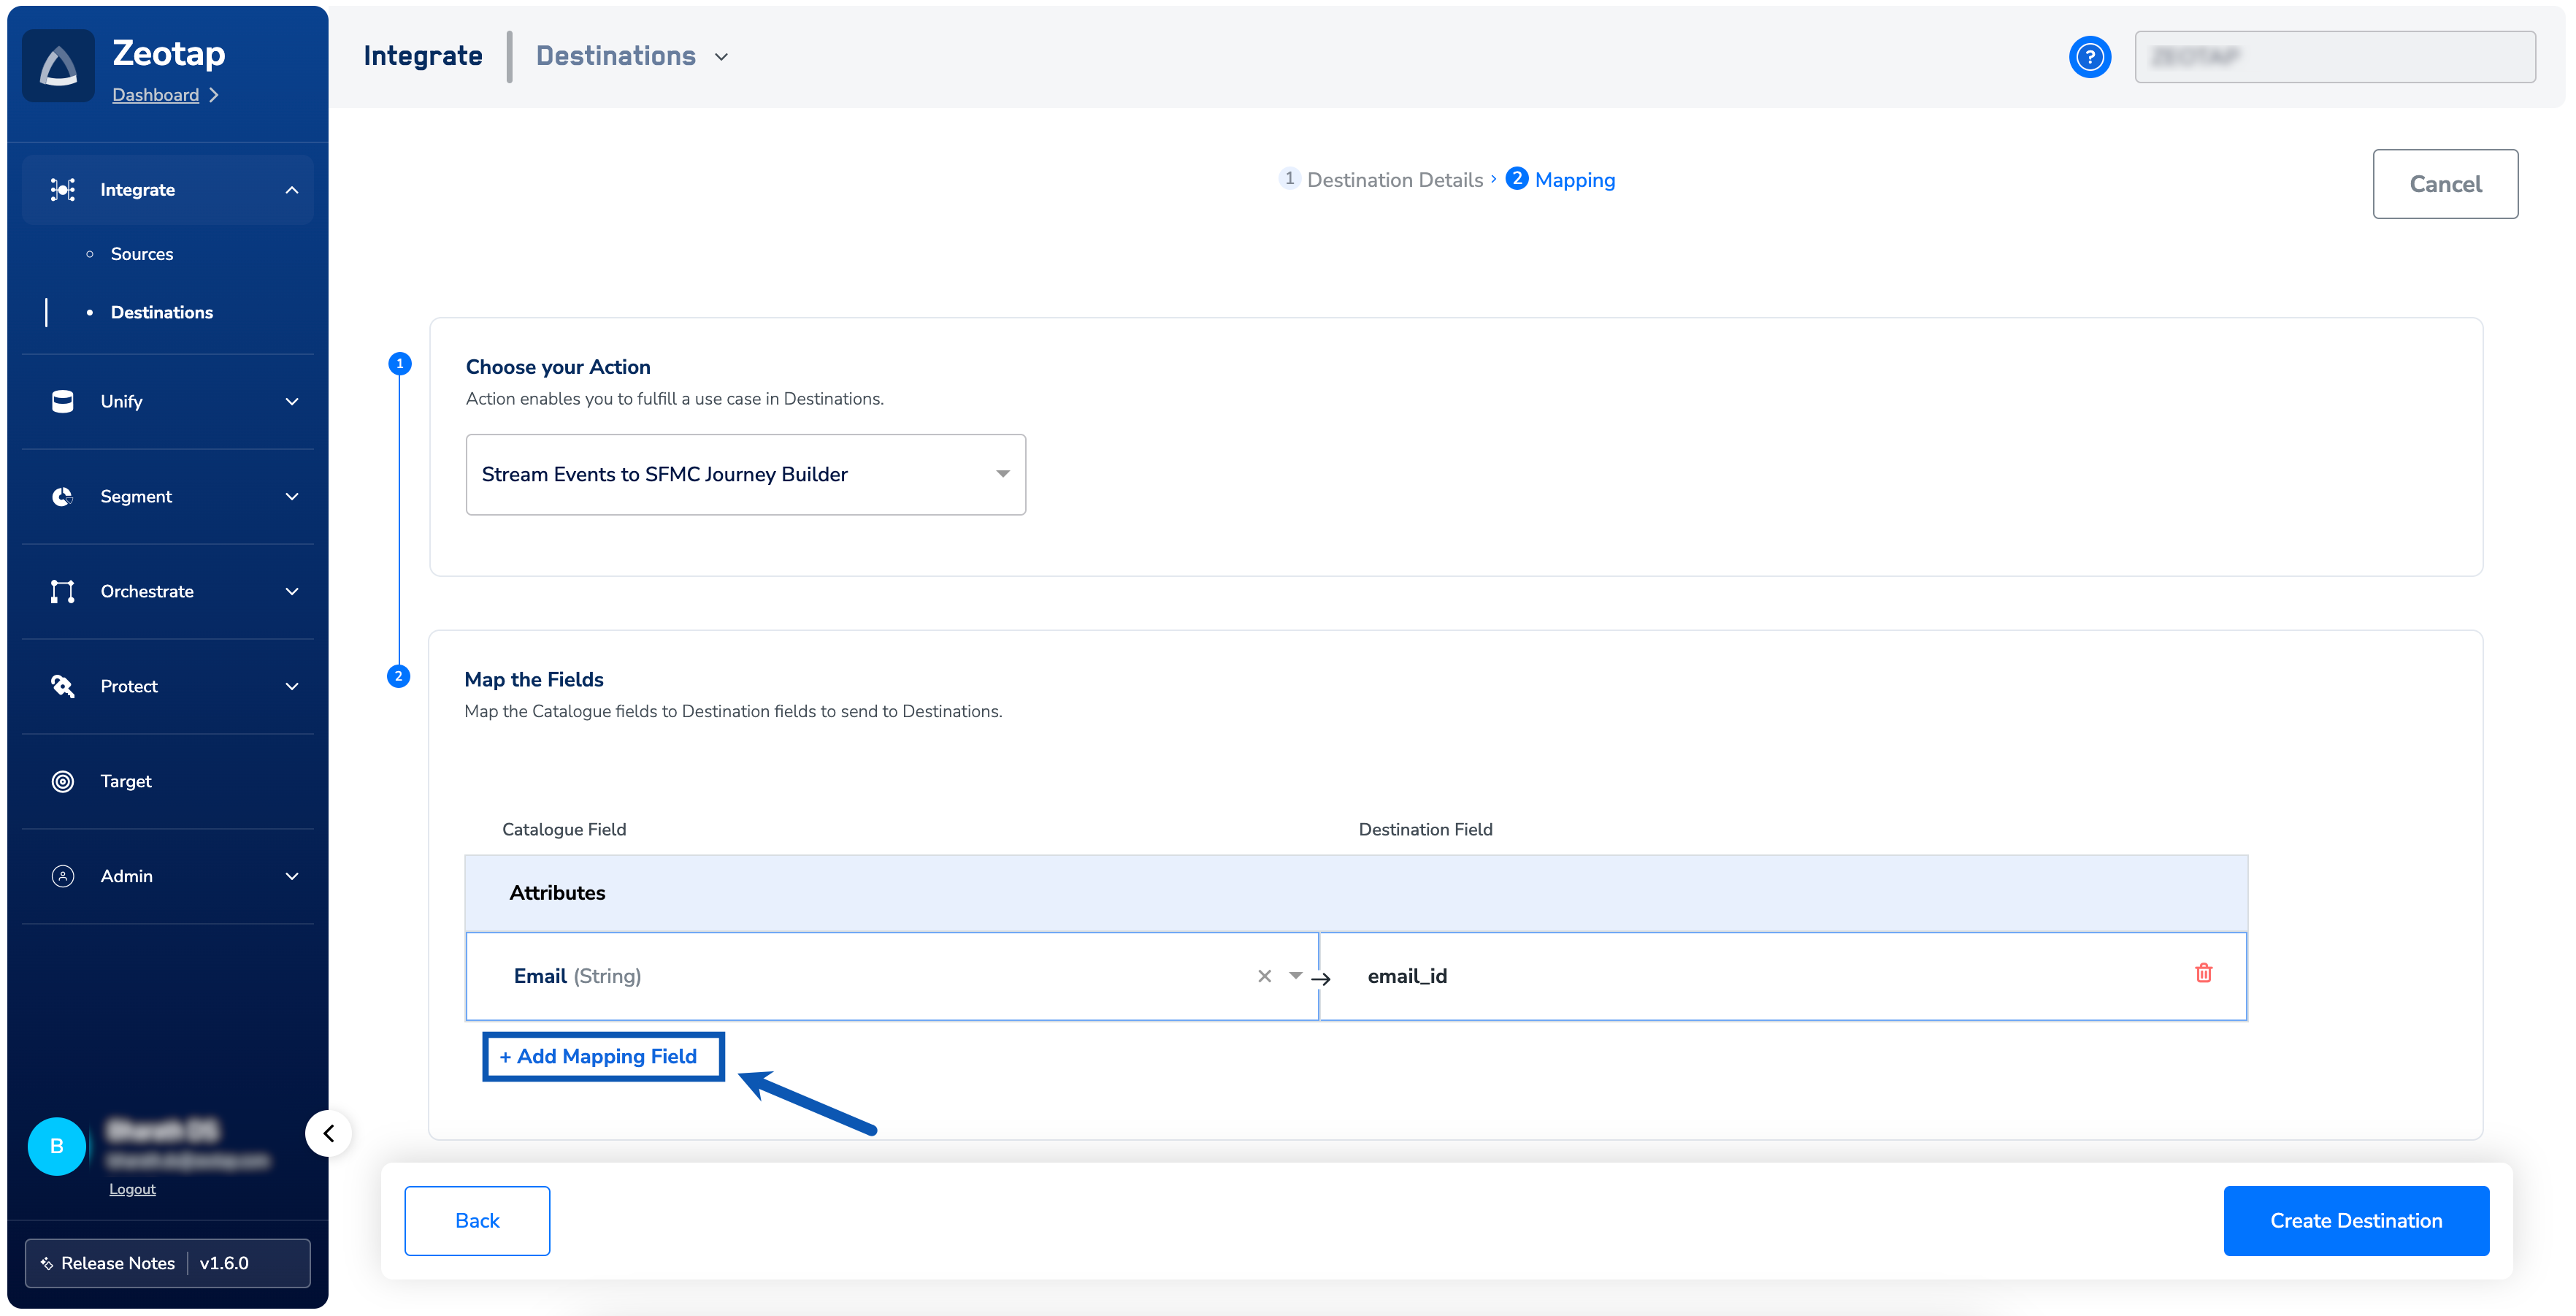
Each Destination Field name must match the attribute name in your data extension exactly. If the data extension has a column called
email, the Destination field for the email data you send from Zeotap CDP must also be email.5
Click Create Destination. The destination is created and becomes available for activation on Journeys.
Link the destination to a journey
Creating the destination stores the connection to your SFMC account. Linking it inside a workflow is what points it at one specific journey.1
In the workflow, click + at the point where the node belongs and choose Send to Destinations from the Choose an action menu.
2
Find your destination in the list using the search box, and select it.
3
Under the Destination Details tab, the Client ID, Client Secret, Sub Domain and Account ID fields are already populated from the destination you created. Enter the two journey-specific values:a. Event Definition Key — the key of the journey in Journey Builder that should receive this data. See Event Definition Key.
b. Contact Key — the unique ID from the data extension used as the entry source. This field must also be mapped under Map the Fields; if Email is your Contact Key, make sure Email is mapped.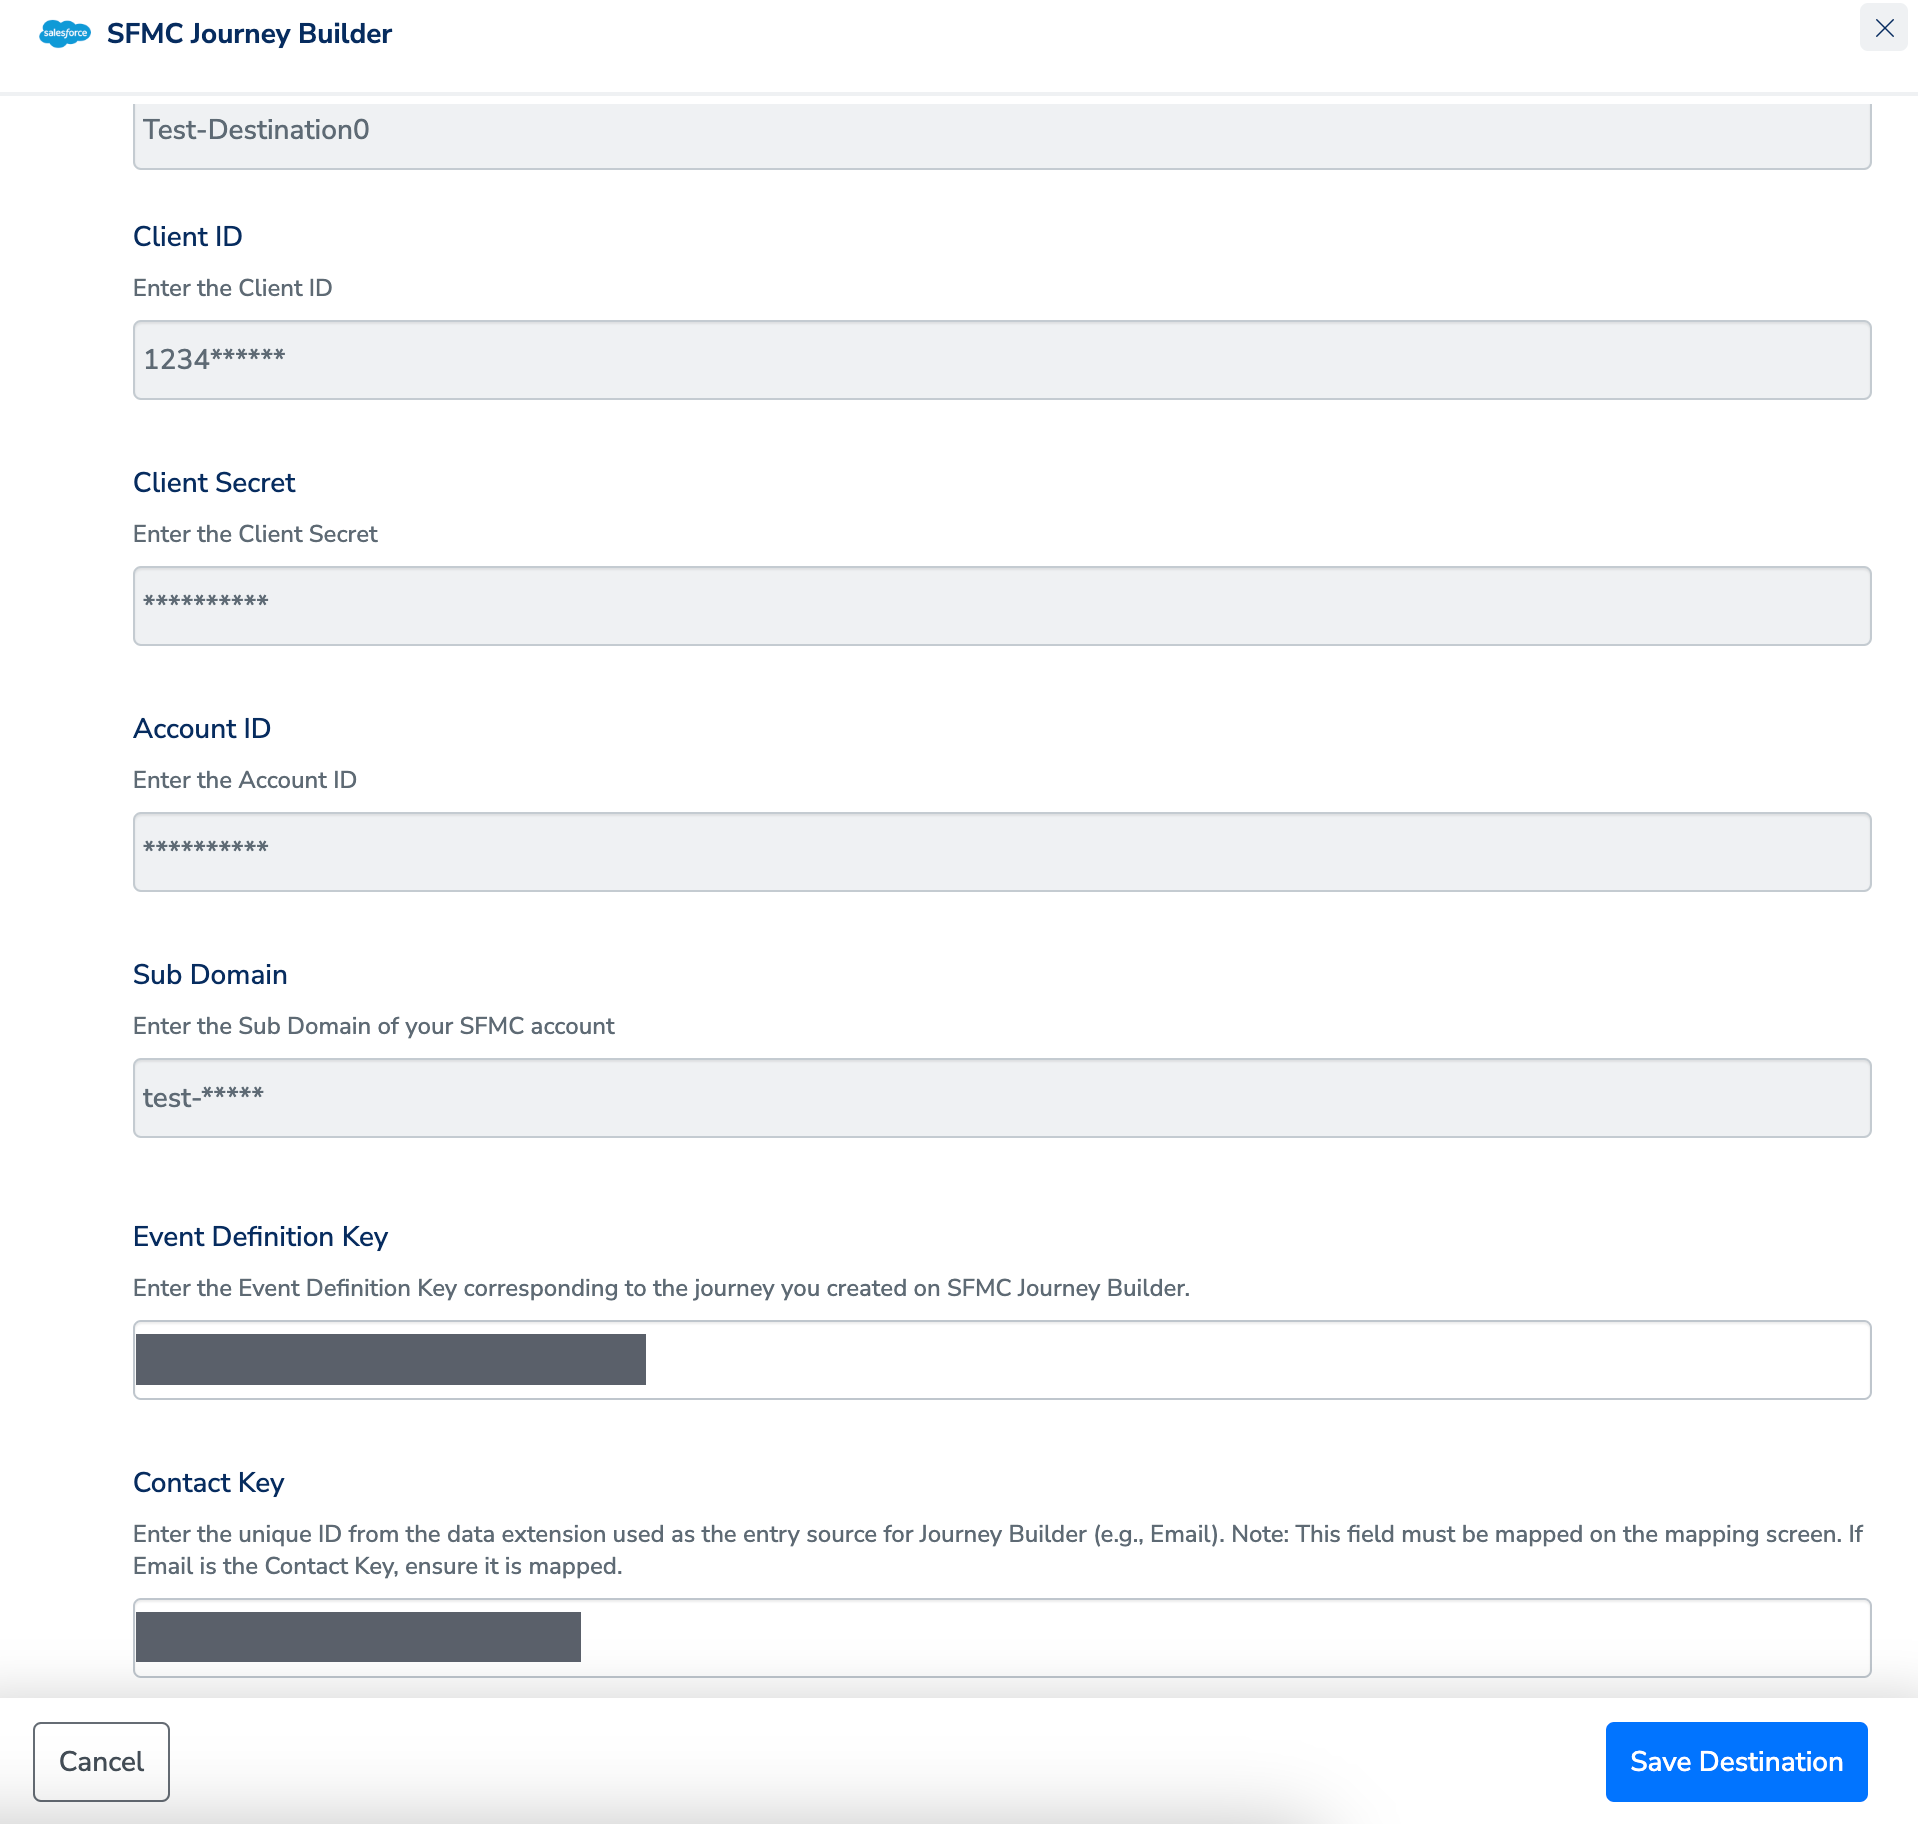
b. Contact Key — the unique ID from the data extension used as the entry source. This field must also be mapped under Map the Fields; if Email is your Contact Key, make sure Email is mapped.
4
Under the Destination Settings tab, choose the action and the mapping you want this node to use.
5
Click Save Destination. The destination is attached to the node.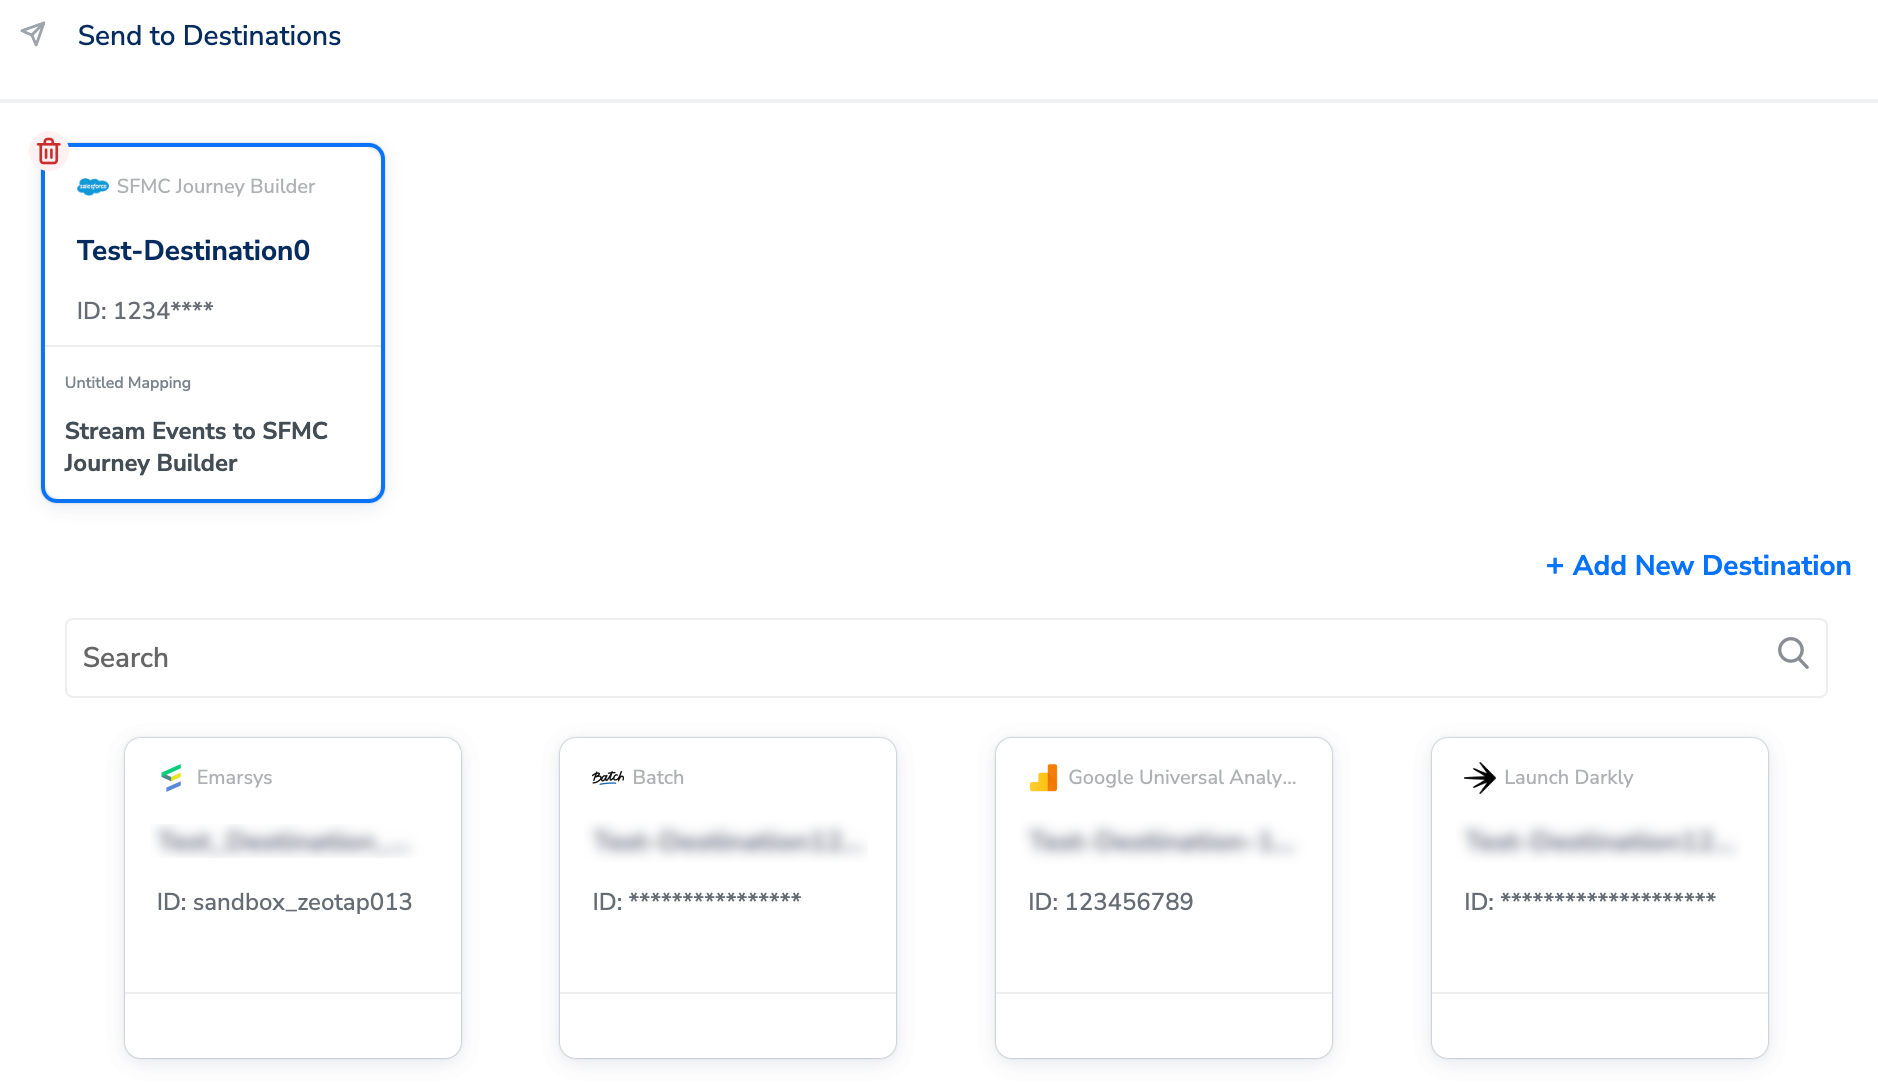
Verify the integration
Check both ends before you rely on the node:- In the Send to Destinations panel — the attached destination card shows the destination name and the Stream Events to SFMC Journey Builder (Legacy) action, so you can confirm at a glance that the right destination and action are wired in.
- In Zeotap CDP — once the workflow runs, open the Execution Details panel for the destination node. It records the failure status code, the timestamp, the destination name and a Request ID for any profile that did not make it through. See Identify Journey Errors.
- In Salesforce Marketing Cloud — open the journey whose Event Definition Key you entered and confirm it is receiving the contacts you expect.
Troubleshoot the integration
If the destination is configured correctly and the failure persists, contact your Zeotap representative. Include the journey and the node that failed, the destination name, the Request ID from the Execution Details panel, and the timestamp of the failure.
FAQ
Which journey in Journey Builder receives the data?
Which journey in Journey Builder receives the data?
The one identified by the Event Definition Key. Because that key is entered when you link the destination in a workflow rather than when you create the destination, a single SFMC destination can feed different journeys from different workflows — each link supplies its own key.
Do I have to create the destination from inside a workflow?
Do I have to create the destination from inside a workflow?
No. A destination can be created ahead of time from the Destinations module and reused across audiences and journeys, or created inline from the Send to Destinations panel. Both routes create the same object and ask for the same details. See Configure a destination.
Can I cap how often a user is sent to this destination?
Can I cap how often a user is sent to this destination?
Yes. Gateway policies can be applied to destinations that trigger a message send, and SFMC Journey Builder with the Stream Events to SFMC Journey Builder (Legacy) action is one of them, under the Email message category. Destinations that do not trigger a message send — data exports, audience syncs — are not covered. See Gateway.