

What this is
Batch is a mobile marketing automation platform for push notifications, in-app messaging, and email. The Batch real-time destination in Zeotap CDP forwards custom audiences and events from a Journeys workflow into a Batch project so a marketer can trigger Batch campaigns off Zeotap-defined segments and user traits. A custom audience passed to Batch carries custom user IDs, advertising IDs (GAID or IDFA), or install IDs, together with any event attributes you map in the destination.Prerequisites
Before you create the destination, confirm the following:
- An active Batch account with access to the Batch dashboard.
- At least one mobile application integrated with Batch. Integrated apps appear on the Batch dashboard.
- The Live API Key and REST API Key from Batch (Settings → General on the Batch dashboard).
- A Journeys workflow in Zeotap CDP with the filters and conditions you want to activate against.
Obtain the Batch API keys
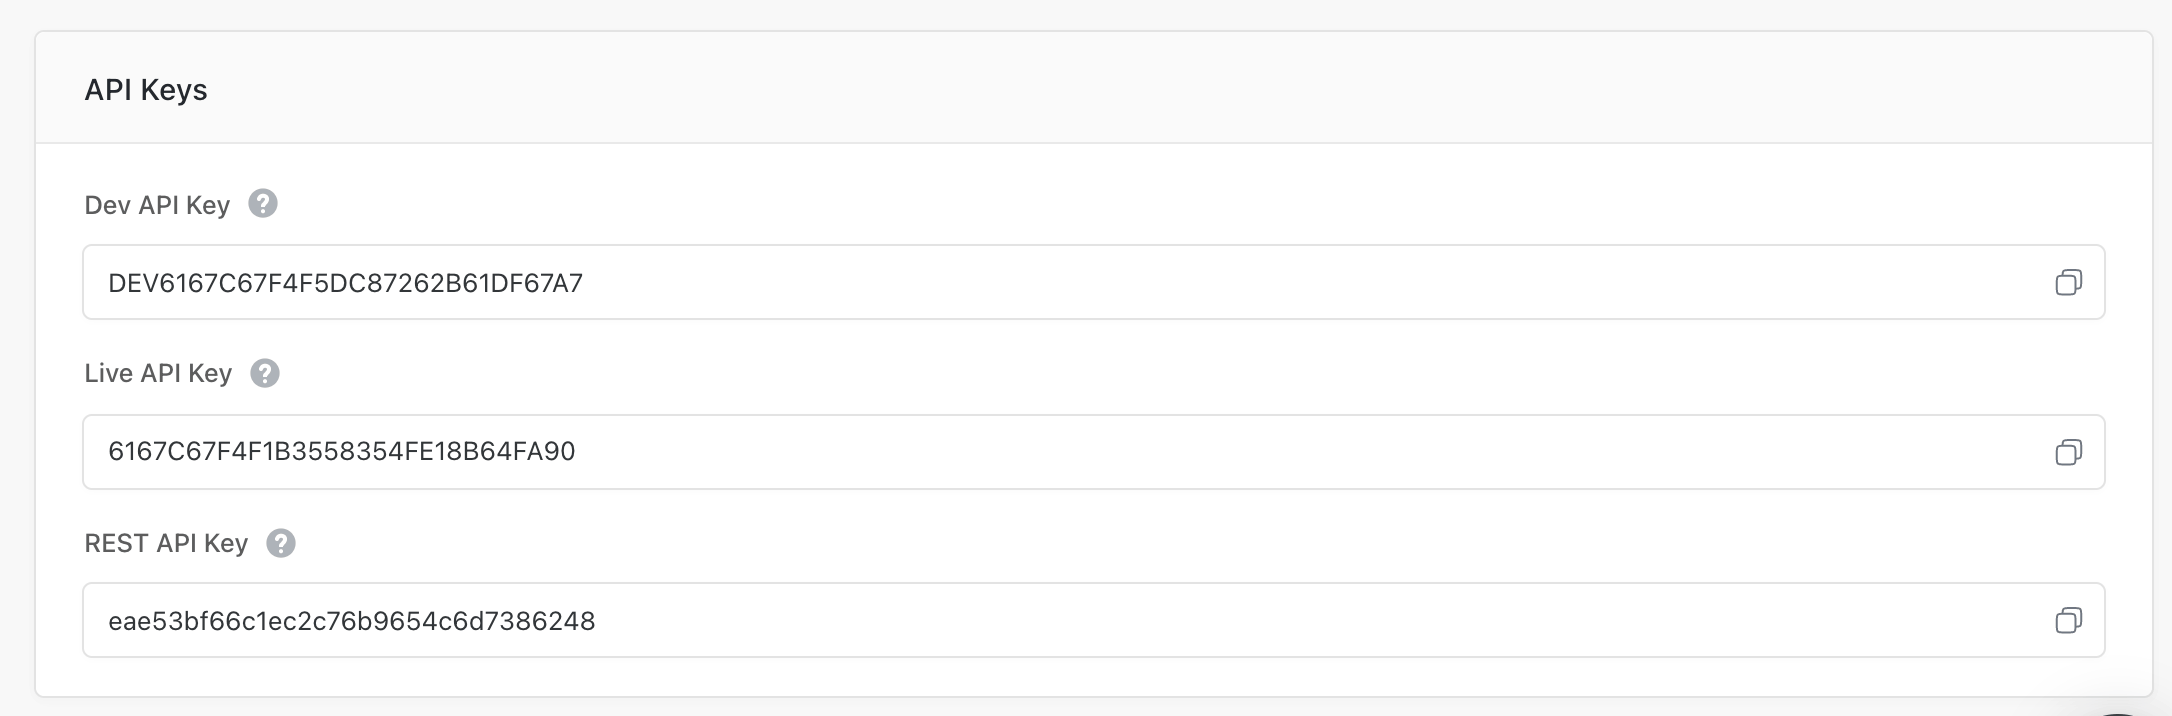
Both keys live on the Batch dashboard under Settings → General. Log into Batch, open SETTINGS from the top panel, and copy both the Live API Key and the REST API Key. You paste both values into the Zeotap destination in the next section.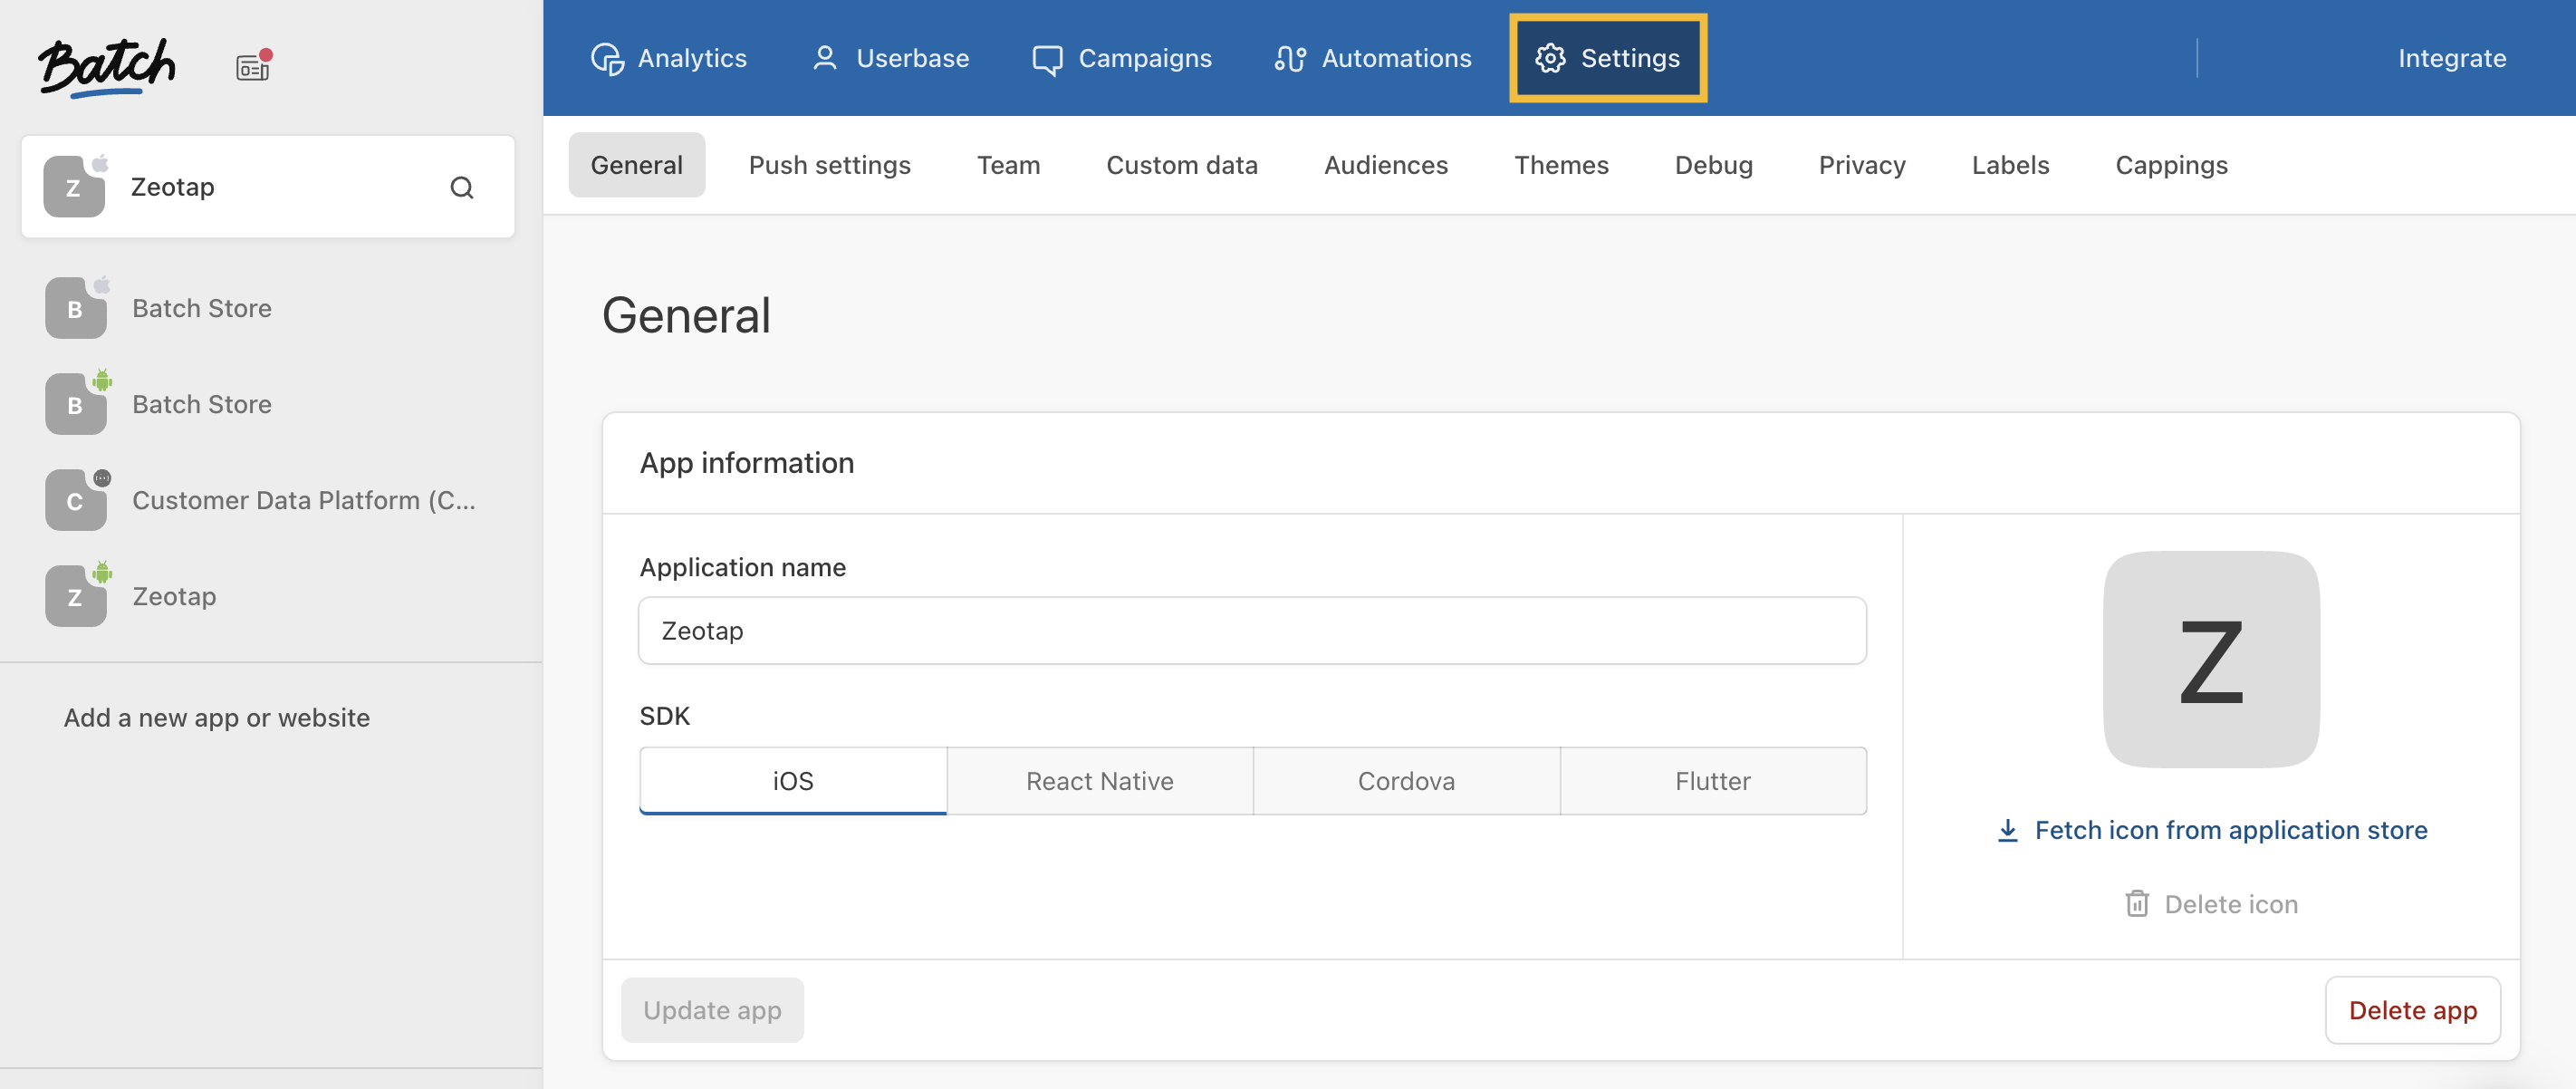
Create the Batch destination in Zeotap
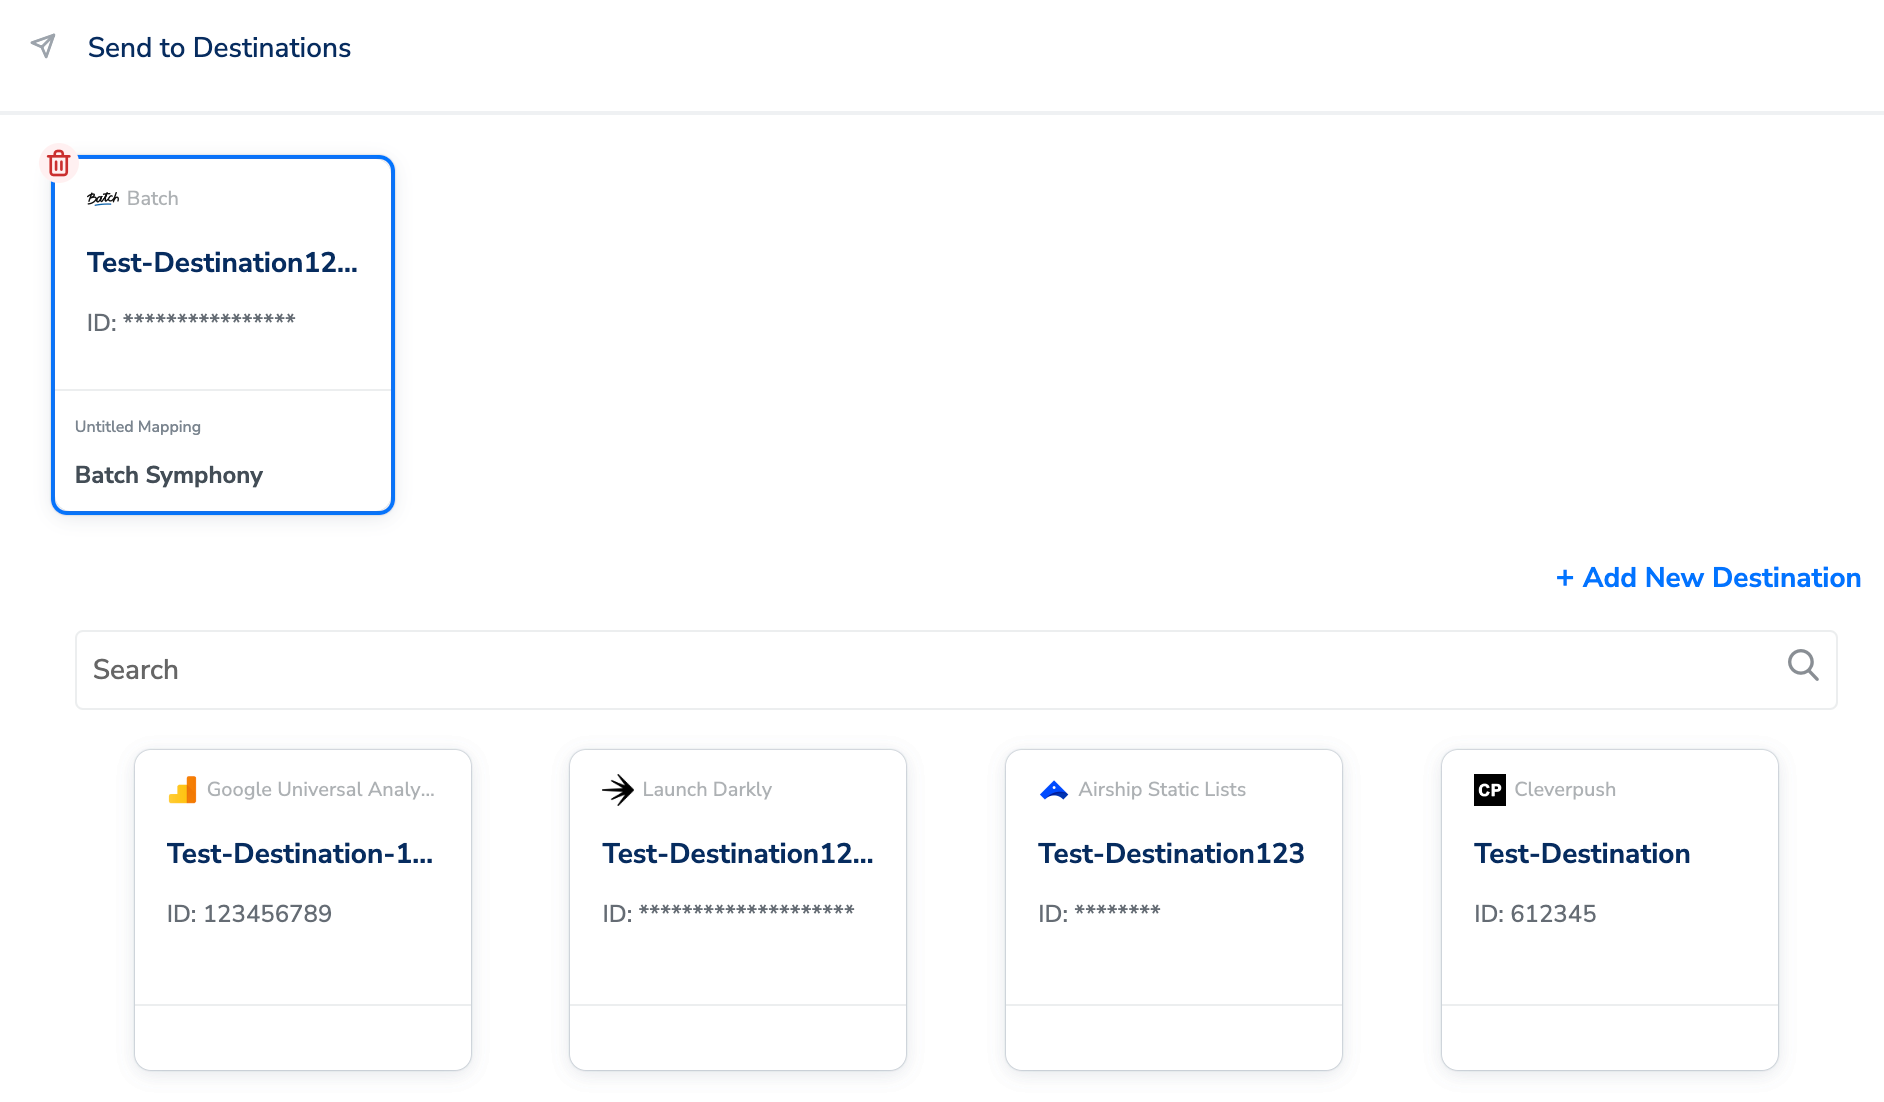
Open the Journeys workflow you want to activate, add a Send to Destinations node, and either pick an existing Batch destination or click + Add New Destination.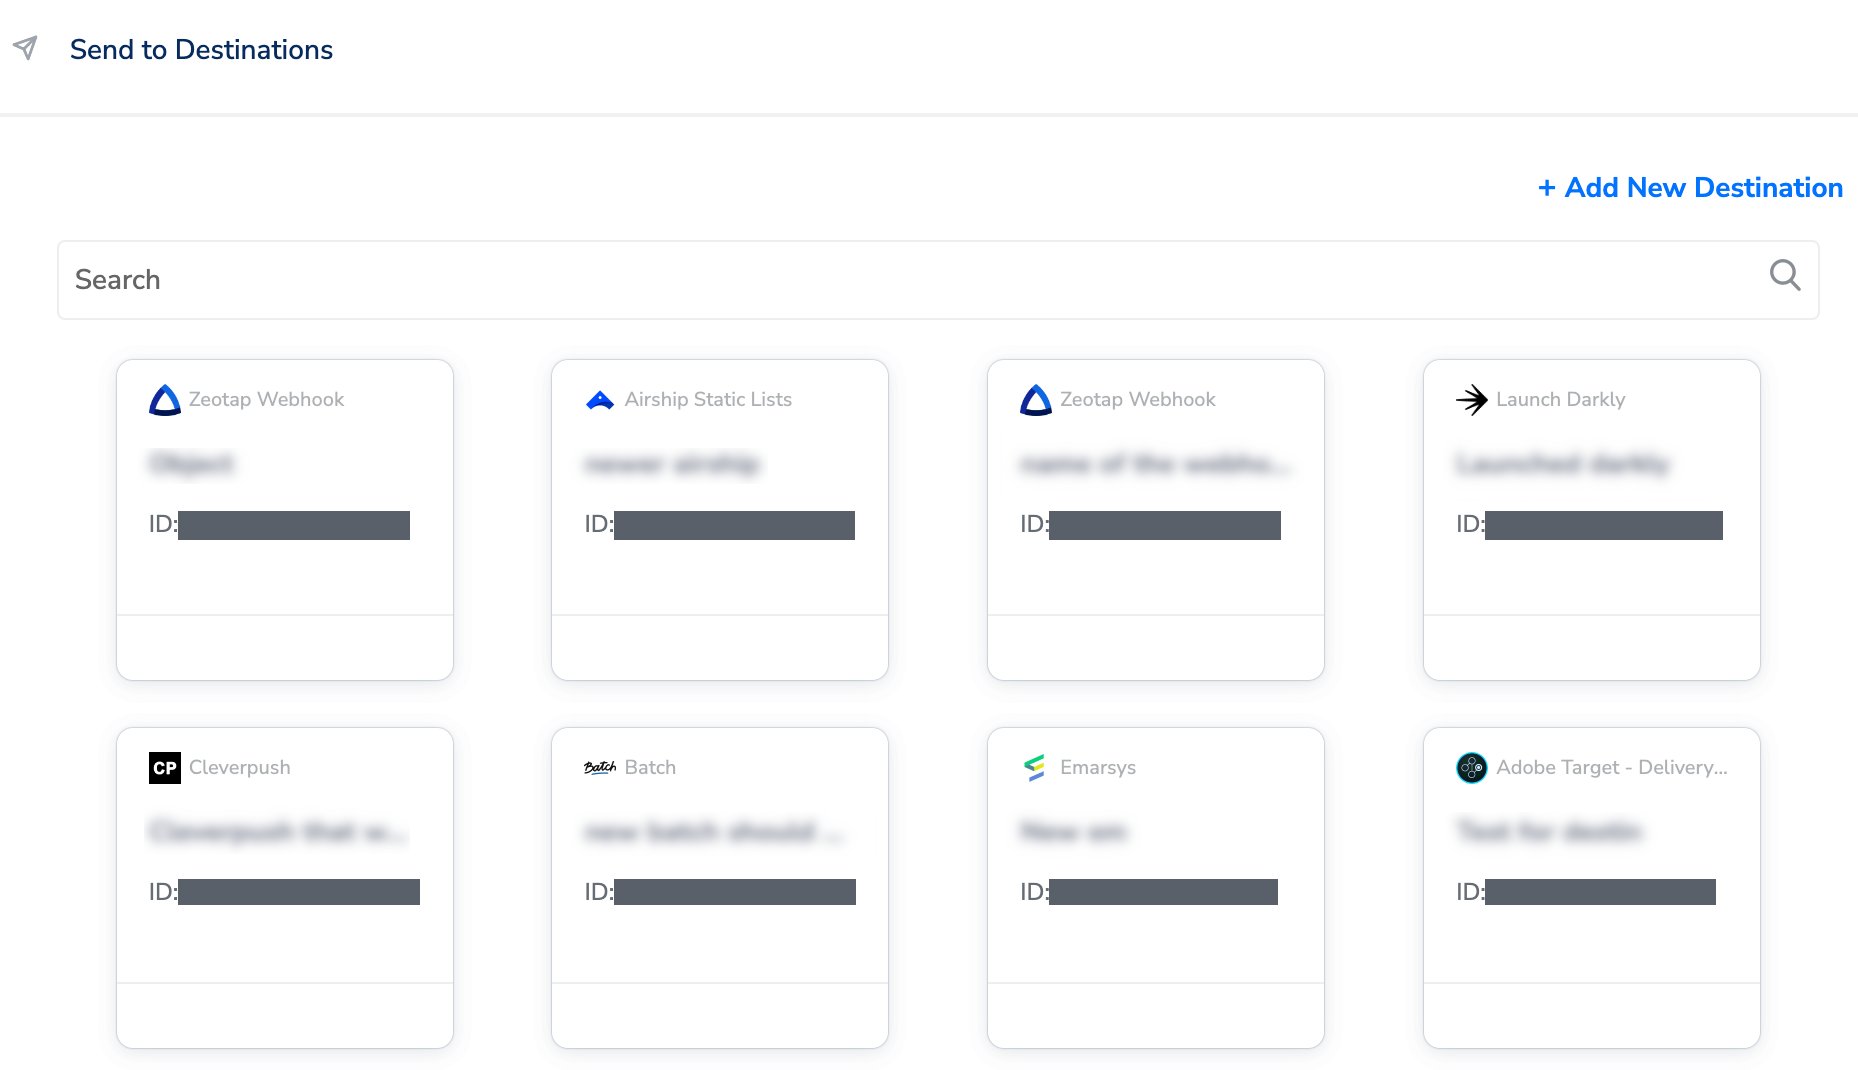
- Click + Add New Destination and search for Batch.
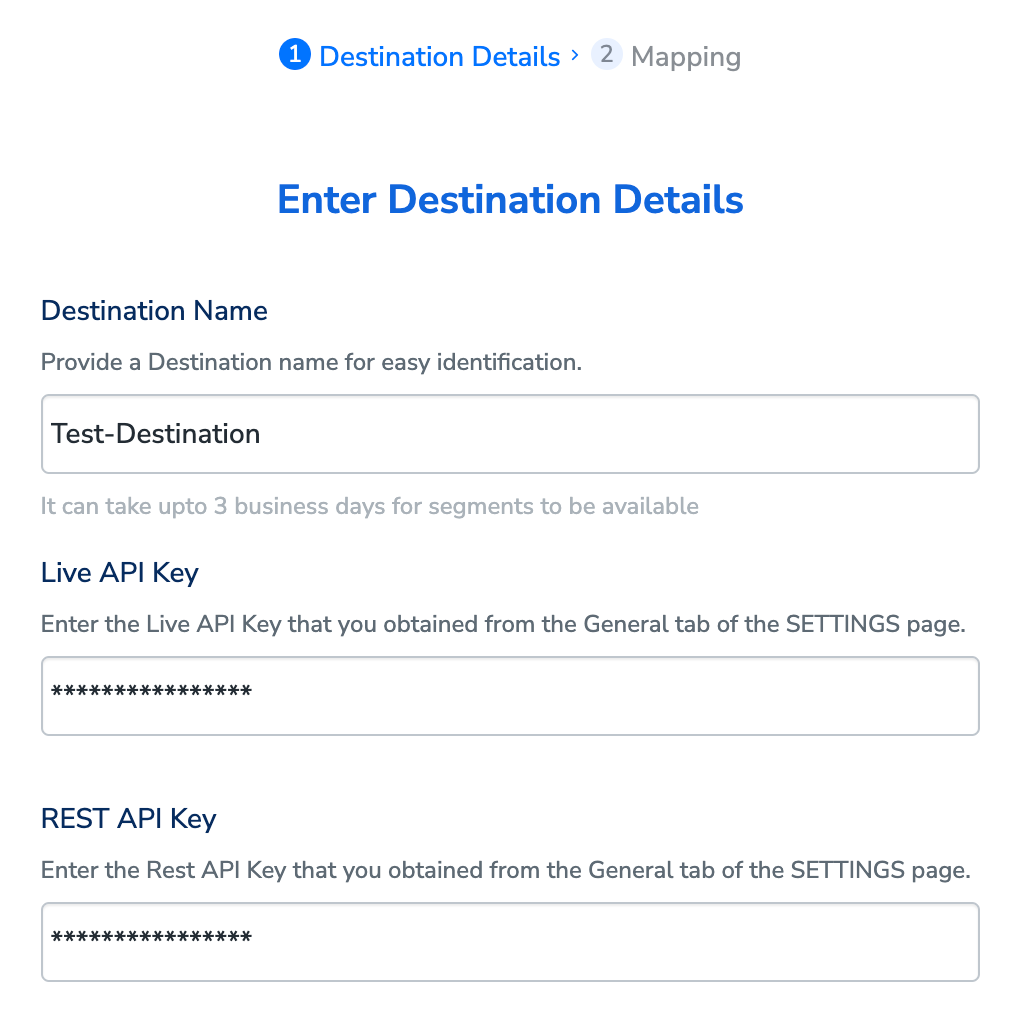
- Click Batch and enter a name for the destination.
-
Paste the Live API Key and REST API Key you copied from Batch, then click Next.
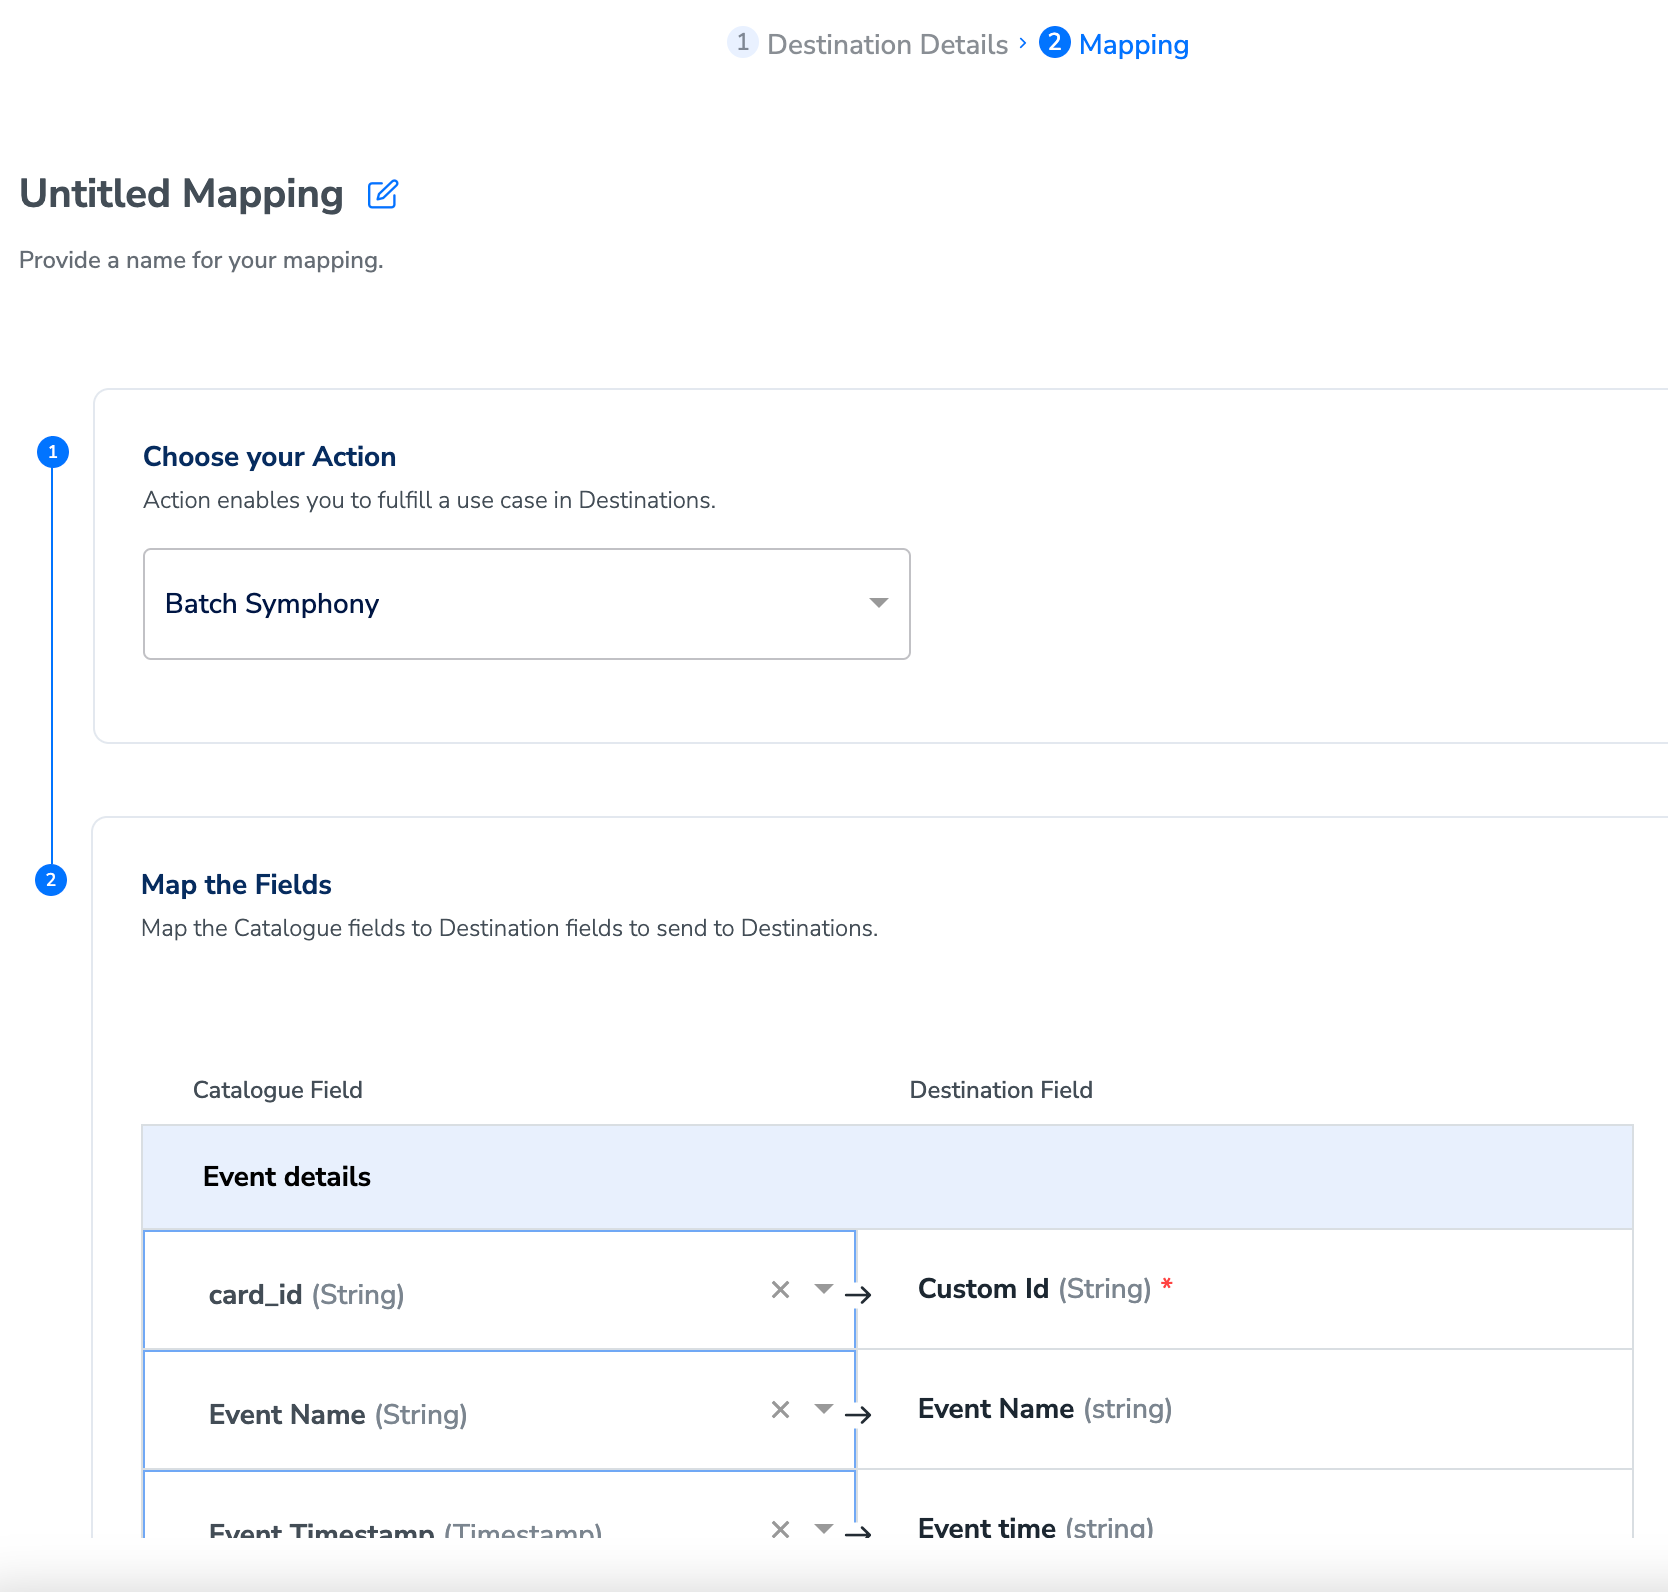
- On the mapping screen, under Choose your Action, select Batch Journeys as the action for sending data from the Journeys workflow.
-
Under Map the Fields, map each Catalogue field on the left to the corresponding Destination field on the right. Event attribute names on the Batch side accept only lowercase letters, digits, and underscores — see the naming rule below.
- Click Create Destination. The destination becomes available for activation in Journeys.
Activate the destination in a Journeys workflow
-
In the workflow canvas, click + and choose Send to Destinations.
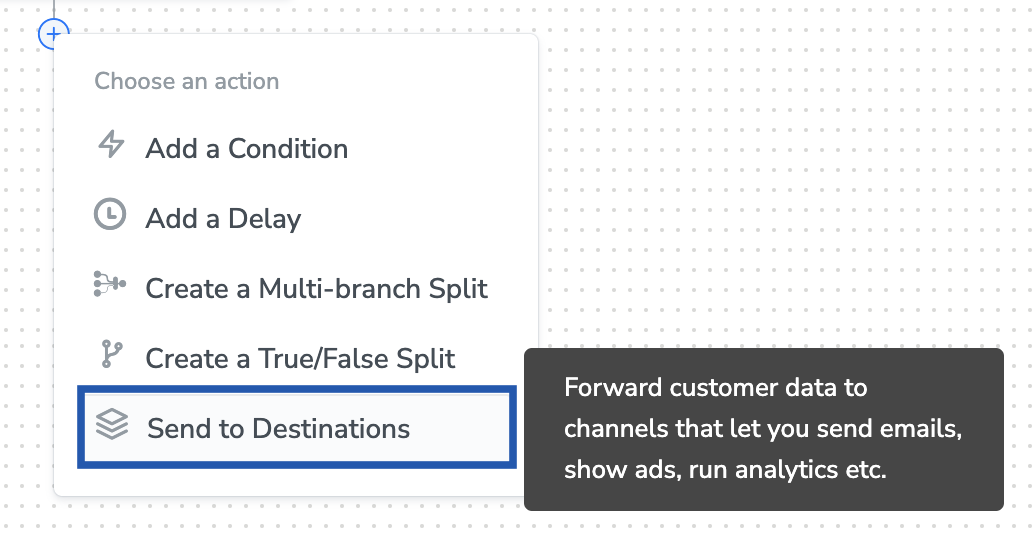
- Search the list of available destinations and select the Batch destination you created.
-
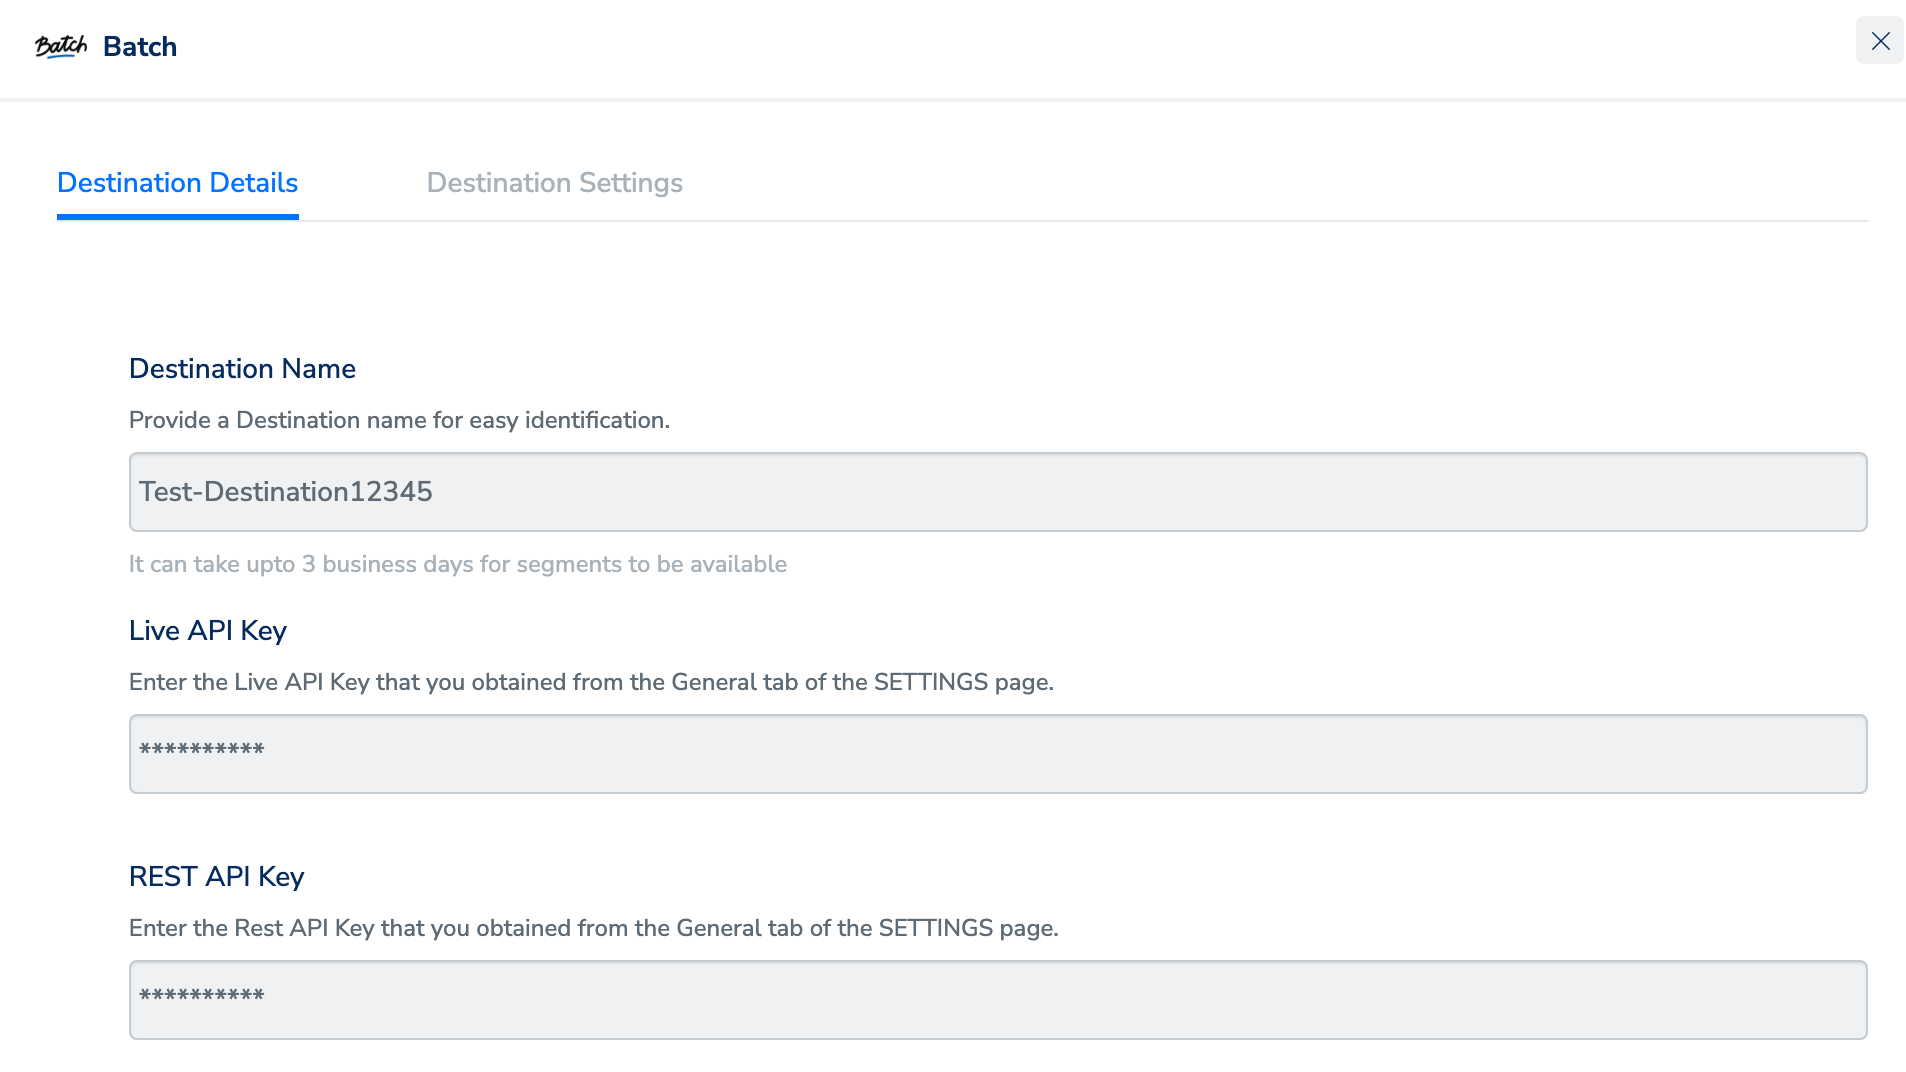
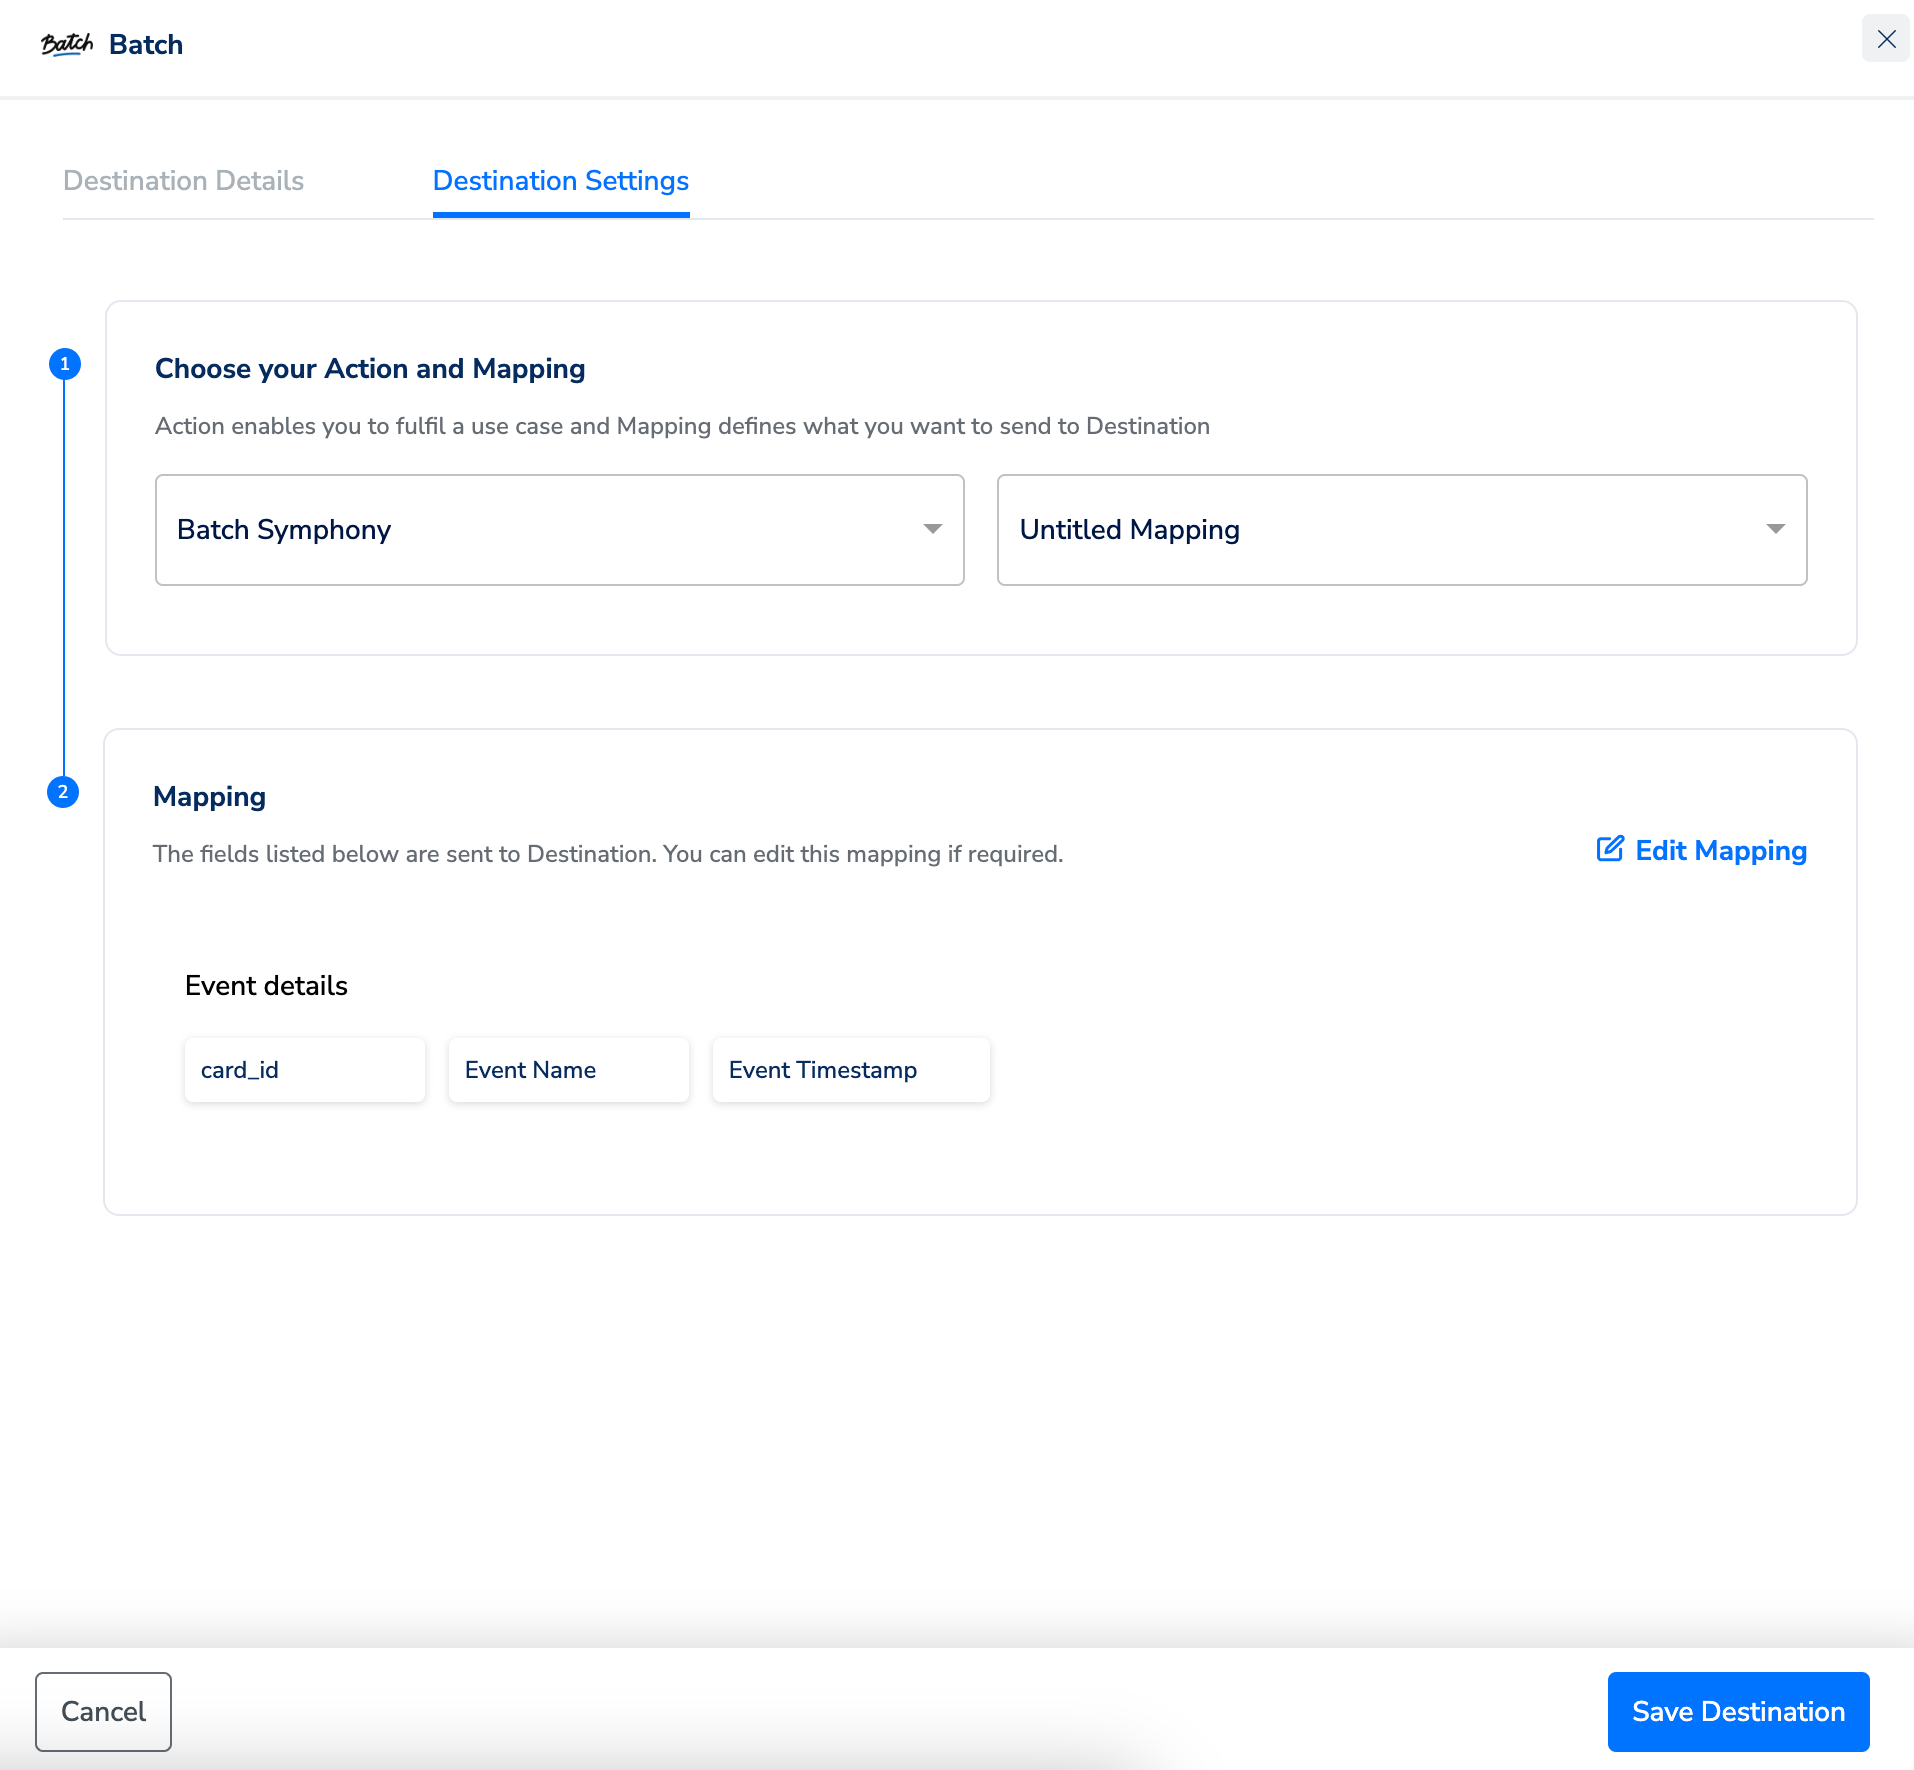
On the Destination Details tab, the Live API Key and REST API Key fields prefill from the destination configuration. Configure the Destination Settings tab — Choose your Action and Mapping, Mapping, and Channel Consent Rule — then click Save Destination.
-
On the Destination Settings tab, choose the Action and mapping for this specific workflow.
-
Click Save Destination. The destination attaches to the Send to Destinations node.
Verify data is reaching Batch
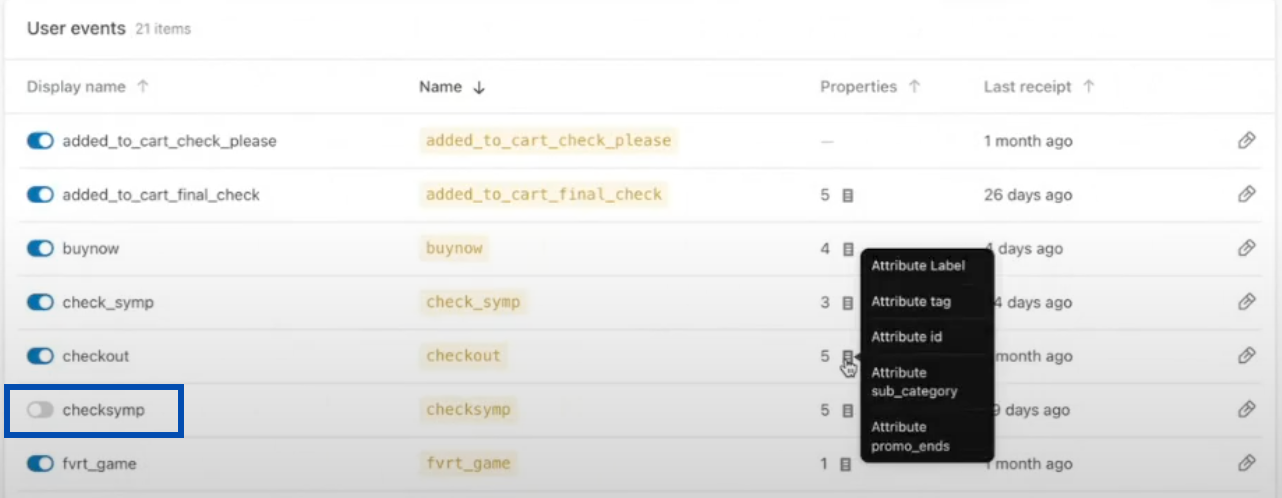
Open the Batch dashboard and go to Settings → Custom data. The user traits, events, and other attributes forwarded from Zeotap appear in this list once the first records arrive.
- The Batch destination in Zeotap saved without an authentication error.
- The destination appears attached to the Send to Destinations node in the workflow.
- The attributes you mapped appear under Batch’s Settings → Custom data list.
Create a push trigger automation in Batch
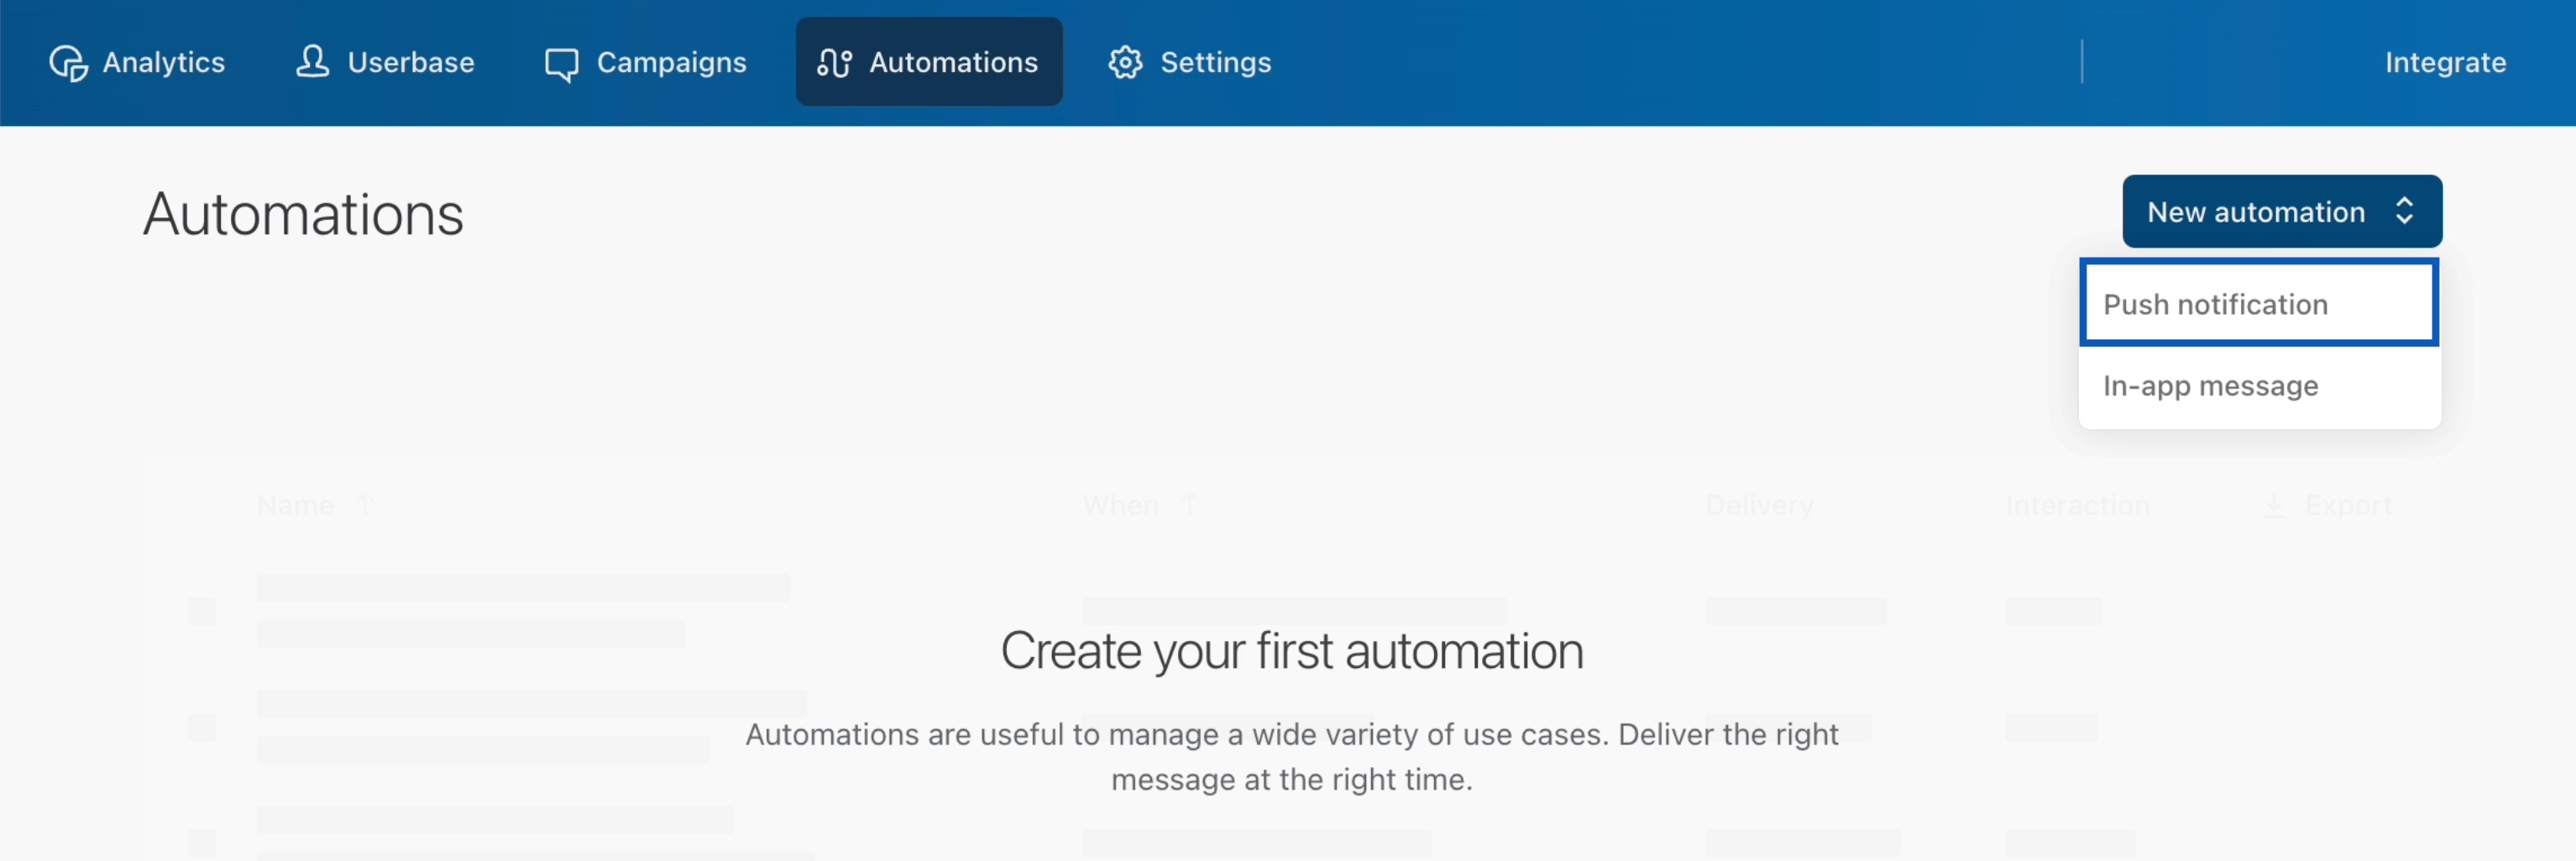
Once events reach Batch, you can trigger a campaign off them:- In the Batch dashboard, go to Automations and click New Automation.
-
Choose Push notification or In-app message.
- Enter a descriptive name for the automation.
-
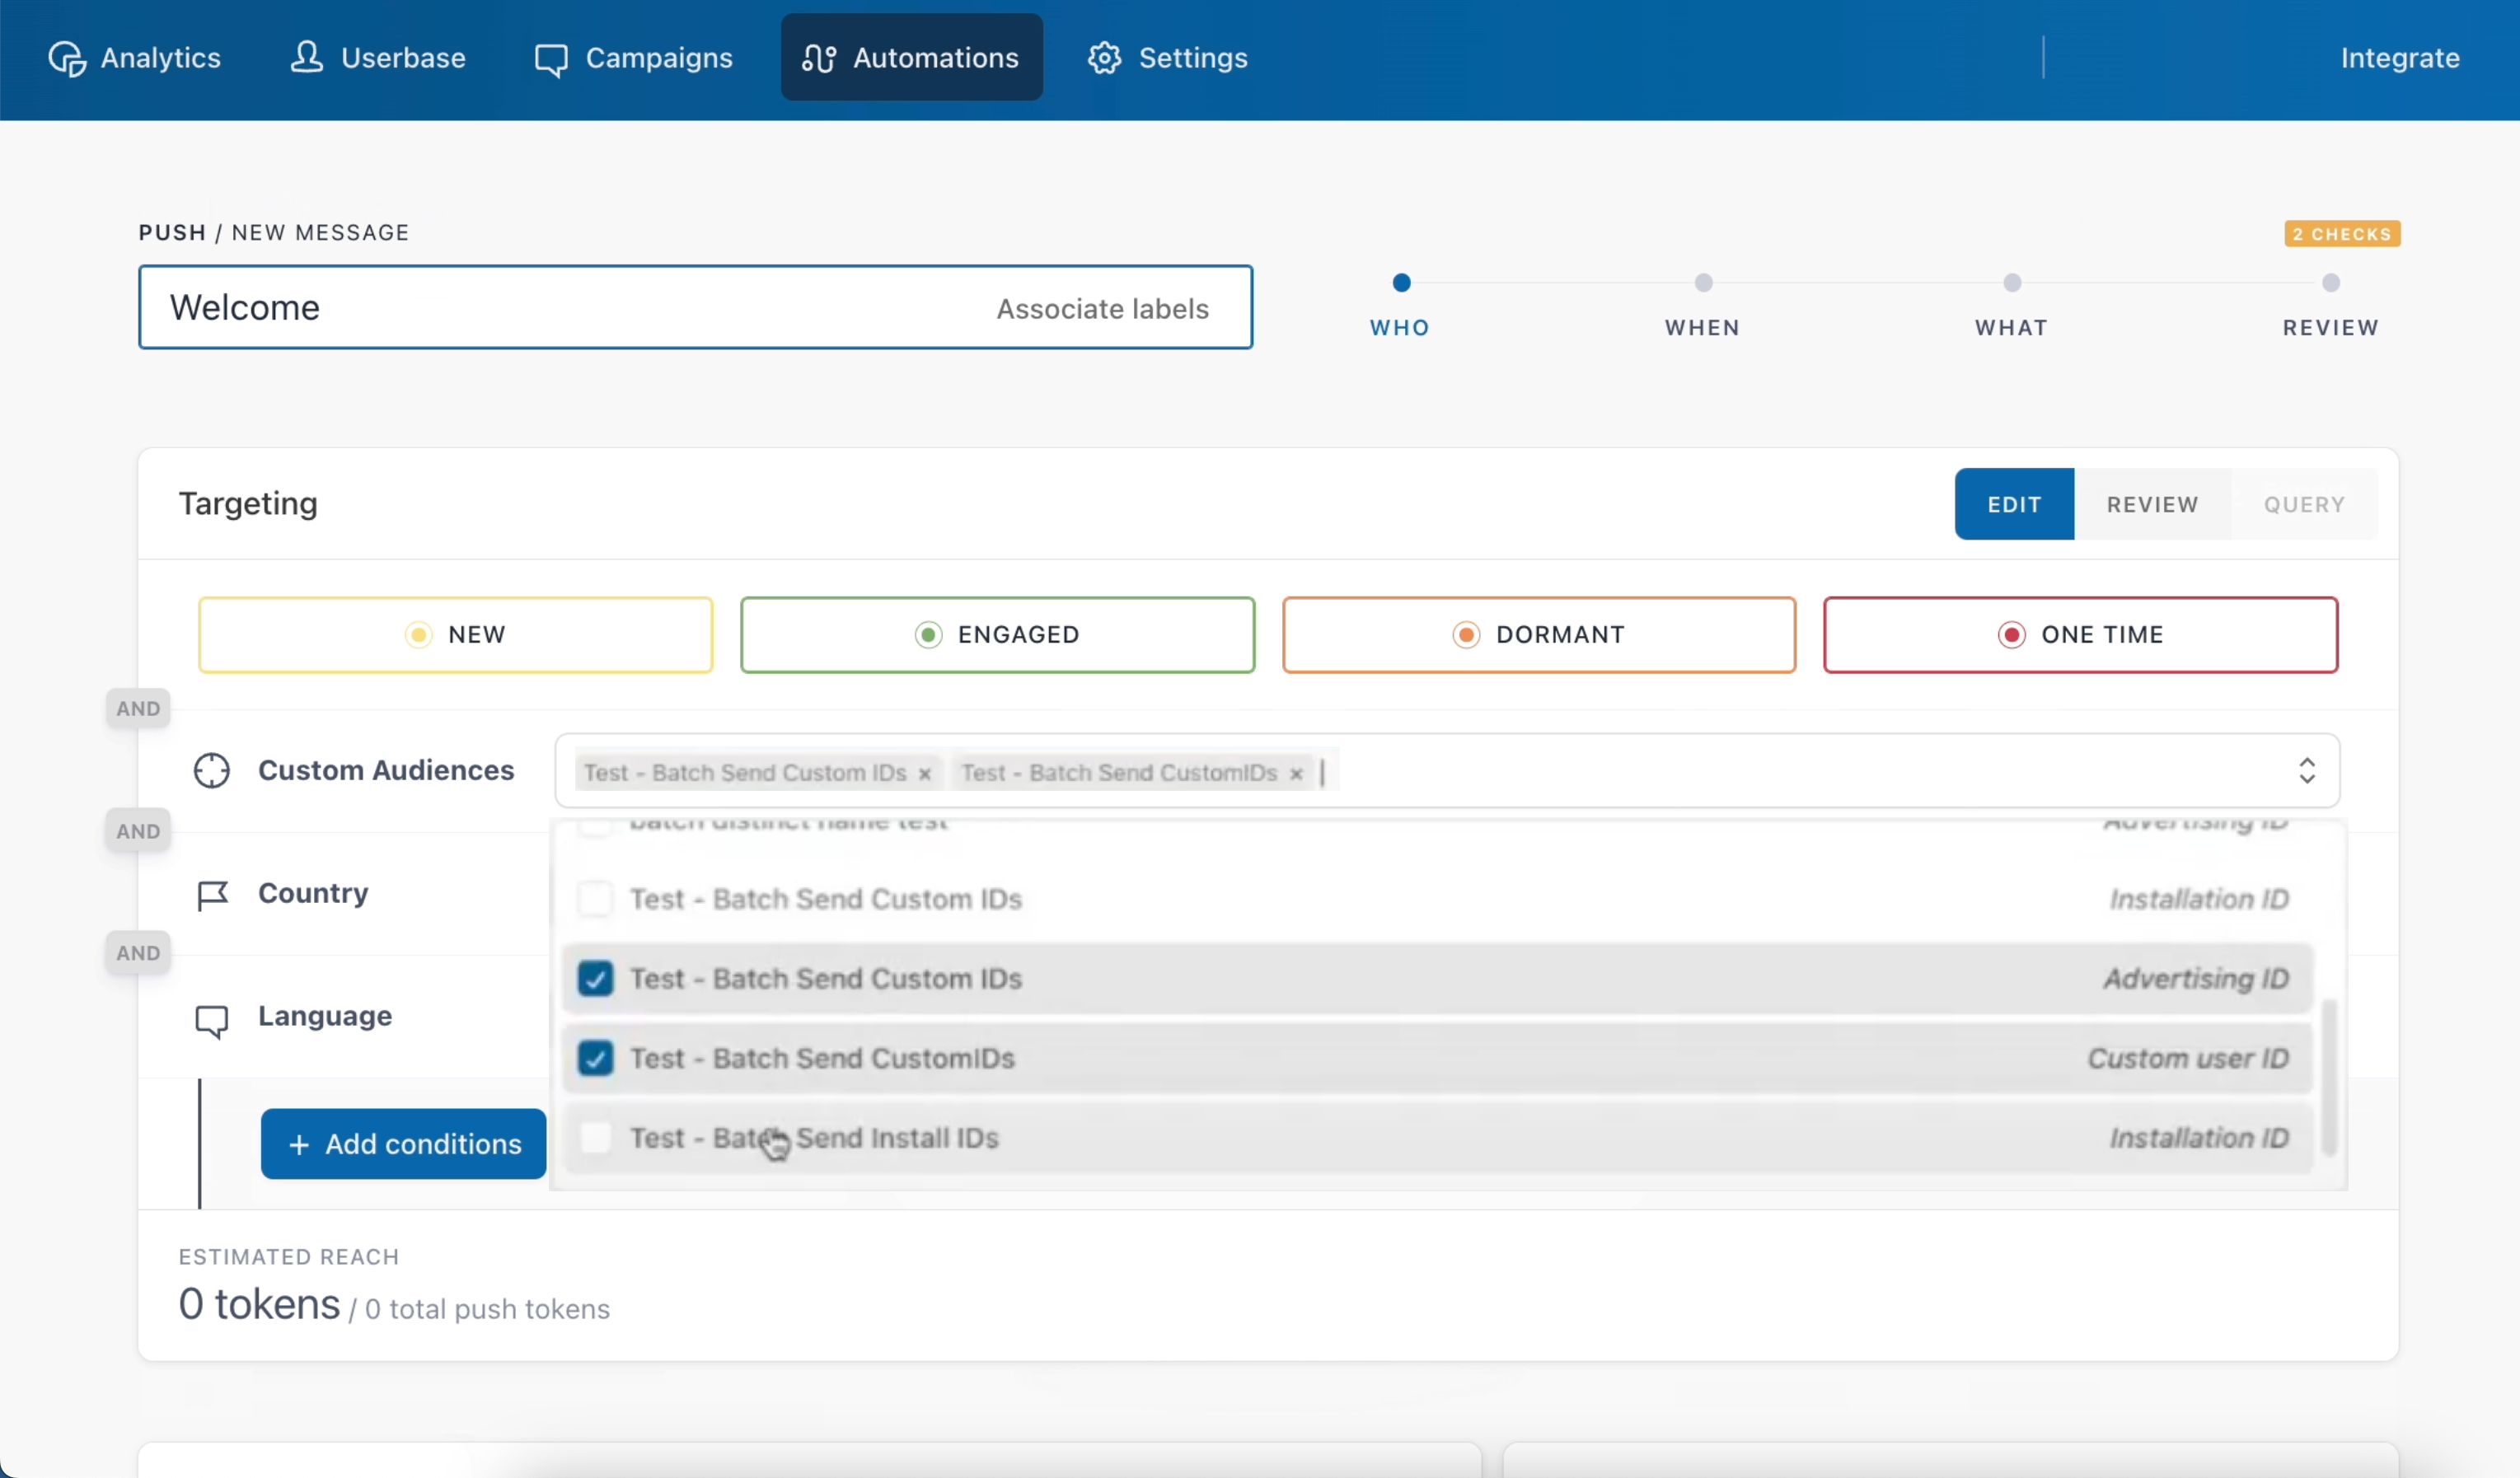
Under Custom Audiences, optionally choose the audiences the automation applies to.
-
Choose the event that triggers the notification.
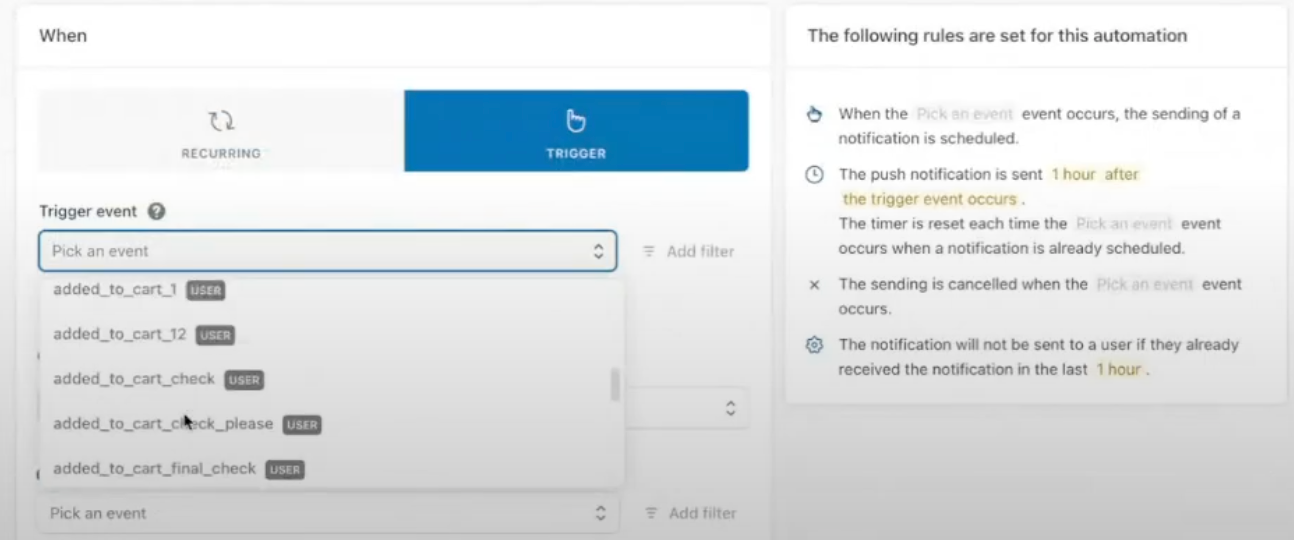
- Enter the message body to send to the user.
- Click Save and run.
Batch’s own documentation covers automation authoring in depth:
Troubleshooting
If a symptom persists after the checks above — for example, the API keys are confirmed correct but the destination still fails to save, or attributes are enabled in Custom data but still absent from Userbase — contact your Zeotap customer success representative. Include the workflow name, the destination name, the timestamp of the failure, and a screenshot of the error message.
FAQ
What identifiers can I send to Batch through this destination?
What identifiers can I send to Batch through this destination?
A custom audience passed to Batch carries custom user IDs, advertising IDs (GAID or IDFA), or install IDs. Map the appropriate identifier field in the destination’s Map the Fields screen.
Do event attribute names have to be lowercase?
Do event attribute names have to be lowercase?
Yes. Batch accepts only the characters
a-z0-9_ for event attribute names. Uppercase letters, hyphens, and spaces block the mapping from saving.Where do I paste the Live API Key and REST API Key?
Where do I paste the Live API Key and REST API Key?
Into the destination creation screen in Zeotap after selecting Batch as the destination type. Both keys come from Batch’s Settings → General page. They also prefill on the Destination Details tab of the Send to Destinations node once the destination is created.
Why don't my attributes show up in Batch's Userbase?
Why don't my attributes show up in Batch's Userbase?
Attributes forwarded from Zeotap appear first under Batch’s Settings → Custom data. They are not exposed to Userbase segments or automations until you toggle each attribute on from that screen and click save.