

What this is
The Cleverpush real-time integration sends data out of Zeotap CDP to Cleverpush, one user at a time, as the user moves through a workflow in Journeys. Cleverpush is a web-based platform that lets website owners and developers send to users who have subscribed to receive them. With this integration you can engage those subscribers in real time and at scale, through mobile applications, websites and emails. This page covers the real-time destination only — the one you attach to a Send to Destinations node in Journeys. Cleverpush has three other pages, and they are not interchangeable:- Cleverpush — the batch destination, linked to an audience rather than to a Journeys node.
- Cleverpush Real Time Source — data flowing the opposite way, from Cleverpush into Zeotap CDP in real time.
- Cleverpush (Batch) Source — the same opposite direction, in batches.
Supported identifiers and actions
This integration supports Subscription ID and standard attributes such as First Name, Last Name, Gender and Email Address (Raw). You can also send custom identifiers and attributes. Which of those you can actually send depends on the action you pick on the mapping screen:Create the standard and custom attributes in your Cleverpush account before you map them in Zeotap CDP. If an attribute does not exist in Cleverpush, the data is not sent correctly. See Add identifiers and attributes in Cleverpush.
Prerequisites
Have the following ready before you create the destination:- A Cleverpush account with a channel set up for the platform you want to send on — Web Push, App Push or Email Push. To create a channel and set up a platform, see the Cleverpush appendix, which covers all three.
- The Private API Key for that Cleverpush account. See Obtain the Private API Key.
- The Channel ID of the push notification channel you want to use. See Obtain the Channel ID.
- The identifiers and attributes already created in Cleverpush, so that they exist when you map them on the Zeotap CDP side. See Add identifiers and attributes in Cleverpush.
- A workflow in Journeys with the filters or conditions that select the users you want to send. See Create a Workflow.
- A Catalogue attribute holding each user’s Cleverpush subscription ID — this is what you map to the Subscription Id destination field.
Obtain the Private API Key
A Private API Key is a unique identifier associated with your Cleverpush account. Cleverpush uses it to authenticate and authorise access to certain features of the platform.1
Log into the Cleverpush console and navigate to Settings.
2
In the left panel, click API and copy the Private API key displayed on the screen.
3
If you want to add an additional API key, click Add additional API key and select the channel where you intend to use the key.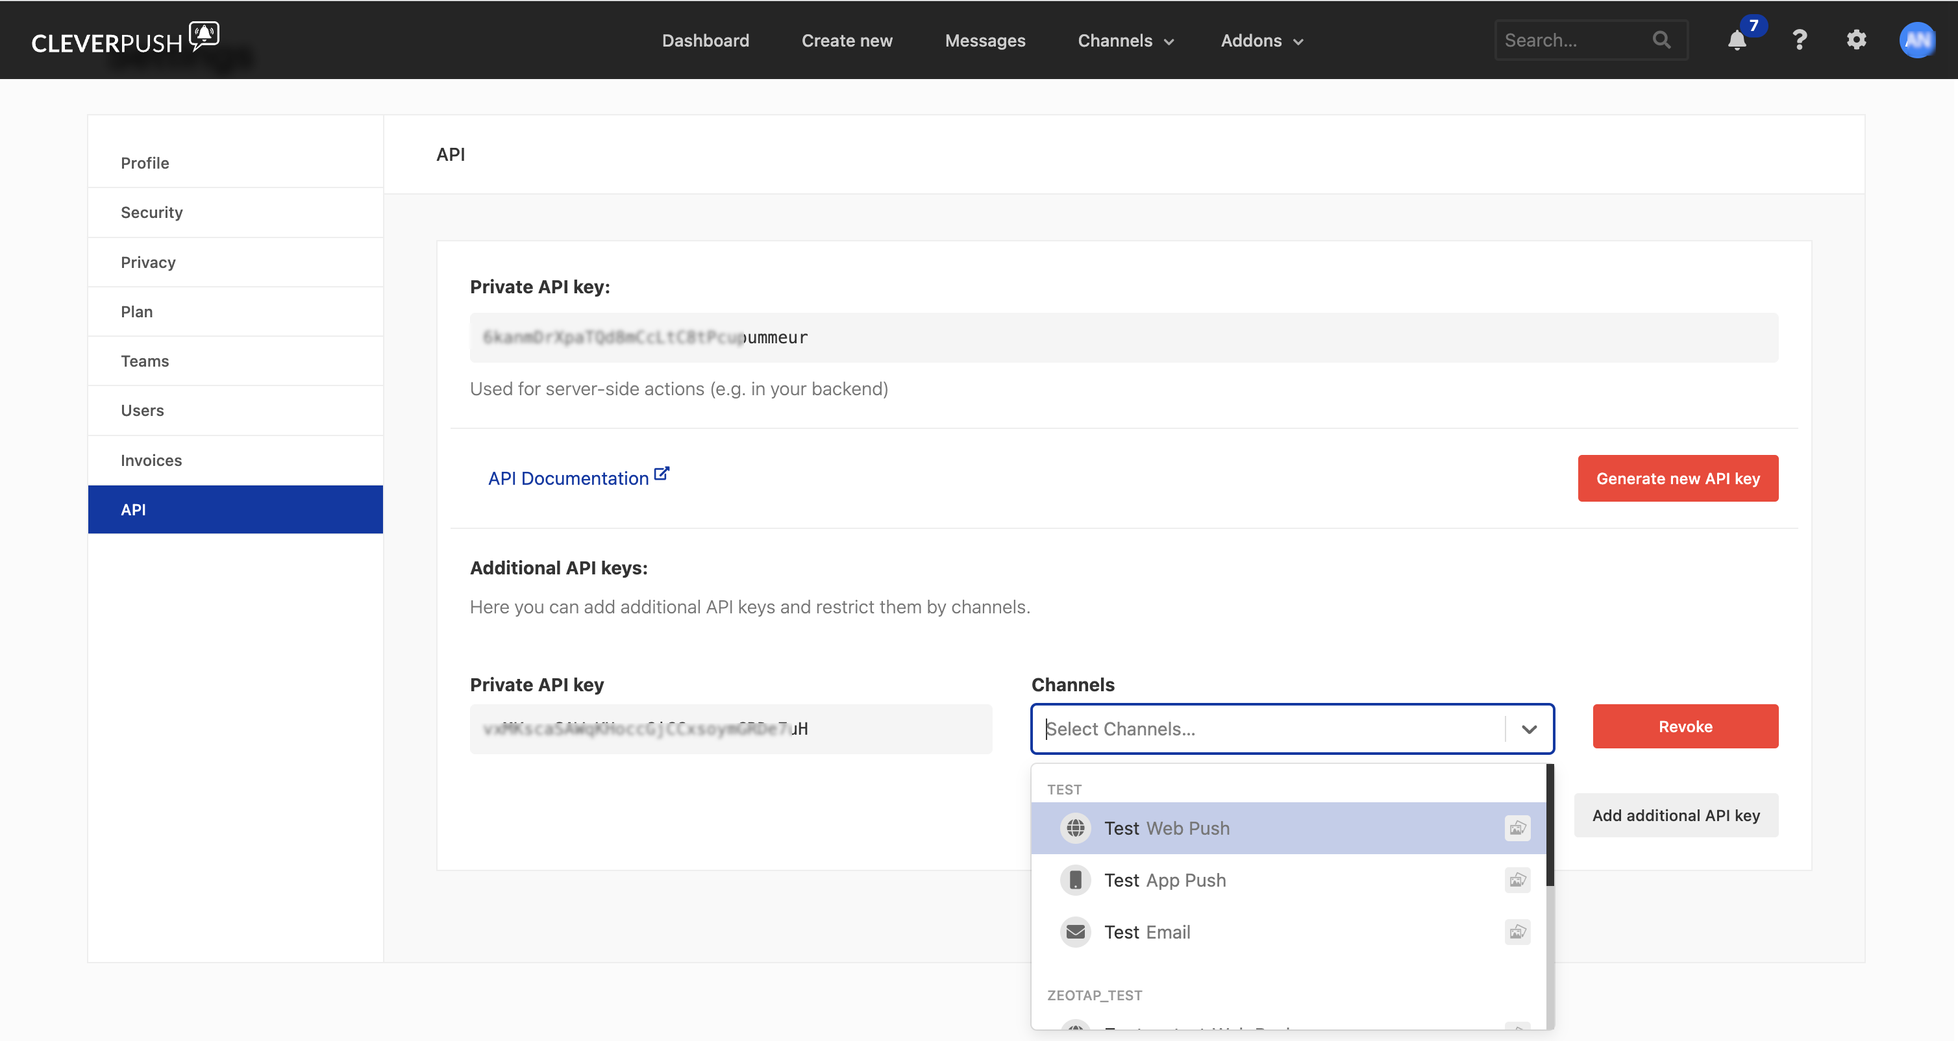
Obtain the Channel ID
A Channel ID is a unique identifier assigned to the push notification channel you create in Cleverpush.1
Log into the Cleverpush console and navigate to Channels on the top navigation bar.
2
Under Channels, click the channel you want to use for sending push notifications. If the channel you need does not exist, create one by clicking Add Channel in the drop-down menu. For the full steps, see Create a new channel in Cleverpush.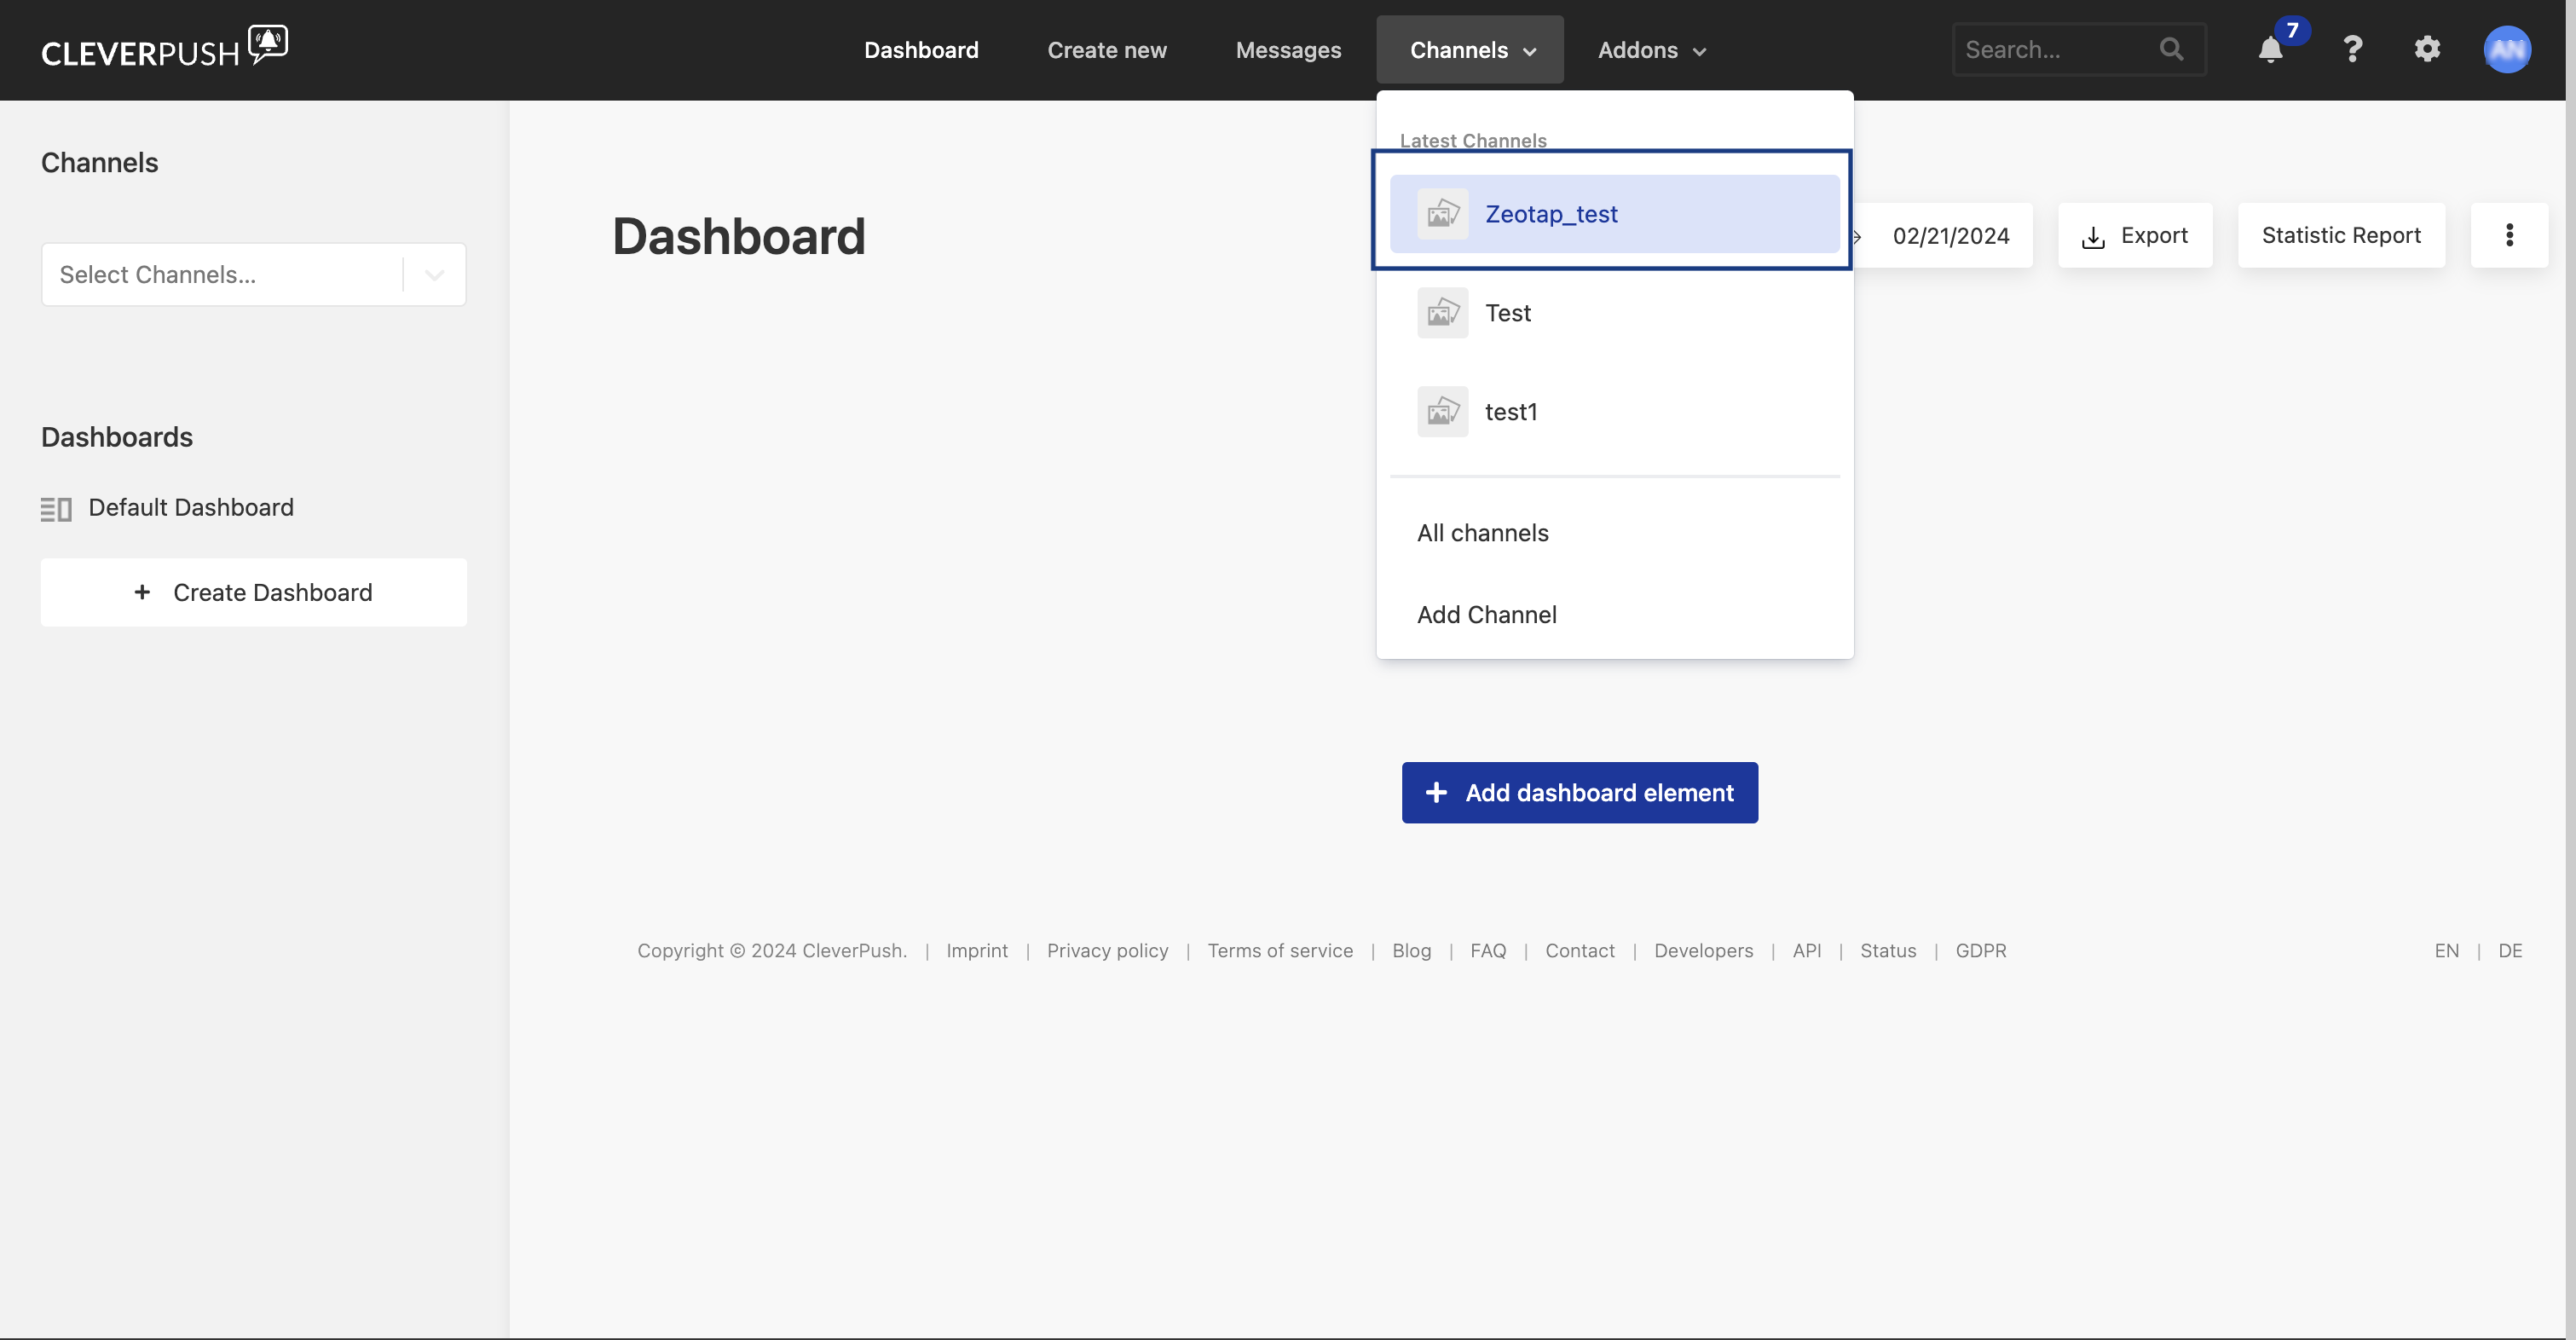
3
Once the channel exists, set up the platforms you want to send notifications on. Zeotap CDP supports: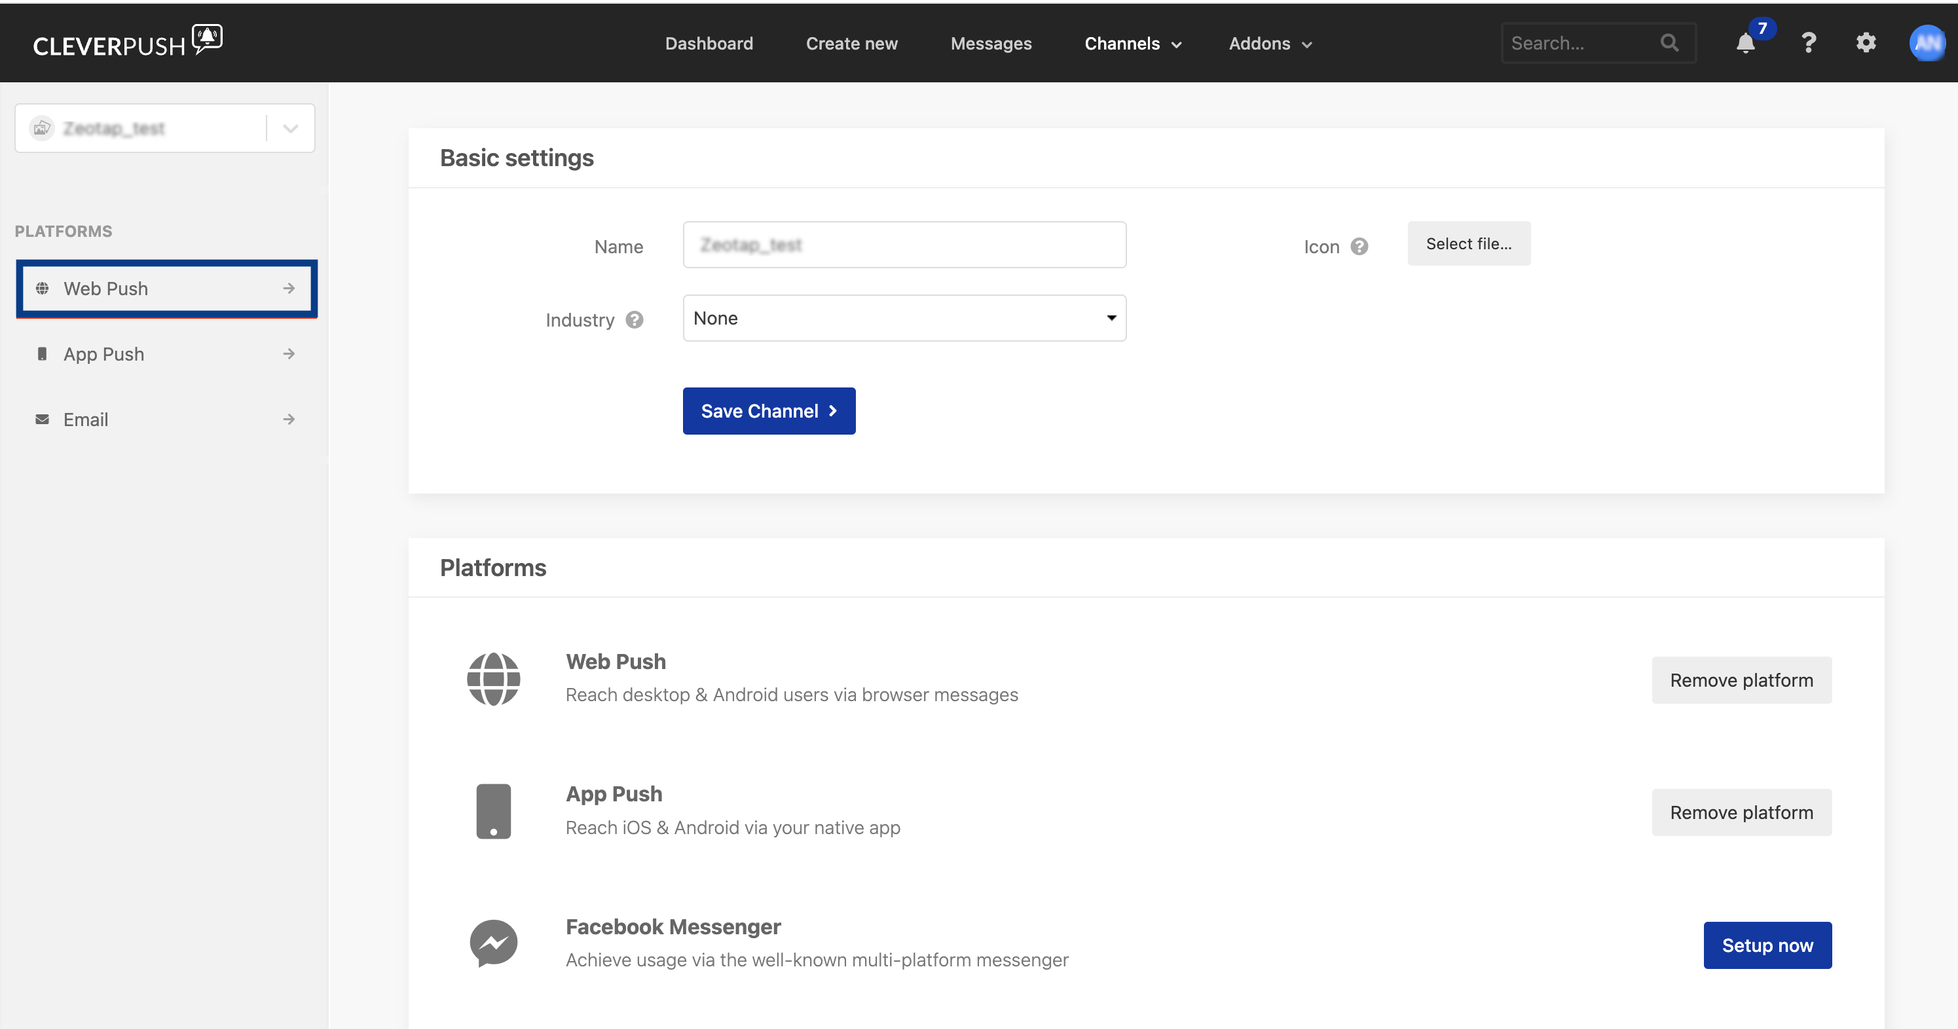
- Web Push
- App Push
- Email Push
For the setup steps for each of these platforms, see the Cleverpush appendix.
4
Click the platform you want and navigate to General → Advanced settings → Channel ID.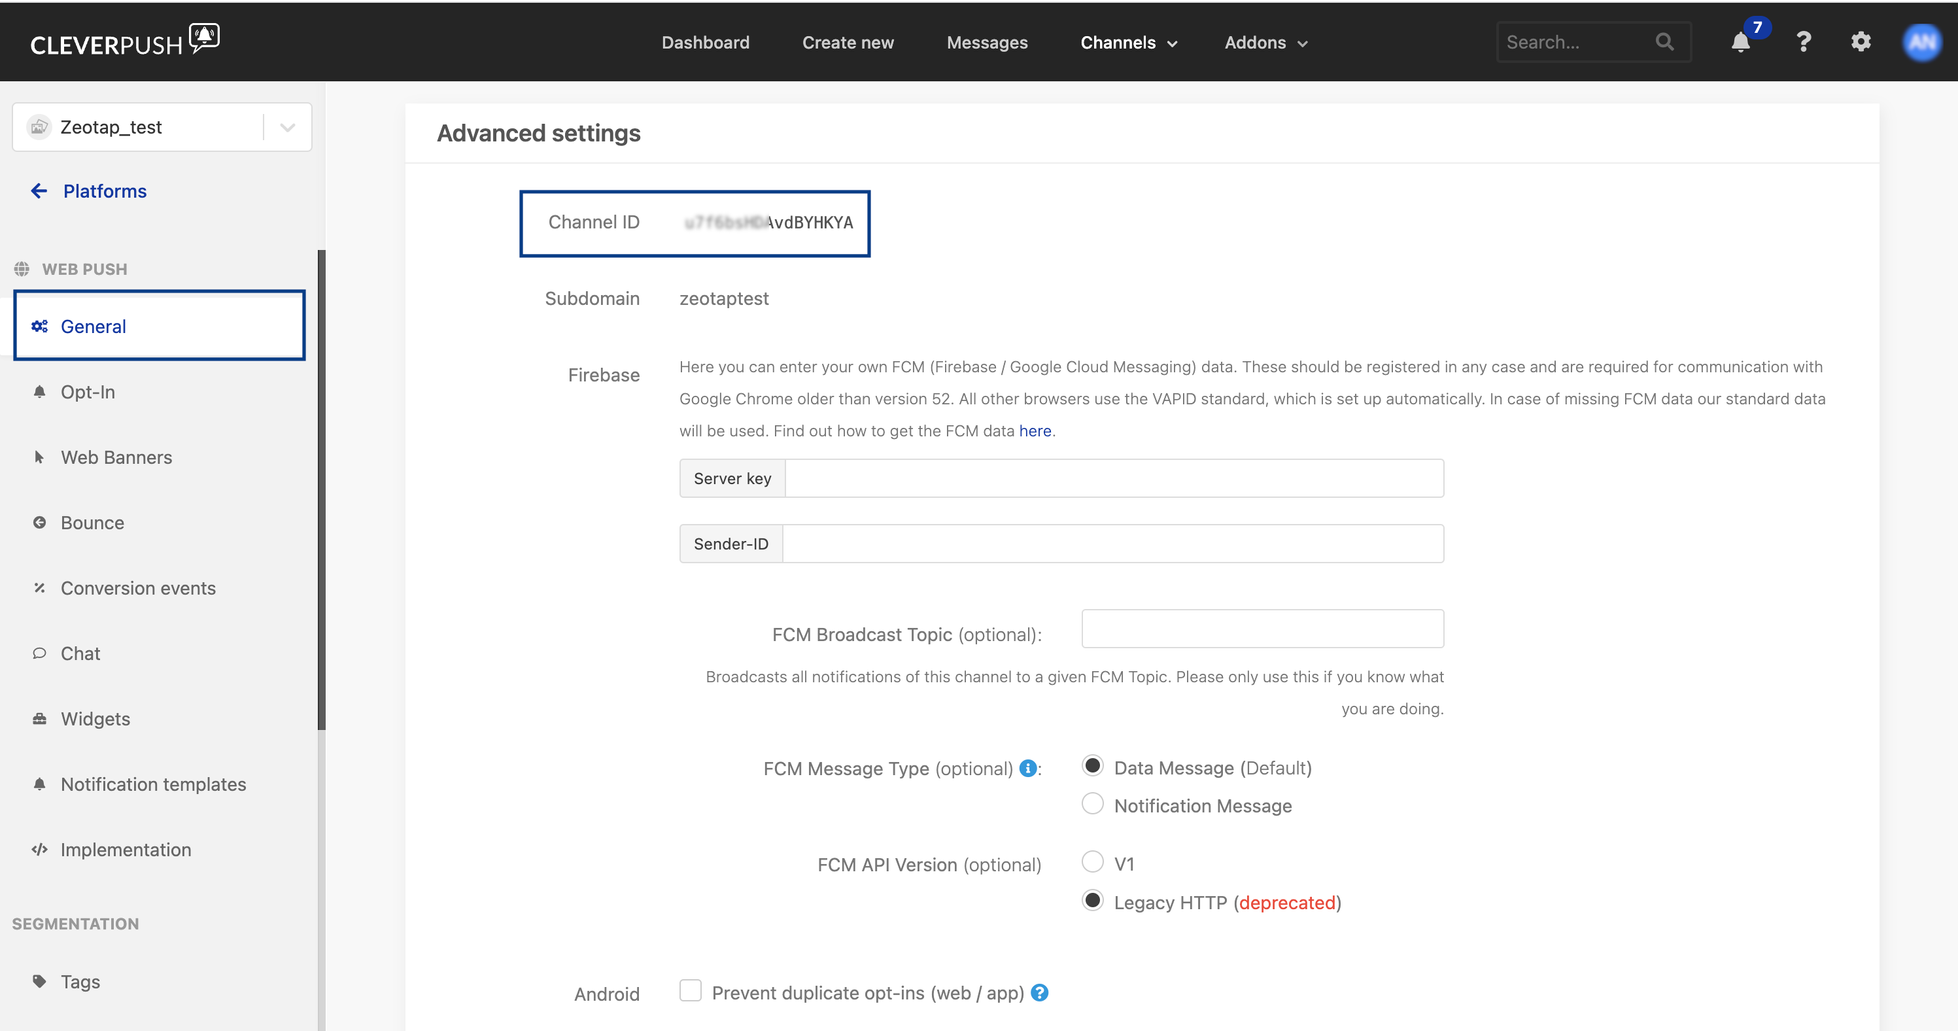
Add identifiers and attributes in Cleverpush
Add the identifiers and attributes in Cleverpush before you map them on the Zeotap CDP mapping screen. If they do not exist in Cleverpush, the data is not sent correctly.1
Log into the Cleverpush console and navigate to Channels on the top navigation bar.
2
Under Channels, click the channel you want to use for sending push notifications. For more about channels, see Obtain the Channel ID.
3
Go to your platform and open Attributes. Under ID, Cleverpush lists a standard set of commonly used attributes. Select the ones you need and give each a name.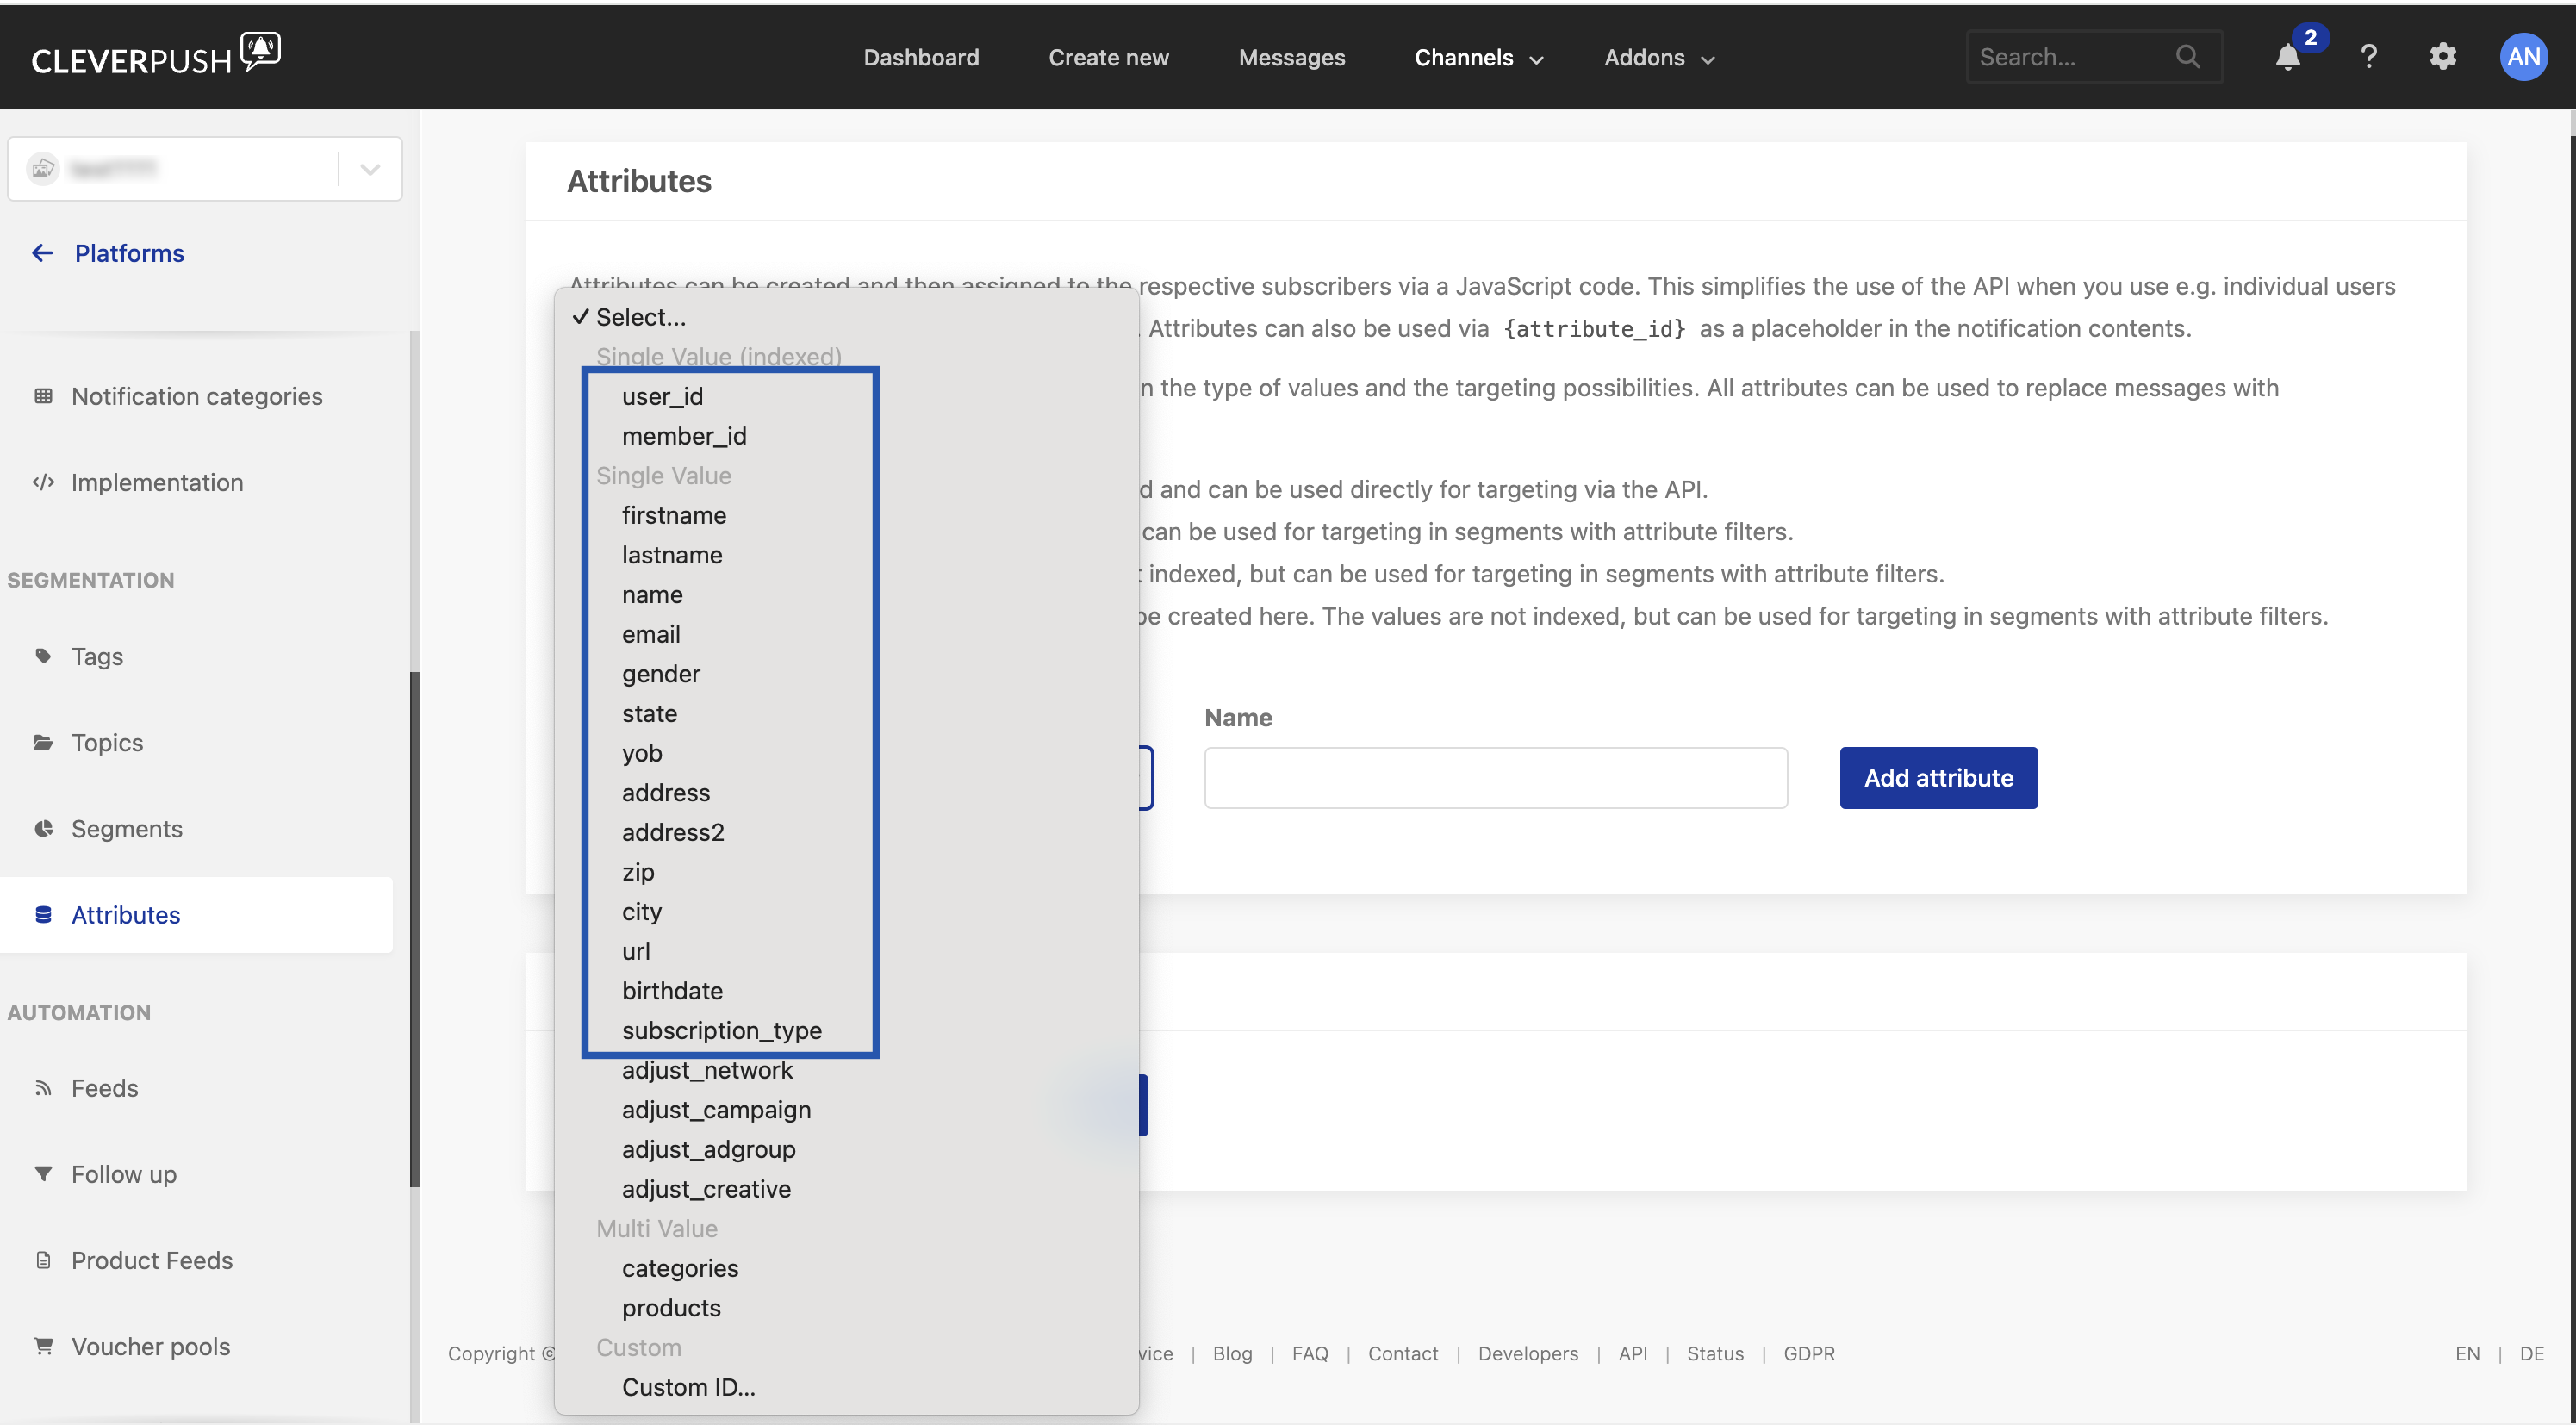
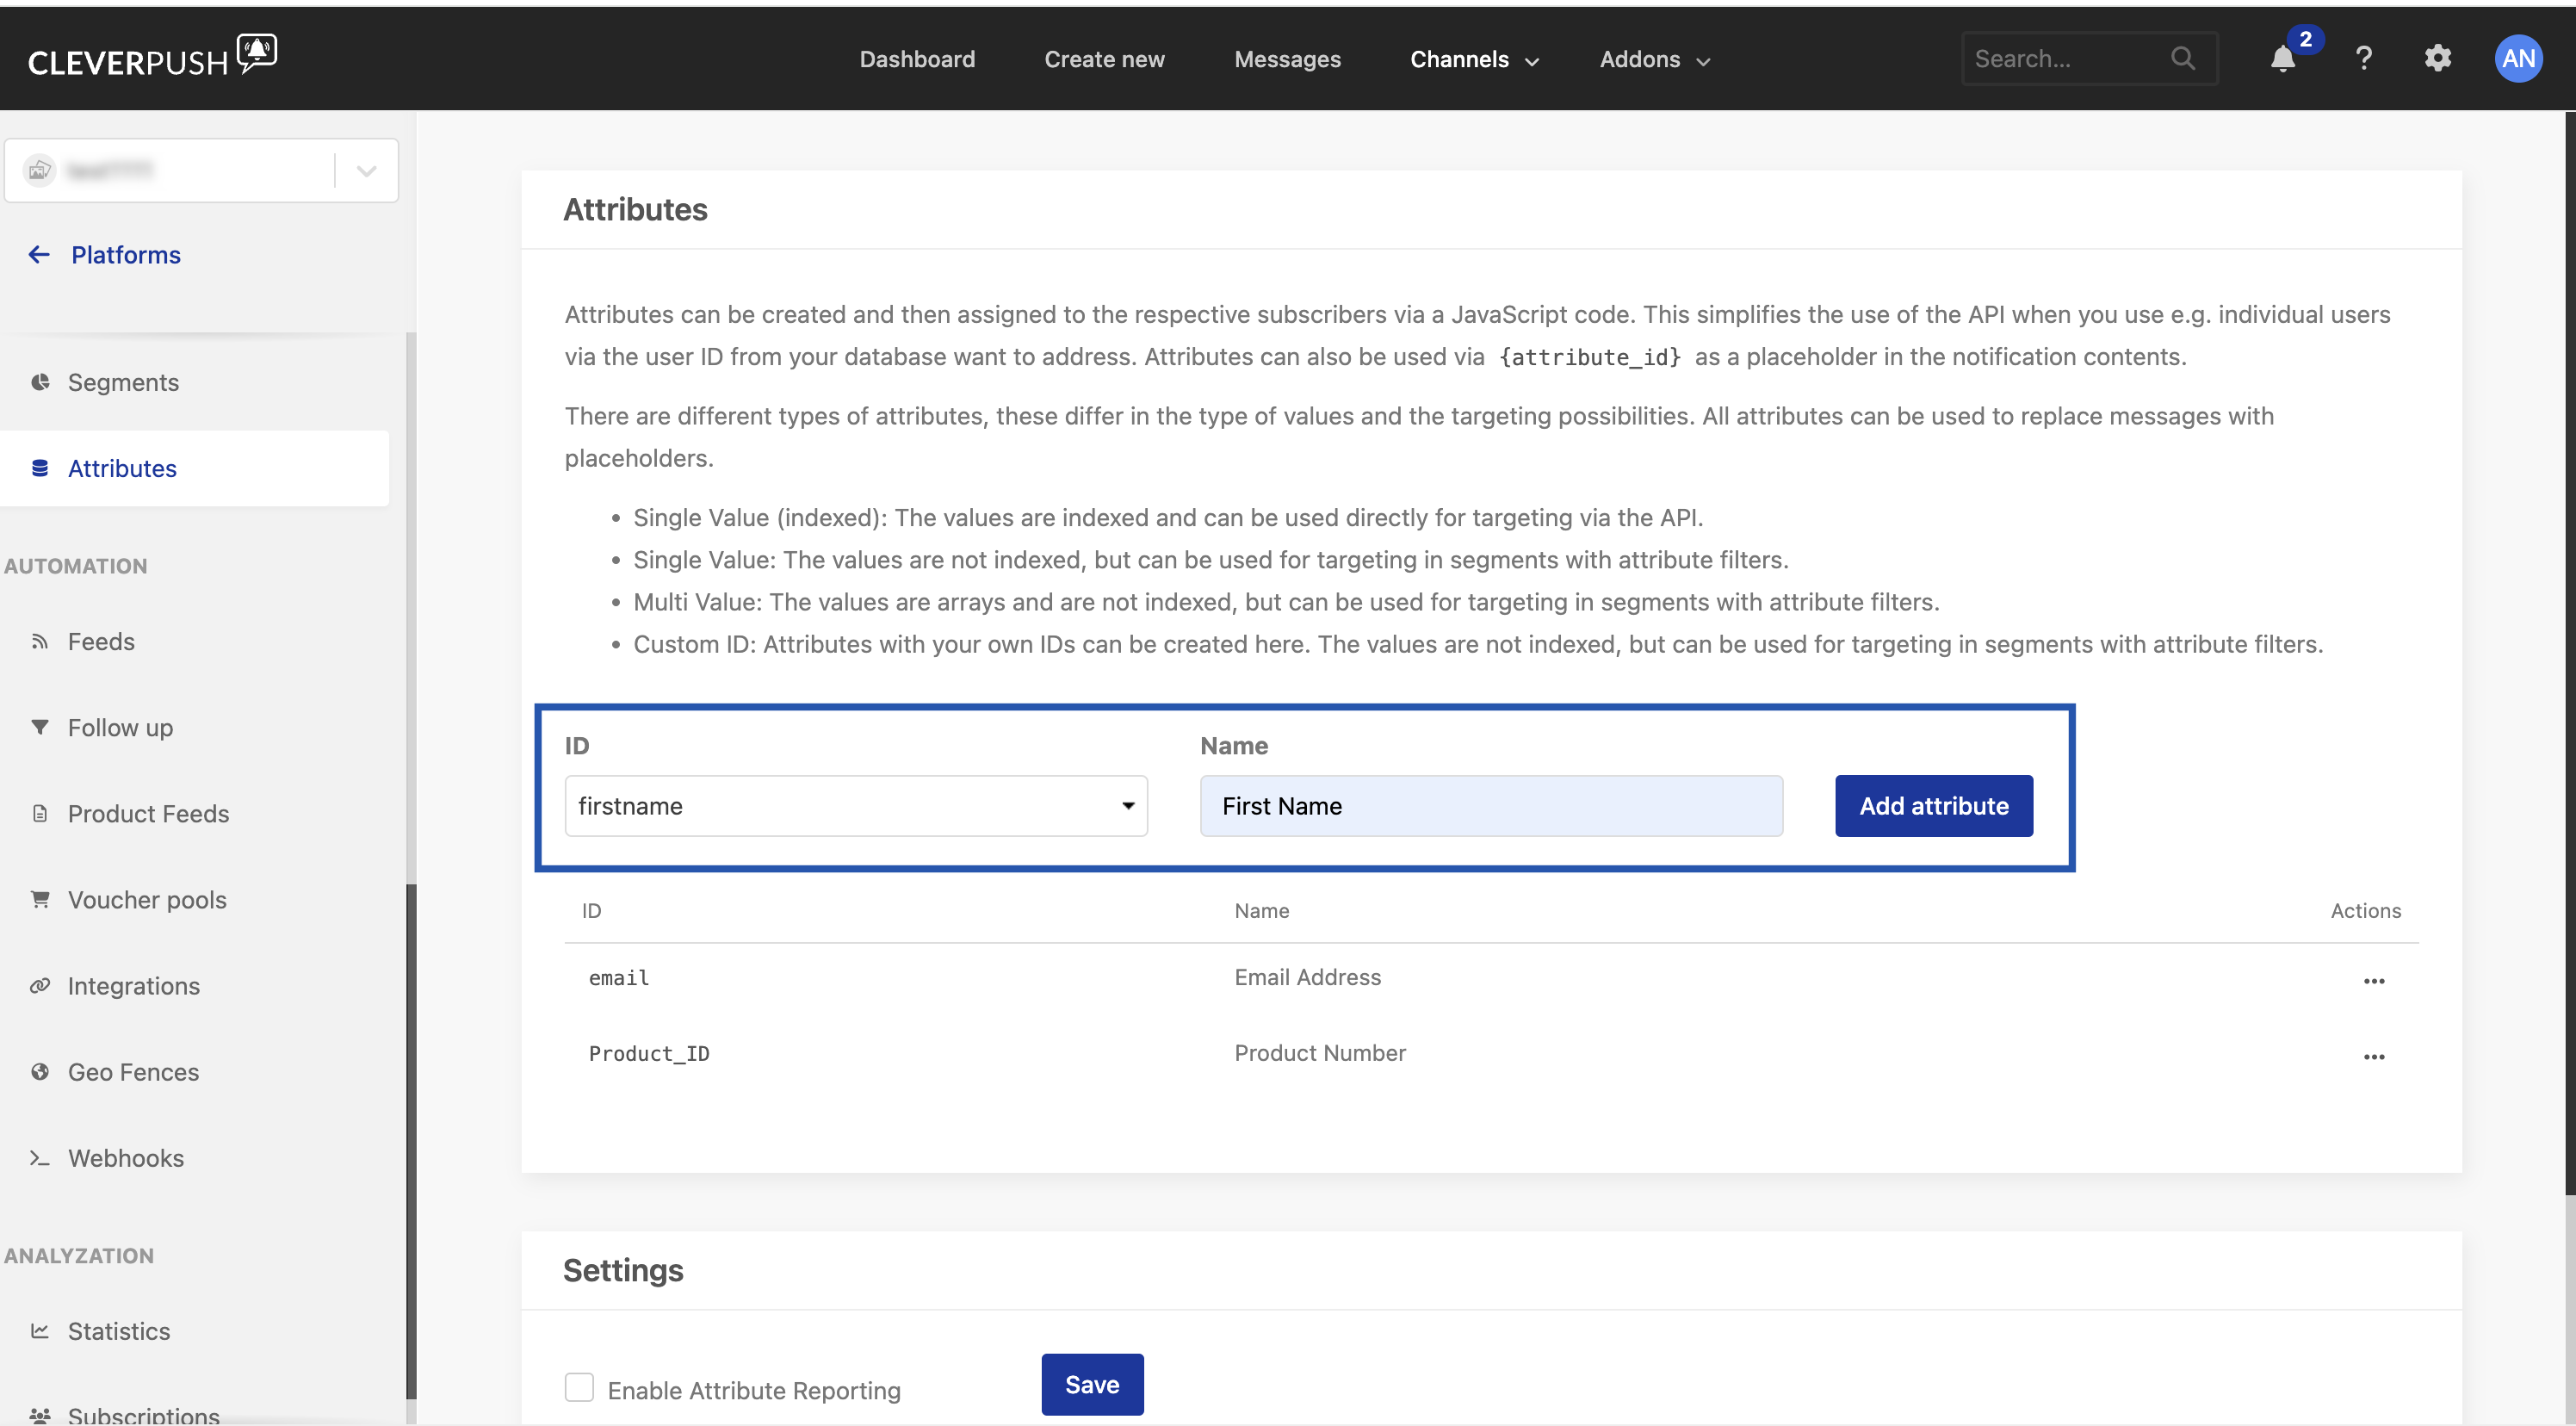
firstname is what connects the attribute in Cleverpush to the field in Zeotap CDP, so the ID must match.4
Click Add attribute. Add any custom identifiers or attributes the same way. Once an attribute exists in Cleverpush, you can map a Catalogue field to it on the Zeotap CDP mapping screen.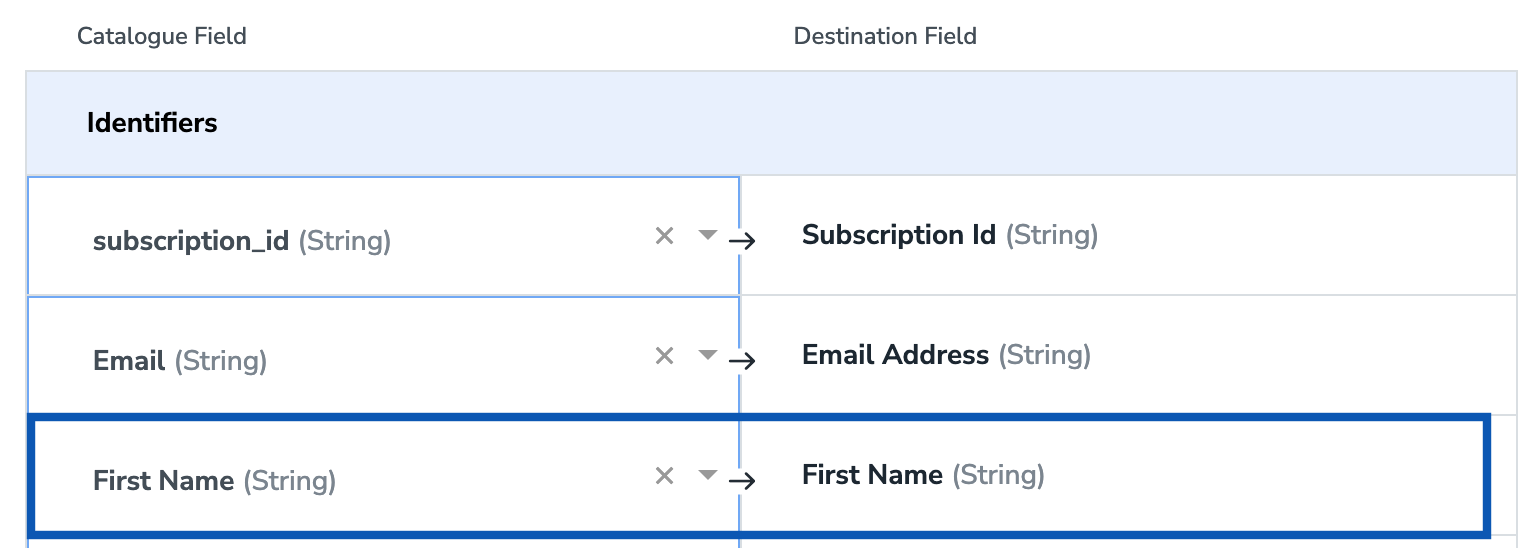
Create the Cleverpush destination
You create this destination from inside a Journeys workflow. After you have applied filters or added conditions for your users in Journeys, activate them in Cleverpush under Send to Destinations. A new window appears where you set up the destination. You can reuse an existing destination from the list or create a new one by clicking + Add New Destination.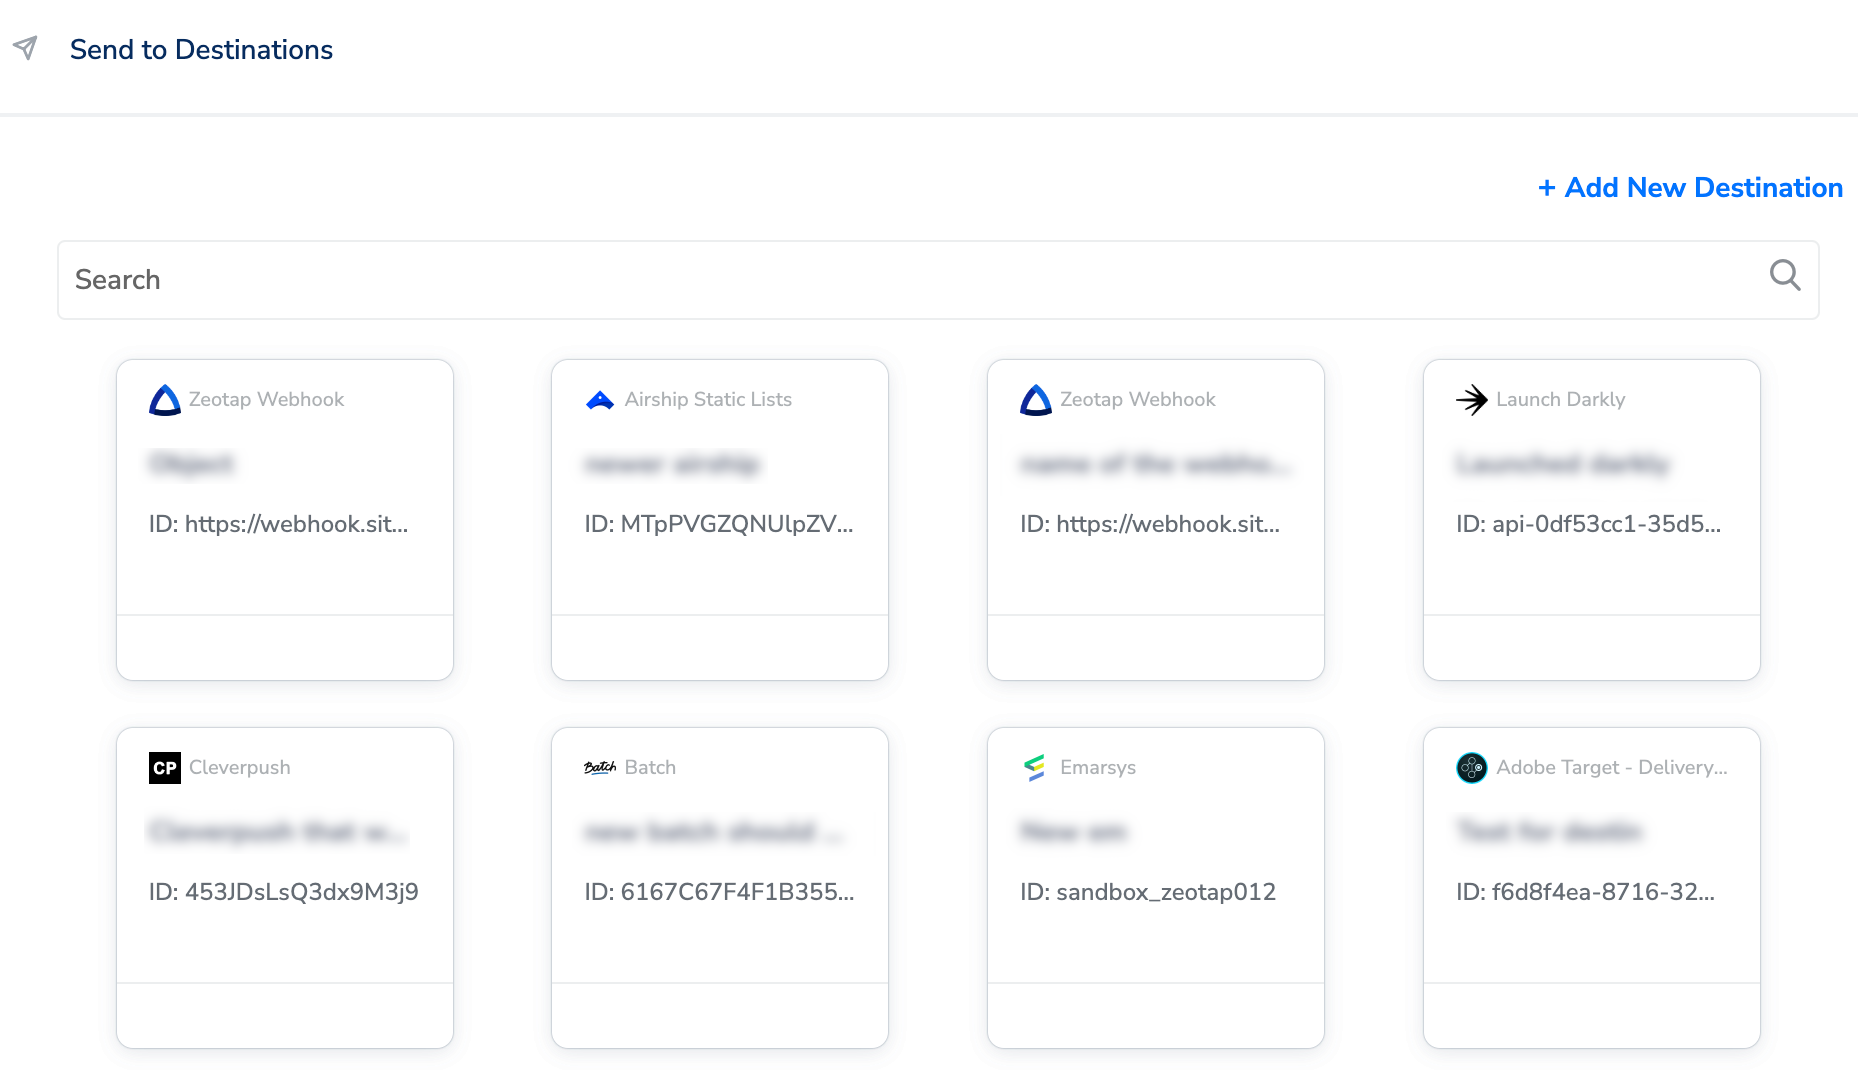
1
Click + Add New Destination.
2
Search for Cleverpush.
3
Click Cleverpush and enter a name for the destination under Destination Name.
4
Choose the API Type from the drop-down menu — either POST or PATCH.
5
Enter the Private API Key associated with your Cleverpush account. To find it, see Obtain the Private API Key.
6
Enter the Channel ID of your push notification channel. To find it, see Obtain the Channel ID.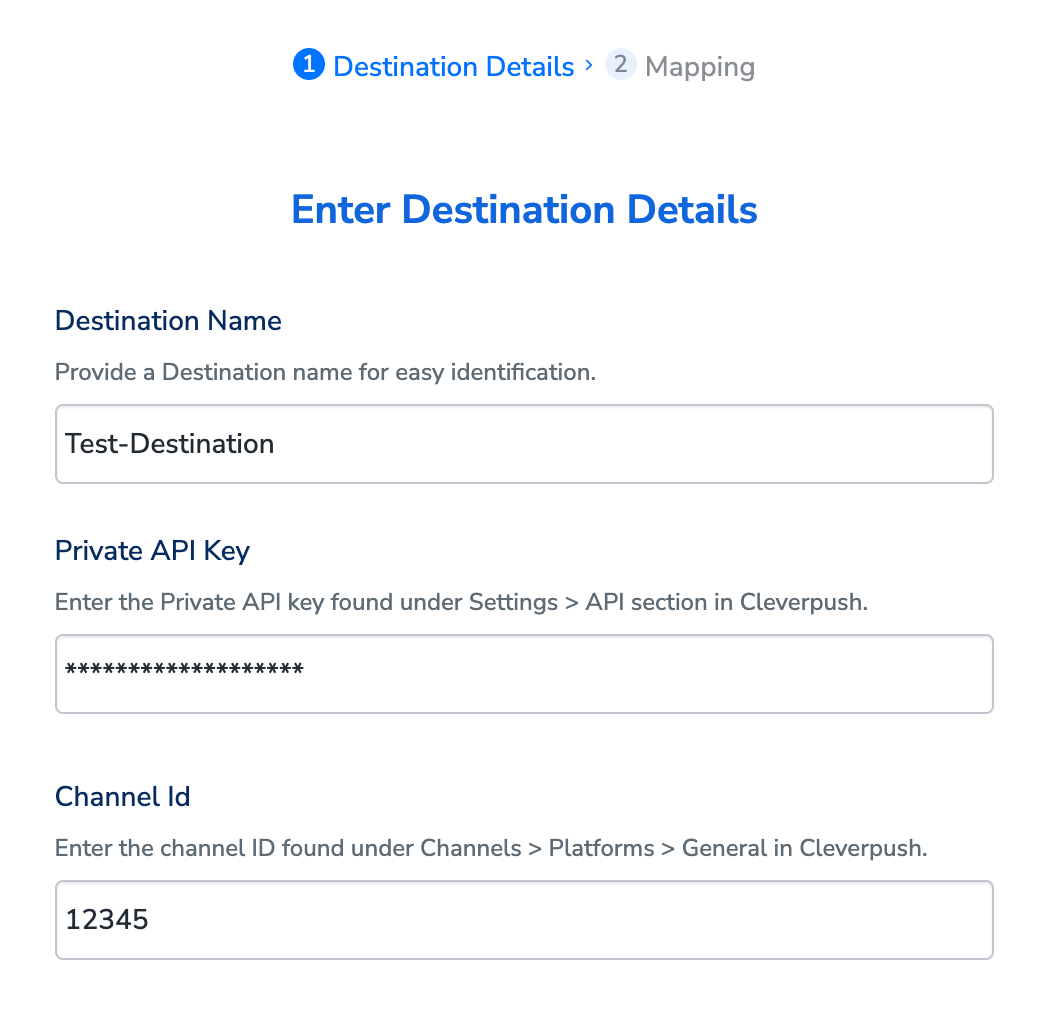
7
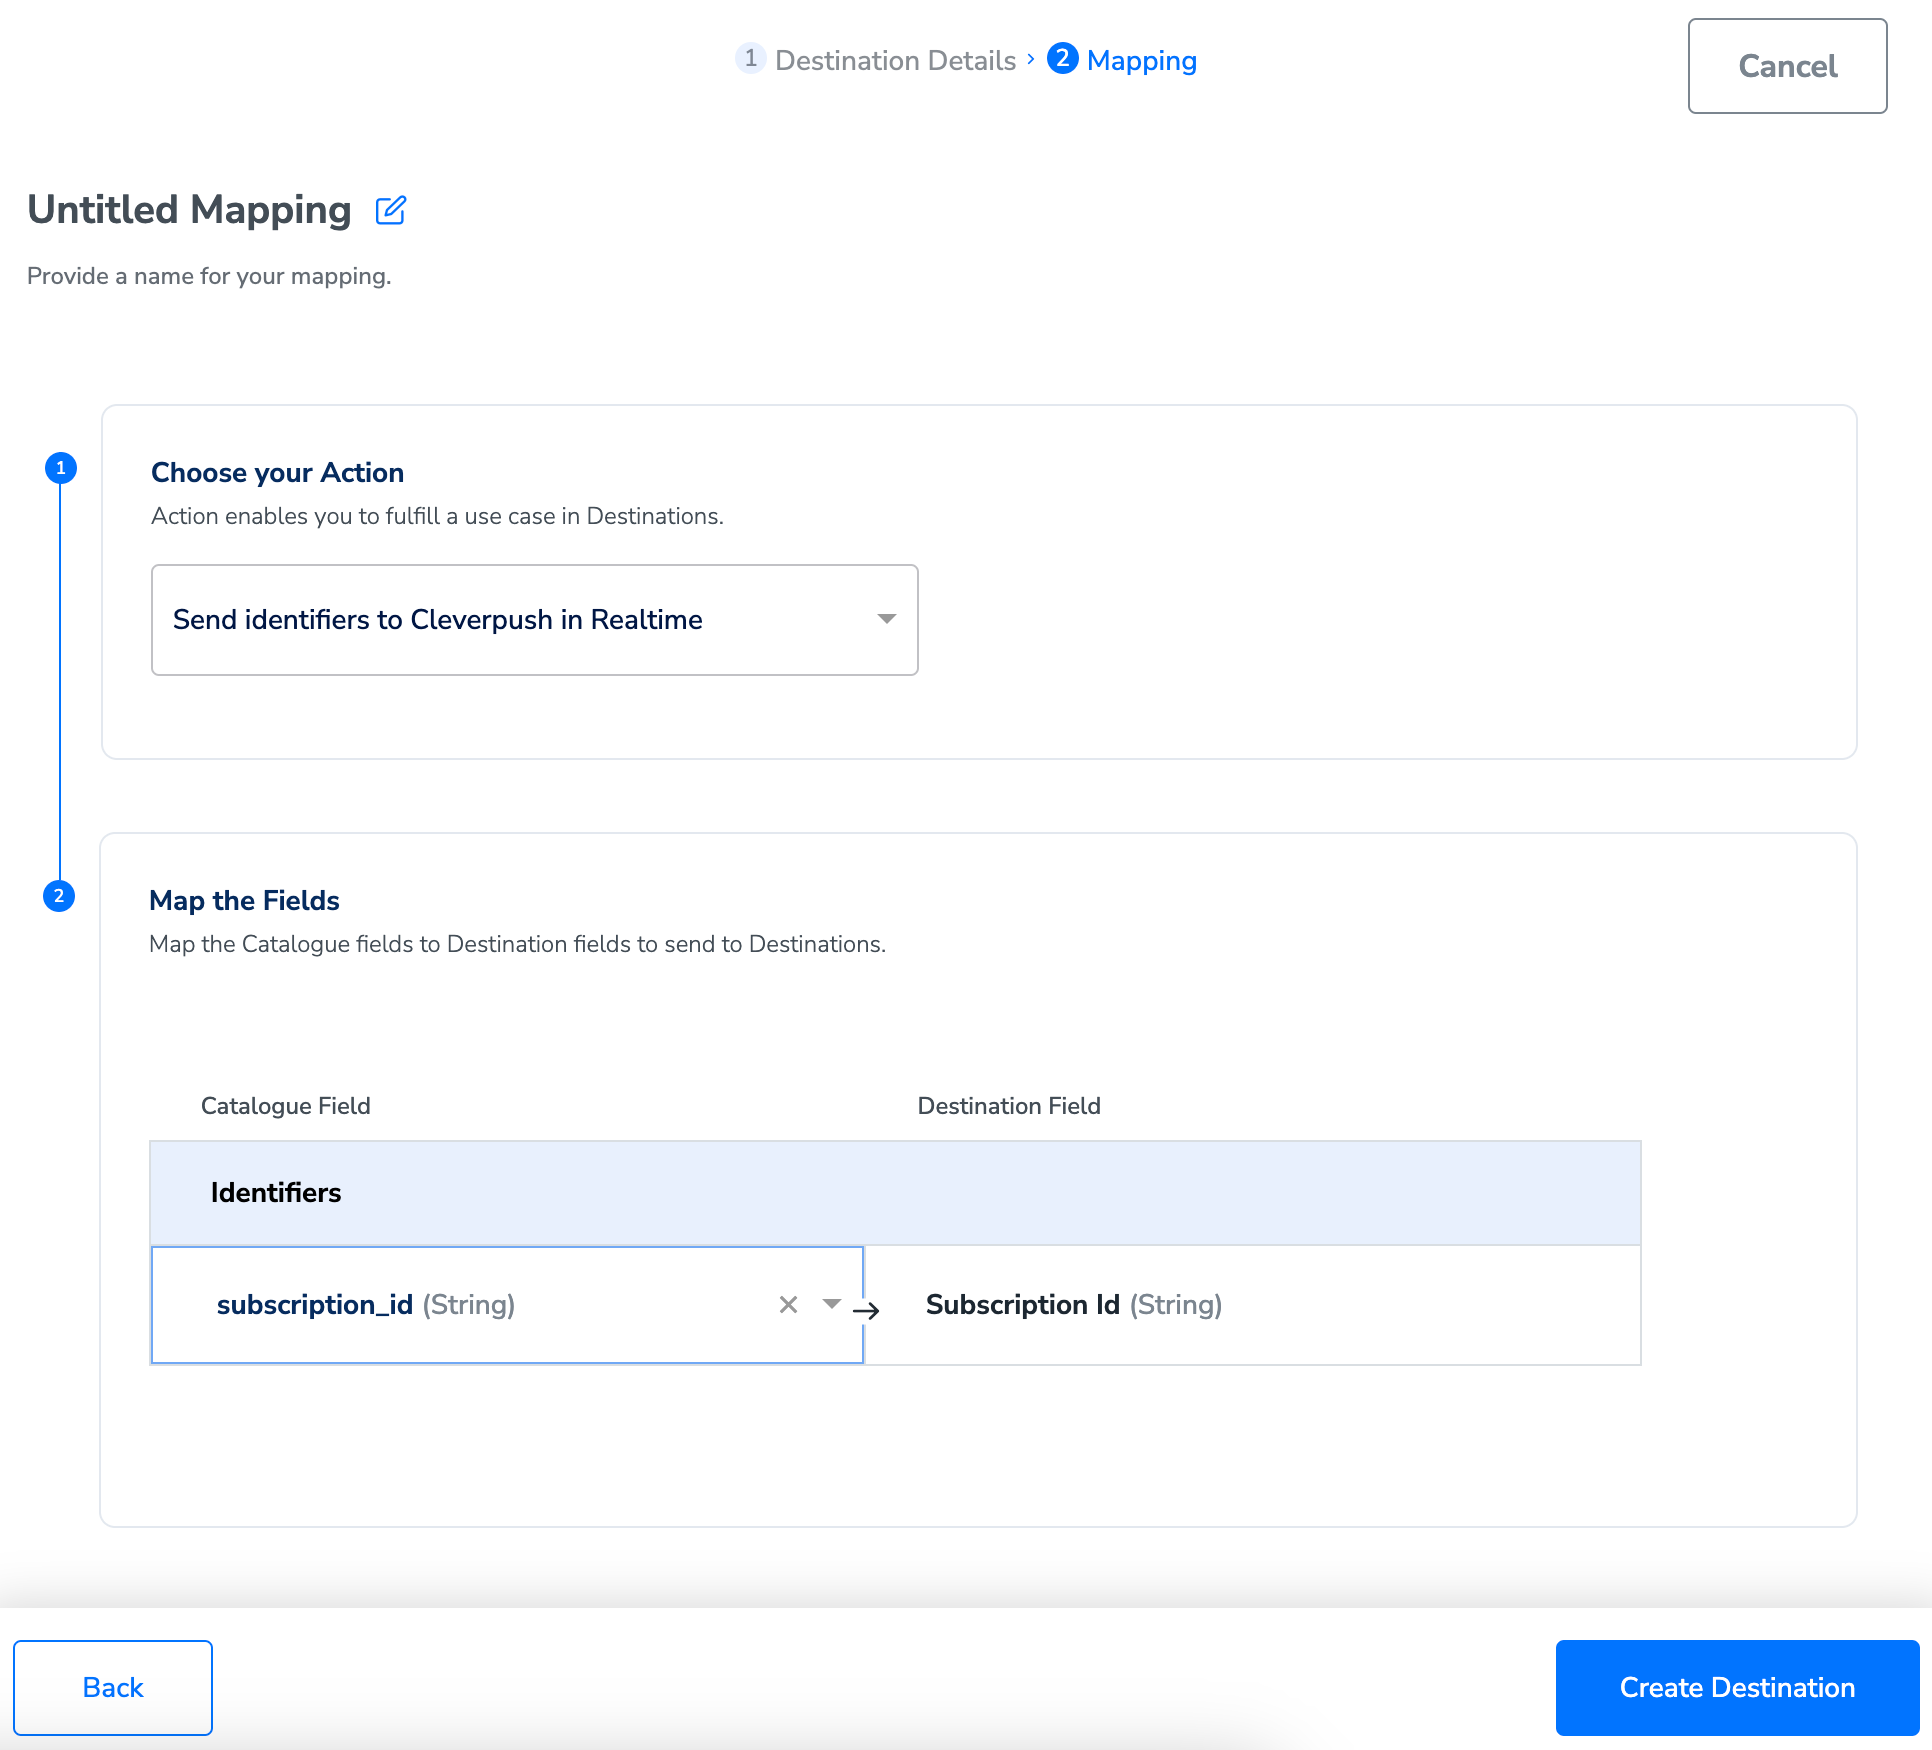
On the mapping screen that appears, give the mapping a name, then choose your action under Choose your Action:a. Send identifiers and attributes to Cleverpush in Realtime — along with the Subscription ID you can send the standard attributes First Name, Last Name, Email Address (Raw) and Gender. Each of these must already exist in the Cleverpush console before you map it; see Add identifiers and attributes in Cleverpush. Use + Add Mapping Field to send custom identifiers and attributes as well — these too must exist in Cleverpush first, or the data is not sent correctly.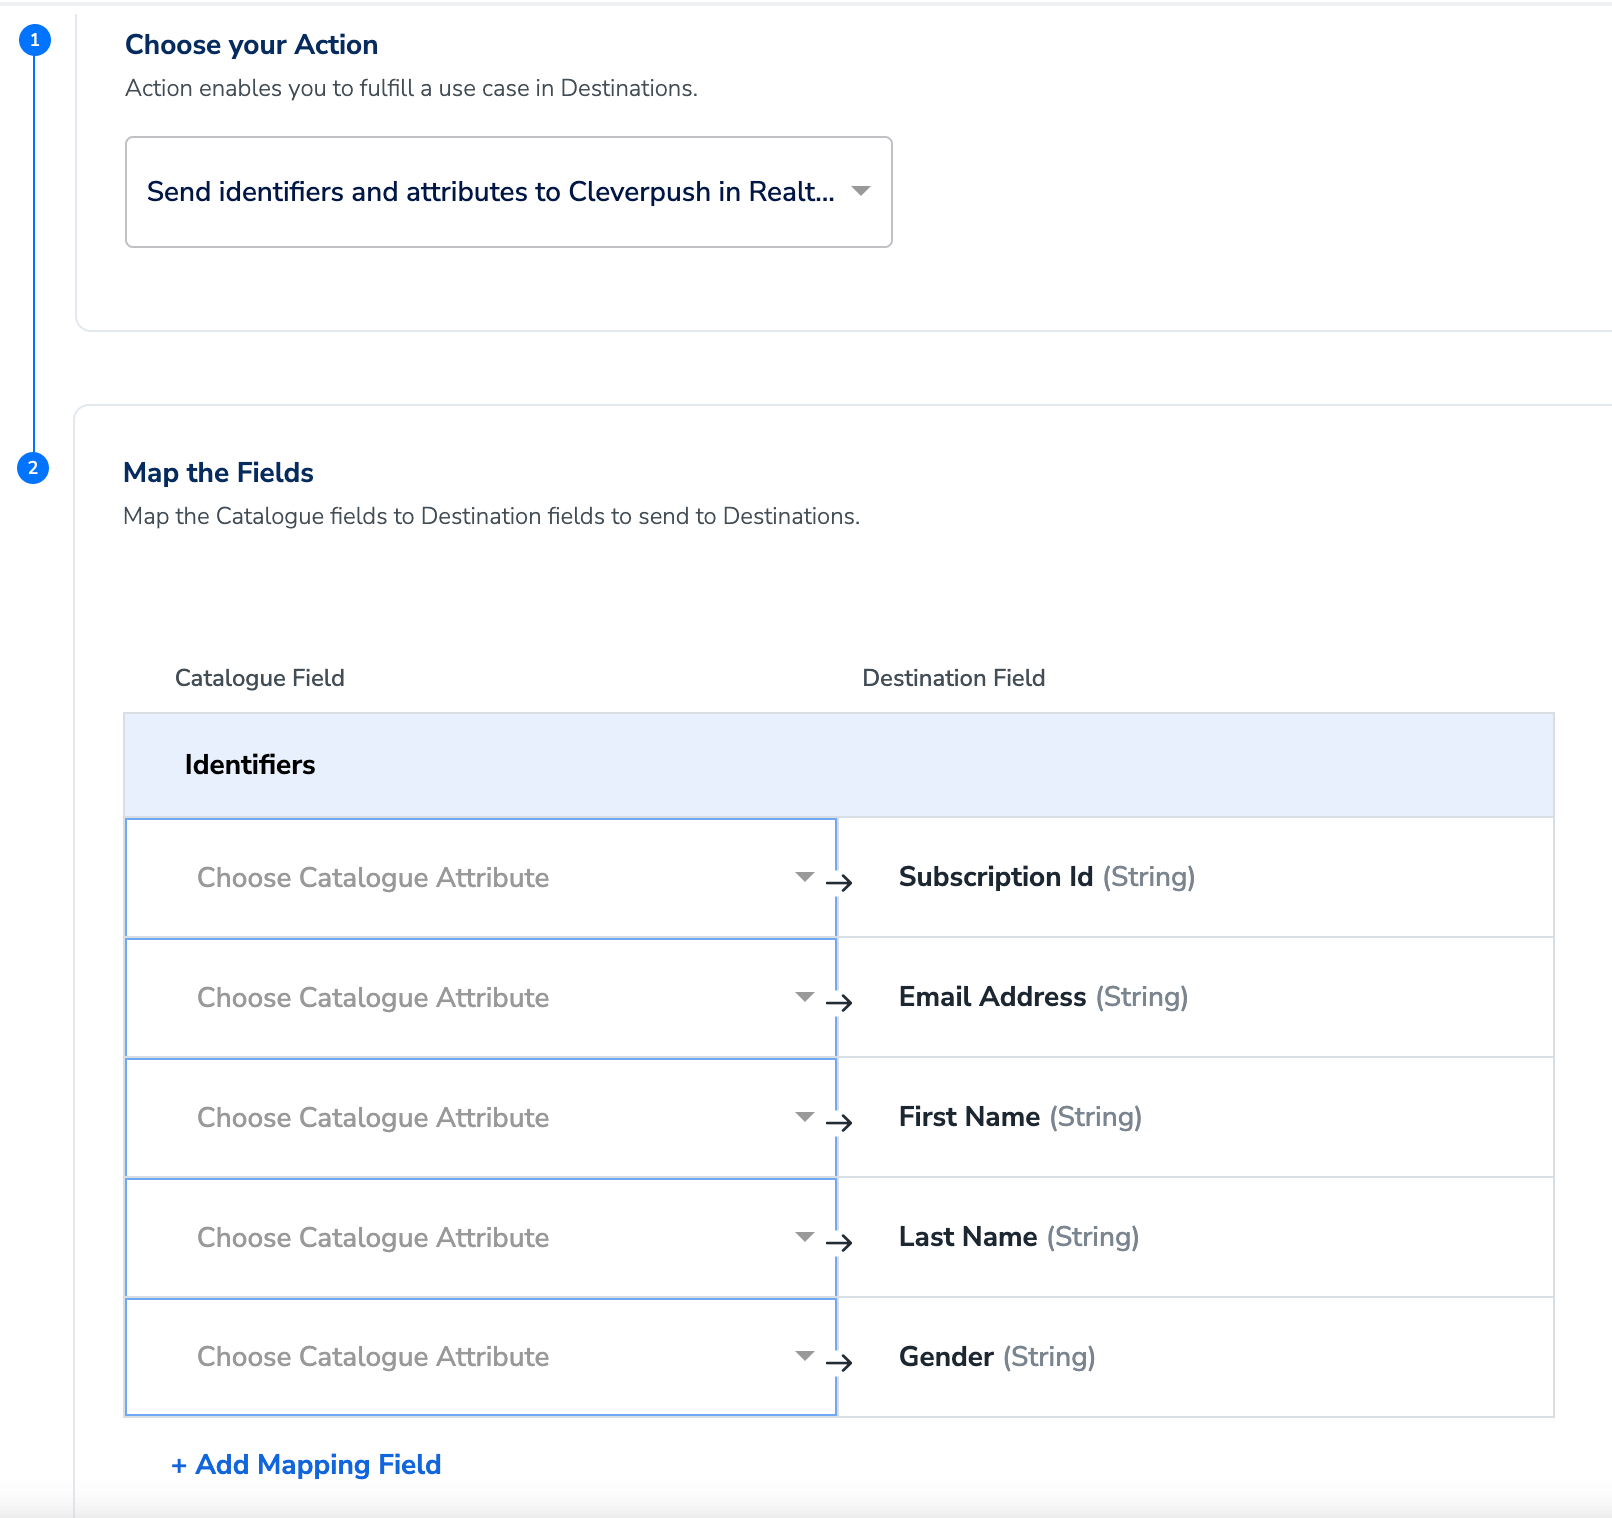
8
Once the mapping is complete, click Create Destination. The destination is created and becomes available for activation in Journeys.
Activate the destination in a Journeys workflow
After the destination exists, add the workflow-level inputs.1
Choose the destination from the list of available destinations, using the search box if needed.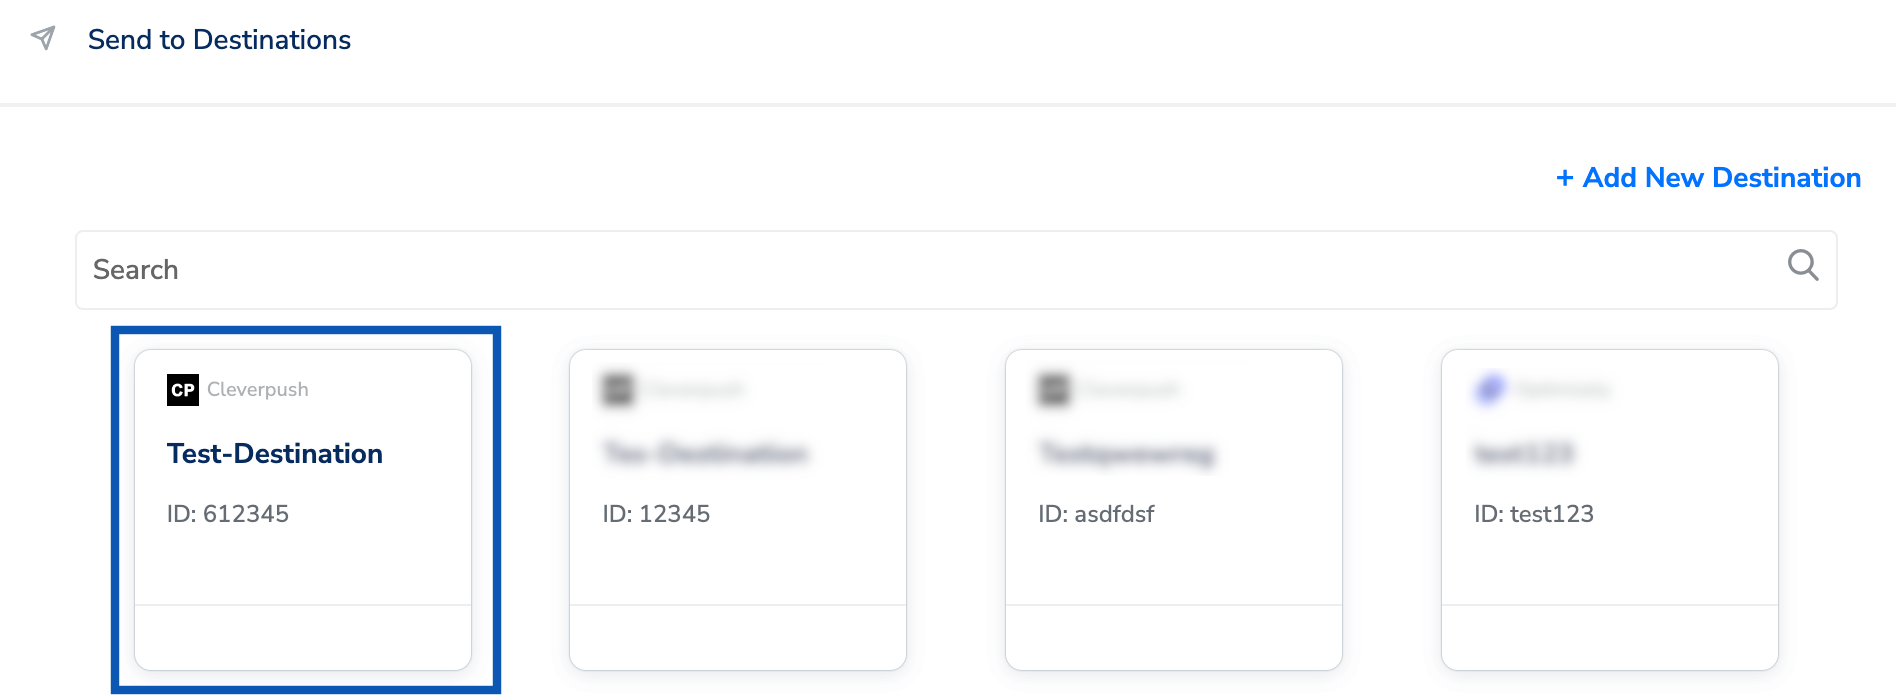
2
On the Destination Details tab, the Private API Key and Channel Id fields are populated automatically from the values you entered when you created the destination.
3
Under Audience, choose a tag from the drop-down to categorise your users by the characteristics that matter for this workflow. Pick an existing tag or create one with + Create New Tag.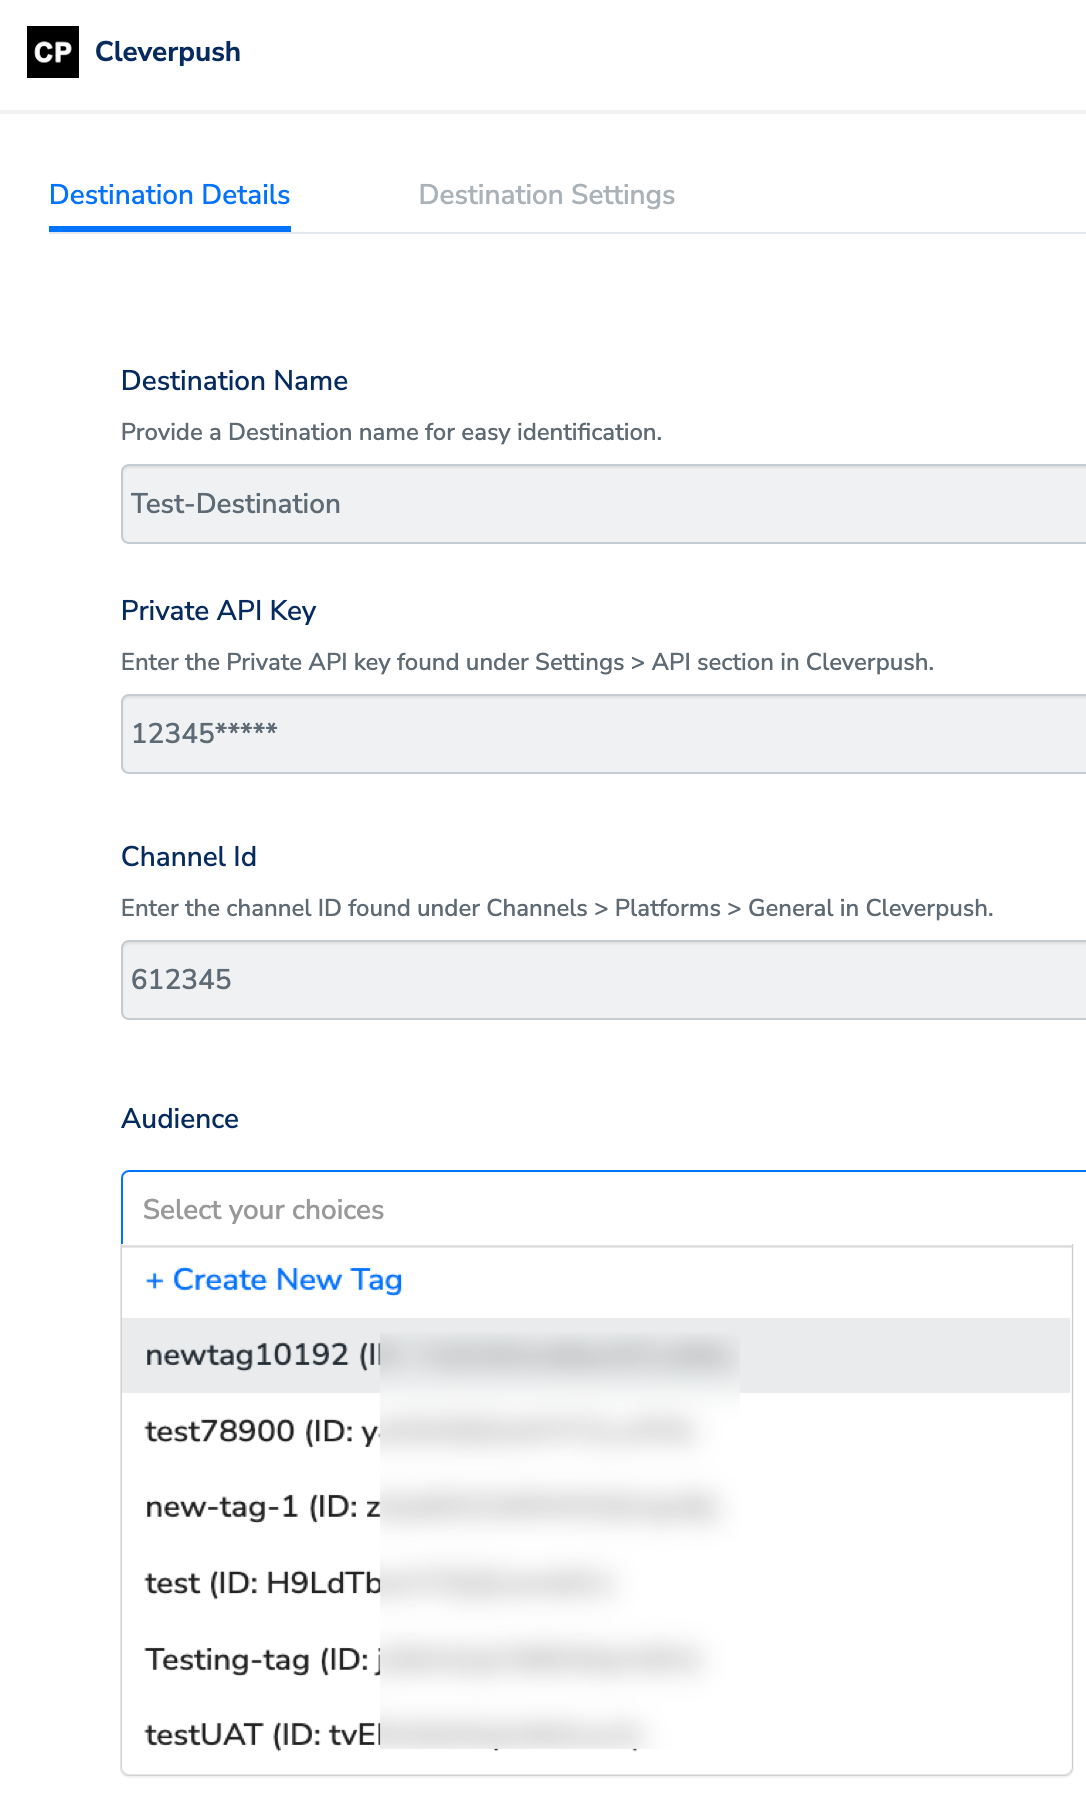
4
On the Destination Settings tab, choose the action and mapping you want this node to use. The fields that will be sent are listed under Mapping, and Edit Mapping lets you change them.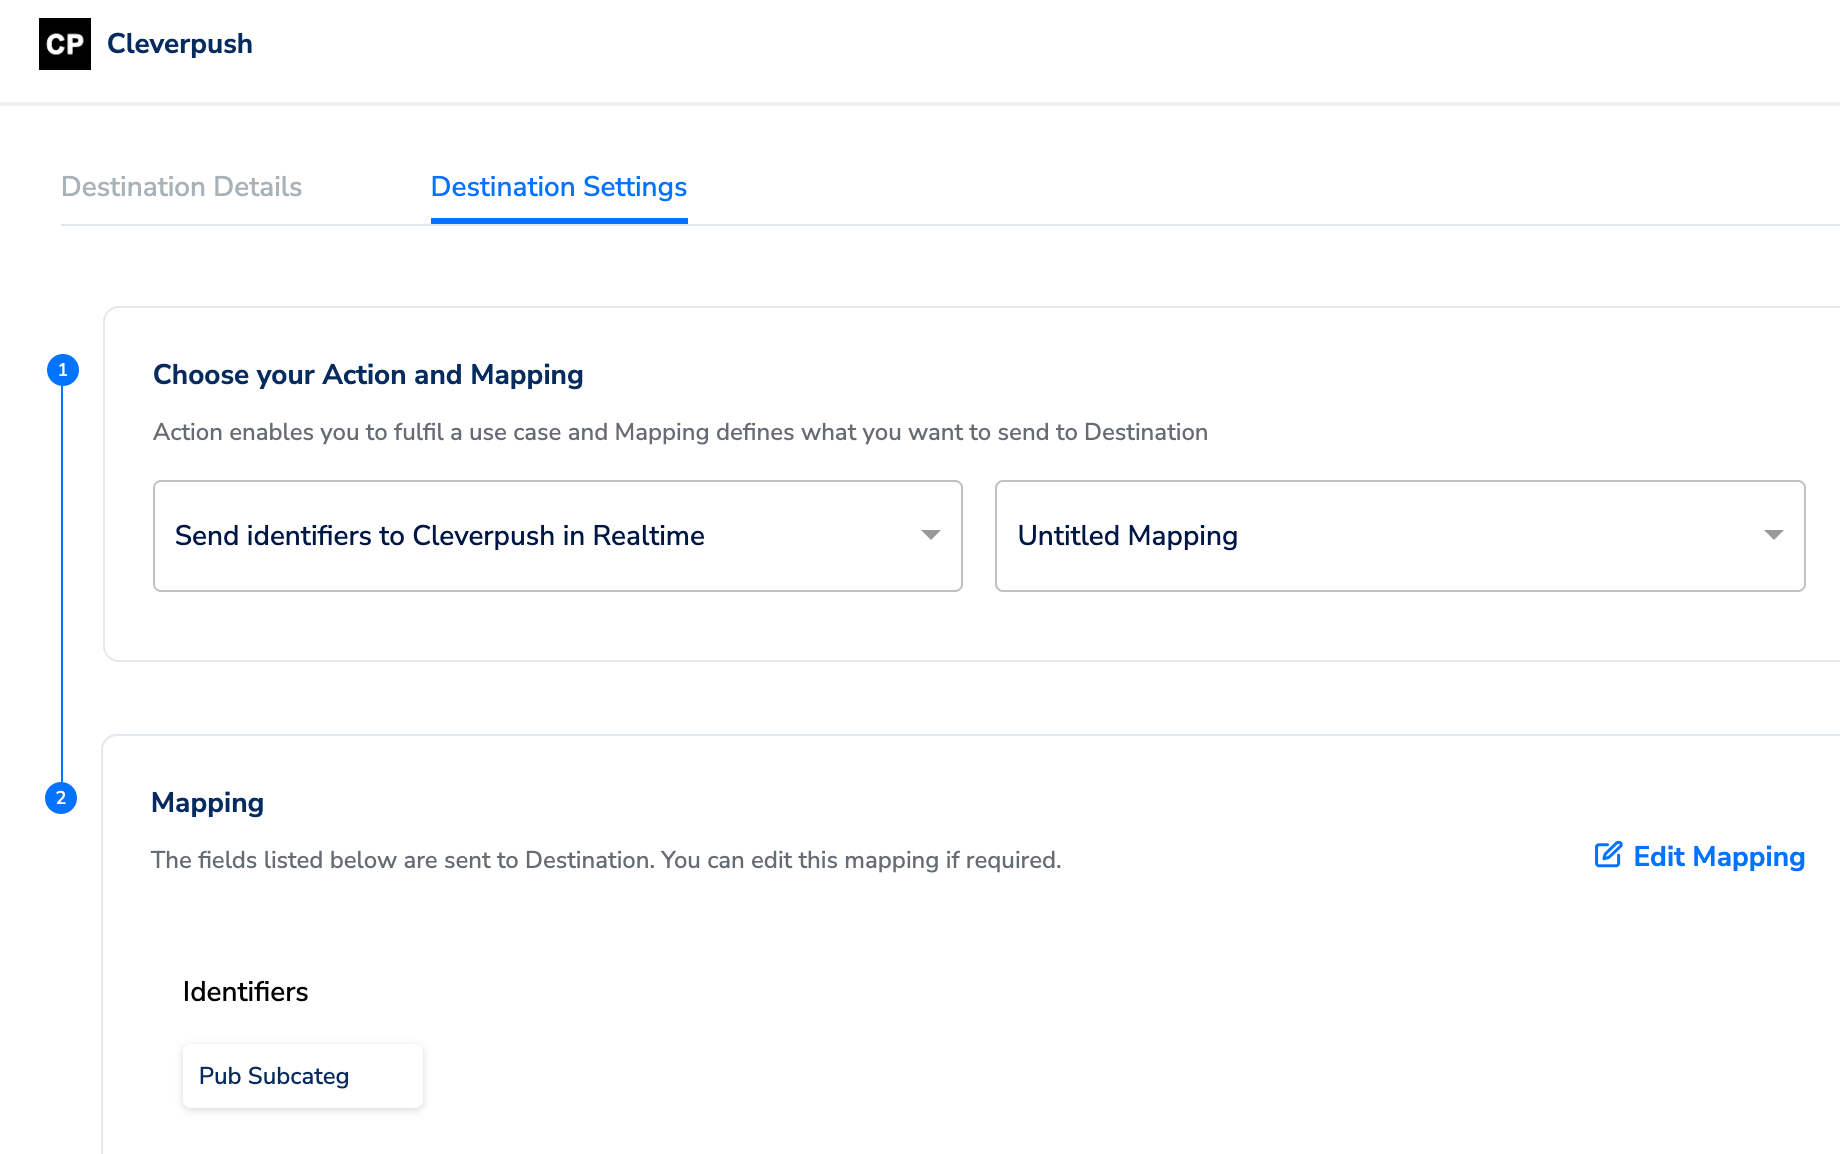
5
Click Save Destination. The destination is attached to the node.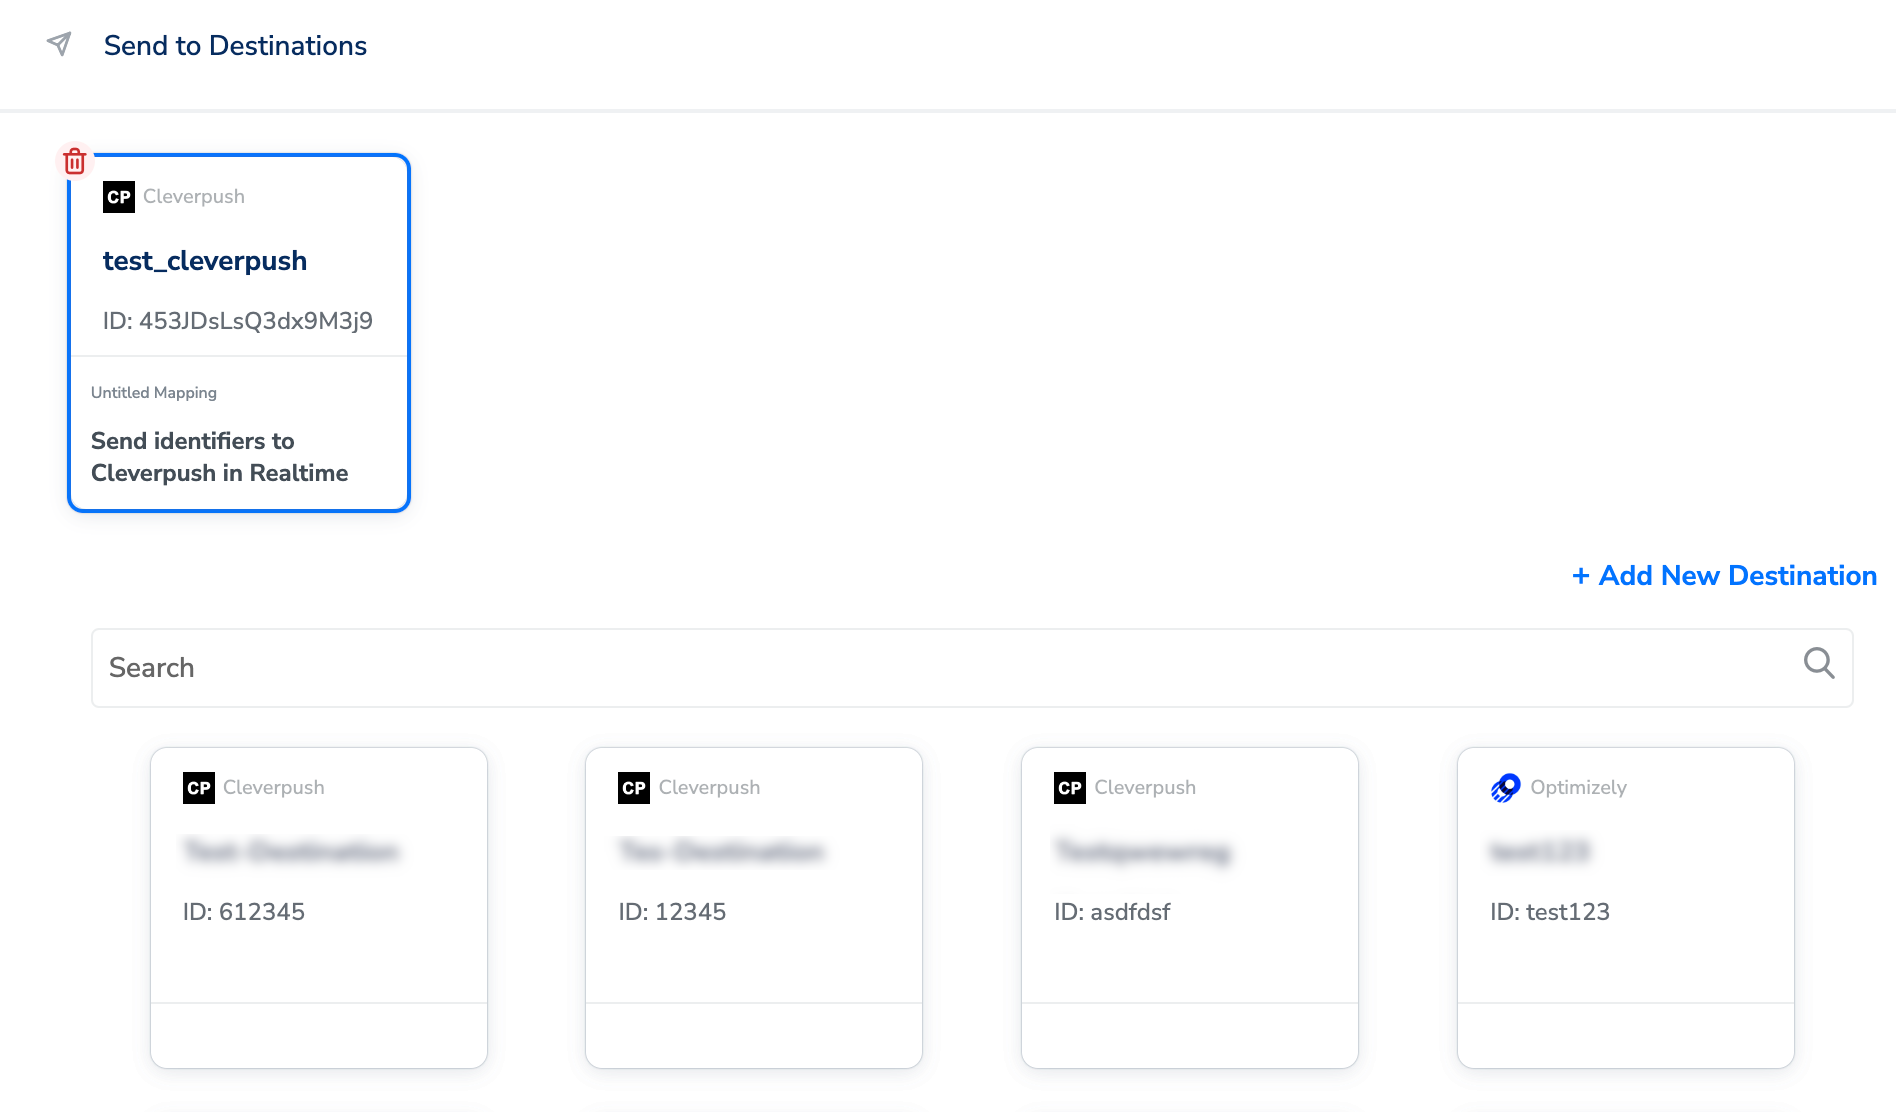
Verify the integration is working
Check the following, in order:- The destination is attached. In the Send to Destinations node, the Cleverpush card appears at the top of the panel and shows the destination name, the mapping name and the action you selected.
- The mapping is the one you intended. Open the Destination Settings tab and confirm the fields listed under Mapping are the ones you expect. For the identifiers-and-attributes action, every attribute listed there must already exist in the Cleverpush console.
- A real user’s payload reached the node. Use Journey Traces to search for a user who qualified for the workflow, then inspect the output event for the Cleverpush destination node. This shows exactly which fields were sent for that user.
- No node-level failures. Open the Execution Details panel on the destination node in the Journey Canvas. See Identify Journey Errors.