Begin by adding an entry condition and providing the basic details, such as the Workflow Title and Description.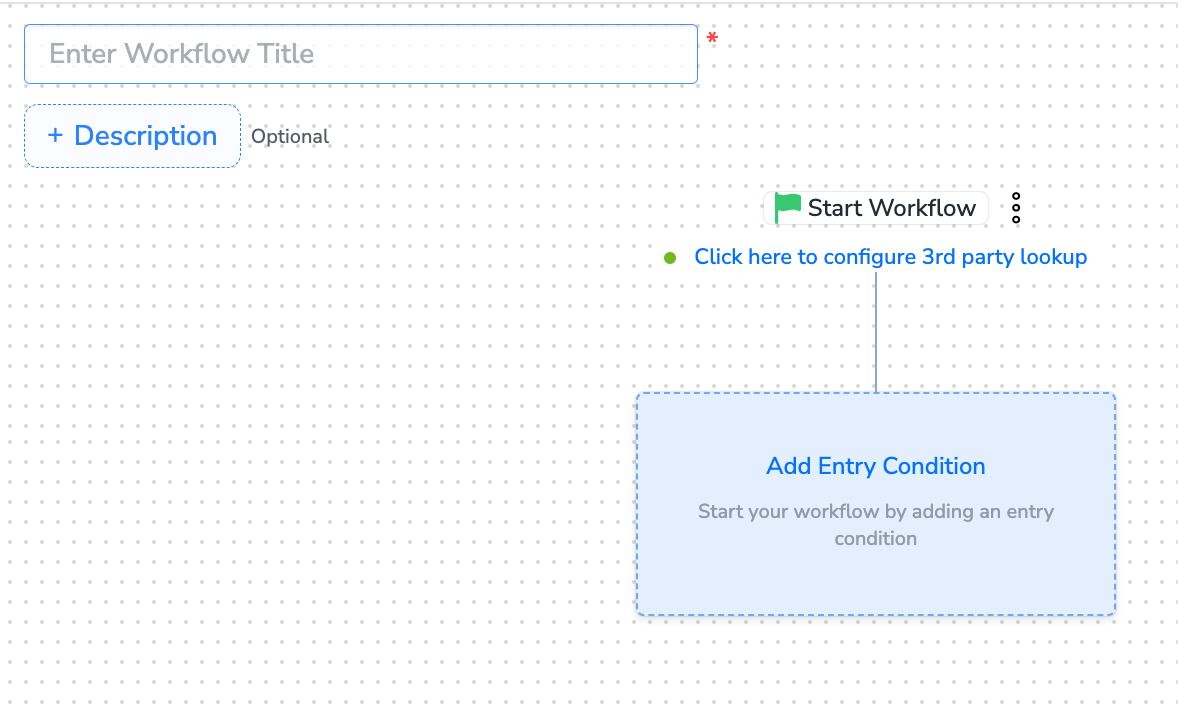
Perform Actions in Workflow Creation. The following actions are available during workflow creation:
Add an Entry Condition
Add a Delay
Add a Condition
Apply Multi-branch Split
Apply True/False Split
Save as Draft
Add or Delete a Node
Name a Node
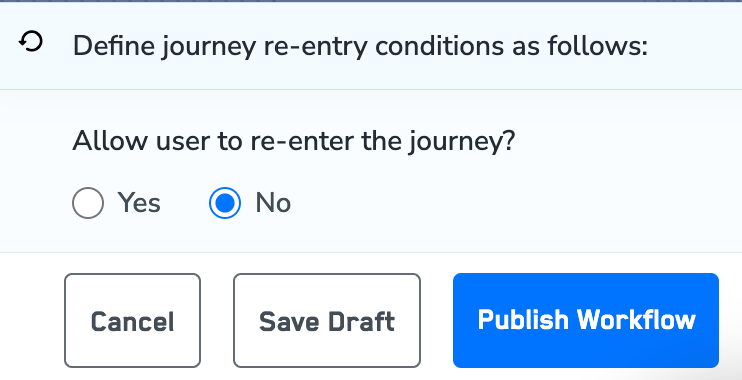
Add Re-entry Criteria
Understand Audience Logging
After adding conditions and filters for users, choose one of the following options:
- Save Draft: Enables you to revisit and edit the workflow before publishing.
- Next: Re-entry Condition: Determines whether a user can re-enter the same workflow.
Sample Workflow
