

What this destination does
The Zeotap Webhook destination lets you receive activation data on your own API rather than on a packaged marketing platform. You register the URL of your endpoint in Zeotap, choose the HTTP method Zeotap should use and how it should authenticate, and map the Zeotap Catalogue fields you want sent. Once the destination is attached to a Send to Destinations node in a Journeys workflow, Zeotap calls your endpoint with the mapped identifiers and attributes as profiles flow through the journey. Use it when the receiving system is your own application, an internal API, or an integration platform that exposes an HTTP listener — anywhere a purpose-built Zeotap destination does not already exist. The action this destination exposes is Send identifiers and attributes to Zeotap Webhook.Prerequisites
Before you configure the destination, have the following ready:
- An HTTP endpoint you host and control that accepts the method you intend to select, and its full URL. This is what you enter in the Upload URL field.
- The API Type your endpoint implements — POST or PATCH.
- The Authentication Type your endpoint requires, along with its credentials: a Username and Password for BASIC, a Bearer Token for Static Bearer Token, or the credential your endpoint expects for API Key. These are issued by your system, not by Zeotap.
- A Journeys workflow, or the ability to create one, in which the destination will be attached to a Send to Destinations node. See Create a Workflow.
- The Catalogue fields you intend to send identified up front. At least one attribute must be mapped or no data reaches your endpoint.
Destination fields
These three fields define how Zeotap reaches your system. You enter them once when you create the destination, and they are then carried onto every workflow that uses it.Upload URL
The endpoint URL of your API — the address Zeotap calls to deliver data. The field name suggests you are uploading something to Zeotap; you are not. Enter the URL of the listener on your own infrastructure that should receive the records.API Type
API Type is the HTTP method Zeotap uses when it calls your Upload URL. Choose the one your endpoint implements:- POST — Zeotap sends the mapped payload as an HTTP
POSTrequest to your Upload URL. Choose this when your endpoint creates a record from the payload it receives. - PATCH — Zeotap sends the mapped payload as an HTTP
PATCHrequest to your Upload URL. Choose this when your endpoint applies the payload as a partial update to a record it already holds.
Authentication Type
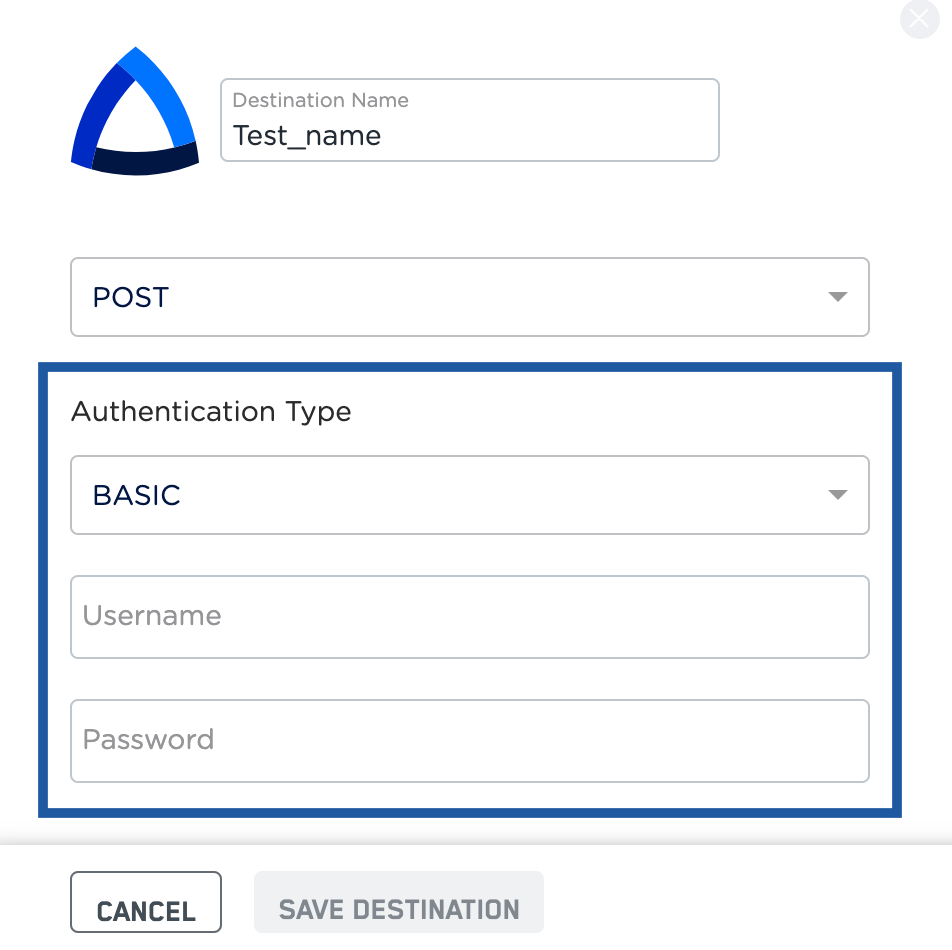
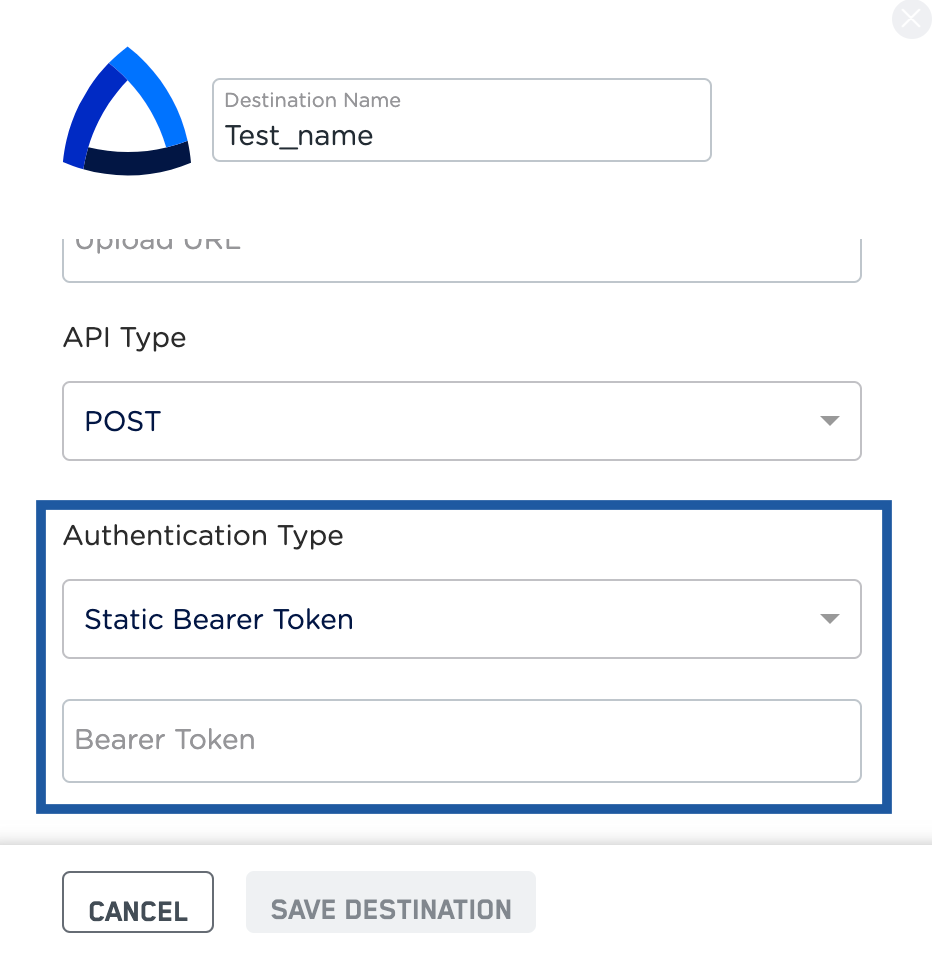
Authentication Type is how Zeotap identifies itself to your endpoint on every call. The drop-down offers BASIC, Static Bearer Token and API Key; pick the scheme your endpoint already accepts.-
BASIC — enter the Username and Password that your endpoint accepts. Zeotap presents these credentials on each call.
-
Static Bearer Token — enter the Bearer Token that your endpoint accepts. The token is issued by the system that hosts the endpoint, which is yours — Zeotap does not generate it. You paste it into Zeotap, and Zeotap presents it on each call.
- API Key — also offered in the drop-down. Confirm the credential your endpoint expects with your Zeotap representative before selecting it.
Create the Zeotap Webhook destination
A destination can be set up ahead of time from the Destinations module with + Create Destination and reused, or created inline while you are building a workflow — both routes create the same object. The steps below take the inline route. Once you have taken care of the prerequisites, you can proceed to creating a workflow in Journeys. After you have applied filters or added conditions for your users in Journeys, you can activate them through the Zeotap Webhook destination under Send to Destinations. A new window appears, where you can set up your destination. Use an existing destination from the list of available destinations, or create a new one by clicking + Add New Destination.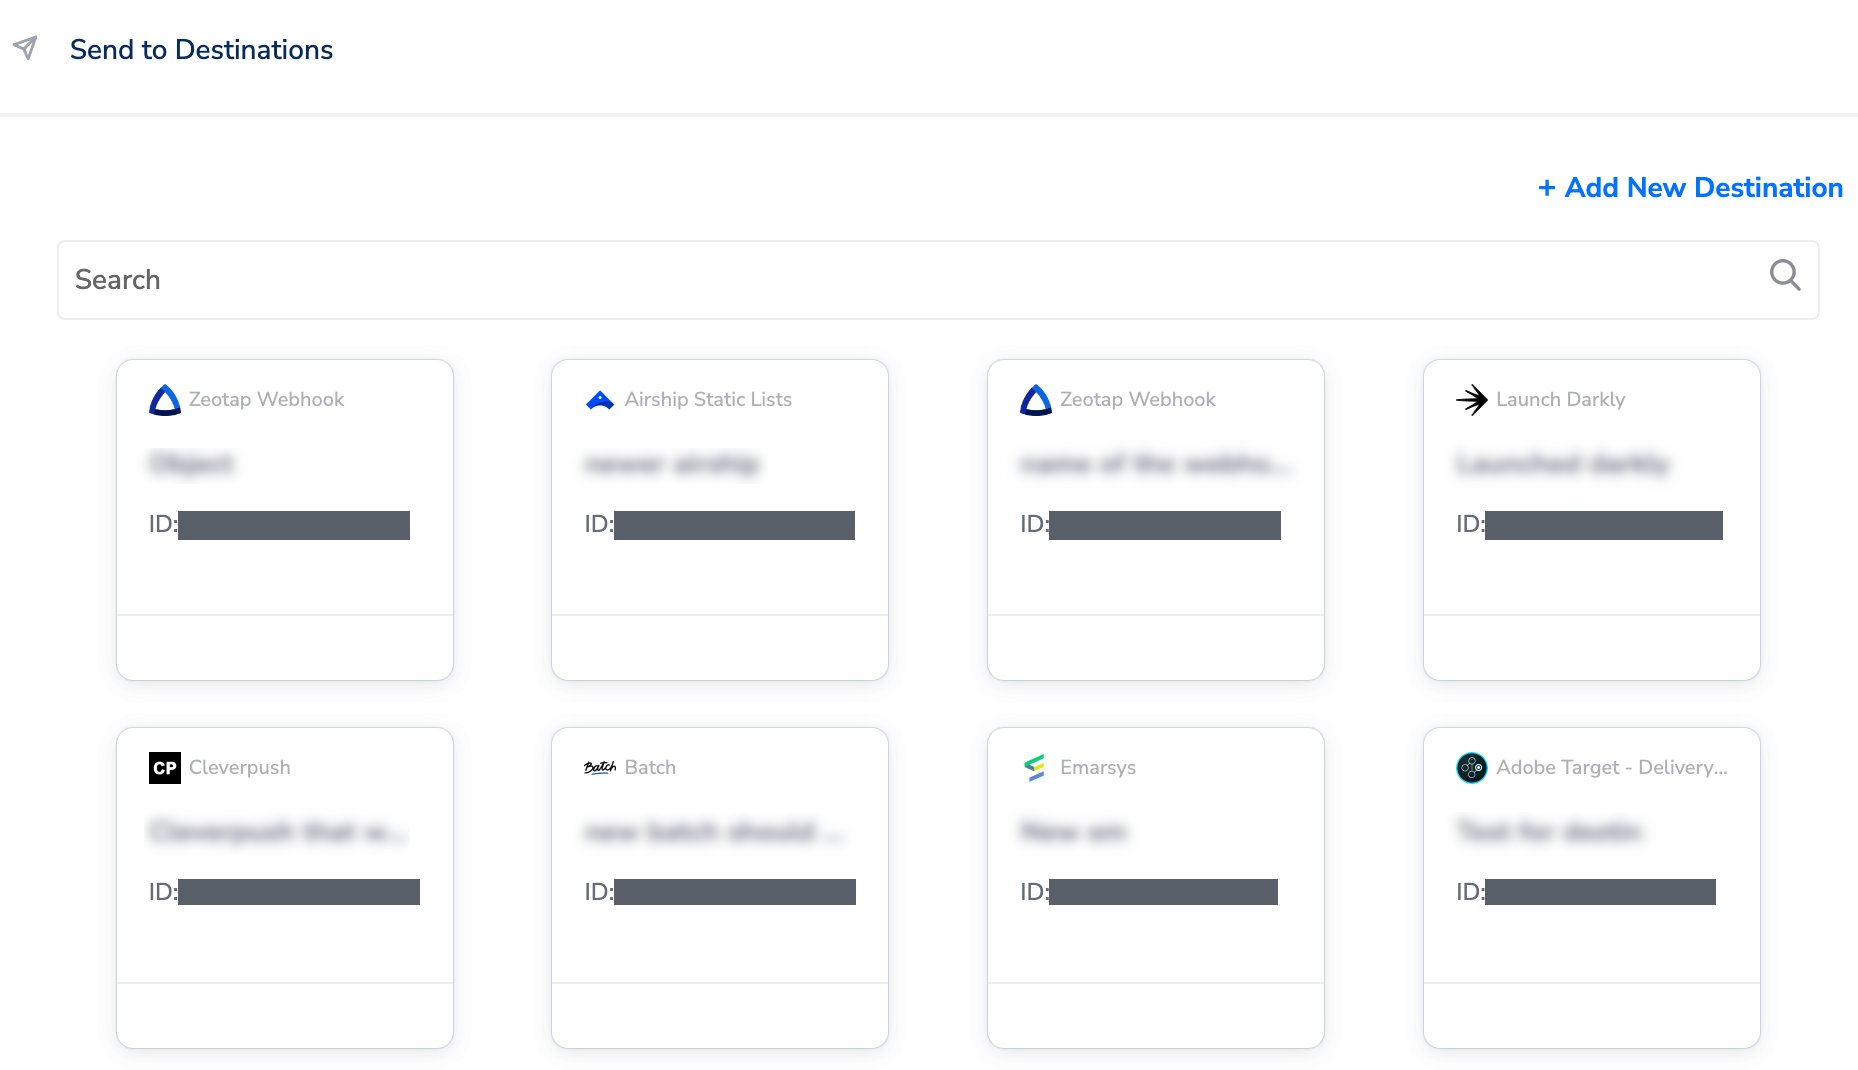
1
Start a new destination
Click + Add New Destination.
2
Find the connector
Search for Zeotap Webhook.
3
Name the destination
Click Zeotap Webhook and enter a Destination Name for easy identification.
4
Enter your endpoint URL
In Upload URL, enter the endpoint URL of your API — the address Zeotap calls to deliver data. See Upload URL.
5
Choose the API Type
Choose the API Type from the drop-down menu. Select POST or PATCH, matching the method your endpoint implements. See API Type.
6
Choose the Authentication Type
Choose the Authentication Type from the drop-down menu and enter the credentials it asks for — Username and Password for BASIC, or a Bearer Token for Static Bearer Token. See Authentication Type.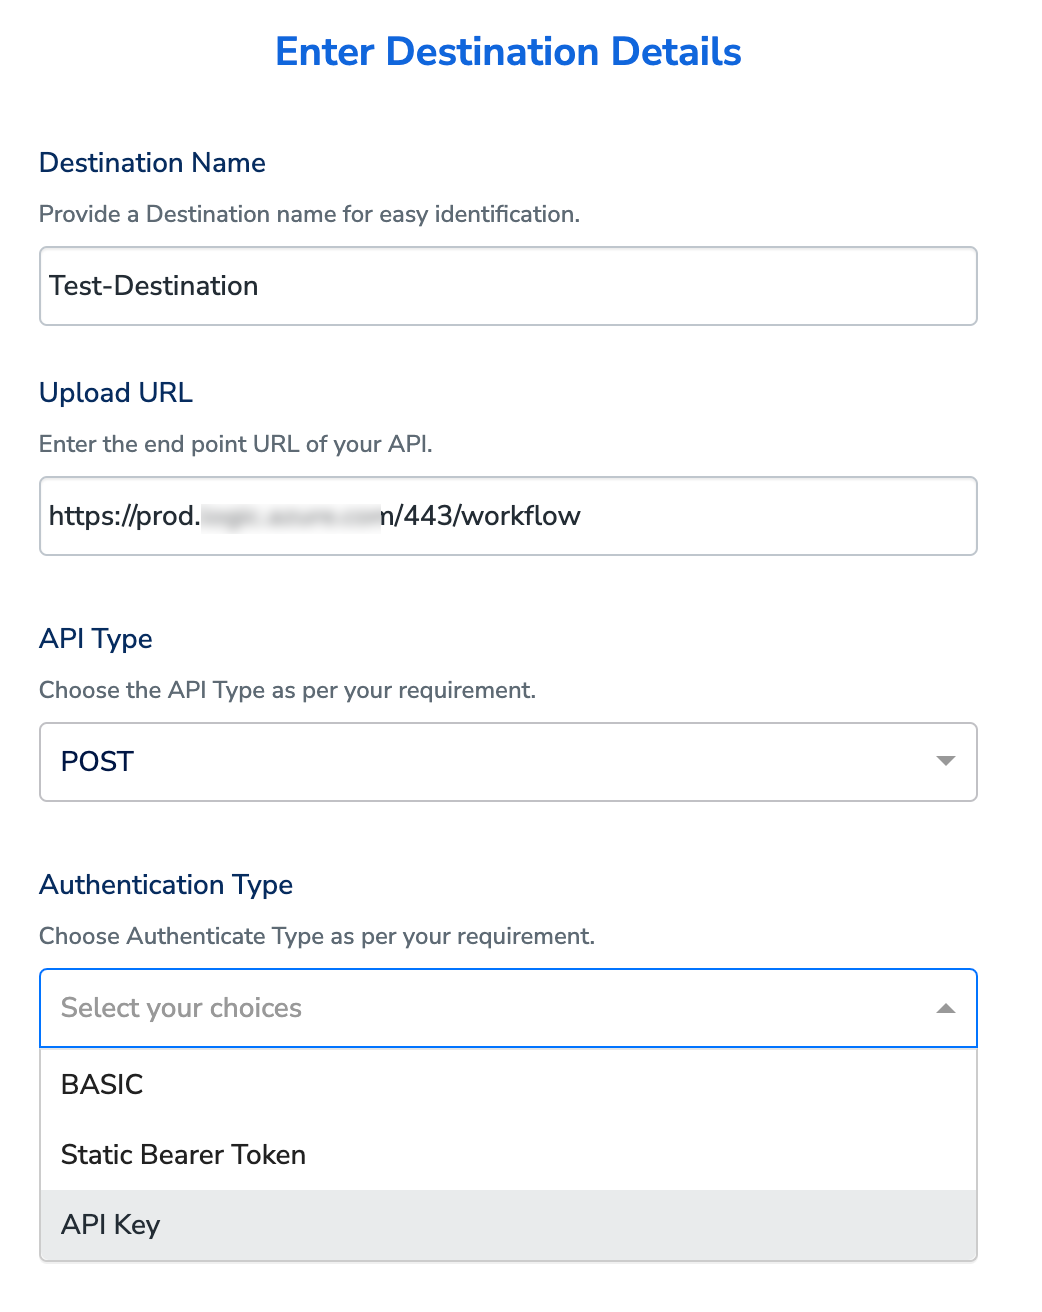
7
Choose the action and map the fields
In the mapping screen that appears, under Choose your Action, select Send identifiers and attributes to Zeotap Webhook as the action for sending data from the workflow created in Journeys. Under Map the Fields, map each Catalogue field to the destination field your endpoint expects, using + Add Mapping Field to add further rows. For the mapping reference that applies to every destination, see Define the mapping.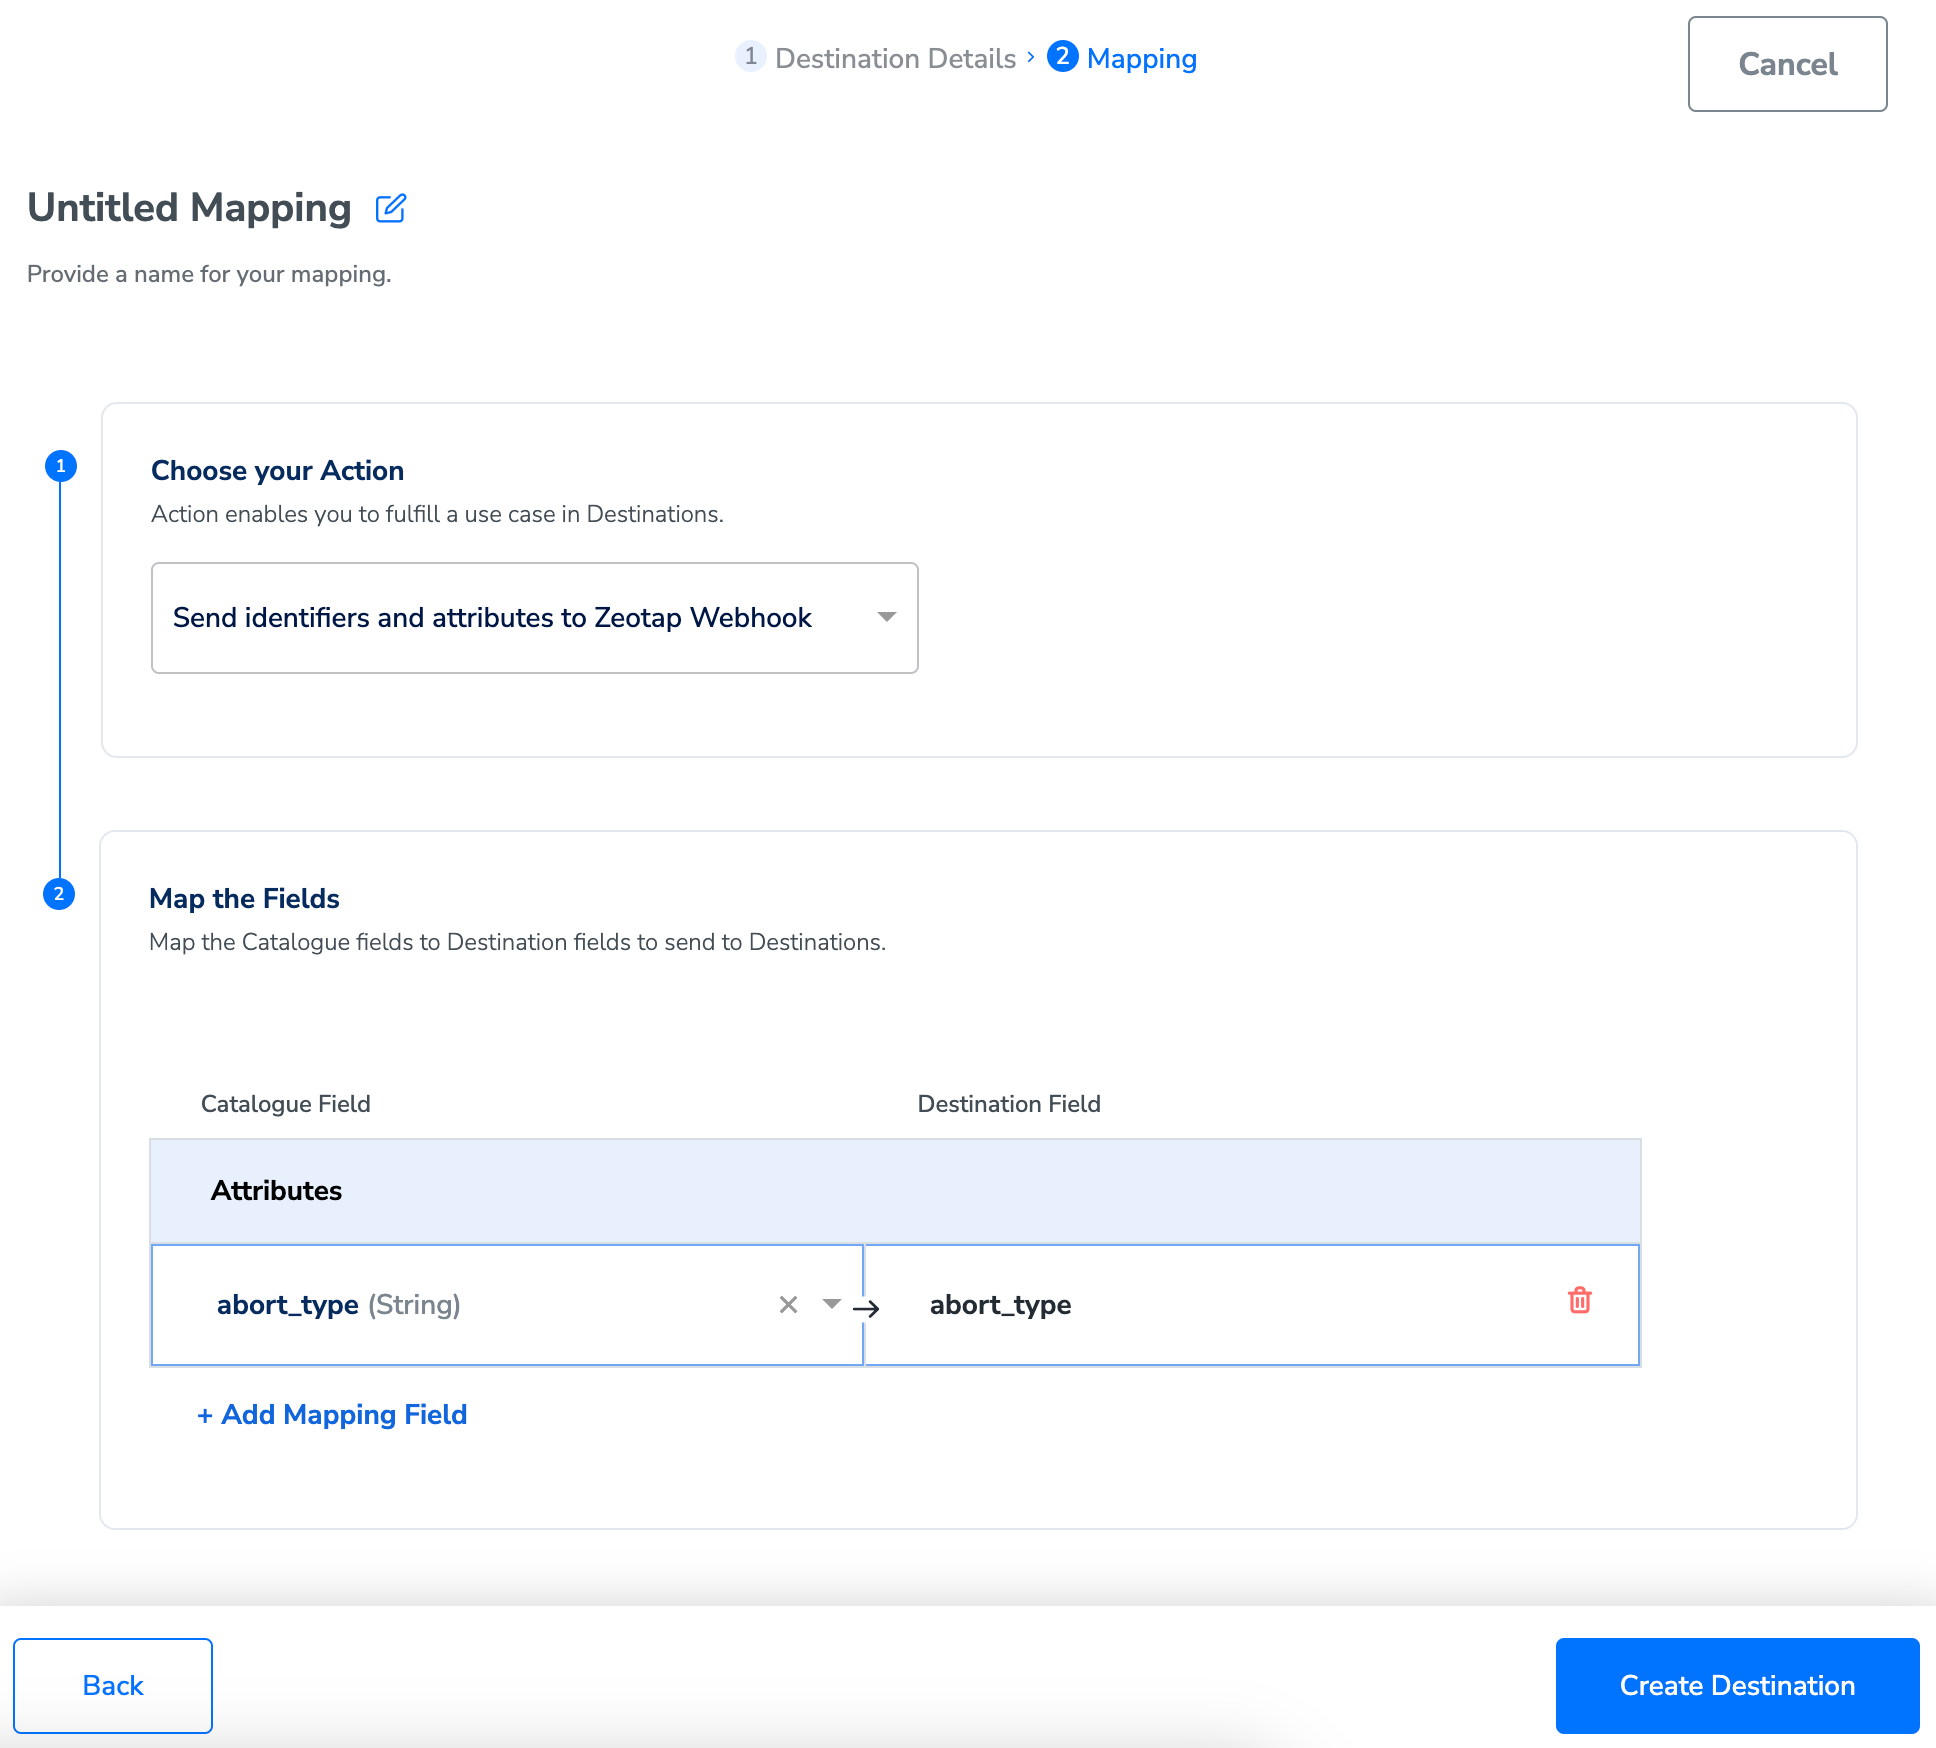
8
Create the destination
Once the mapping is complete, click Create Destination. The destination is created and made available for activation on Journeys.
Ensure that you map at least one attribute. Otherwise, the data does not flow to the destination.
Attach the destination to a Journeys workflow
After creating the destination, link it in the Send to Destinations node within the workflow.1
Add the Send to Destinations node
In the workflow, click + and choose Send to Destinations.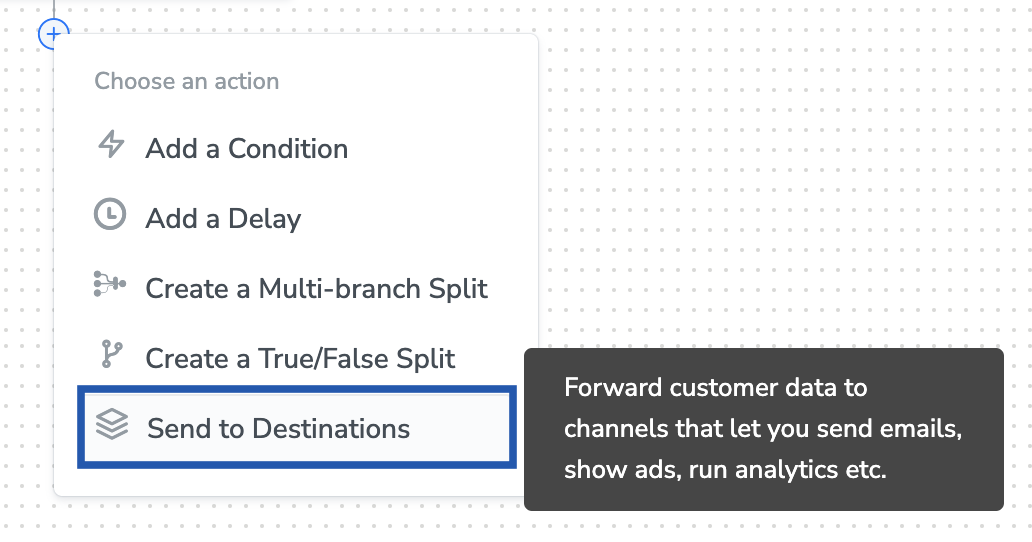
2
Select the destination
Choose the destination from the list of available destinations by using the search feature.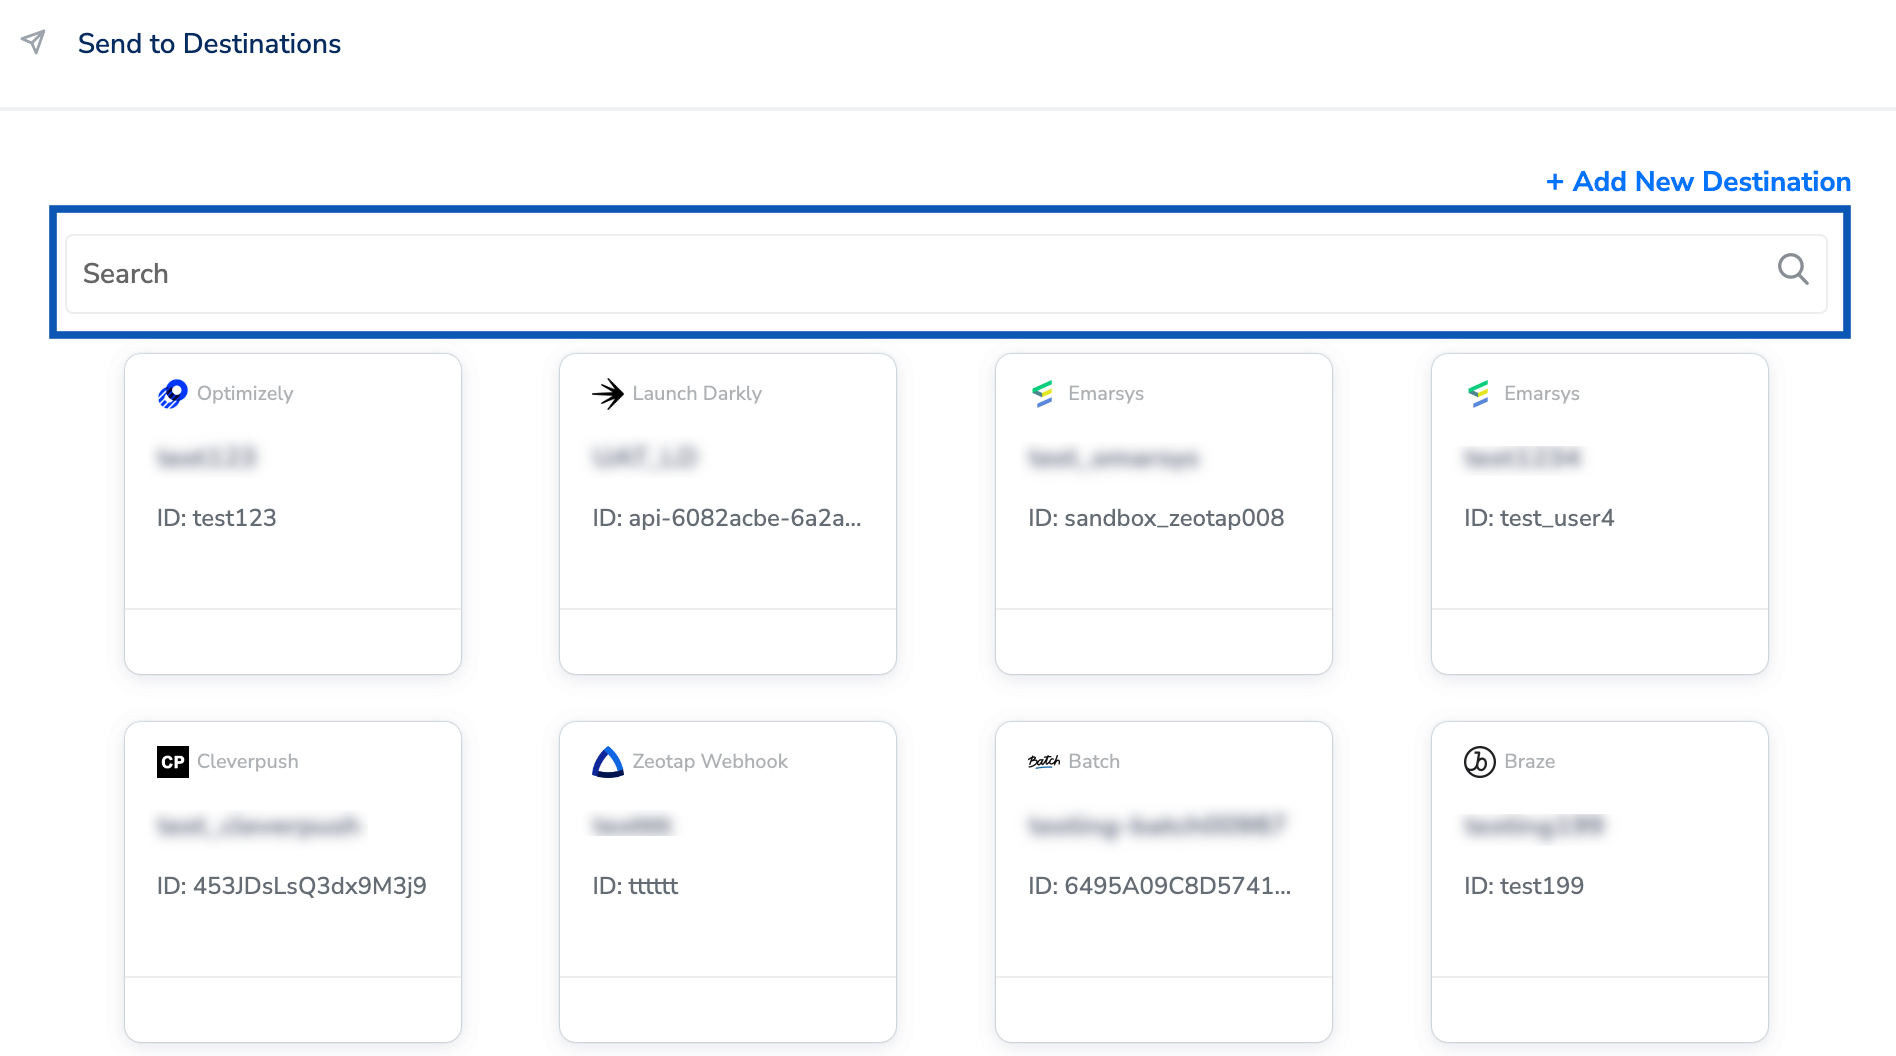
3
Confirm the details and name the audience
Under the Destination Details tab, the Upload URL, API Type, Authentication Type and the credential fields for that authentication type — for example Bearer Token — are populated automatically from the values you entered while creating the destination. In the Audience Name field, enter a name to categorise the users this workflow sends.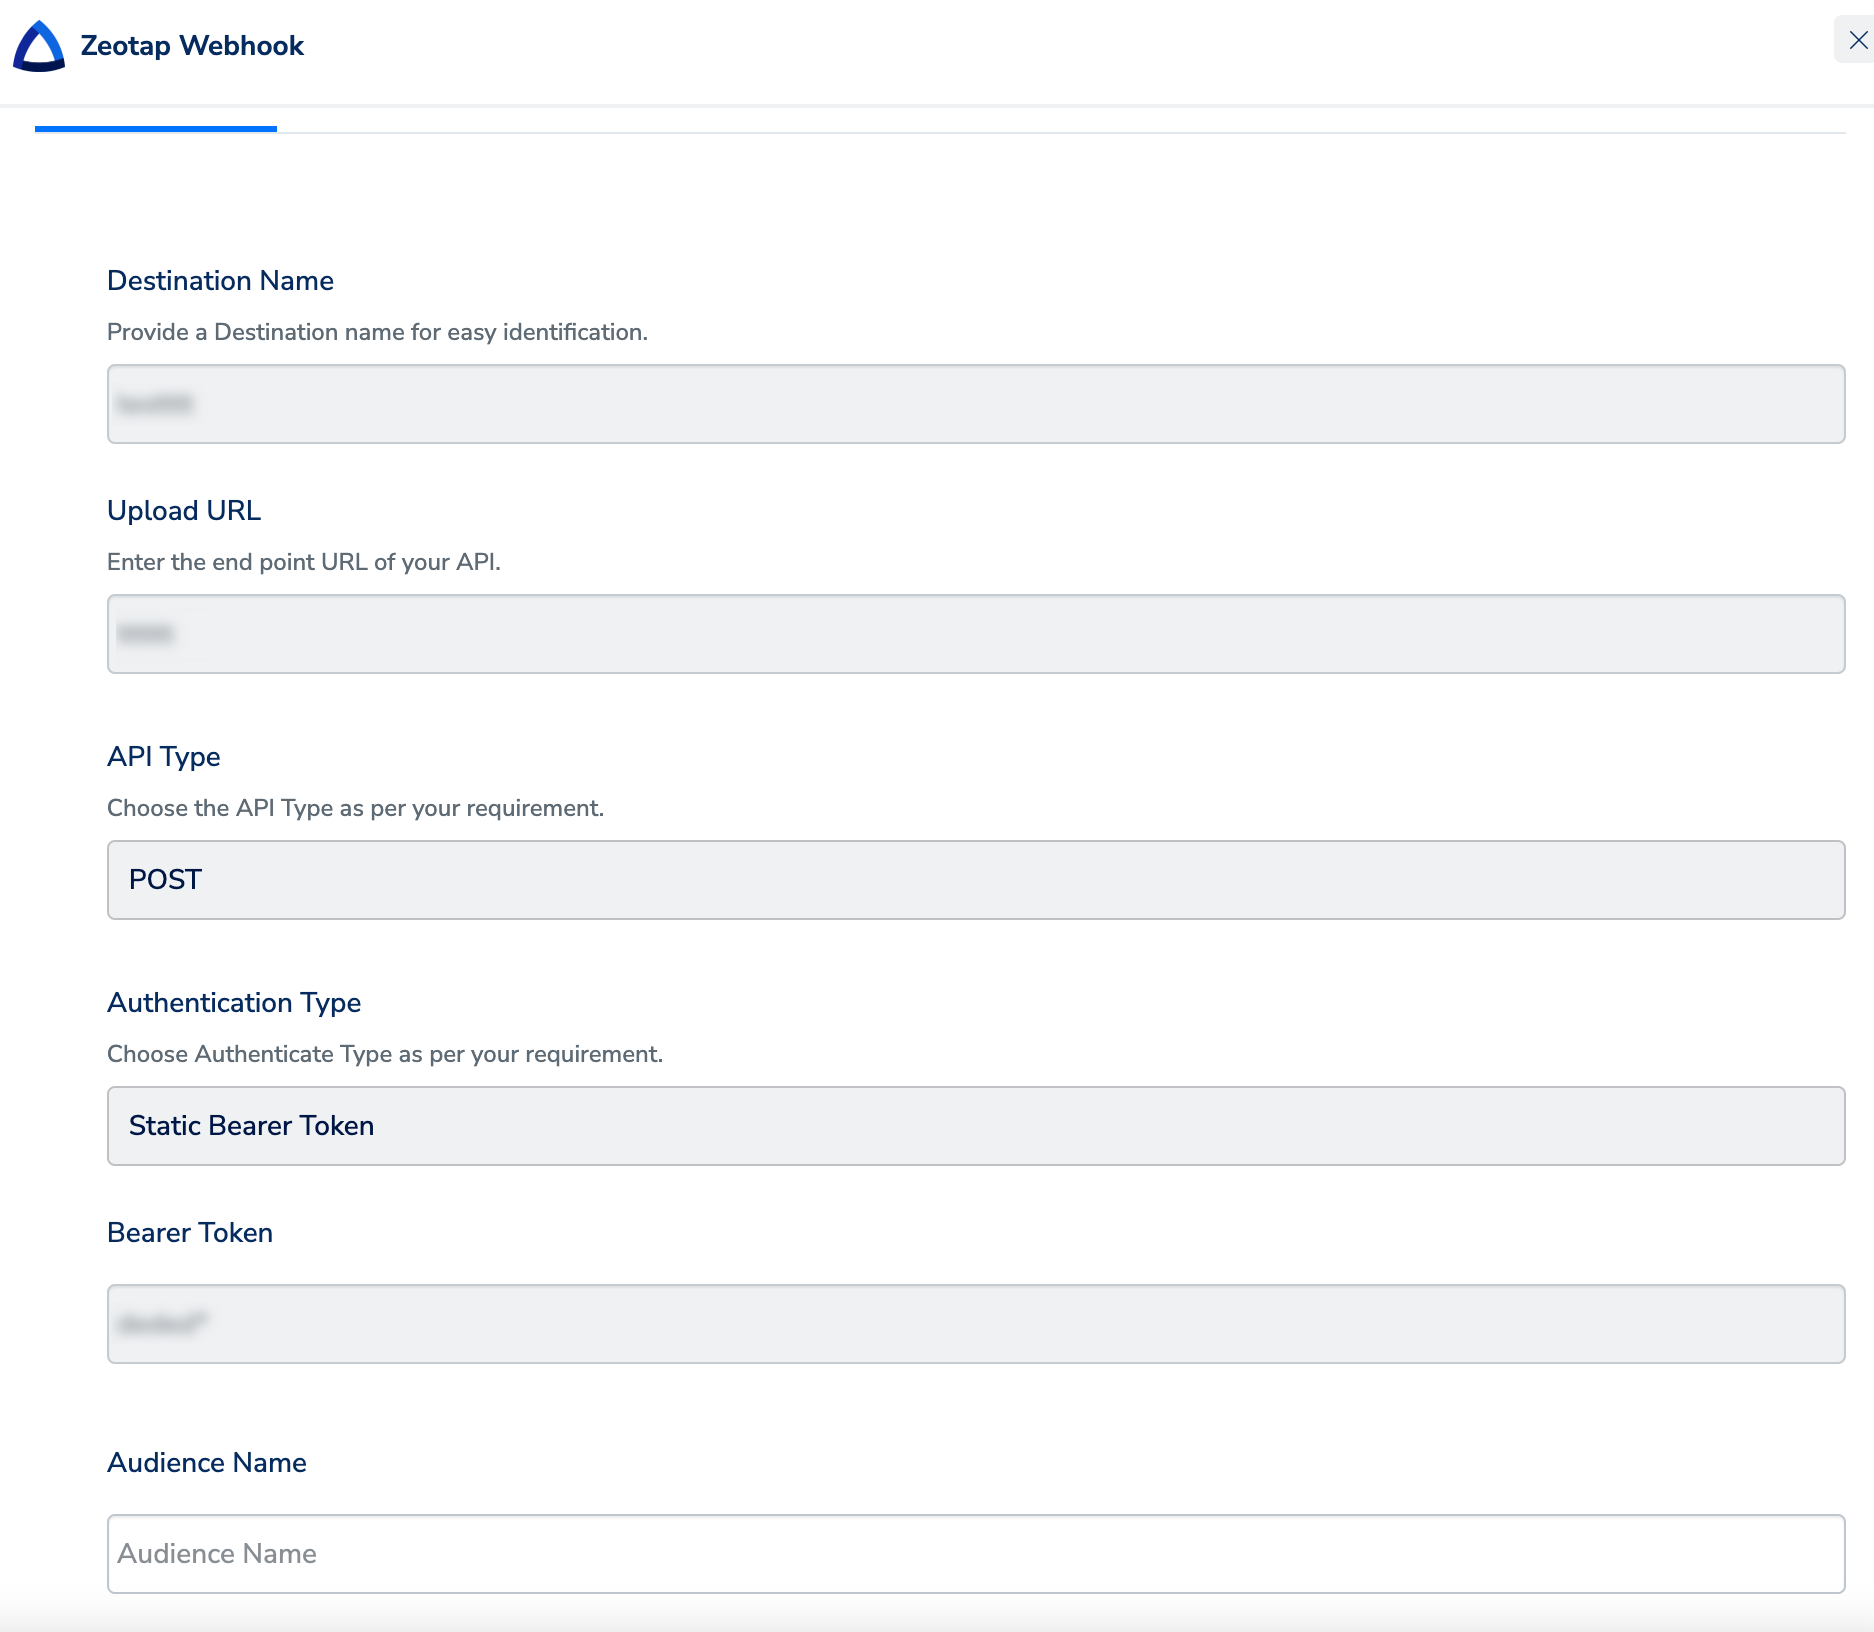
4
Confirm the action and mapping
Under the Destination Settings tab, confirm the action and mapping, or adjust them using Edit Mapping.
5
Save
Click Save Destination. The destination is attached to the node, as shown below.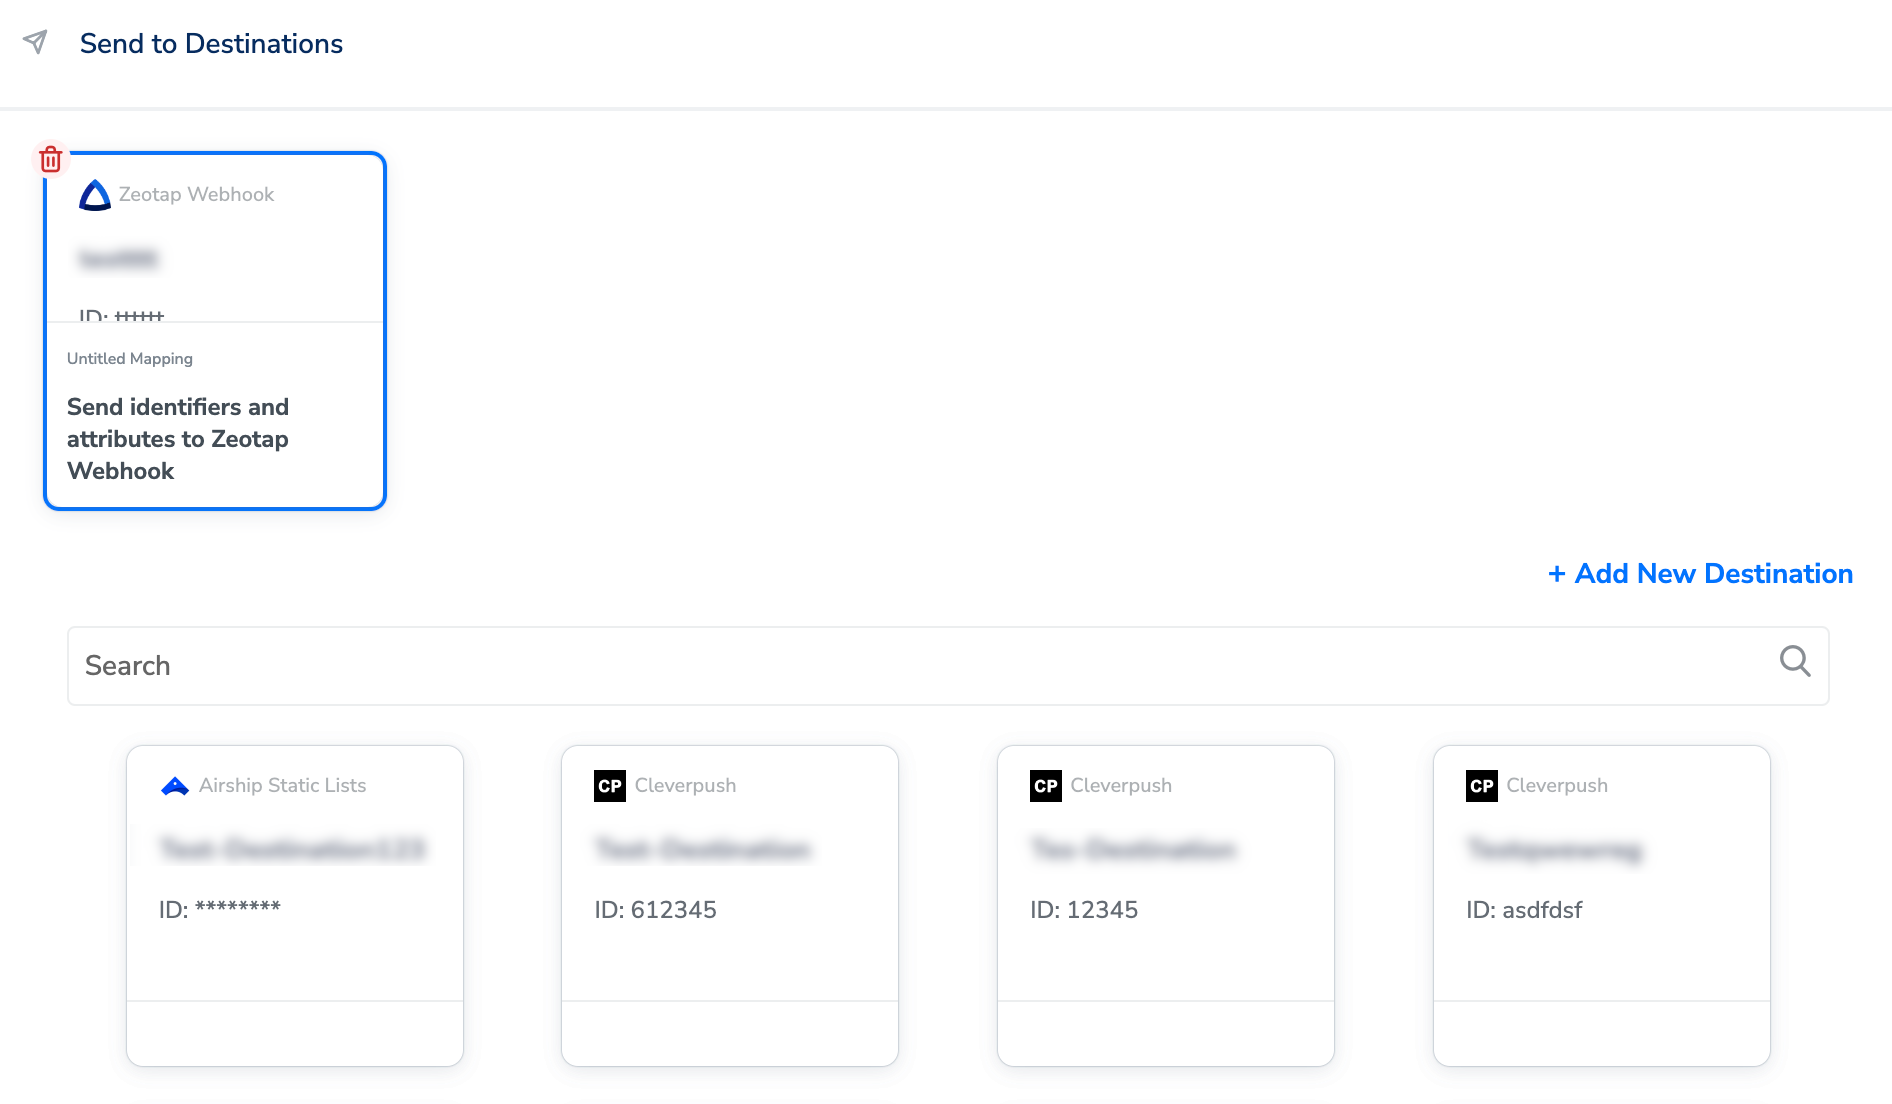
Verify the destination is delivering
- In Journeys, confirm the Zeotap Webhook destination card appears attached inside the Send to Destinations node, showing the action Send identifiers and attributes to Zeotap Webhook and the mapping you selected.
- Confirm the workflow is in Published state on the Workflow listing screen.
- On your own infrastructure, confirm your endpoint is receiving the calls — check the access or application logs of the service behind the Upload URL for incoming requests, and confirm the payloads carry the Catalogue fields you mapped.
Troubleshoot delivery to your endpoint
Because you own the receiving side of this integration, most failures are visible in your own endpoint’s logs. Work through these conditions before contacting support.
For failure conditions shared across every real-time destination, see Why records are rejected.
When to contact support
Contact your Zeotap customer success representative if your endpoint is reachable and accepting requests from other clients, the workflow is published, at least one attribute is mapped, and your endpoint’s logs still show no incoming calls. Include in your request: the destination name, the workflow and its published state, the API Type and Authentication Type you configured, the mapping, the Audience Name on the node, and the time window you checked in your endpoint’s logs. Do not include the password or bearer token itself.FAQ
Does Zeotap host the webhook endpoint I send data to?
Does Zeotap host the webhook endpoint I send data to?
No. The direction is the other way round — Zeotap calls an endpoint that you host. The Upload URL field is where you enter the URL of your own API, and the name is misleading: nothing is uploaded to Zeotap through this destination. If you want to send data into Zeotap over HTTP, use the Server-to-Server source instead.
Who generates the Bearer Token?
Who generates the Bearer Token?
You do. The token is issued by the system that hosts the endpoint — yours. Zeotap does not generate it. You paste it into the Bearer Token field when you create the destination, and Zeotap presents it on every call to your Upload URL.
Can one destination use both POST and PATCH?
Can one destination use both POST and PATCH?
No. API Type is fixed for the destination and applies to every call it makes. If you need both methods, create a separate Zeotap Webhook destination for each and attach whichever one the workflow needs.
Why is no data reaching my endpoint even though the workflow is published?
Why is no data reaching my endpoint even though the workflow is published?
The most common cause is that no attribute is mapped — the destination requires at least one mapped attribute before data flows. Open the destination’s Map the Fields screen and confirm at least one Catalogue field is mapped, then re-check your endpoint’s logs.
Can I attach more than one destination to the same Send to Destinations node?
Can I attach more than one destination to the same Send to Destinations node?
Yes. In the Send to Destinations node, click Add Destinations to attach additional destinations to the same node. See Activate Your Real Time Audiences.
Where does the Audience Name I enter on the workflow go?
Where does the Audience Name I enter on the workflow go?
The Audience Name field on the Destination Details tab of the Send to Destinations node categorises the users that workflow sends. Set a distinct value per workflow so you can tell the traffic apart on your side.
Next steps
- Explore Real-Time Integrations to see the pattern every real-time destination follows →
- Explore the Google Pub/Sub destination for message-queue delivery →
- Explore the Apache Kafka destination for topic-based delivery →
- Explore the Server-to-Server source to send data into Zeotap over HTTP →
- Explore how to create a workflow in Journeys →
- Explore the Destinations reference for actions and mapping →