

What this is
Google Universal Analytics is a real-time destination: data flows out of Zeotap CDP to your Google Universal Analytics (GA) property, driven from a workflow in Journeys. Each time a user qualifies for — or drops out of — the workflow, Zeotap sends an event to GA against that user’s GA Client ID, so the enhanced profile you hold in Zeotap is available for reporting and audience building inside Google. Google Universal Analytics itself covers event, page view, e-commerce, crash and exception reporting. Integrated with Zeotap CDP you can additionally:- Send data into GA custom dimensions and custom metrics, carrying enhanced user traits and profile attributes alongside the event.
- Send offline data that you cannot send through a direct Google Analytics implementation.
- Build audiences on the resulting GA data and activate them in other Google products.
The opposite direction — getting the GA Client ID into Zeotap in the first place — is handled by the Google Tag Manager source, where the Zeotap Collect Tag can pick up the GA Client ID from the
_ga cookie. Without that, Zeotap has no GA Client ID to send back.For the Google Analytics 4 property type, use the separate Google Analytics 4 destination, which sits in the Batch Integrations lane and is linked to an audience rather than to a journey.Supported identifiers and actions
You can map additional Catalogue attributes to GA custom dimensions and custom metrics on the same mapping.
Prerequisites
Have all of the following ready before you create the destination:- A Google Universal Analytics property, and its Tracking ID. See Set up the Google Analytics property below.
- Custom dimensions and custom metrics created in Google Universal Analytics, so that Zeotap has somewhere to send the attributes to. See Create custom dimensions and custom metrics below.
- The GA Client ID flowing into Zeotap through your Web or Google Tag Manager implementation. The GA Client ID is the user identifier for this integration, and Zeotap can only send it onward if it was collected first.
- A workflow in Journeys to attach the destination to — see Create a Workflow.
Set up the Google Analytics property
Perform the following steps in Google Analytics to create a property and obtain the Tracking ID:1
Log in to the Google Analytics (GA) account.
2
Go to Admin > Create Property.
3
Enter a Property Name and then click Show Advanced Options.
4
Select the toggle on Create a Universal Analytics property and enter the URL of the website that you want to track. Select the Create a Universal Analytics property only option.
5
Enter your Business Information and then click Create. The UA property is created.
6
Under the Property section, search for the Property Name you just created.
7
Click Property Settings. A section appears on the right side with all the relevant information about the property. Search for the Tracking ID and copy the details.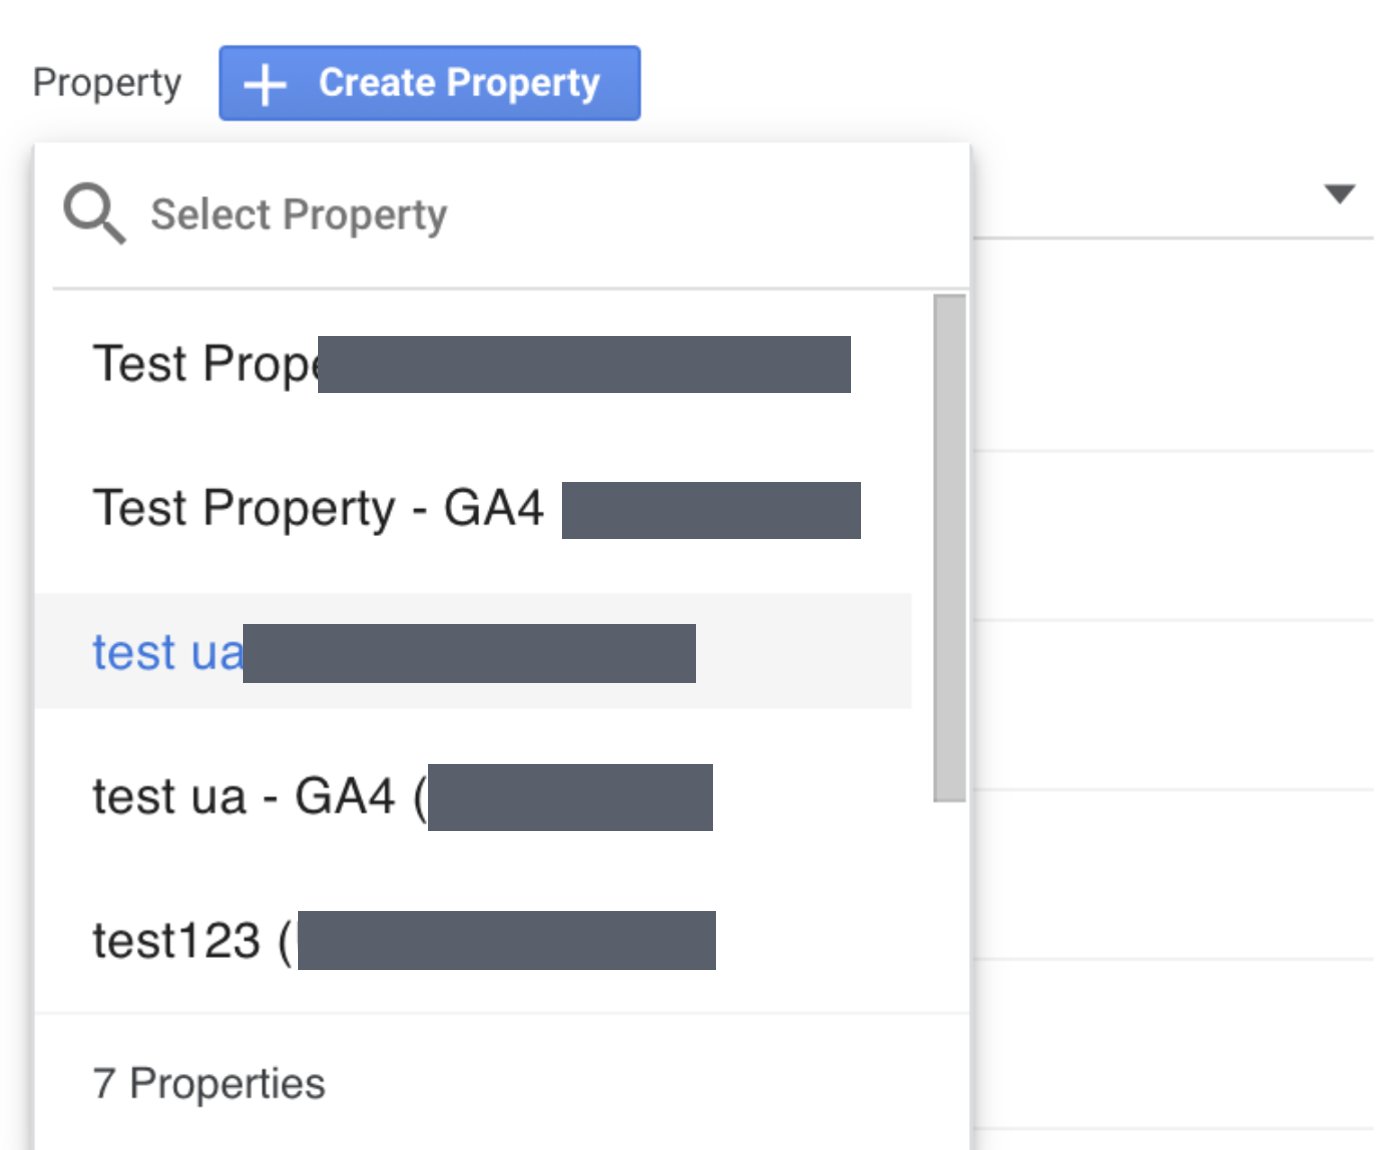
Note:The Tracking ID is required while creating a Google Universal Analytics destination under Journeys.
Create custom dimensions and custom metrics
Perform the following steps to set up a custom dimension and a custom metric in Google Analytics:1
Go to Admin > Custom Definitions under Property.
2
Choose Custom Dimension or Custom Metric based on your requirement and click +New Custom Dimension/Metric based on the selection.
3
Add name, scope and click the Active checkbox to activate a Custom Dimension. Similarly, for Custom Metric, add name, scope, formatting type, minimum and maximum value and click Active checkbox to activate a custom metric.
4
For Custom Dimensions, four scopes are provided, namely, Hit, Session, User and Product. Mostly, you may have to use the User scope as you need to add users based on Custom Dimensions. Similarly, for Custom Metric, two scopes are provided, namely, Hit and Product. To know more about the scopes, refer here.
5
Ensure that the custom dimensions are mapped to the correct index in Zeotap, else attributes will be mapped to the wrong values.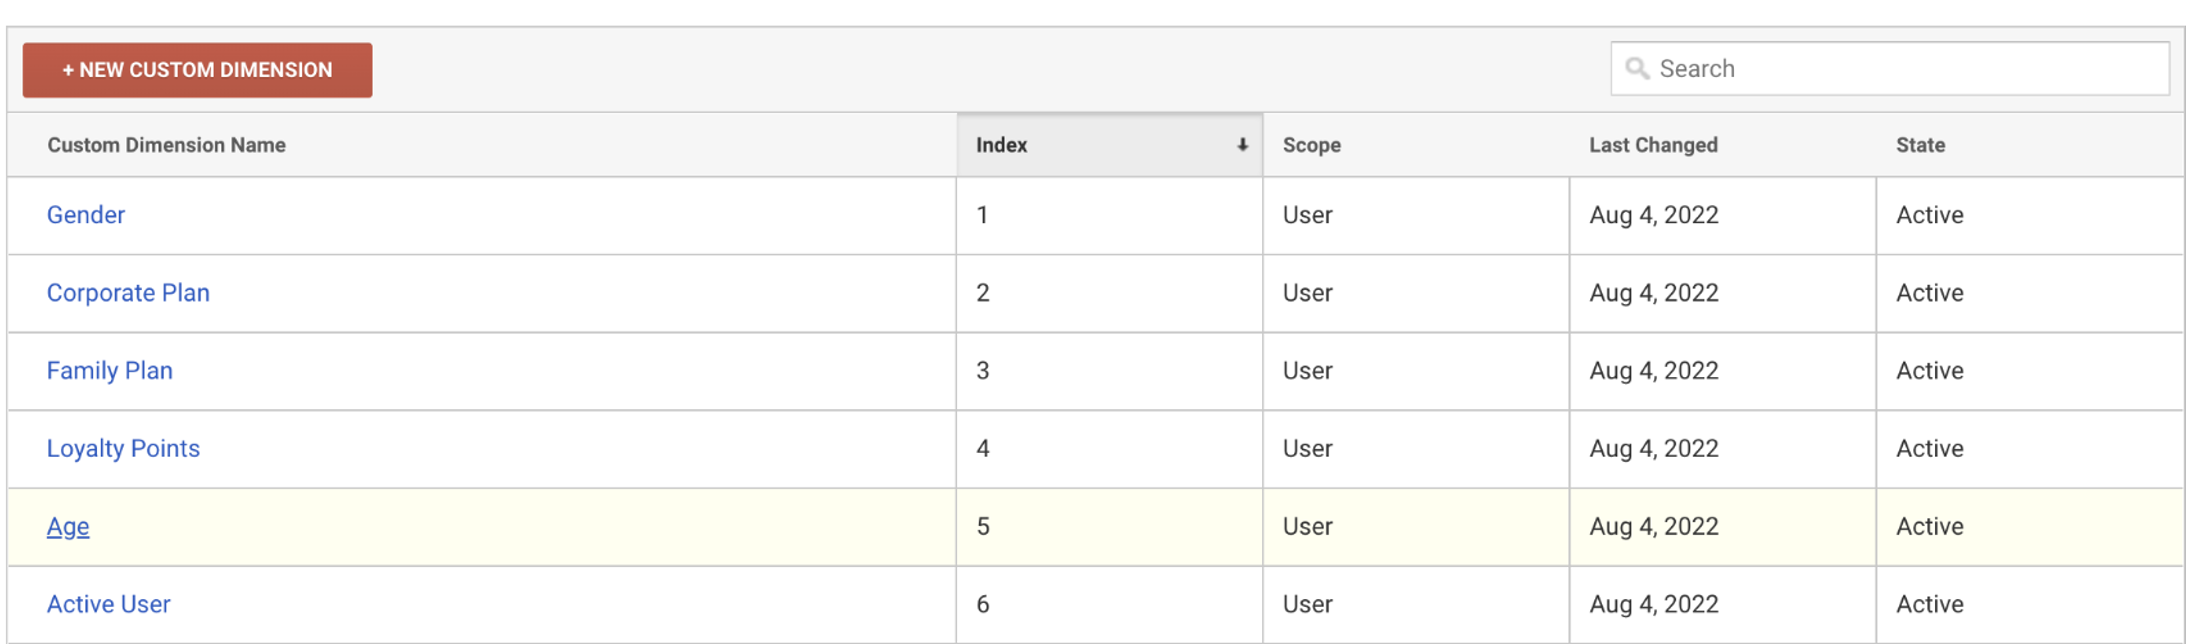
Create the Google Universal Analytics destination
After you have applied filters or added conditions for your users in Journeys, you can activate them in Google Universal Analytics under Send to Destinations. A new window appears, where you can set up your destination. You can use an already existing destination from the list of available Destinations or create a new one by clicking + Add New Destination.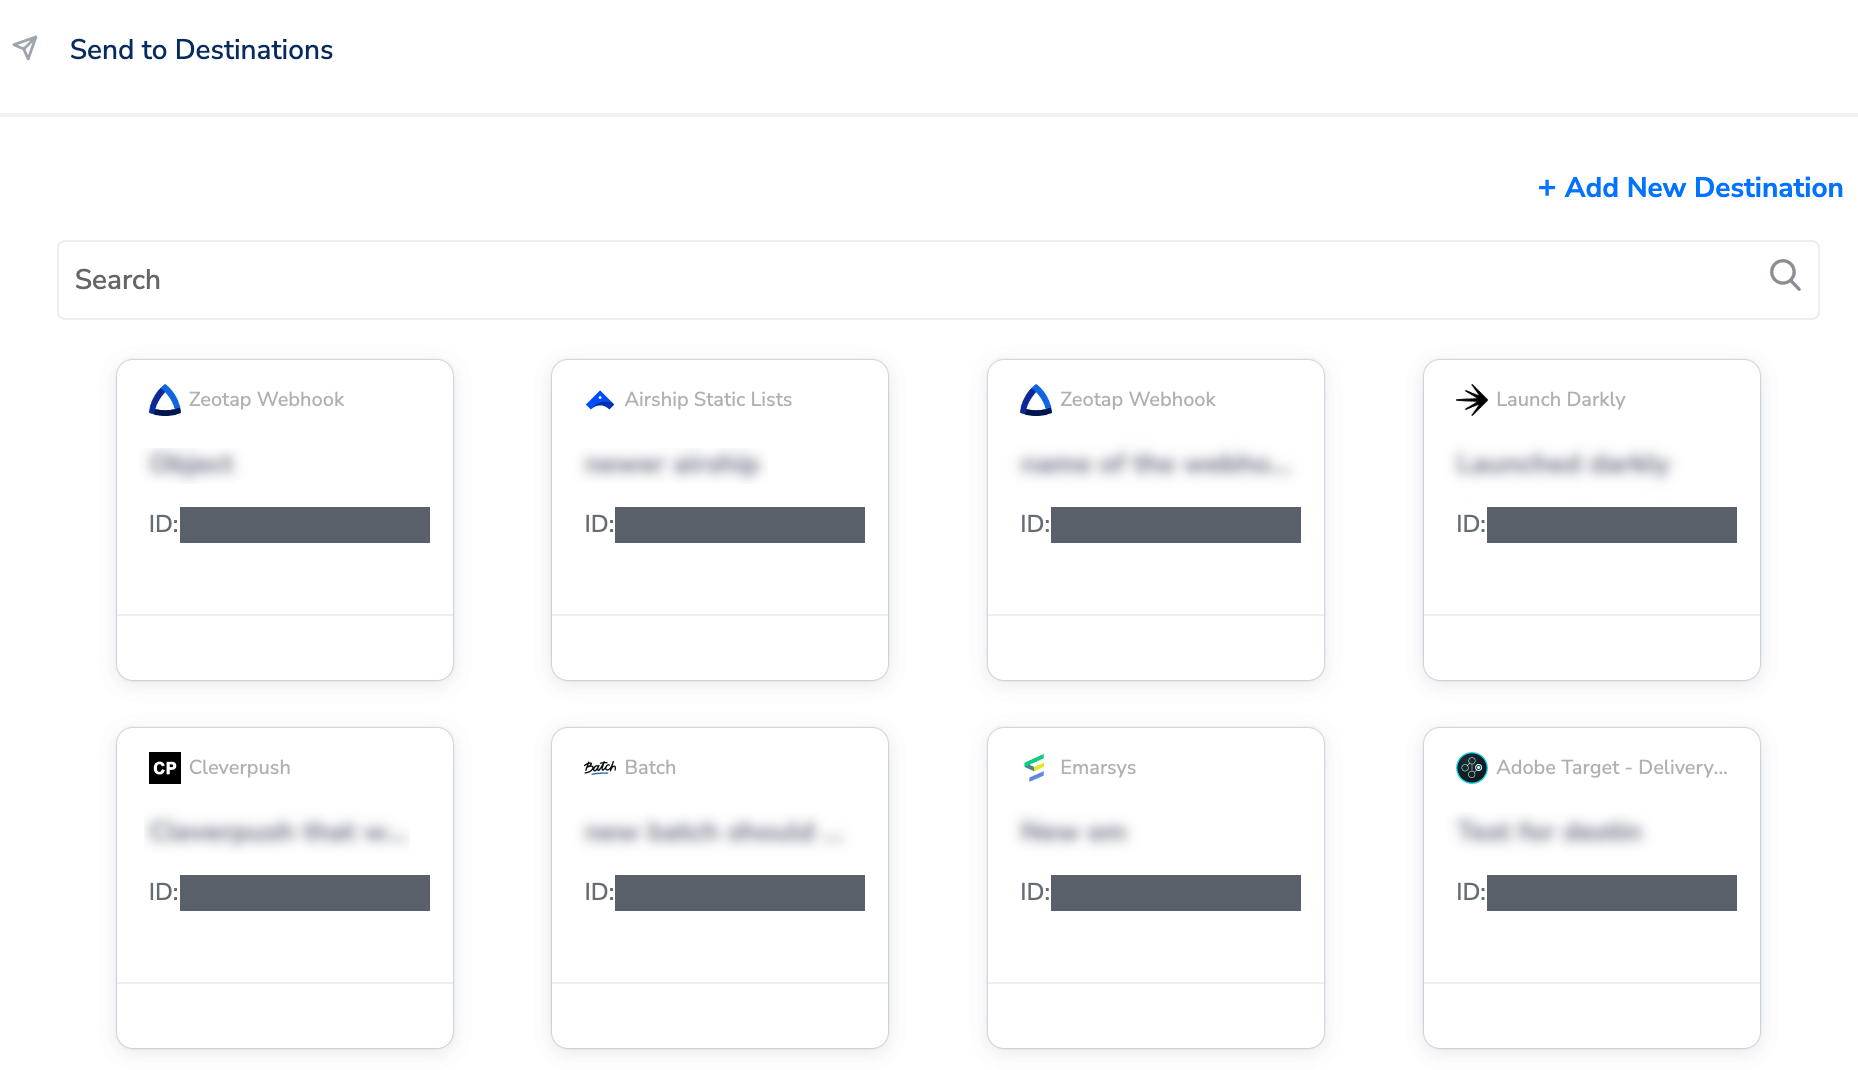
1
Click + Add New Destination.
2
Search for Google Universal Analytics.
3
Click Google Universal Analytics and enter a name for the Destination.
4
Add the Destination Name and Tracking ID (that you received above) and save the destination.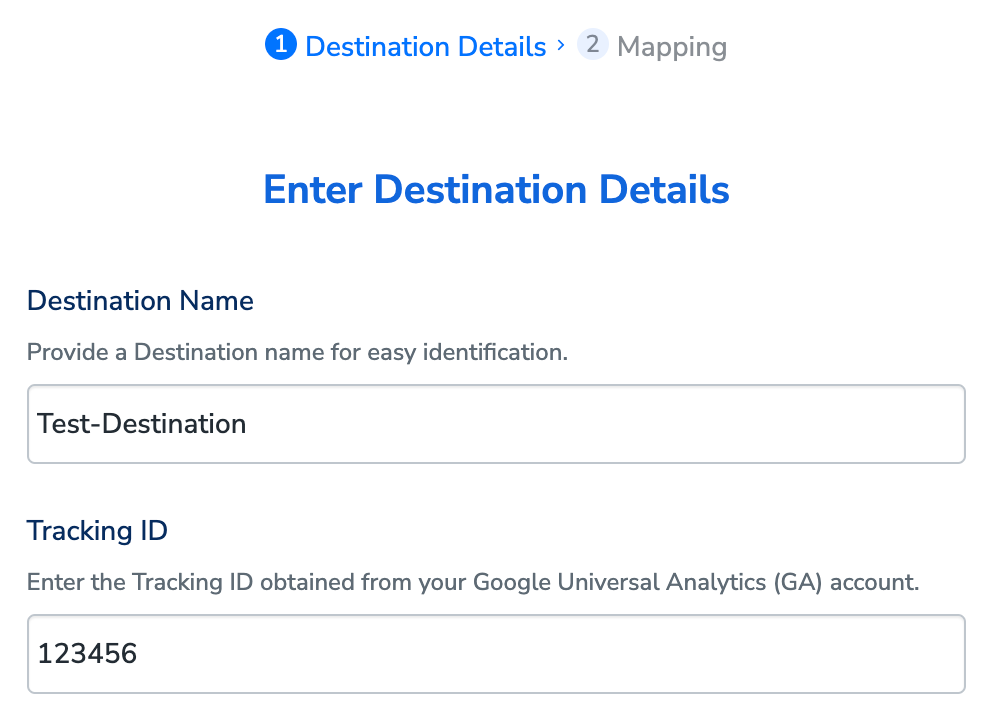
5
In the mapping screen that appears, under Choose your Action, select Send events to Google Universal Analytics in realtime as the action for sending data from the workflow created in Journeys. Under Map the Fields, you need to map an identifier to Google Client ID. You can also add more fields as required.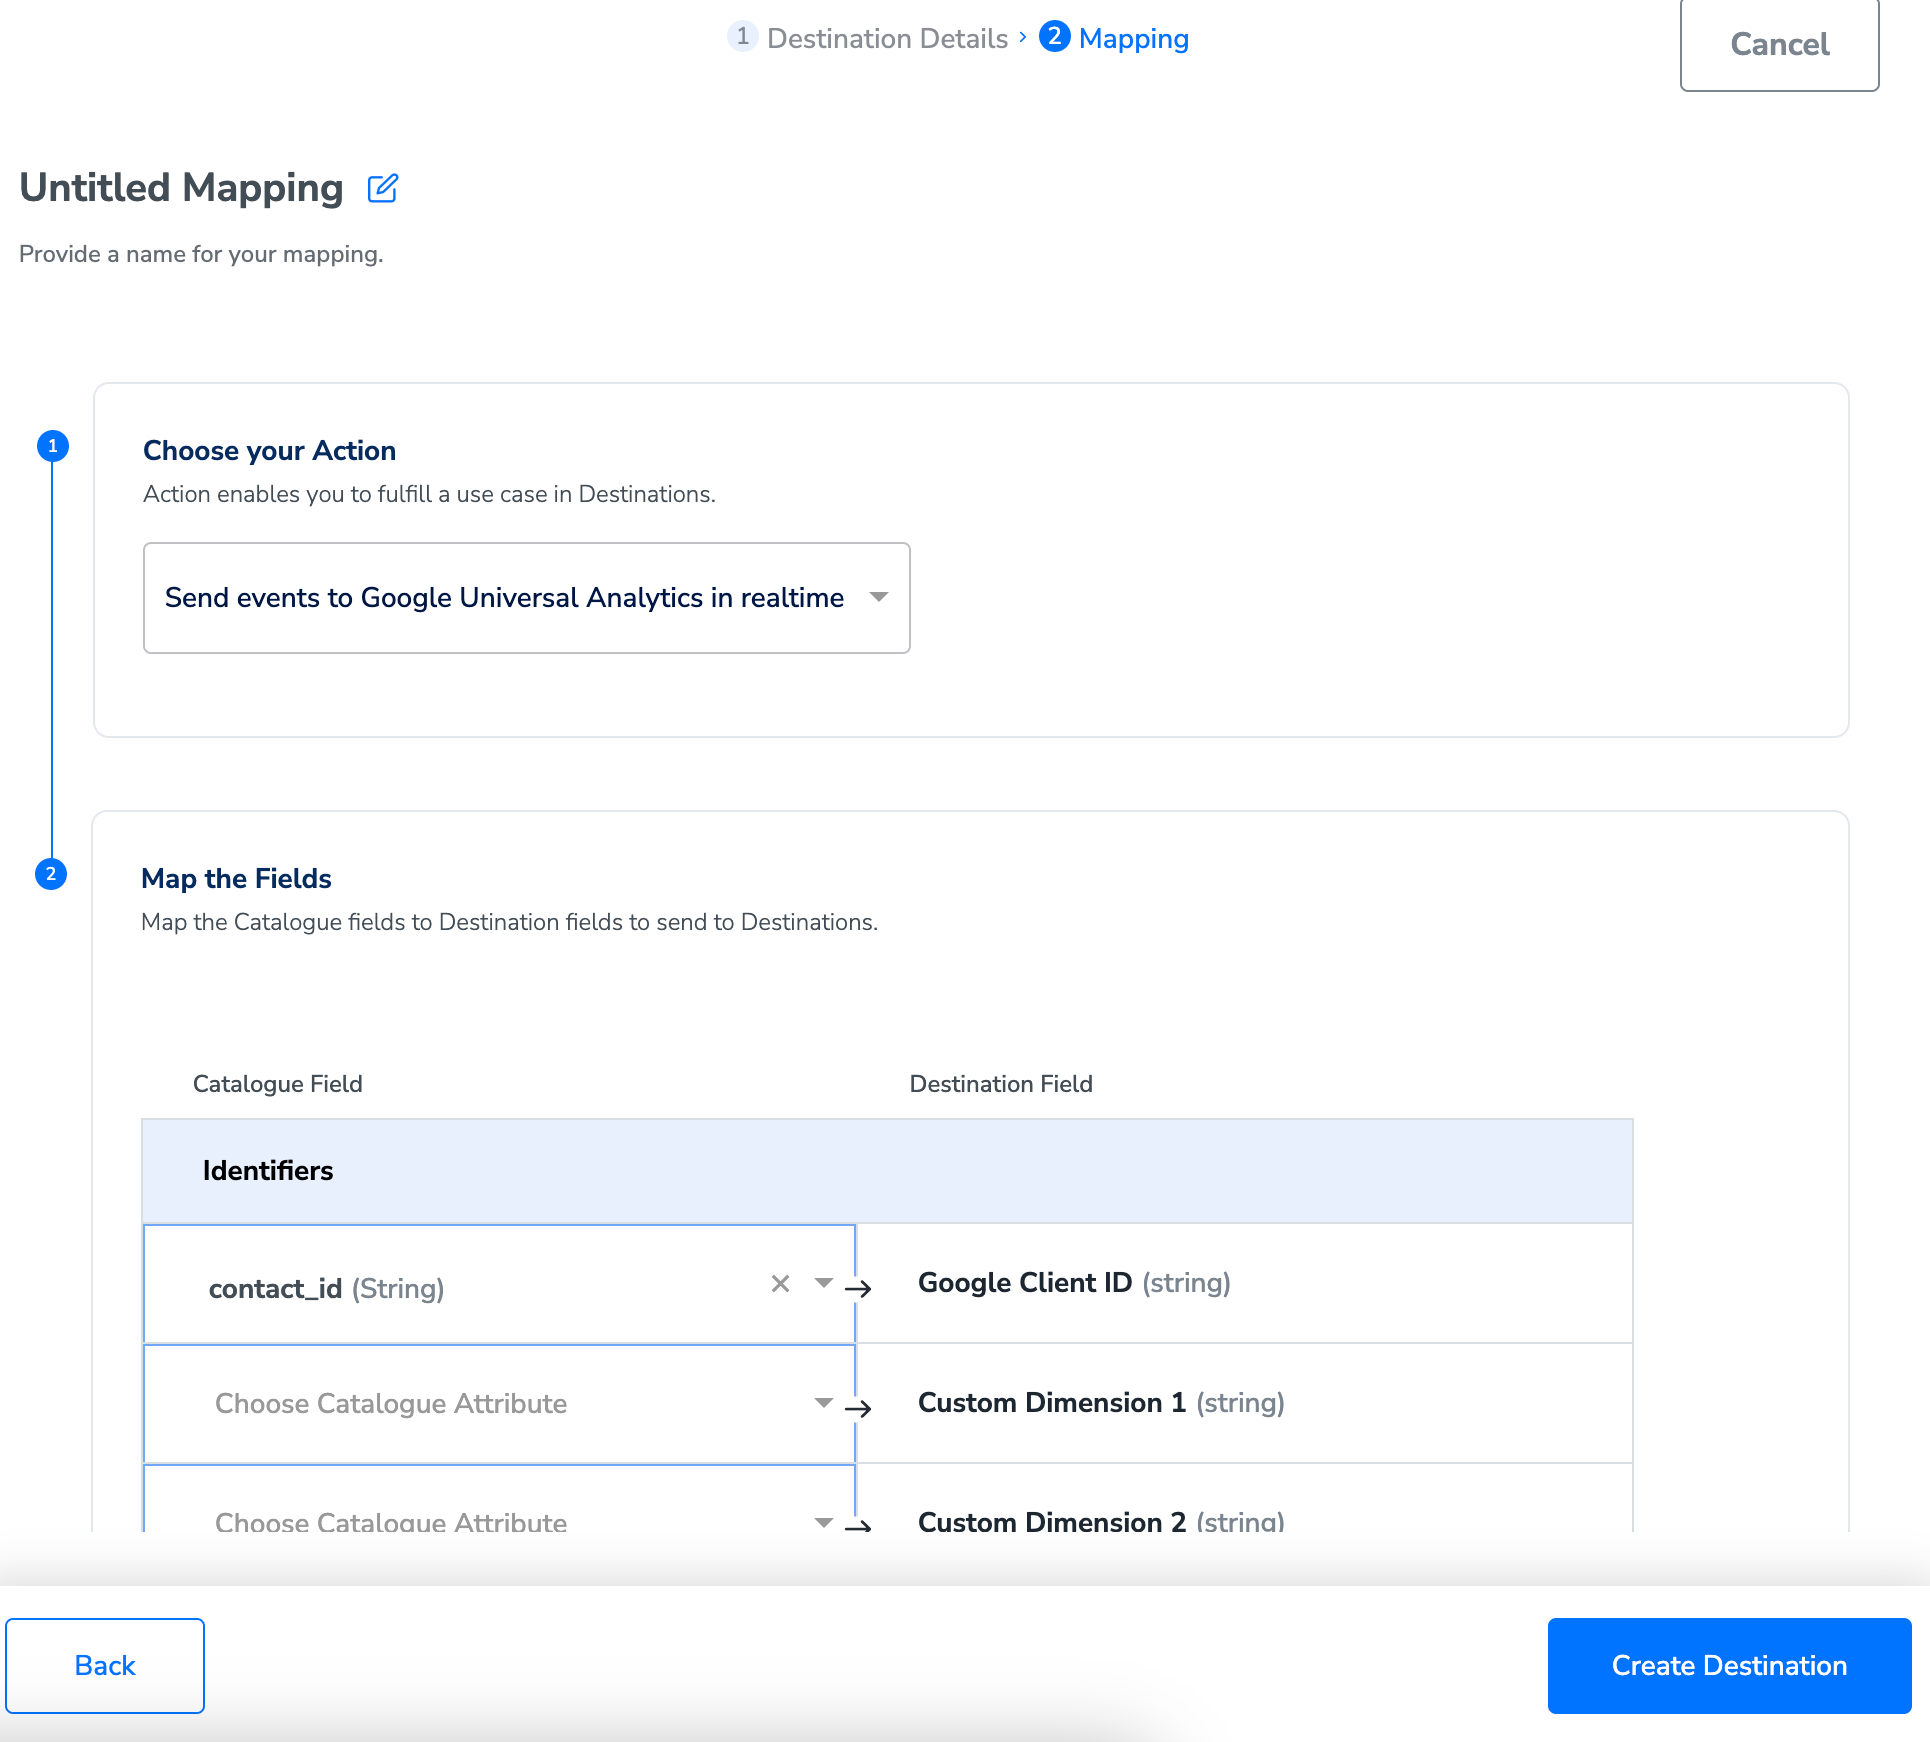
6
Once the mapping is complete, click Create Destination. The destination is created and made available for activation on Journeys.
Add the destination to a journey
After creating a destination, next, you need to link it in the Send to Destination node within the workflow, as explained below.1
In the workflow, click + and choose Send to Destinations.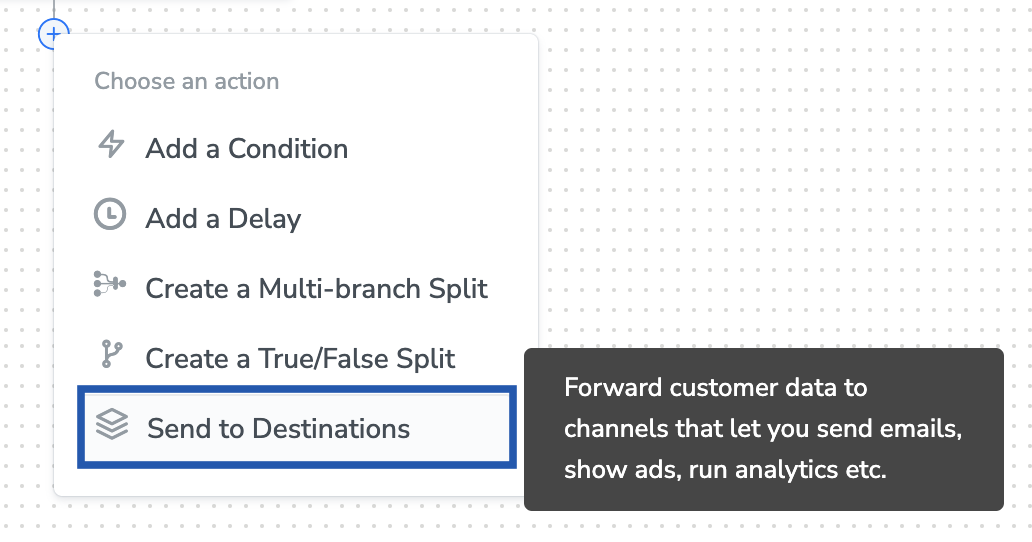
2
Choose the destination from the list of available destinations by using the search feature.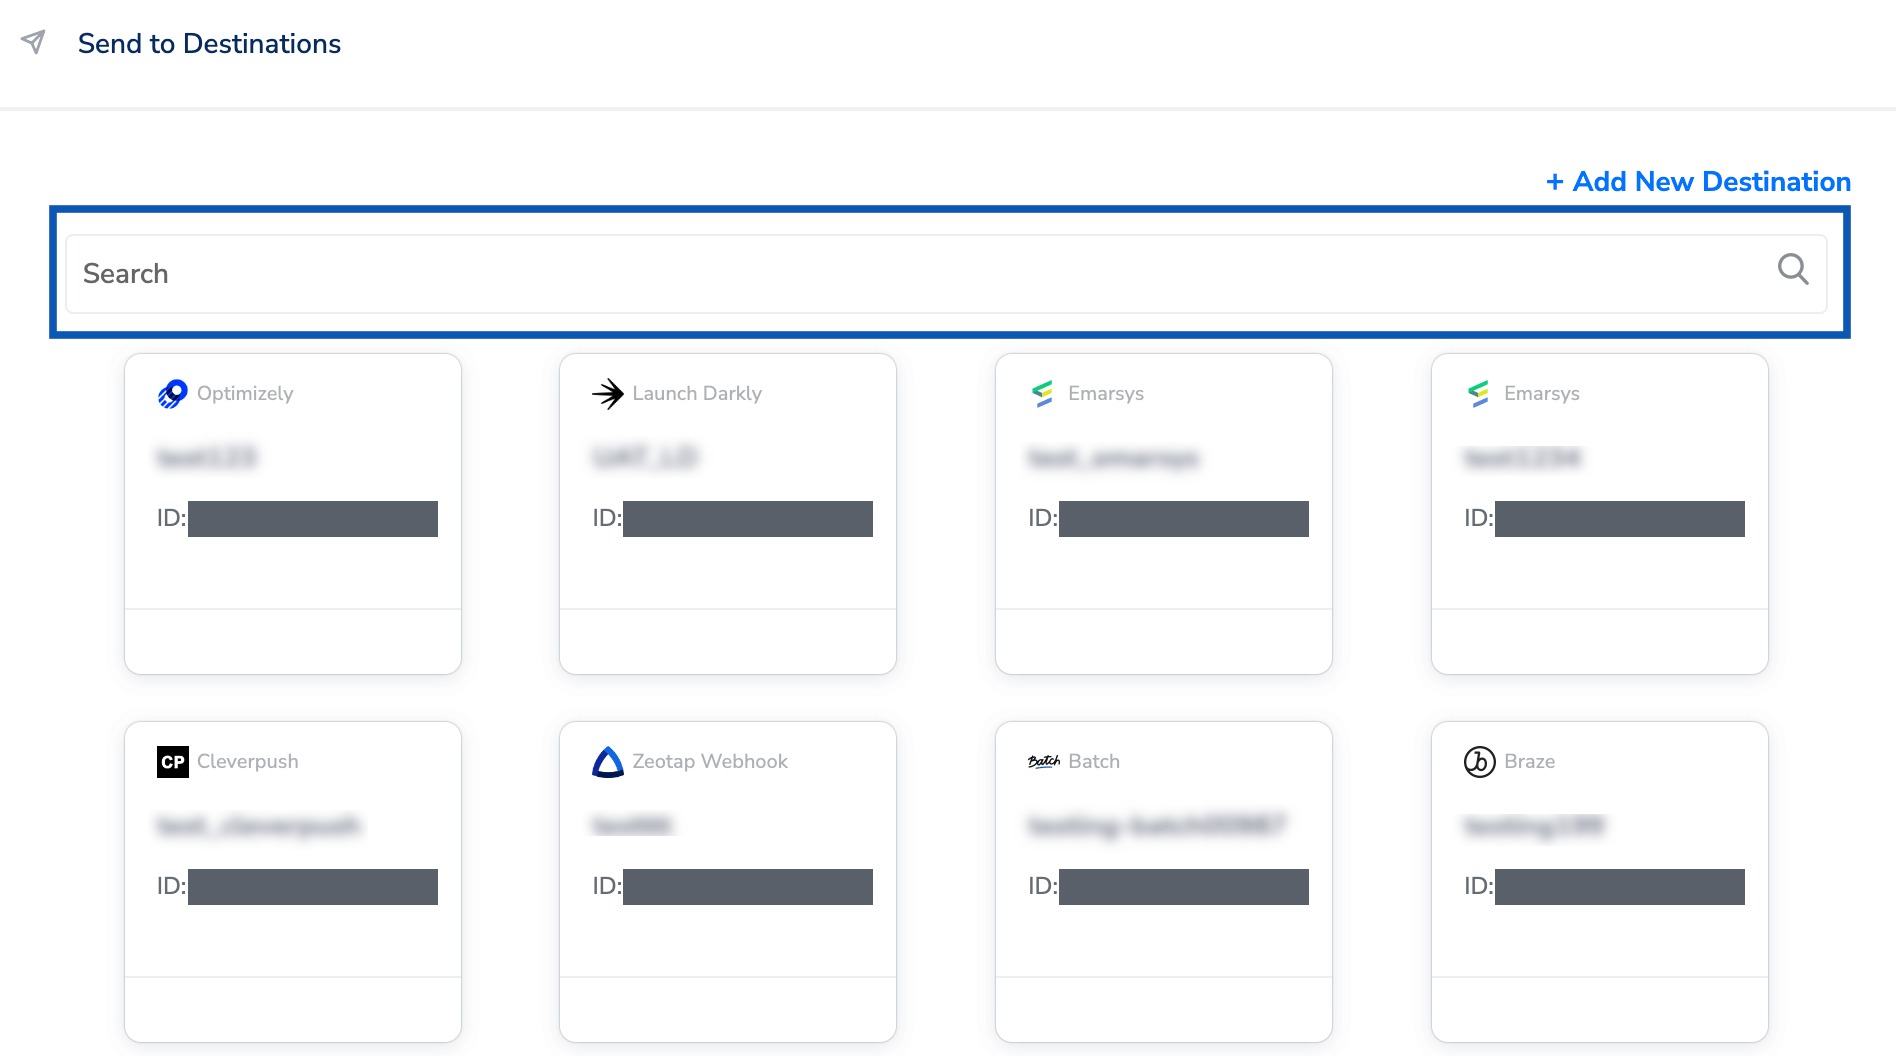
3
Under the Destination Details tab, the Tracking ID is populated automatically from the value you entered while creating the destination. However, in the Audience Name field, enter a name to categorise your users.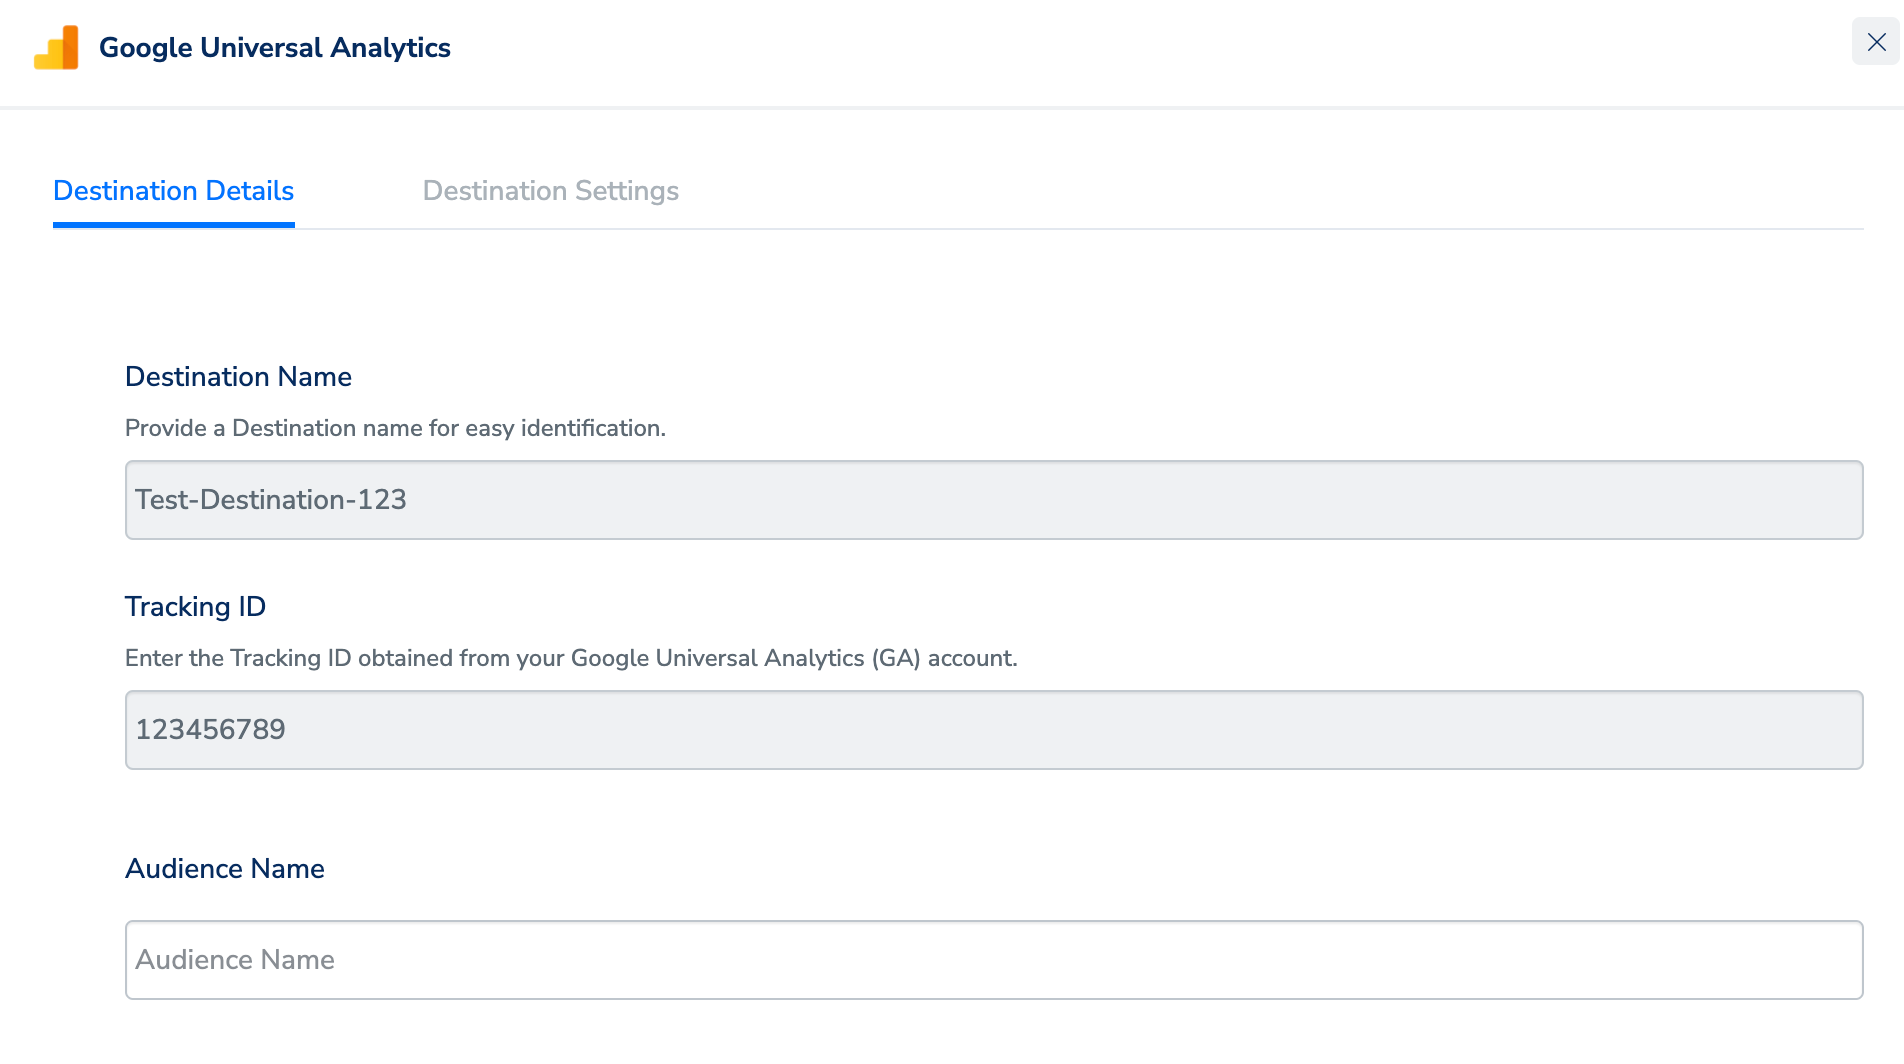
4
Under the Destination Settings tab, choose the Action and mapping as per your requirement.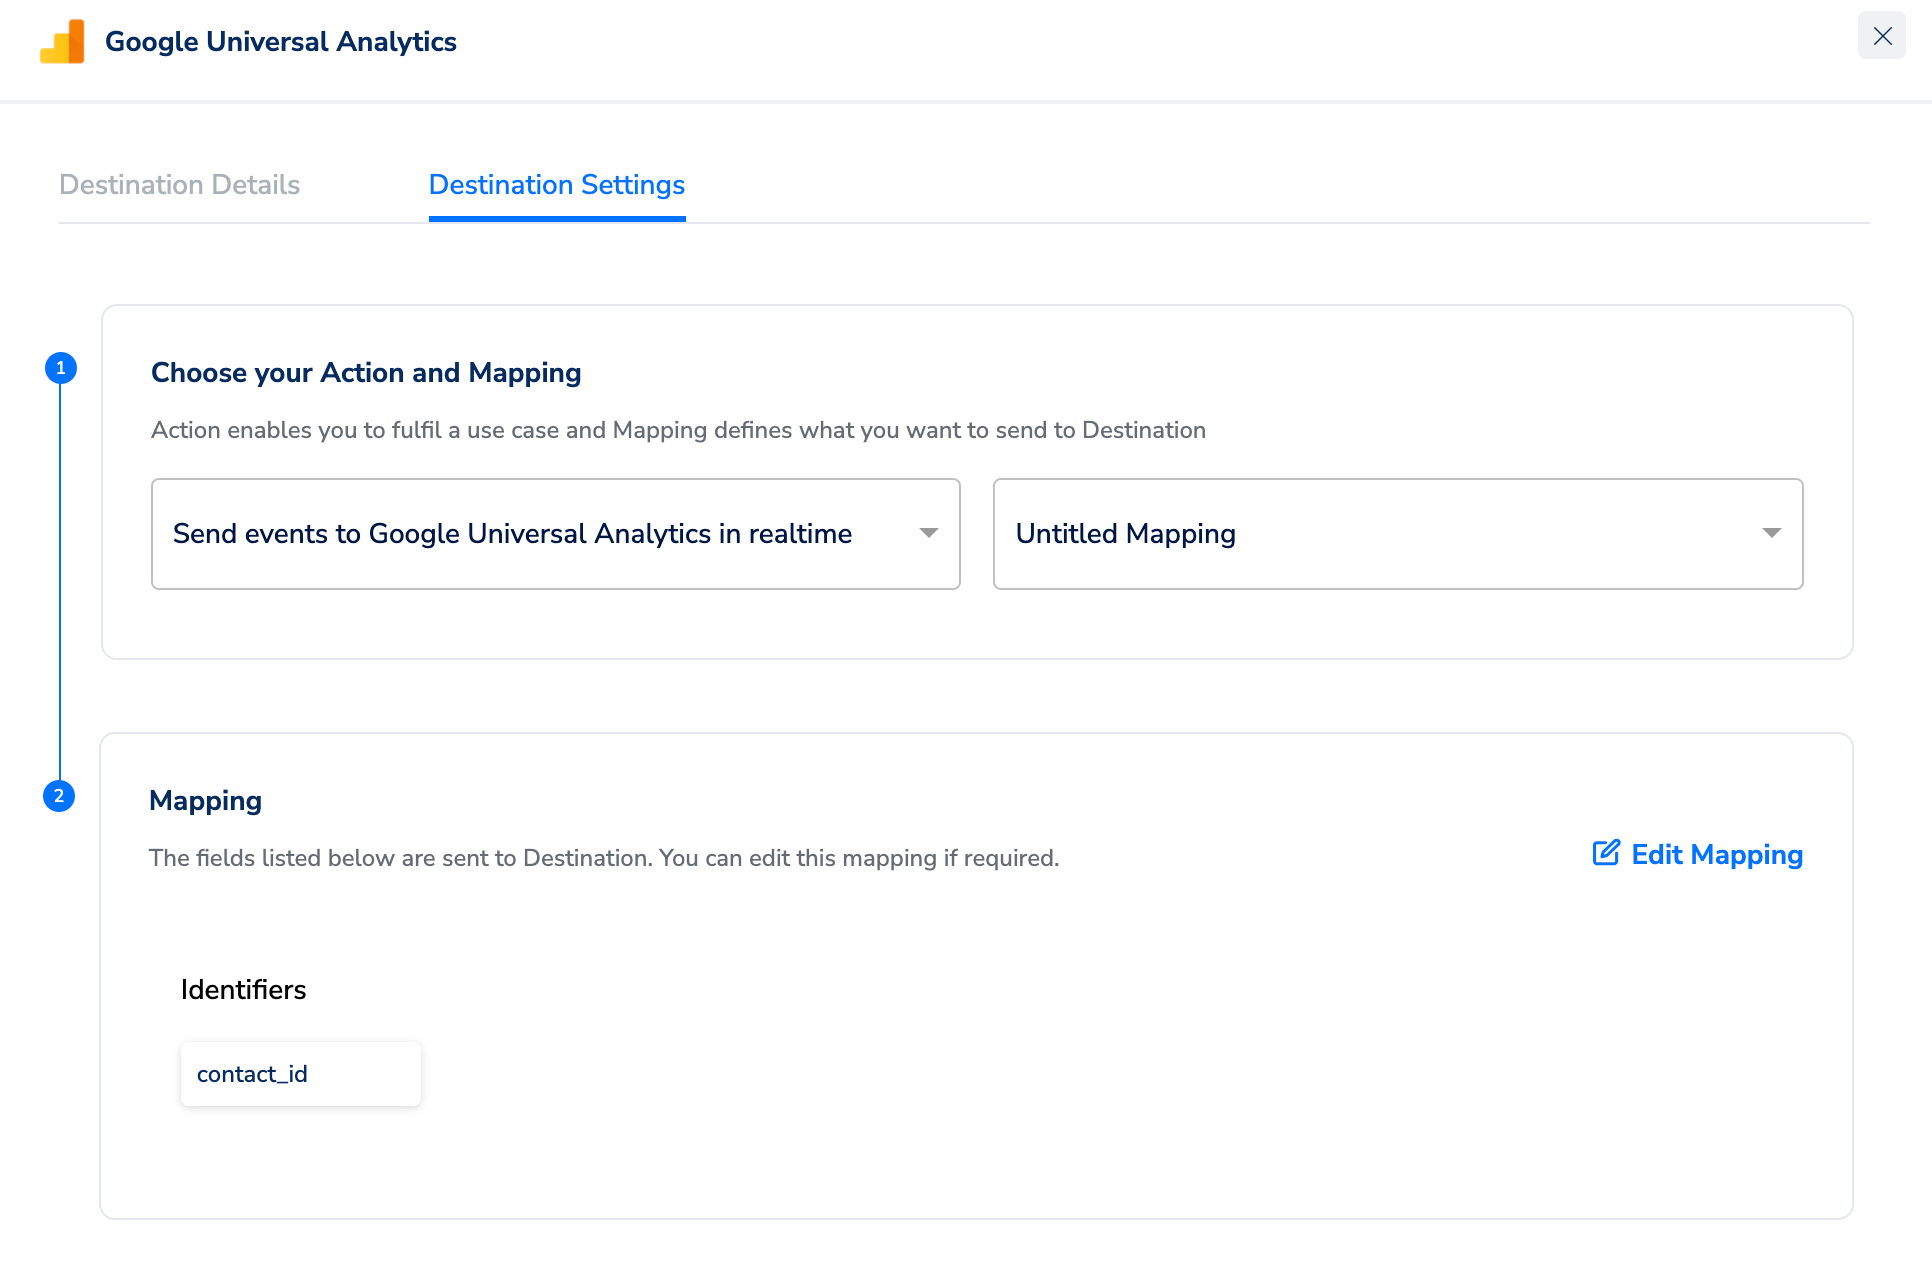
5
Upon clicking Save Destination. The destination is attached as shown in the image below.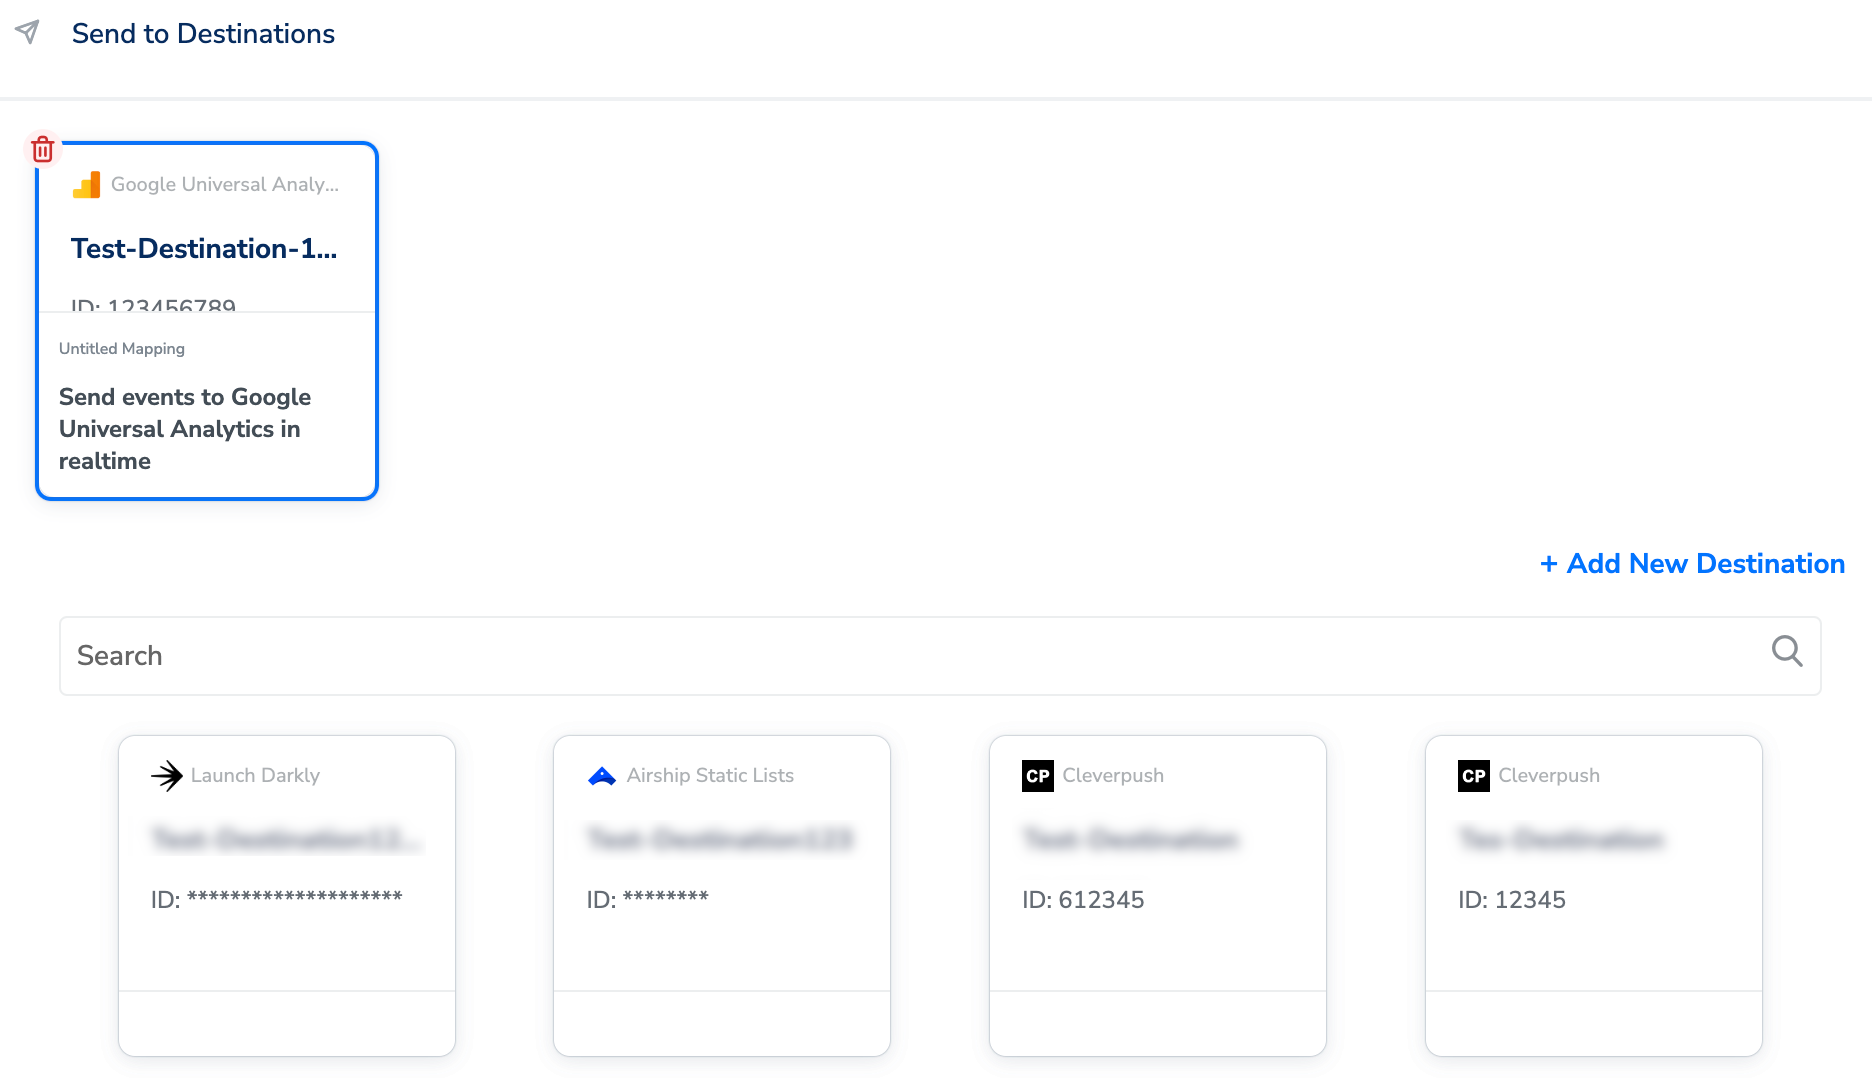
Verify the data reaching Google Analytics
Zeotap sends each delivery to Google Analytics through the Measurement Protocol, as event parameters. Use the fields below to work out what to look for in your GA reports. A delivery carries the following parameters:
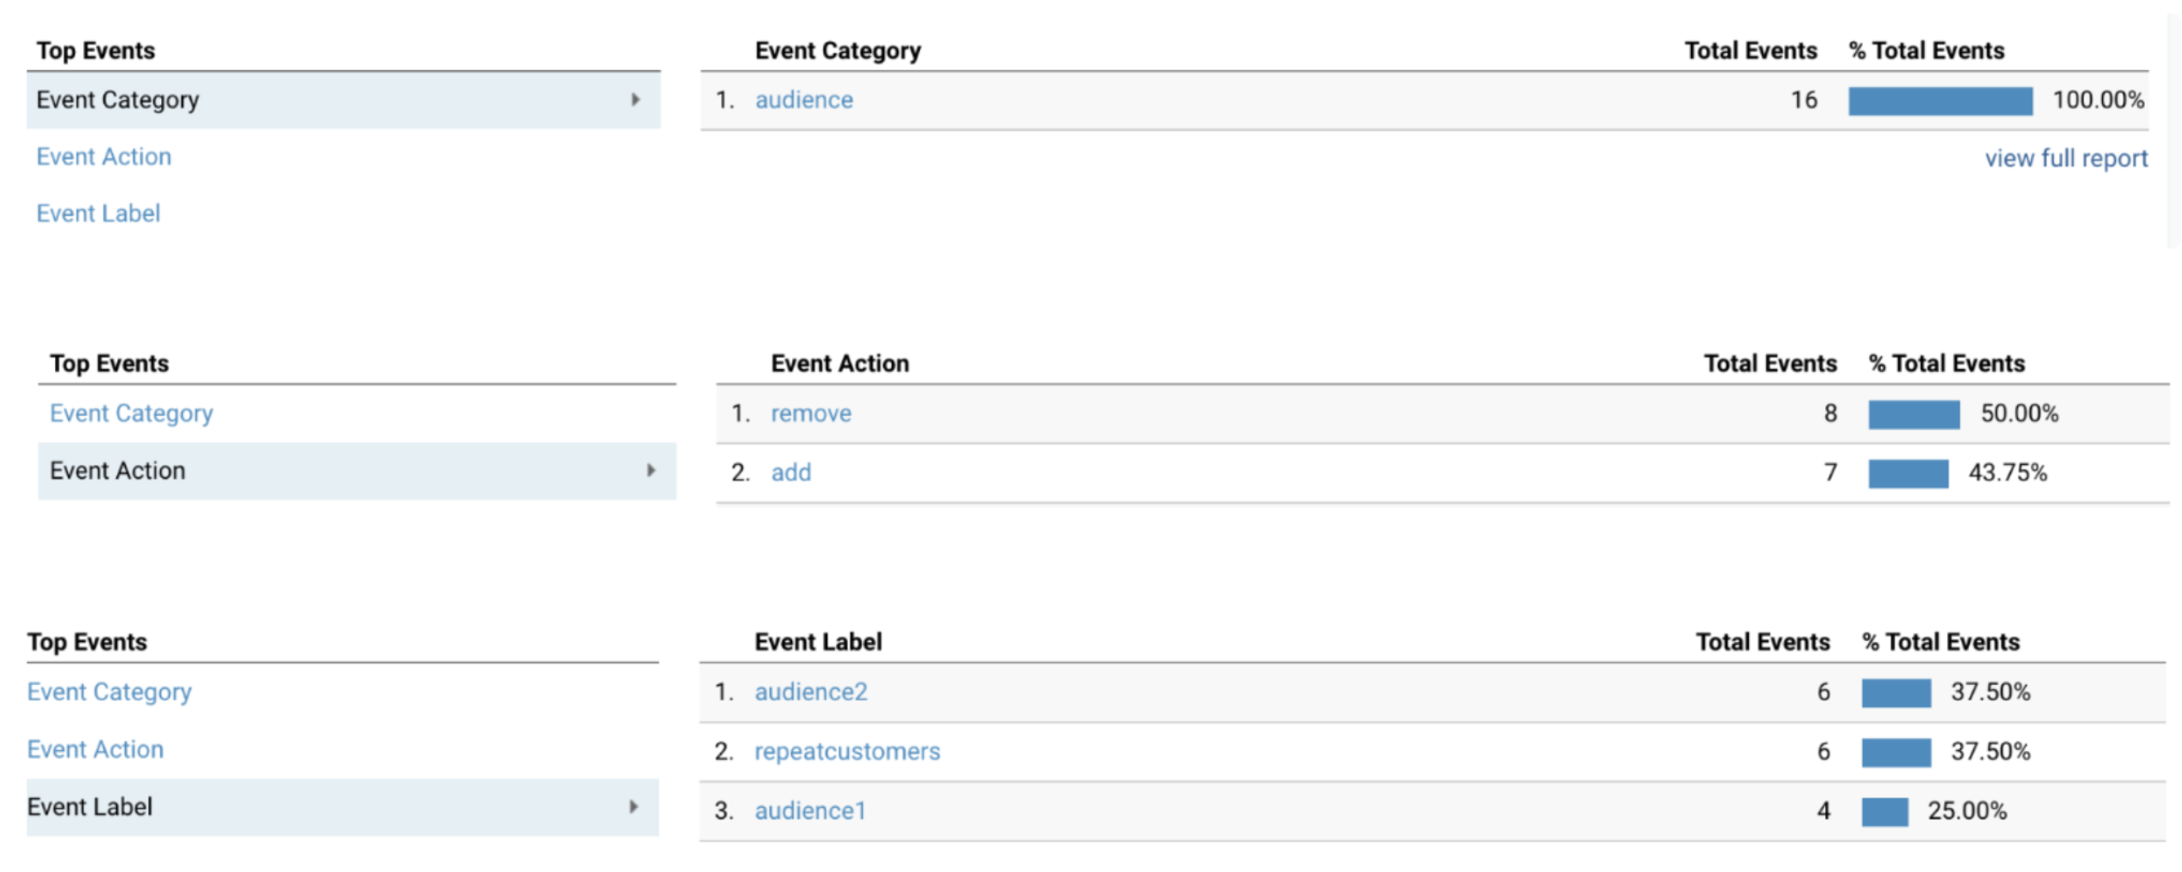
In Google Analytics, the deliveries surface in the Top Events report: the Event Category holds the fixed
audience value, the Event Action distinguishes users being added from users being removed, and the Event Label carries the Audience Name you entered on the node.
Set up an audience in Optimize 360
Perform the following steps to set up audience in Optimize 360 -1
Link Optimize 360 to Google Analytics by following the instructions mentioned here. This is a one-time setup activity.
2
Go to Google Analytics, select the Admin tab and navigate to the PROPERTY created as mentioned under Set up the Google Analytics property above.
3
Under the Property column select Audience Definitions -> Audiences.
4
Select Audience Source -> All Website Data -> Next Step -> Audience Definition -> Create New.
5
Navigate to Advanced -> Sequences -> Filter: Include Users -> Select Dimension.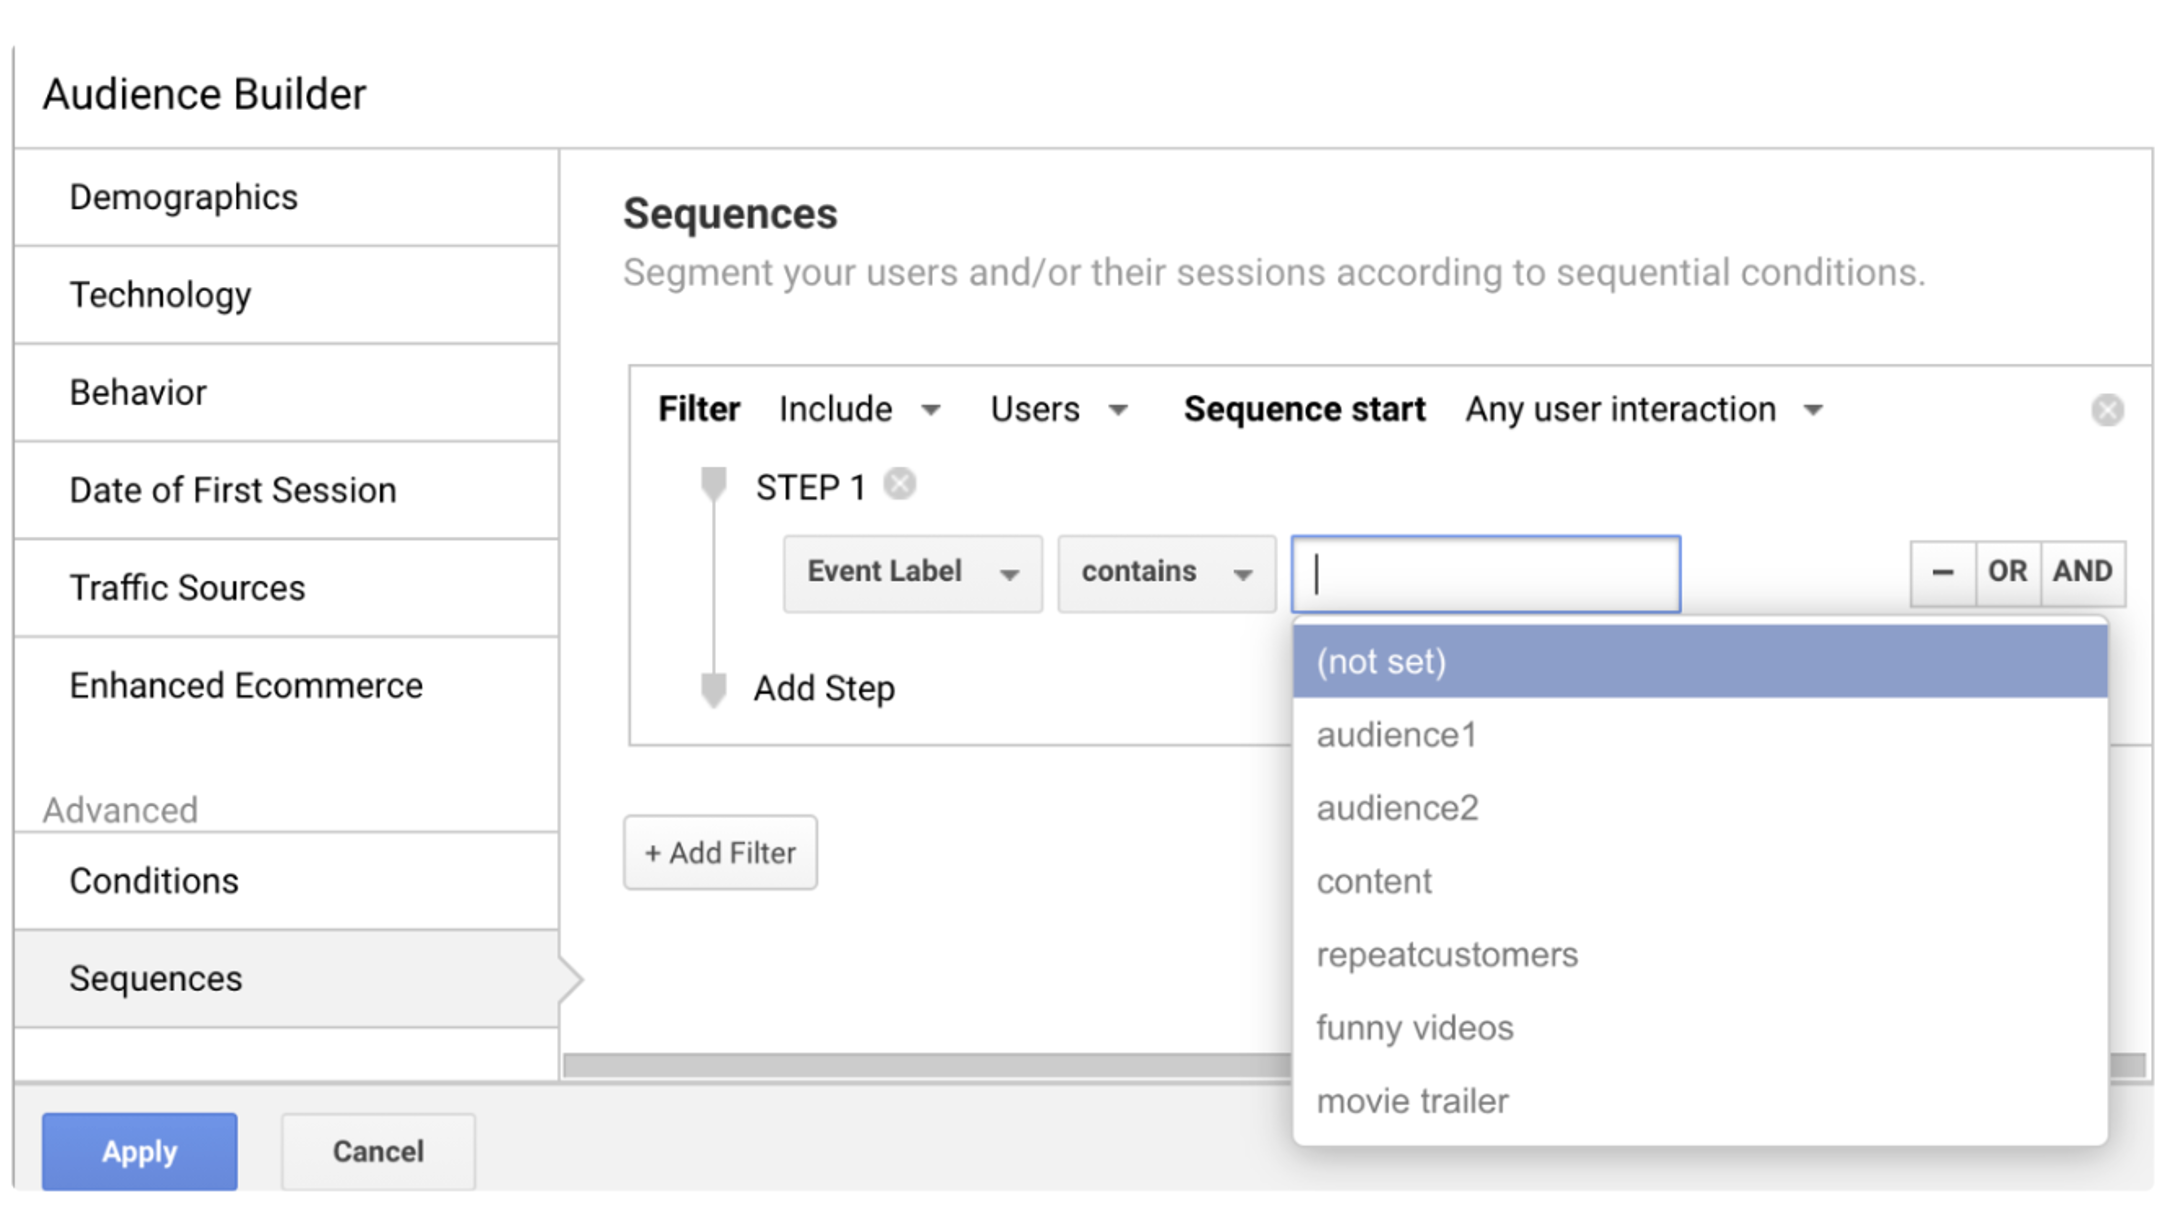
6
Create filtering criteria using Event Category (audience), Event Action (add), Event Label (Audience Name) and custom dimensions.
7
Provide an Audience Name-> Next -> Audience Destinations. Your Optimize 360 account appears here once Optimize 360 is linked to this Analytics property, as in step 1.
8
Select Destination and click Publish. Instructions on how to use the audience within Optimize are available here (Target an Audience on Optimize 360).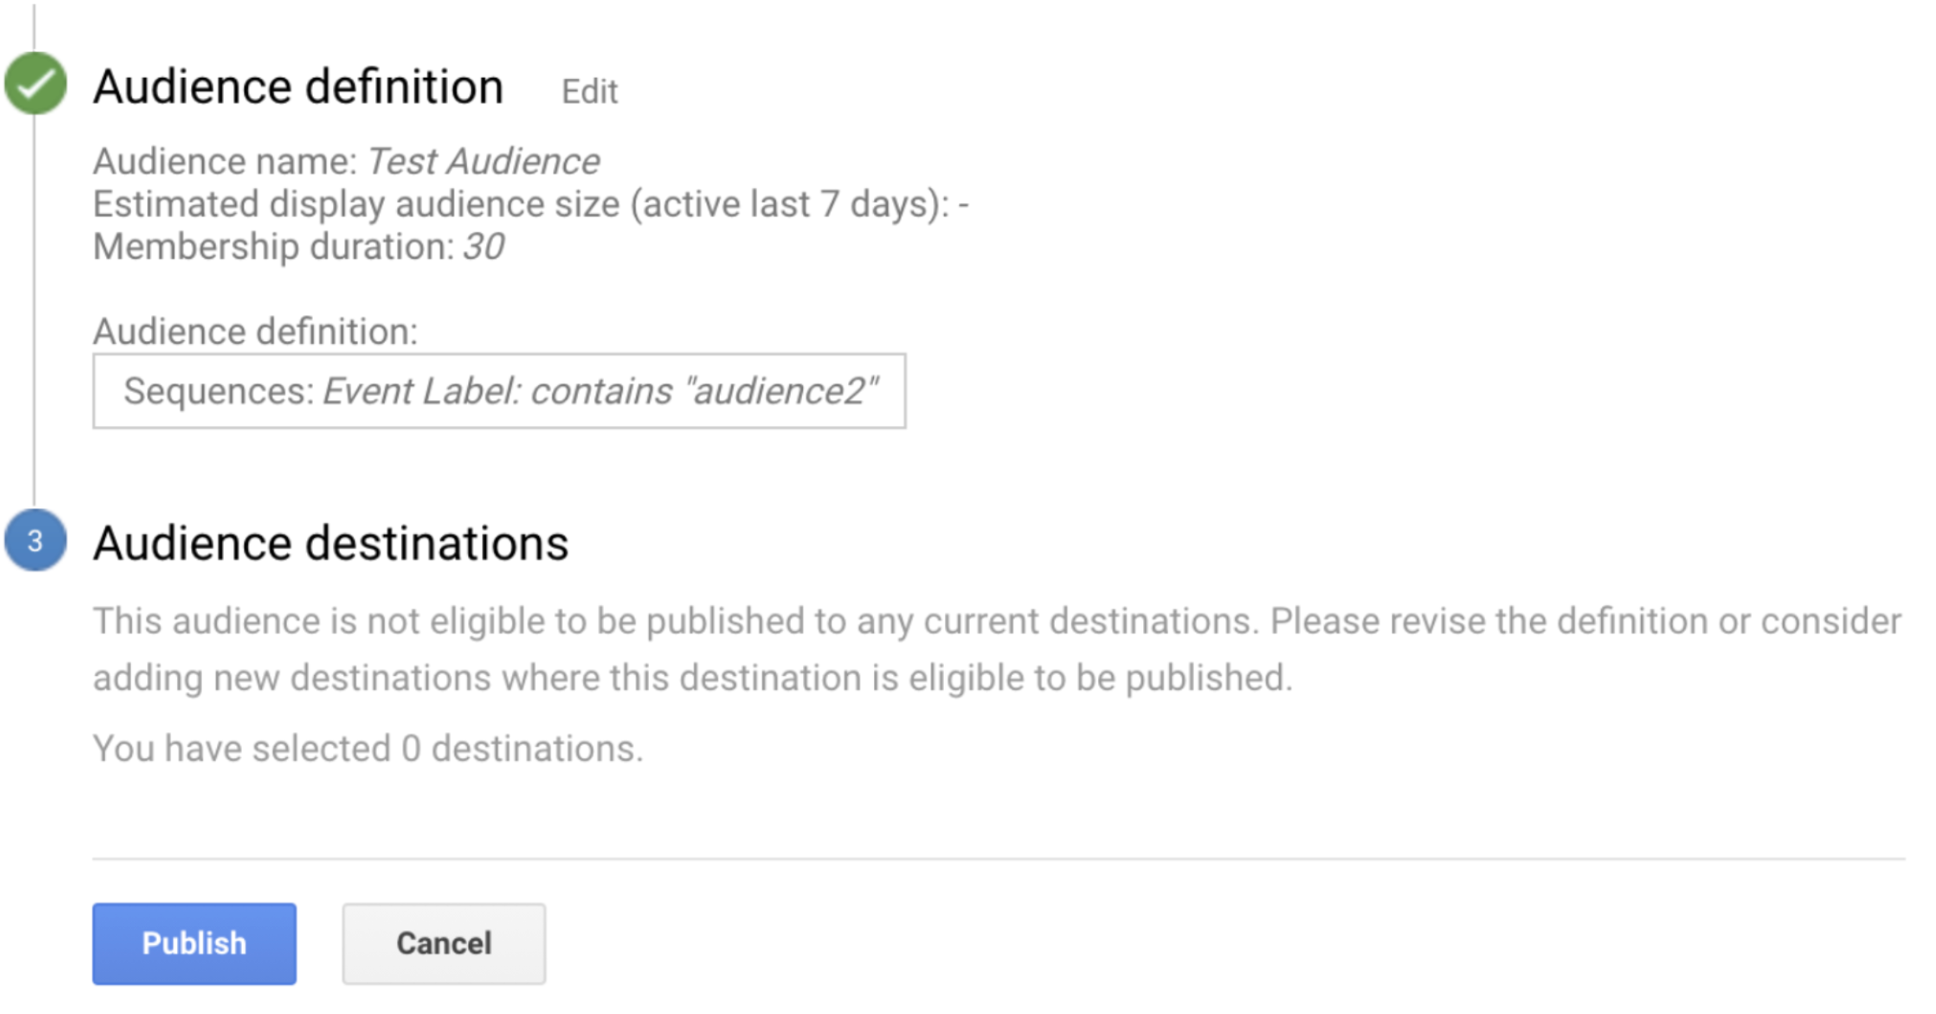
Limits
- It can take up to 24-48 hours by GA to process the data. The latency is variable and depends on the type of account (paid or free), amount of data etc. If you are a paid customer (Analytics 360), the data limits are increased and latency is reduced. Find more details here.
- There are 20 indices available for different custom dimensions and 20 indices for custom metrics in each property. 360 accounts have 200 indices available for custom dimensions and 200 for custom metrics. Currently, we support 20 custom dimensions and 20 custom metrics to be sent to GA. Find more details here.
- Audiences exported to Google Optimize are updated on a daily basis. Find more details here.
Troubleshoot the integration
Next steps
- Create a Workflow — build the journey this destination attaches to.
- Add Re-entry Criteria — control when a user can re-enter the workflow.
- Google Tag Manager source — the opposite direction, bringing the GA Client ID into Zeotap.
- Google Analytics 4 — the GA4 property type, as a batch destination linked to an audience.
- Google Enhanced Conversions API (CAPI) — the other Google real-time destination, for conversion data to Google Ads.
- Destinations — actions, mappings and how destinations work across the platform.