

What this is
The Talon.One : Trigger Custom Events destination sends custom event data out of Zeotap CDP to Talon.One, so that activity captured in a journey can drive your promotion and loyalty rules. Events leave Zeotap CDP from the Send to Destinations node of a Journeys workflow. Talon.One is an API-first promotion and loyalty engine. Marketers build rules without coding and trigger discounts, coupons, loyalty points and gamified rewards from customer data, across online, in-store and mobile channels. This destination gives those rules a live event feed from Zeotap CDP.Talon.One also has a batch destination. Talon.One Audience adds customer profiles to, and removes them from, Talon.One audiences in a batch. Use that integration for audience membership, and this one for events.
Supported identifiers and actions
- Direction — Zeotap CDP to Talon.One, from a Journeys workflow.
- Action — Trigger Custom Events in Talon.One.
- Mandatory fields — Profile Id and Custom Event Name. Both are mapped from a Catalogue attribute, and the mapping cannot be saved until both are populated.
- Event attributes — you can map further event attributes alongside the mandatory fields, each from a Catalogue attribute, and set the data type for each one. You can edit, add or remove entries in the list.
Prerequisites
- An active Talon.One account and Application.
- Your Talon.One Base URL — the URL of your Talon.One instance, for example
https://retailstore.talon.one. - A Talon.One Integration API Key. See Get your Talon.One base URL and API key below.
- The custom events and attributes you want to send, defined in Talon.One. See Creating a custom event in the Talon.One documentation.
- A workflow in Journeys to send the events from, with your filters and conditions already applied. See Create a Workflow.
Get your Talon.One base URL and API key
Both values come from Talon.One, not from Zeotap CDP.- Base URL — the URL of your Talon.One instance.
- Integration API Key — in Talon.One, open the Application you want to use and go to Settings > Integration API Keys > Create API Key. Give the key a name and an expiration date.
Create the Talon.One destination
1
Log in to the Zeotap CDP app and go to Integrate > Destinations.
2
Click + Create Destination.
3
Under All Destinations, search for Talon.One : Trigger Custom Events and select it.
4
On the Enter Destination Details screen, the left panel describes the integration. Enter the following on the right:a. Destination Name — a name that identifies this destination in Zeotap CDP.
b. Base URL — the base URL of your Talon.One instance.
c. API Key — the Integration API Key you generated in Talon.One.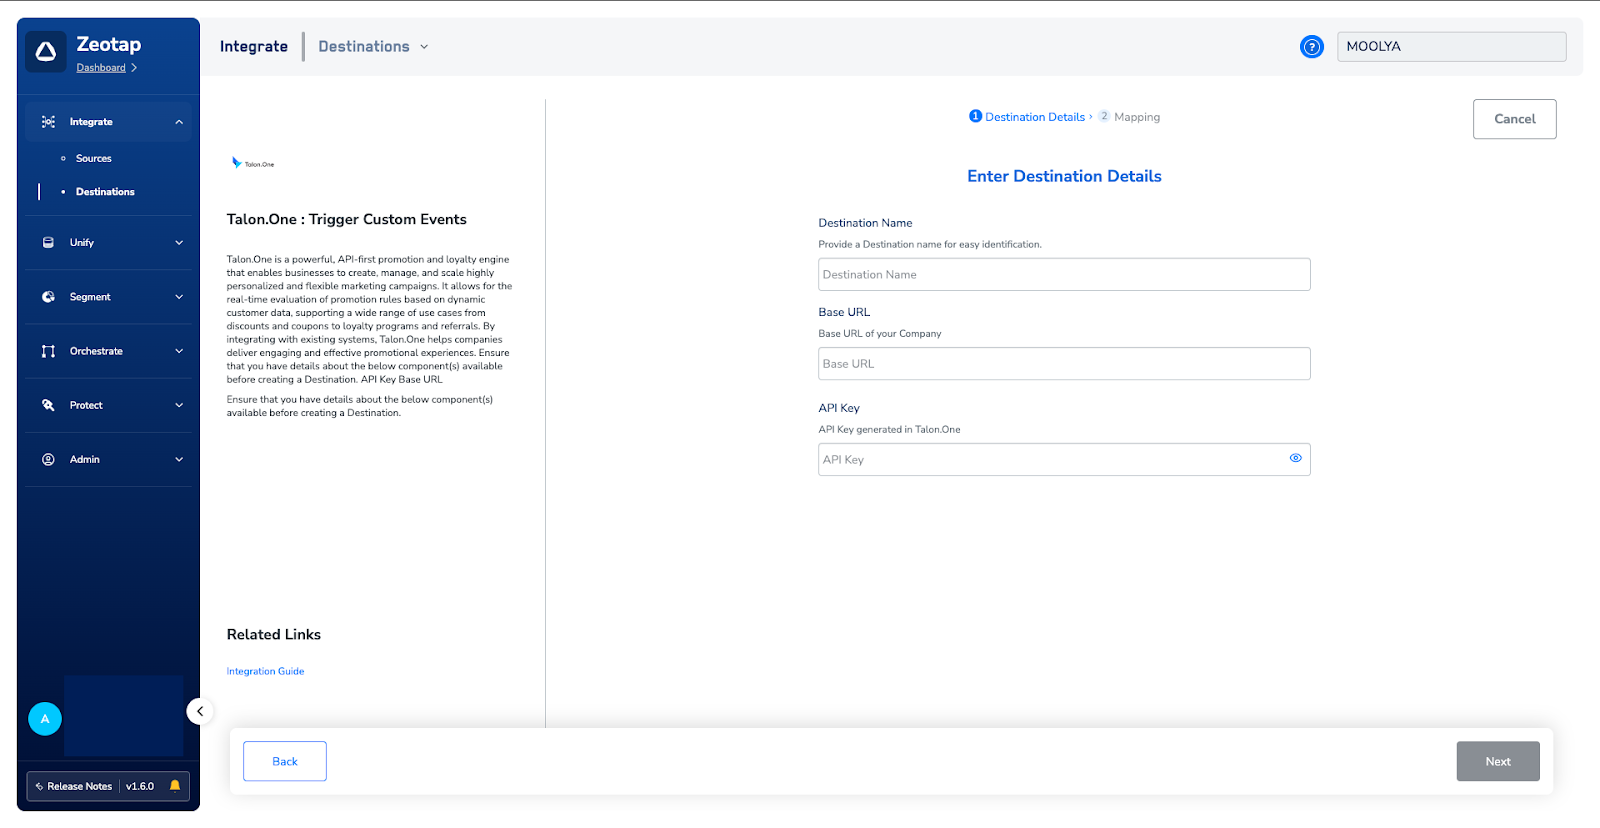
b. Base URL — the base URL of your Talon.One instance.
c. API Key — the Integration API Key you generated in Talon.One.
5
Click Next to move to the Mapping step.
6
Under Choose your Action, select Trigger Custom Events in Talon.One.Under Map the Fields, map a Catalogue attribute to each destination field. Profile Id and Custom Event Name are mandatory; add, edit or remove the optional event attribute rows beneath them as needed.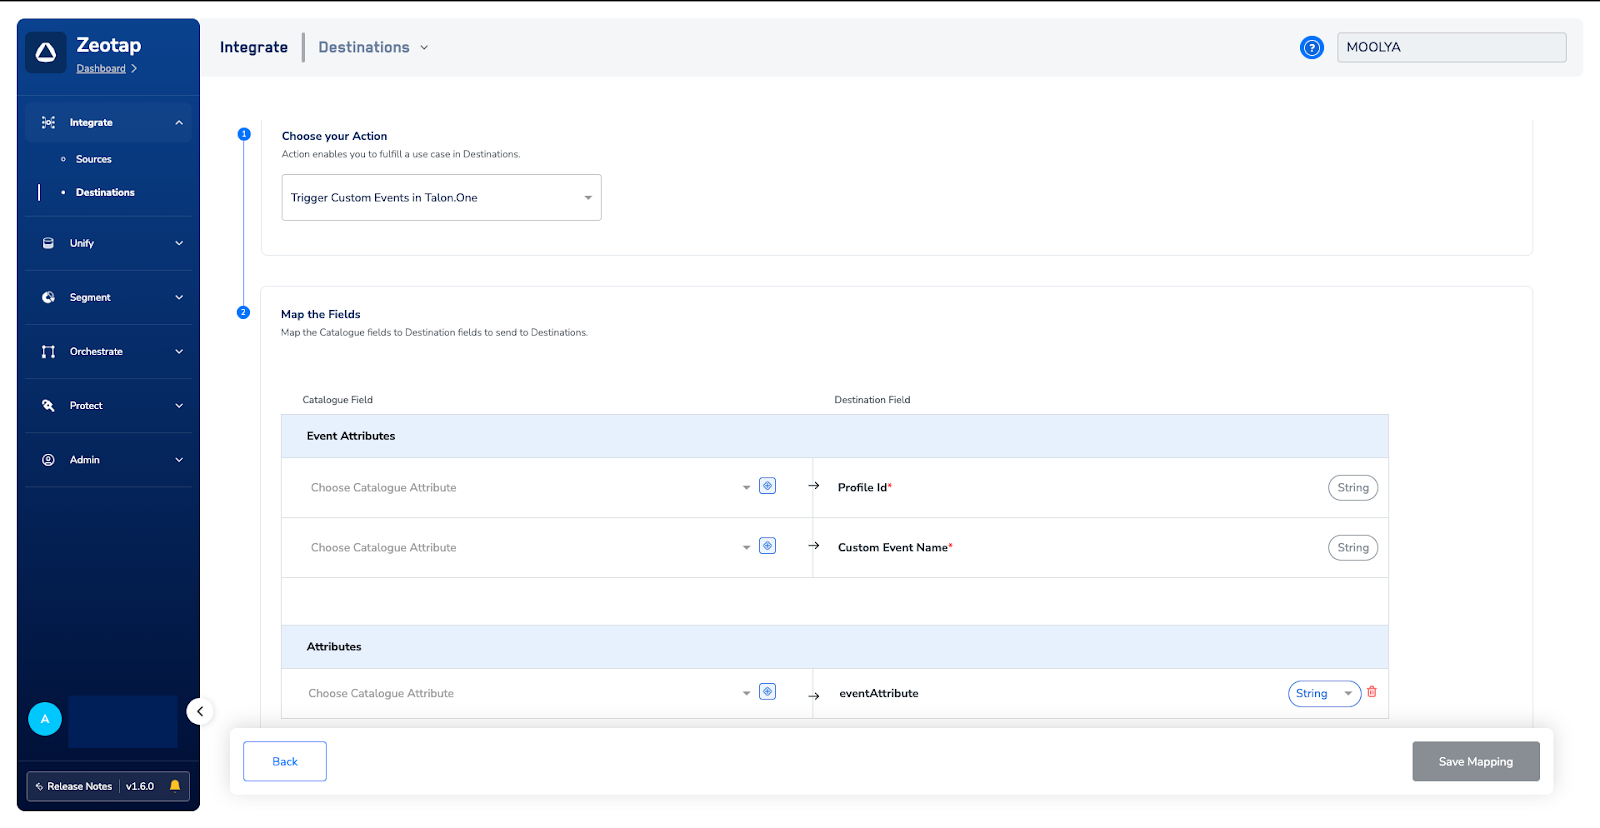
7
Click Save Mapping.
Link the destination to a journey
The destination sends events only once it is attached to a workflow. After you have applied your filters and conditions in Journeys, link the destination in the Send to Destinations node.1
In the workflow, click + and choose Send to Destinations.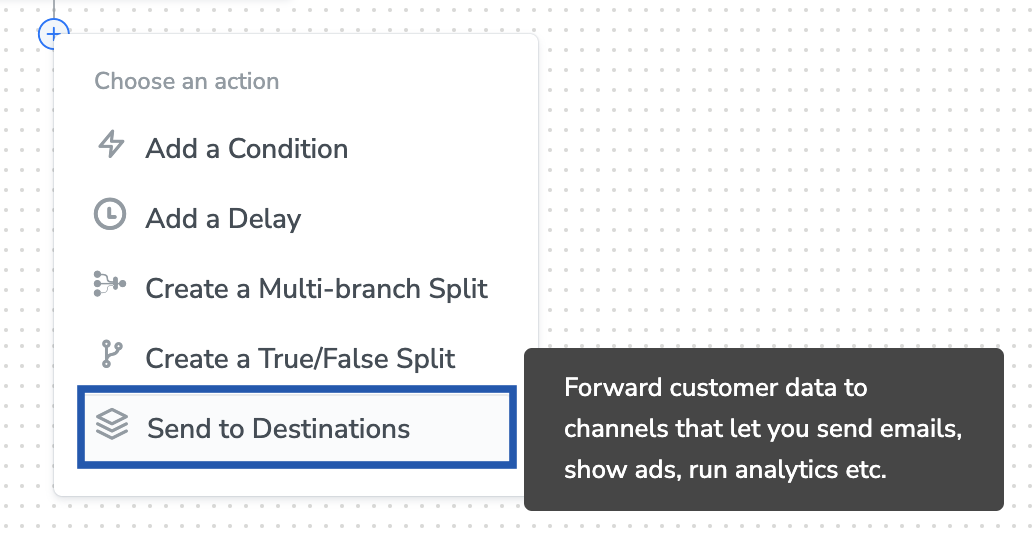
2
Choose your Talon.One destination from the list of available destinations, using the search box if the list is long. You can also create a new one here with + Add New Destination.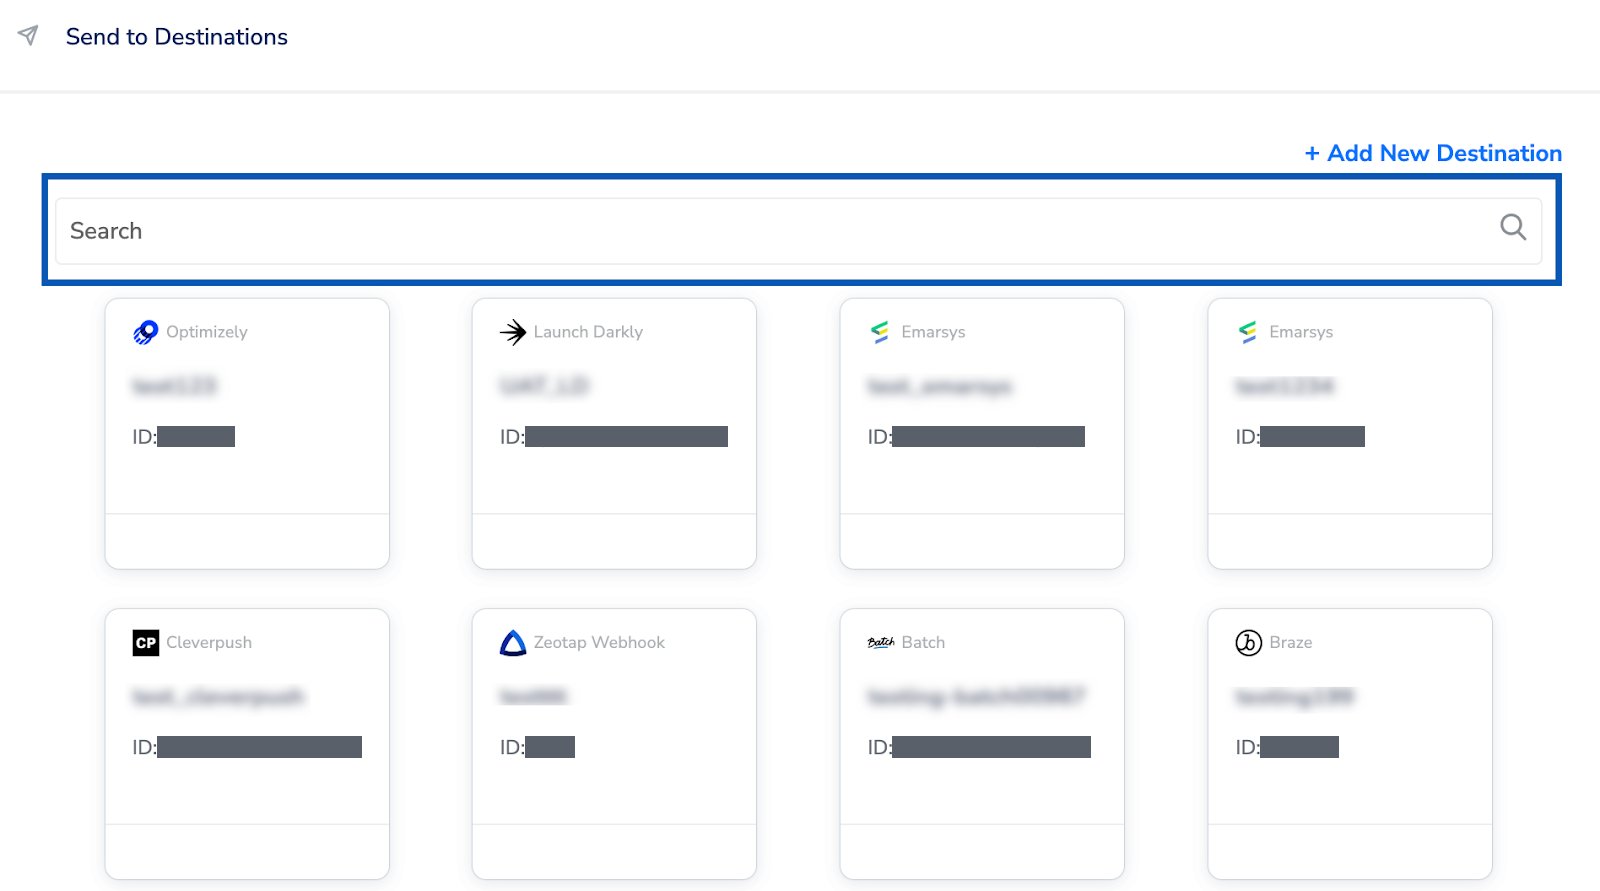
3
Under the Destination Details tab, the Base URL and API Key fields are automatically populated from the values you entered when you created the destination.
4
Under the Destination Settings tab, choose the Action and mapping you want this node to use.
5
Click Save Destination.
Verify the destination is attached
The Talon.One destination appears as a card in the Send to Destinations node, showing its name and the mapping action it will run.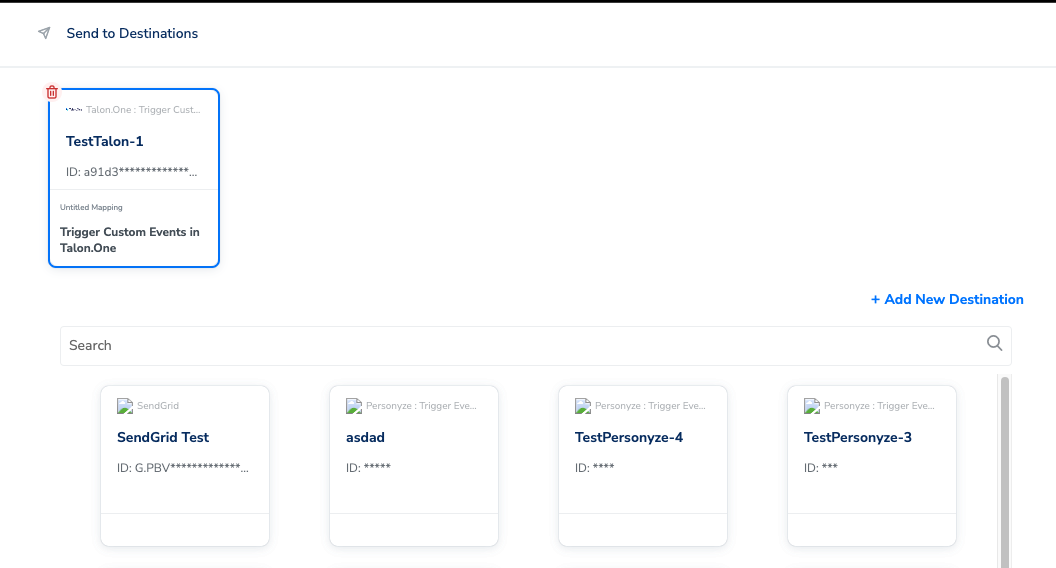
Next steps
- Talon.One Audience — the batch destination that adds profiles to and removes them from Talon.One audiences.
- Configure a destination and Define the mapping — how destinations and mappings work in general.
- Why deliveries fail — what to check when a destination stops delivering.
- Create a Workflow — build the journey this destination runs from.
- Activate your real-time audiences — attach, name and publish a real-time destination in Journeys.
- Real-time integrations — the index for Zeotap CDP’s real-time destinations.