

What this is
This is an outbound destination: data flows out of Zeotap CDP to LaunchDarkly. From a journey in Orchestrate, Zeotap CDP sends identifiers to LaunchDarkly as a segment, so that segment can be used to target a feature flag. Nothing flows back from LaunchDarkly into Zeotap CDP. LaunchDarkly is a feature management platform that lets development teams deliver, control and measure their software through feature flags, and run experiments on any flag. With this destination, the customers you have filtered or split into a branch in a journey become a segment that a LaunchDarkly flag can target. LaunchDarkly also has a batch destination, which sends an audience from the Audiences application rather than from a journey. If you want a scheduled audience delivery instead of a journey-triggered one, see LaunchDarkly. Both lanes are configured with the same two LaunchDarkly credentials.Supported identifiers and actions
This destination supports Custom IDs — any ID that is activated within LaunchDarkly, such as a user ID or a CRM ID. It exposes a single action, Send Identifiers to Launch Darkly. In the mapping for that action you map one Catalogue identifier field to the destination field User ID.Prerequisites
Before you start, make sure you have:- A LaunchDarkly account, and the LaunchDarkly project and environment you want to link to Zeotap CDP.
- An access token created in LaunchDarkly. See Create an access token.
- The Client-side ID of that LaunchDarkly environment. See Find the Client-side ID.
- A journey in Zeotap CDP with the filters or conditions that select the customers you want to send.
Get the LaunchDarkly credentials
Create an access token
An access token in LaunchDarkly authenticates and controls access to your feature flags and experiments. To create one:1
Log into the LaunchDarkly console and go to Settings > Authorization.
2
Under Access tokens, click Create token.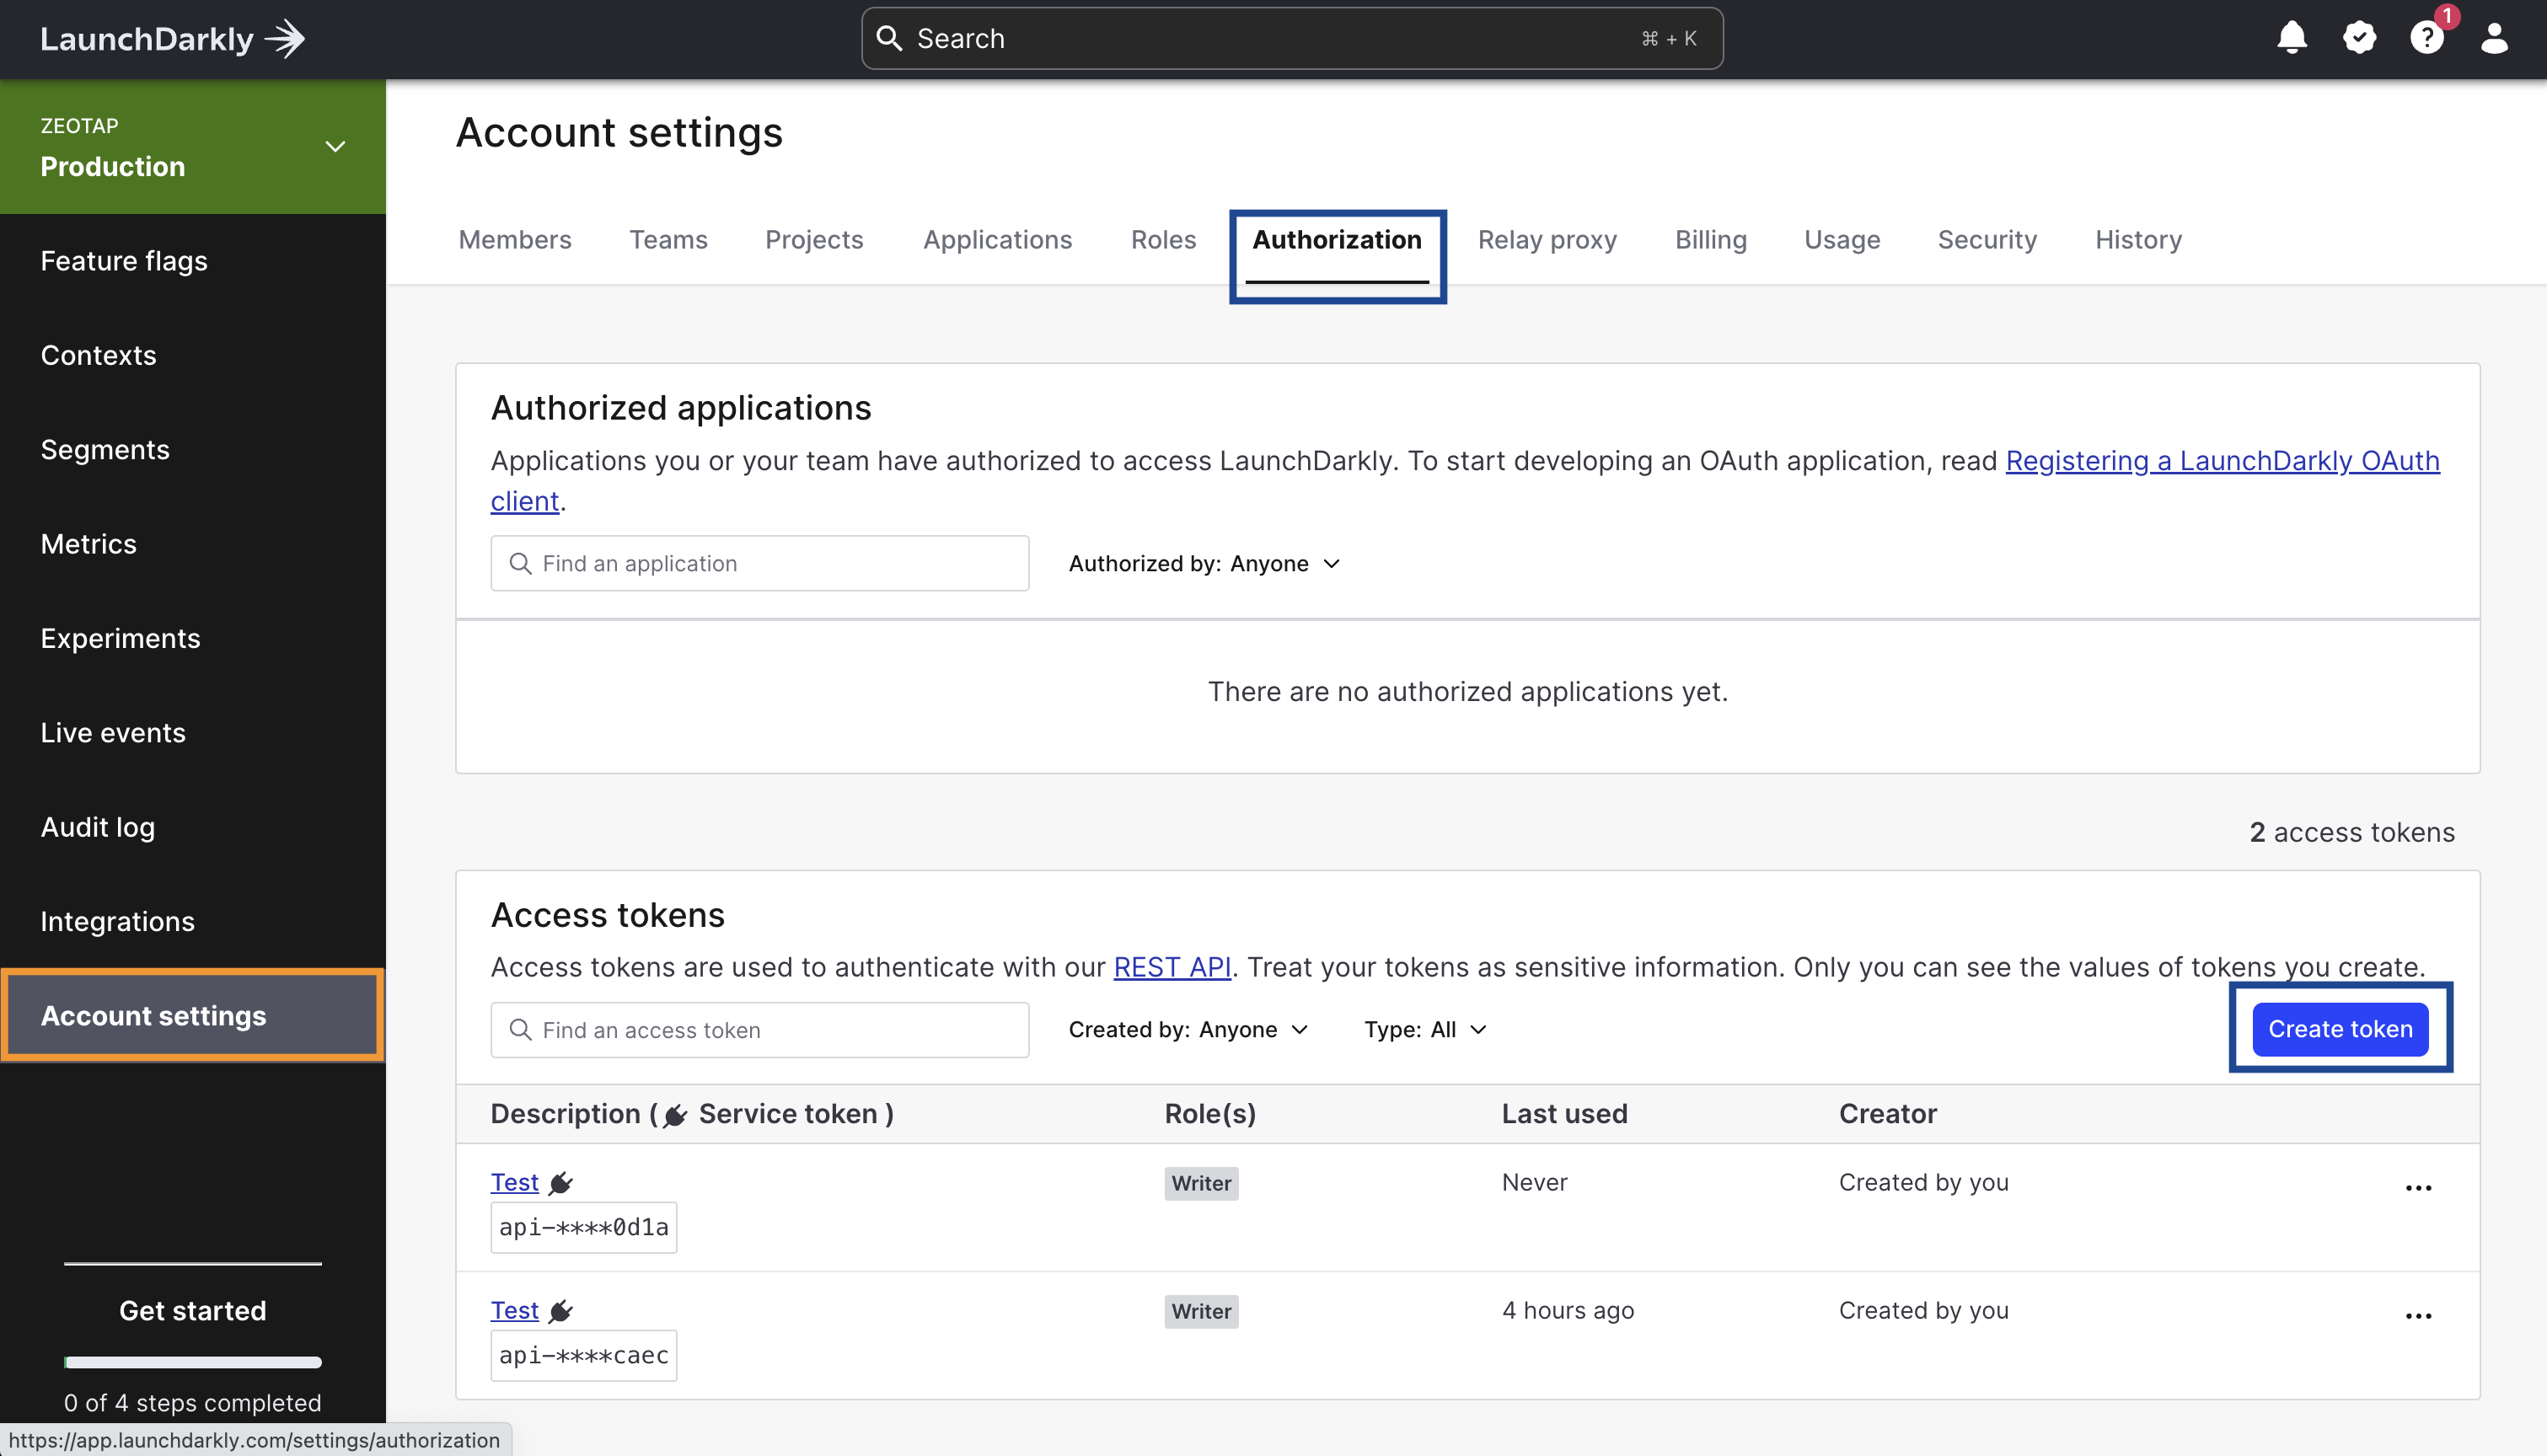
3
In the Create access token window, provide the following details:a. Enter a Name for your access token.b. Choose the Role as Writer from the drop-down menu.c. Choose the API version for your token from the drop-down menu. By default, API requests you send using this token use this API version. For more information about how API versioning works in LaunchDarkly, refer here.d. If you are an Enterprise customer, select the This is a service token checkbox if you want to create a service token.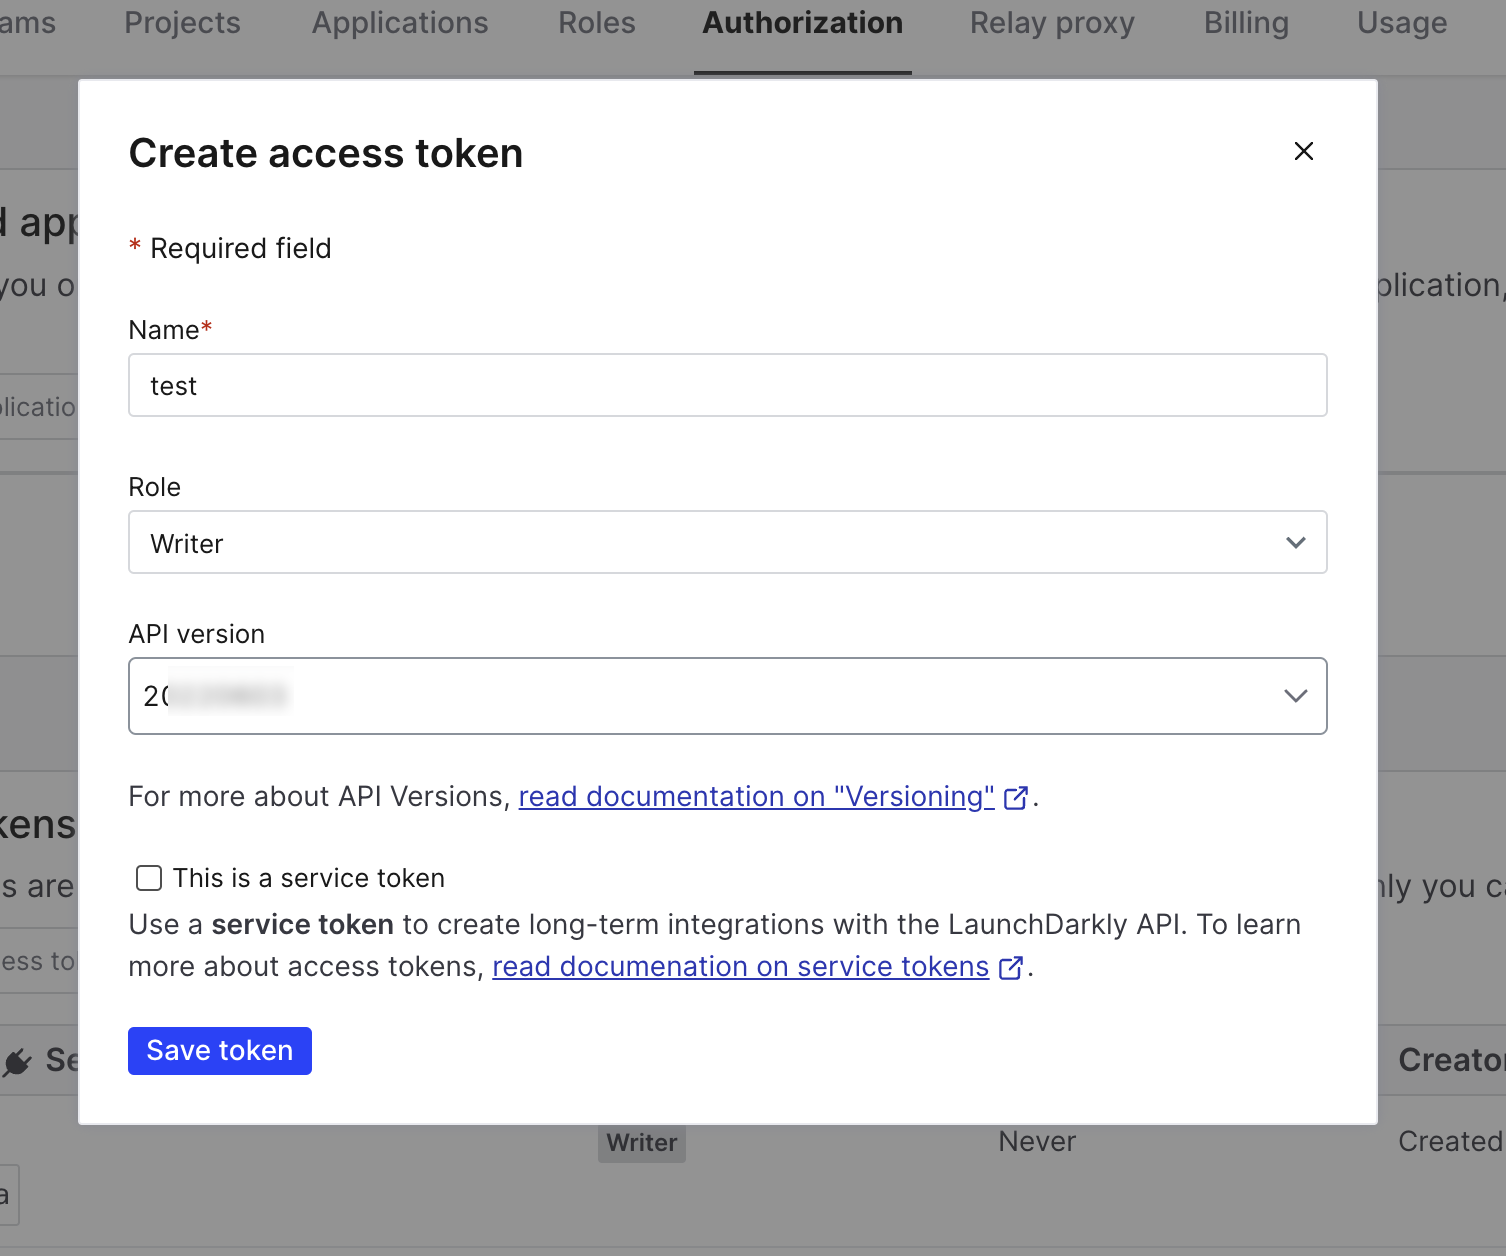
4
Review the details and click Save Token. The new access token is listed on the Authorization page.
Find the Client-side ID
The Client-side ID belongs to a single environment inside a LaunchDarkly project, so copy the one for the environment you want to link. To find it:1
Log into LaunchDarkly and go to Settings > All projects.
2
Select the project you want to link to Zeotap CDP. It opens on All environments.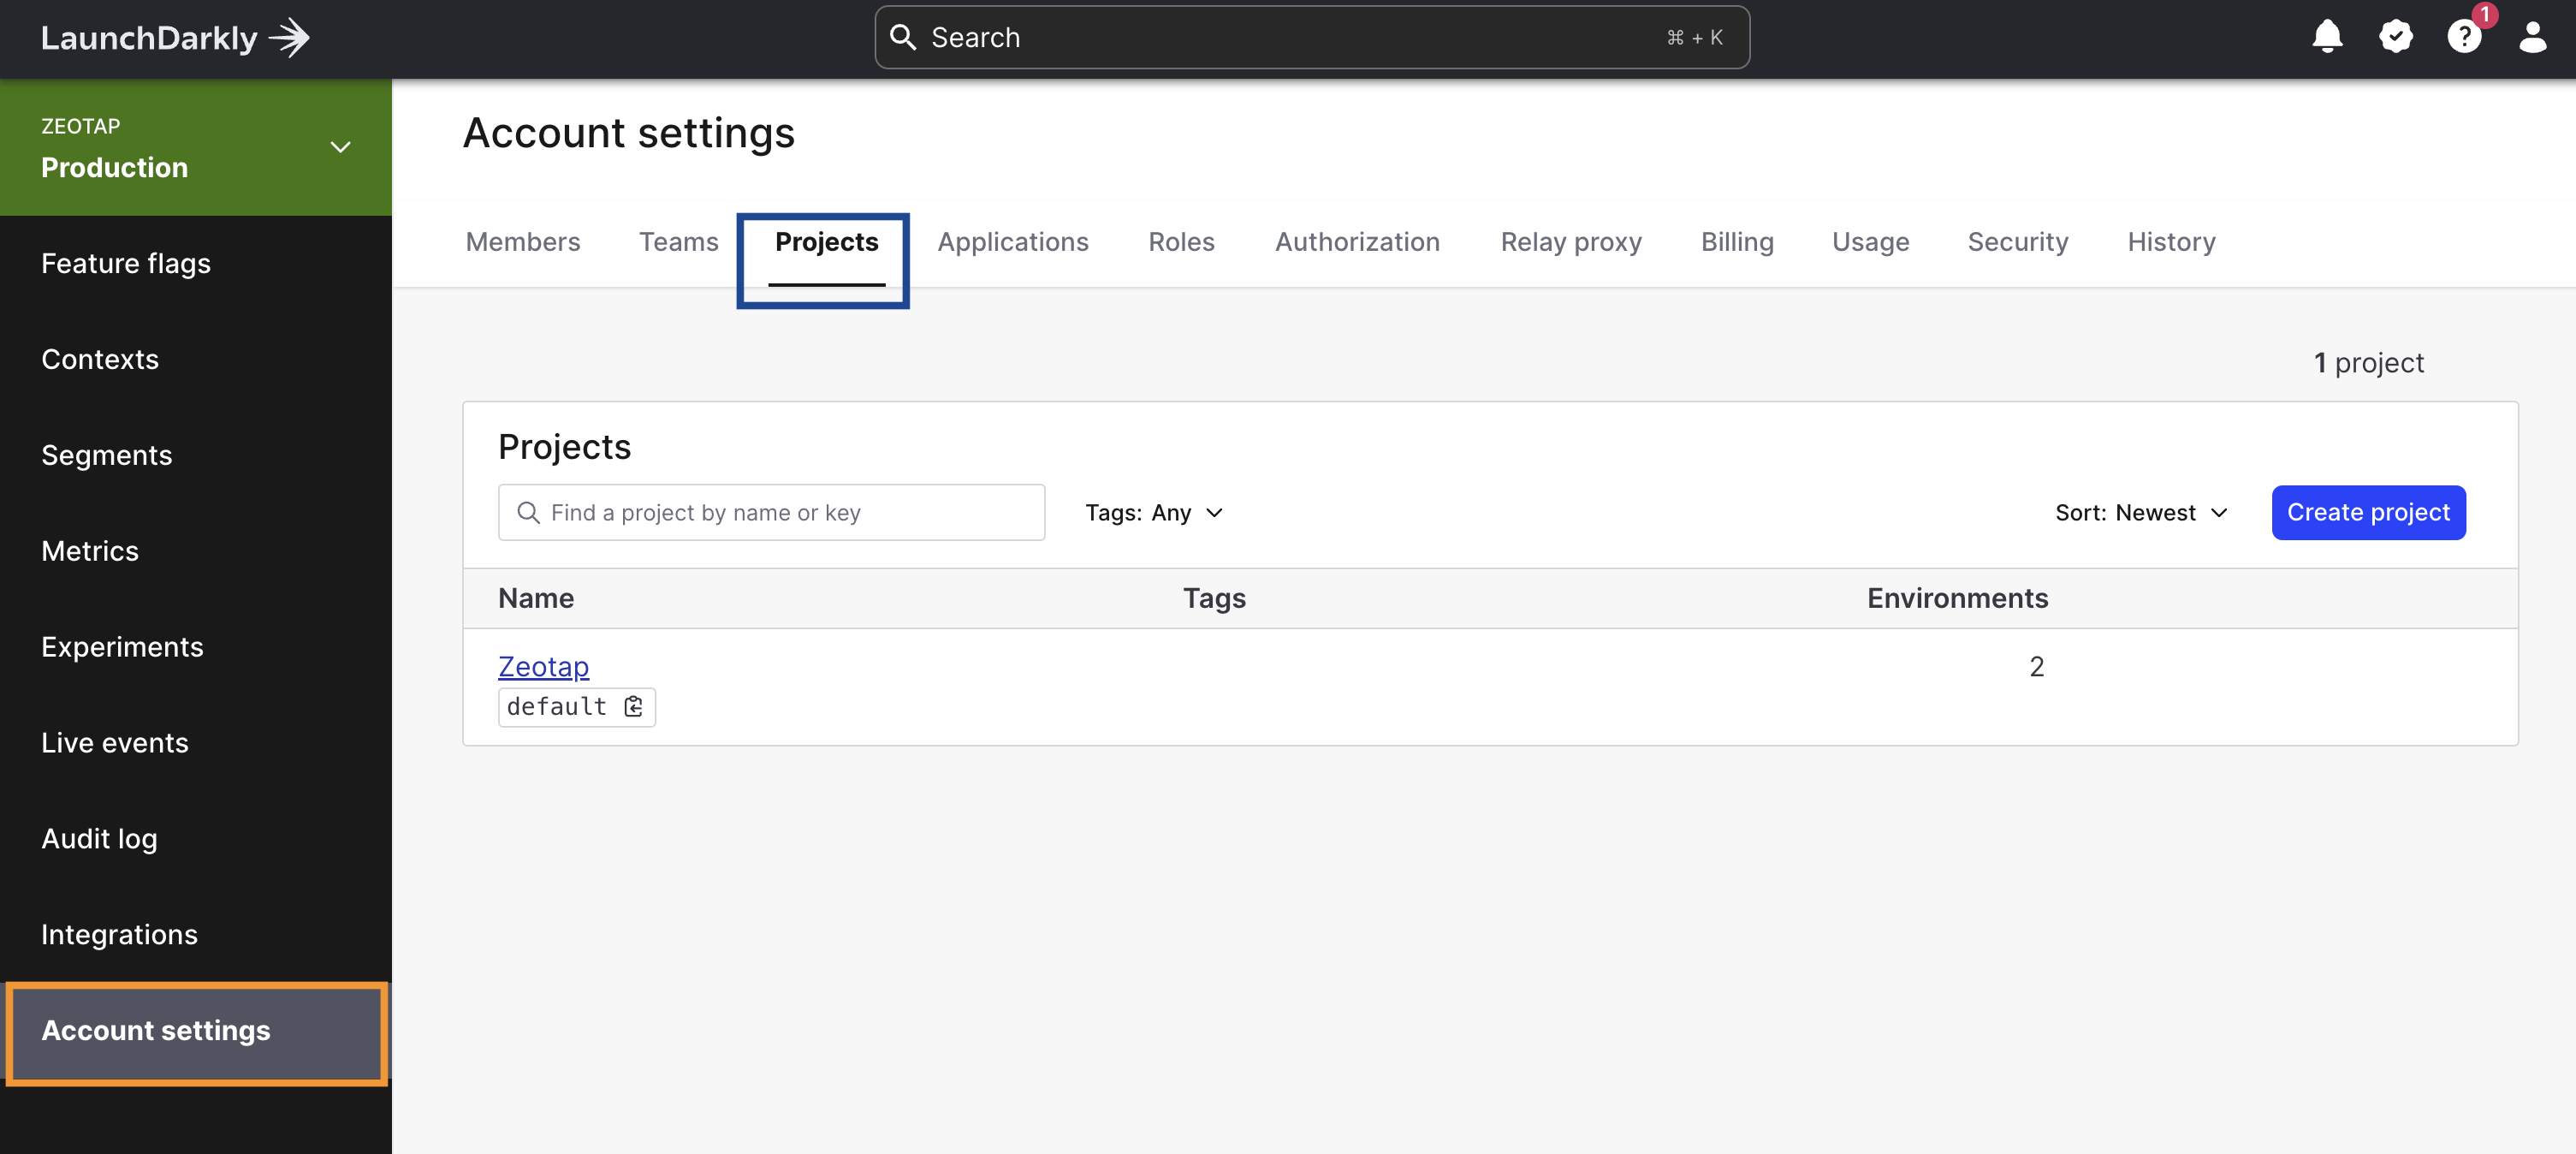
3
Click the … menu next to the environment you want to link with Zeotap CDP, select View SDK keys, and copy the value under Client-side IDs. You use it when you create the destination.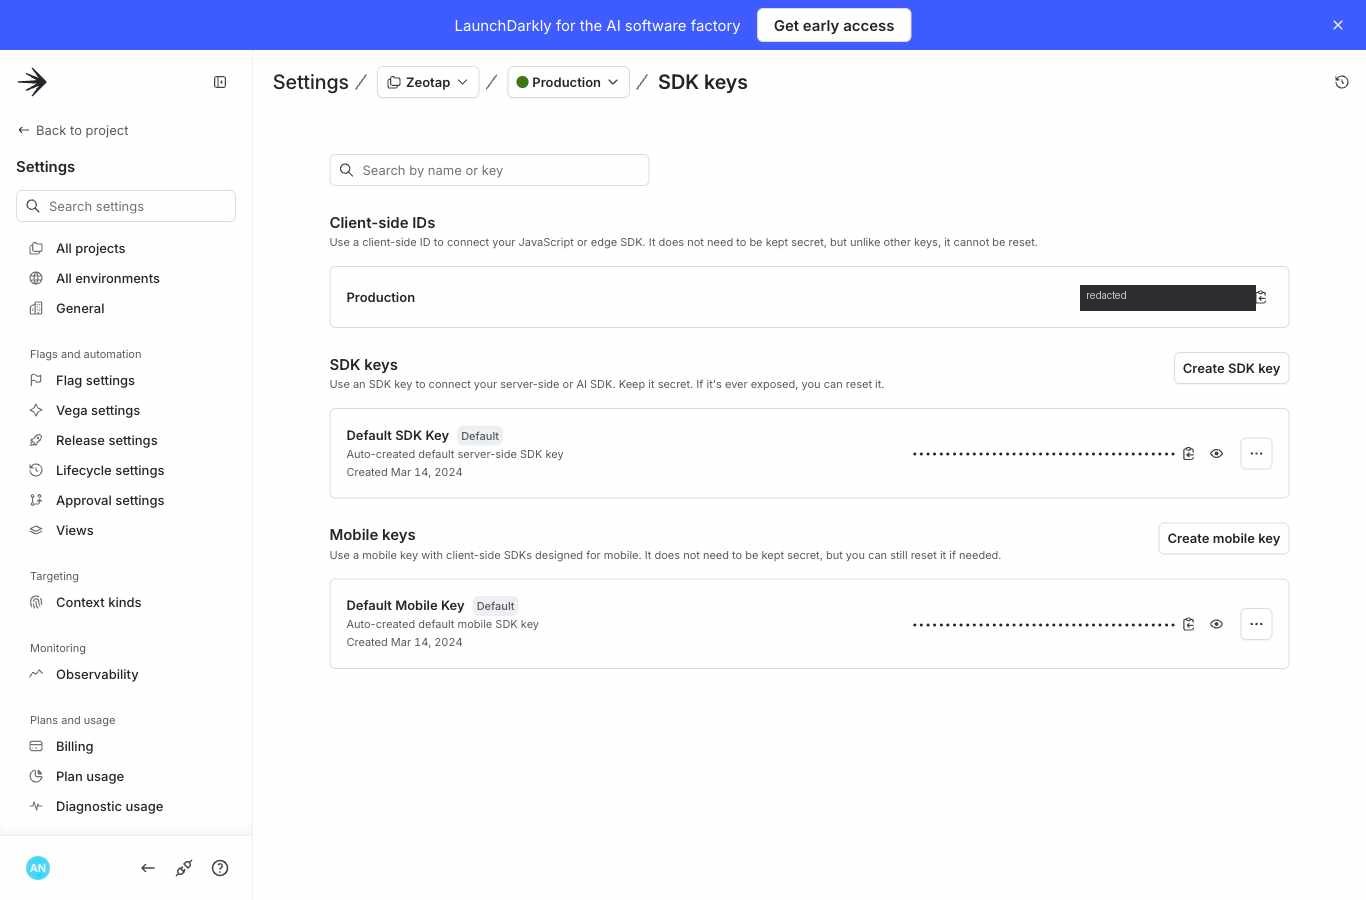
Create the LaunchDarkly destination
Once you have applied filters or added conditions for your users in Journeys, you activate them from the Send to Destinations node in the journey. The node opens a panel where you can pick an existing destination or create a new one with + Add New Destination.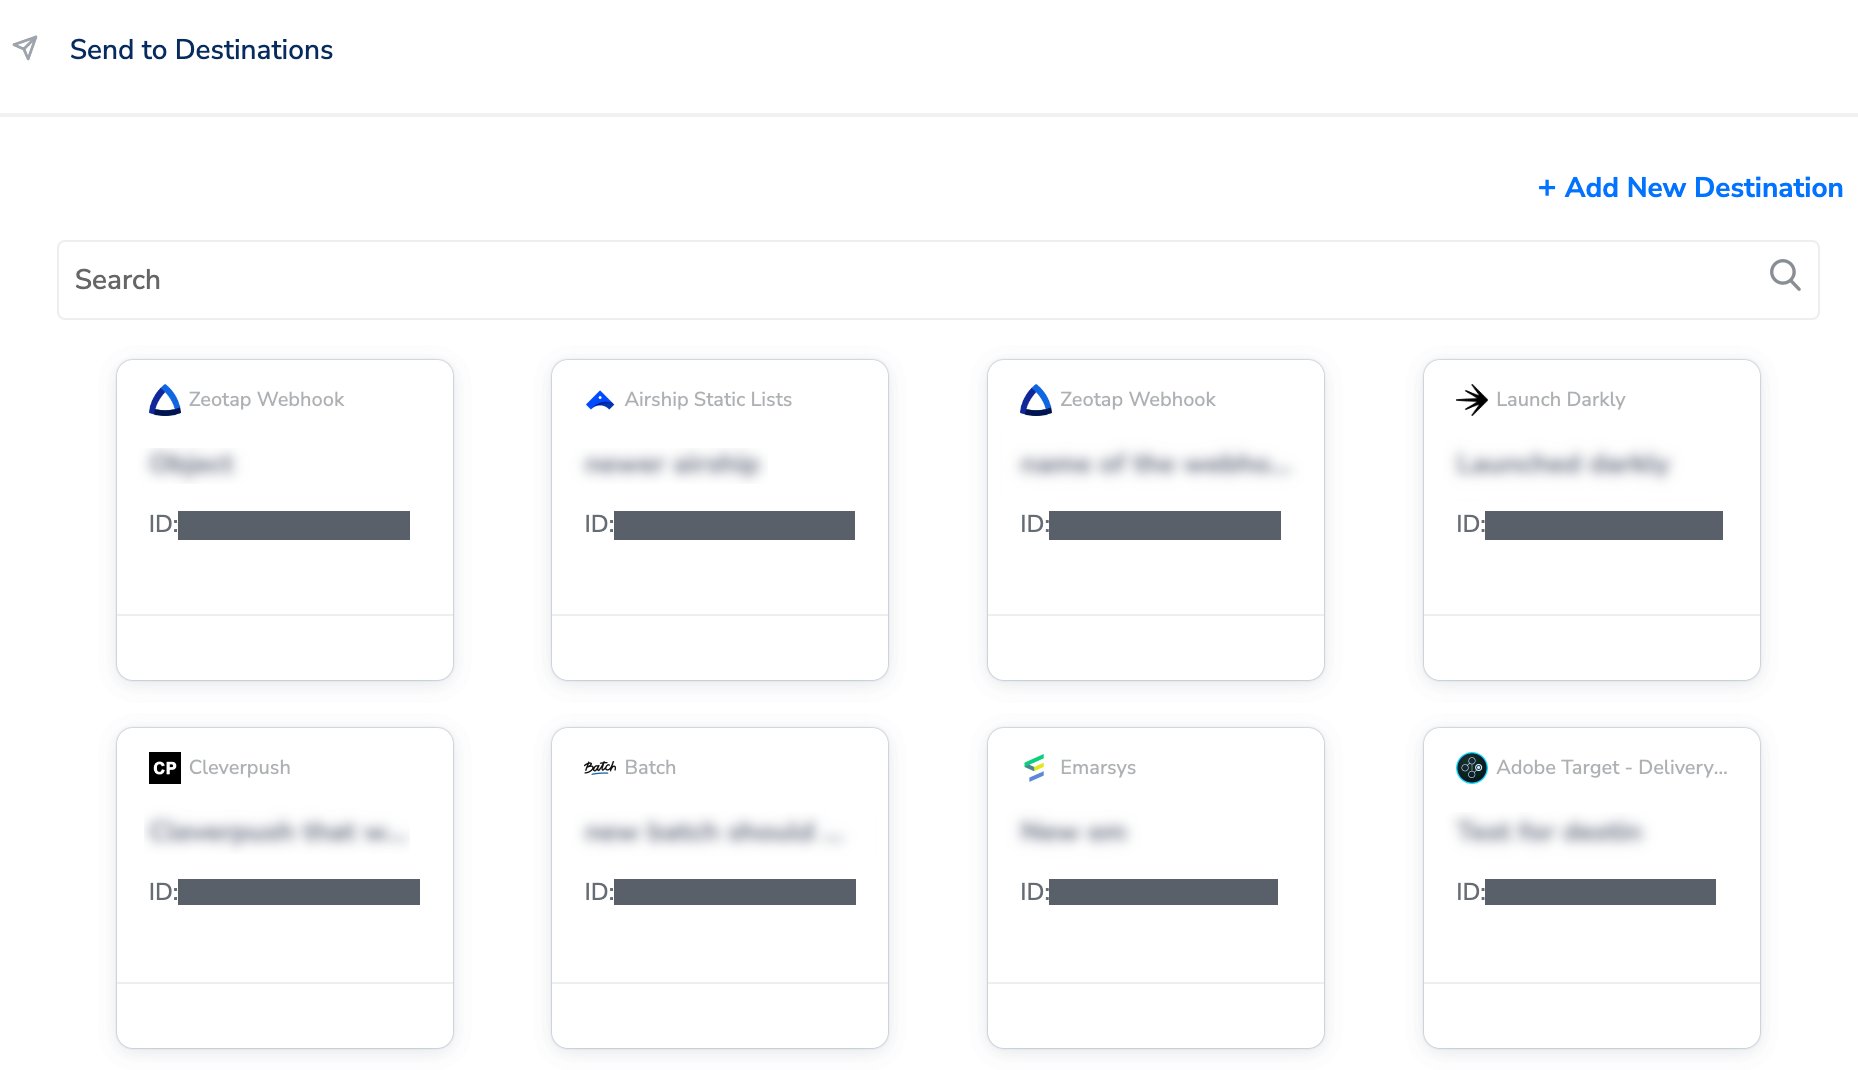
1
Click + Add New Destination.
2
Search for Launch Darkly.
3
Click Launch Darkly and enter a name for the destination.
4
Enter the Access Token and Client Side ID from your LaunchDarkly account, then click Next.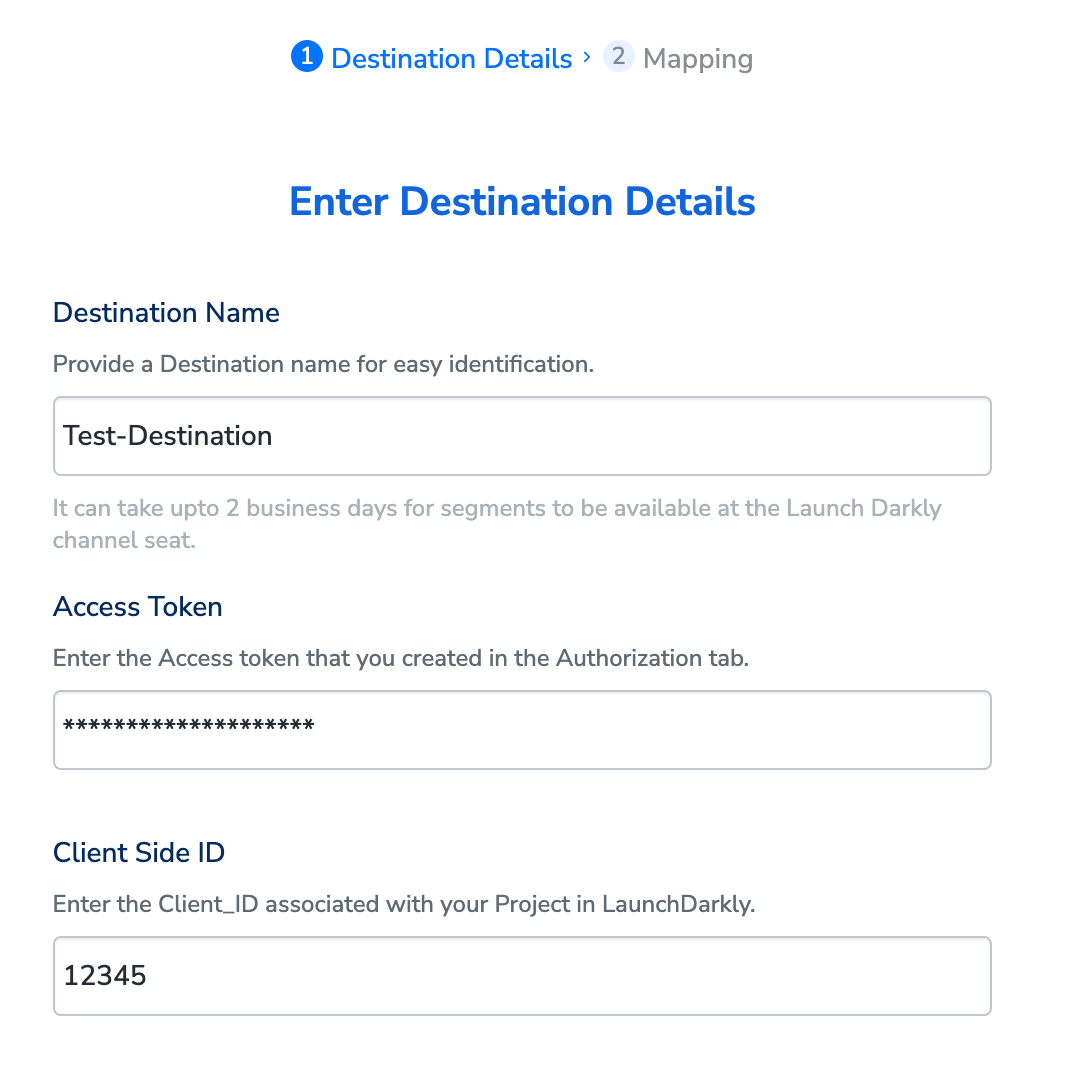
5
On the mapping screen, under Choose your Action, select Send Identifiers to Launch Darkly. Under Map the Fields, map the Catalogue field you want to send to the destination field User ID.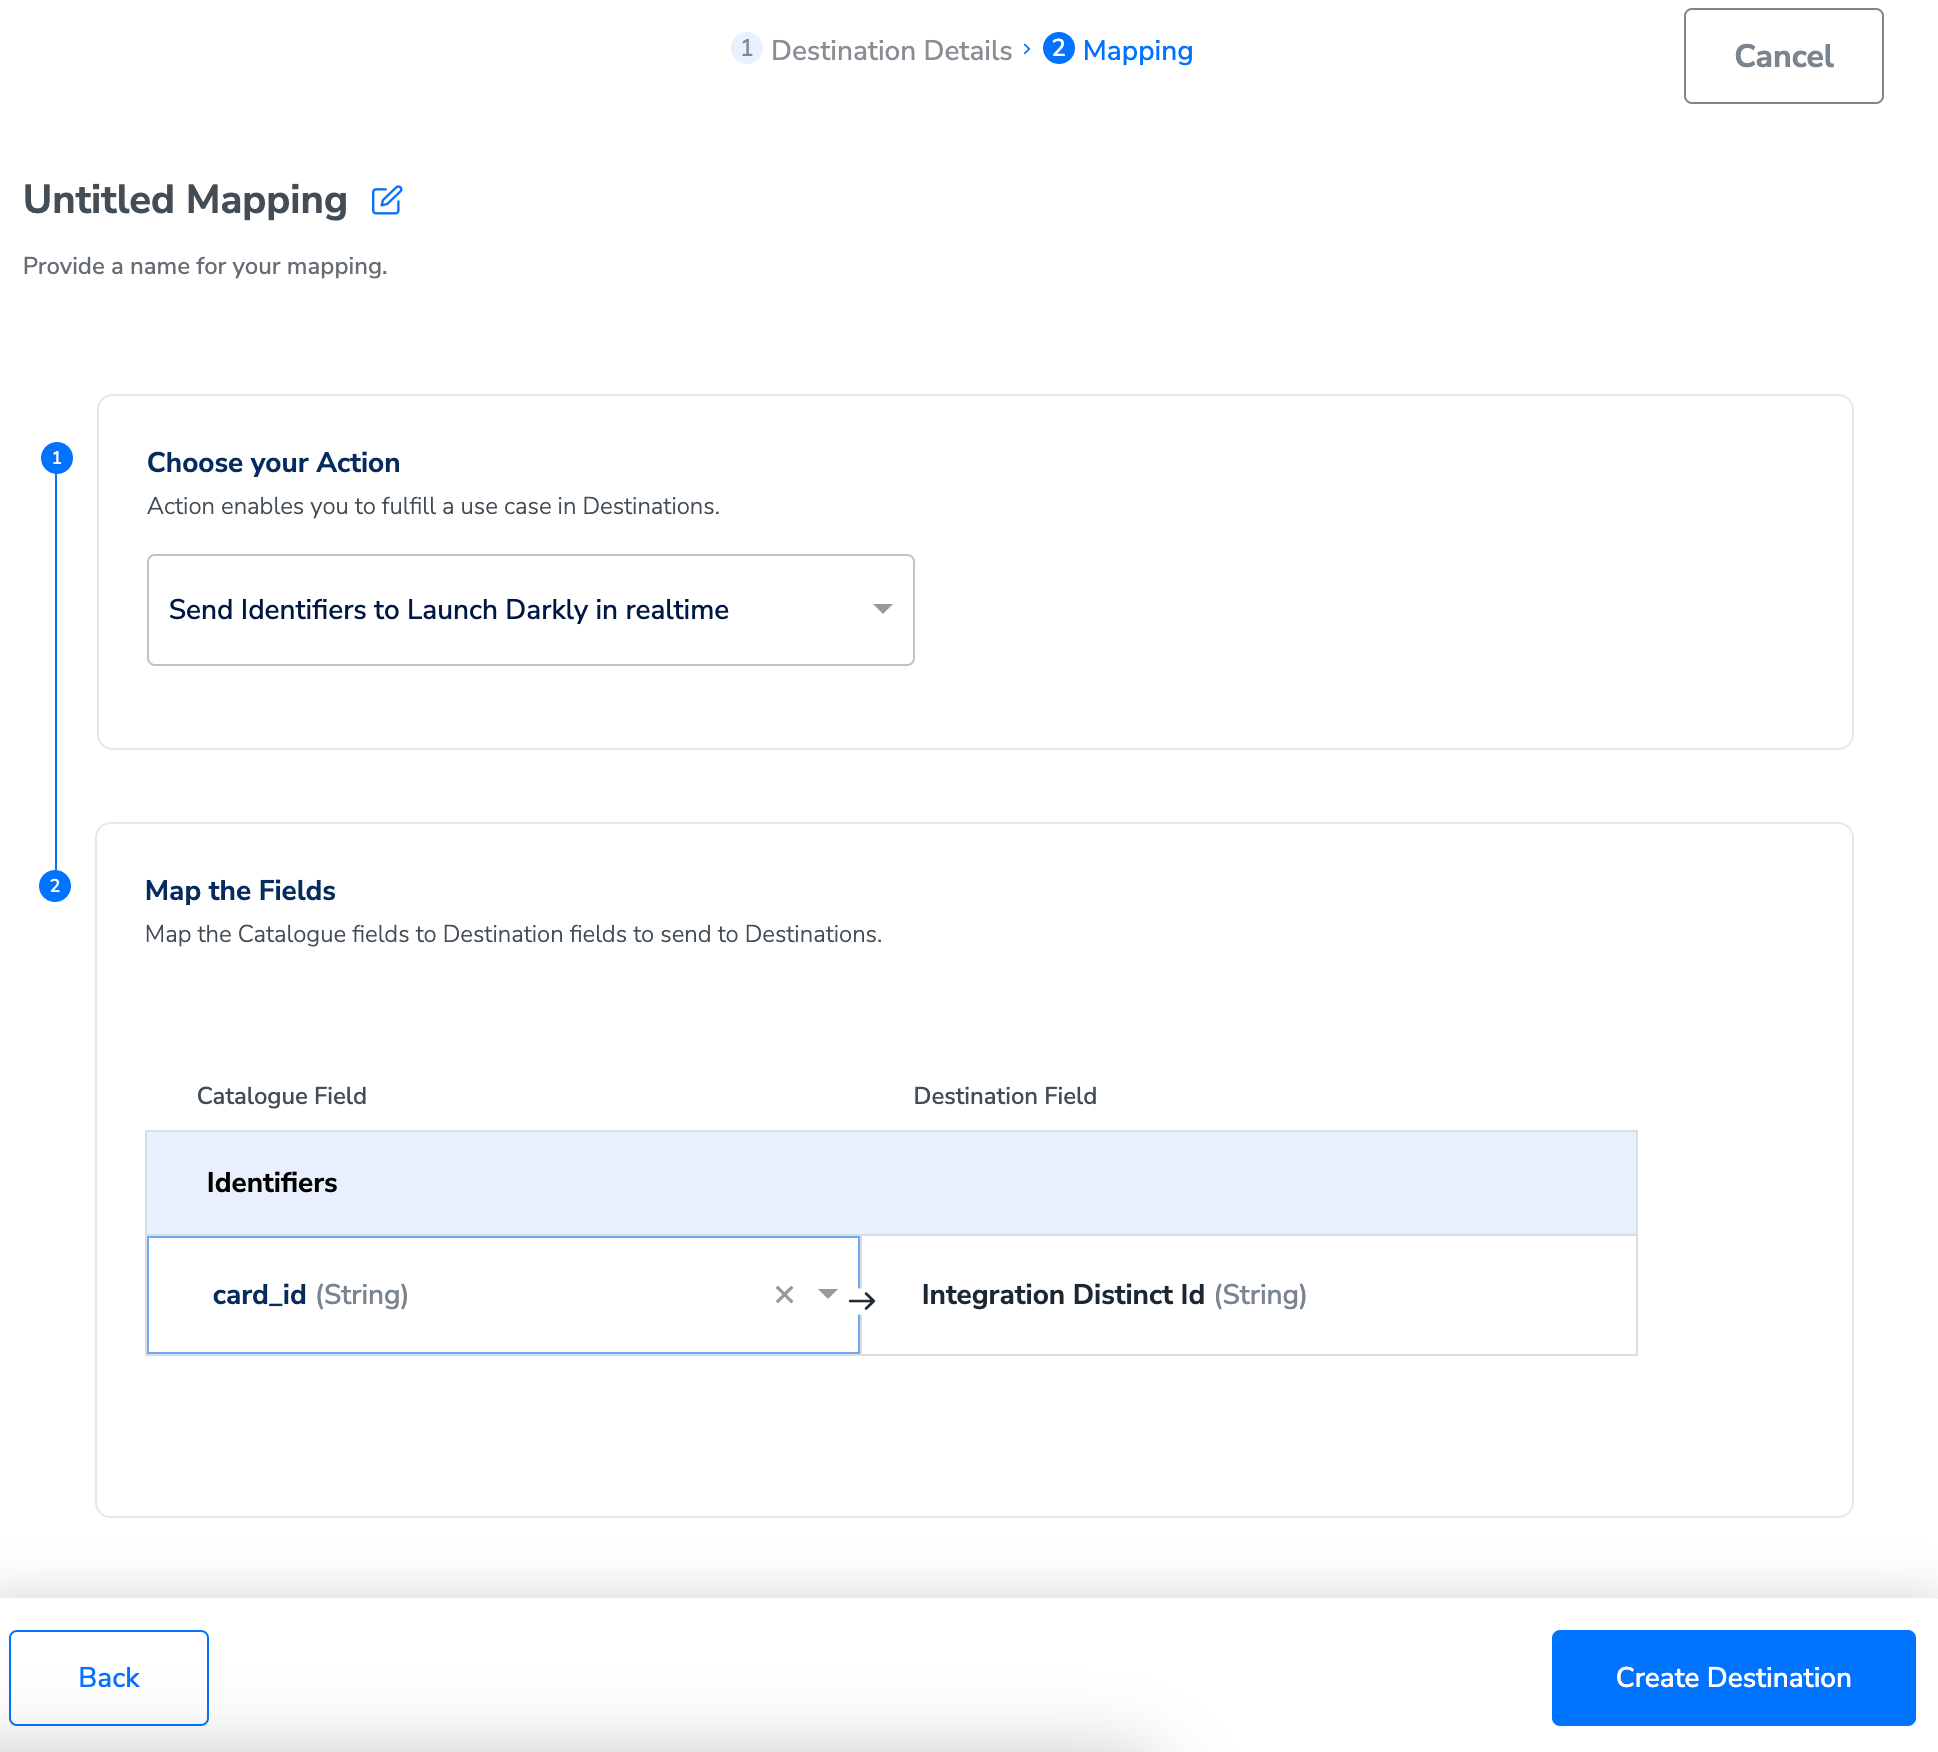
6
Click Create Destination. The destination is created and becomes available for activation in Journeys.
The destination form states that it can take up to two business days for segments to be available at the Launch Darkly channel seat, so a newly created destination may not deliver a visible segment immediately.
Add the destination to your journey
After creating the destination, link it in the Send to Destinations node of the workflow.1
In the workflow, click + and choose Send to Destinations.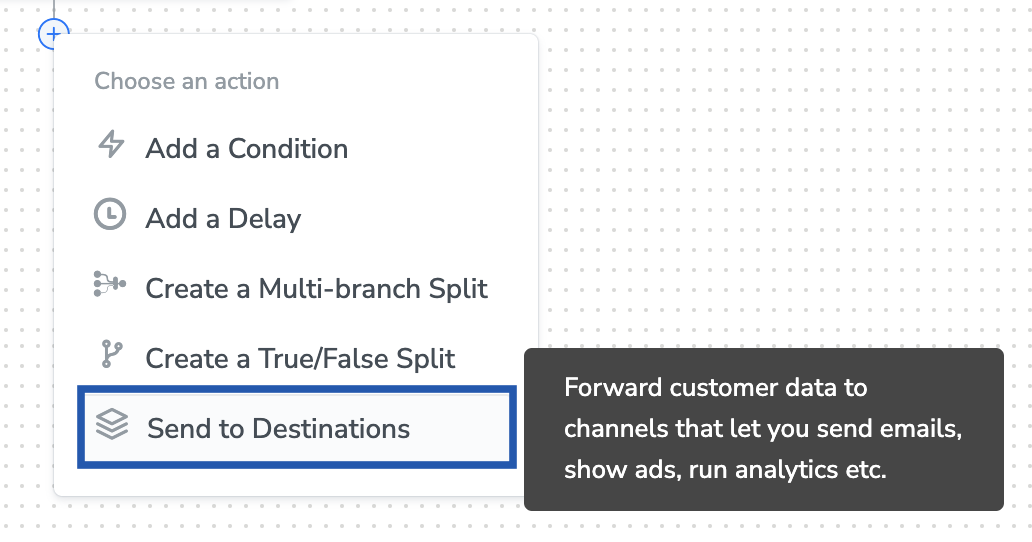
2
Find your destination in the list of available destinations using the search box.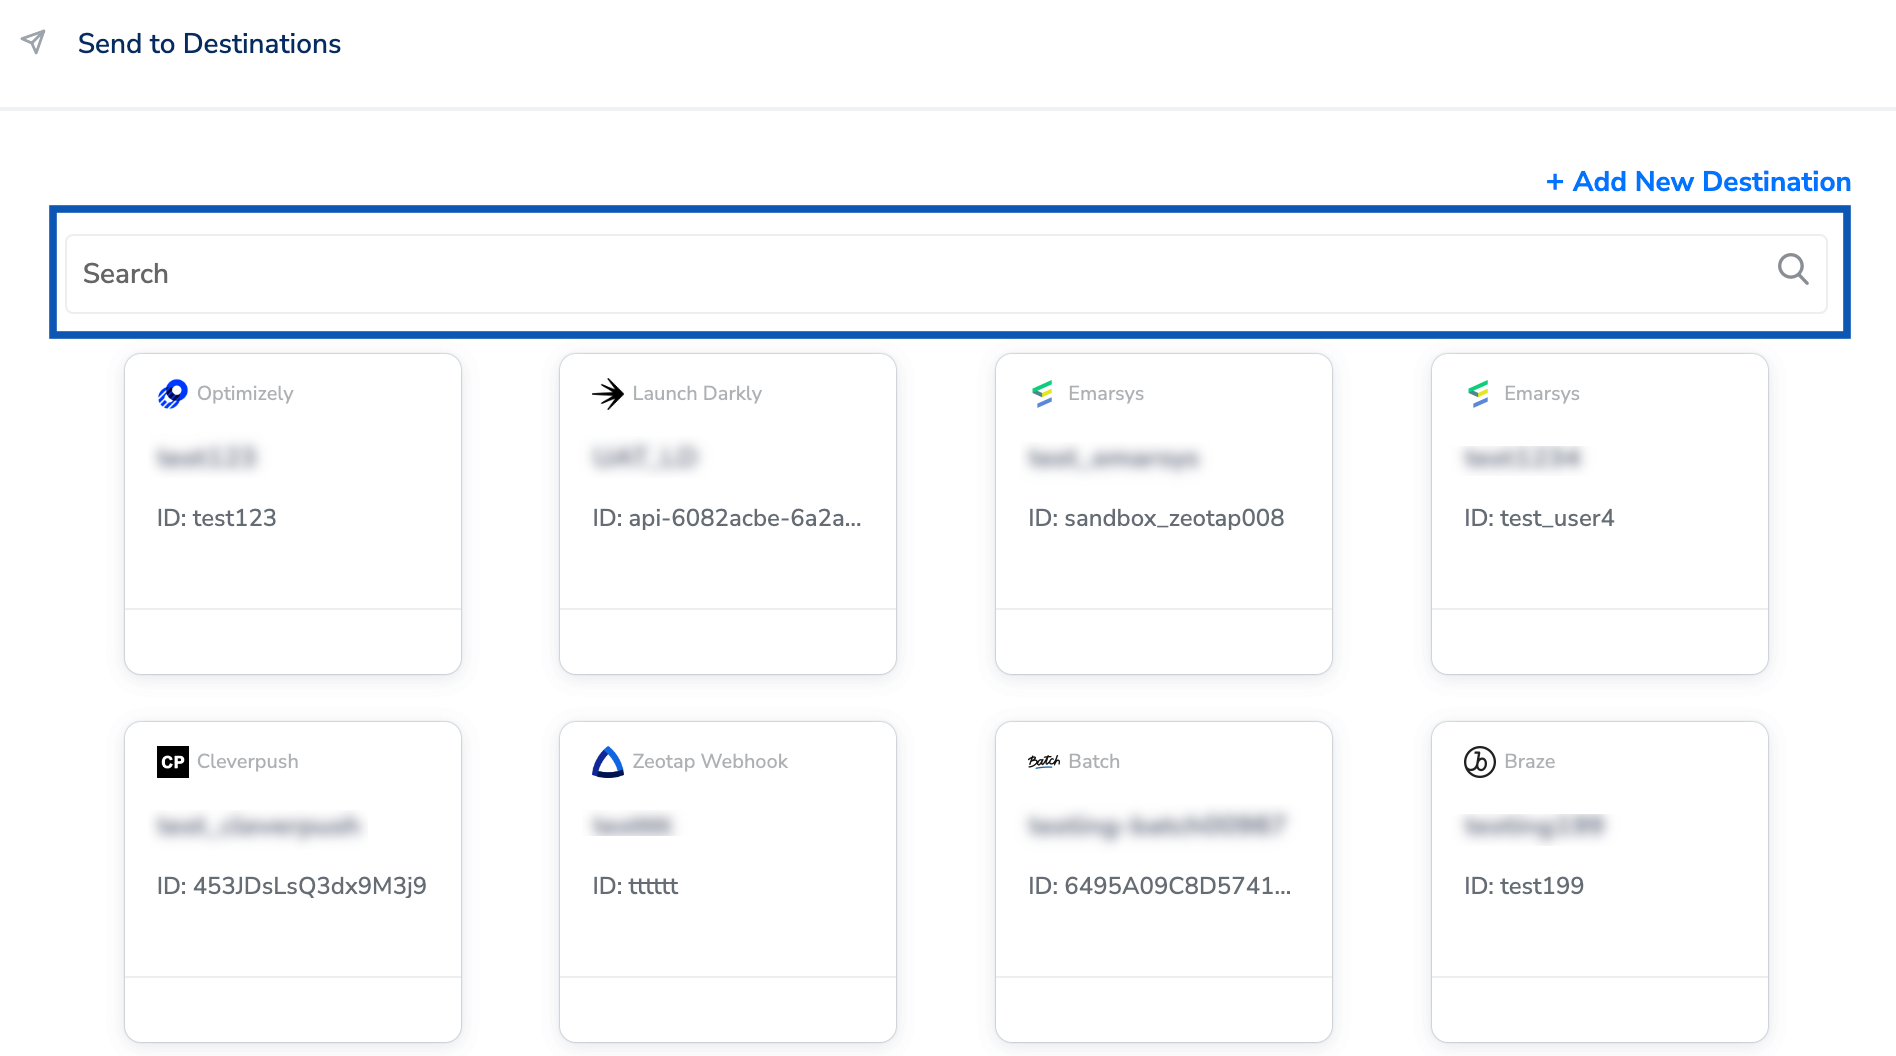
3
On the Destination Details tab, the Access Token and Client Side ID fields are already filled in from the values you entered when you created the destination. In Segment Name and Segment Id, enter a name and an ID to categorise your users.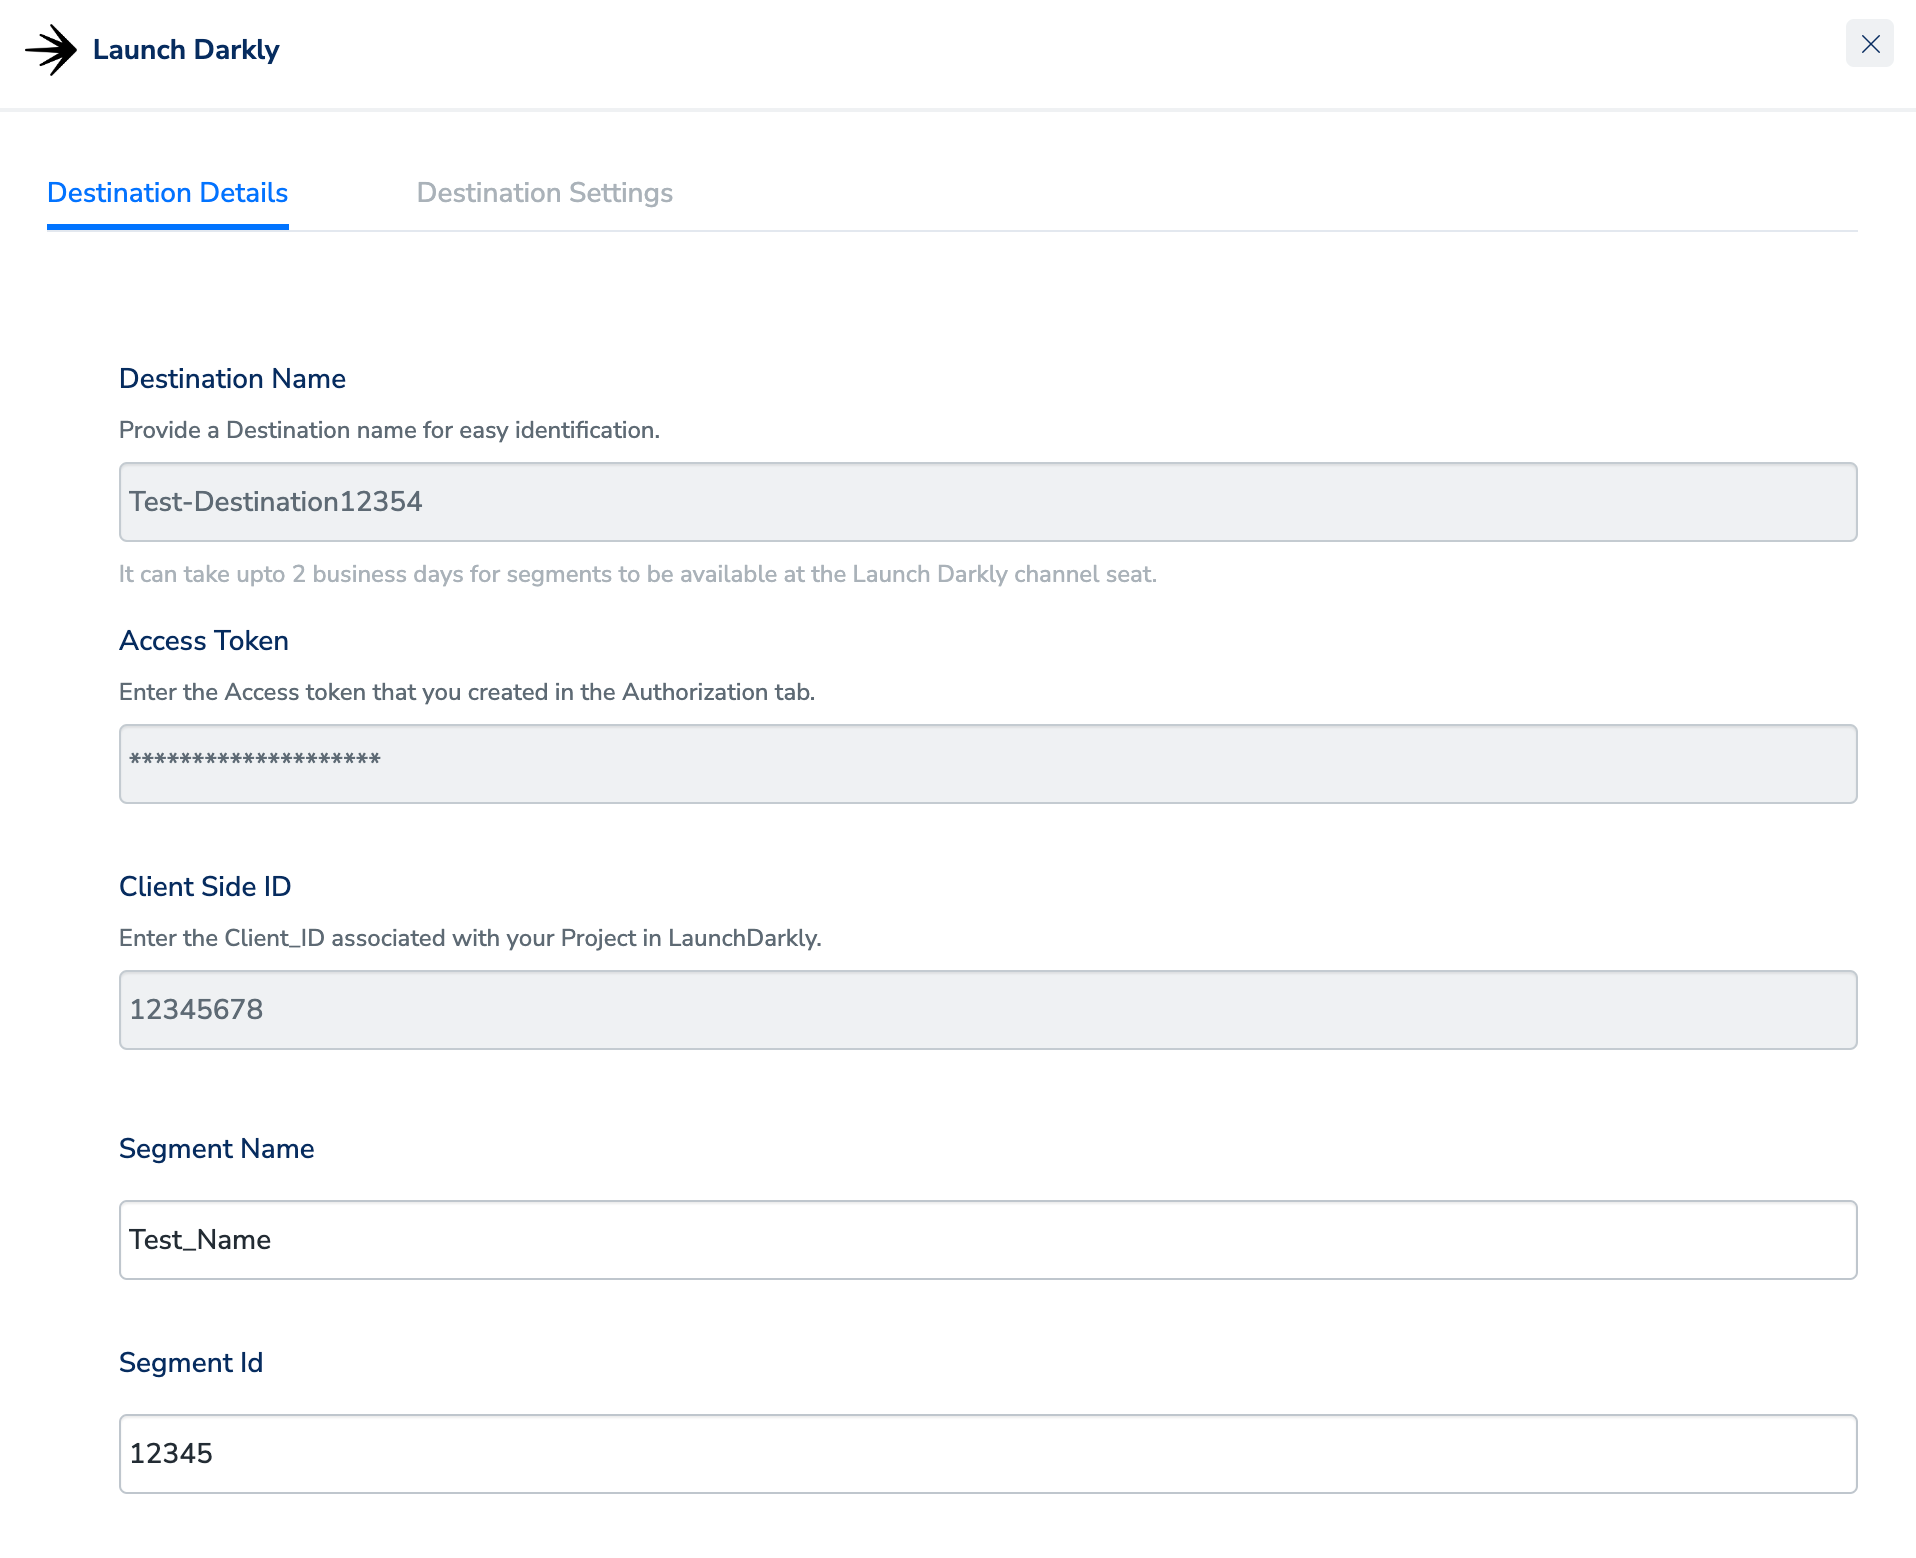
4
On the Destination Settings tab, choose the action and mapping you need. The mapping’s identifiers are listed below it, and Edit Mapping lets you change them.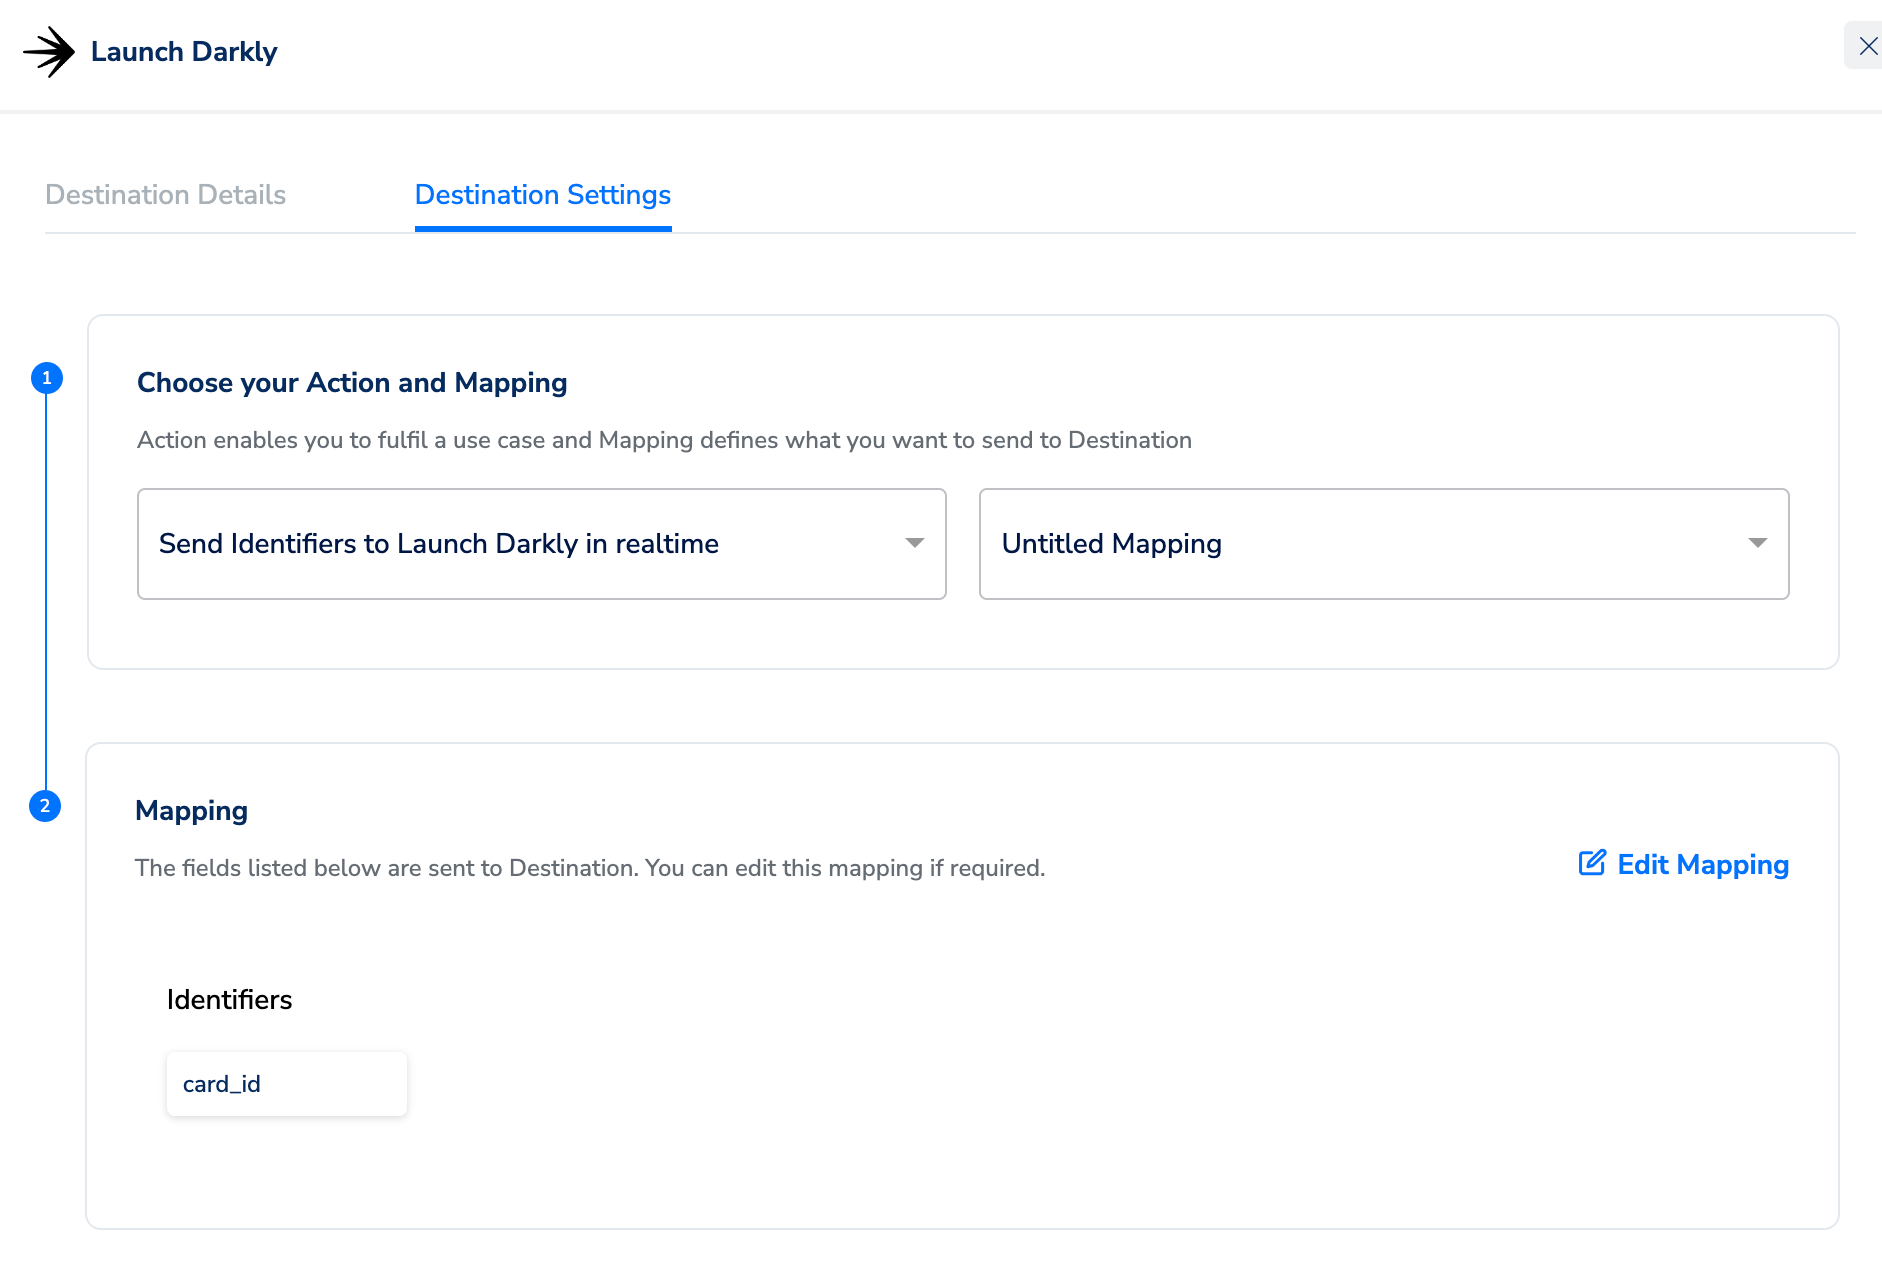
5
Click Save Destination. The destination is attached to the node.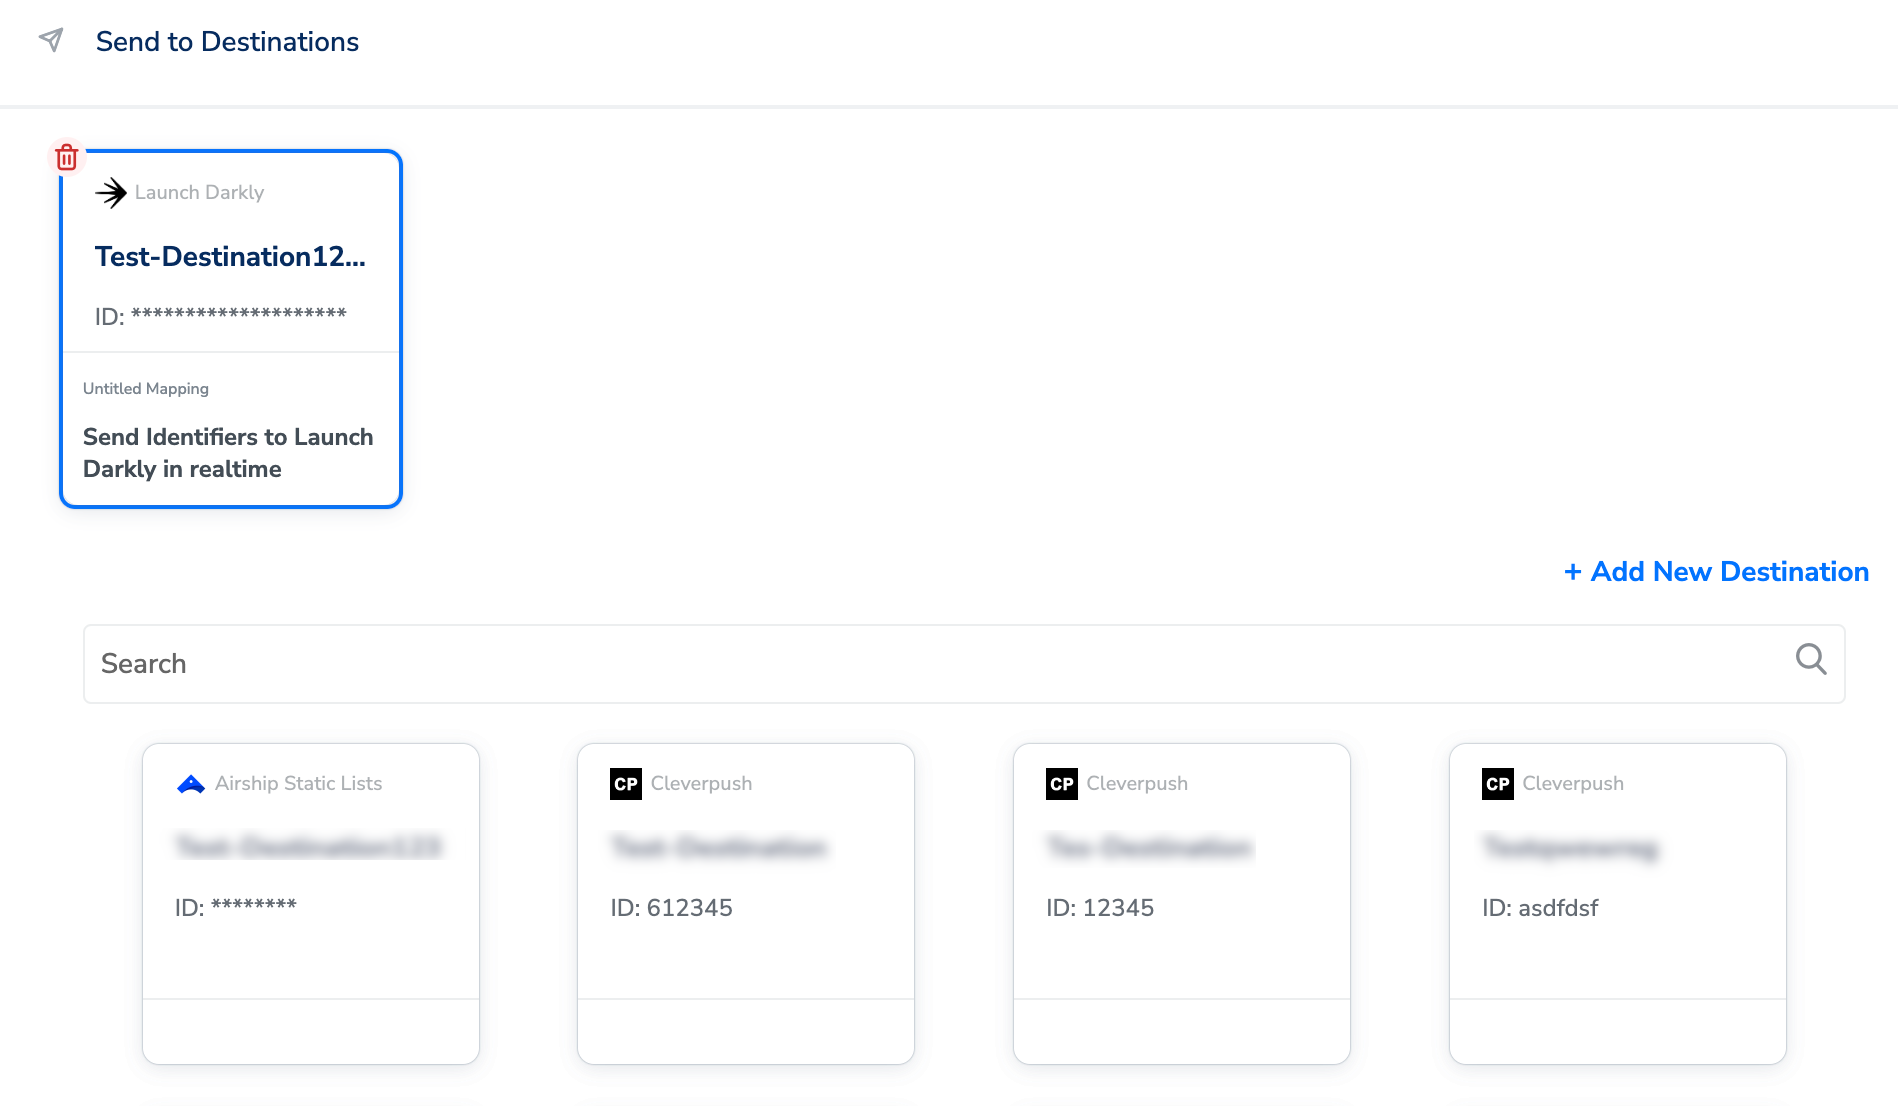
The terms Audiences and Segments are used interchangeably to refer to customer cohorts belonging to a specific category.
Verify the segment reaches LaunchDarkly
In LaunchDarkly, segments pushed from Zeotap CDP appear when you target segments on a feature flag: open Feature flags, choose a flag, add a Target Segments rule, then expand Select Segments. The batch LaunchDarkly page walks through that screen in View Segments on LaunchDarkly. Two things to keep in mind while checking:- The destination form warns that segments can take up to two business days to be available at the Launch Darkly channel seat, so an empty Select Segments list immediately after setup is not necessarily a failure.
- On the Zeotap CDP side, use Journey traces to see whether customers reached the Send to Destinations node.
Troubleshoot the integration
The destination does not appear in the Send to Destinations node
The destination does not appear in the Send to Destinations node
The destination has to exist before you can attach it. Create it first with + Add New Destination in the node’s panel, as described in Create the LaunchDarkly destination, then search for it again.
The segment is not in the Select Segments list in LaunchDarkly
The segment is not in the Select Segments list in LaunchDarkly
Check that the destination is attached to the journey node and that the journey has run. Then allow for the delivery window the destination form describes — up to two business days for segments to be available at the Launch Darkly channel seat.
The segment shows up against the wrong LaunchDarkly environment
The segment shows up against the wrong LaunchDarkly environment
The Client-side ID identifies a single environment inside a LaunchDarkly project. Reopen the environment via View SDK keys, copy the Client-side ID of the environment you intended, and compare it with the Client Side ID on the destination.
You did not save the access token
You did not save the access token
LaunchDarkly hides a token’s value after you leave the page, and it cannot be recovered. Create a new access token under Settings > Authorization and update the destination with it.
Customers are not reaching the node at all
Customers are not reaching the node at all
This is a journey problem rather than a destination one. See Journey troubleshooting and Journey error codes.
Next steps
LaunchDarkly (batch)
Send an audience to LaunchDarkly from the Audiences application instead of from a journey.
Destinations
How actions, mappings and destinations work across Zeotap CDP.
Add or delete a node
Work with the Send to Destinations node and the rest of the journey canvas.
Journey traces
Trace individual customers through a journey to confirm a delivery happened.