What this is

The Brevo destination sends contact data out of Zeotap CDP and into a Brevo contact list in real time. Each time a customer reaches a Send to Destinations node in a journey, Zeotap appends that customer to the Brevo list you nominated, so an email or SMS audience in Brevo stays in step with journey activity without any file export. Zeotap CDP ships two separate Brevo destinations, and the destination catalogue lists both:
  • Brevo — this page. Real time, attached to a journey, appends contacts to one Brevo list.
  • Sendinblue (Brevo) — batch, attached to an audience, pushes a list (segment) into a Brevo folder.
Brevo was formerly called Sendinblue, and both names still appear in the Zeotap CDP catalogue and in the Brevo console. Zeotap CDP’s integrations list records this vendor as a Destination only, so no data flows from Brevo into Zeotap CDP and there is no opposite-direction Brevo Source page.

Supported identifiers and actions

Prerequisites

In Zeotap CDP:
  • An active account with permission to create and edit destinations. For the wider destination model, see Destinations.
  • A journey you can edit, so the destination has somewhere to be attached. See Create a workflow.
  • The customer data or events you intend to send, available in the Catalogue.
In Brevo:
  • An active Brevo account with API access.
  • Permission to generate API keys in that account.
  • At least one contact list created, and its list ID to hand.

Get your Brevo API key and list ID

Both values come from the Brevo console, before you touch Zeotap CDP.
1
Sign in to your Brevo account at app.brevo.com.
2
Open your account settings from the profile menu in the top-right corner, and go to the API Keys section.
3
Click Generate a new API key, give the key a descriptive name (for example, Zeotap Integration), and click Generate.
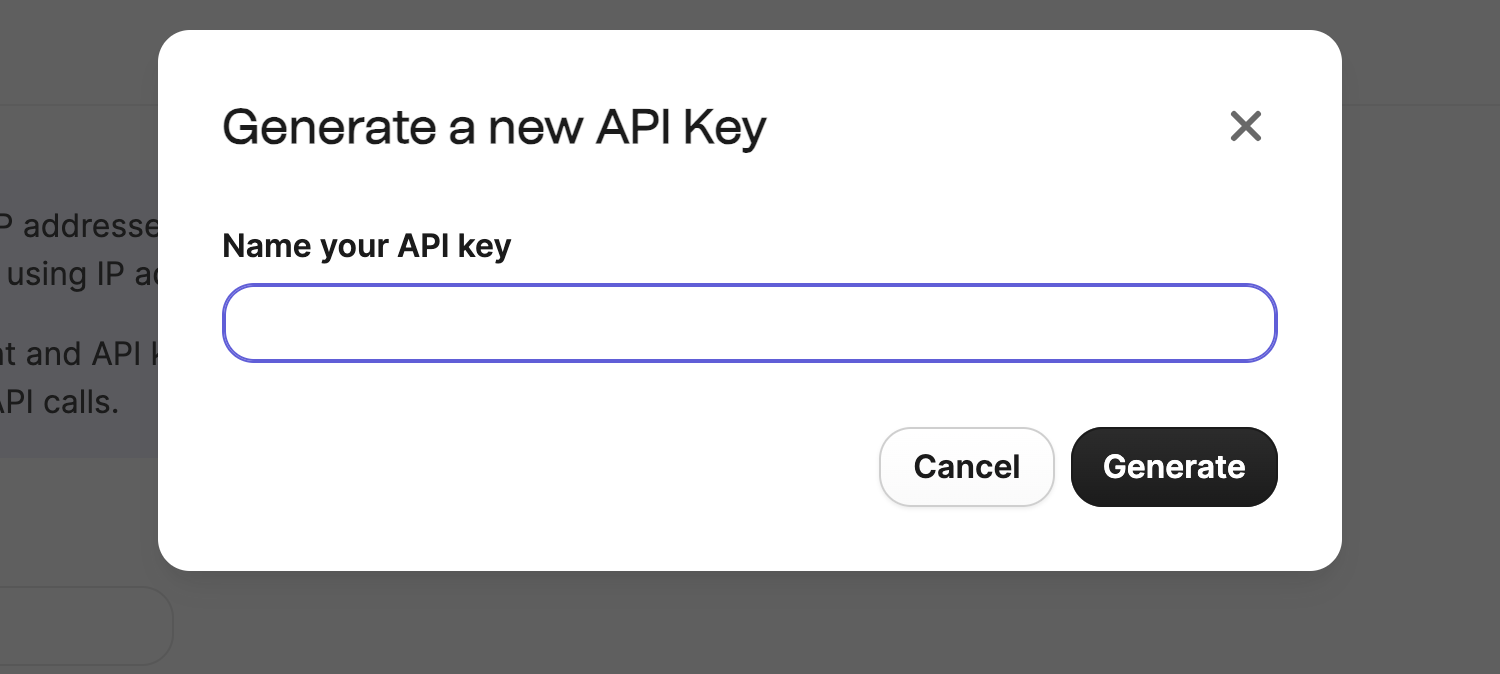
Brevo dialogue titled Generate a new API Key, with a Name your API key field and a Generate button

Brevo's Generate a new API Key dialogue, with a name field and Cancel and Generate buttons

4
Copy the key and store it somewhere safe.

Brevo's confirmation dialogue, which states that the key cannot be shown again and offers a copy control

Brevo shows the key once. Once you close this dialogue you cannot view it again — you would have to generate a replacement key.
5
Go to Contacts → Lists, find the list you want Zeotap to append contacts to, and note its ID.
Brevo Lists table with columns for Lists, ID, Folder, Contacts, Creation date and Actions

Brevo's Lists table, showing the ID column alongside folder, contact count and creation date

The sibling Sendinblue (Brevo) destination documents that a Brevo API key only works when its user-data permissions are enabled. If an existing key is rejected, generate a fresh one rather than editing the old one.

Create the Brevo destination

1
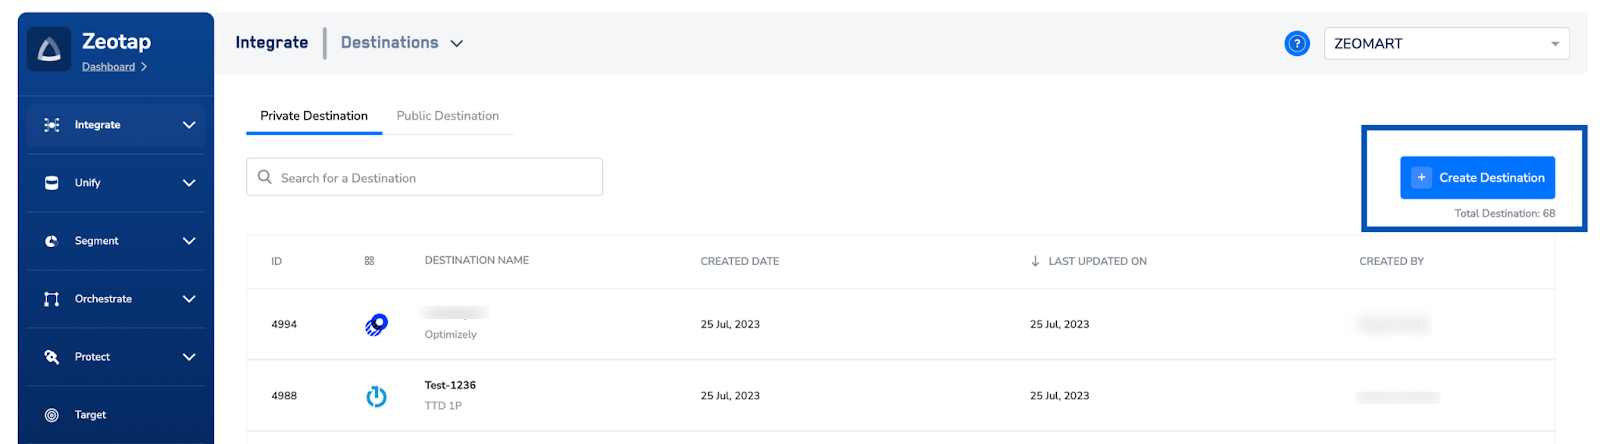
Sign in to the Zeotap CDP app, go to Integrate → Destinations, and click + Create Destination.
Zeotap CDP Integrate Destinations screen listing existing destinations, with the Create Destination button highlighted
The Zeotap CDP Destinations screen, with the Create Destination button highlighted

2
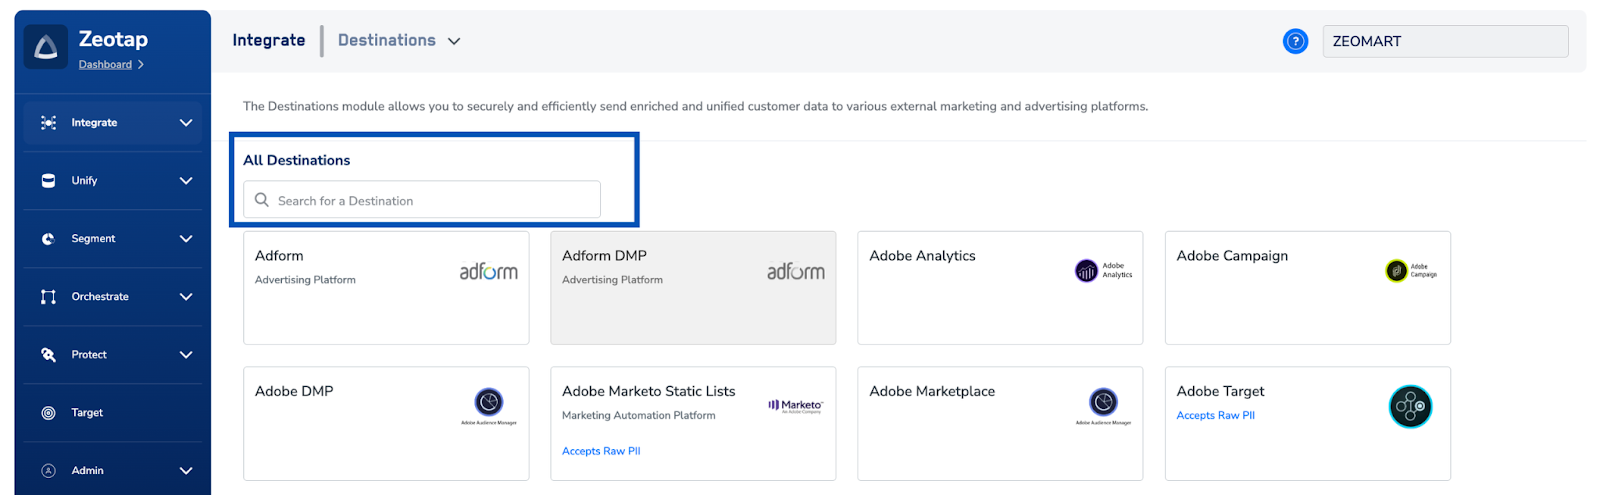
Under All Destinations, use the search box to find Brevo.
Zeotap CDP All Destinations catalogue showing destination tiles and a search box

The All Destinations catalogue with its search box highlighted
3
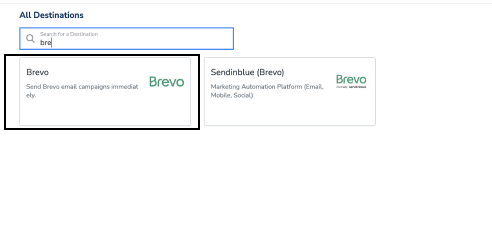
Click the Brevo tile.The search returns two tiles for this vendor. Pick Brevo for real-time journey delivery; Sendinblue (Brevo) is the batch destination covered on its own page.
Destination search results showing a highlighted Brevo tile next to a Sendinblue (Brevo) tile

Search results showing two separate tiles for this vendor, Brevo and Sendinblue (Brevo), with the Brevo tile highlighted

4
On the Destination Details tab, enter:
  • Destination Name — a name that identifies this destination later, when you pick it from a journey.
  • Brevo API Key — the key you generated above.
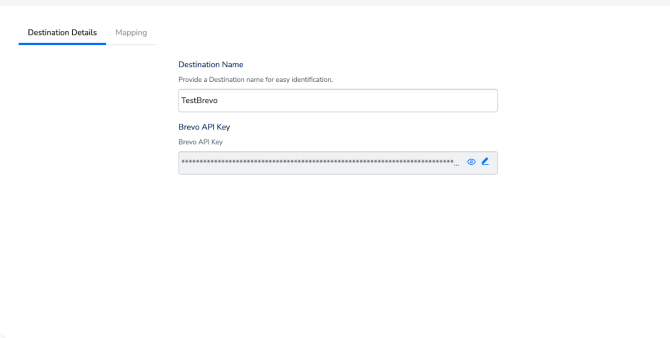
Zeotap CDP Destination Details tab showing a Destination Name field and a Brevo API Key field, alongside a Mapping tab

The Destination Details tab, with the Destination Name and Brevo API Key fields
The list ID is not entered here — you supply it per journey, when you attach the destination.
5
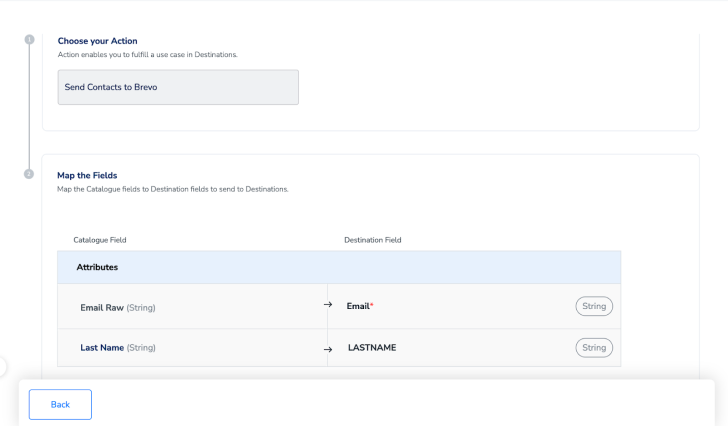
Choose the action and define the mapping.Under Choose your Action, select Send Contacts to Brevo. Under Map the Fields, map the Catalogue fields you want to send to the matching Brevo contact attributes. The email identifier is mandatory; everything else is optional.
Zeotap CDP mapping screen with Send Contacts to Brevo selected, and the Catalogue fields Email Raw and Last Name mapped to the Brevo Email and LASTNAME fields

The Choose your Action and Map the Fields screen, mapping Catalogue fields to Brevo contact attributes

A Brevo contact attribute must already exist in Brevo before it appears as a destination field here, and Brevo attribute names are entered in capitals. To create one, see Appendix for Sendinblue.For the rules that govern actions and mappings across every destination, see Define the mapping.
6
Review the values and save the destination. It is then available to any journey in the workspace.

Attach the destination to a journey

Creating the destination stores the credentials; it does not send anything on its own. Data starts flowing once you attach the destination to a Send to Destinations node.
1
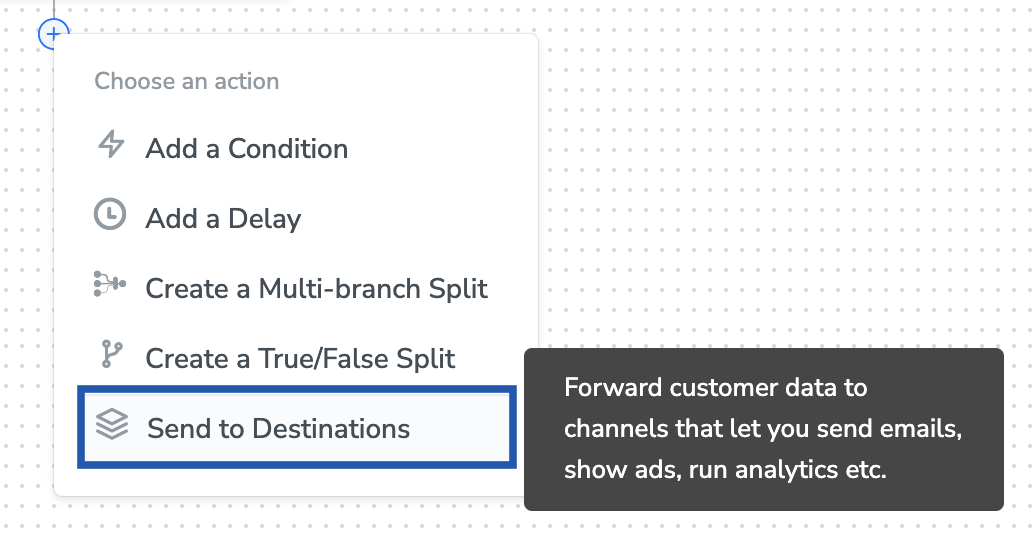
In the journey canvas, click + at the point where you want the delivery to happen, and choose Send to Destinations.
Journey canvas Choose an action menu listing Add a Condition, Add a Delay, the two split types and Send to Destinations, with Send to Destinations highlighted
The Choose an action menu on the journey canvas, with Send to Destinations highlighted

2
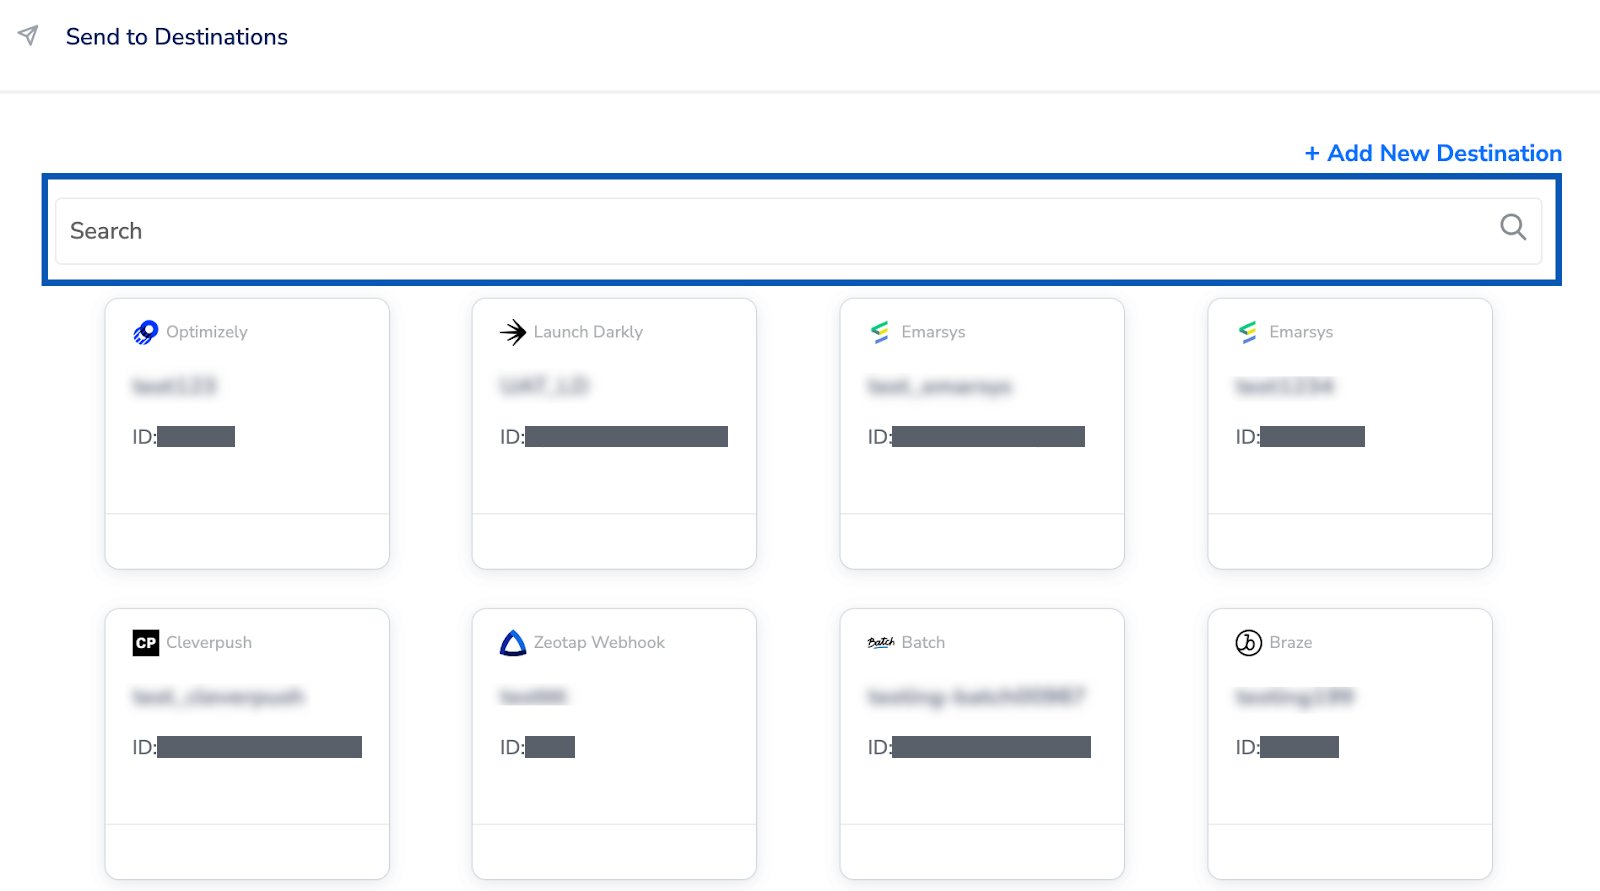
Search for the Brevo destination you created, and select it.
Send to Destinations panel showing a search box, an Add New Destination link and cards for the destinations available to the journey

The Send to Destinations panel, with its search box highlighted above the available destination cards
3
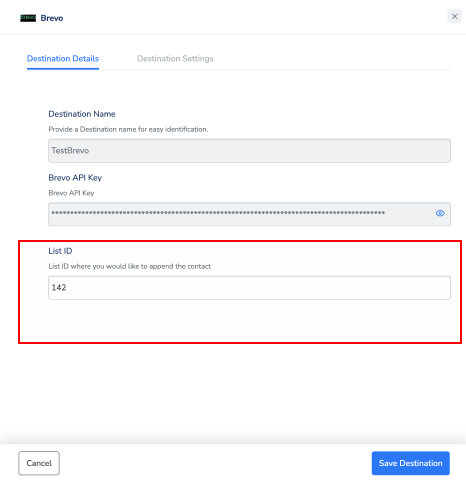
On the Destination Details tab, the destination name and API key are pre-filled from the destination you created. Enter the List ID of the Brevo list the contacts should be appended to.
Journey-level Brevo panel with pre-filled Destination Name and Brevo API Key fields above a highlighted List ID field and a Save Destination button

The journey-level Destination Details tab, where the pre-filled destination fields sit above the List ID field
The list ID is a journey-level input, so one destination can feed a different Brevo list from each journey that uses it.
4
On the Destination Settings tab, confirm the action and mapping are the ones you want for this journey.
5
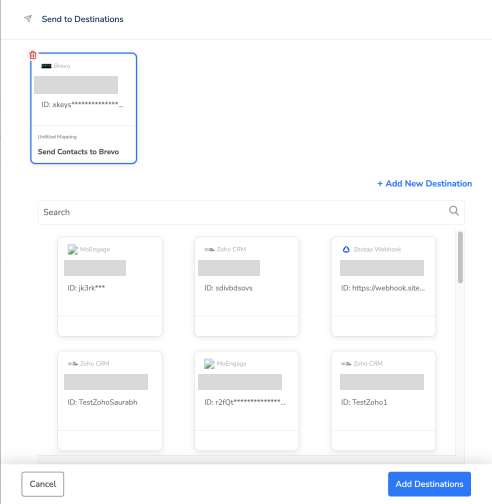
Click Save Destination. The destination is attached to the node, showing the action it will perform.
Send to Destinations panel with an attached Brevo card labelled Send Contacts to Brevo, above the remaining available destinations and an Add Destinations button

The Send to Destinations panel after saving, with the Brevo destination attached to the node

Verify contacts reach Brevo

Check both sides once the journey has run.
  1. In Zeotap CDP — open the journey and read the counts on the Send to Destinations node. Successful deliveries and failures are counted separately at node level, so a node with a non-zero success count is delivering. For a per-customer view of what was sent, see Journey traces.
  2. In Brevo — go to Contacts → Lists, open the list whose ID you entered on the journey node, and confirm the expected contacts are present.
If the two counts do not match, open the journey trace for the affected customers before assuming the list is complete.

Troubleshoot delivery failures

When a delivery fails, Zeotap CDP records a failure status code on the node rather than a Brevo-specific message. Start with the journey trace logs, which carry the raw response from Brevo alongside the code. The codes most likely to appear on this destination are:
  • AUTHENTICATION_ERROR — the Brevo API key on the destination is no longer valid, or it lacks the permissions the integration needs. Generate a fresh key in Brevo and update the destination.
  • BAD_REQUEST — a required field was missing or empty in the payload. Check that the email identifier is mapped and never null before investigating anything else.
  • EVENT_PARSING_FAILED — the mapping and the Brevo attribute disagree. Confirm the attribute exists in Brevo and that its type matches the Catalogue field you mapped to it.
If every customer fails at the node, the cause is usually authentication or mapping. If only a small share fail, look at consent or data quality on the affected records instead. For the full code reference and the resolution steps for each, see Journey error codes and Troubleshooting workflows.

FAQ

They are two different integrations for the same vendor. Brevo — this page — is a real-time destination: you attach it to a journey and it appends contacts to a single Brevo list as customers flow through. Sendinblue (Brevo) is a batch destination: you attach it to an audience and it pushes the whole list (segment) into a Brevo folder. Choose the one that matches where you are activating from, Journeys or Audiences.
On the journey. The destination itself stores only the destination name and the Brevo API key; the List ID field appears when you attach the destination to a Send to Destinations node. One Brevo destination can therefore feed a different list from each journey that uses it.
No. Contacts are appended to the list you name. Existing contacts stay in place, and a contact Brevo already holds is updated rather than duplicated.

Next steps

Last modified on October 6, 2026