Overview
Object Sync in Braze is a Journey-enabled action on the existing Braze destination that lets you Add, Update, or Remove a custom Braze object on a user profile when that user qualifies for a Journey in Zeotap CDP. The object name and schema are fully custom — you define them per use case — so this works for any Braze custom object structure that fits your activation flow. This action lives on the Mapping screen of an already-configured Braze destination; no new credentials are required.Available Actions and Supported Features
This action is triggered from a Journey workflow rather than from a segment-membership upload, so the standard ID Extension / Delete / Delta Upload features do not apply.
Prerequisites
- An active Braze destination is already configured in Zeotap CDP. If not, follow Braze Integration first.
- You know the Braze object name and schema you want to sync. The object name and column structure are fully custom and defined by you.
- You have a Journey (or are creating one) where this action will be triggered.
- For Update or Remove operations: you have decided which schema field acts as the Identifier Key — the primary key Braze uses to look up the object on the user profile (for example,
permission_id).
Setting up the Object Sync Mapping
1
Open your existing Braze destination in Integrate > Destinations and switch to the Mapping tab. Click + Create Mapping to start a new mapping.
2
Under Choose your Action, select Object Sync in Braze. The dropdown also shows other Journey-enabled Braze actions (such as Delete User in Braze); look for the Journeys tag.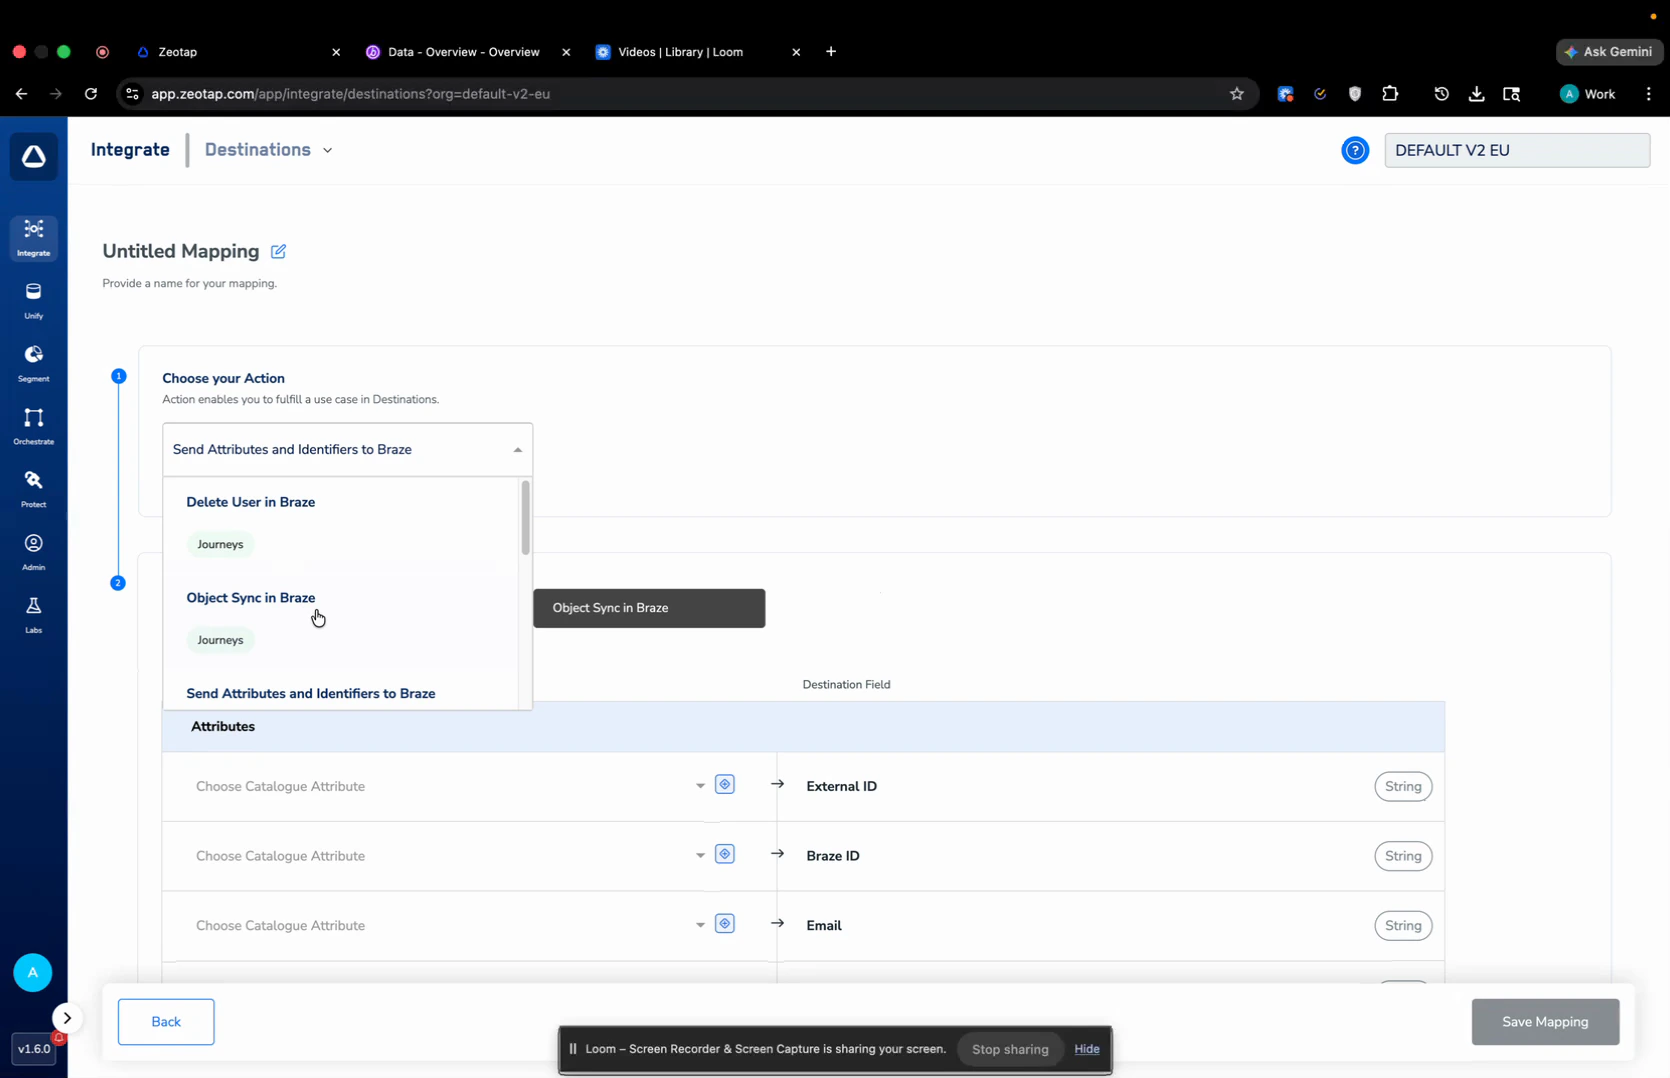
3
Under Map the Fields, map a Catalogue Attribute to the External ID destination field. This mapping is mandatory — Braze uses this value to identify the user profile to update. In the example below, the catalogue attribute 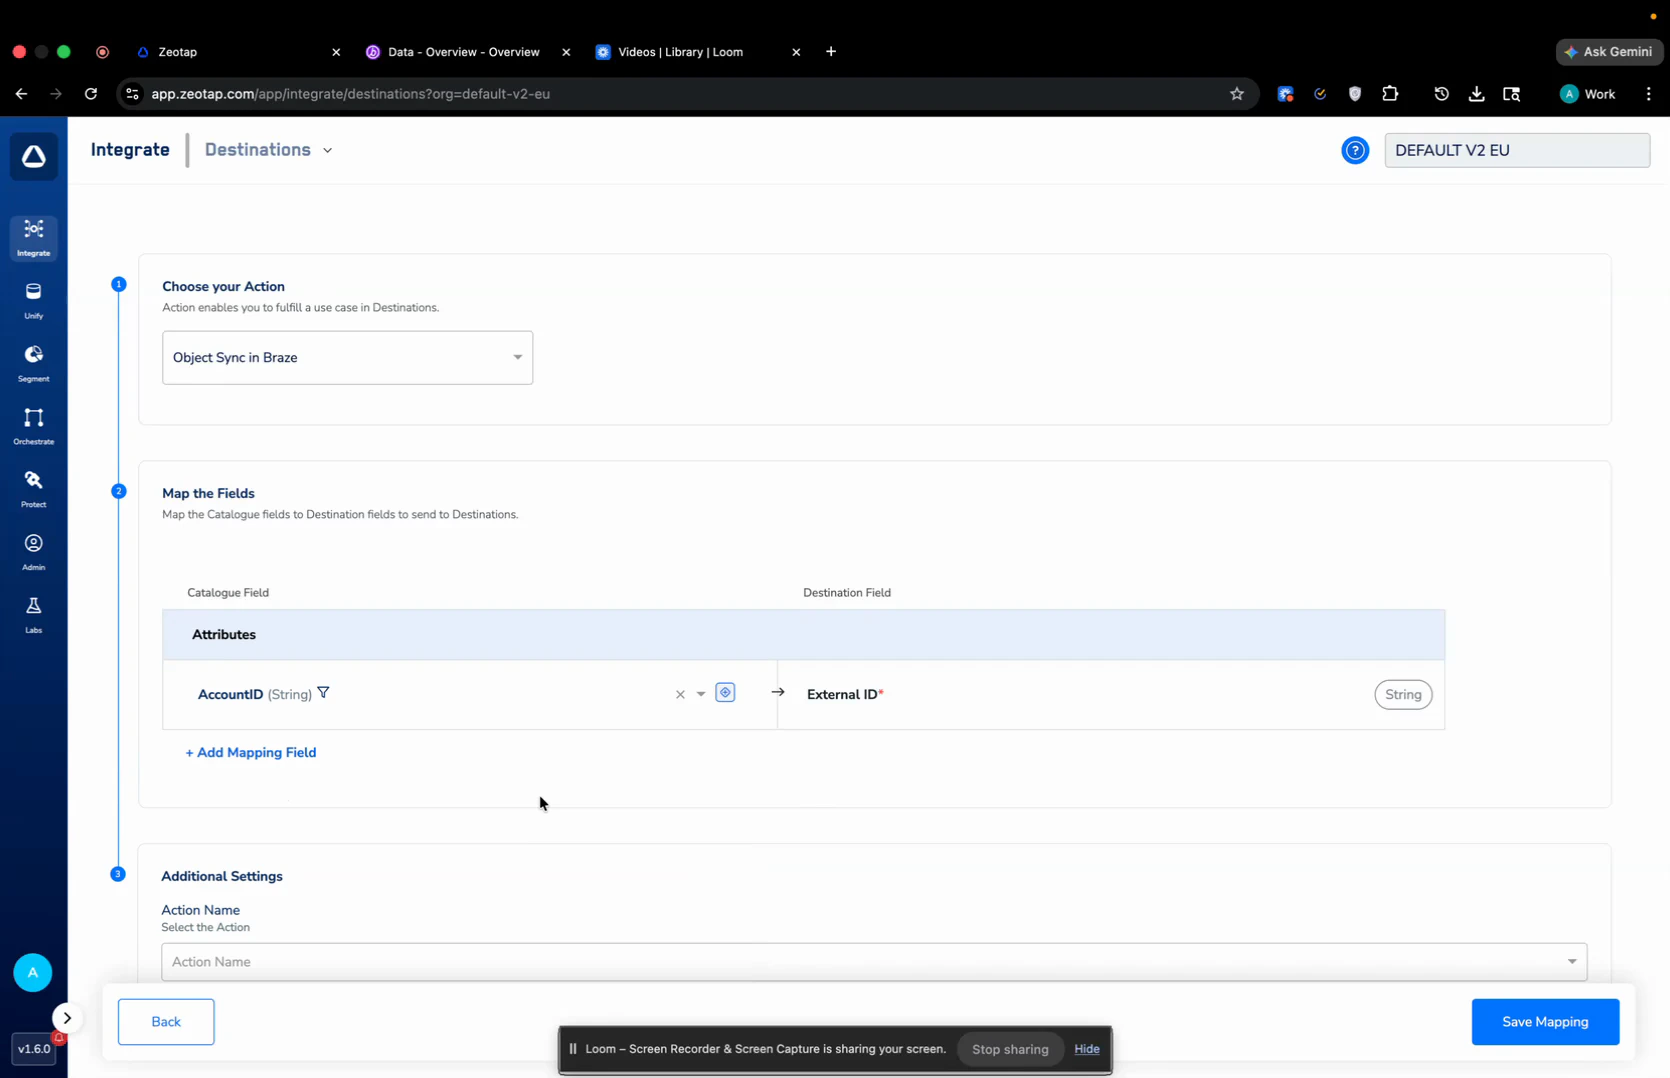
AccountID is mapped to External ID.4
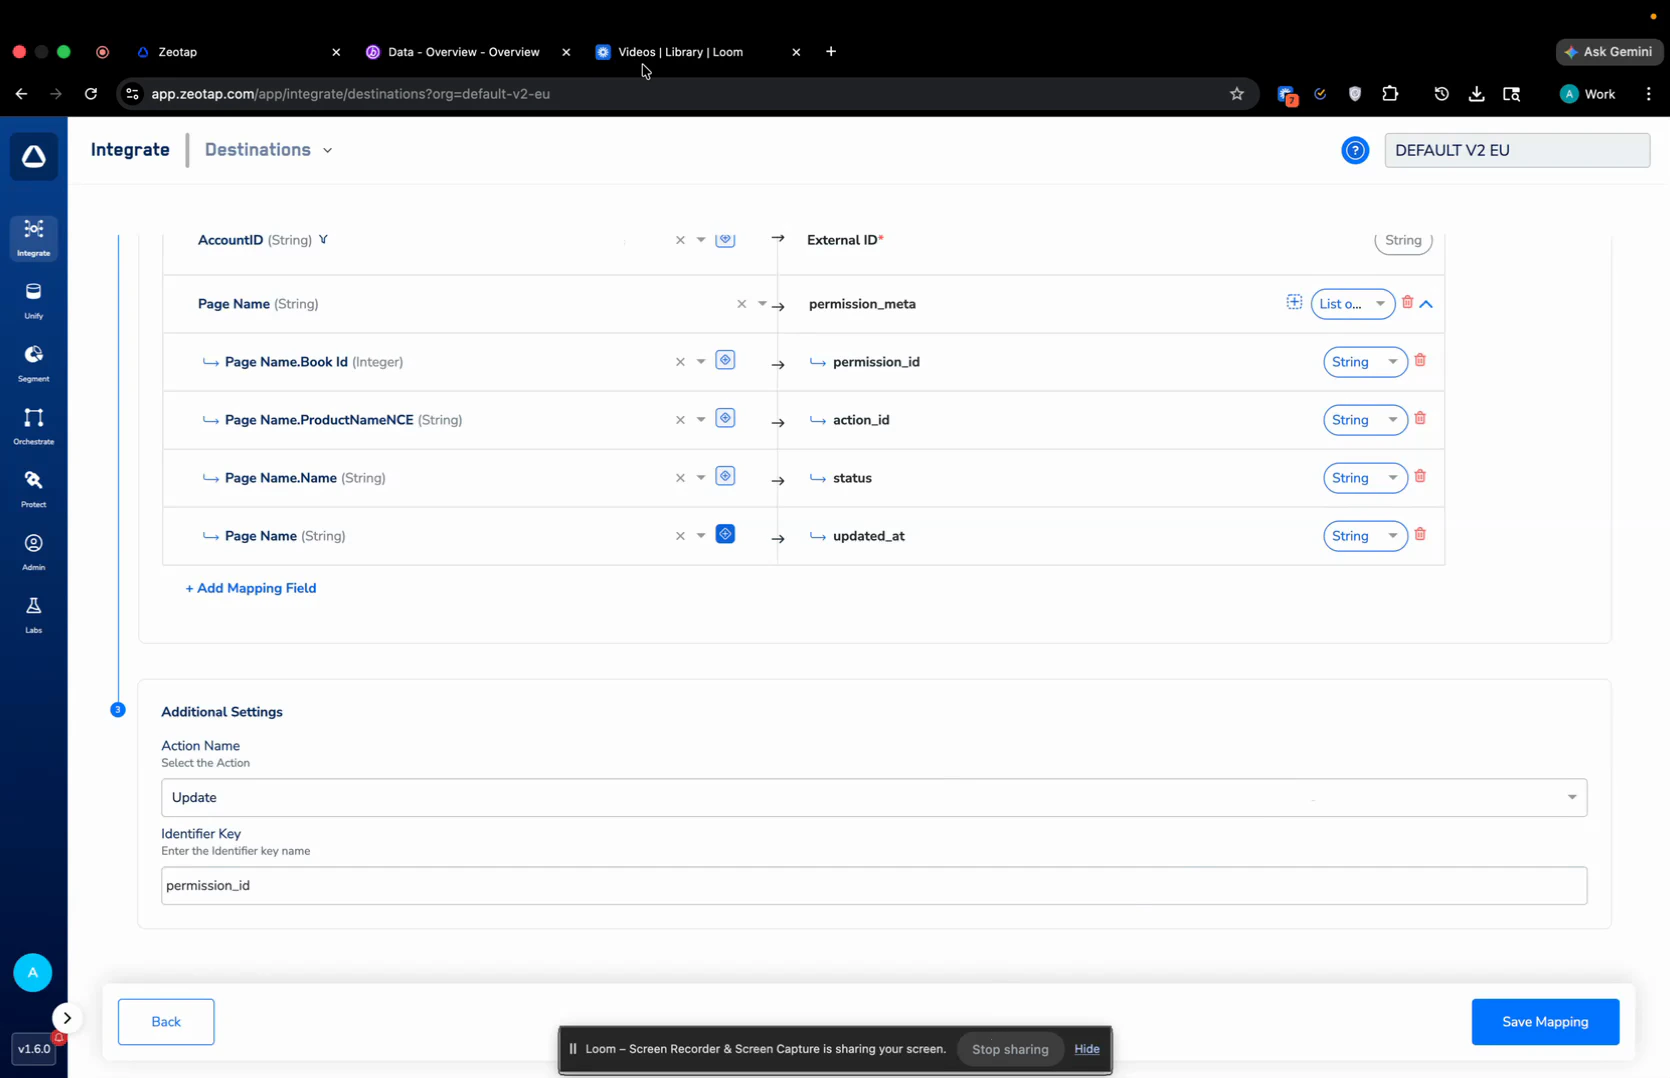
Click + Add Mapping Field to add the custom object. In the new row:a. Enter the object name in the destination field (for example, 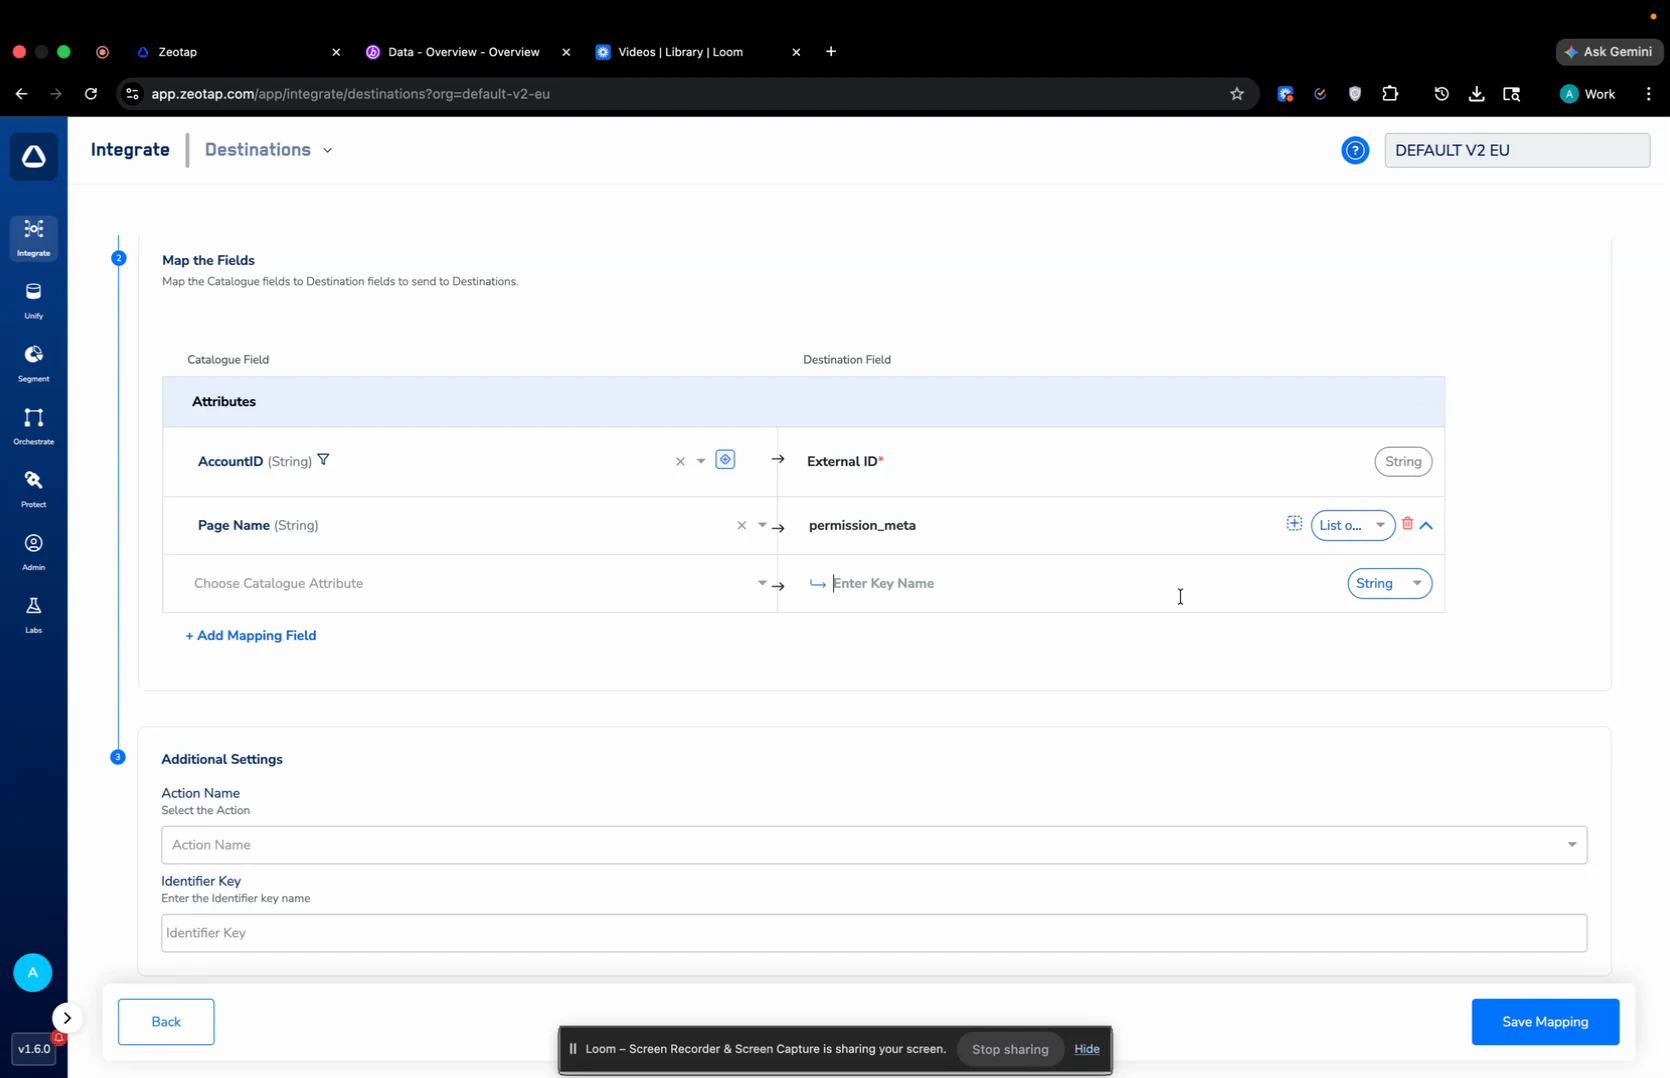
permission_meta). This is the name Braze will store the object under on the user profile.b. Set the row type to List of Objects using the dropdown on the right.c. Choose the parent object — pick an NCE (Non-Catalogue Entity) or any Object you have configured in Zeotap that holds the rows you want to send.5
Build the schema field-by-field under the parent object. For each schema field, map the corresponding NCE / Object attribute on the left to the destination key name on the right. In the example below the schema has four fields: 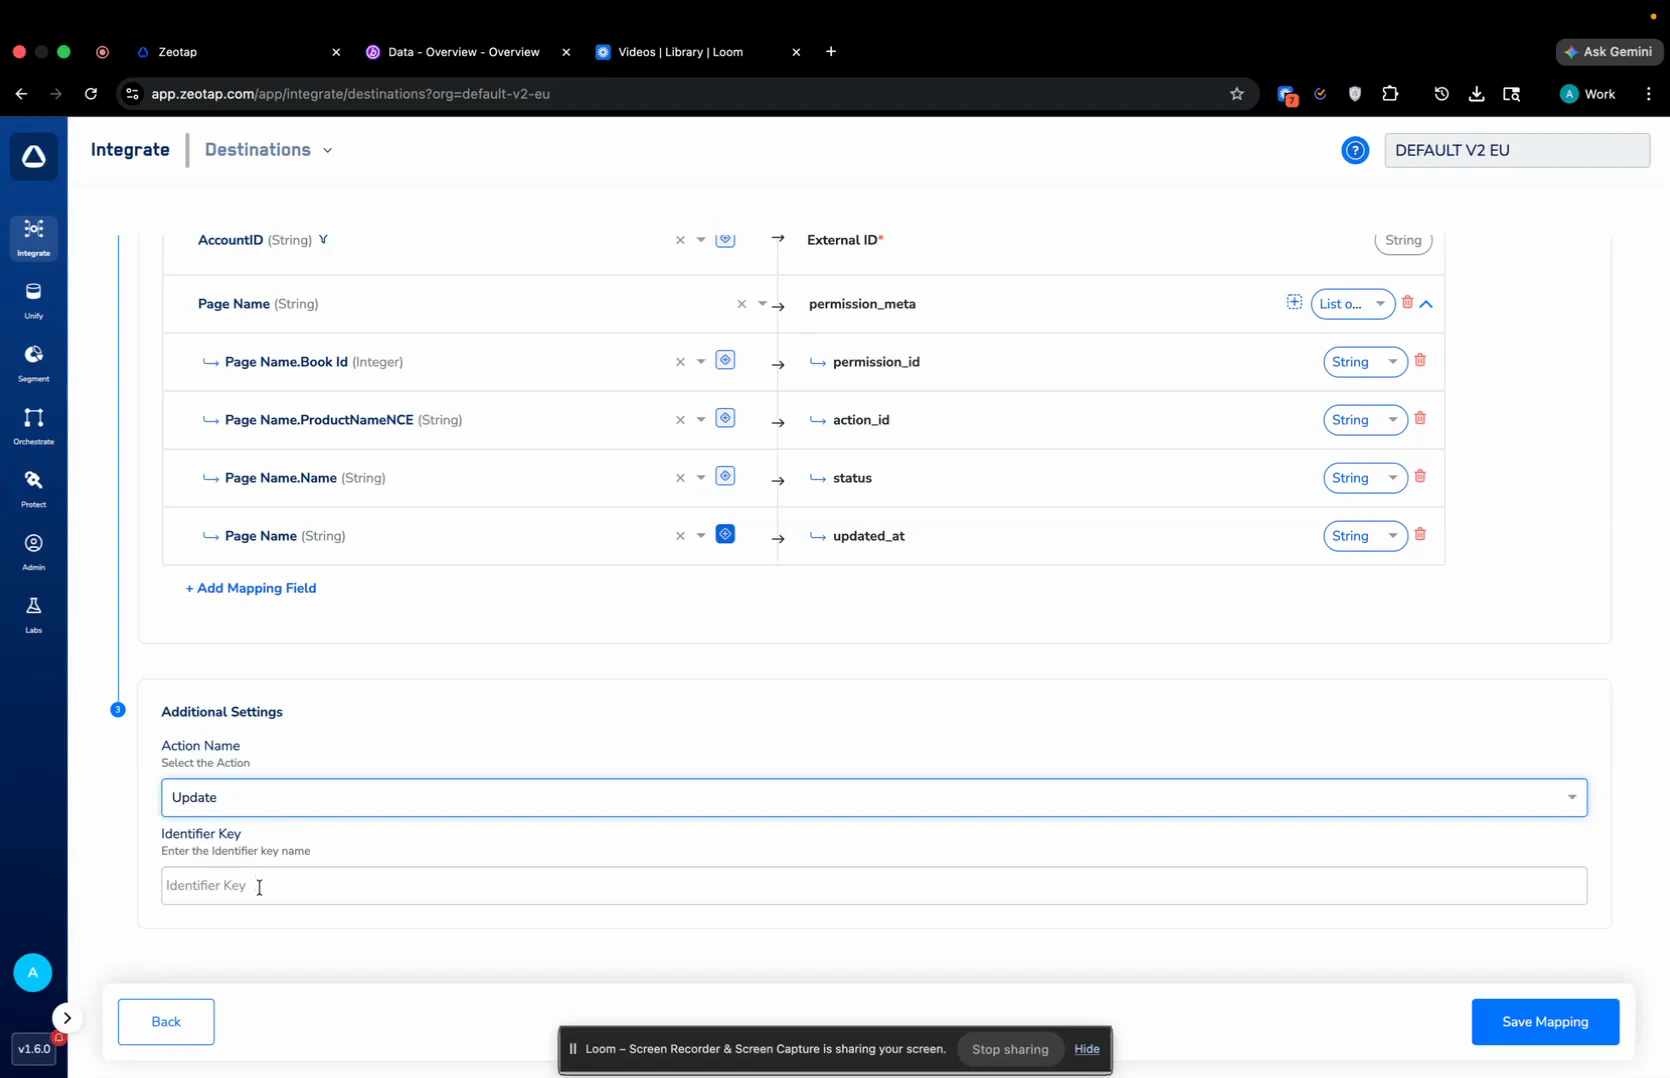
permission_id, action_id, status, and updated_at.The object name (e.g.,
permission_meta) and the schema fields are fully customer-defined. Choose whatever names and types fit your Braze setup — Zeotap forwards the structure as-is.6
For any timestamp field in the schema, use the Timestamp Enricher to send the value in Braze’s expected format. Click the enricher icon next to the timestamp field, choose Timestamp in Choose the Enricher, and select the format 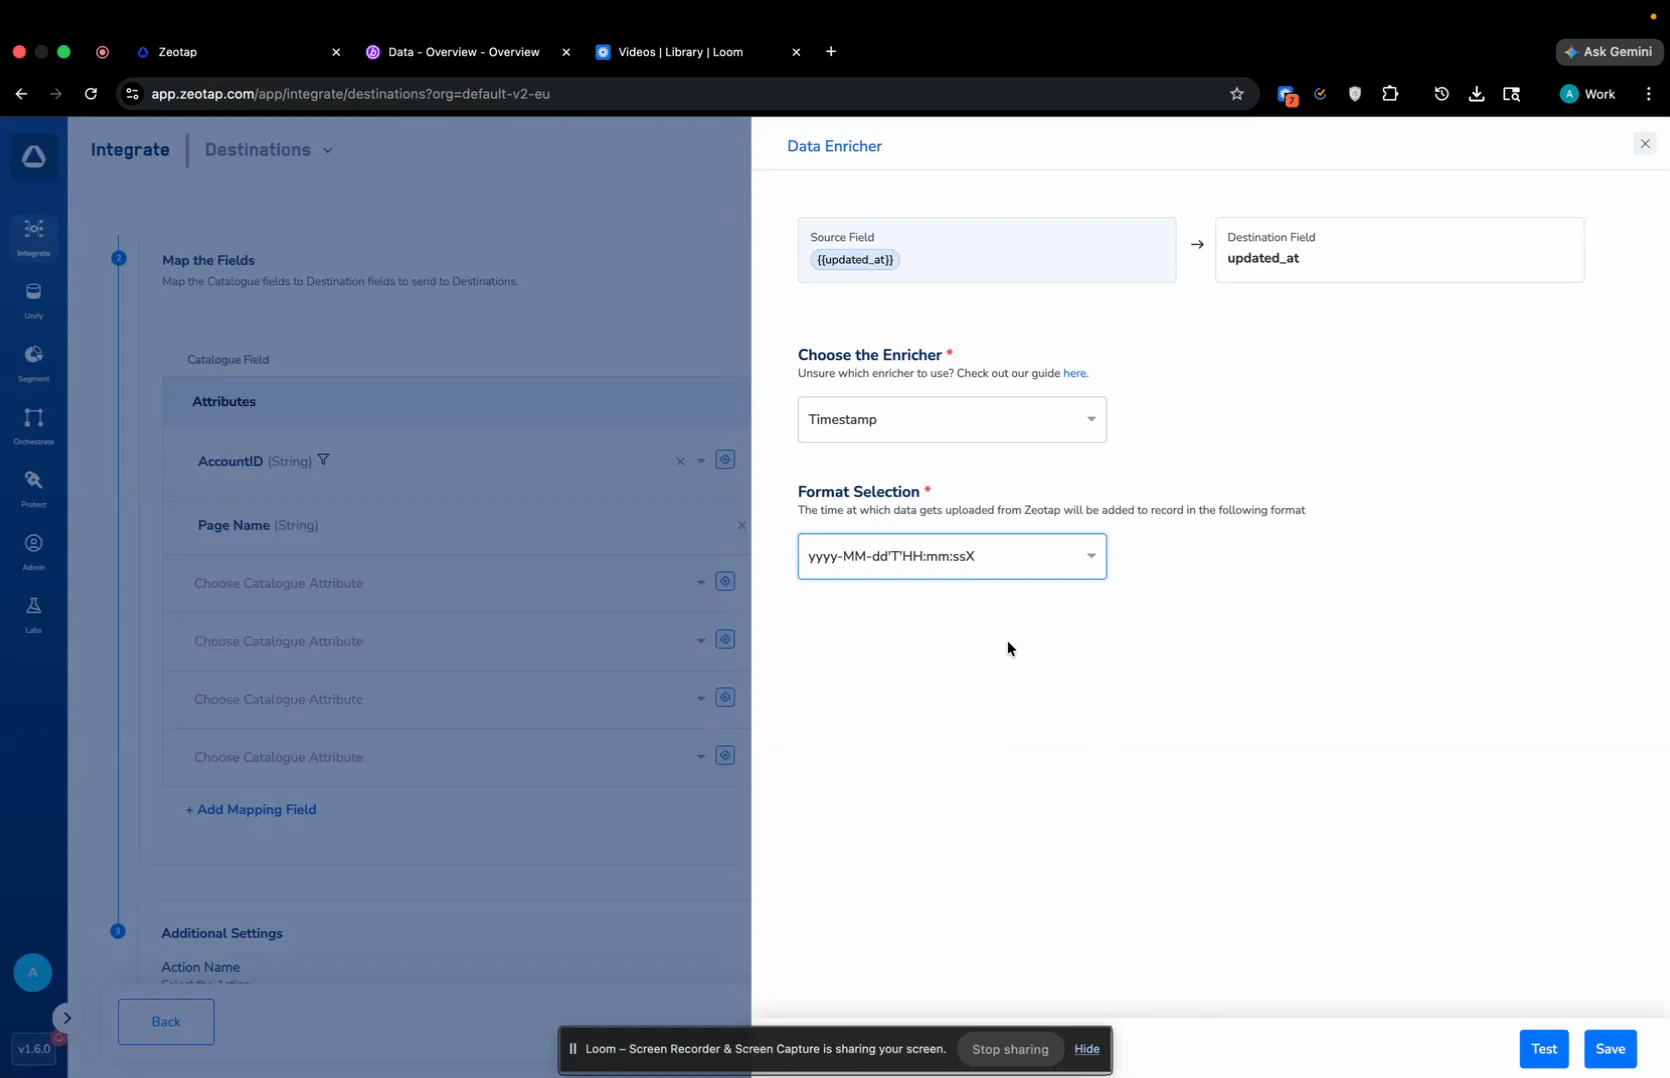
yyyy-MM-dd'T'HH:mm:ssX under Format Selection. Click Save.7
Under Additional Settings > Action Name, choose the operation to perform on the Braze object: Add, Update, or Remove.
- Add — adds the object to the user profile. No further configuration needed; click Save Mapping.
- Update or Remove — modifies or deletes an existing object on the user profile. You must also fill in the Identifier Key field with the schema field that acts as the object’s primary key in Braze (for example,
permission_id). Click Save Mapping.
Attach the Action to a Journey
Once the mapping is saved, attach it inside a Journey workflow:1
Open your Journey in Orchestrate > Journeys. At the point in the workflow where you want the object to fire, click + and choose Send to Destinations.
2
Search for and select your Braze destination. Pick the Object Sync in Braze mapping you just created.
3
Click Save Destination. The Object Sync action now fires for every user who reaches that node in the Journey, with the operation (Add / Update / Remove) you configured in the mapping.
Notes and Limitations
- The object name and schema are fully customer-defined. Choose names and types that match your Braze setup — Zeotap forwards the structure as-is.
- Update and Remove always require an Identifier Key. Add does not.
- For any timestamp field, always use the Timestamp Enricher with the
yyyy-MM-dd'T'HH:mm:ssXformat so the value lands in Braze in the format Braze expects. - This action is enabled for Journeys only — it cannot be linked from the Audiences/Segments flow.