

What this is
The Adobe Target (Delivery API) destination sends data out of Zeotap CDP and into Adobe Target: profile parameters are streamed from a Journeys workflow to Adobe Target in real time. Nothing travels back into Zeotap CDP through this integration. Adobe Target has no source integration — to bring web events and identities from the Adobe stack into Zeotap CDP, use the Adobe Experience Platform Tag Extension source instead. Adobe Target’s Delivery API enables real-time personalisation and targeting of customer experiences across various channels, including web, mobile and email. It allows for the automated delivery of personalised content and offers based on customer data and behaviour, improving engagement and conversion rates.Which Adobe Target integration to use
Zeotap CDP offers three ways to integrate with Adobe Target, described together on the Adobe Target page:- Delivery API — this page. A real-time integration that lets you create personalised experiences based on the activity performed by your customers on the website.
- Single Profile — a real-time integration that sends a profile update for a single user, generally used when an update must occur in relation to a transaction in a channel that has not implemented Target.
- Bulk Profile Update — updates the profiles of multiple website visitors at once from a batch file.
Supported identifiers and actions
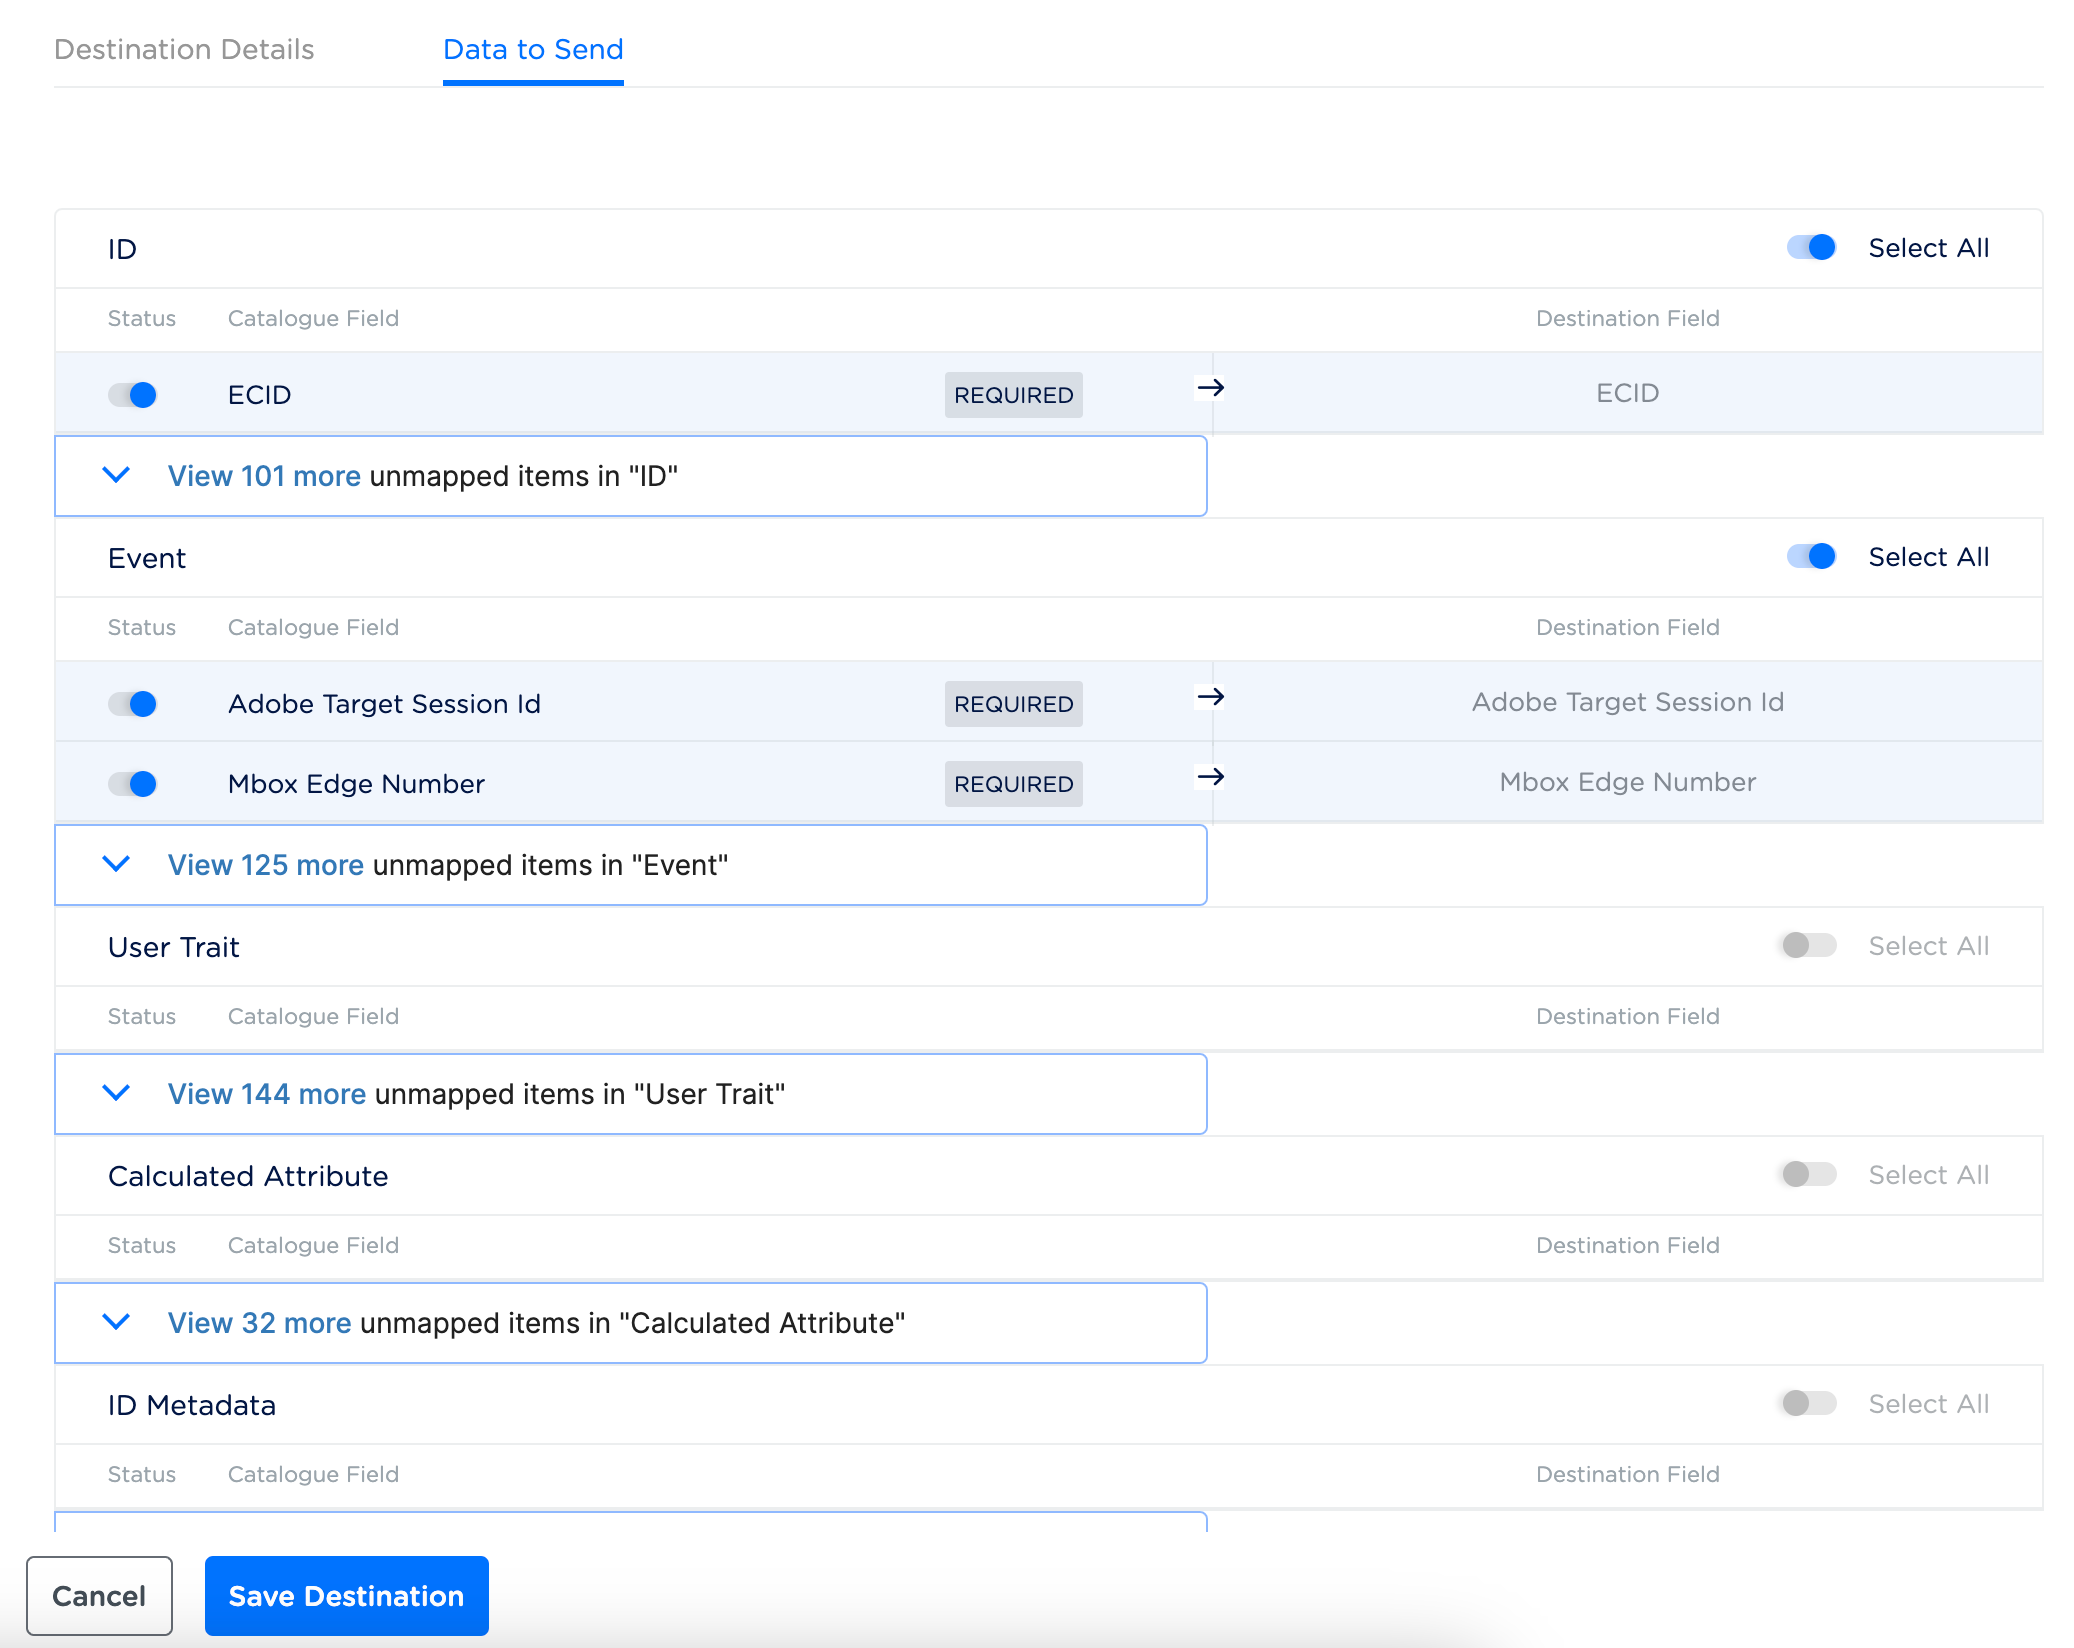
This integration supports ECID, Adobe Target Session Id and Mbox Edge Number. All three are mandatory in the destination mapping.Prerequisites
Gather the following details from Adobe before you create the destination in Zeotap CDP.Property token
A Property Token is a unique identifier assigned to a specific property within Adobe Target. It is used to retrieve or update the property value for a specific instance. You can obtain the Property Token from the Adobe Experience Platform by navigating to Administration → Properties, then opening an existing property or creating a new one with + Create Property. The set of characters inside the implementation code shown in the dialog is your Property Token.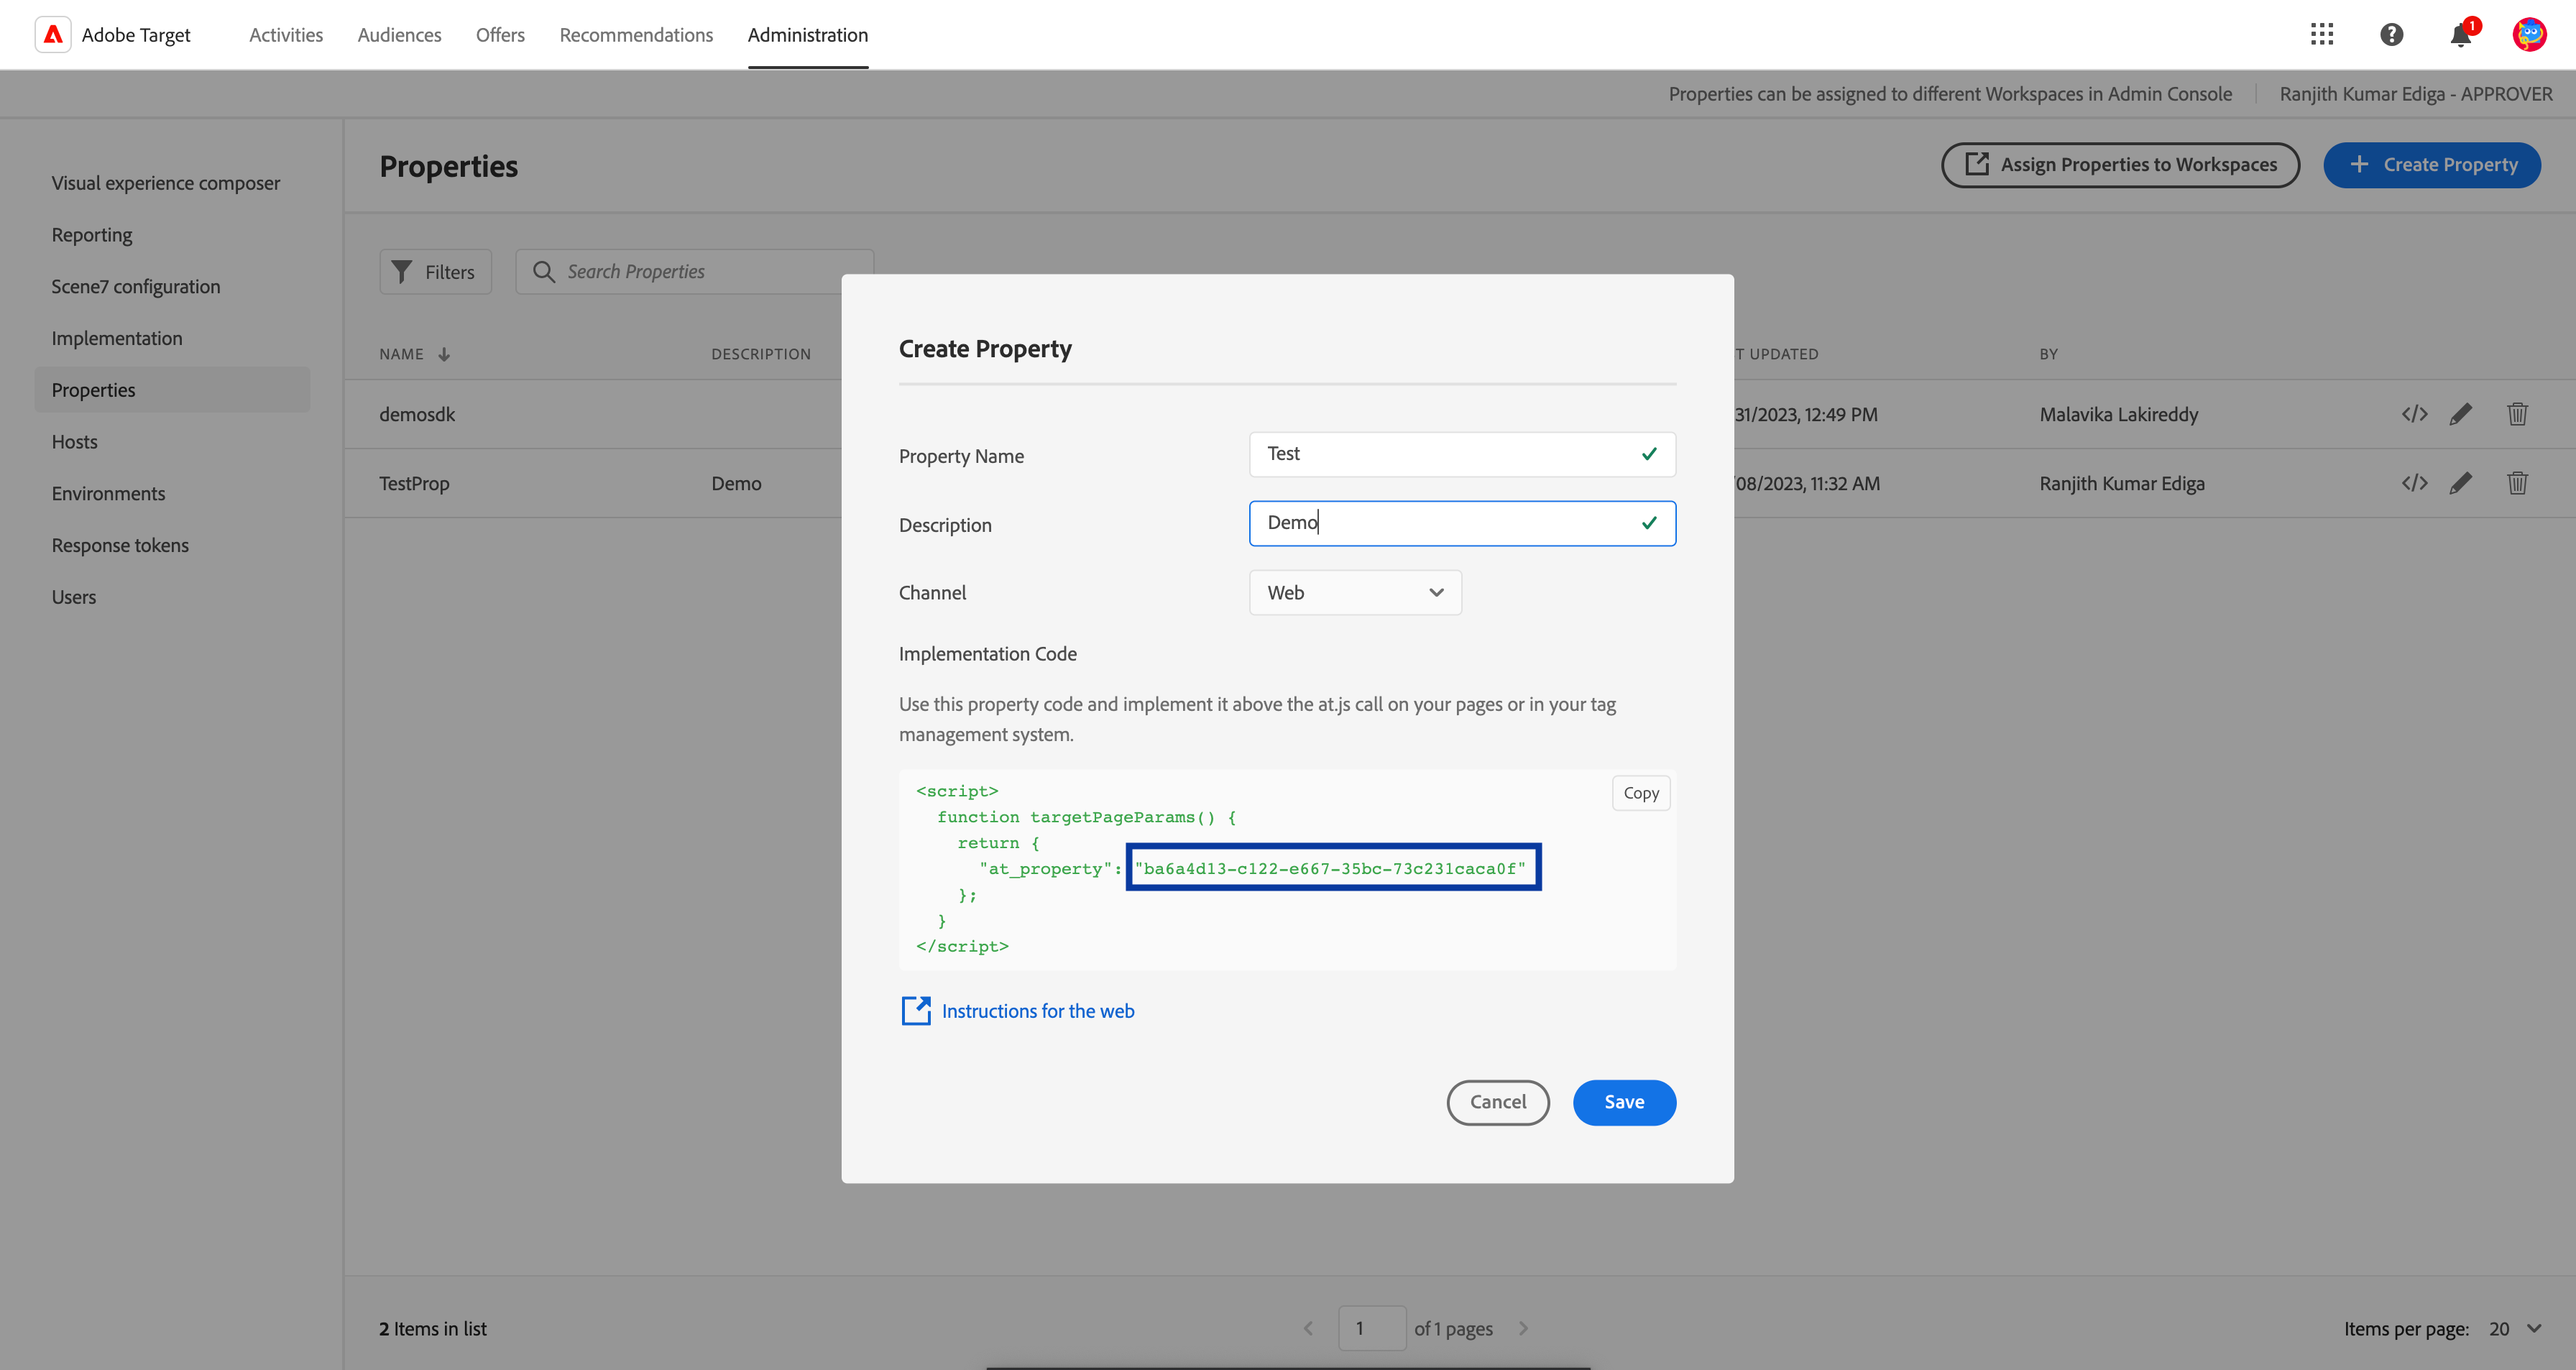
Client code
A Client Code is a unique identifier assigned to a specific client or user to track and personalise their experiences across different channels and devices. You can obtain the Client Code from the Adobe Experience Platform by navigating to Administration → Implementation → Account details.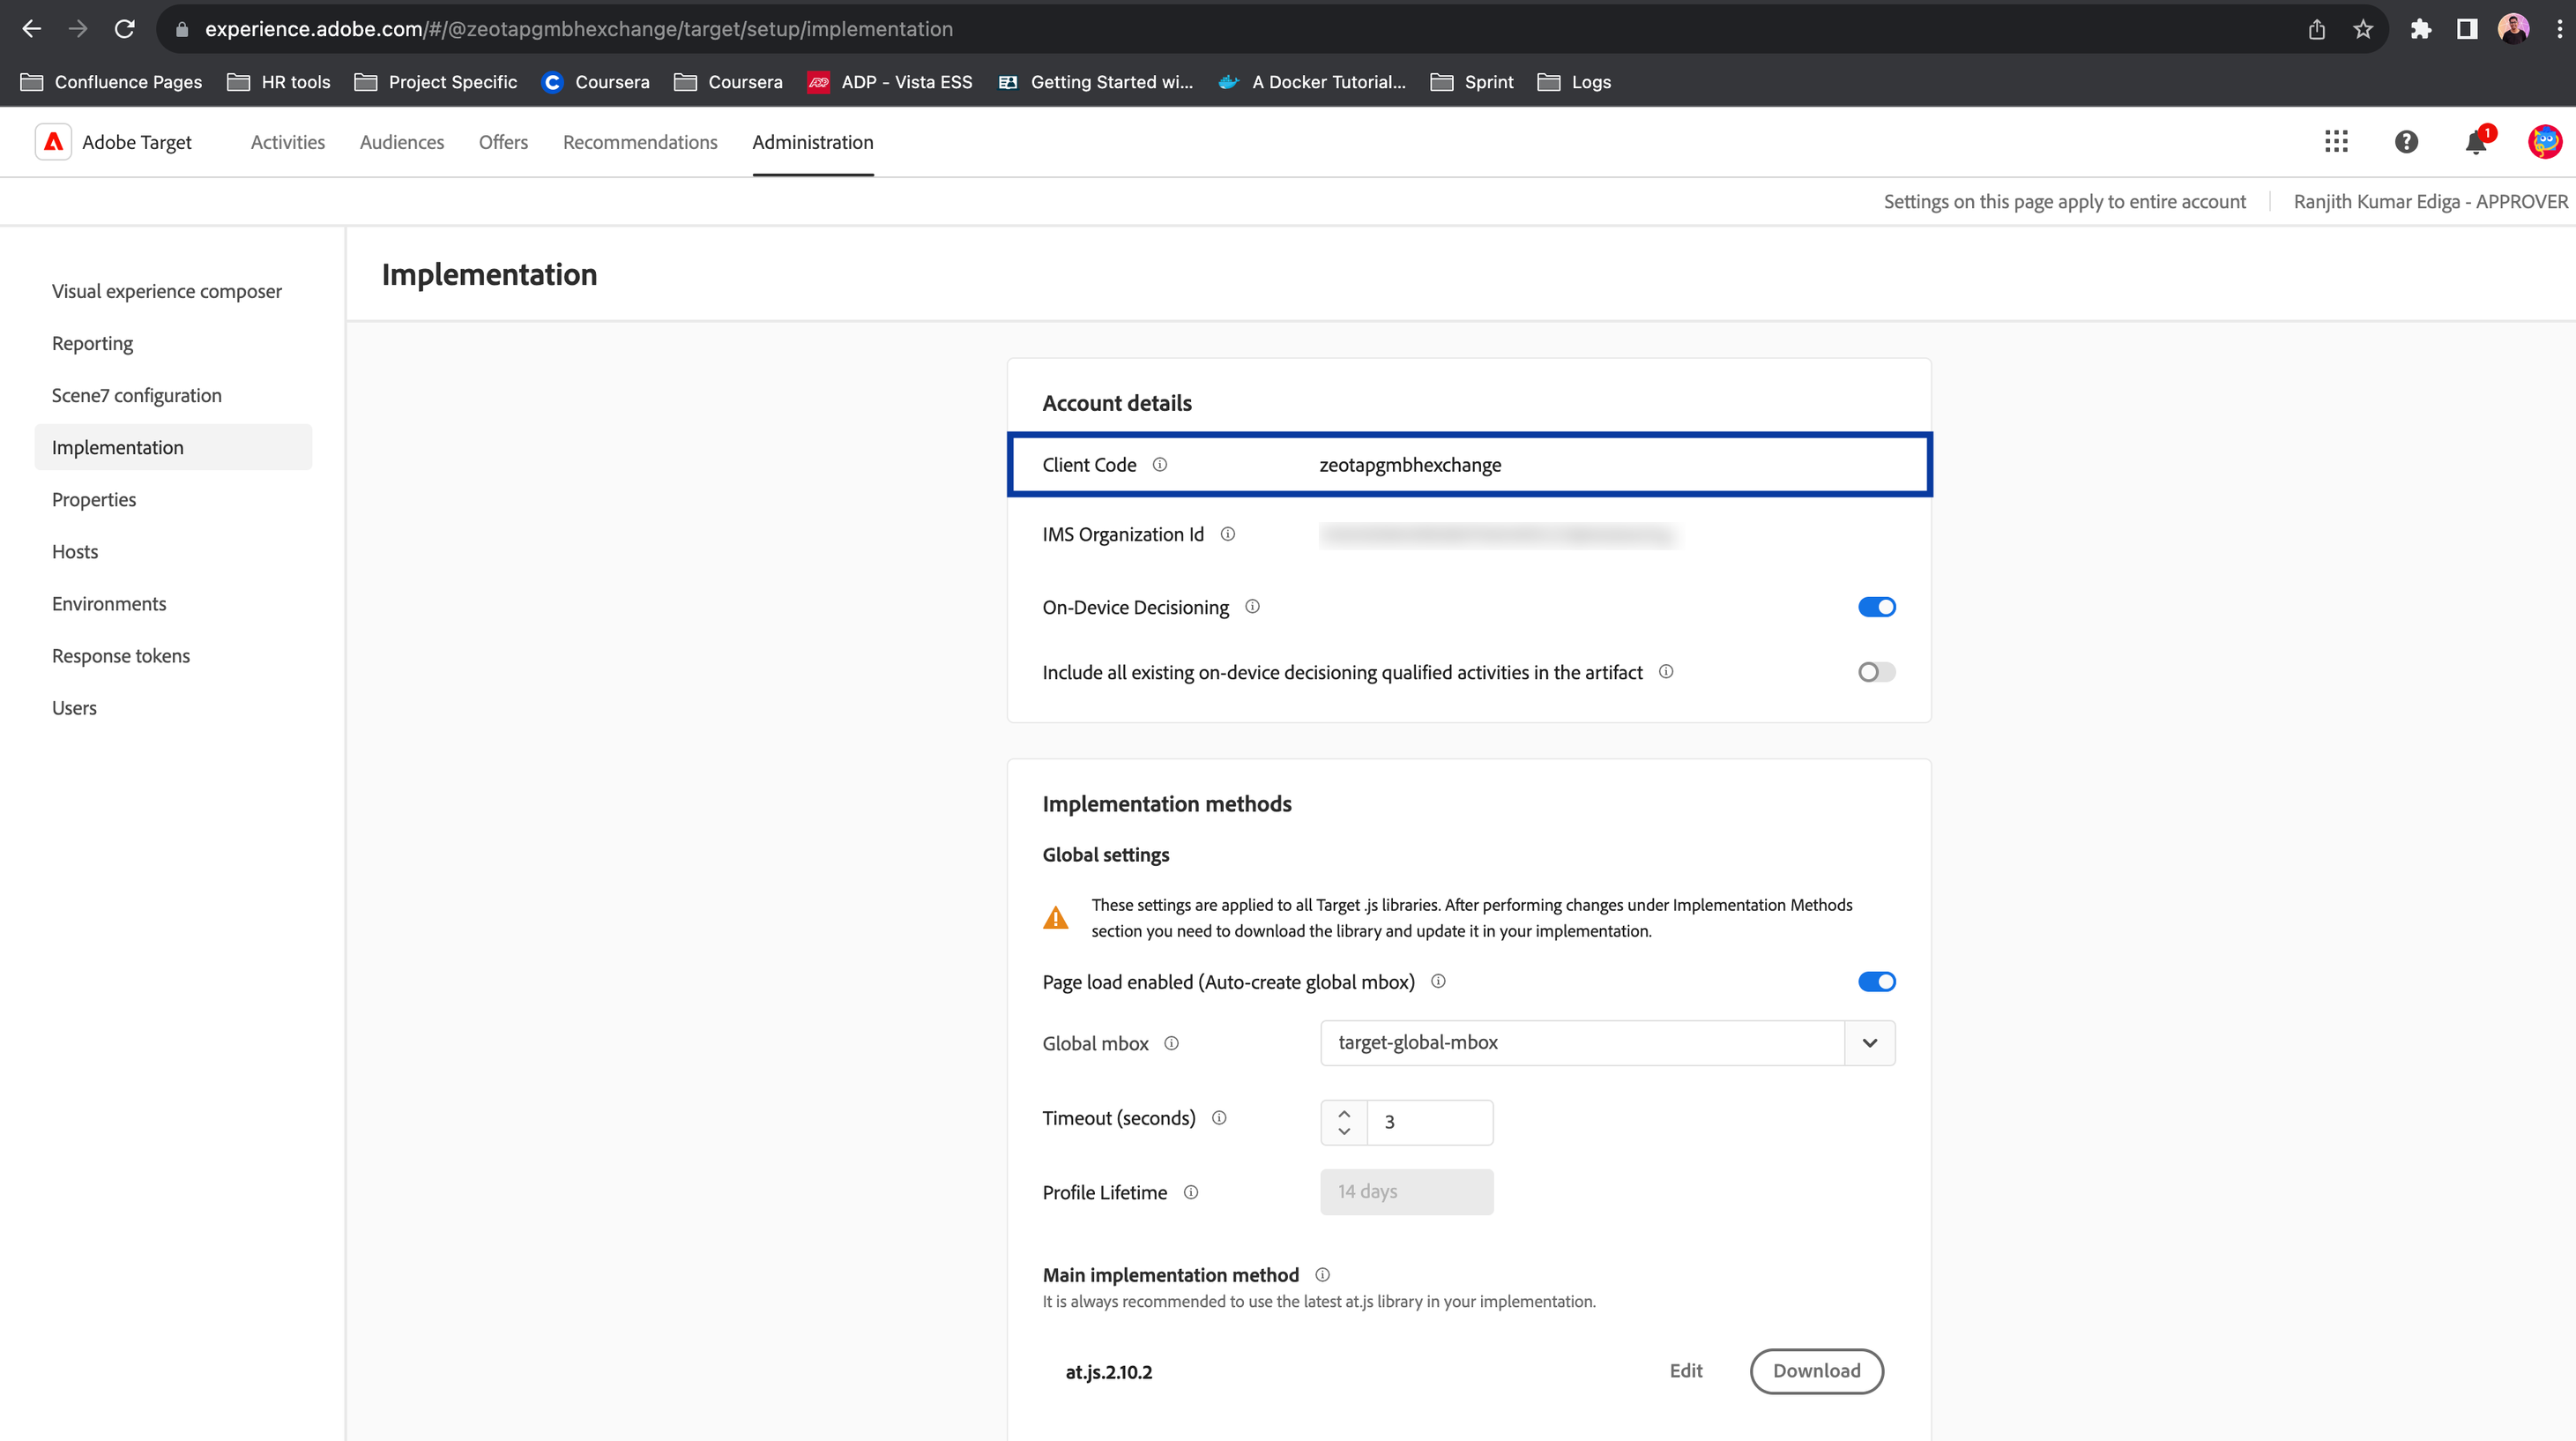
Mbox name
The Mbox Name identifies the mbox account to which you share the profile parameters. You can obtain the Mbox Name from the Adobe Experience Platform by navigating to Activities → Location. The drop-down list shows all the mbox accounts available.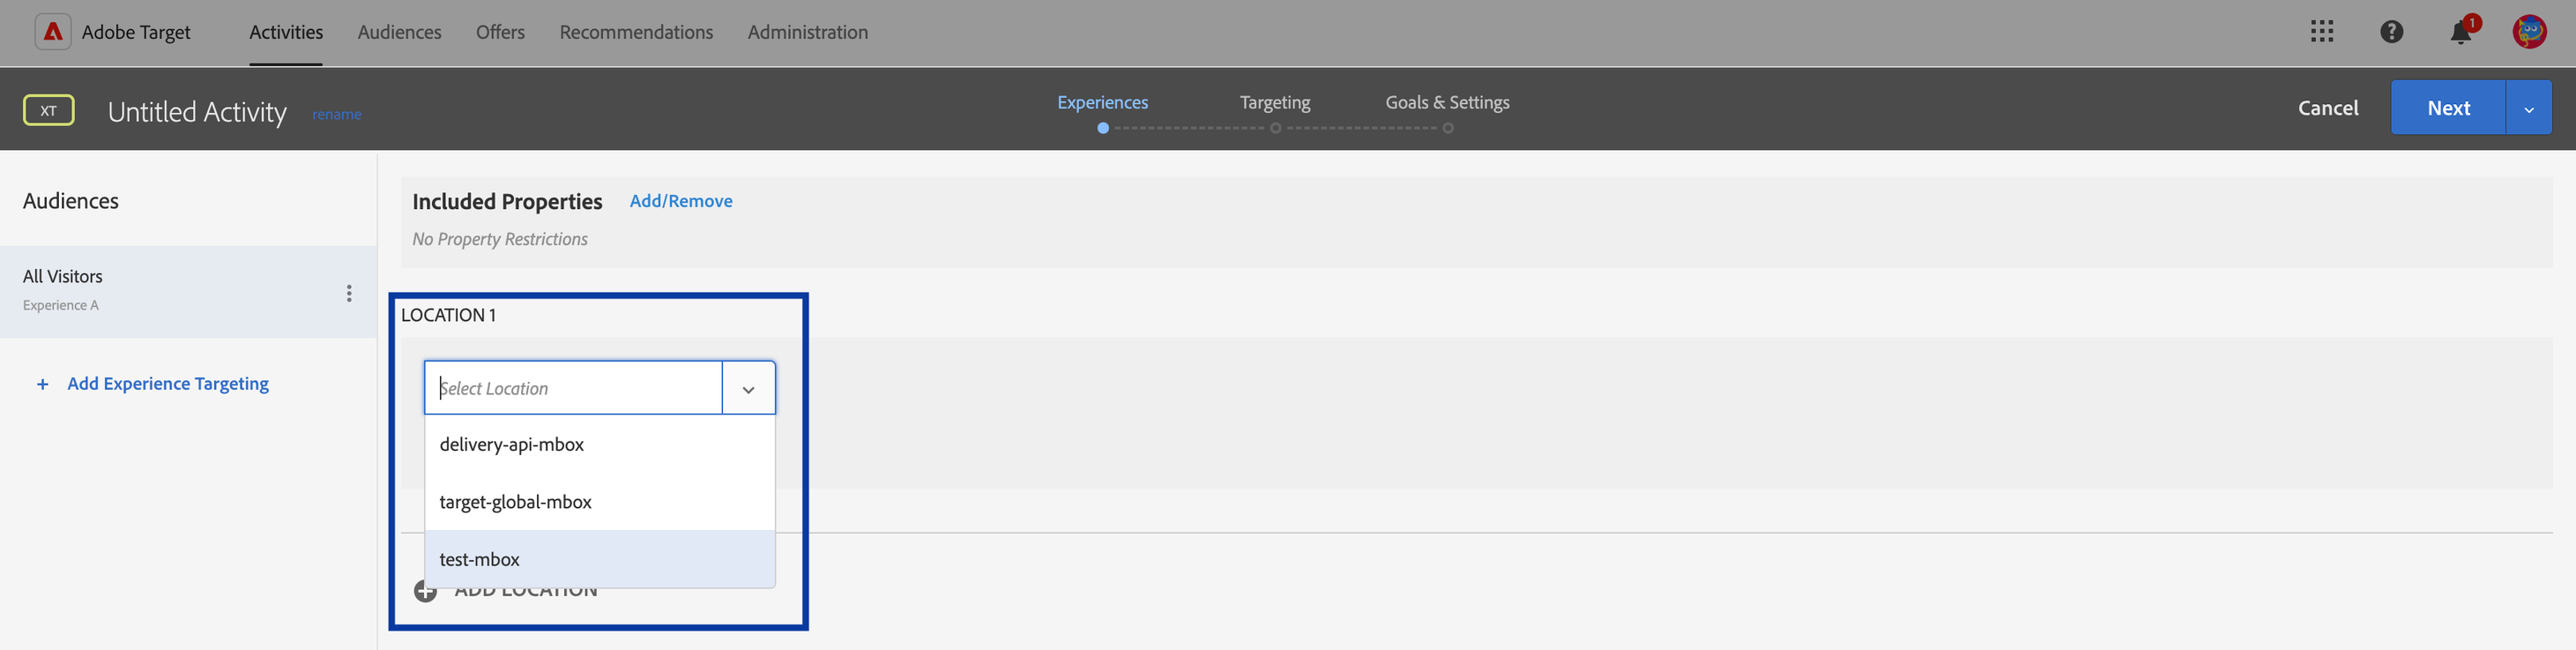
Create the Adobe Target (Delivery API) destination
After you have applied filters or added conditions for your users in Journeys, you activate them under Send to Destinations. A new window opens, where you can set up your destination. You can use an already existing destination from the list of Available Destinations or create a new one.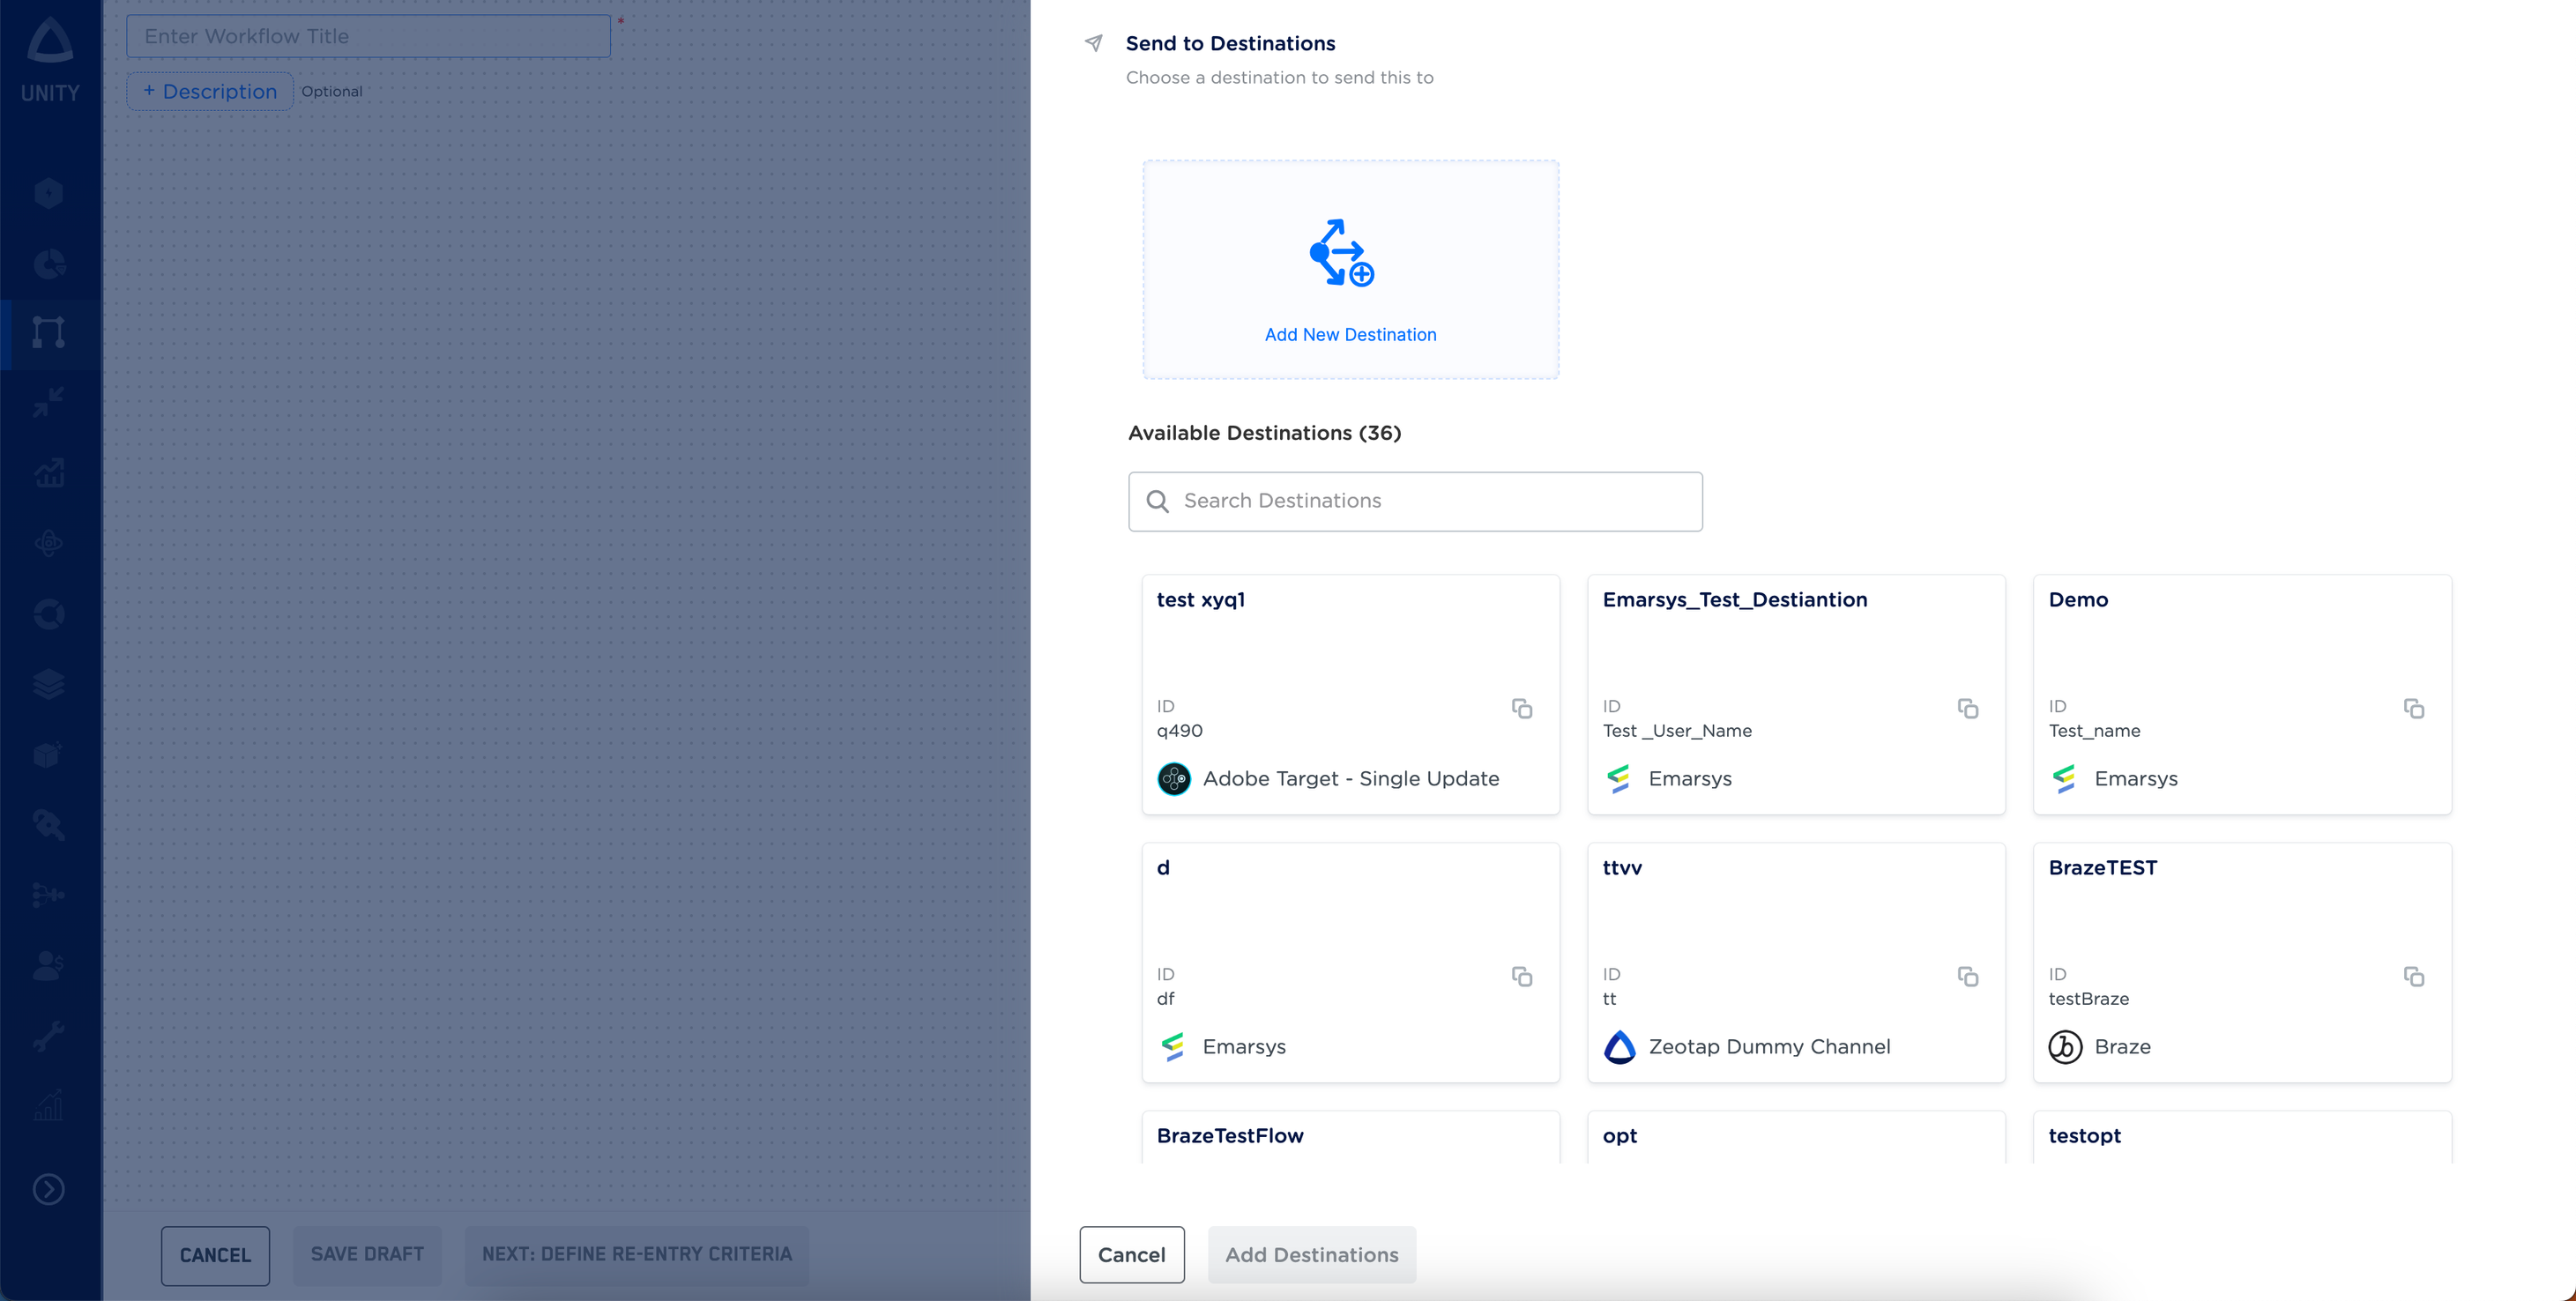
1
Log into the Zeotap CDP App and go to Integrate → Destinations.
2
Click + Create Destination.
3
Under All Destinations, search for Adobe Target - Delivery API.
4
Click Adobe Target - Delivery API.a. Enter a name for the destination.b. Enter the Property Token, Client Code and Mbox Name that you obtained in the prerequisites.
5
Review the fields entered above and click Next.
6
In the mapping screen that appears, under Choose your Action, select Stream attributes to Adobe Target - Delivery API as the action for sending data from the workflow created in Journeys.Under Map the Fields, note that you must mandatorily map ECID, Adobe Target Session Id and Mbox Edge Number. Use + Add Mapping Field to add custom identifiers and attributes you wish to send to Adobe Target (Delivery API).
7
Once the mapping is complete, click Create Destination.
Link the destination to the workflow
After creating a destination, link it to the Journeys workflow and map the relevant source fields to the destination fields in the Data To Send tab.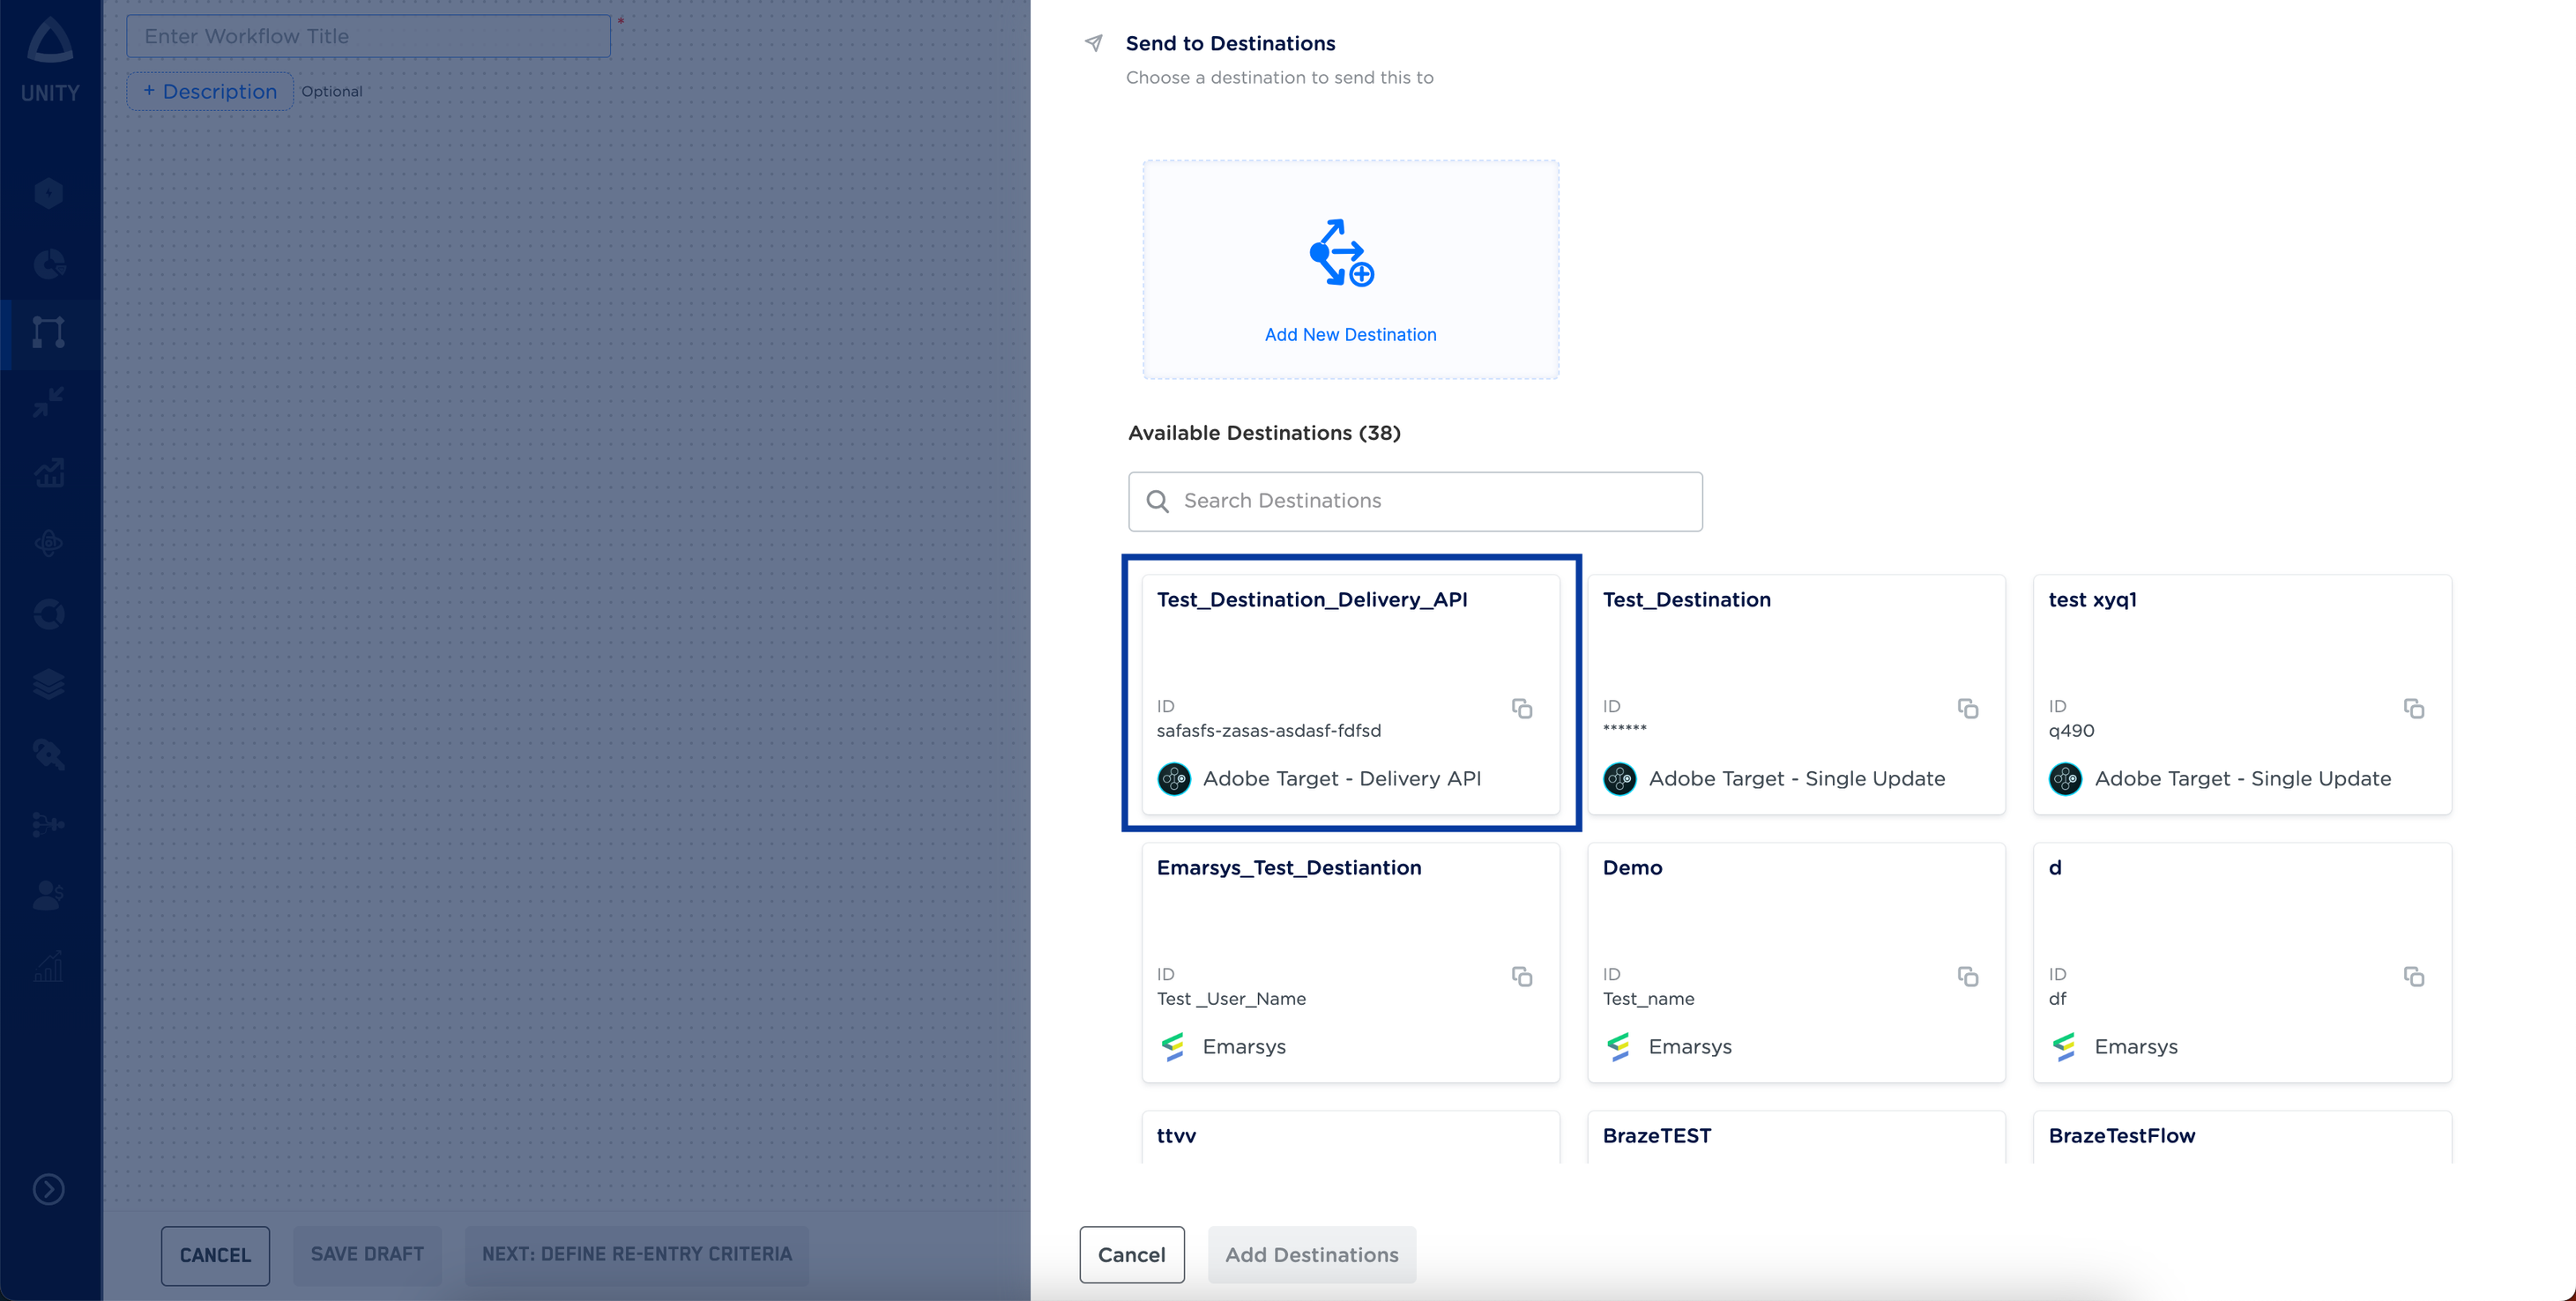
Verify the profile updates in Adobe Target
You can view the profile parameters sent to Adobe Target (Delivery API). To do so, log into the Adobe Experience Platform and perform the following steps:1
Go to the Audiences tab and click Create Audience.
2
Under Attributes, drag and drop Visitor Profile to the middle of the screen.
3
Use the drop-down option on the Visitor Profile to verify the presence of the profile parameters that you have shared through Zeotap.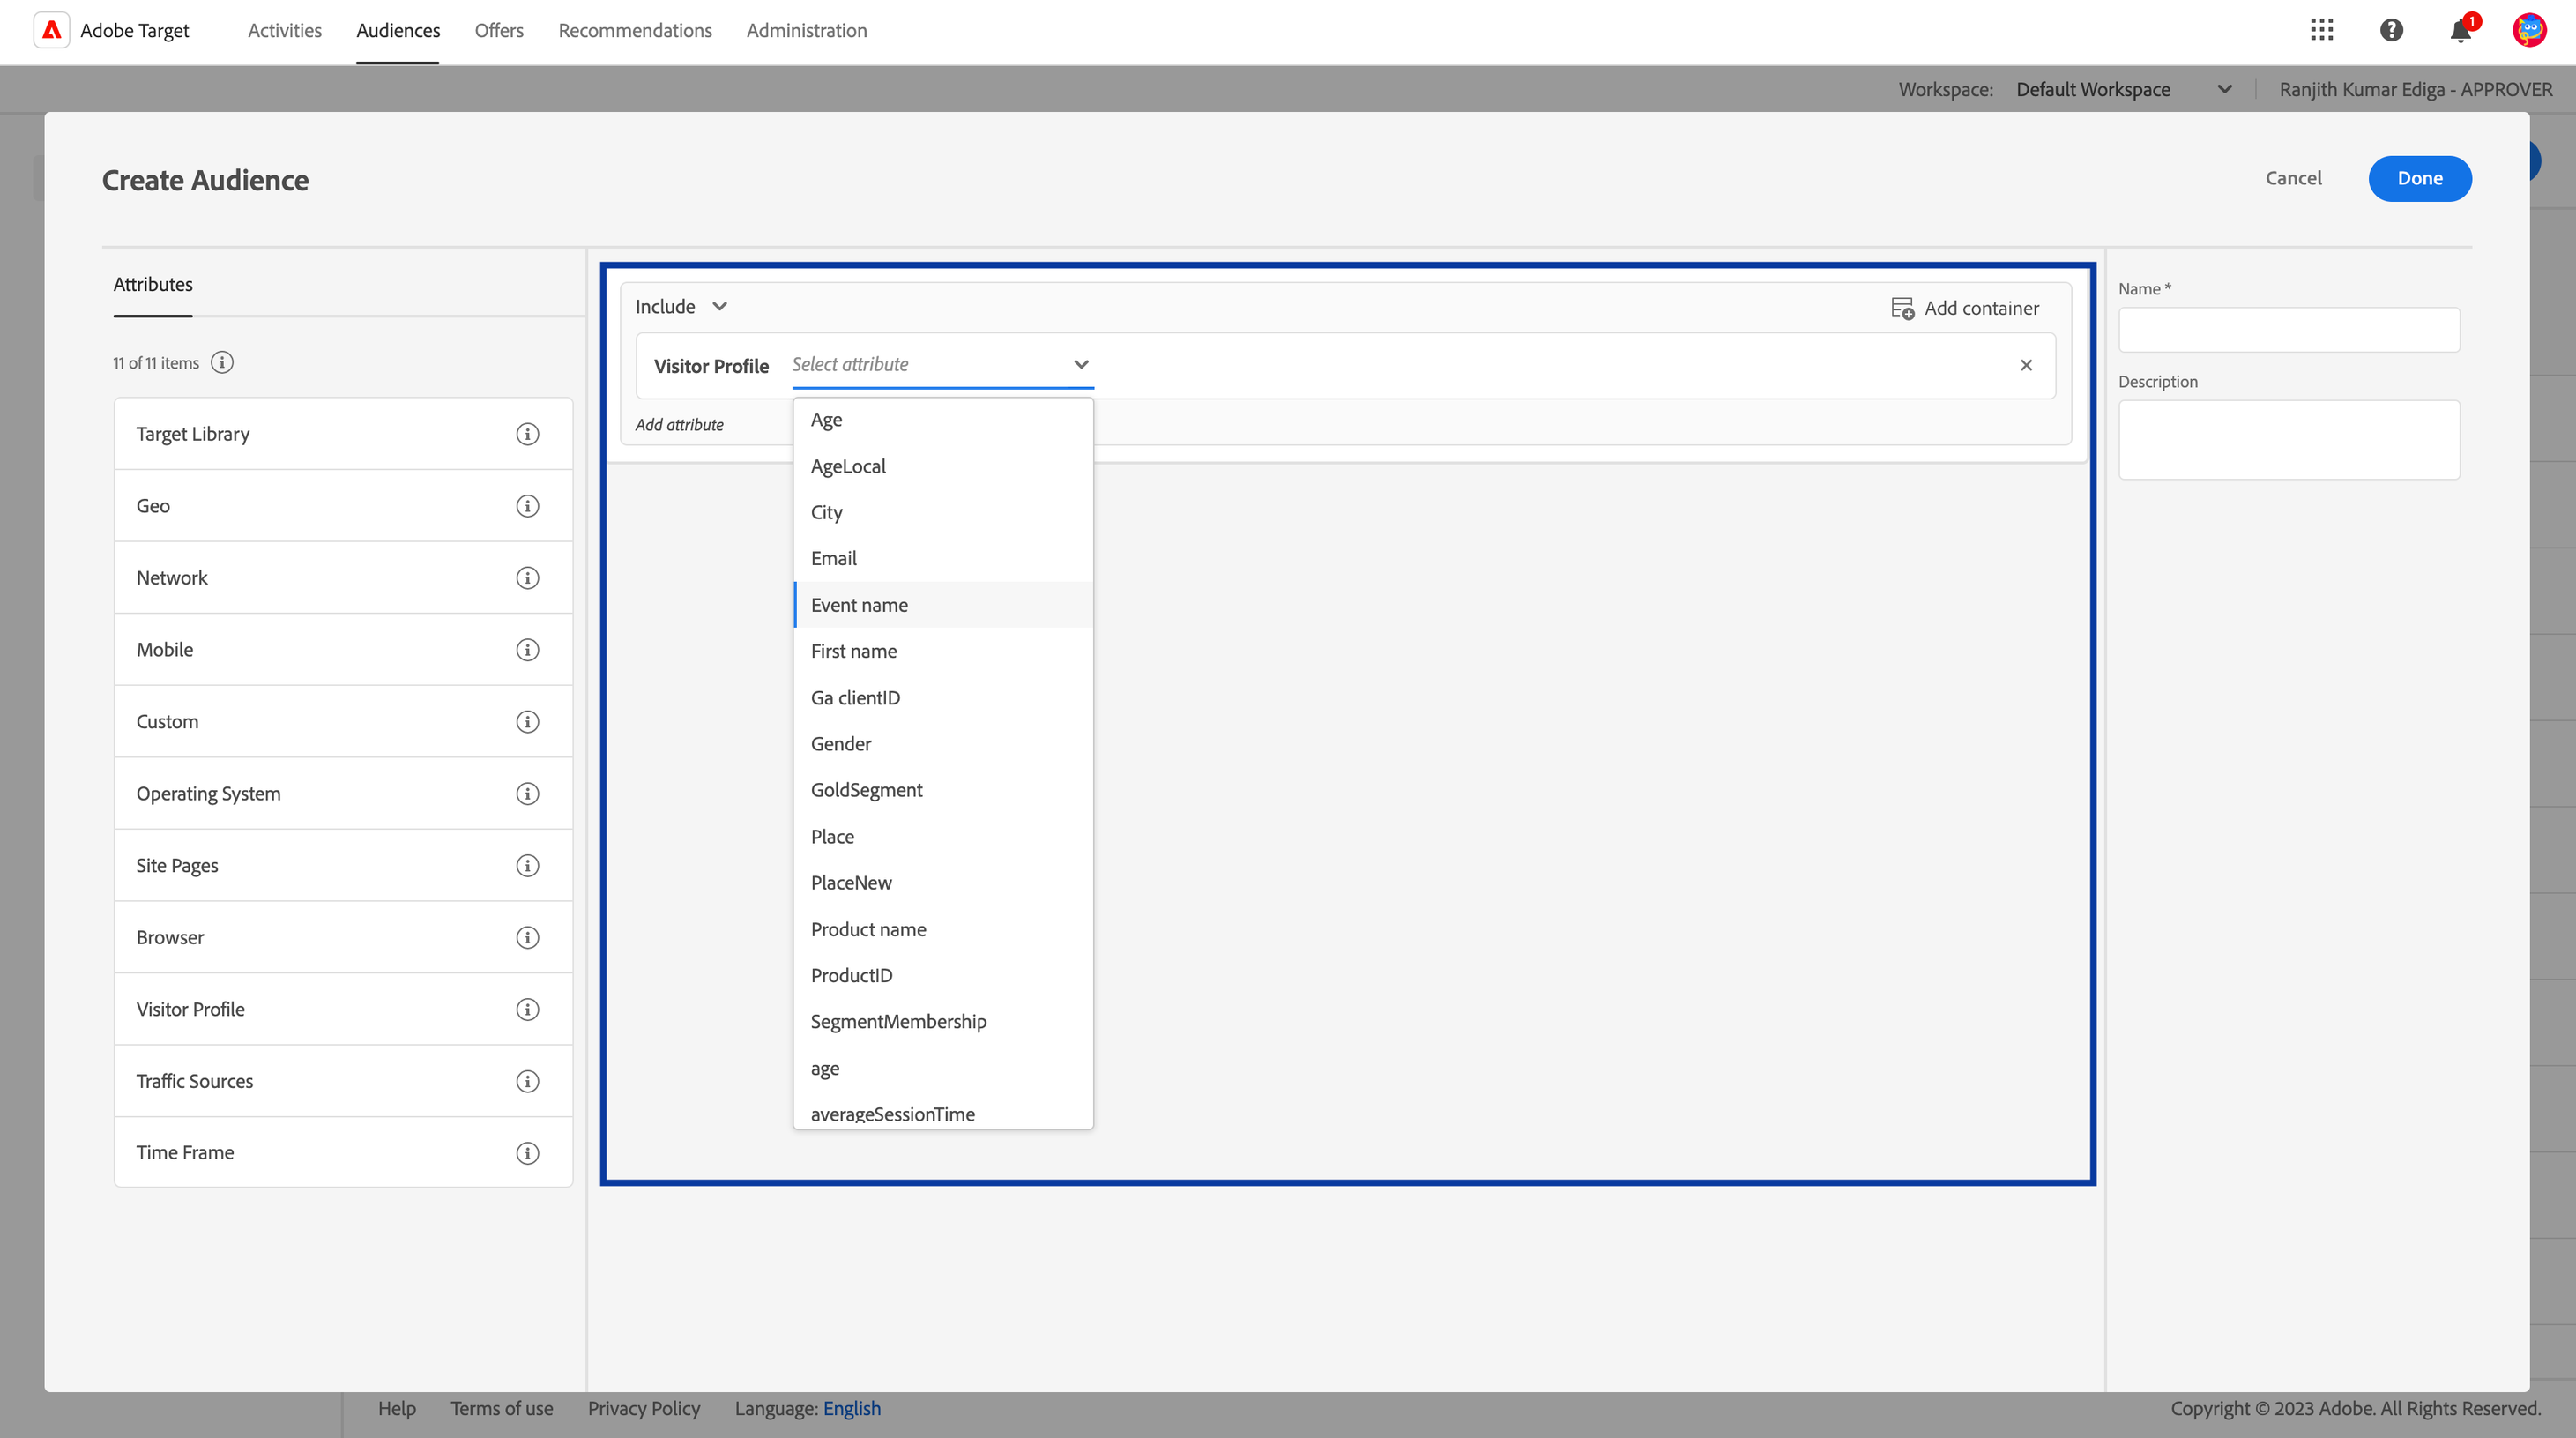
Next steps
- Adobe Target — the three Adobe Target integration modes and when to use each.
- Adobe Target (Single Update) — the other real-time Adobe Target destination.
- Adobe Target (Bulk Update) — the batch route, for updating many visitor profiles at once.
- Activate your real-time audiences — activating a workflow on any real-time integration.
- Destinations — how deliveries are verified, why they fail and when to raise a support ticket.
- Delta upload and delete functions — how refreshes send only what has changed.
- Updating profiles — Adobe’s own reference for single and bulk profile updates.