

1
Enter a Catalogue Field. As you type, suggestions based on the existing Catalogue Fields appear. You can choose a suggested Catalogue Field or click +Add Catalogue Field to add a new field.
2
Map the Catalogue Field to its corresponding Source Field. Same as the above behaviour, you can choose a suggested Source Field or click +Add a new Source Field to add a new field.
3
Enter a description for easy identification.
4
Choose Consent as the Category.
5
Choose String as the Data Type. Consent only stores Yes or No type of value. Therefore, the only Data Type allowed is String.
6
7
As per advanced settings, define the TTL for consent. Forever is the default value. You can choose the number of Days for TTL as per your requirement. A consent purpose maintains a timestamp property that gets updated every time a state is communicated. This is used to determine how long the value can be retained based on the TTL value.
8
Save the changes.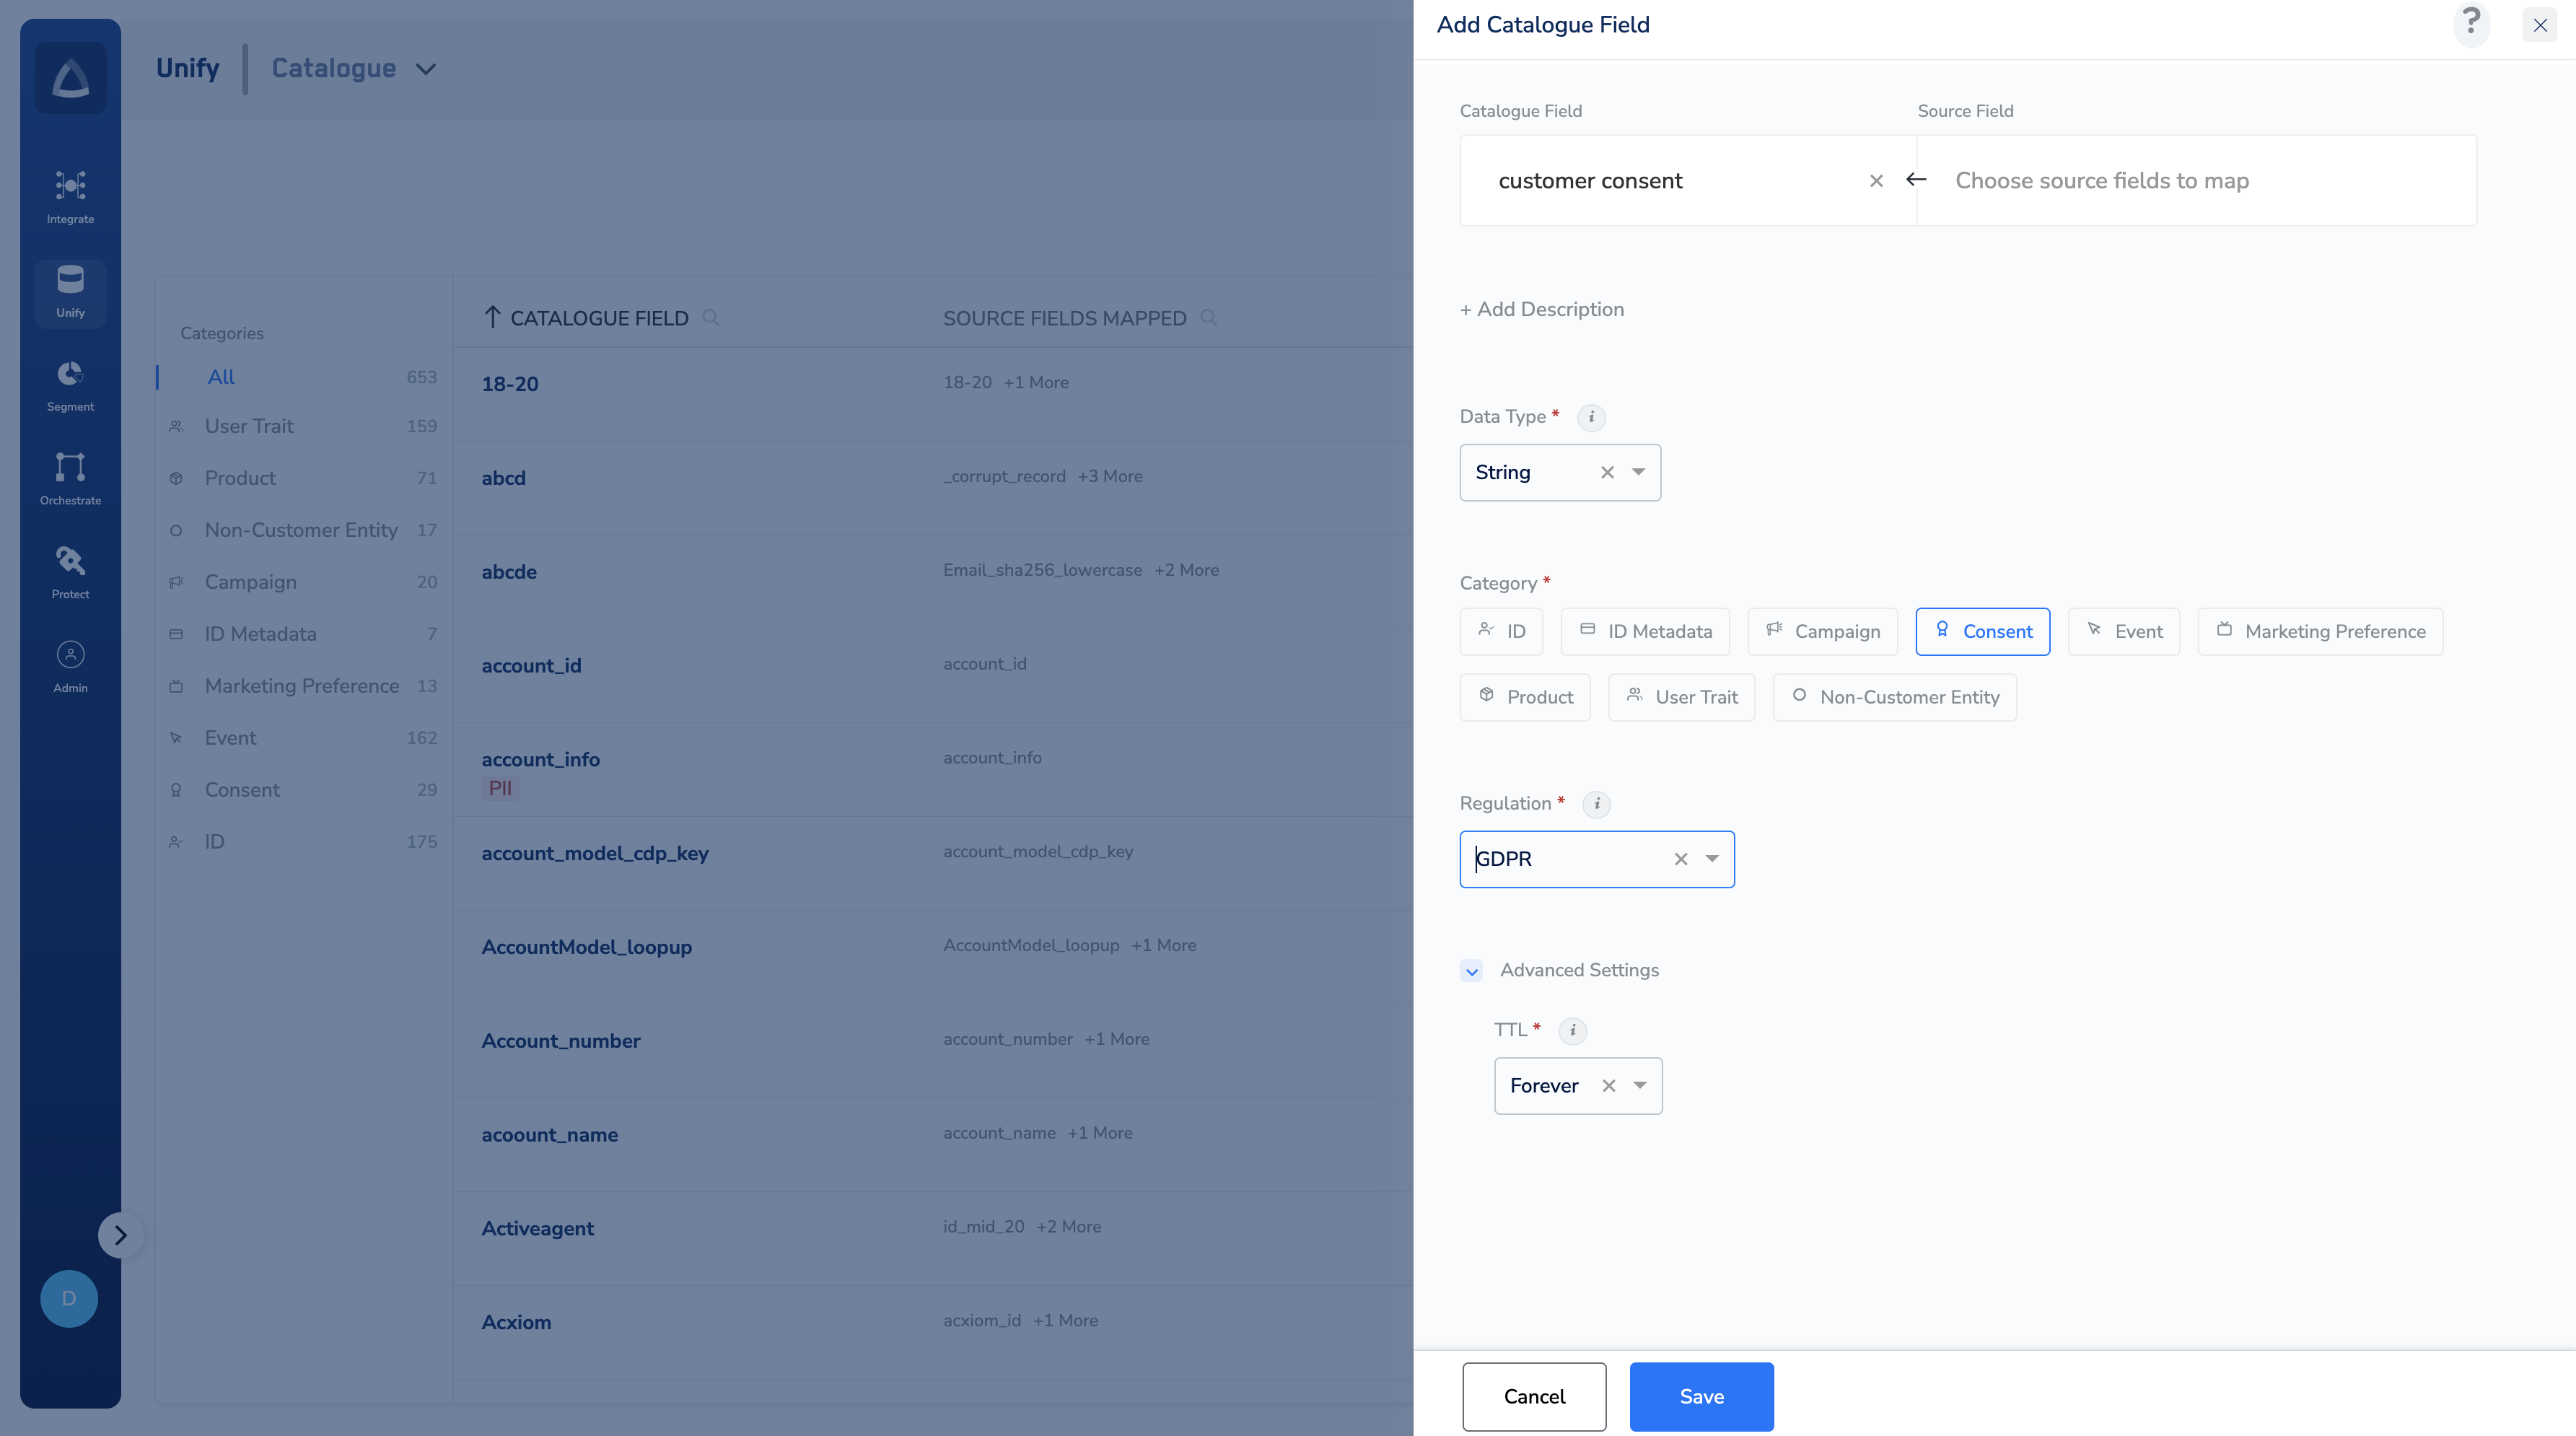
Note:In Step 4 the accepted values for a consent field in are
Yes, No, and Not Given (information is not present). Any other value will not be recognised during consent evaluation.In Step 7 each consent field maintains a timestamp that is updated every time a new consent state is received. The TTL is calculated from this timestamp — not from the date the field was created. Setting TTL to Forever means the consent value is retained indefinitely until a new value is received.The Catalogue Field name you choose acts as the consent purpose identifier. Use a clear, descriptive name (for example, gdpr_consent_email) as this name will appear when configuring Audience Templates, Journeys, or Channel Consent Rules.