

What this is
The Insider Webhook source brings event data from Insider into Zeotap CDP: you create the source in Zeotap CDP, then build a webhook integration in Insider that posts the events you select to the endpoint Zeotap generates for that source. This page covers the Insider-side configuration — the second half of the setup. The first half, creating the source itself, is on Create an Insider Source. To send data in the opposite direction — out of Zeotap CDP to Insider — use the Insider destination instead. That integration sends the attributes and identifiers of a Zeotap CDP audience, and events from Journeys workflows, to Insider.When you build the webhook in Insider you set the Integration Type to Destination. That describes the direction from Insider’s point of view — Zeotap is the destination Insider posts to — and is what makes this integration a source in Zeotap CDP.
Supported events
You choose which of Insider’s events trigger the webhook. Its default events are grouped as follows; the Rules screen also offers a Custom Events trigger. The default events are grouped as follows:
Alongside the events themselves you can send event parameters and additional attributes, and you can narrow the users whose events are sent with a segment filter. All three are configured in the Rules step below.
Prerequisites
- An Insider source created in Zeotap CDP. See Create an Insider Source.
- The API URL and Write Key for that source. Both are generated when the source is created and appear under IMPLEMENTATION DETAILS. Note them down before you start:
- The API URL is used to establish a connection between Insider and Zeotap.
- The Write Key is used to securely ingest data from Insider to Zeotap.
- Access to your Insider account, with External Integrations available under Integrations in the left panel and permission to create and launch a webhook integration.
Configure the webhook in Insider
Perform the following steps to configure the webhook within Insider:1
Log into your Insider account.
2
In the left panel, under Integrations, click External Integrations.
3
In the new screen that appears, search and find Webhook as shown in the image below.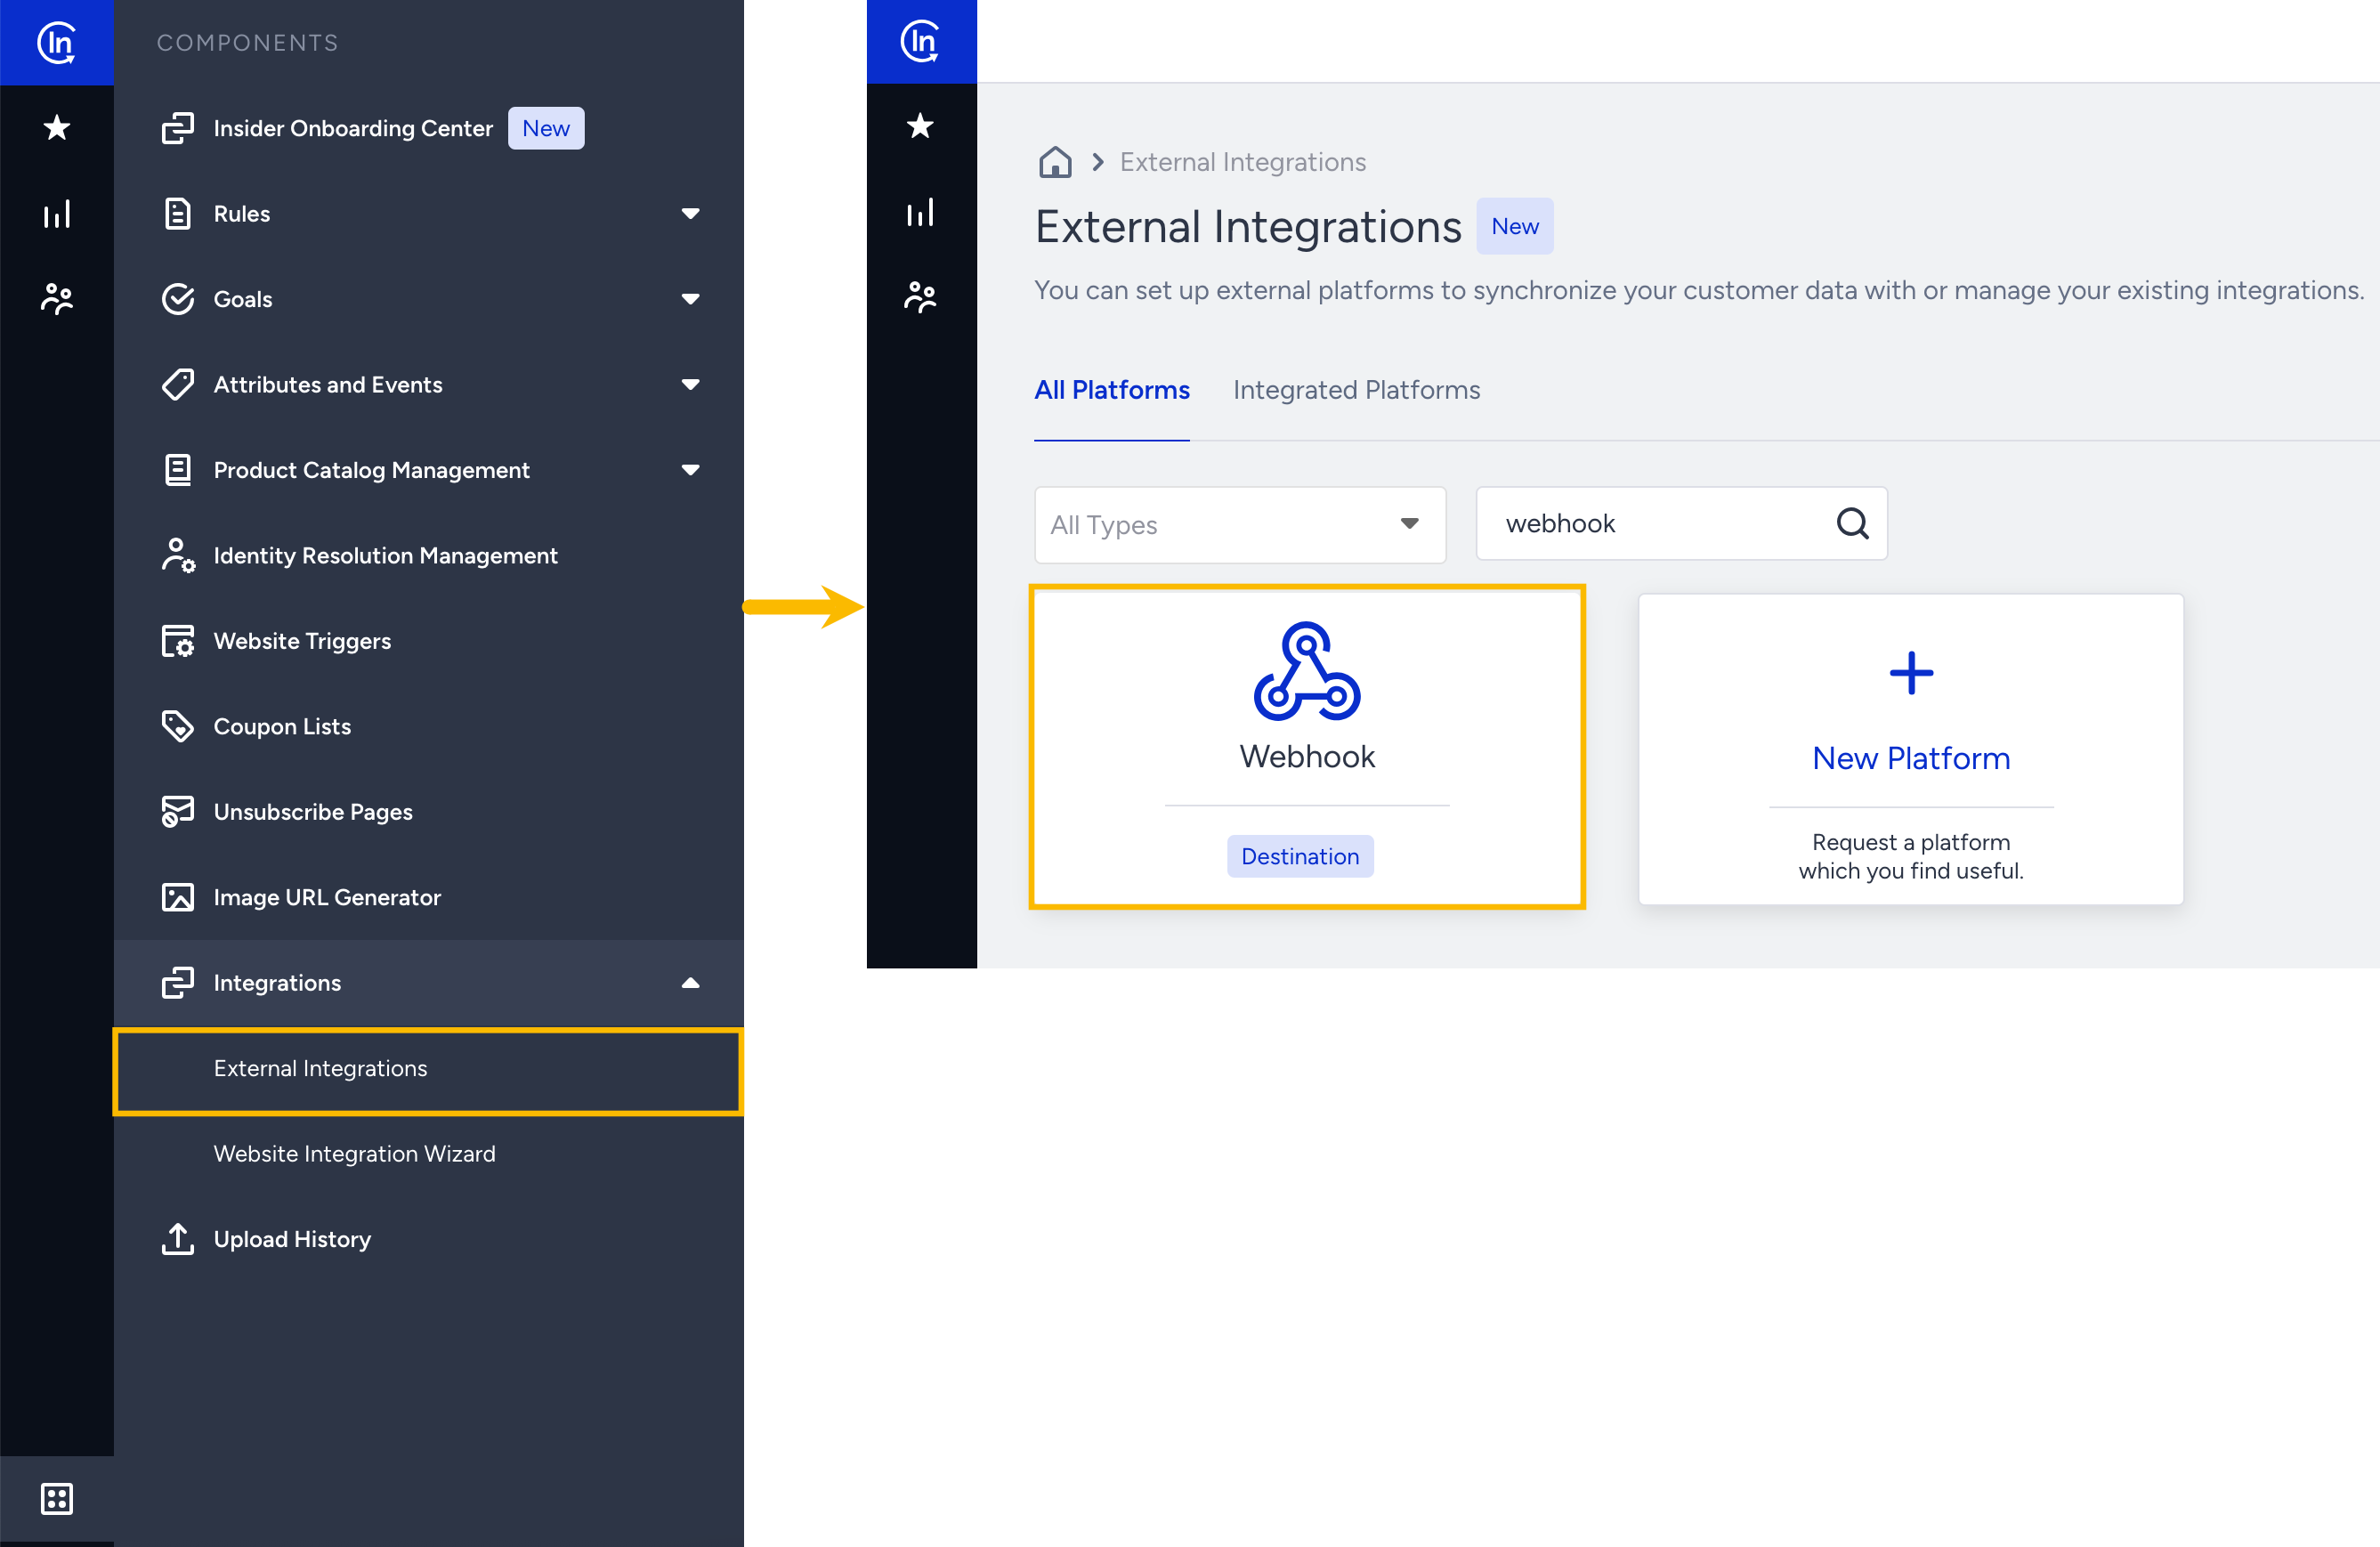
4
Click Webhook and provide a Name for your integration for easy identification.
5
Under Integration Type, select Destination and click Save.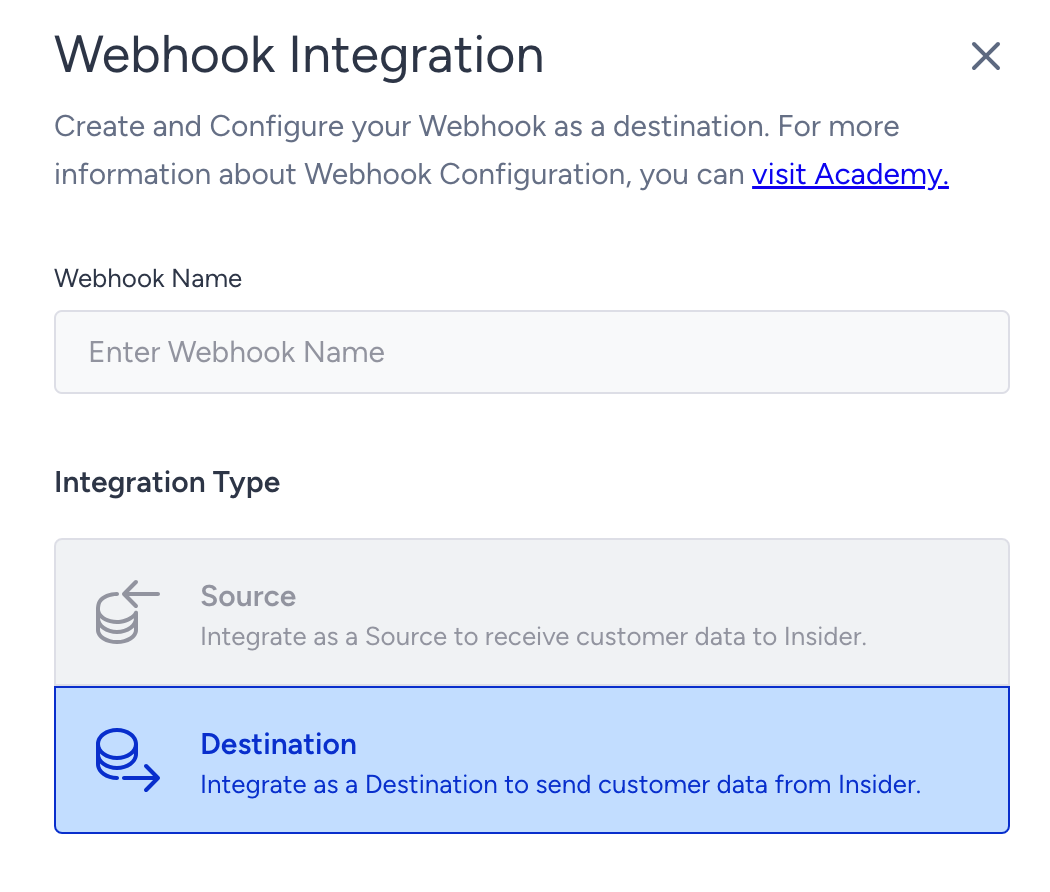
6
In the Rules screen that appears, use the Events and Attributes tabs to choose the event type you wish to send from Insider to Zeotap CDP. The triggers are grouped by channel. For better understanding, let’s say you choose User Events.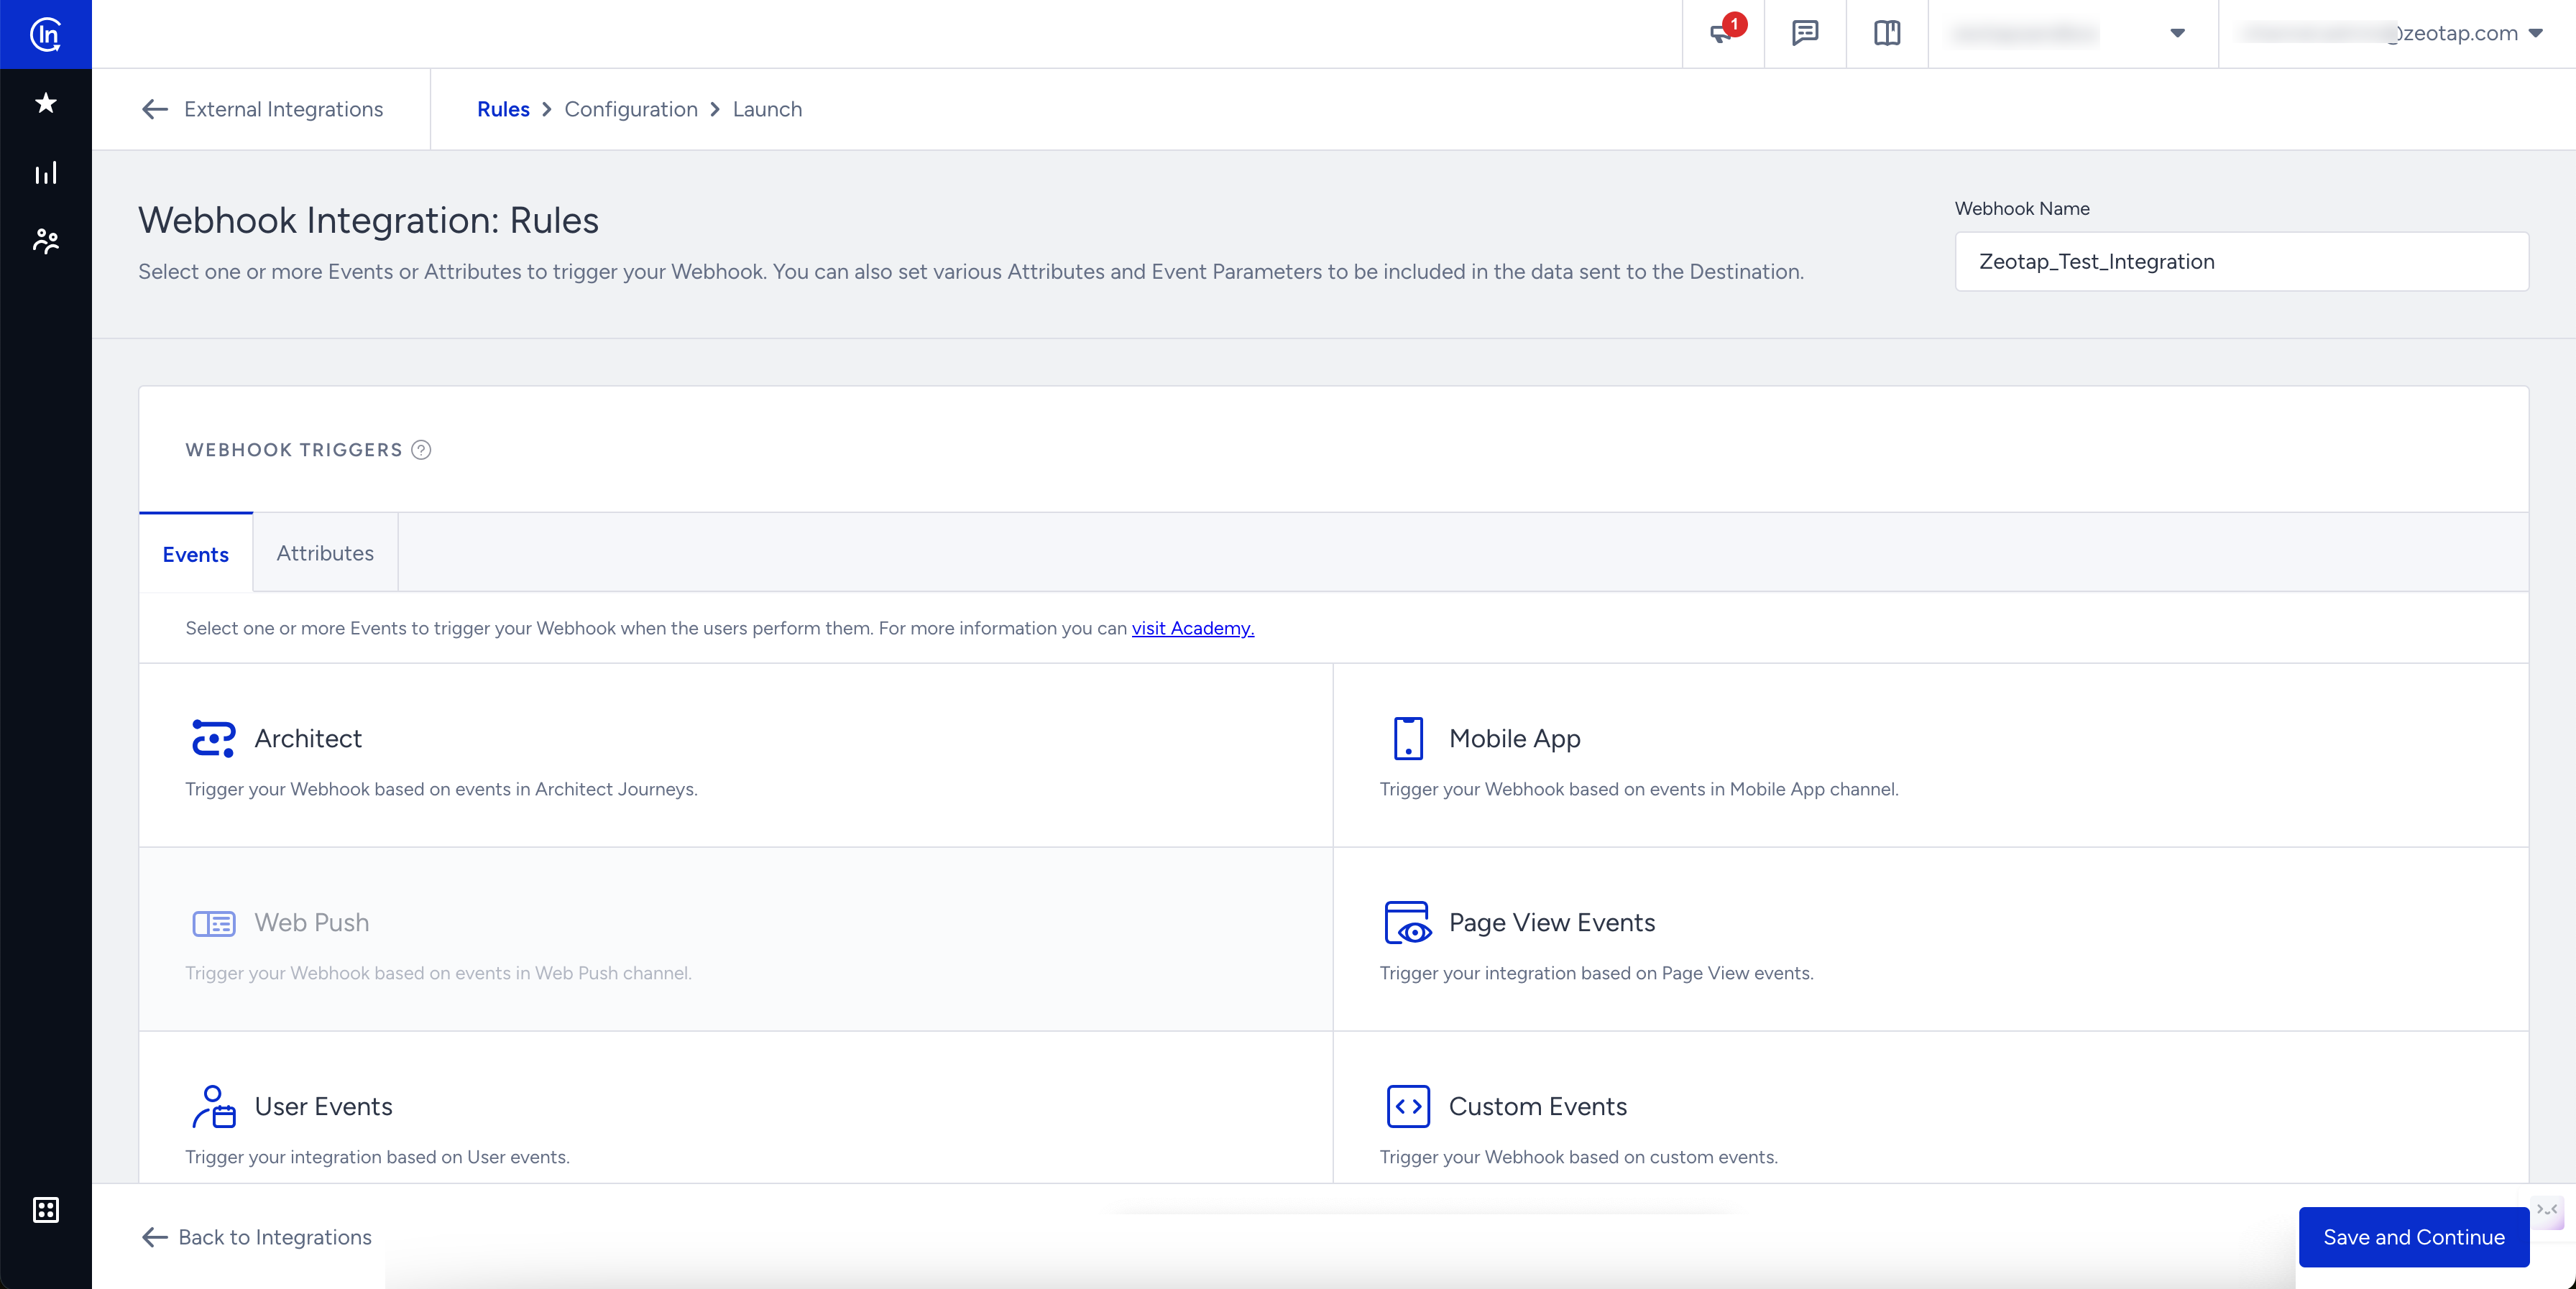
7
Based on the event type you choose, make additional selections under that event type. For example, if you choose User Events, the corresponding events are listed as shown below. Use the checkboxes to select the desired events.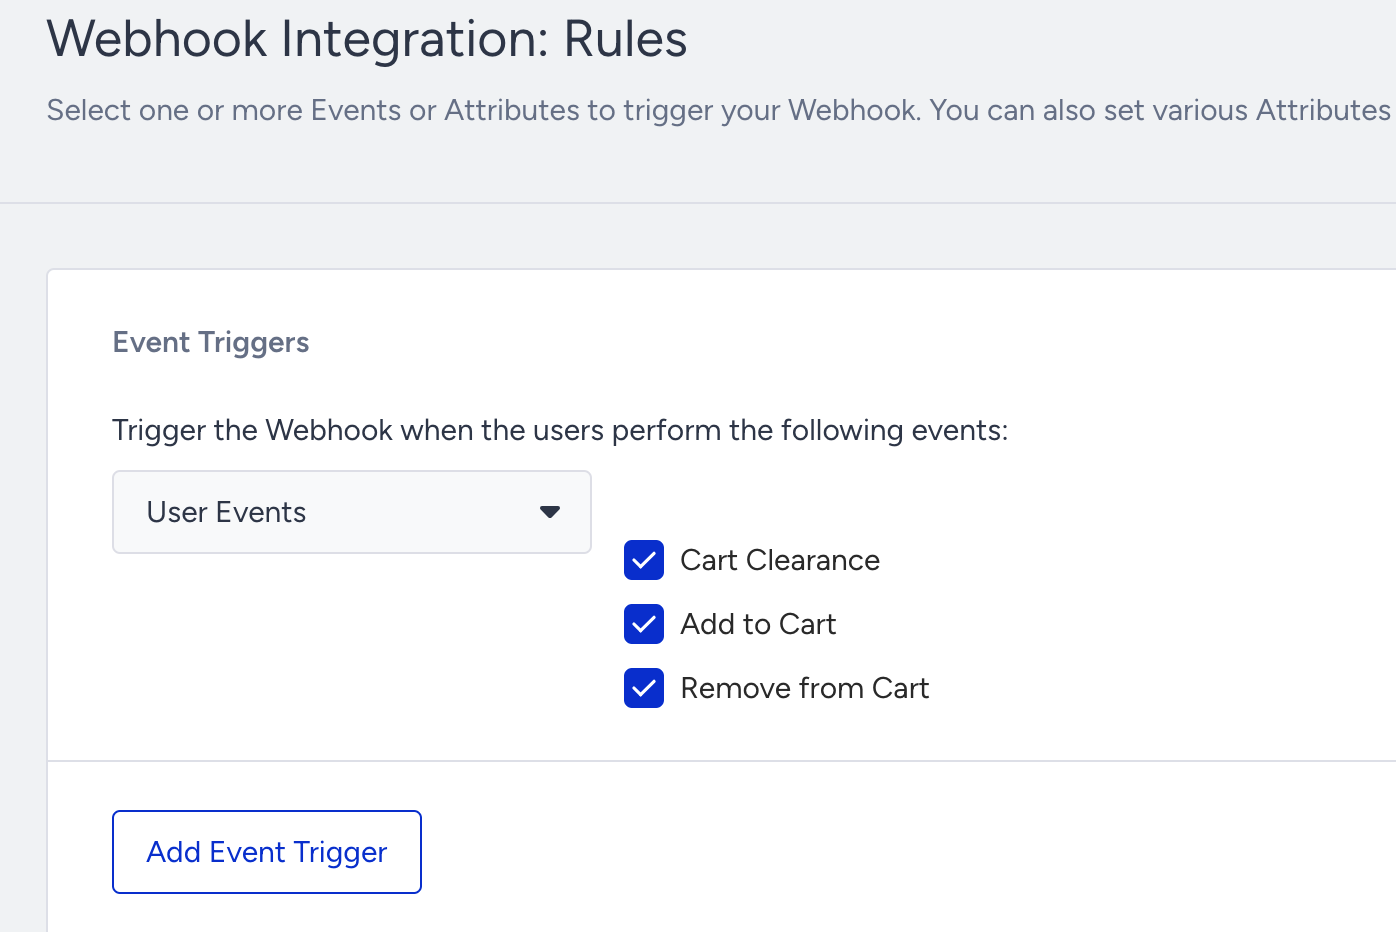
8
In addition, you can add event parameters for the selected events by clicking + Add Condition. A new set of fields is displayed where you can add the details of the event as shown below.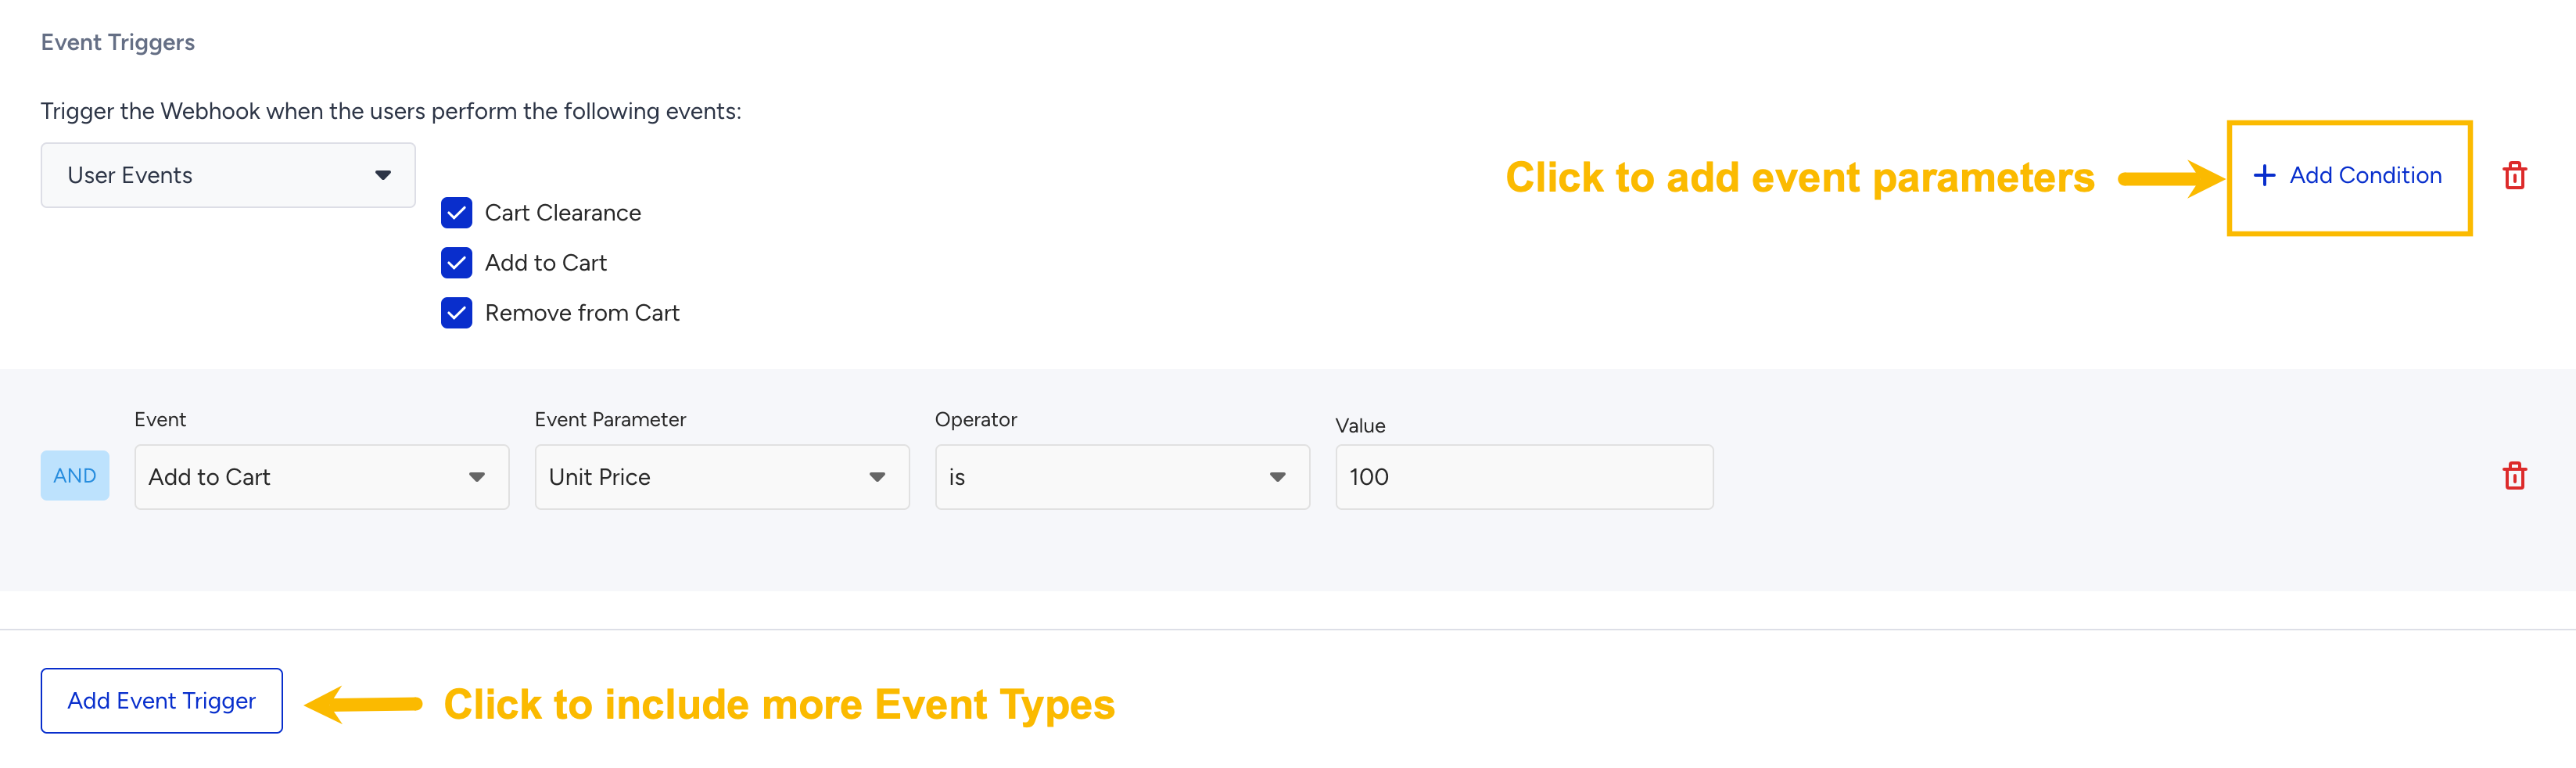
9
In the same screen, you can include more event types by clicking Add Event Trigger.
10
You can also add additional attributes to send to Zeotap CDP using the drop-down menu, as shown below. For example, when sending an email opened event, add the email address as an additional attribute. This configuration helps identify which email address opened a specific email campaign.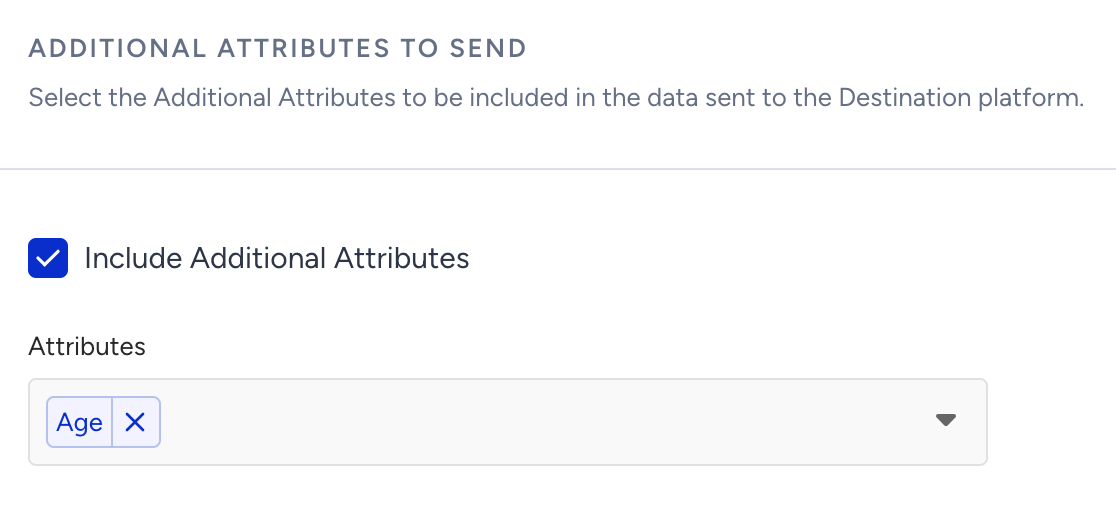
11
In the Segmentation step, filter users in specific segments in Insider before sending the data to Zeotap CDP. The data is sent only if users perform the selected event and meet the optional segment filter criteria.For example, use this section to send data for users who perform an Add to Cart event and have purchased 2 products in the last 1 day.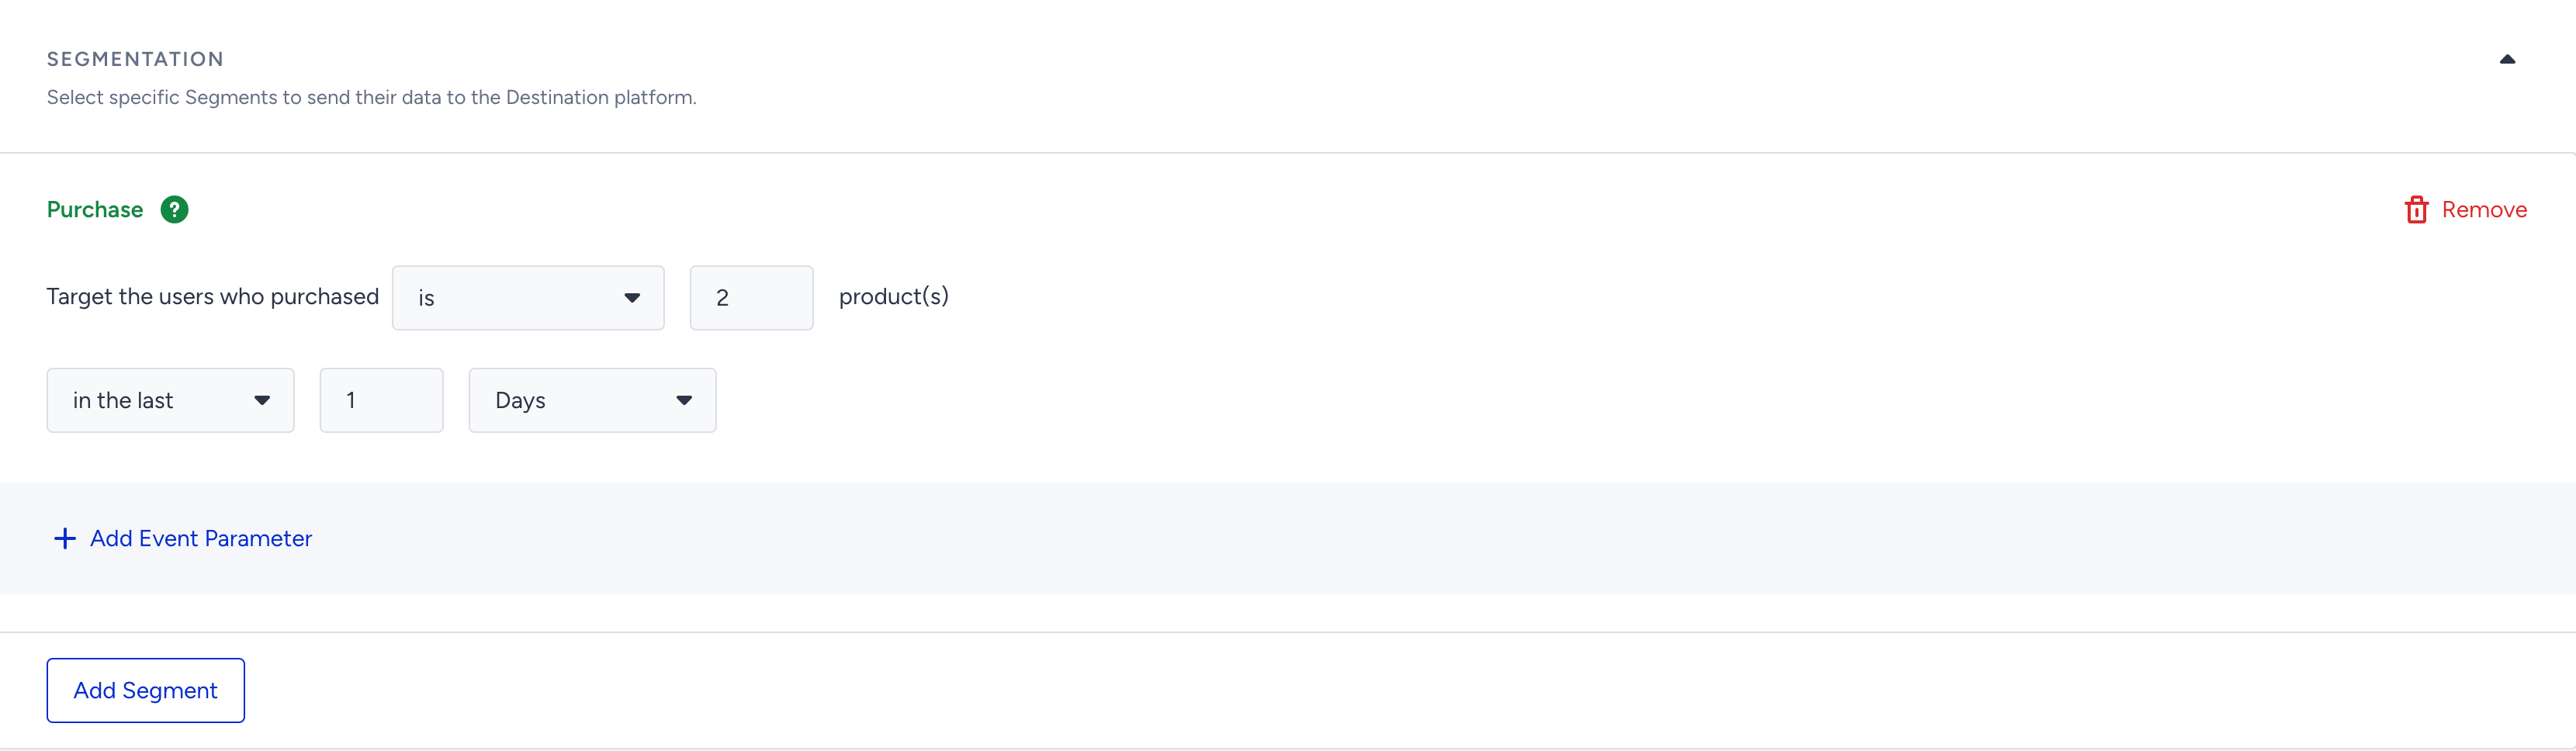
12
After configuring the events, attributes and segments in the appropriate sections, click Save and Continue to move to the Configuration screen.
13
In the new screen that appears, perform the following steps:a. Under Endpoint, provide the API URL that you generated during source creation in the Zeotap CDP App (IMPLEMENTATION DETAILS tab). Ensure that the API call method is POST.b. Under Headers, click Add Header.c. In the new key-value field, enter the following: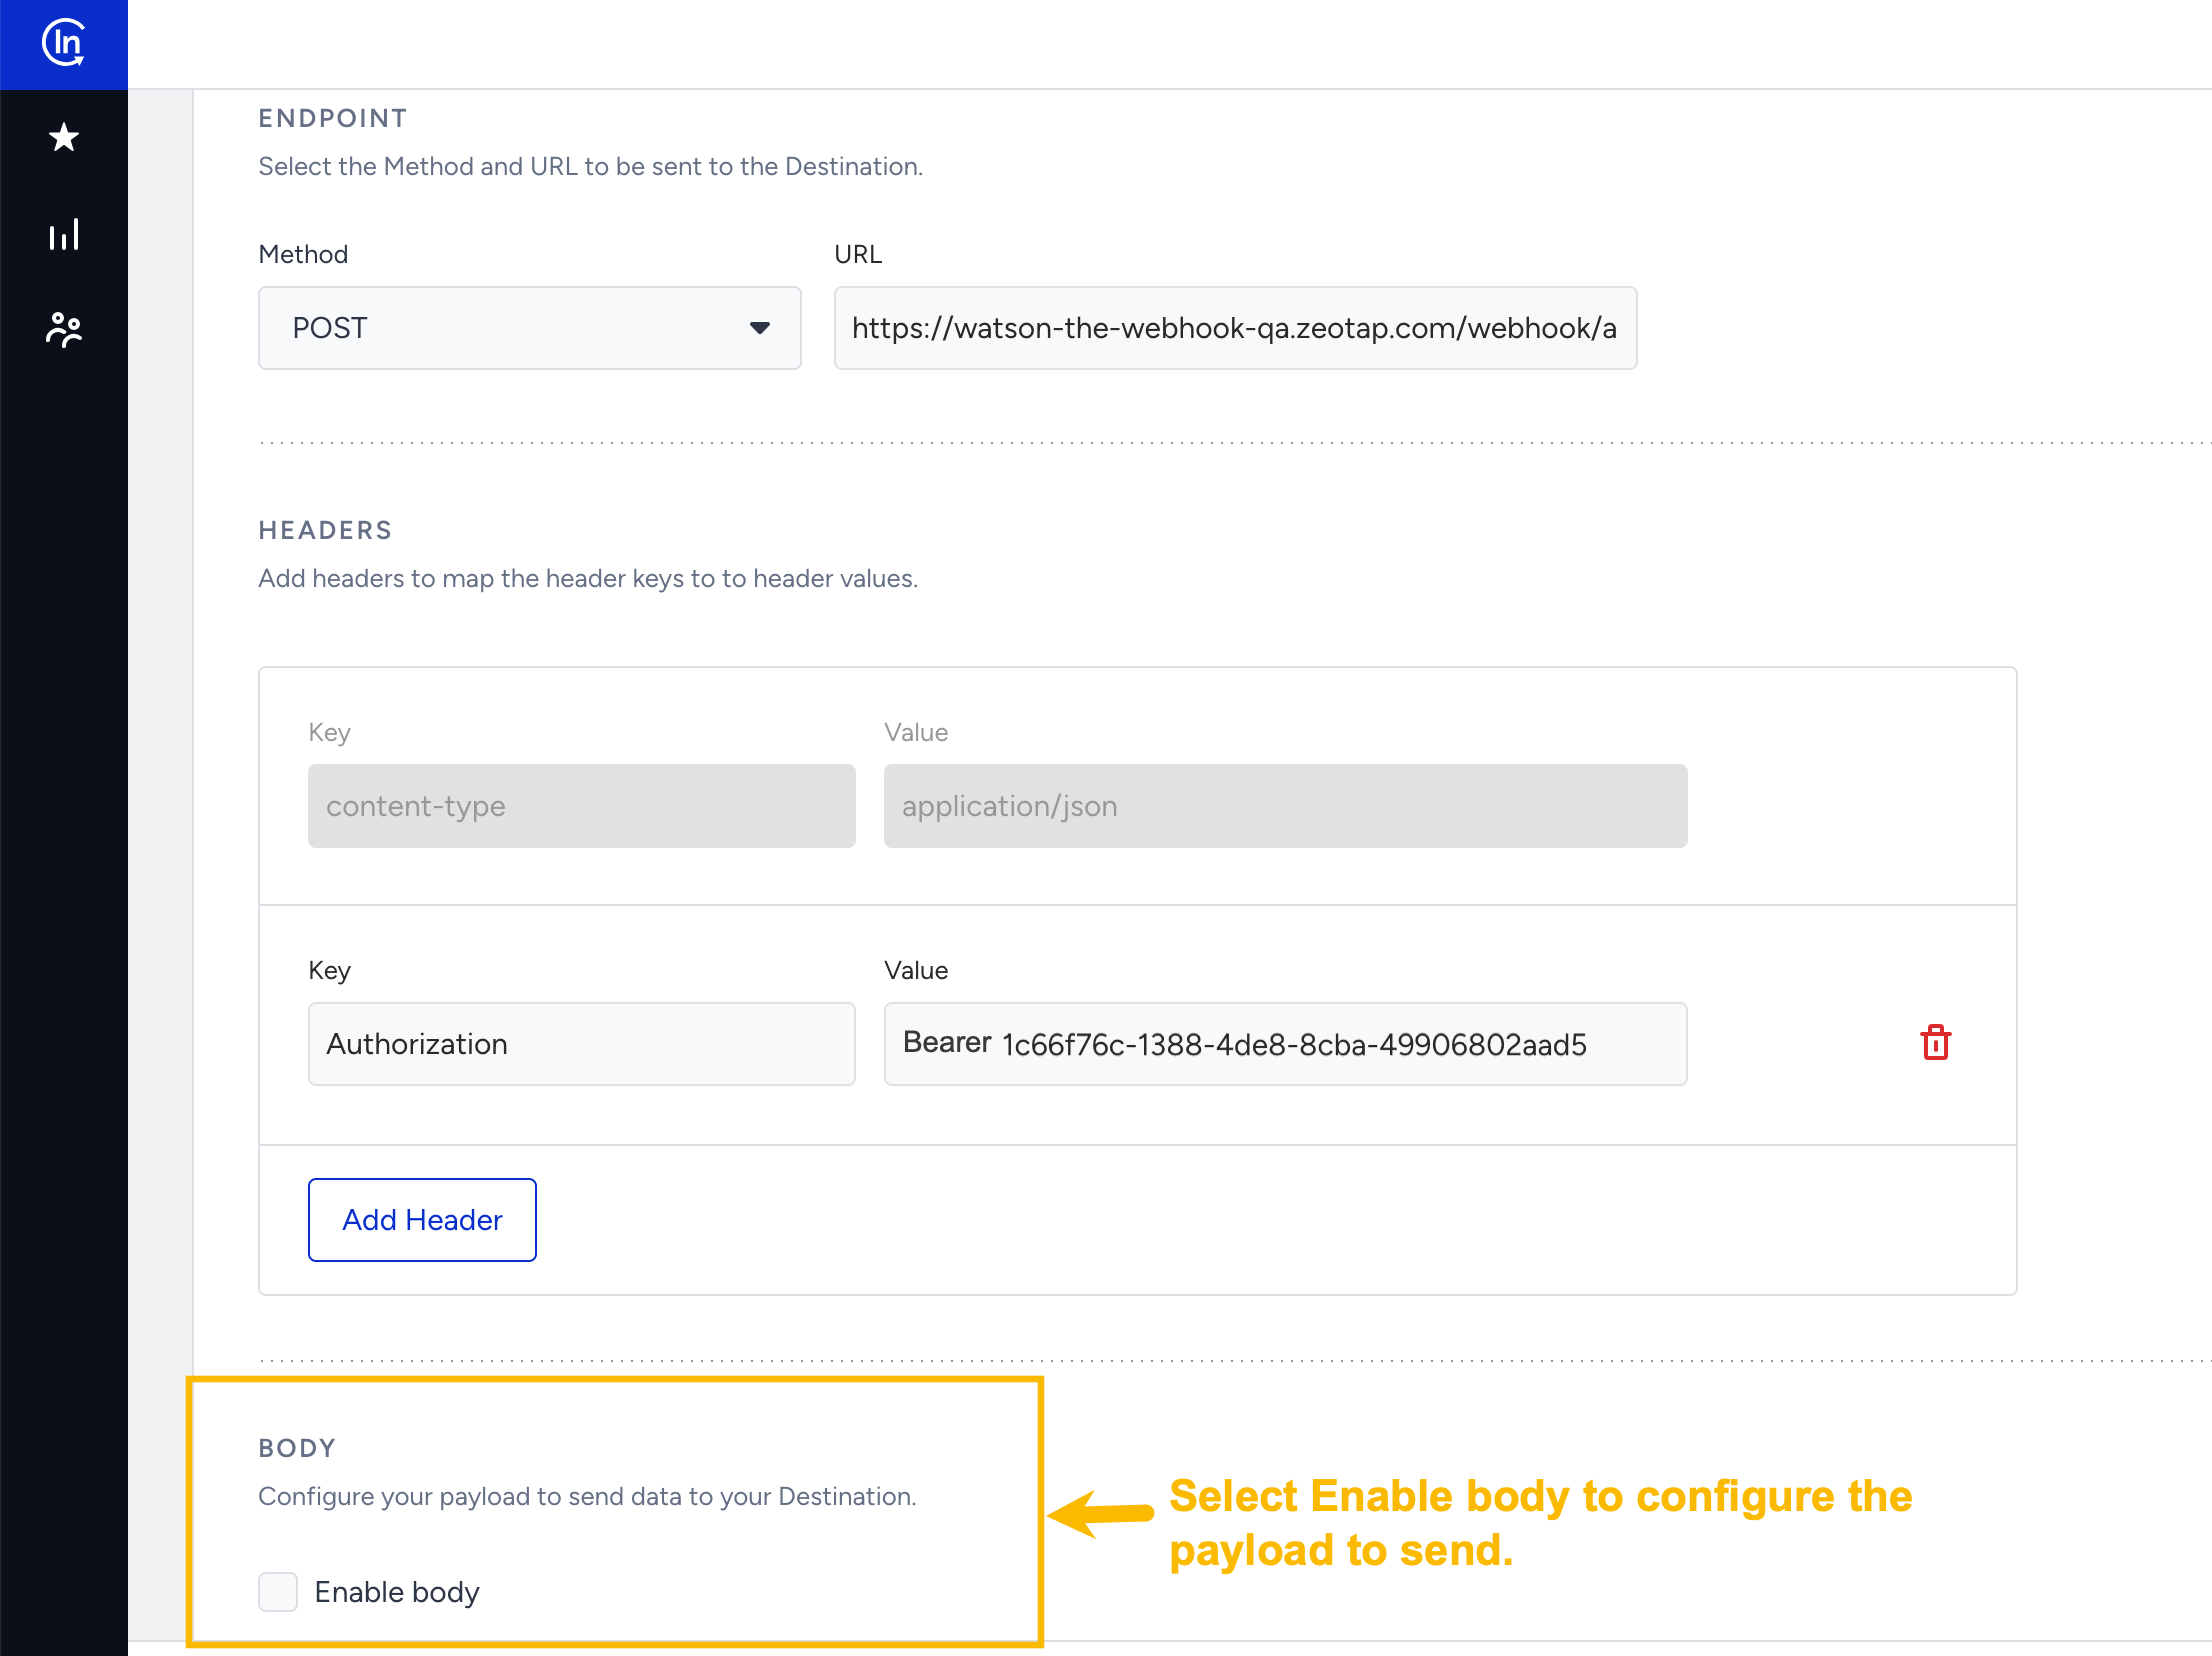
- Key: Authorization.
- Value: Paste the write key generated during source creation in Zeotap CDP. Ensure that you add the prefix Bearer as shown below.
Bearer<space>write_key- Add dynamic values, including event parameters and attribute values.
- Copy and paste the API payload.
- Replace values with dynamic content to match Zeotap CDP’s API requirements.
14
After configuring the endpoint, headers and body for the webhook, click Save and Continue to proceed to the Launch step and complete the integration.
15
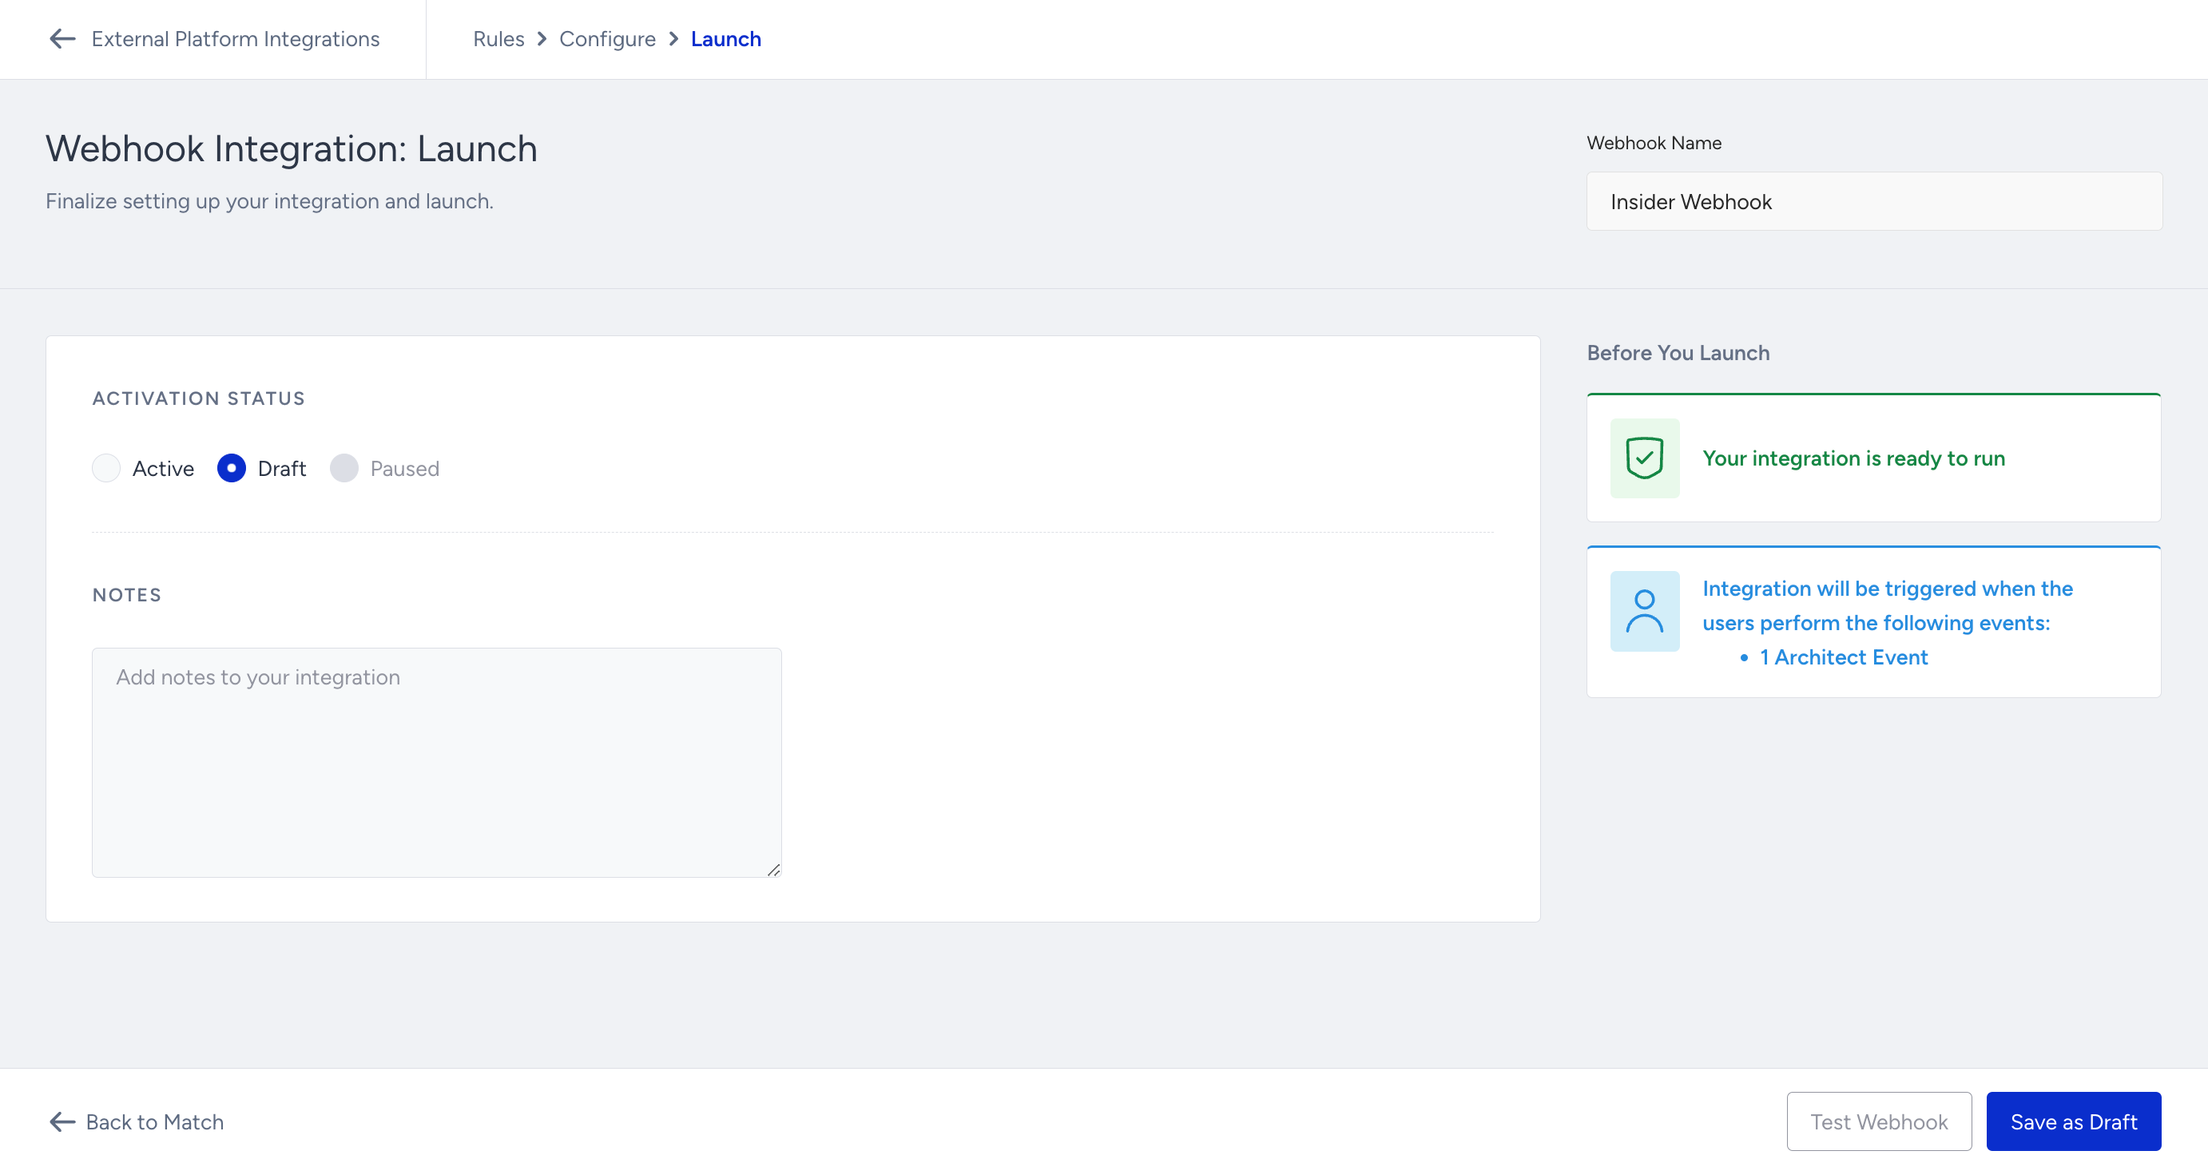
Select a launch option: Draft, Active or Paused. The Draft option is selected by default. Optionally, enter additional information in the Notes field.
Verify the integration
Check both sides of the integration. In Insider, before sending webhooks, test the webhook using the Test Webhook button.- Automatically generate random values for dynamic fields and select Test to send the data.
- View the response status and request details in the side panel to verify whether the request was sent successfully.
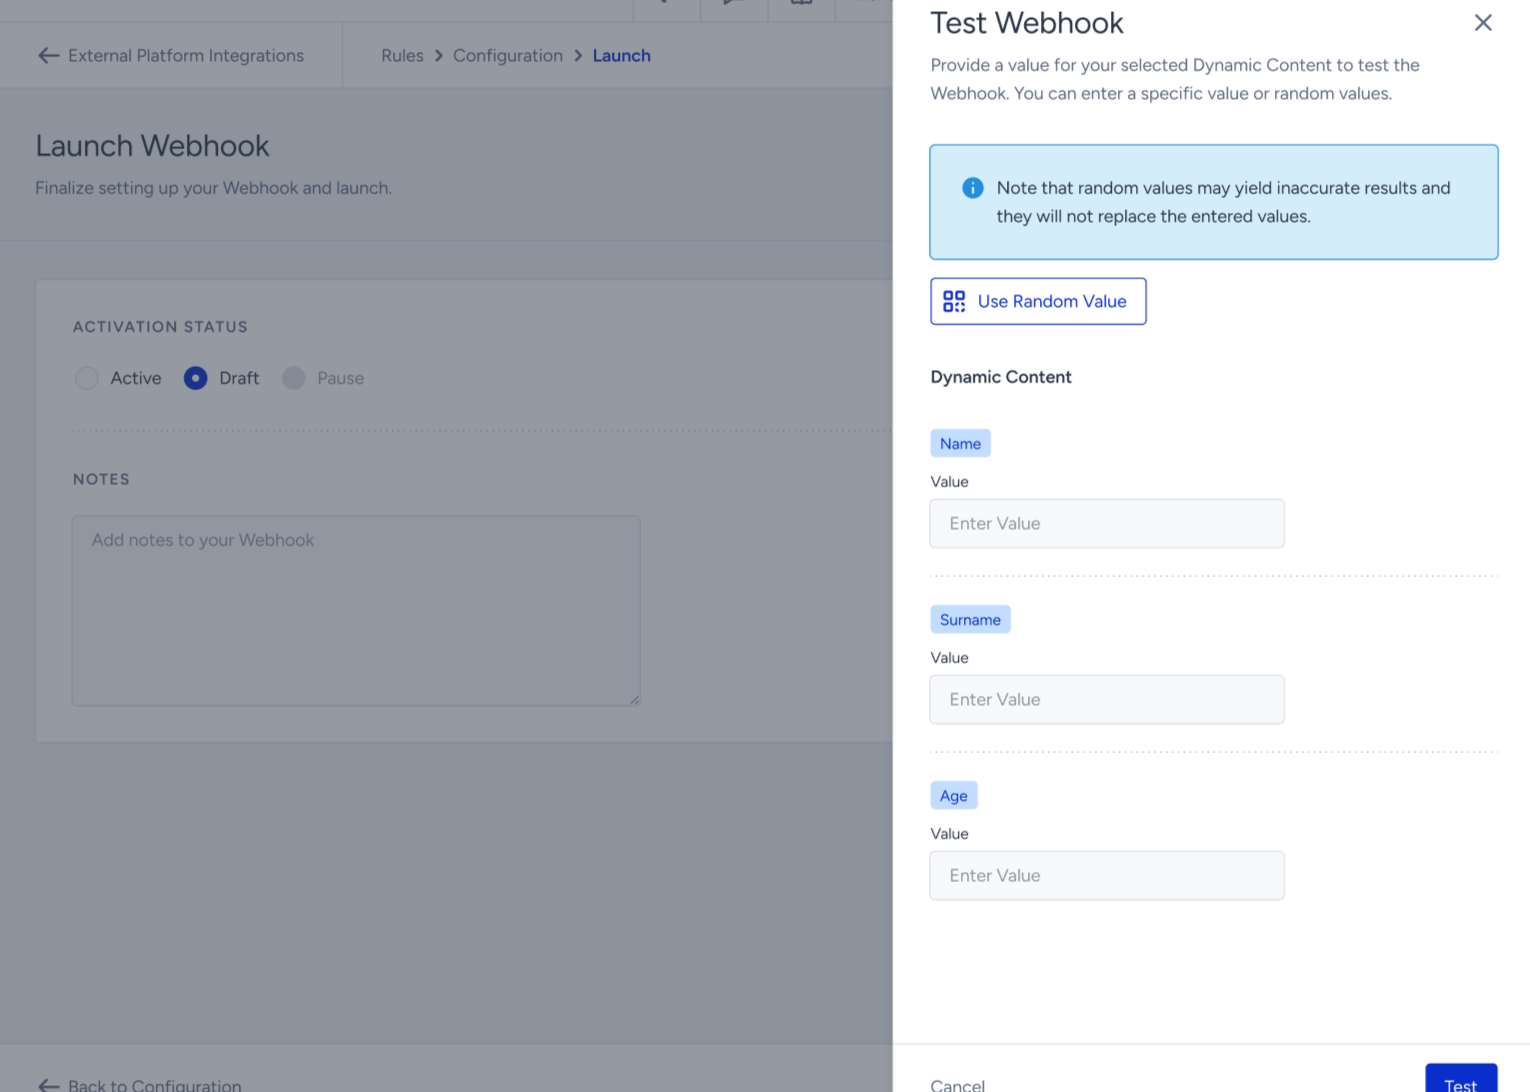
- If the status shows a successful HTTP response, activate the integration and start sending data to the endpoint.
- Created — the source exists but has not received any data yet.
- Integrated — data has started flowing in. You can now preview the incoming records on the source’s PREVIEW DATA tab.
Troubleshoot the integration
The source status stays Created and no data appears under PREVIEW DATA. A source in the Created state has been created but has not yet received any data. Re-check the Insider webhook integration:- The Endpoint is the API URL from the IMPLEMENTATION DETAILS tab of this source, not of another source, and the method is POST.
- The header key is
Authorizationand its value isBearer<space>write_key— the prefix, a single space, then the write key from the same tab. - The integration was launched in the Active state. Draft is selected by default at the Launch step, and an integration left in Draft or Paused sends nothing.