

What this is
The Amazon S3 source connects Zeotap CDP directly to data that already resides in your S3 bucket, so you do not have to move files anywhere else first. You create it from the Sources application under Integrate, in the Data Warehouse category. Once the source is created, Zeotap CDP reads CSV or JSON files from the bucket and folder you nominate. The first sync starts as soon as you create the source; every sync after that follows the Sync frequency you chose. Delta Queries Selection controls whether a sync picks up only the data that changed in your bucket since the last sync.Prerequisites
Before you create an Amazon S3 source in Zeotap CDP, you must have an account with Amazon S3, and the data intended for import to Zeotap CDP must reside within that account.Collect the following details from that account before you start — each one is explained in Collect the Amazon S3 details:
- Bucket Name — the S3 bucket holding your data.
- S3 Bucket Region — the geographical location of that bucket.
- Folder — the folder path inside the bucket that holds the files to import.
- Access Token and Secret Access Token — the credentials Zeotap CDP uses to read the bucket.
Supported data and identifiers
For the full list of source integrations and what each one supports, see Source Integrations (Batch+Real-Time). To understand Customer Data and Non-Customer Entity data, see Supported data entities.
Collect the Amazon S3 details
Bucket Name
S3 Bucket Region
Folder
Access Token and Secret Access Token
Bucket Name
This is the name of your S3 bucket. You can obtain this information on your Amazon S3 account by navigating to Buckets. In the example shown below, test-adobe-s3-bucket is the bucket name.
S3 Bucket Region
This is the geographical location where the Amazon S3 storage is available. You can obtain this information by navigating to the Properties tab under the Amazon S3 bucket as shown in the image below.
Folder
In Amazon S3, a folder serves as a logical container for organising stored objects within a bucket. In reality, there are no actual folders in Amazon S3. Instead, the folder concept is emulated by employing object key names containing slashes (”/”) to replicate a hierarchical arrangement. You can obtain this information from your Amazon S3 account by navigating to the Objects tab under the Amazon S3 bucket as shown in the image below.
Access Token and Secret Access Token
These are the security tokens that provide secure access to your Amazon S3 resources. You can obtain the Access Token and Secret Access Token by navigating to the AWS IAM Credentials tab under Security credentials in your Amazon S3 account. Ensure that you have the following permissions to create Access token and Secret access token for your own IAM user:iam:ListAccessKeys– Allows listing the access keys for an IAM user.iam:CreateAccessKey– Allows creating new access keys for an IAM user.
Create the Amazon S3 source in Zeotap CDP
Once you have obtained the above details from your Amazon S3 account, perform the following steps to create an Amazon S3 Source in the Zeotap CDP App:1
Navigate to the Sources application under Integrate, in the Zeotap CDP App.
2
Click CREATE SOURCE.
3
Choose Data Warehouse as the Category.
4
Under SELECT DATA SOURCE, click Amazon S3.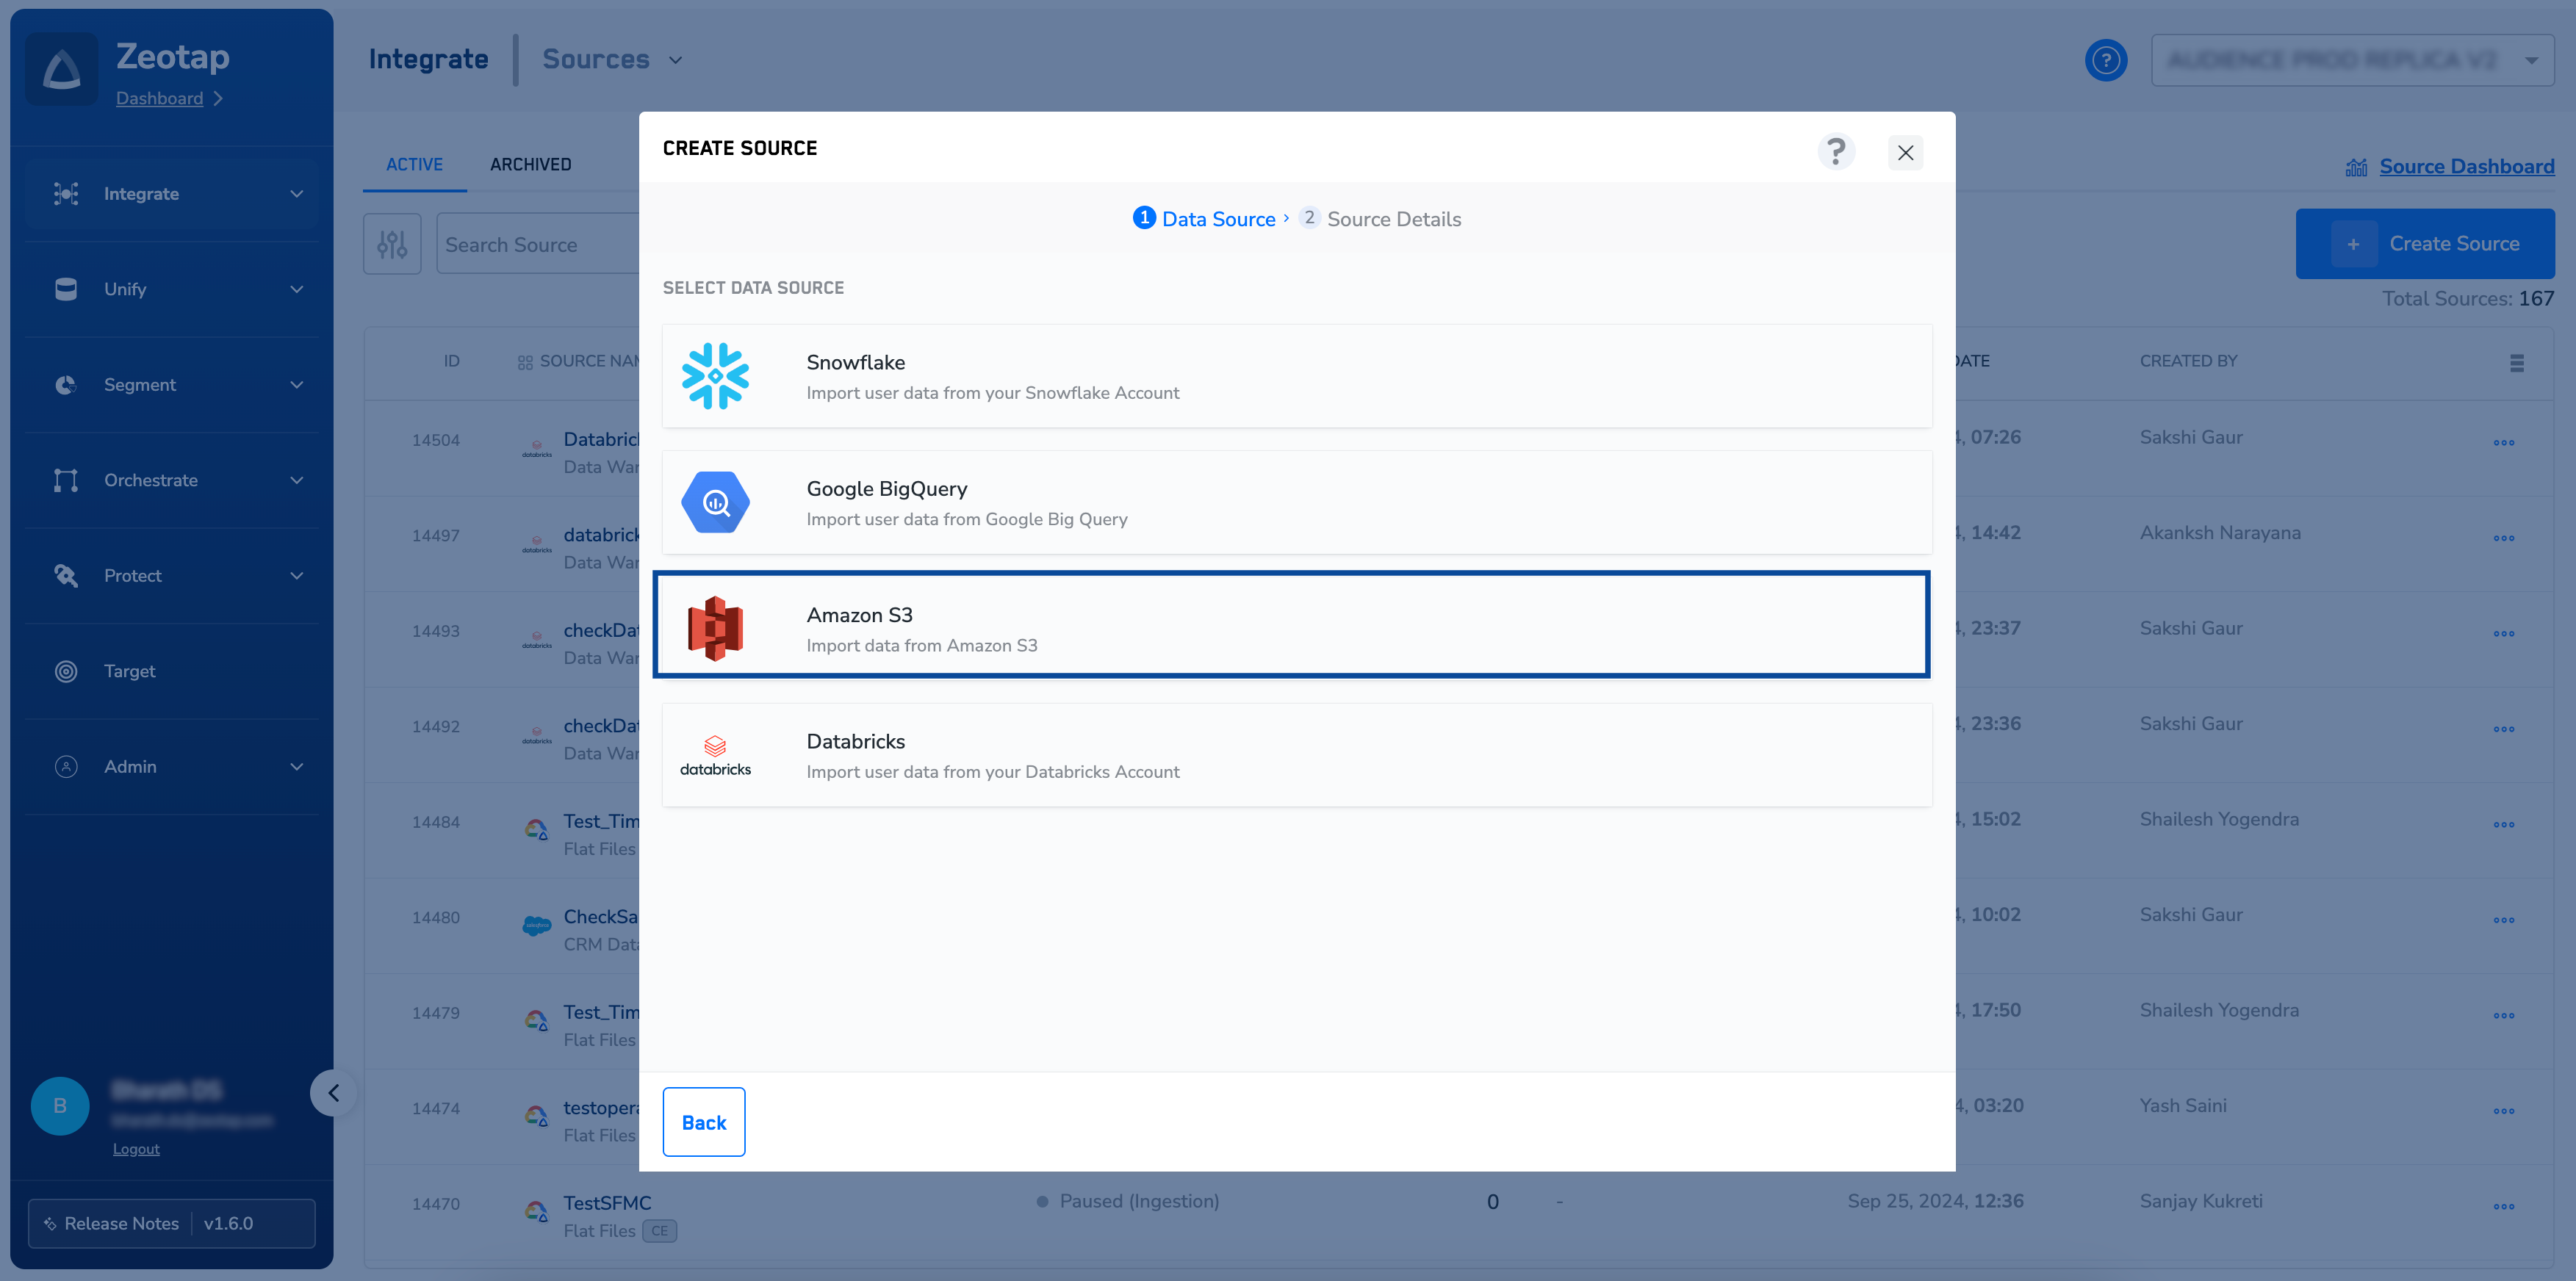
5
Enter a short and descriptive name for the Source.
6
Choose the Region of upload — the region in which the ingested data is stored. This is not the same field as the S3 Bucket Region you enter later, which is the location of your own S3 bucket.
7
Enter the Access Token and Secret Access Token that you obtained from your Amazon S3 account.
8
Enter the Bucket Name of your Amazon S3 bucket.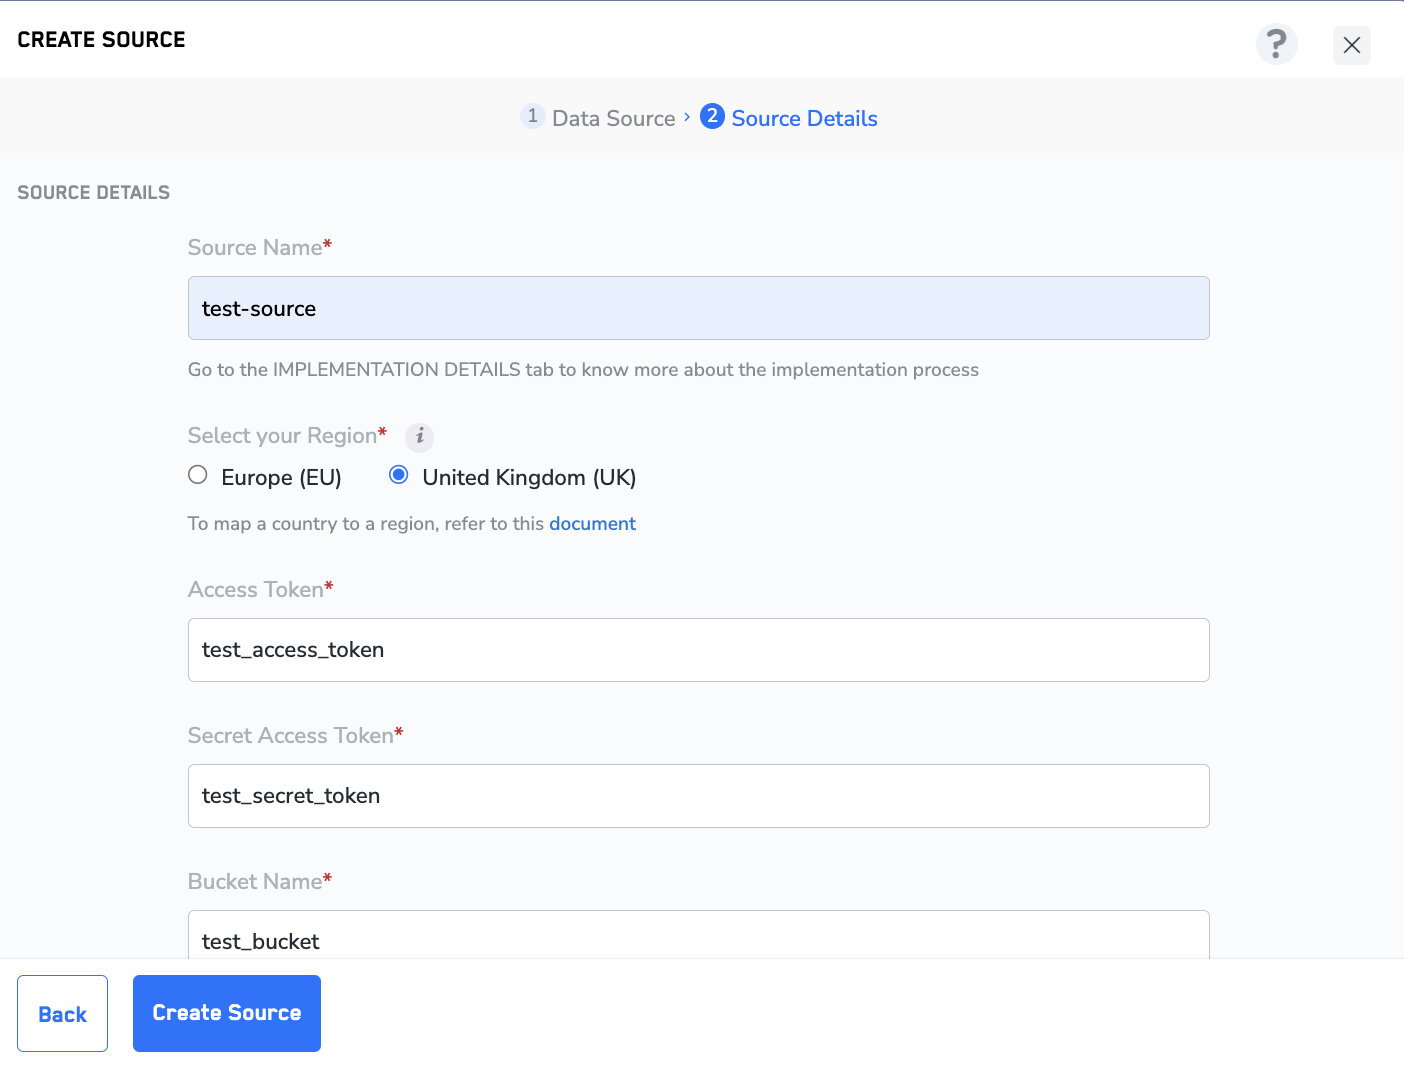
9
Provide the Folder path inside that bucket that holds the data you want Zeotap CDP to import.
10
Enter the S3 Bucket Region associated with the bucket from which you want Zeotap CDP to fetch the data.
11
Choose the desired Sync frequency from the drop-down menu. Note that the first sync is initiated once you create the source. However, the subsequent syncs occur based on the sync frequency you choose. Currently, we support the following sync frequencies:a. Dailyb. Weeklyc. Monthly
12
Set Delta Queries Selection to either true or false based on your requirement. If you select true, then Zeotap CDP fetches all the data that has been updated in your S3 bucket after the last data sync between your S3 account and Zeotap CDP.
13
Choose the file type. Currently, Zeotap CDP supports CSV and JSON formats.
14
Under Data Entity, depending on the type of data you want to ingest, choose either Customer Data or Non Customer Data and proceed with the Source creation. To know more about Customer Data and Non Customer Data, refer here.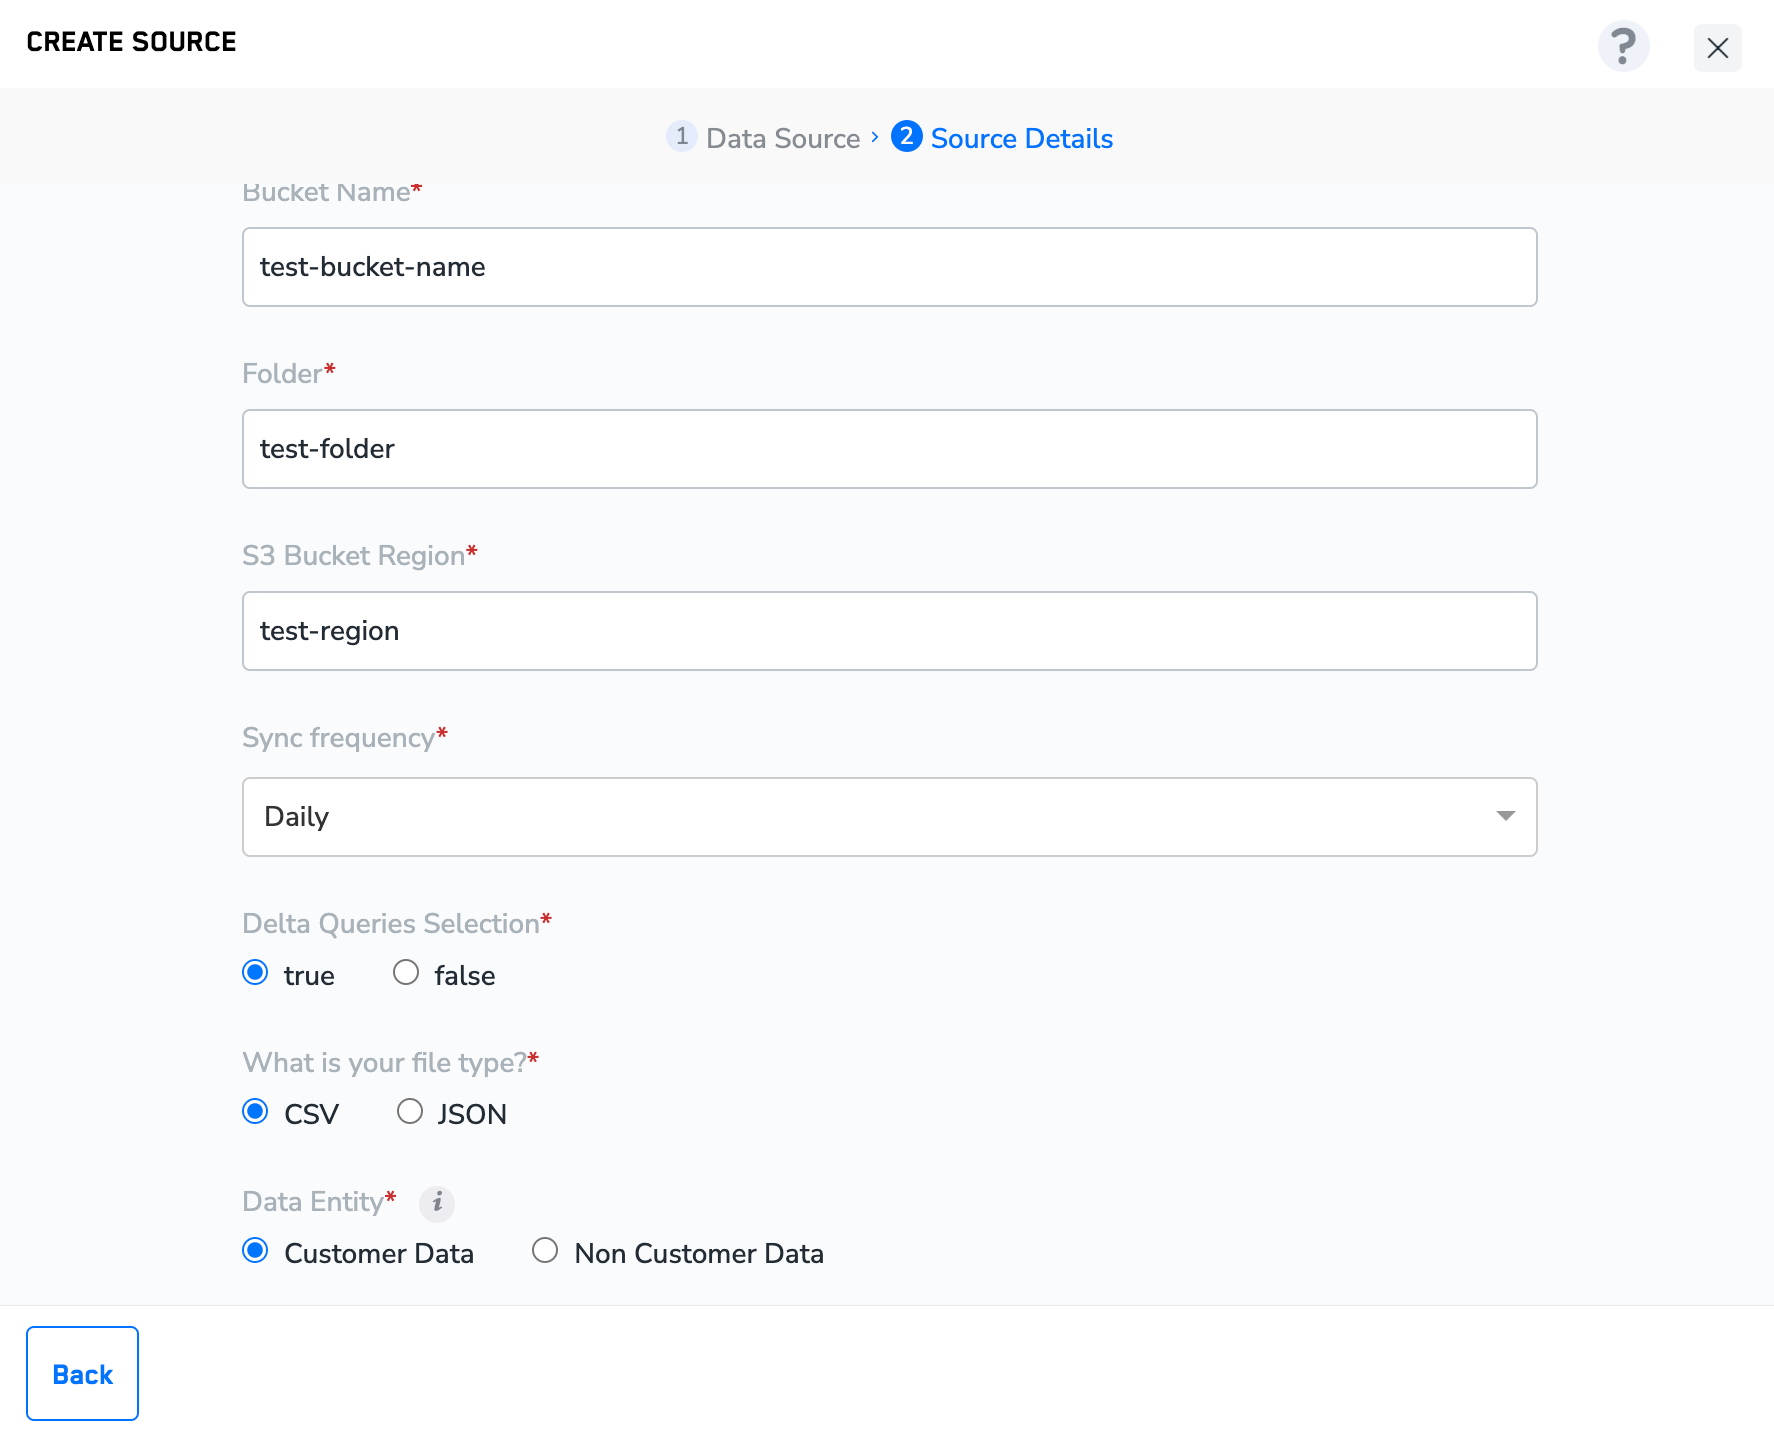
15
Click CREATE SOURCE.
Verify the source
Upon successfully creating the source, you can view all the relevant information about the created source under the IMPLEMENTATION DETAILS tab.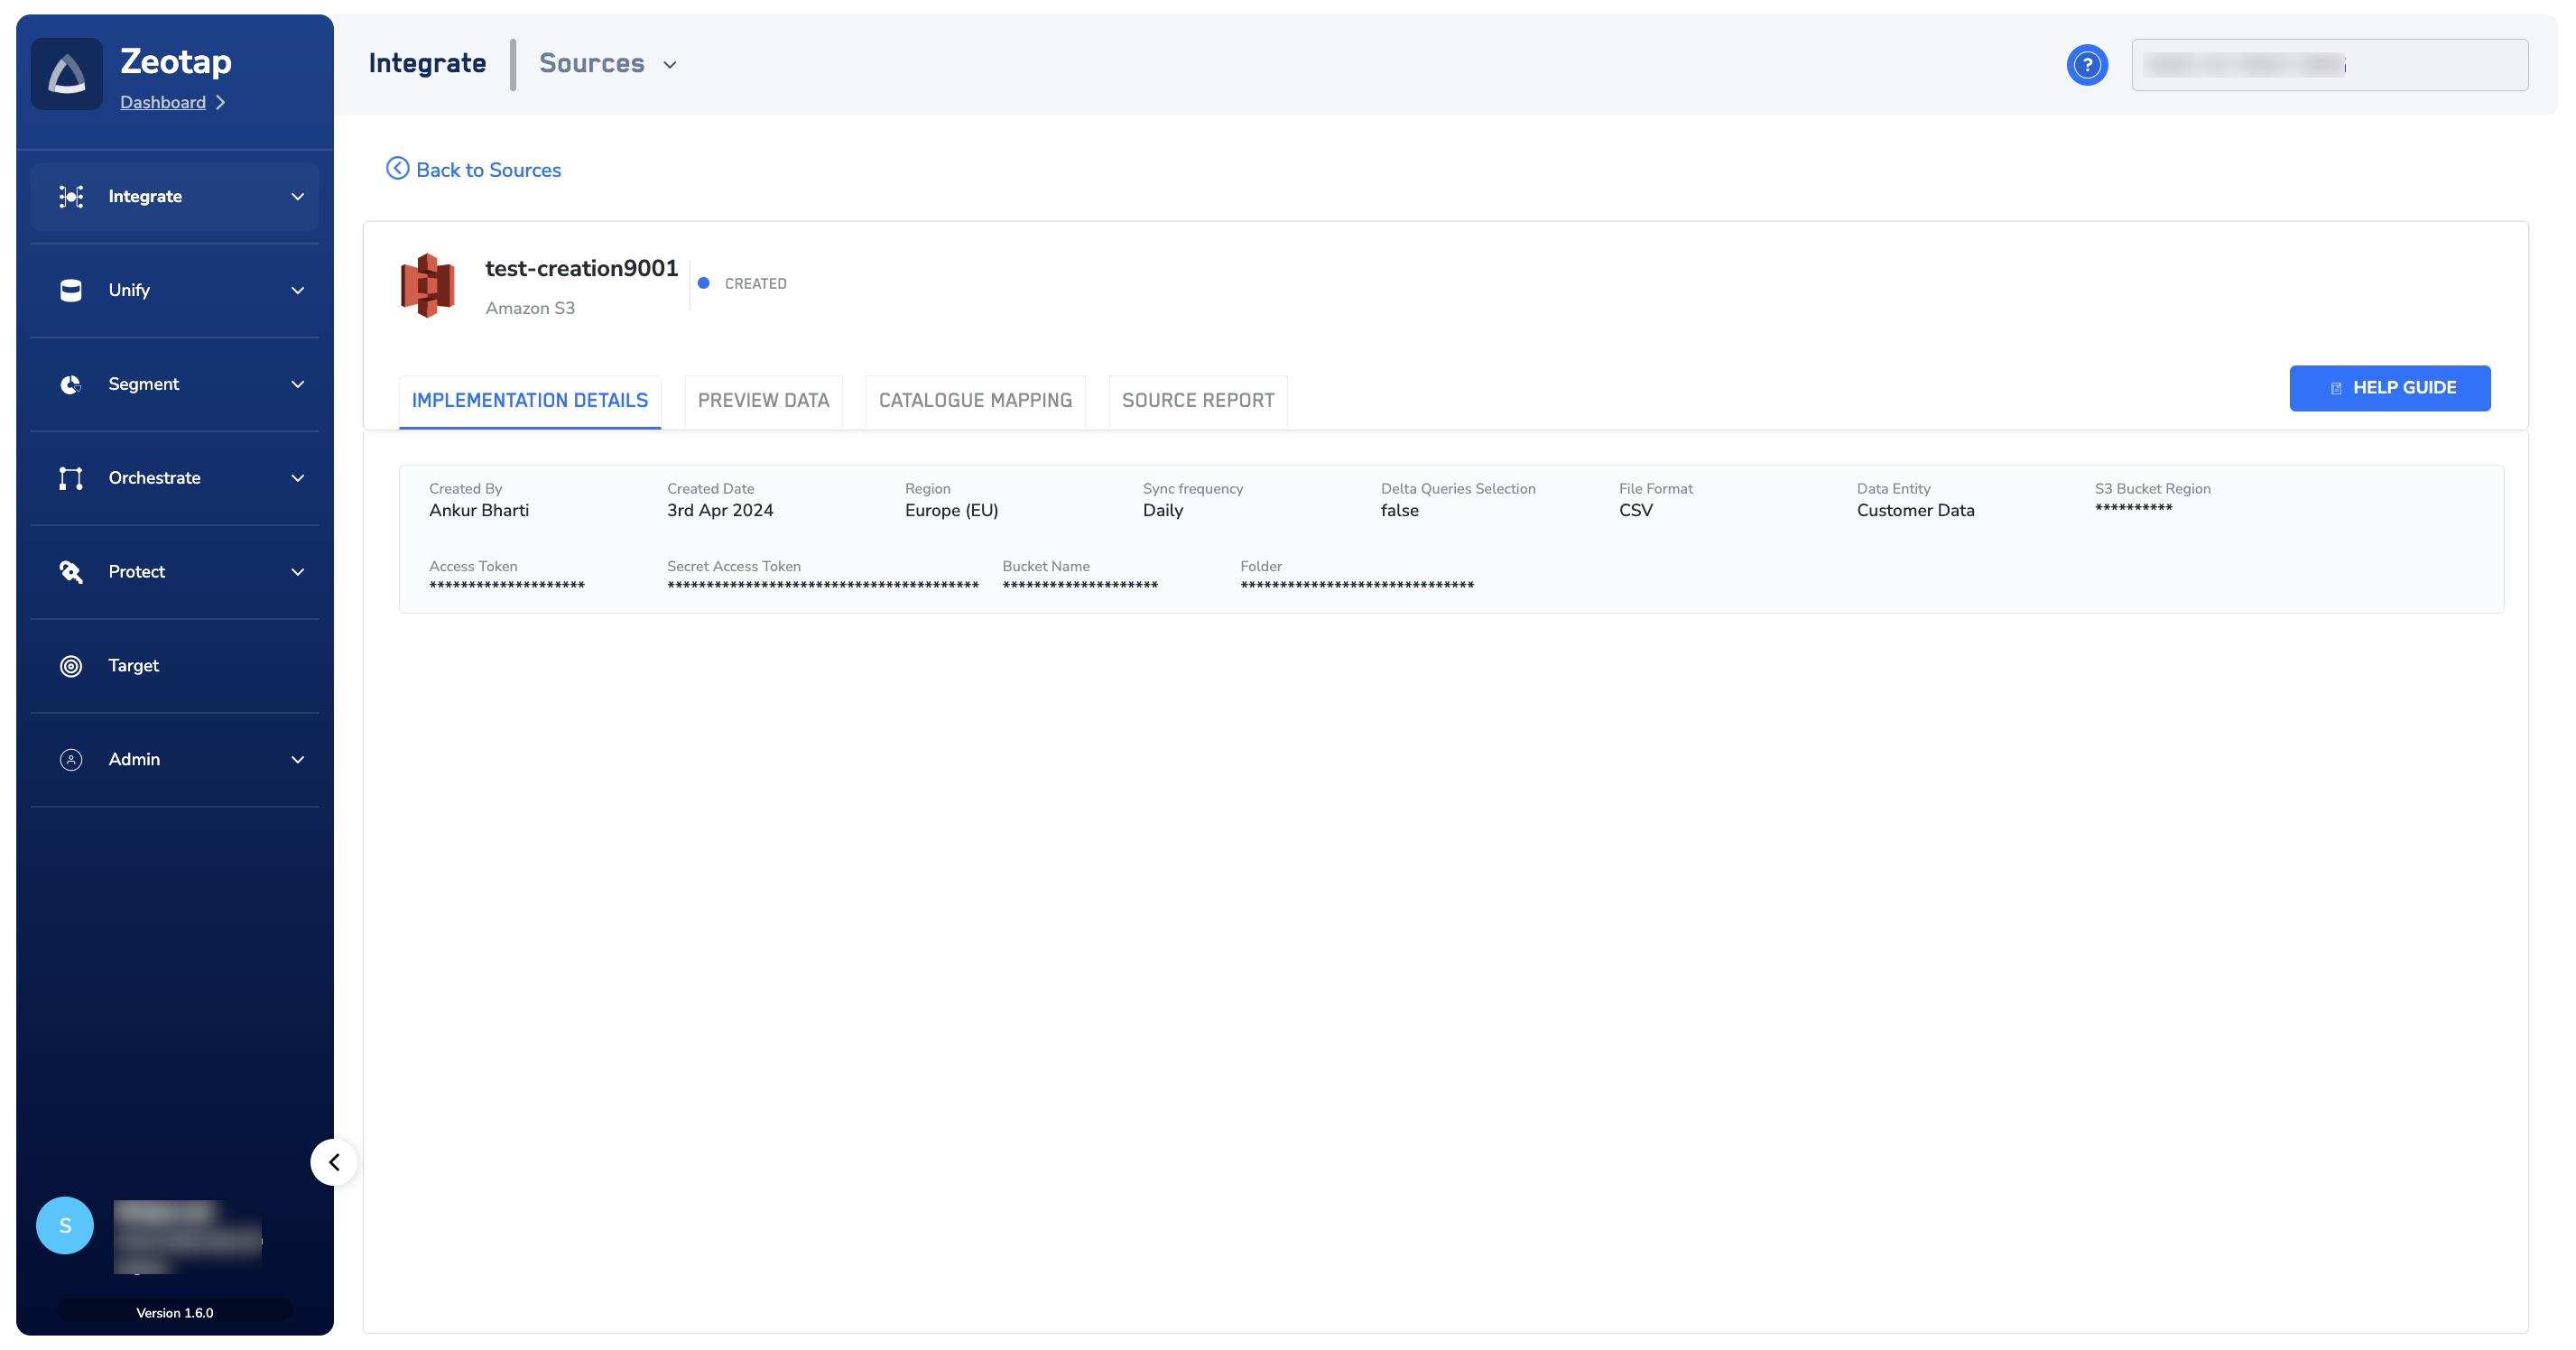
Next steps
- Map the incoming fields into your Catalogue — see Map the Catalogue for Customer Data, or Map the Catalogue for Non-Customer Entity data if you chose Non Customer Data.
- Review the other Data Warehouse integrations in Data Warehouse (CE+NCE).
- To send audiences from Zeotap CDP back out to Amazon S3, set up the Amazon S3 destination.
Note:For assistance with Amazon S3 source setup or other questions, reach out to the Zeotap support team at support@zeotap.com.