

What this is
A Microsoft Dynamics CRM source brings data from your Dynamics 365 environment into Zeotap CDP, where it can be unified and segmented. The integration runs in that direction only — the integrations master list lists Microsoft Dynamics CRM as a Source, so there is no matching Dynamics CRM destination for sending audiences back out to Dynamics. Setting the source up takes three parts, in this order:- Register an app in the Azure portal and collect its credentials.
- Give that app access to the Dynamics 365 environment you want to read from.
- Create the source in Zeotap CDP using those credentials.
Supported identifiers and data
The identifier and integration-type entries come from the integrations master list. To understand the difference between Customer Data and Non-Customer Entity data, see Supported Data Entities.
Prerequisites
Register an app in your Dynamics 365 instance and keep the following details to hand before you create the source in Zeotap CDP:- App Client ID
- Tenant ID
- App Client Secret
- Organization URL
Register an app in the Azure portal
Perform the following steps to register an app and generate the App Client ID, Tenant ID and App Client Secret:1
Log into the Azure portal.
2
On the homepage, select App registrations > New registration.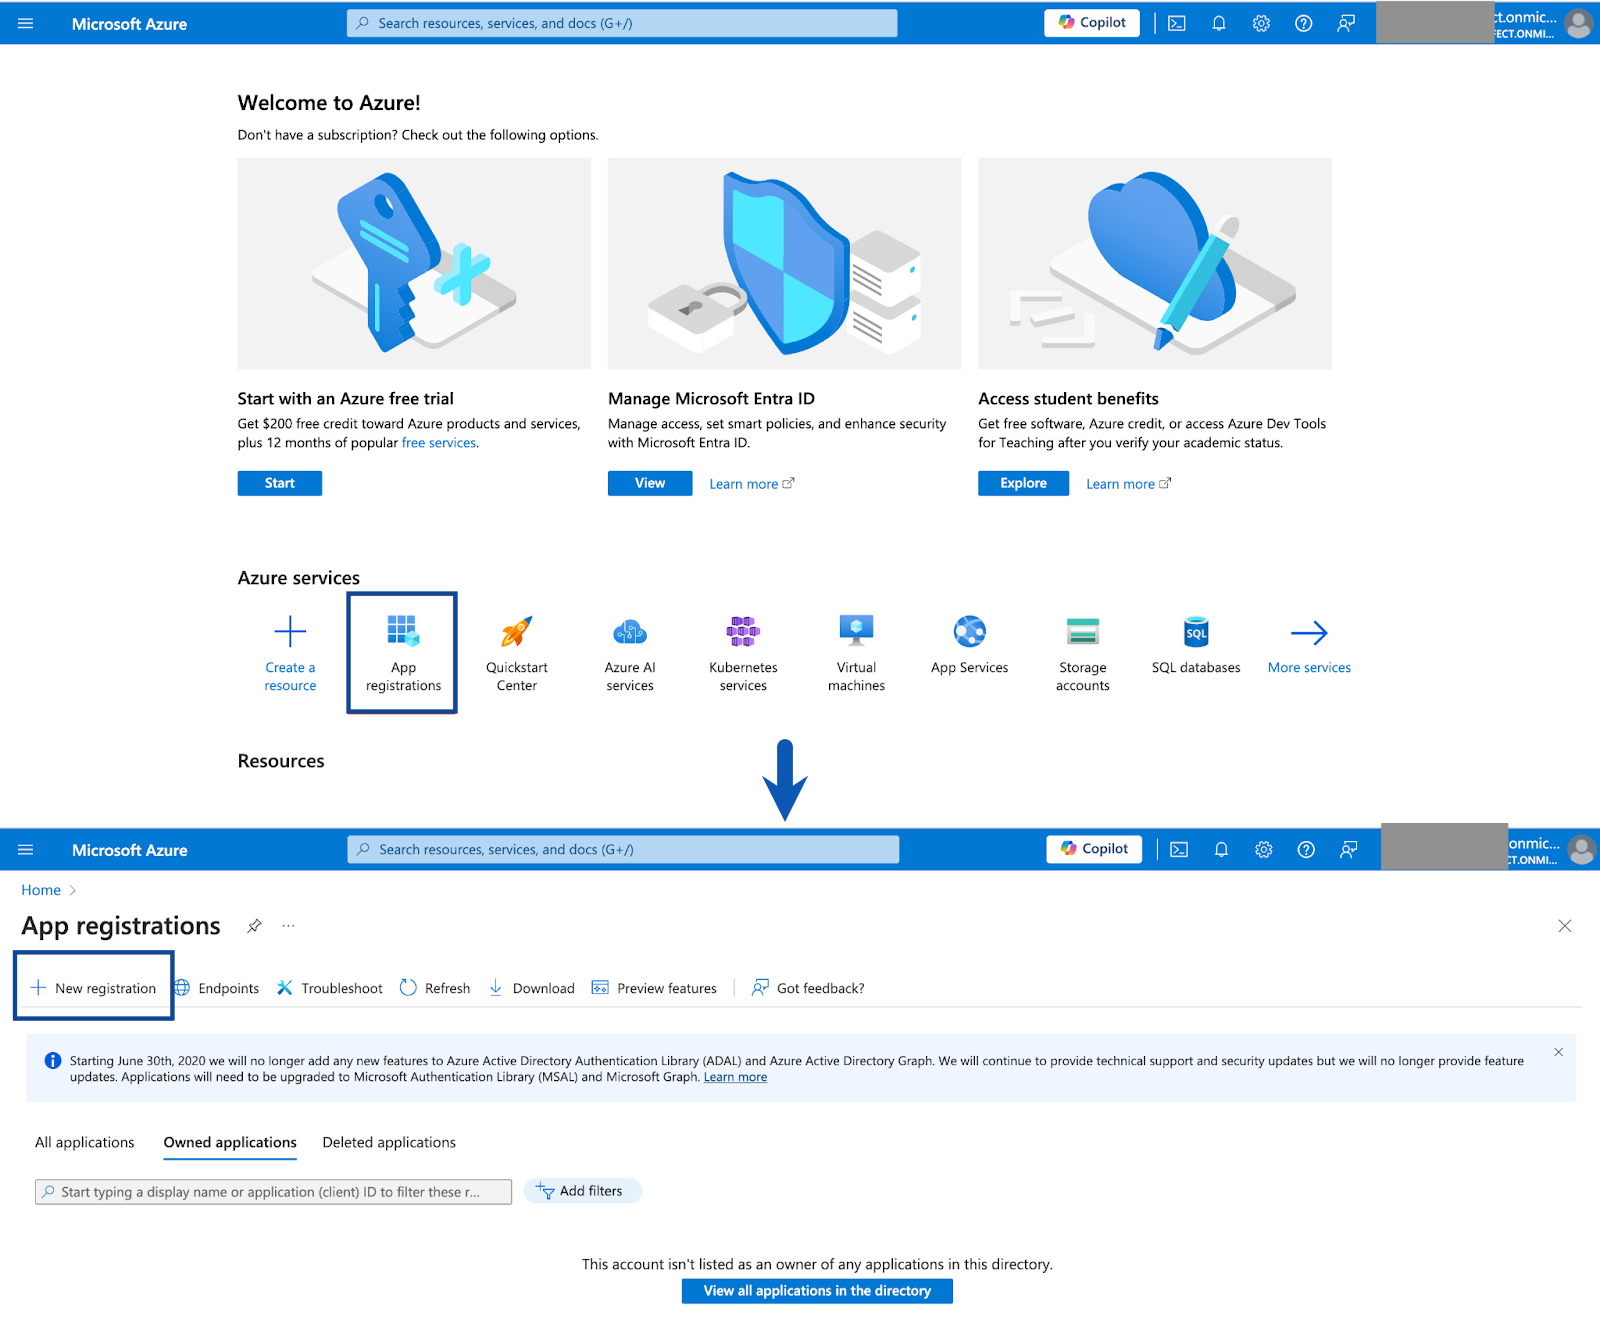
3
In the Application Registration form, provide the following information: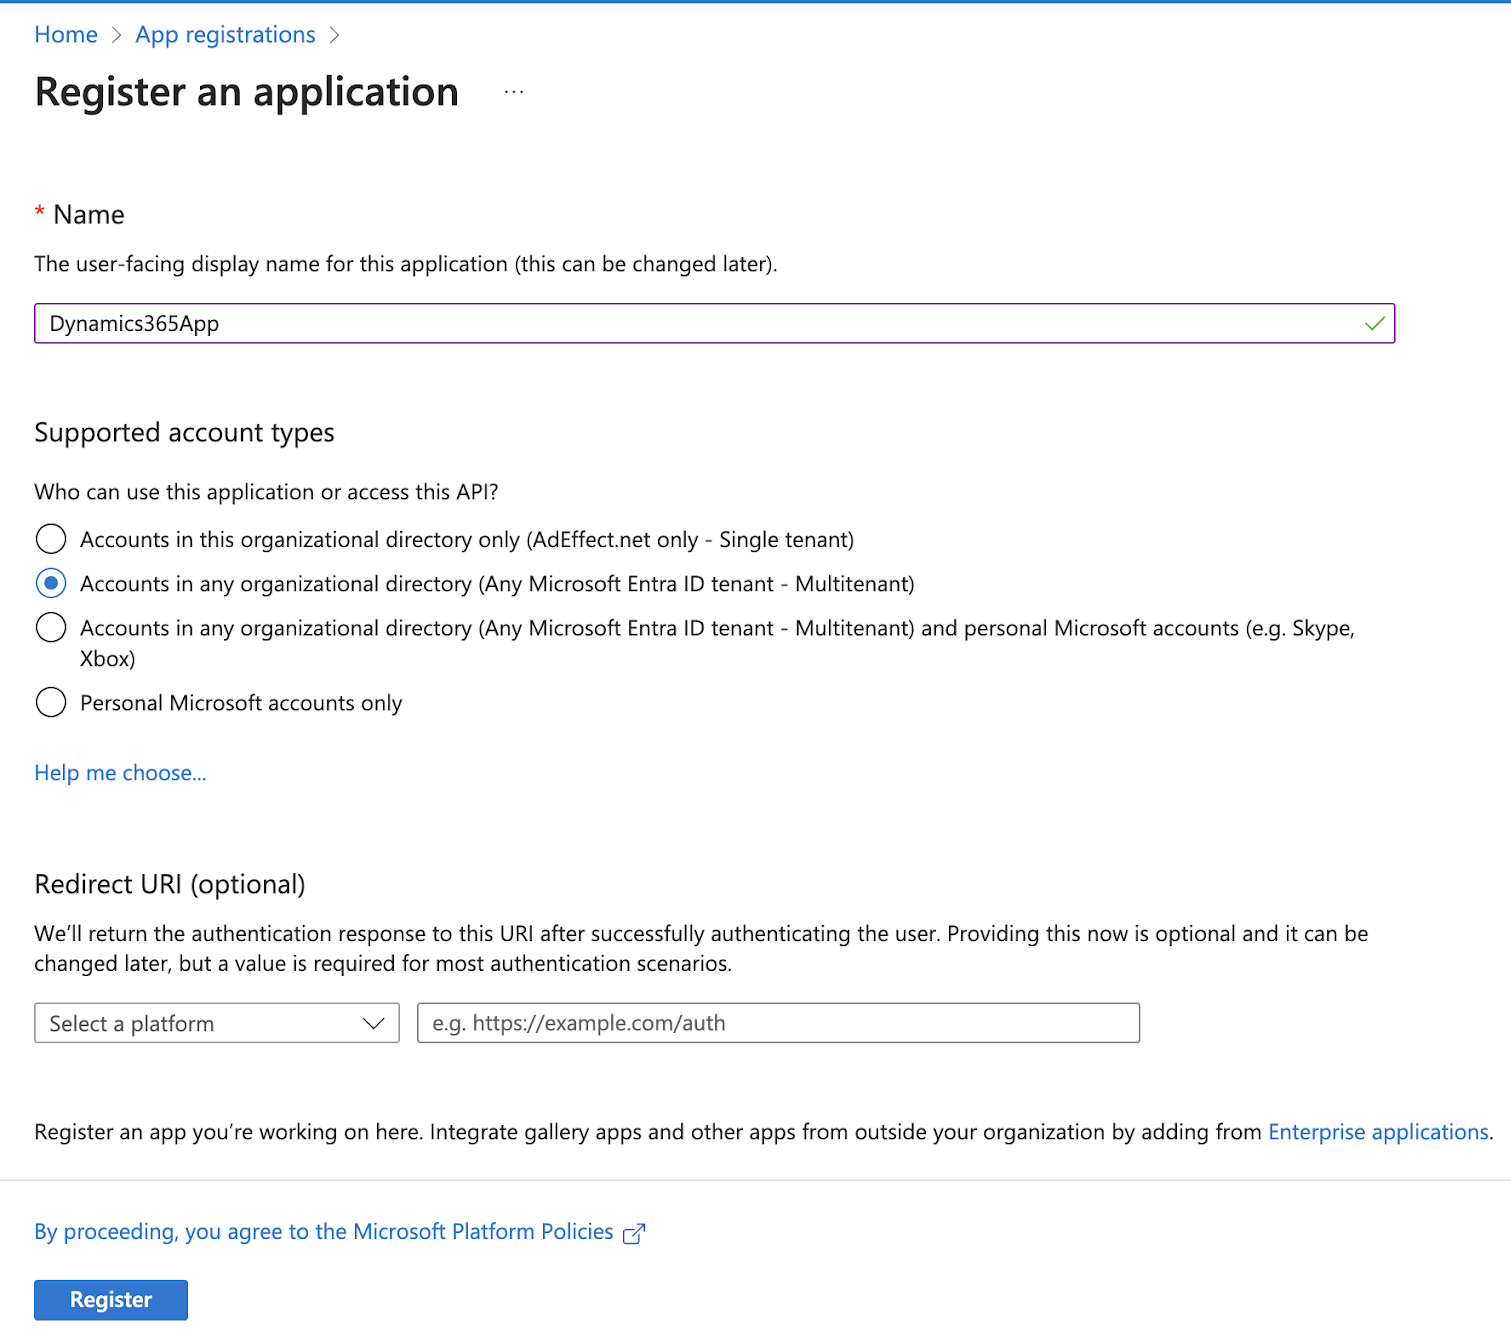
- Under Name, enter a meaningful name for the registration app.
- Under Supported Account Types, select Accounts in any organizational directory (Any Microsoft Entra ID tenant - Multitenant) using the radio button as shown in the image below.
- Leave the redirect URL blank.
4
Select Register.Once the app is registered, you can copy the values displayed for Application (client) ID and Directory (tenant) ID. These values are required for integrating MS Dynamics with Zeotap CDP.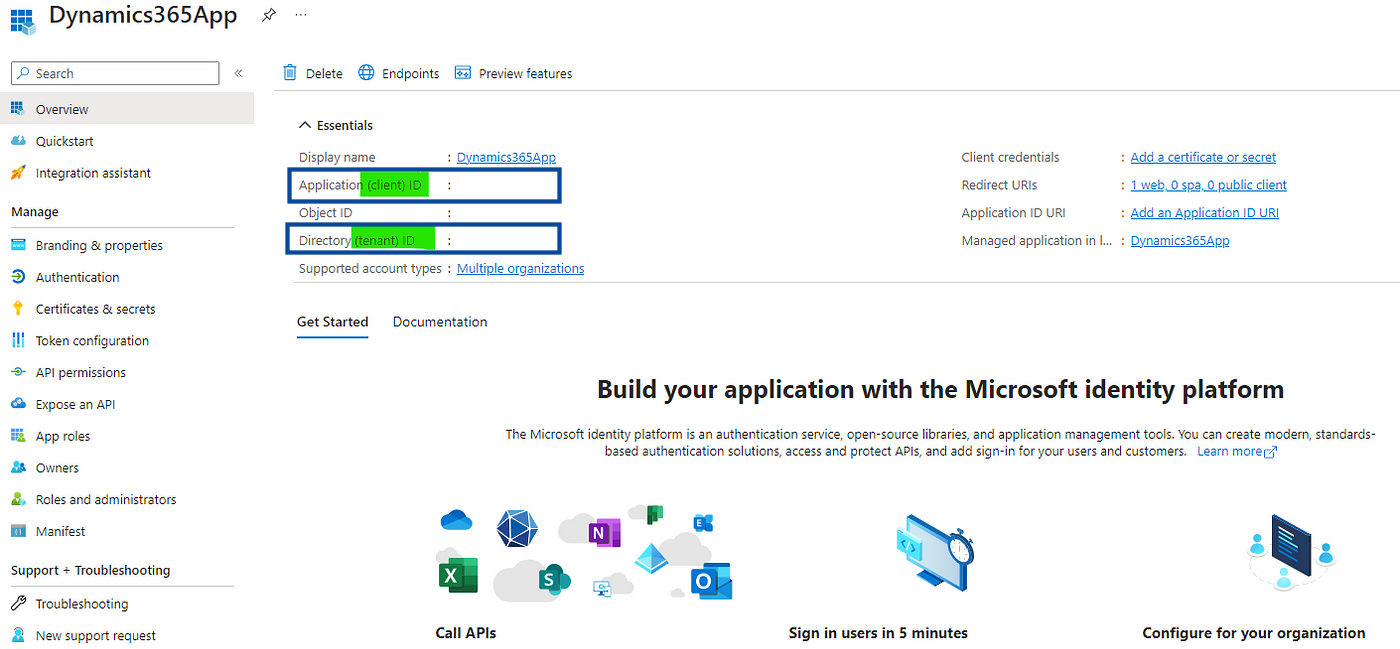
5
Next, you must provide the necessary permissions for the API. To do so, in the left navigation panel, click API permissions.
6
In the new screen that appears, under the Microsoft APIs tab, click Dynamics CRM.
7
In the Request API permissions screen that appears, click Delegated permissions.
8
Under Select permissions, use the checkbox to select the 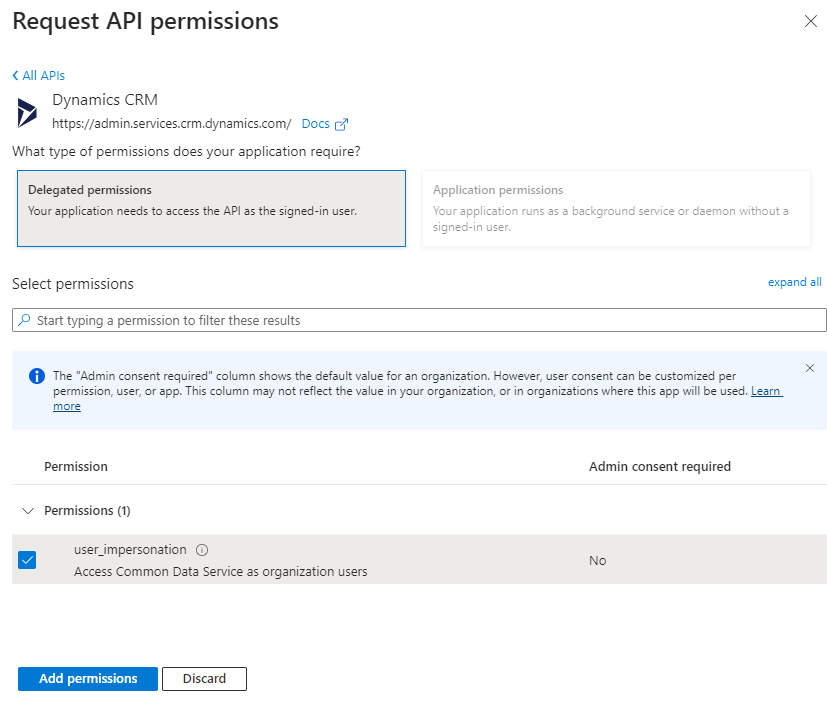
user_impersonation permission and click Add permissions.9
Next, in the left navigation panel, go to Certificates & secrets > New client secret.
10
In the new window that appears, provide the following details:a. In the Description field, enter a short description for the client secret.b. For Expires, choose the validity of the client secret using the drop-down menu.c. Click Add.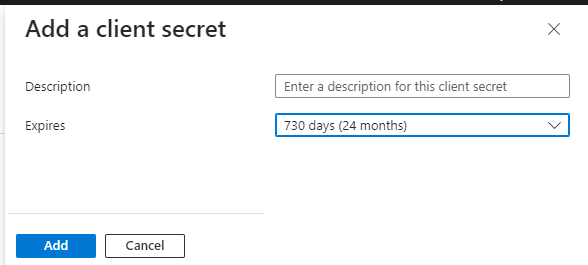
11
To find the client secret added, in the left navigation panel, click Certificates & secrets and go to the Client secrets tab as shown below.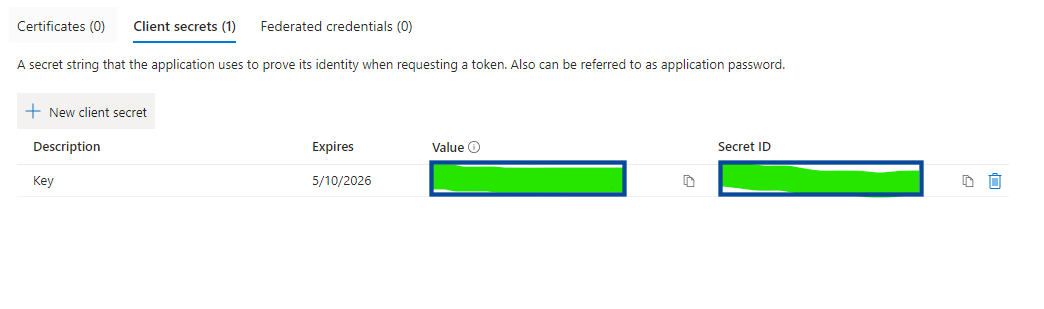
12
Copy the value displayed under Value. This is the App Client Secret required when creating a MS Dynamics CRM source in Zeotap CDP. The value is shown only once, so copy and save it securely.
13
As a final step, navigate again to API permissions and click Grant admin consent as shown below. This completes the app registration process on MS Dynamics.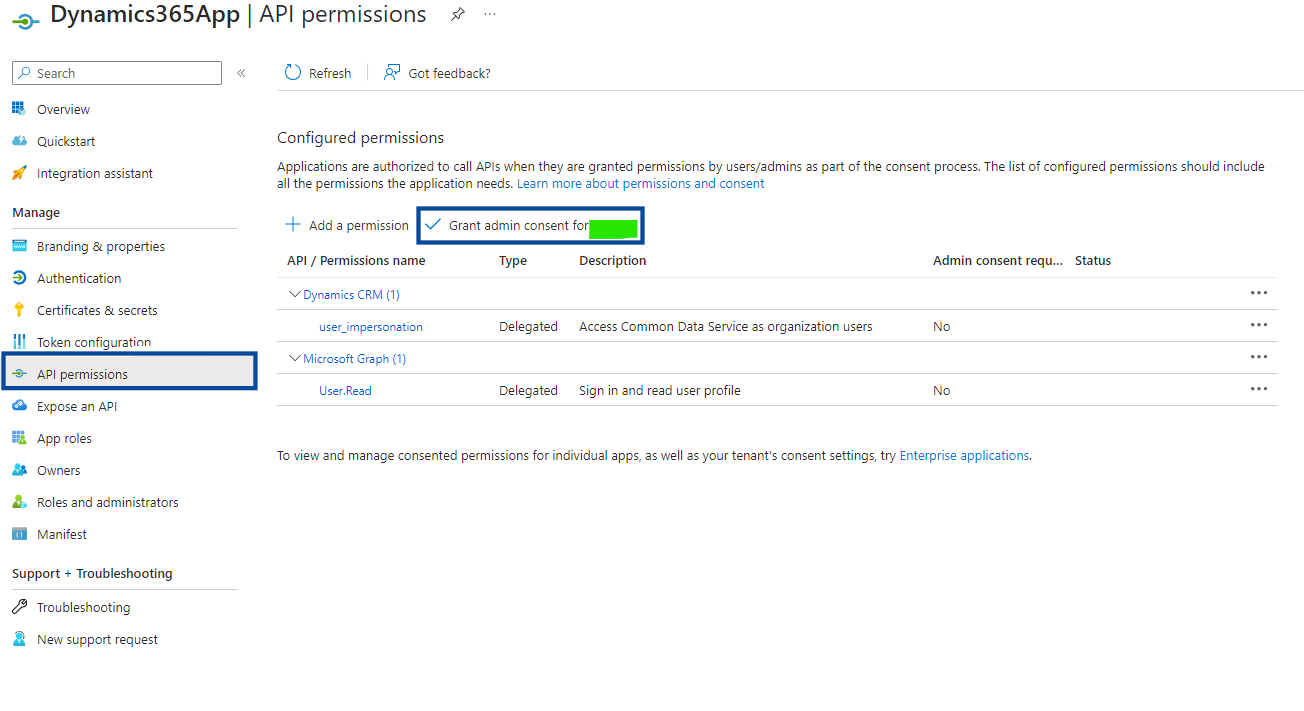
Grant the app permissions in the Power Automate portal
The app now exists in your directory, but it cannot read your Dynamics data until you add it as an application user on the environment. This section is also where you find the Organization URL.1
Log into the Power Automate portal at https://admin.powerplatform.microsoft.com/.
2
In the left navigation panel, click Environments and then choose the environment where your Dynamics CRM is located as shown below.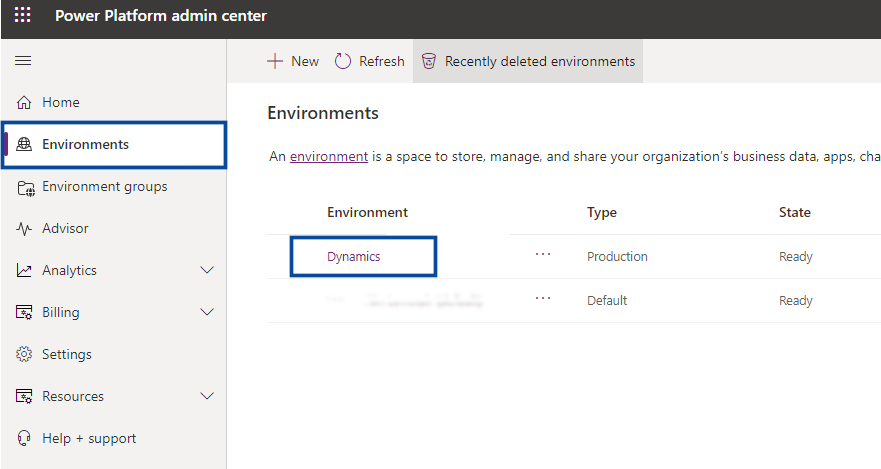
3
Click Settings. Under Details, find the Environment URL as shown in the image below. This is the Organization URL required when creating the MS Dynamics CRM source in Zeotap CDP.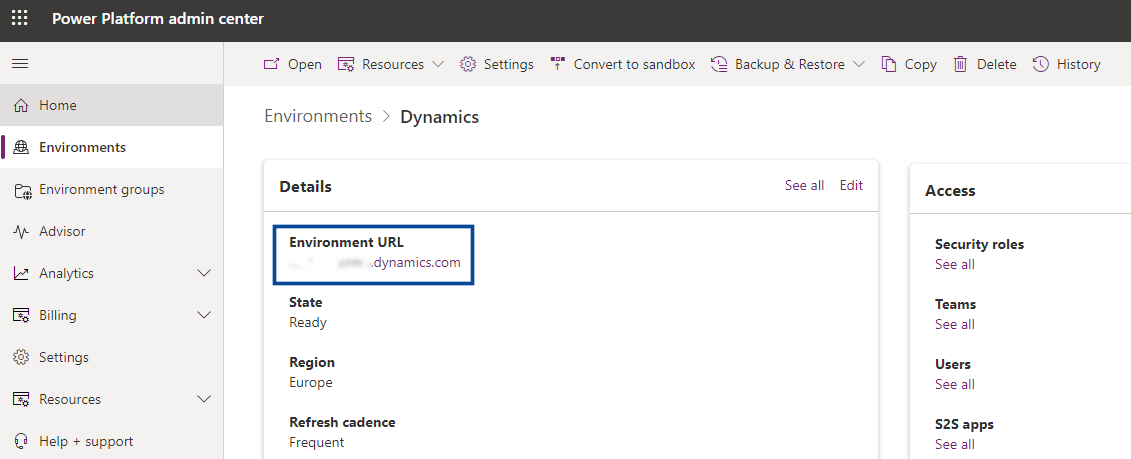
4
Next, under Users + permissions, click Application users.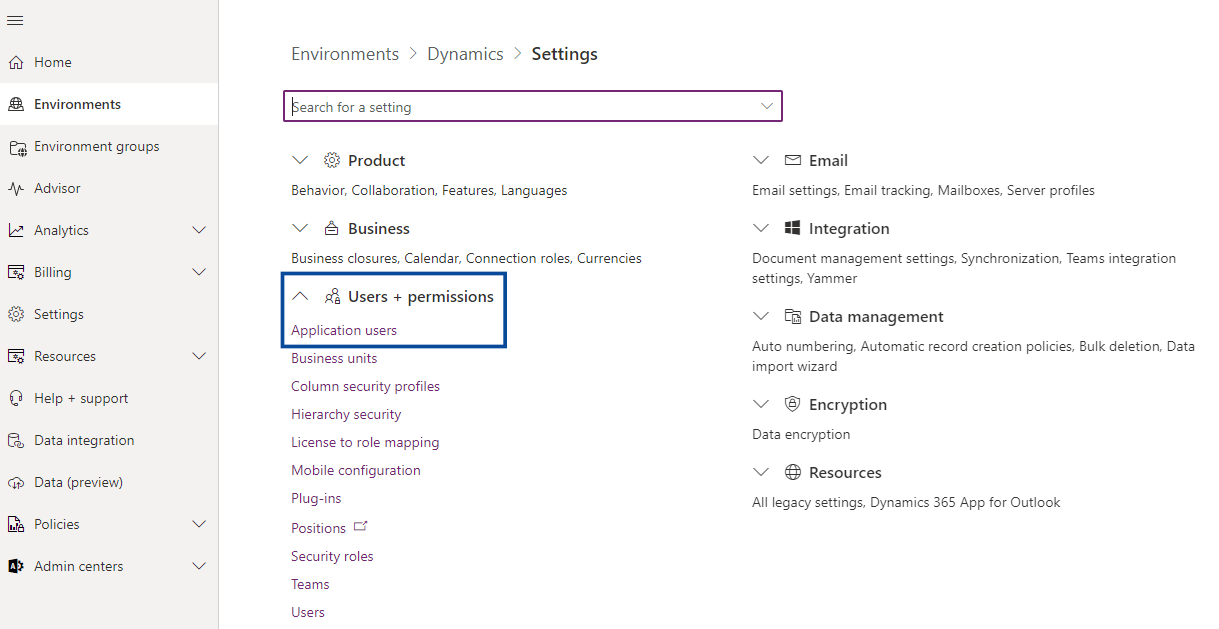
5
In the new screen that appears, click + New app user.
6
In the Create a new app user window, under App, choose the Business unit using the drop-down menu and then click + Add an app.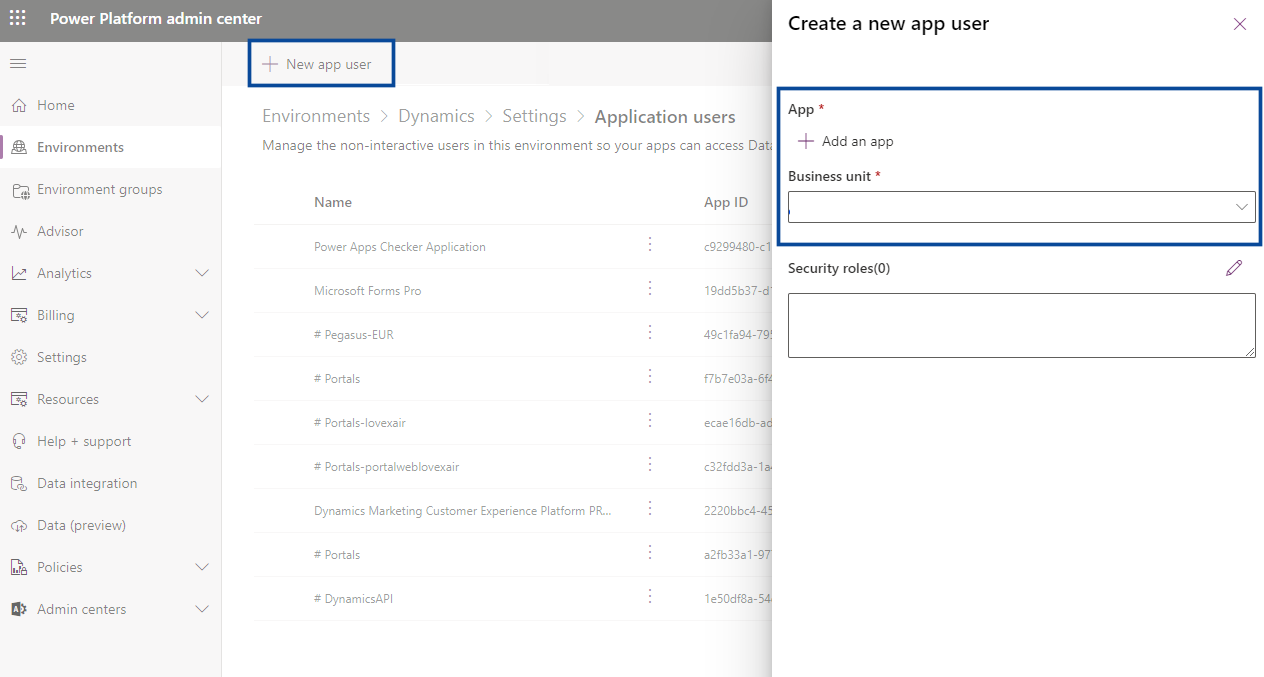
7
In the new window that appears, search for the app that you registered earlier and click Add.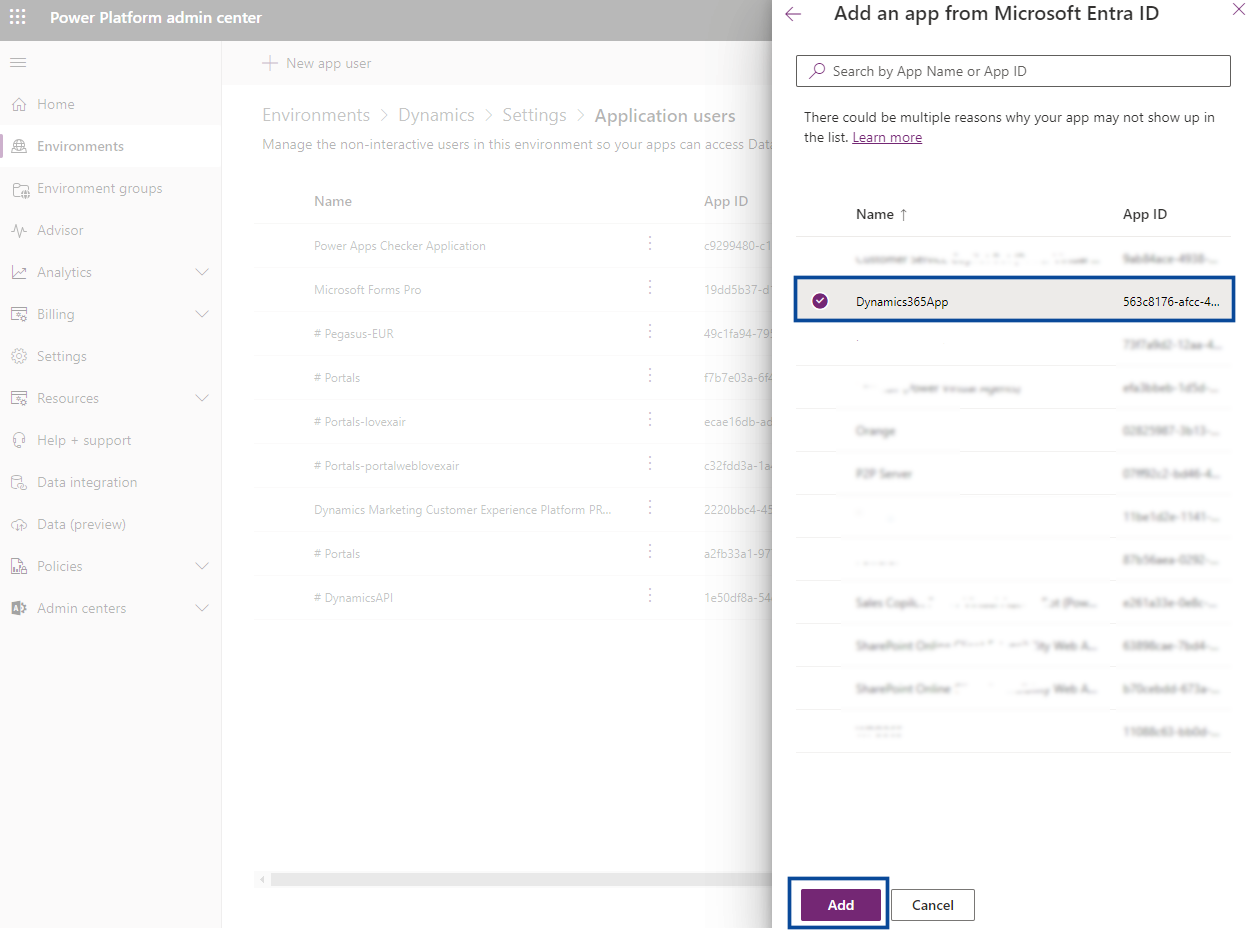
8
Once done, you will be taken back to the Create a new app user window. Next to Security roles, select the Edit icon as shown below.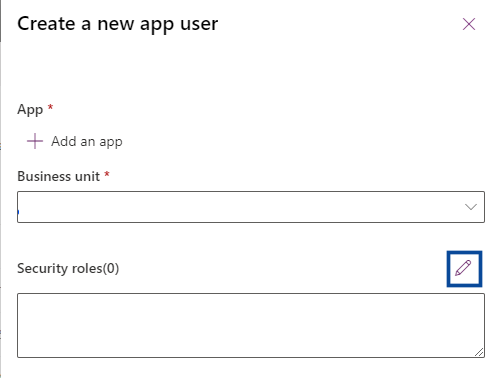
9
Provide the following permissions for your app:
- Basic User
- Service Reader
10
Once done, click Save and then click Create. After a few seconds, you will see your app user listed. This completes the configuration part. Next, you need to create an MS Dynamics source in Zeotap CDP.
Create the Microsoft Dynamics CRM source
Perform the following steps to create an MS Dynamics CRM source in the Zeotap CDP App:1
Navigate to the Sources application in the Zeotap CDP App.
2
Click CREATE SOURCE.
3
Choose CRM Data as the Category.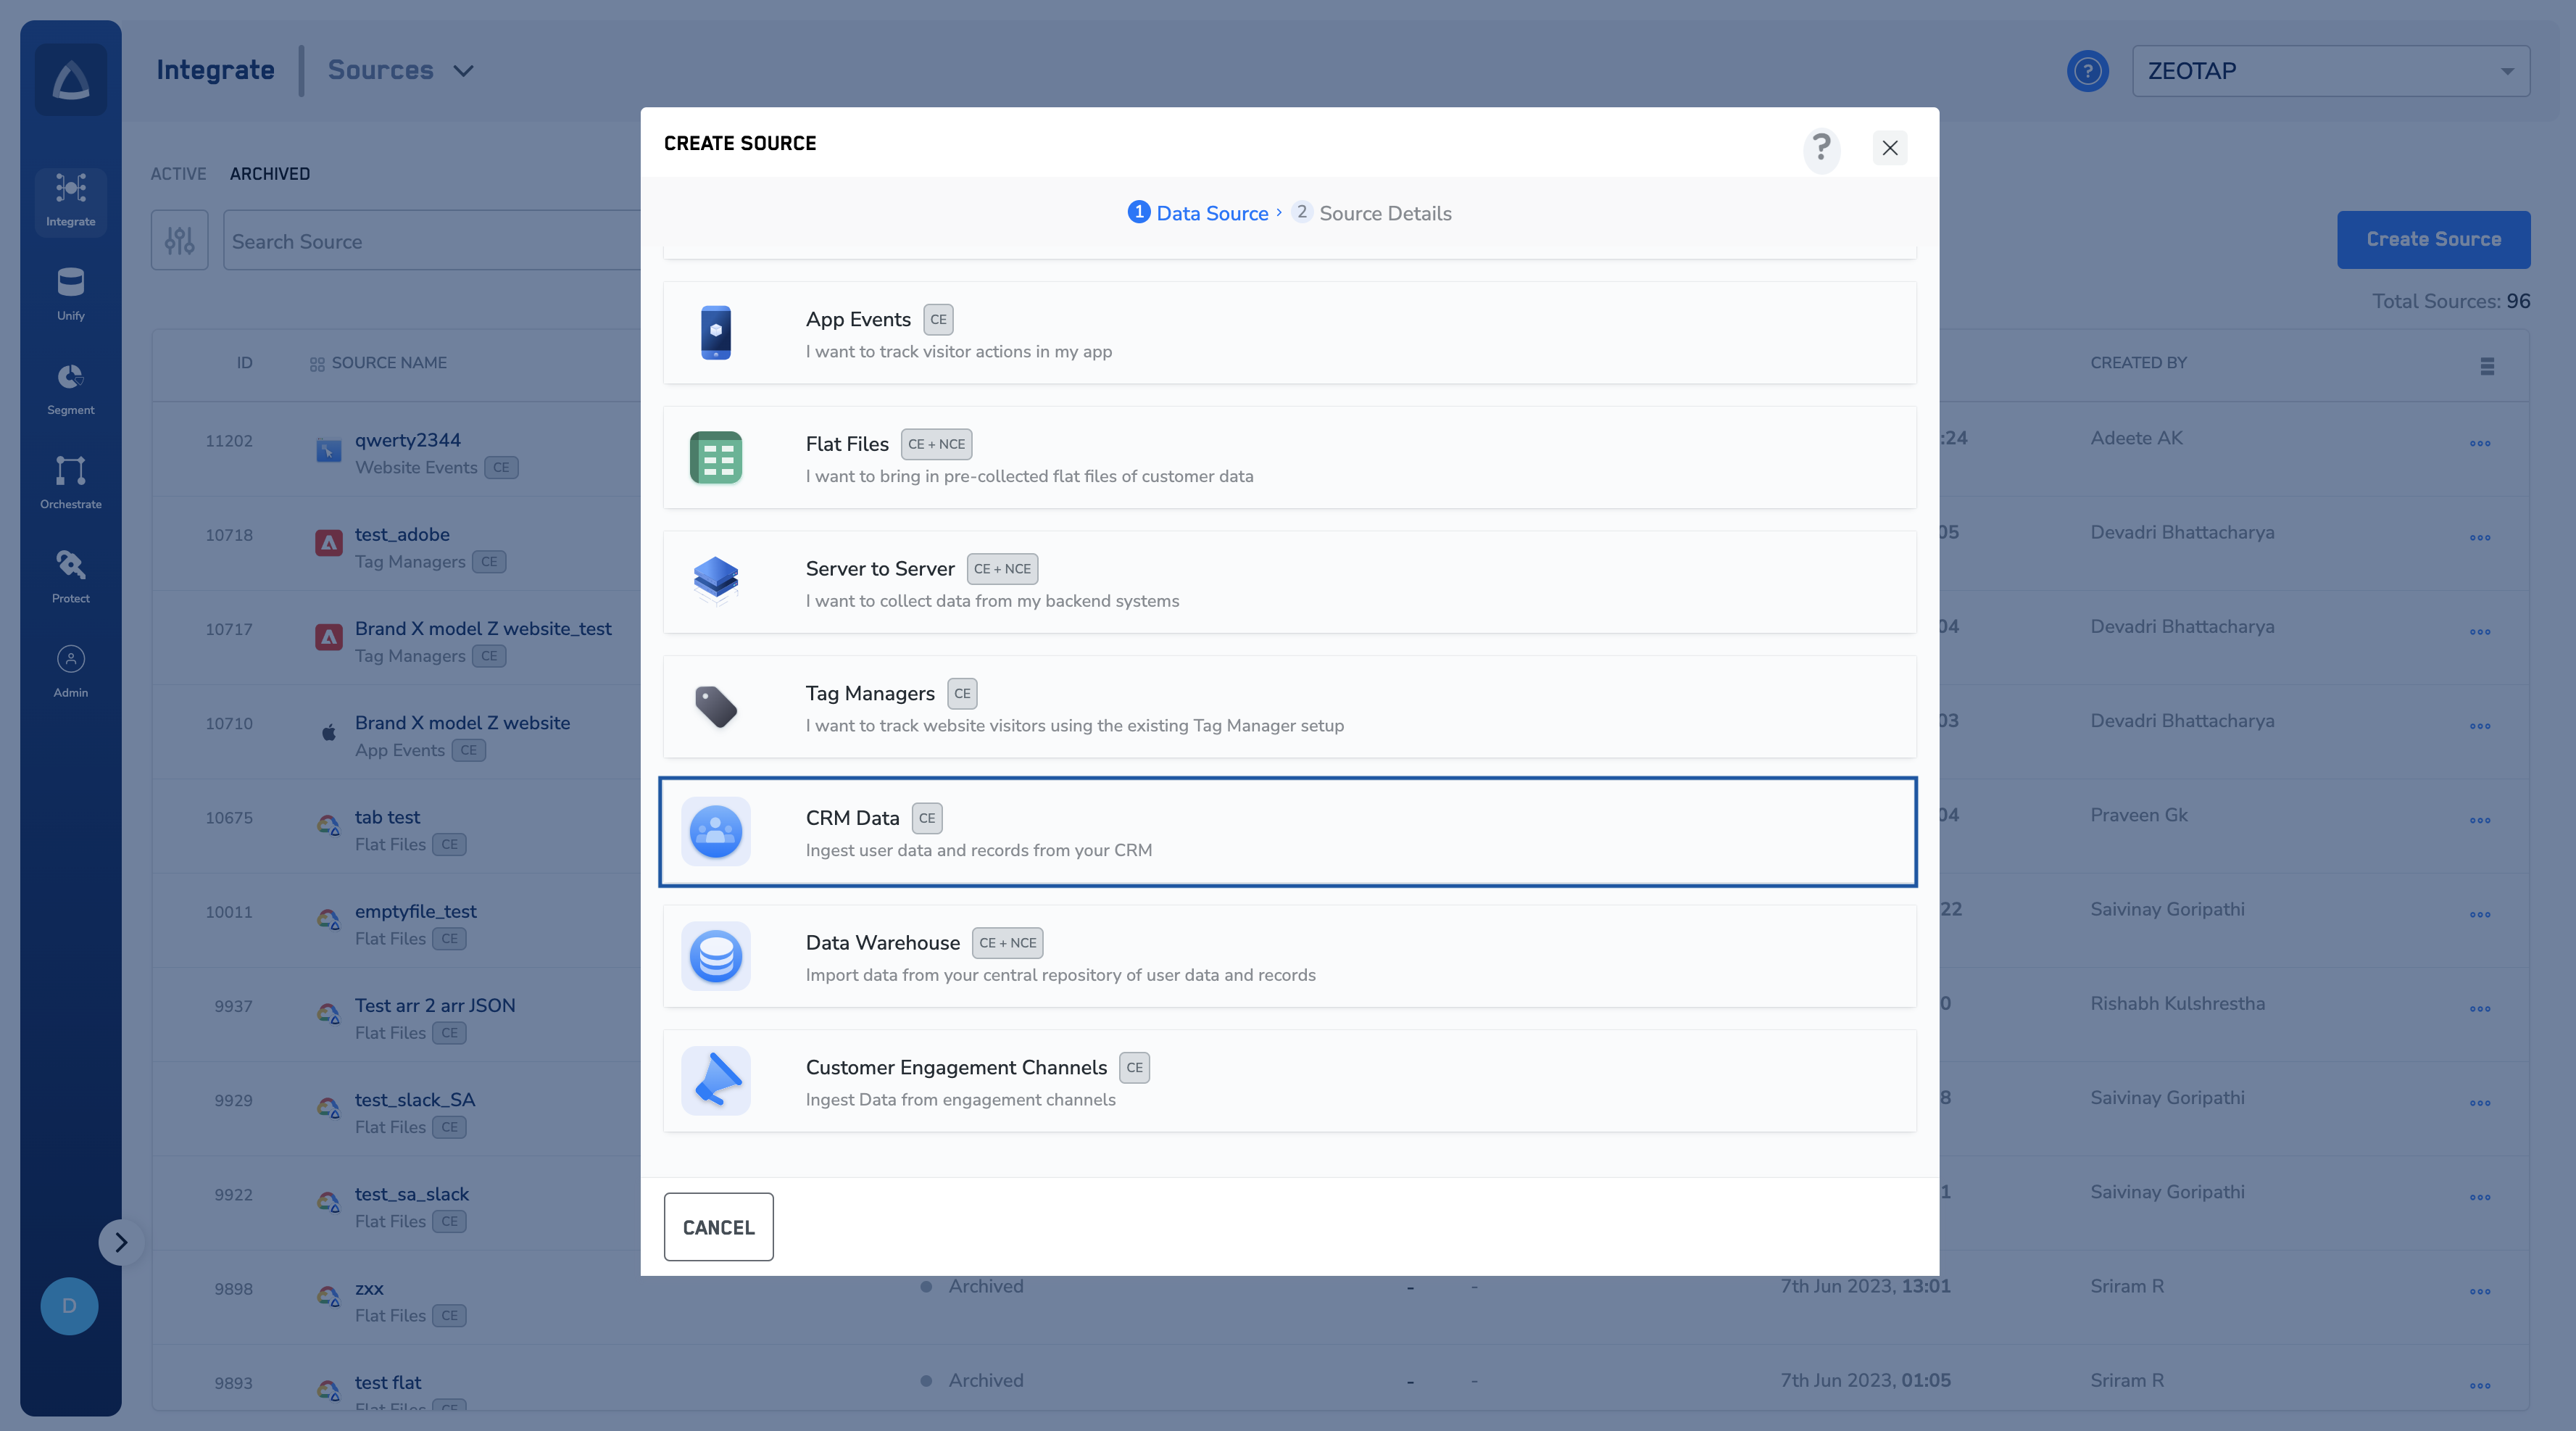
4
Click Microsoft Dynamics CRM as the Data Source.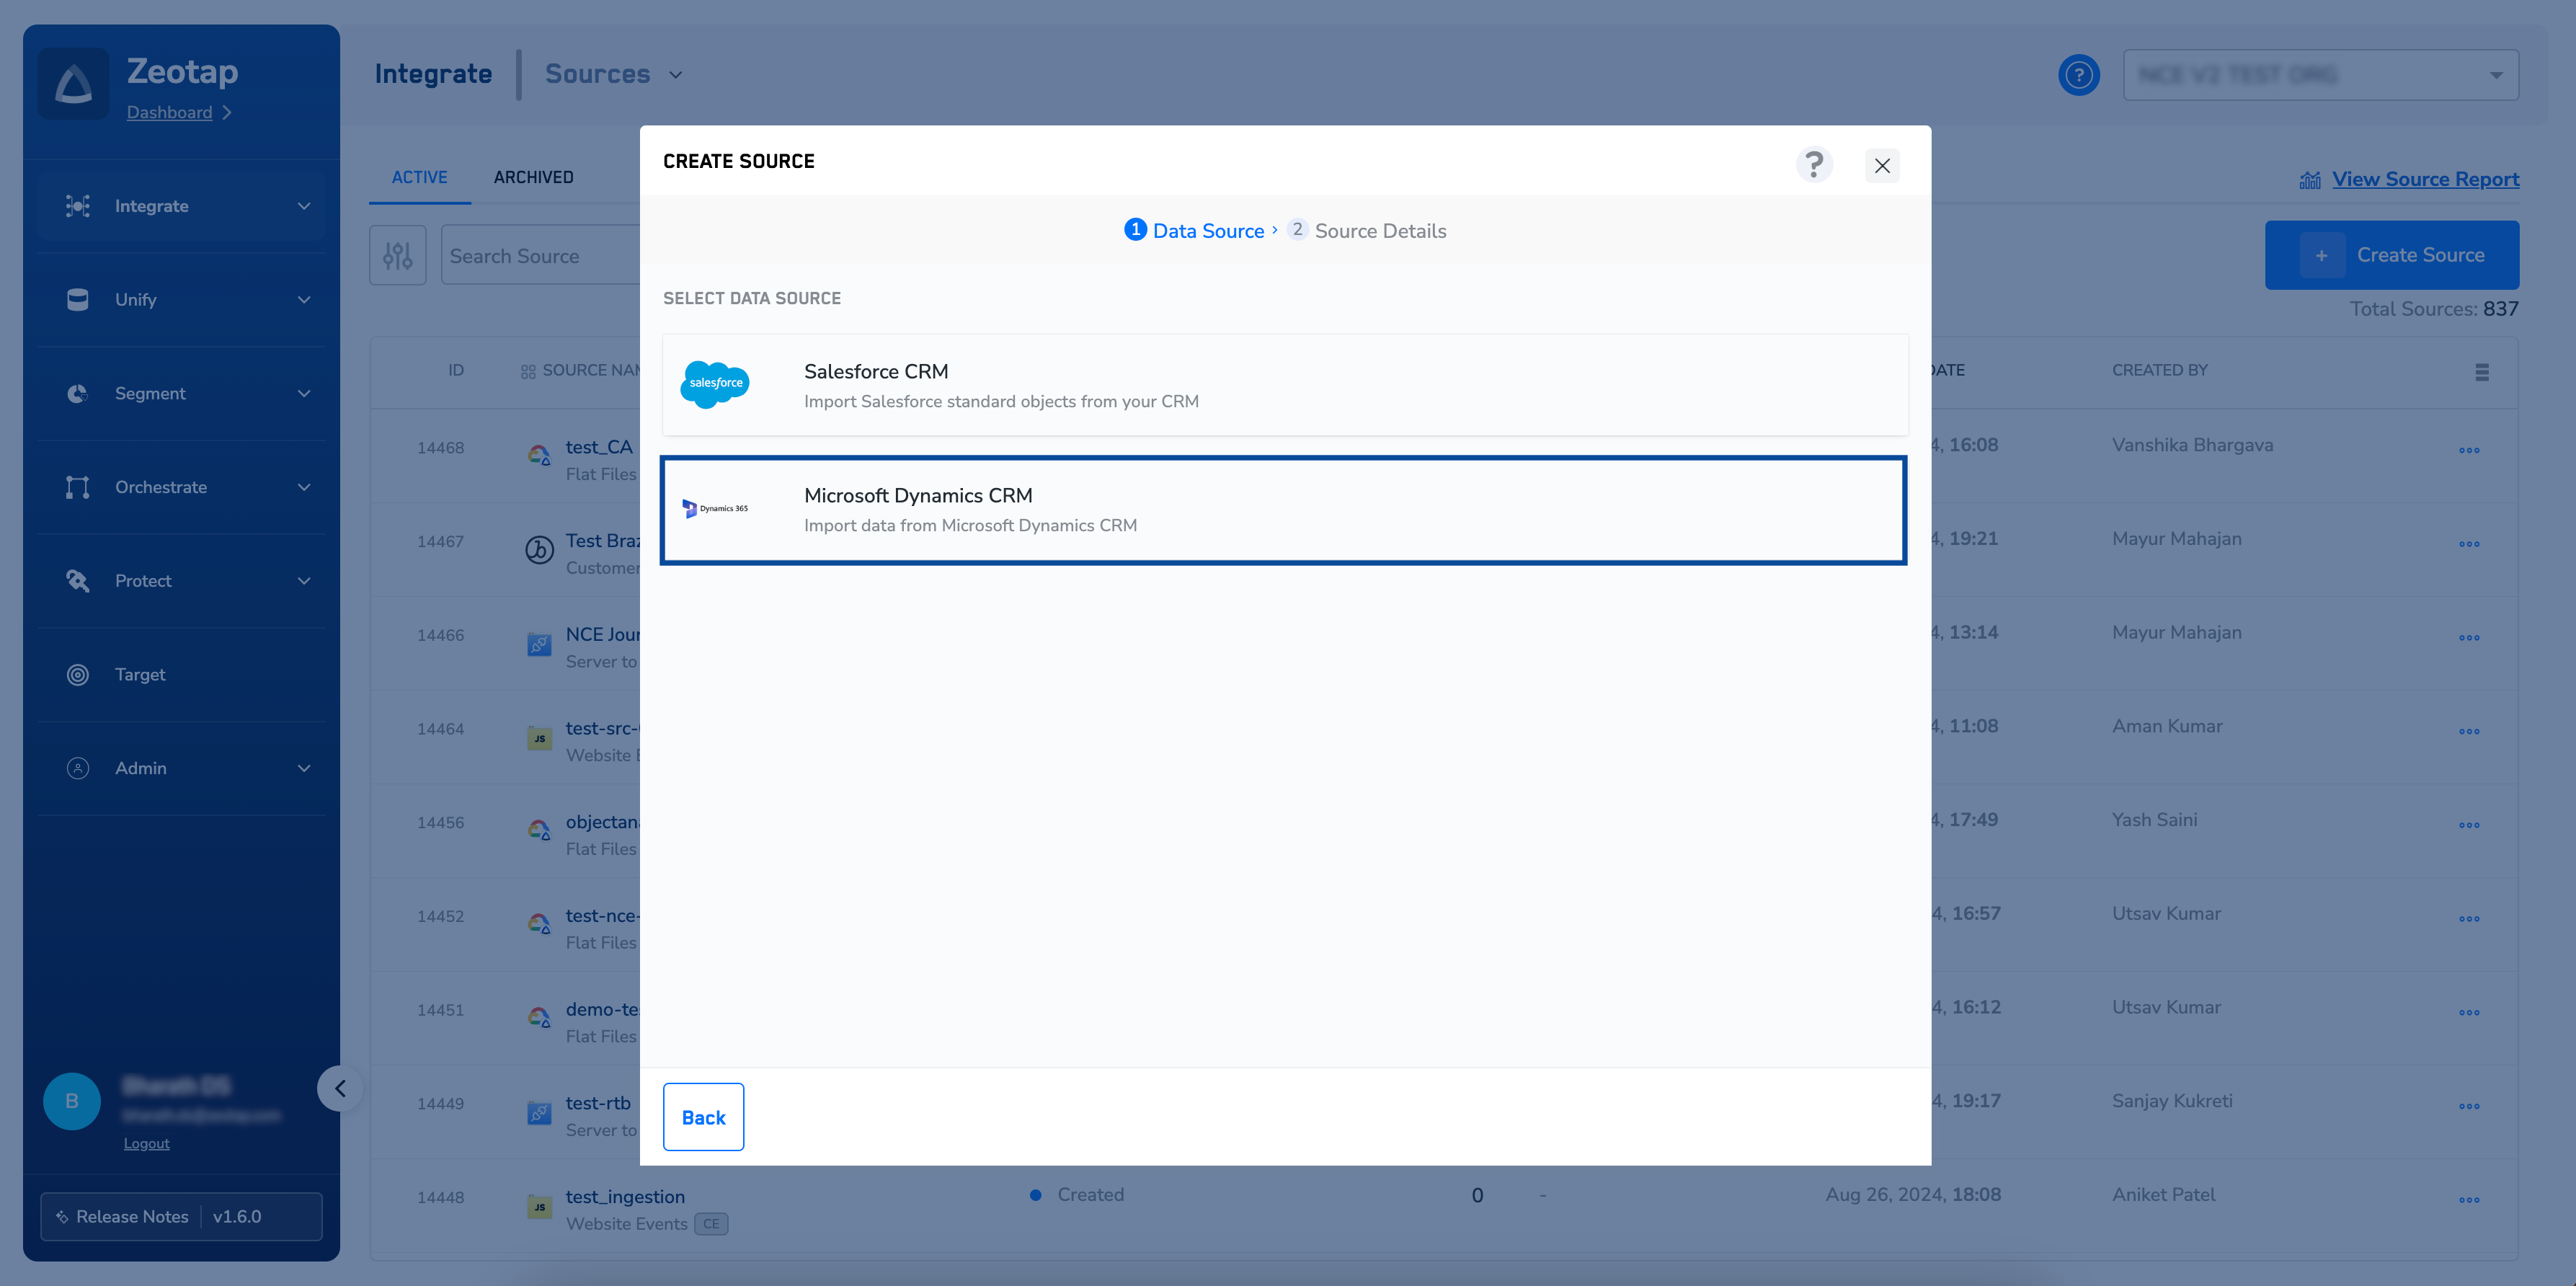
5
In the window that appears, enter a short and descriptive name for the source.
6
Select the Region of upload.
7
Enter the App Client ID, App Client Secret, Tenant ID and Organization URL obtained from the Azure portal and the Power Automate portal in the respective fields. For more information about how to obtain these values, see Register an app in the Azure portal and Grant the app permissions in the Power Automate portal.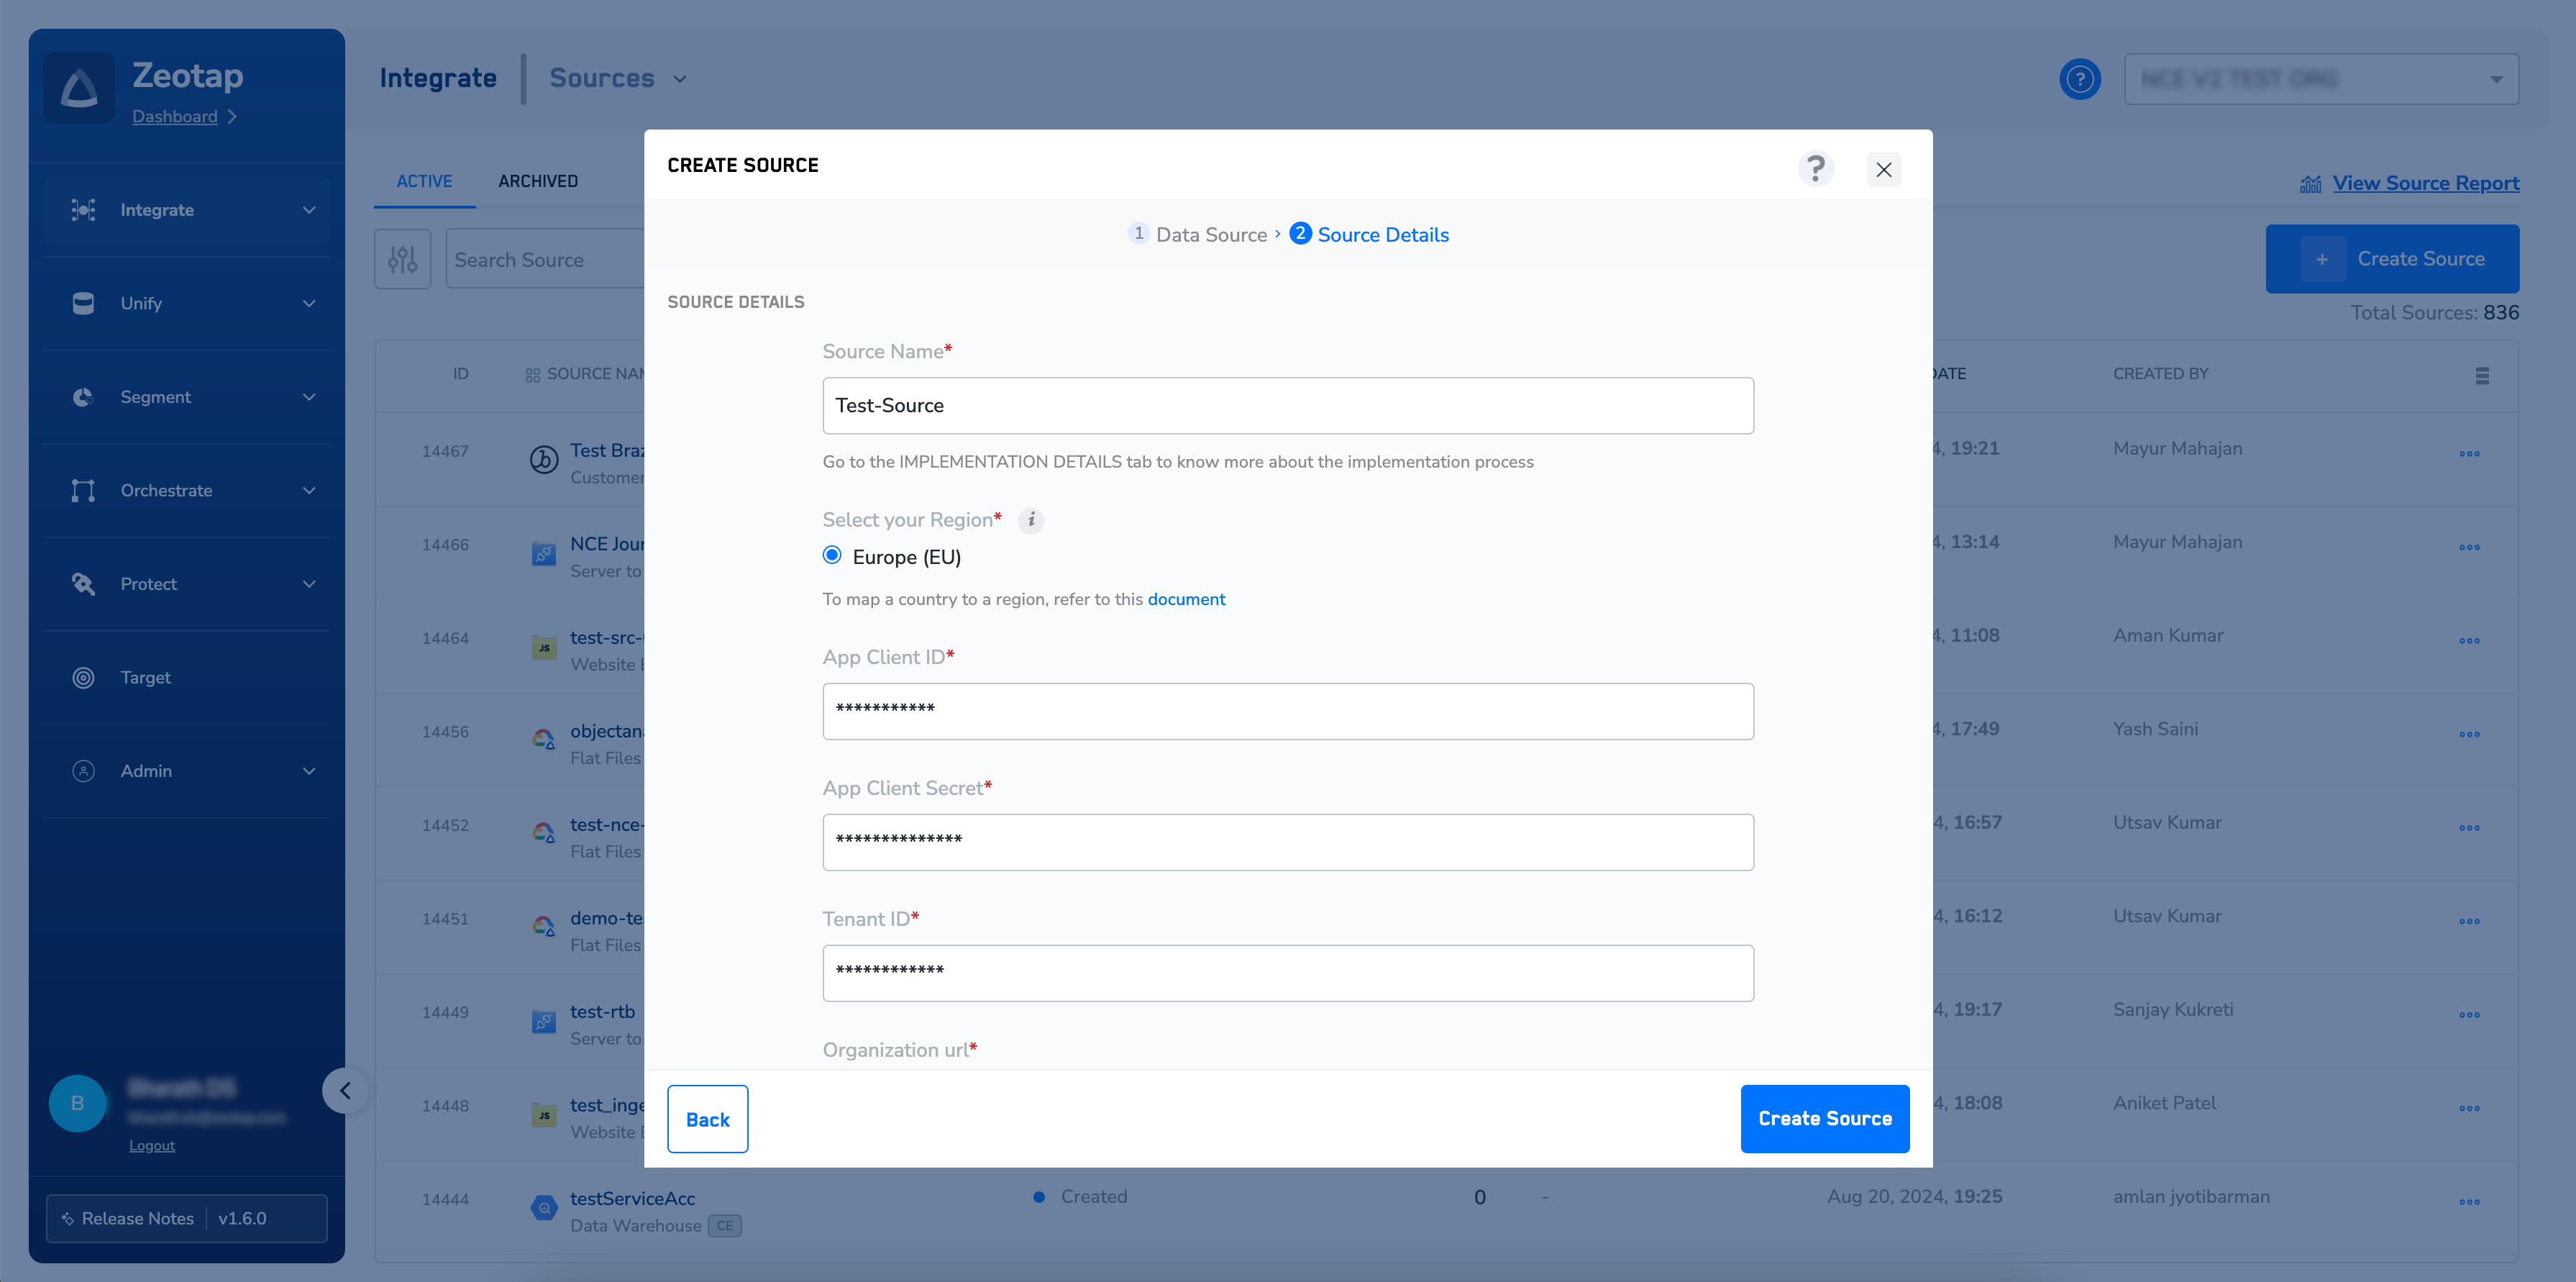
8
Provide the desired Entity name. For example, account, campaign and incident (case) can be used to track and support sales, marketing and service activities. To learn more about what entities mean in MS Dynamics, see the Microsoft documentation on entities.
9
Under Data Entity, depending on the type of data you want to ingest, choose either Customer Data or Non Customer Data and proceed with the source creation. To know more about Customer Data and Non Customer Data, see Supported Data Entities.
10
Review the fields entered above and click Create Source.
Verify the source
The created Microsoft Dynamics CRM source is listed on the source listing page. Open it and check the IMPLEMENTATION DETAILS tab, where you can find details about the source. Once data starts flowing in, you can examine a sample of it on the PREVIEW DATA tab, and the status of the source changes to Integrated. See Components of the Preview Data Tab for what each option on that tab does.Troubleshoot the source
You did not copy the client secret. The Value of a client secret is shown only once, when the secret is created. If you did not save it, you cannot read it back from the Azure portal — add a new client secret as described in Register an app in the Azure portal and copy the value at that point. No preview data appears. If no preview is available, an error message is displayed on the PREVIEW DATA tab stating the reason. Fix the issue reported there, check that the source is implemented correctly, and try again after some time. See Components of the Preview Data Tab. For anything else, reach out to the Zeotap support team at support@zeotap.com.Next steps
- Map the ingested data in the Catalogue — see Map the Catalogue for Customer Data for Customer Data (CE), or Map the Catalogue for Non-Customer Entity Data for Non-Customer Entity (NCE) data.
- Check what Customer Data and Non-Customer Entity data cover in Supported Data Entities.
- Read more about the integration itself in MS Dynamics Source.