

What this is
A Databricks source lets Zeotap CDP ingest data from a table in your Databricks workspace on a defined refresh schedule. Two connection mechanisms are supported — JDBC, which reads through a Databricks SQL warehouse, and Job Based, which runs a Databricks job to move the data. The Job-based approach is the recommended path for tables above 1 million records, since JDBC may encounter issues at that data volume. Data ingested from Databricks lands in either the Customer Data or Non Customer Data entity in Zeotap CDP.Prerequisites
Setting up a Databricks source requires access to your Databricks workspace with permission to create a service principal, generate the credentials for your chosen mechanism (OAuth Client ID and Client Secret, or a personal access token), and read the target table. You also need access to the Sources application in the Zeotap CDP App.
Required permissions in Databricks
The user or service principal used for authentication must have:- Unrestricted Cluster Access, or a cluster policy that permits creating the required node-type clusters.
- SELECT permission on the required tables.
- USE SCHEMA permission on the relevant schema.
Components needed for every Databricks source
Obtain these four values from your Databricks account before you create the source in Zeotap CDP.Databricks Host
The Databricks Host is the unique URL assigned to your Databricks workspace. You can find it in the URL for the Databricks account.
Catalog Name
In Databricks, a catalog acts like a folder system. It organises schemas and databases into a hierarchy, allowing users to group tables and views logically.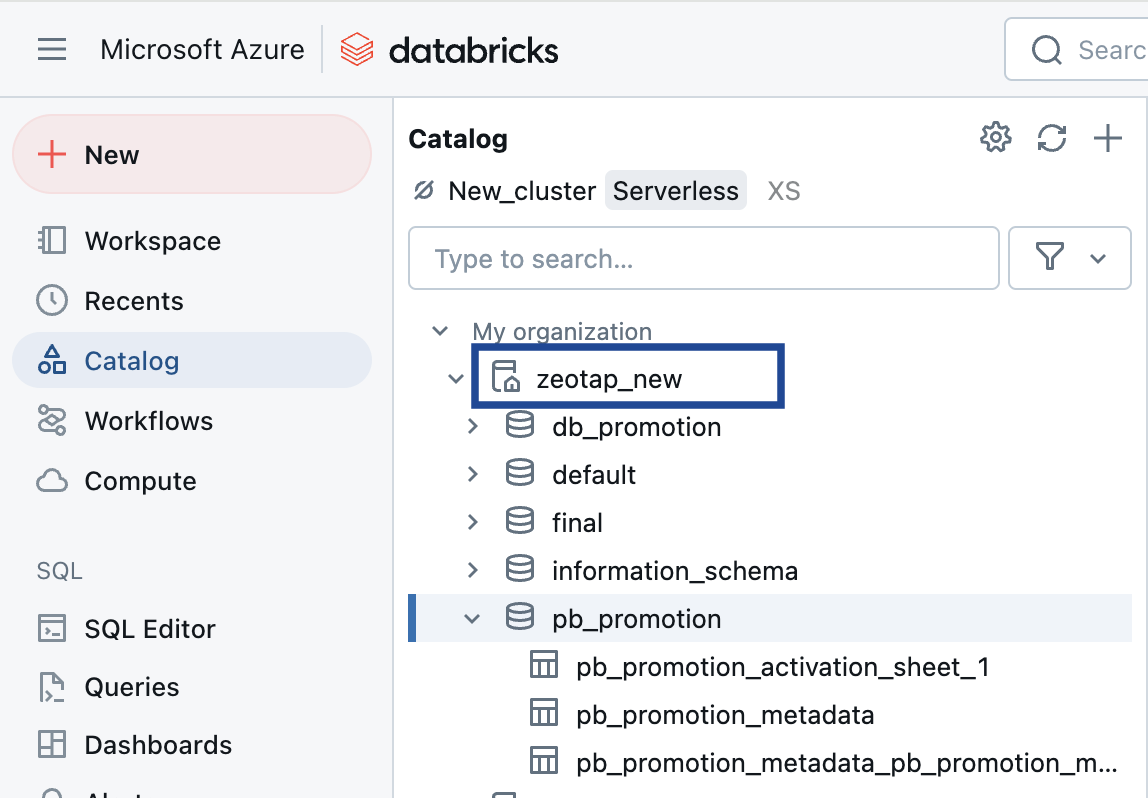
Schema Name
In Databricks, a schema is essentially a database that contains tables. It serves as a container for organising and managing related tables, providing a structured way to store and retrieve data.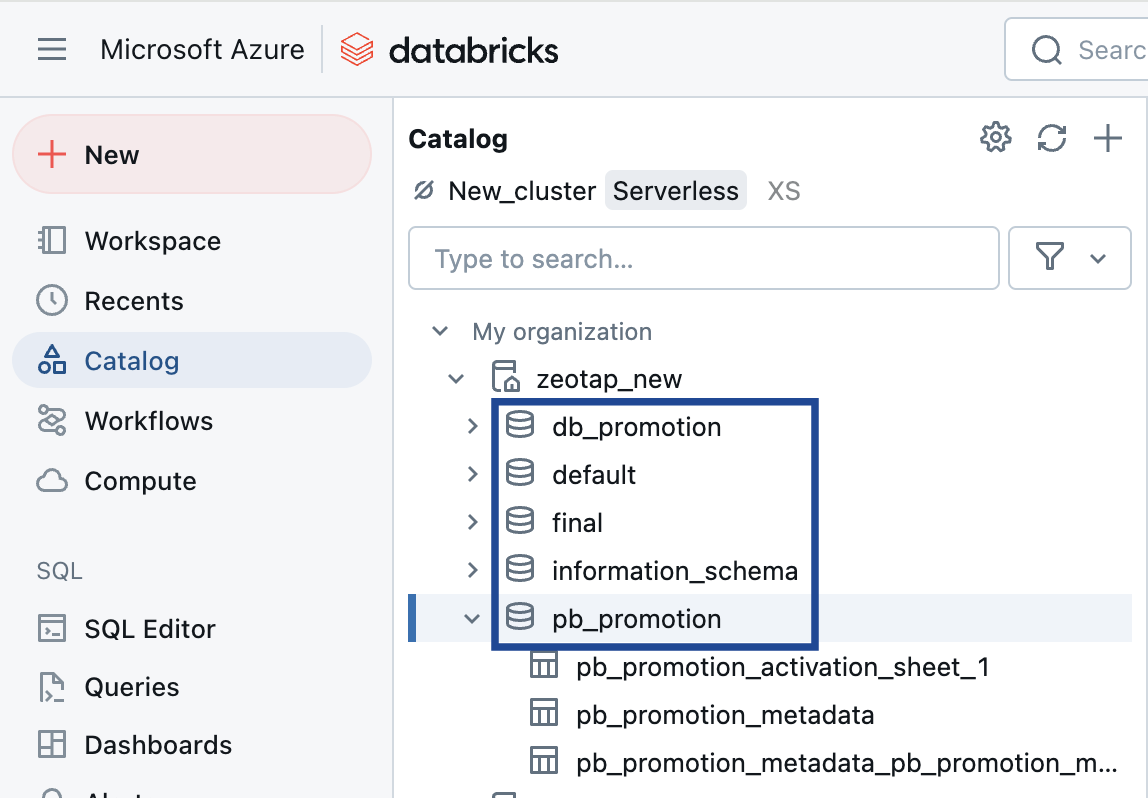
Table Name
This is the name of the table within the schema that you want to ingest.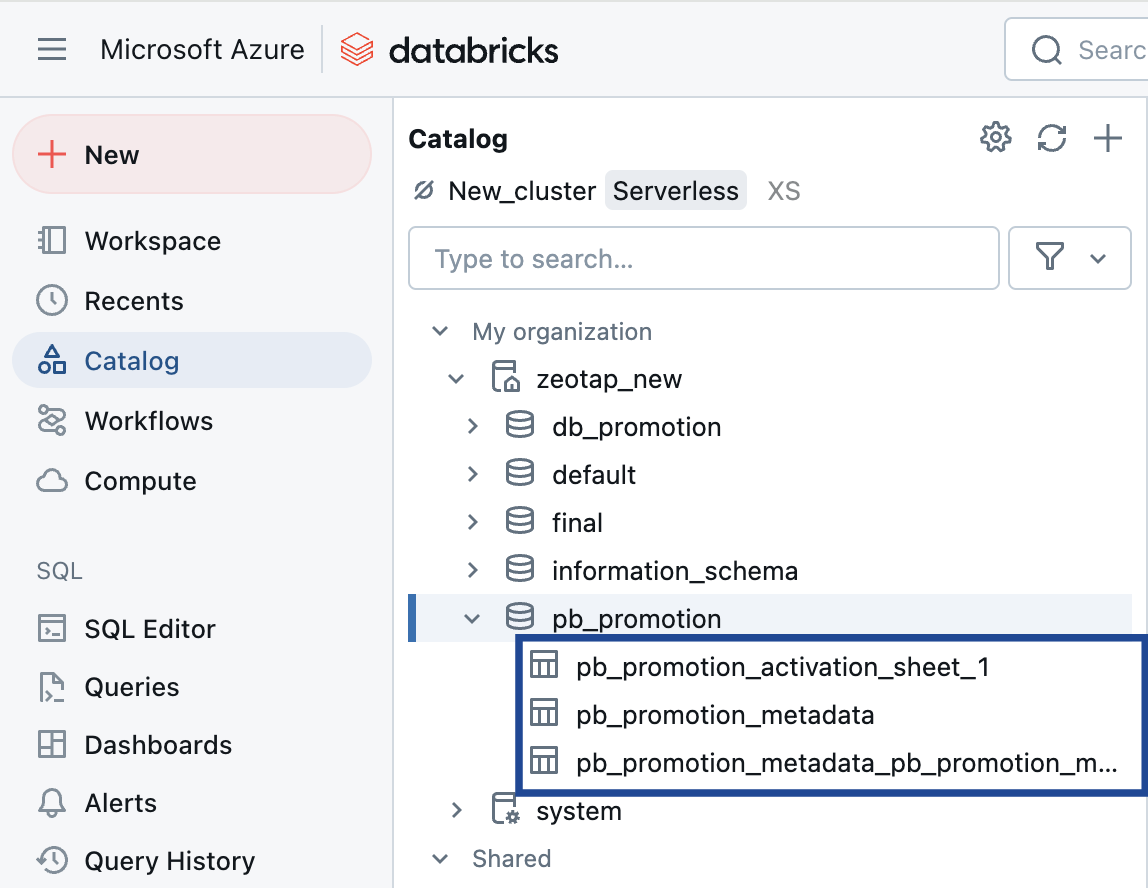
Additional components for the JDBC mechanism
- HTTP Path of a Databricks SQL warehouse.
- Client ID and Client Secret from an OAuth service principal.
- Partition Column or Unique Column (see Partition Column and Unique Column).
1. Create a Service Principal
2. Assign Workspace-Level Permissions to the Service Principal
3. Create an OAuth Secret for the Service Principal
Databricks Client ID and Client Secret
Before you can use OAuth to authenticate to Databricks, you must first create an OAuth Client Secret, which is used to generate OAuth access tokens. A service principal can hold up to five OAuth secrets. Account admins and workspace admins can create an OAuth secret for a service principal. For the specific procedure to generate the Client ID and Client Secret, see step 3 of the Databricks OAuth documentation. To create a service principal and generate its Client ID and Client Secret, go to Identity and Access → Service Principals → Add Service Principal → Generate Secret in your Databricks workspace:1
Open Service Principals
Go to Identity and Access → Service Principals and click Add service principal.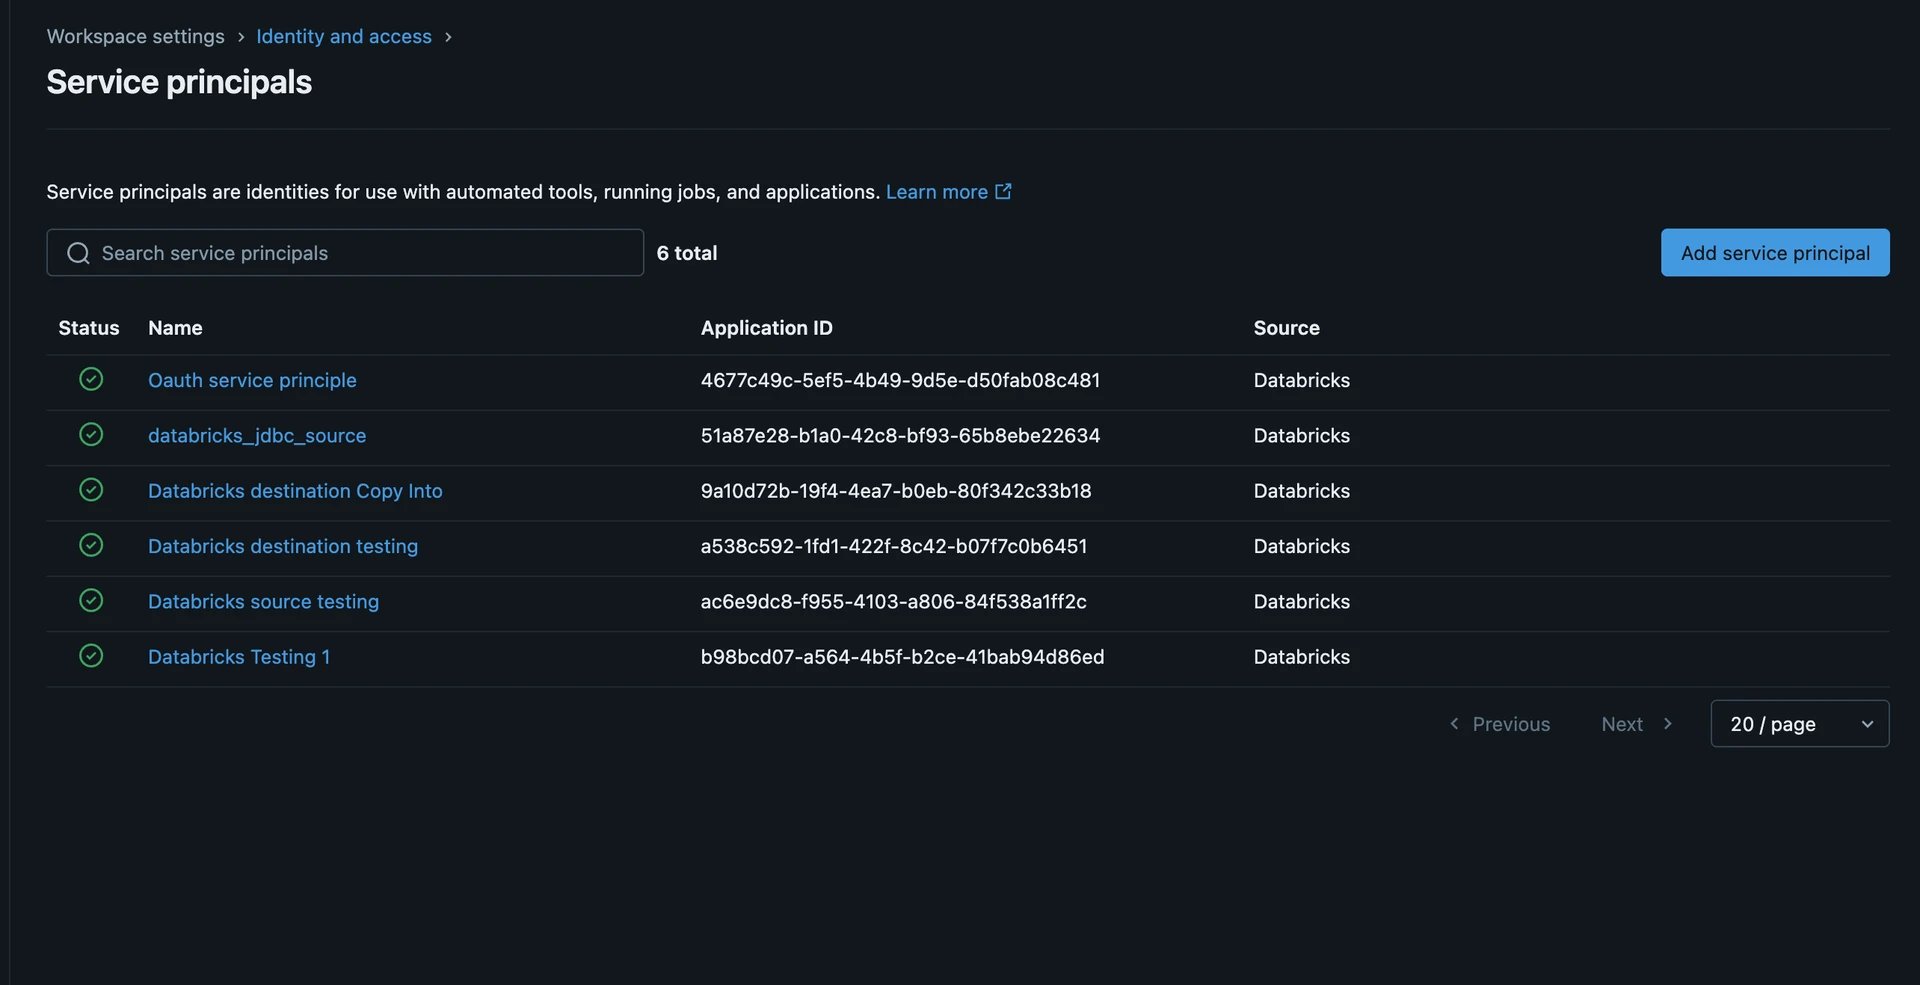
2
Add the service principal
Select an existing service principal from your account, or create a new one, then click Add service principal.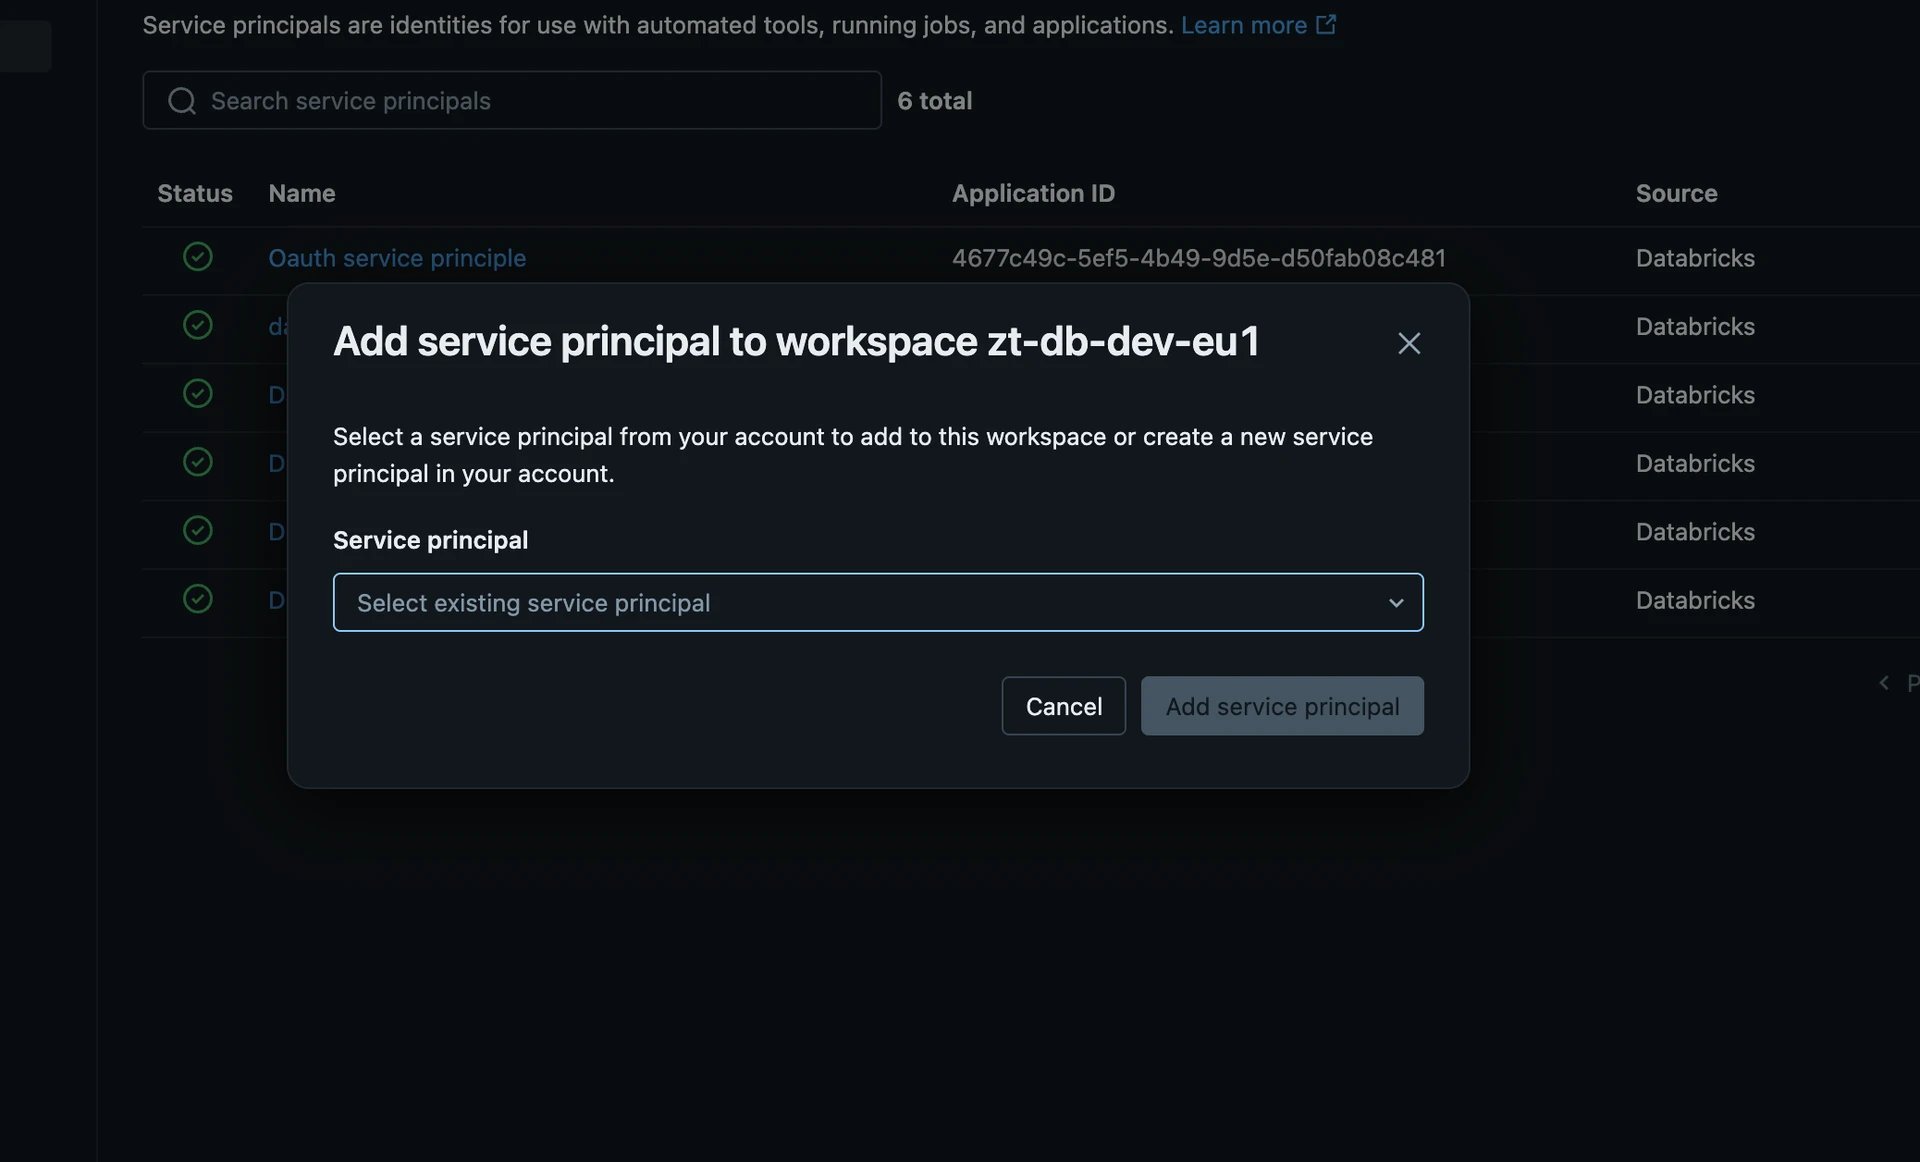
3
Generate the secret
Open the service principal, go to the Secrets tab, and click Generate secret. Copy the generated Client ID and Client Secret — the secret value is shown only once.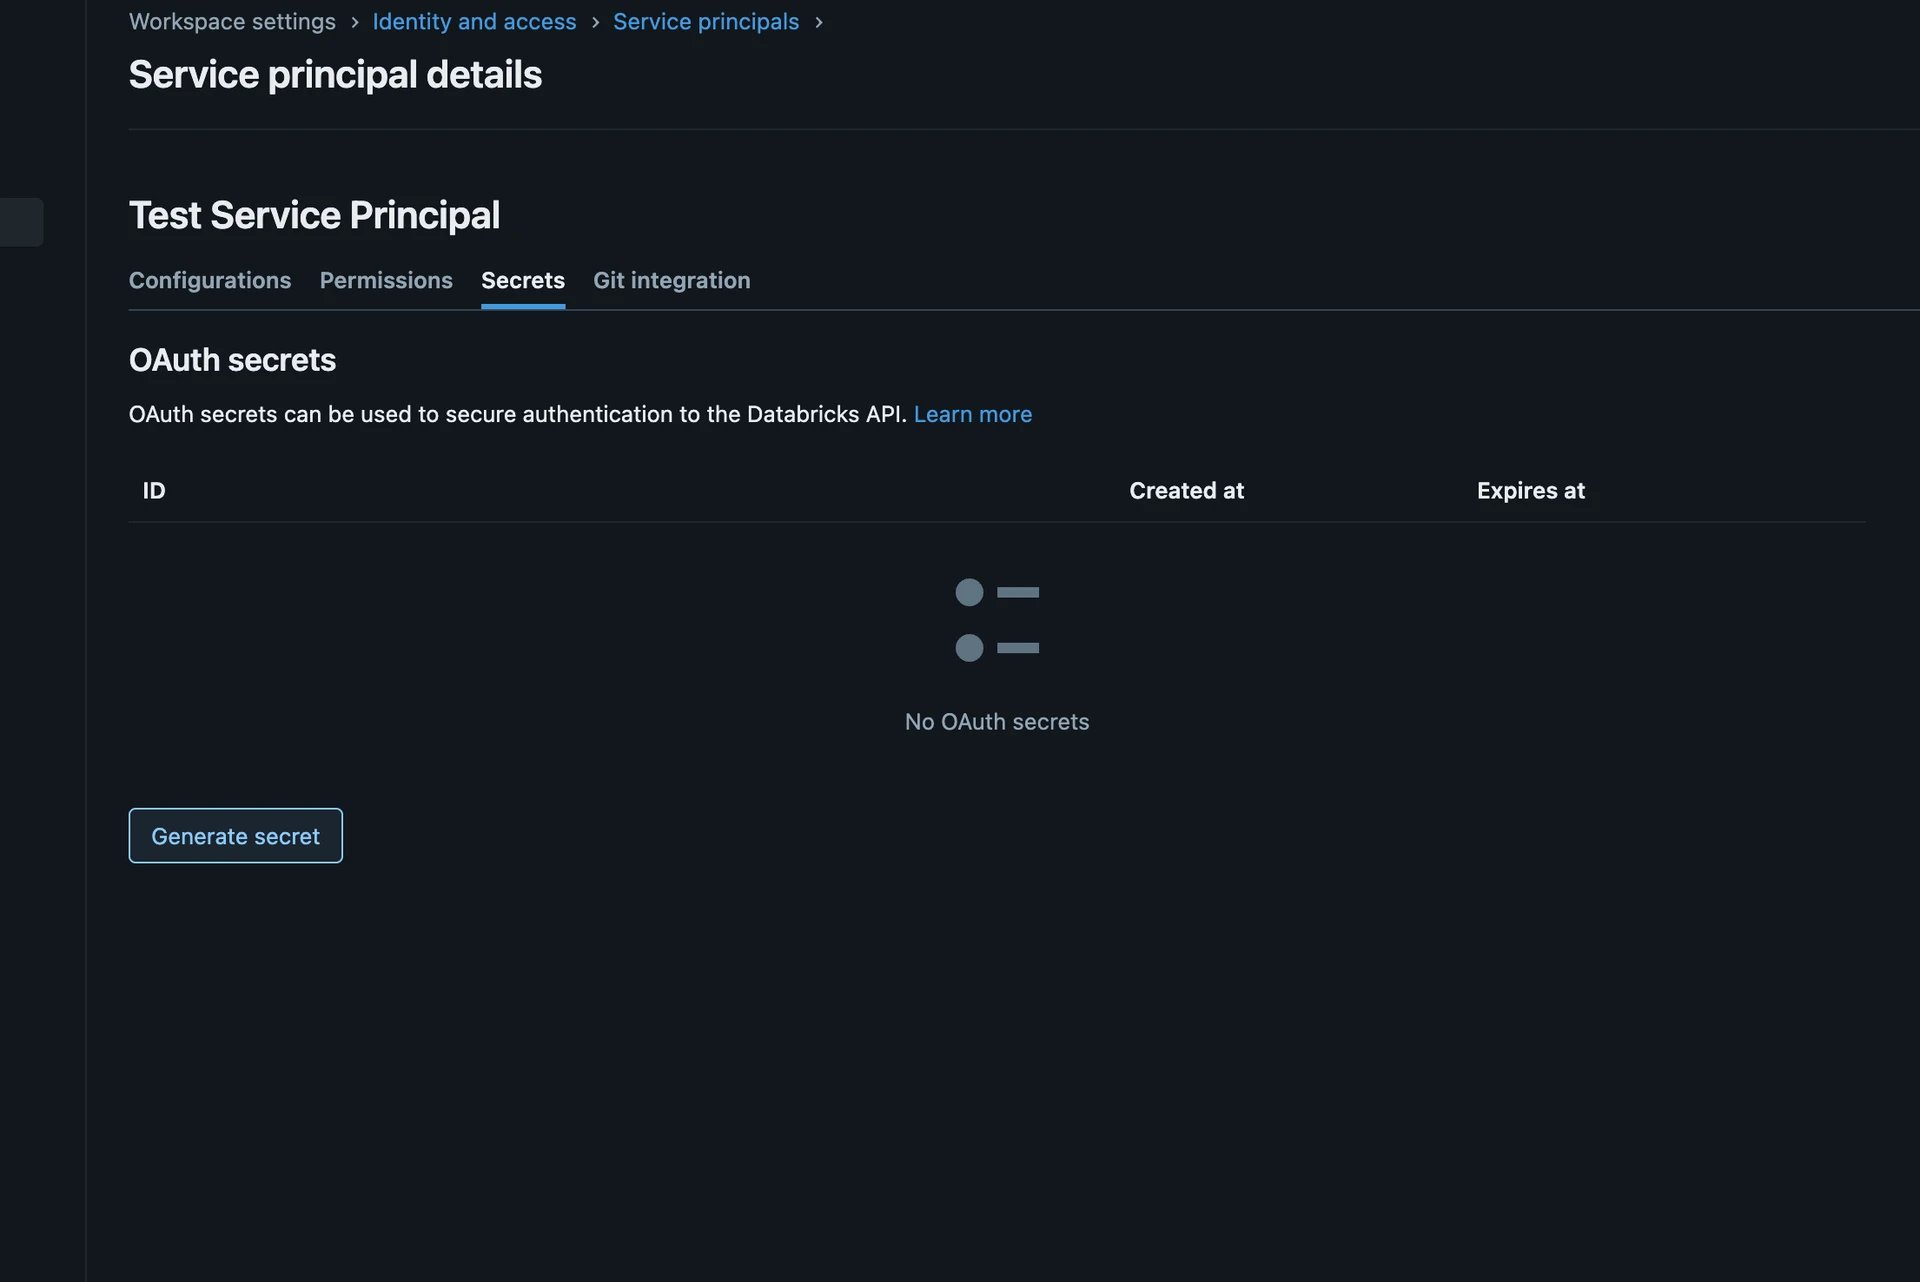
HTTP Path
To locate the HTTP Path in Databricks, perform the following steps:1
Open SQL Warehouses
Log in to your Databricks instance and, under SQL, click SQL Warehouses.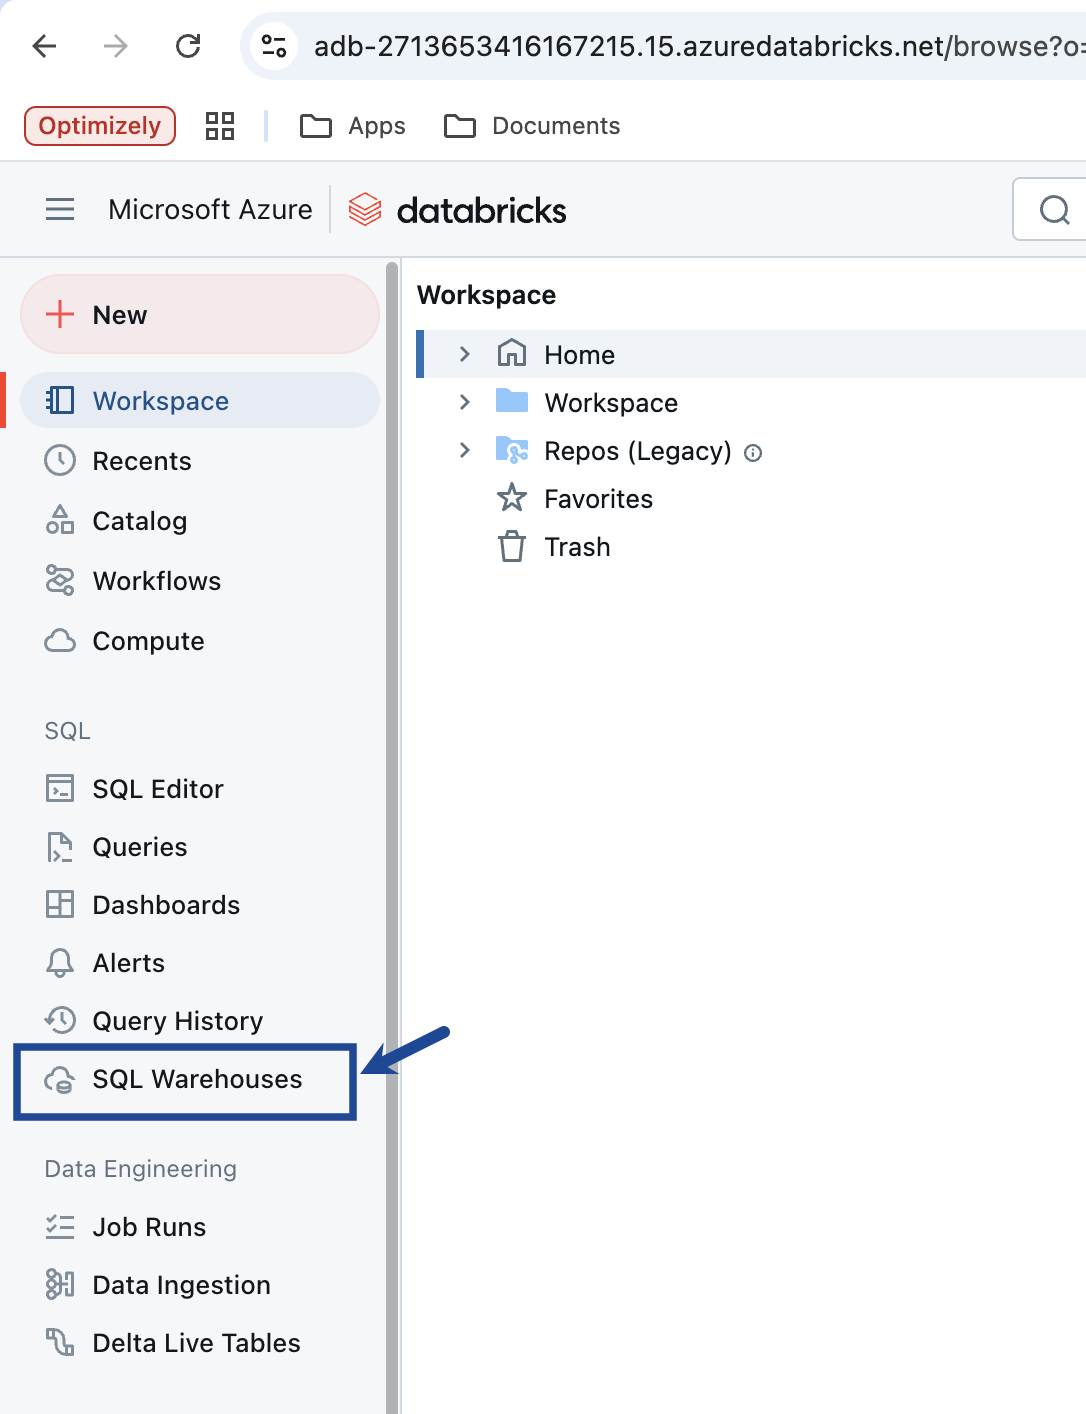
2
Select the SQL warehouse
Click the desired SQL warehouse. If no SQL warehouse exists, create one by clicking Create SQL Warehouse.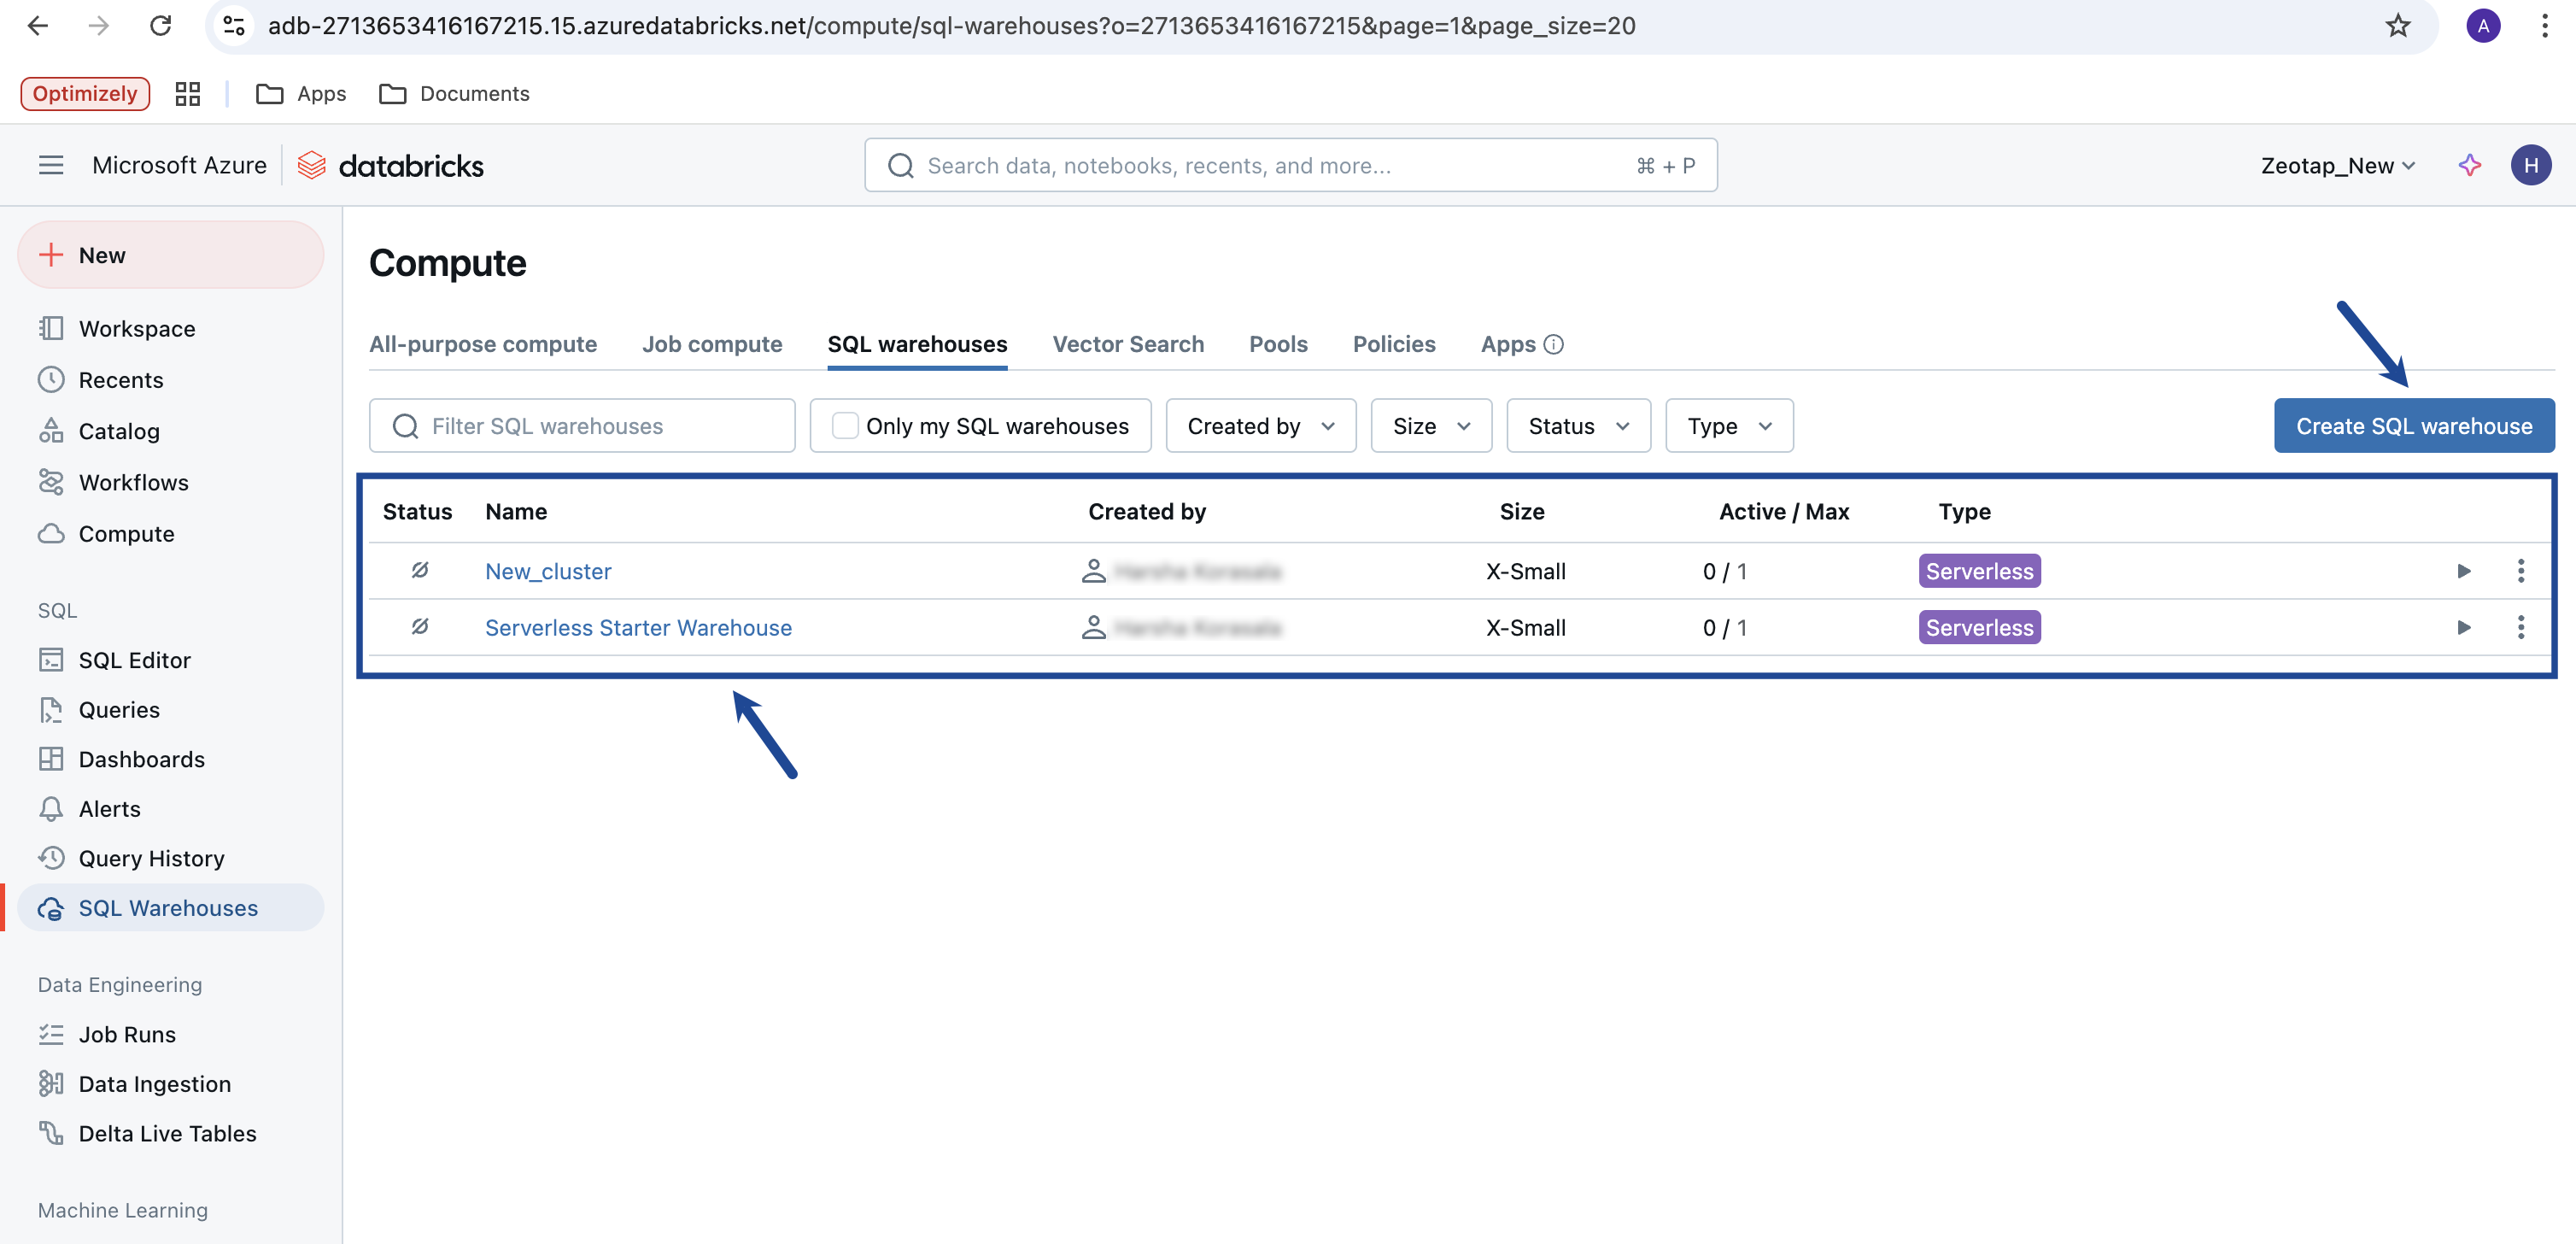
3
Open Connection details
On the SQL warehouse summary page, go to the Connection details tab.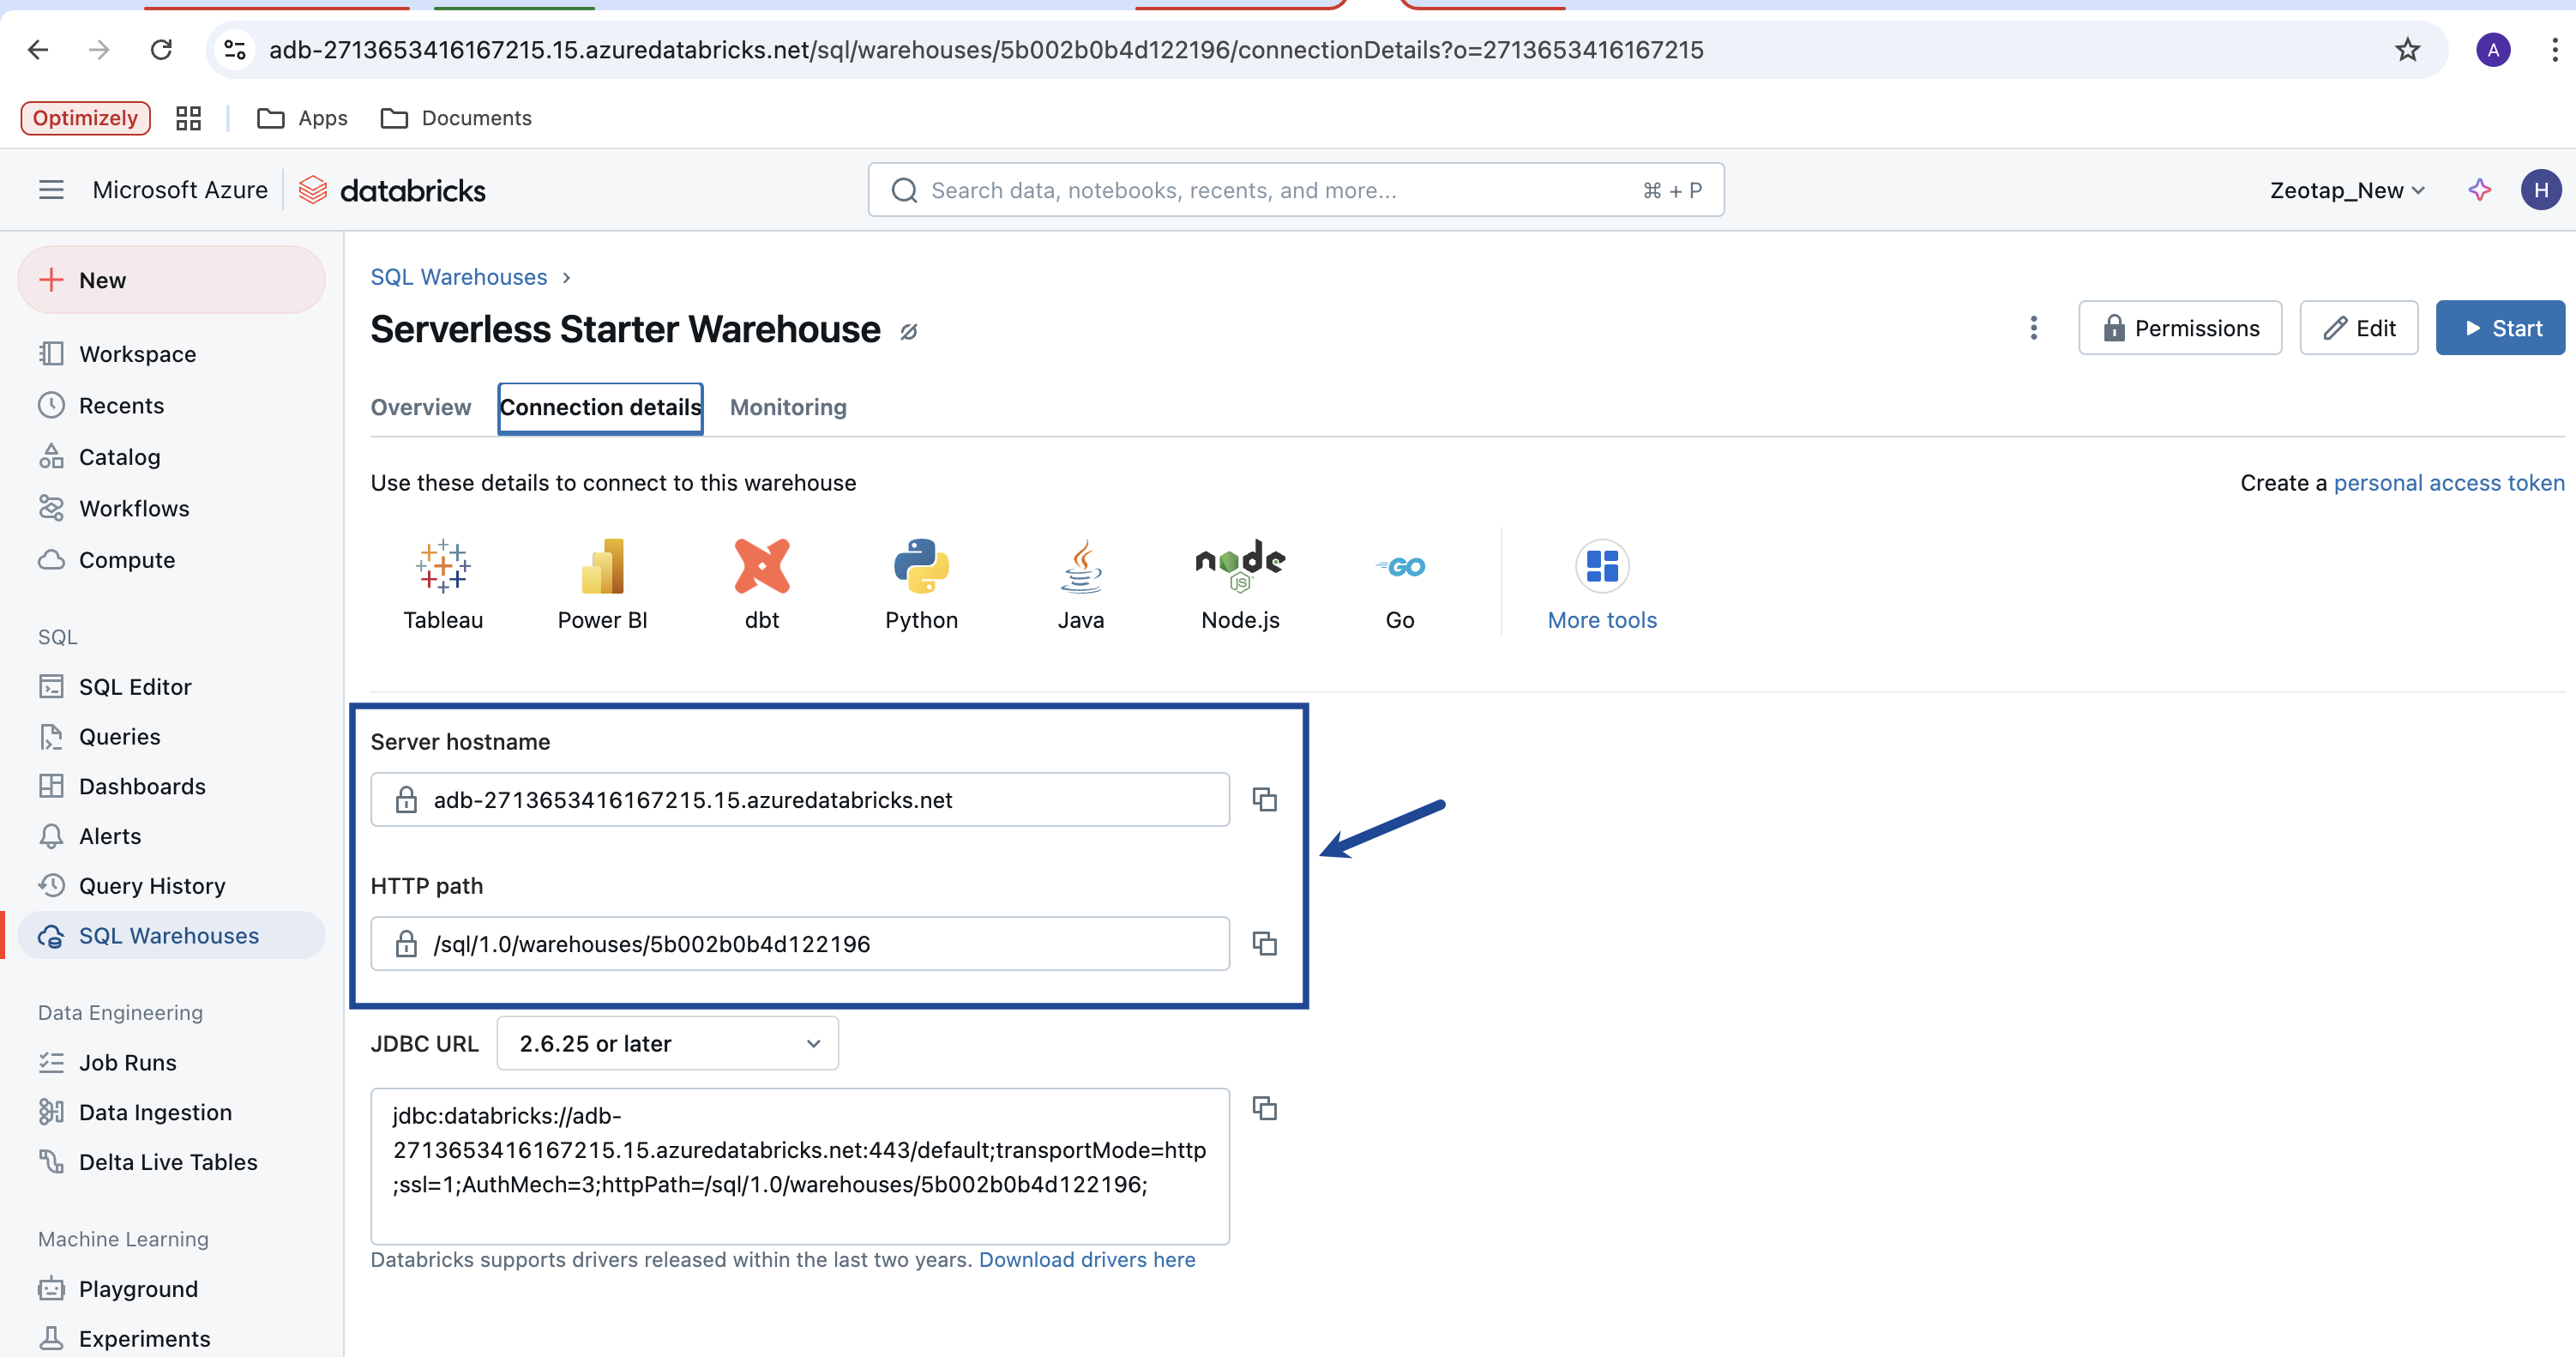
4
Copy the HTTP Path
Copy the HTTP Path value from the displayed information.
Partition Column and Unique Column
A Partition Column is a key used to organise large tables into smaller, logical groups. For example, data can be partitioned by date or region, so queries targeting a specific time range or location run much faster. If no Partition Column exists on the source table, use any Unique Column instead — a column whose values are different in every row. When only a Unique Column is available, Zeotap CDP:- Creates a temporary view and runs the read queries over that view.
- Drops the view once all the data has been fetched.
Additional components for the Job-based mechanism
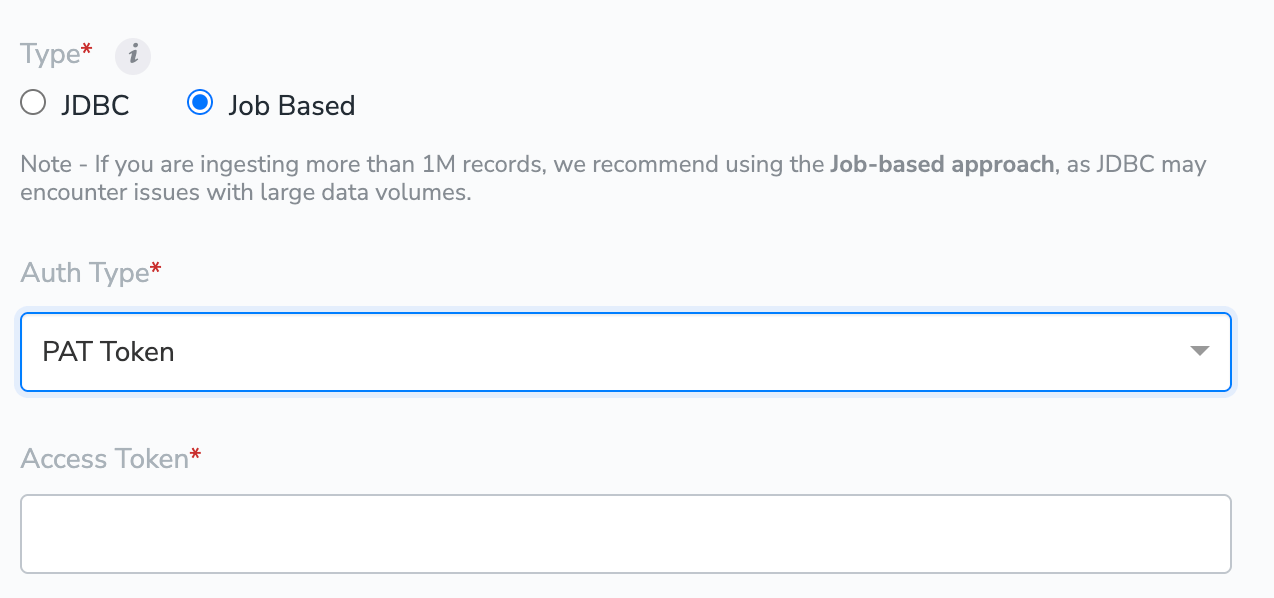
For the Job Based approach, select an Auth Type and provide the corresponding credentials. The supported auth types are PAT Token and Service Principal.PAT Token
A Personal Access Token (PAT) can be generated in Databricks under Settings → User setting → Developer → Generate new token.
- jobs
- secrets
- sql
- unity-catalog
- workspace
- Creating and running jobs
- Managing secret scopes
- Accessing tables via SQL and Unity Catalog
- Creating notebooks and workspace artefacts
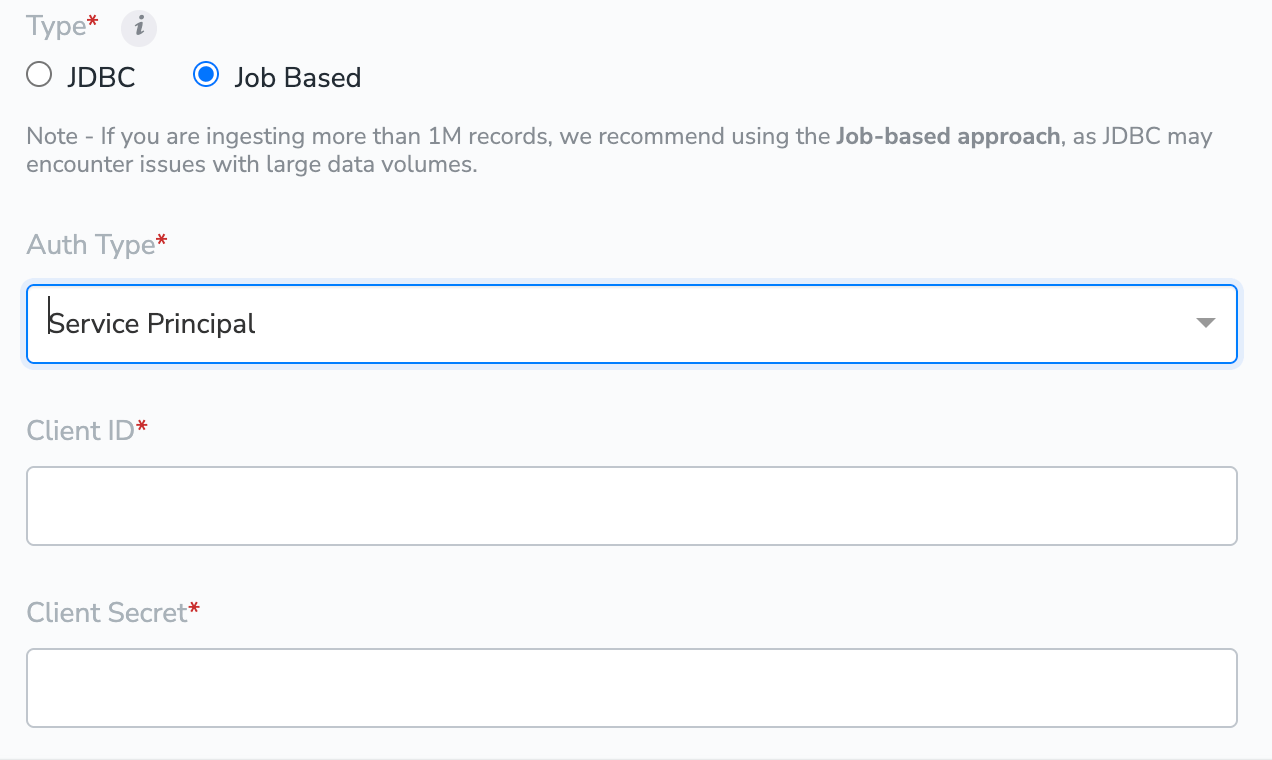
Service Principal
Provide the Client ID and Client Secret of your Databricks service principal. These are the same credentials used for the JDBC approach — see Databricks Client ID and Client Secret for how to create the service principal and generate the OAuth secret.Choose a connection mechanism
Configure the source in Zeotap CDP
Once you have gathered the Databricks components, create the source in the Zeotap CDP App.1
Open the Sources application
In the Zeotap CDP App, open the Sources application under Integrate, then click CREATE SOURCE.
2
Select Data Warehouse as the category
Under Category, choose Data Warehouse..png?fit=max&auto=format&n=ROPrHg77hrORMuiL&q=85&s=146e94f6110f76970d52baf2ab1e964b)
3
Select Databricks as the data source
Click Databricks as the Data Source.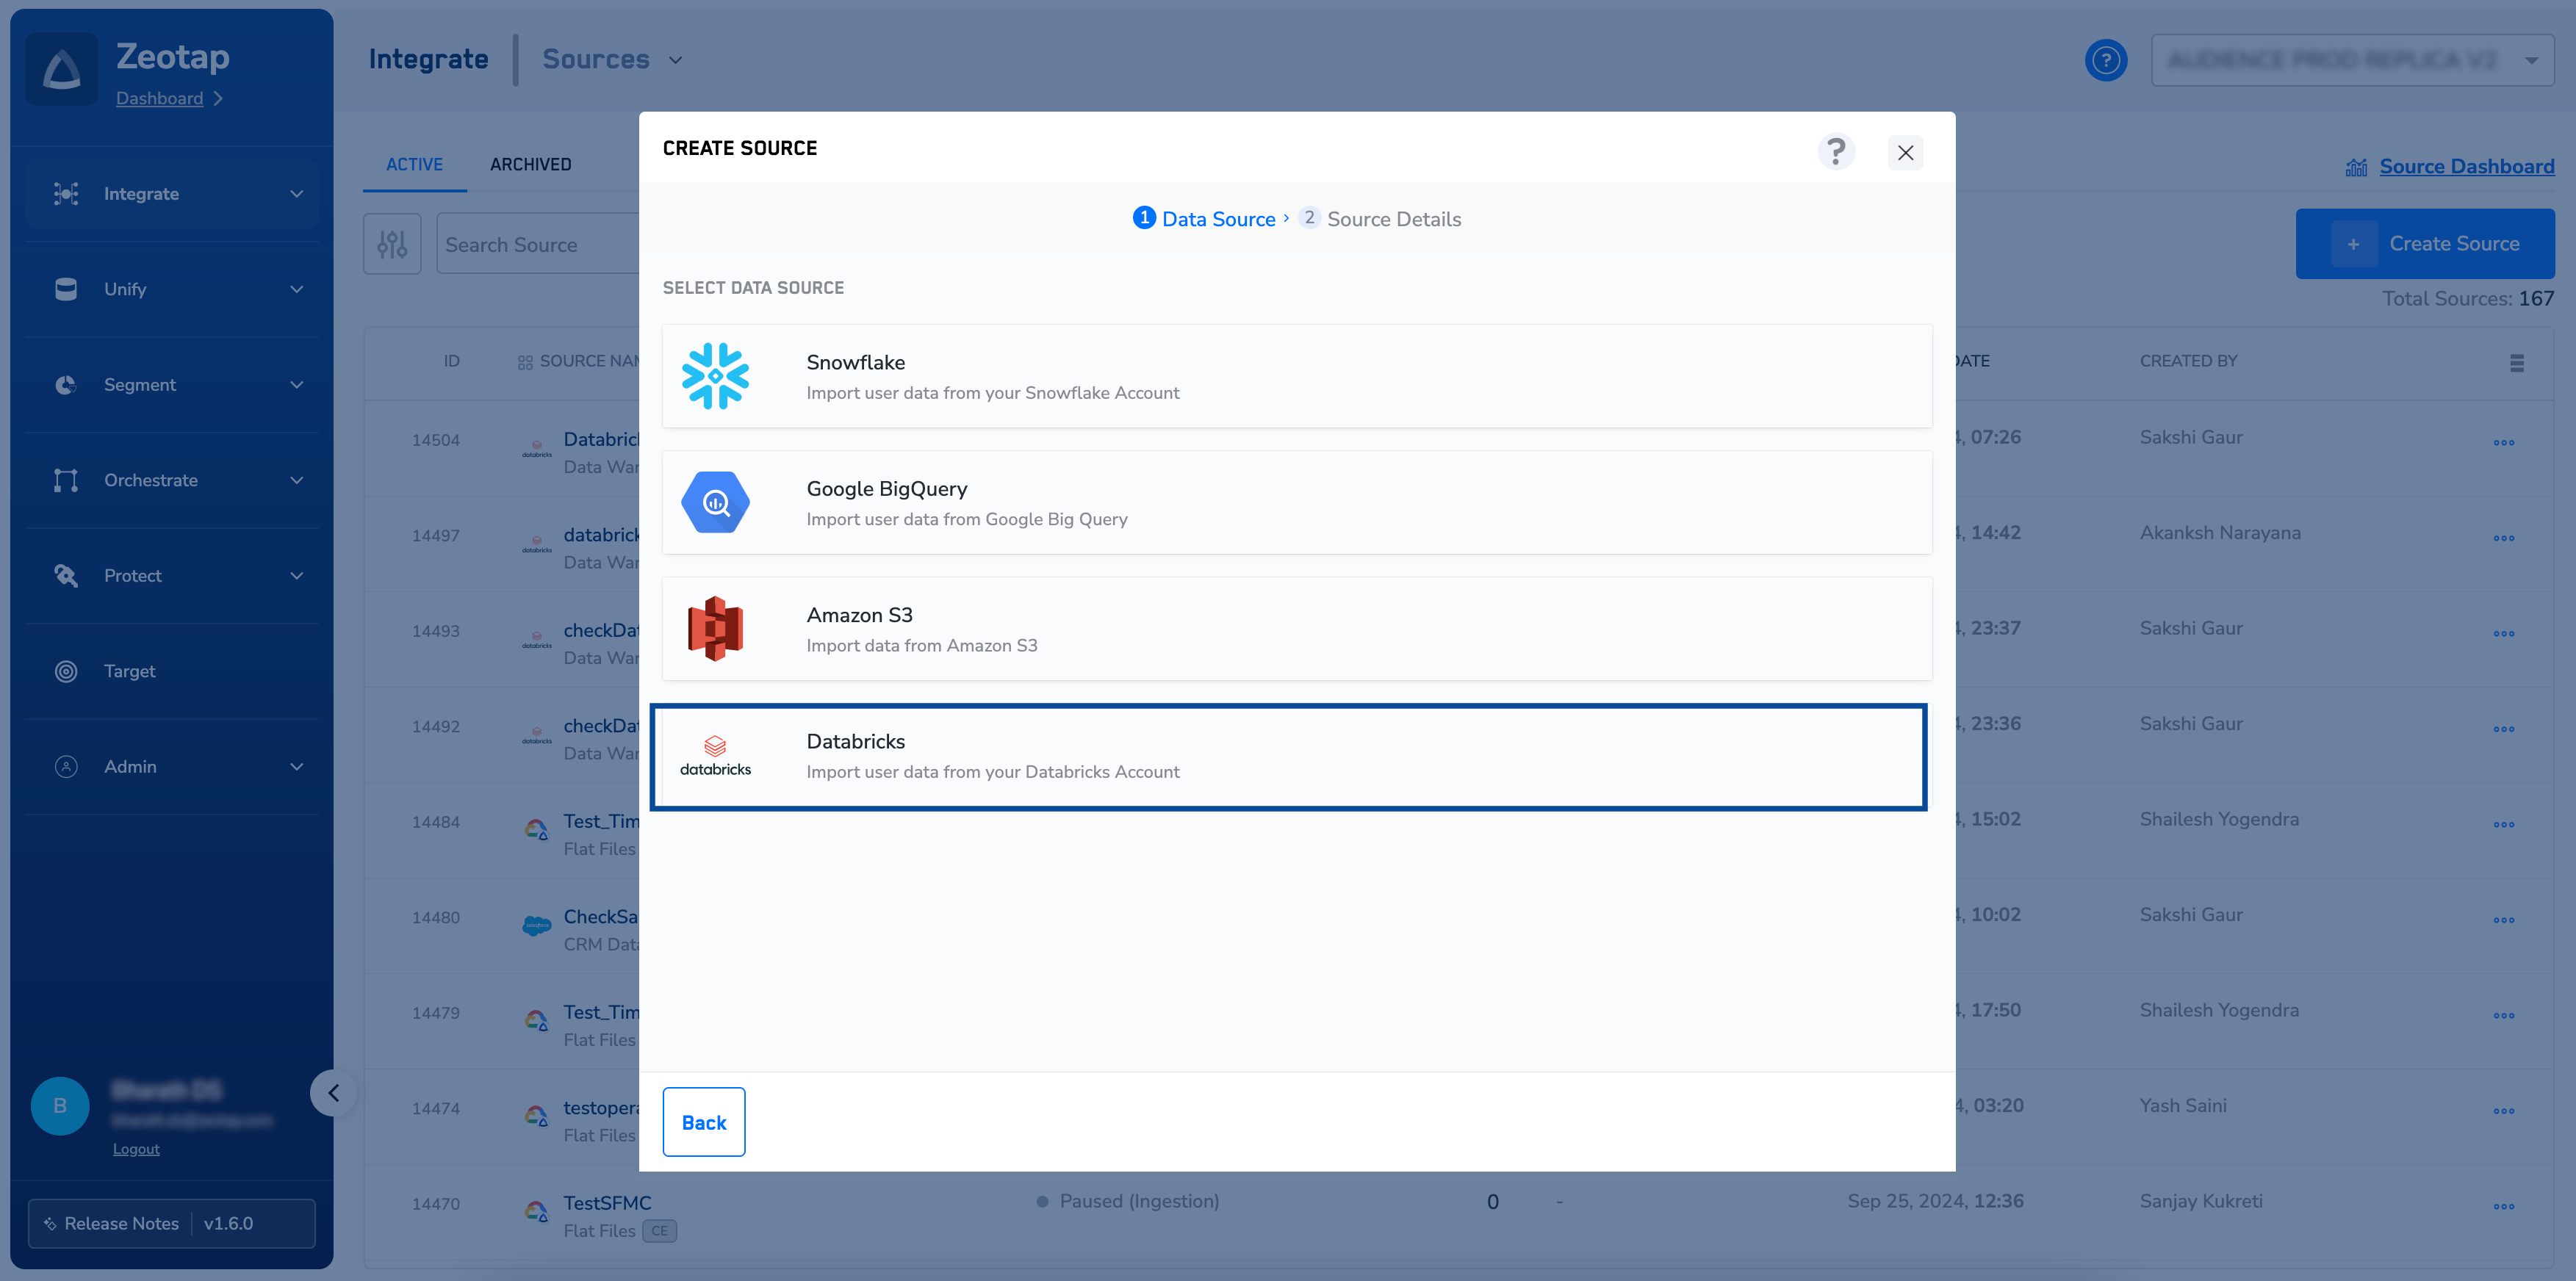
4
Name the source and pick the region
Enter a short, descriptive Source Name and choose the Region of upload.
5
Set the Refresh Frequency
Choose the Refresh Frequency from the drop-down. The first sync runs when the source is created; subsequent syncs follow the frequency you select. Supported frequencies:
- Sync once
- Every hour
- Every 3 hours
- Every 6 hours
- Every 12 hours
- Daily
- Weekly
- Monthly
6
Enter host, catalog, schema, and table
Enter your Databricks workspace URL in the Databricks Host field, followed by Catalog Name, Schema Name, and Table Name.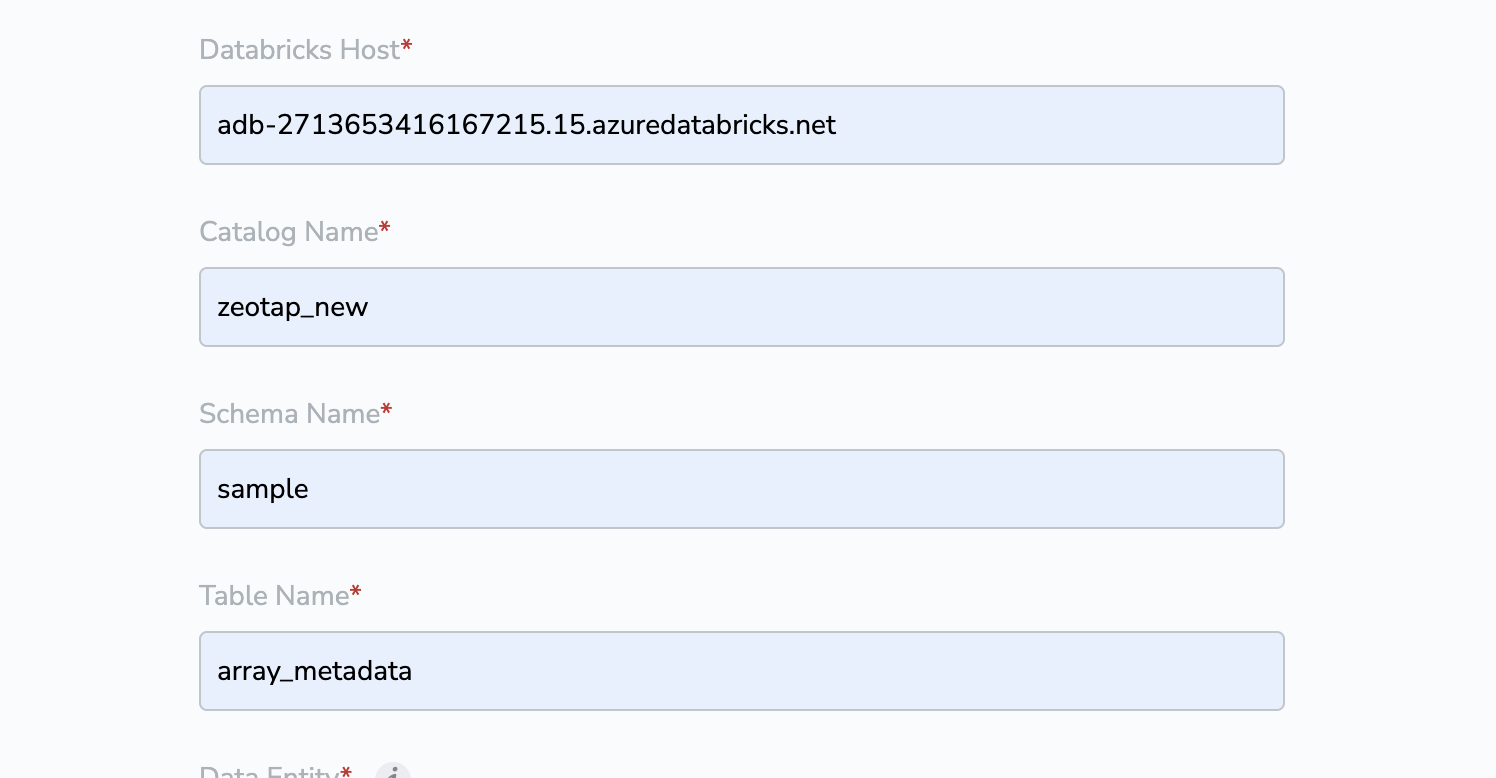
7
Choose the data entity
Under Data Entity, select Customer Data or Non Customer Data depending on the type of data you are ingesting. For the distinction, see Supported Data Entities.
8
Configure Delta Queries Selection
Under Delta Queries Selection, decide whether to consider deltas (data additions and changes) in the table based on a timestamp column. Choose true or false: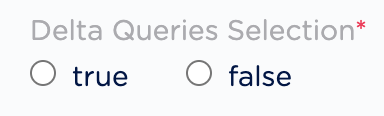
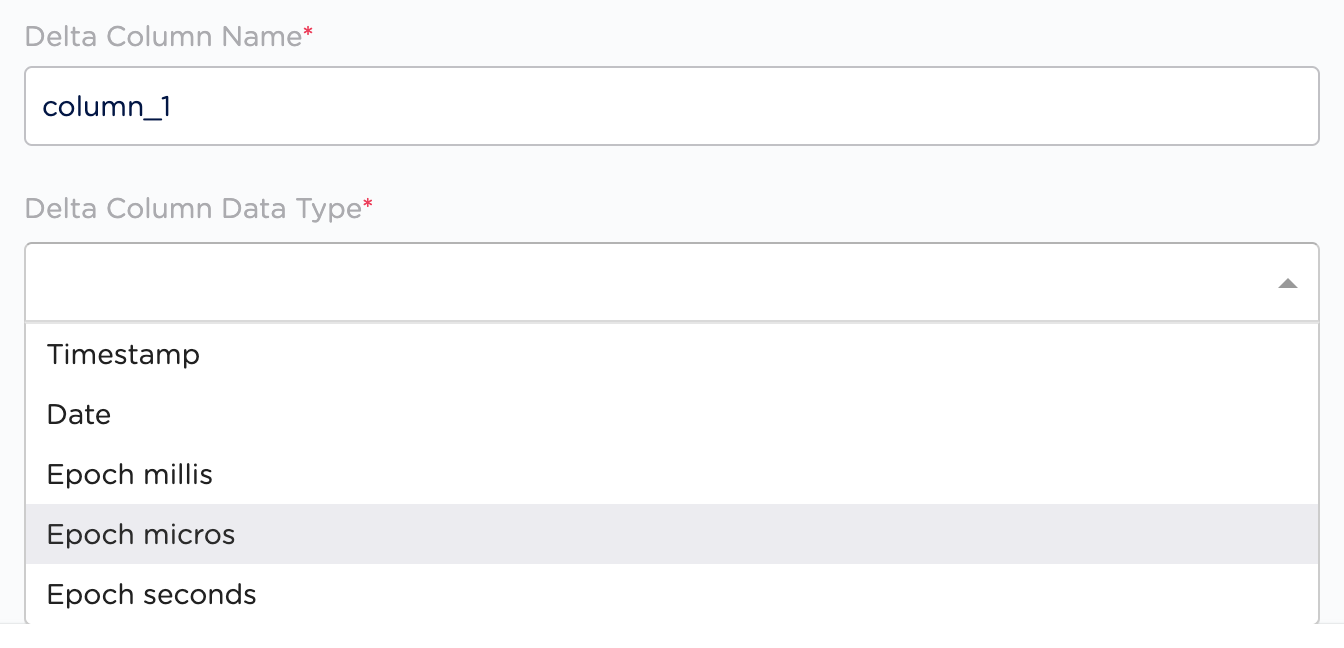
- true — only new and updated values, based on the timestamp in the delta column, are fetched. Delta Column Name and Delta Column Data Type become active: enter the name of the column to fetch data from, and choose the time increment for fetching the data from that column.
- false — no additional selections are needed. Zeotap CDP fetches all existing data from the table on every run.
9
Select the connection mechanism
Select the mechanism used to pull the data. The currently supported options are JDBC and Job Based.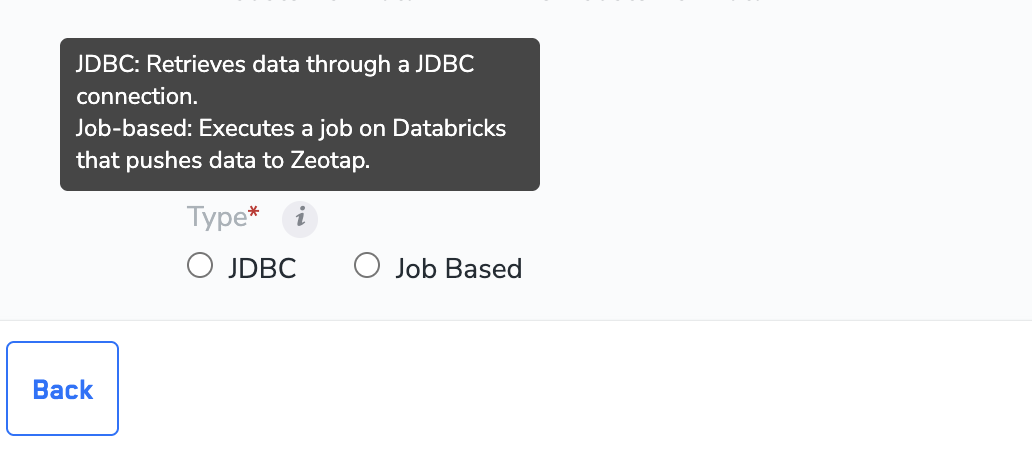
10
Enter the credentials for the chosen mechanism
If you selected JDBC, enter the following values (see Additional components for the JDBC mechanism for how to obtain them):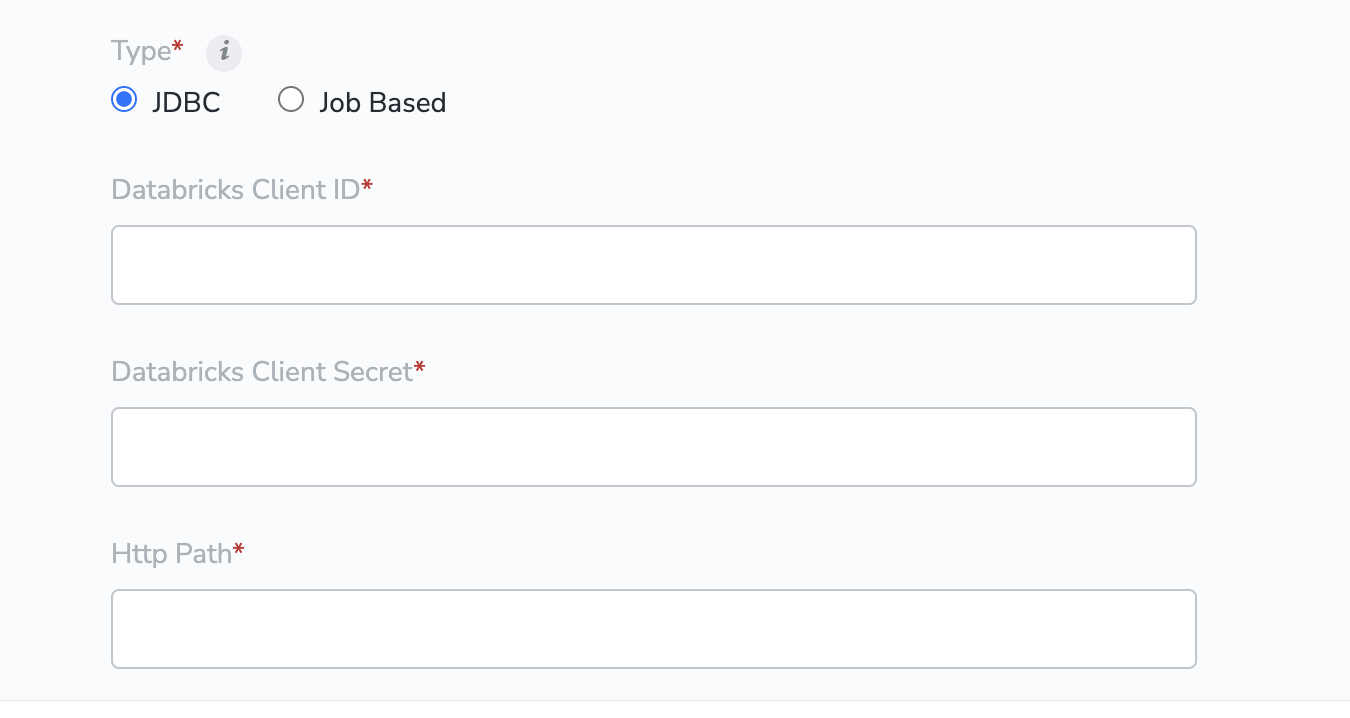
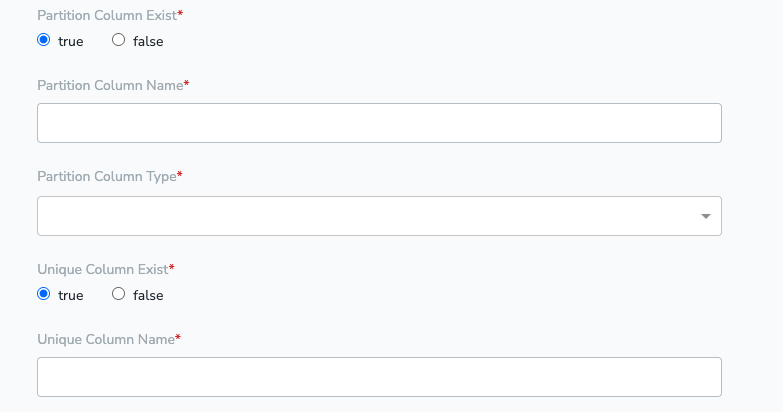
- Client ID
- Client Secret
- HTTP Path
- Partition Table Details (Partition Column Name, Partition Column Type)
- Unique Column Name
11
Select the fields to ingest
Click Next to proceed to field selection. A list of fields is displayed: tick the columns you want to ingest, use Select All to pick every column available in your Databricks account, or search by name if you already know the field names.
12
Create the source
Click CREATE SOURCE. The source appears on the Sources listing page.
Field-level requirements
The fields a Databricks source configuration collects:
Connection fields, by mechanism:
Verify the source is integrated
Open the source from the Sources listing and go to the IMPLEMENTATION DETAILS tab. A successfully created source shows all the relevant information about the created source on this tab and appears on the Sources listing with the Integrated status.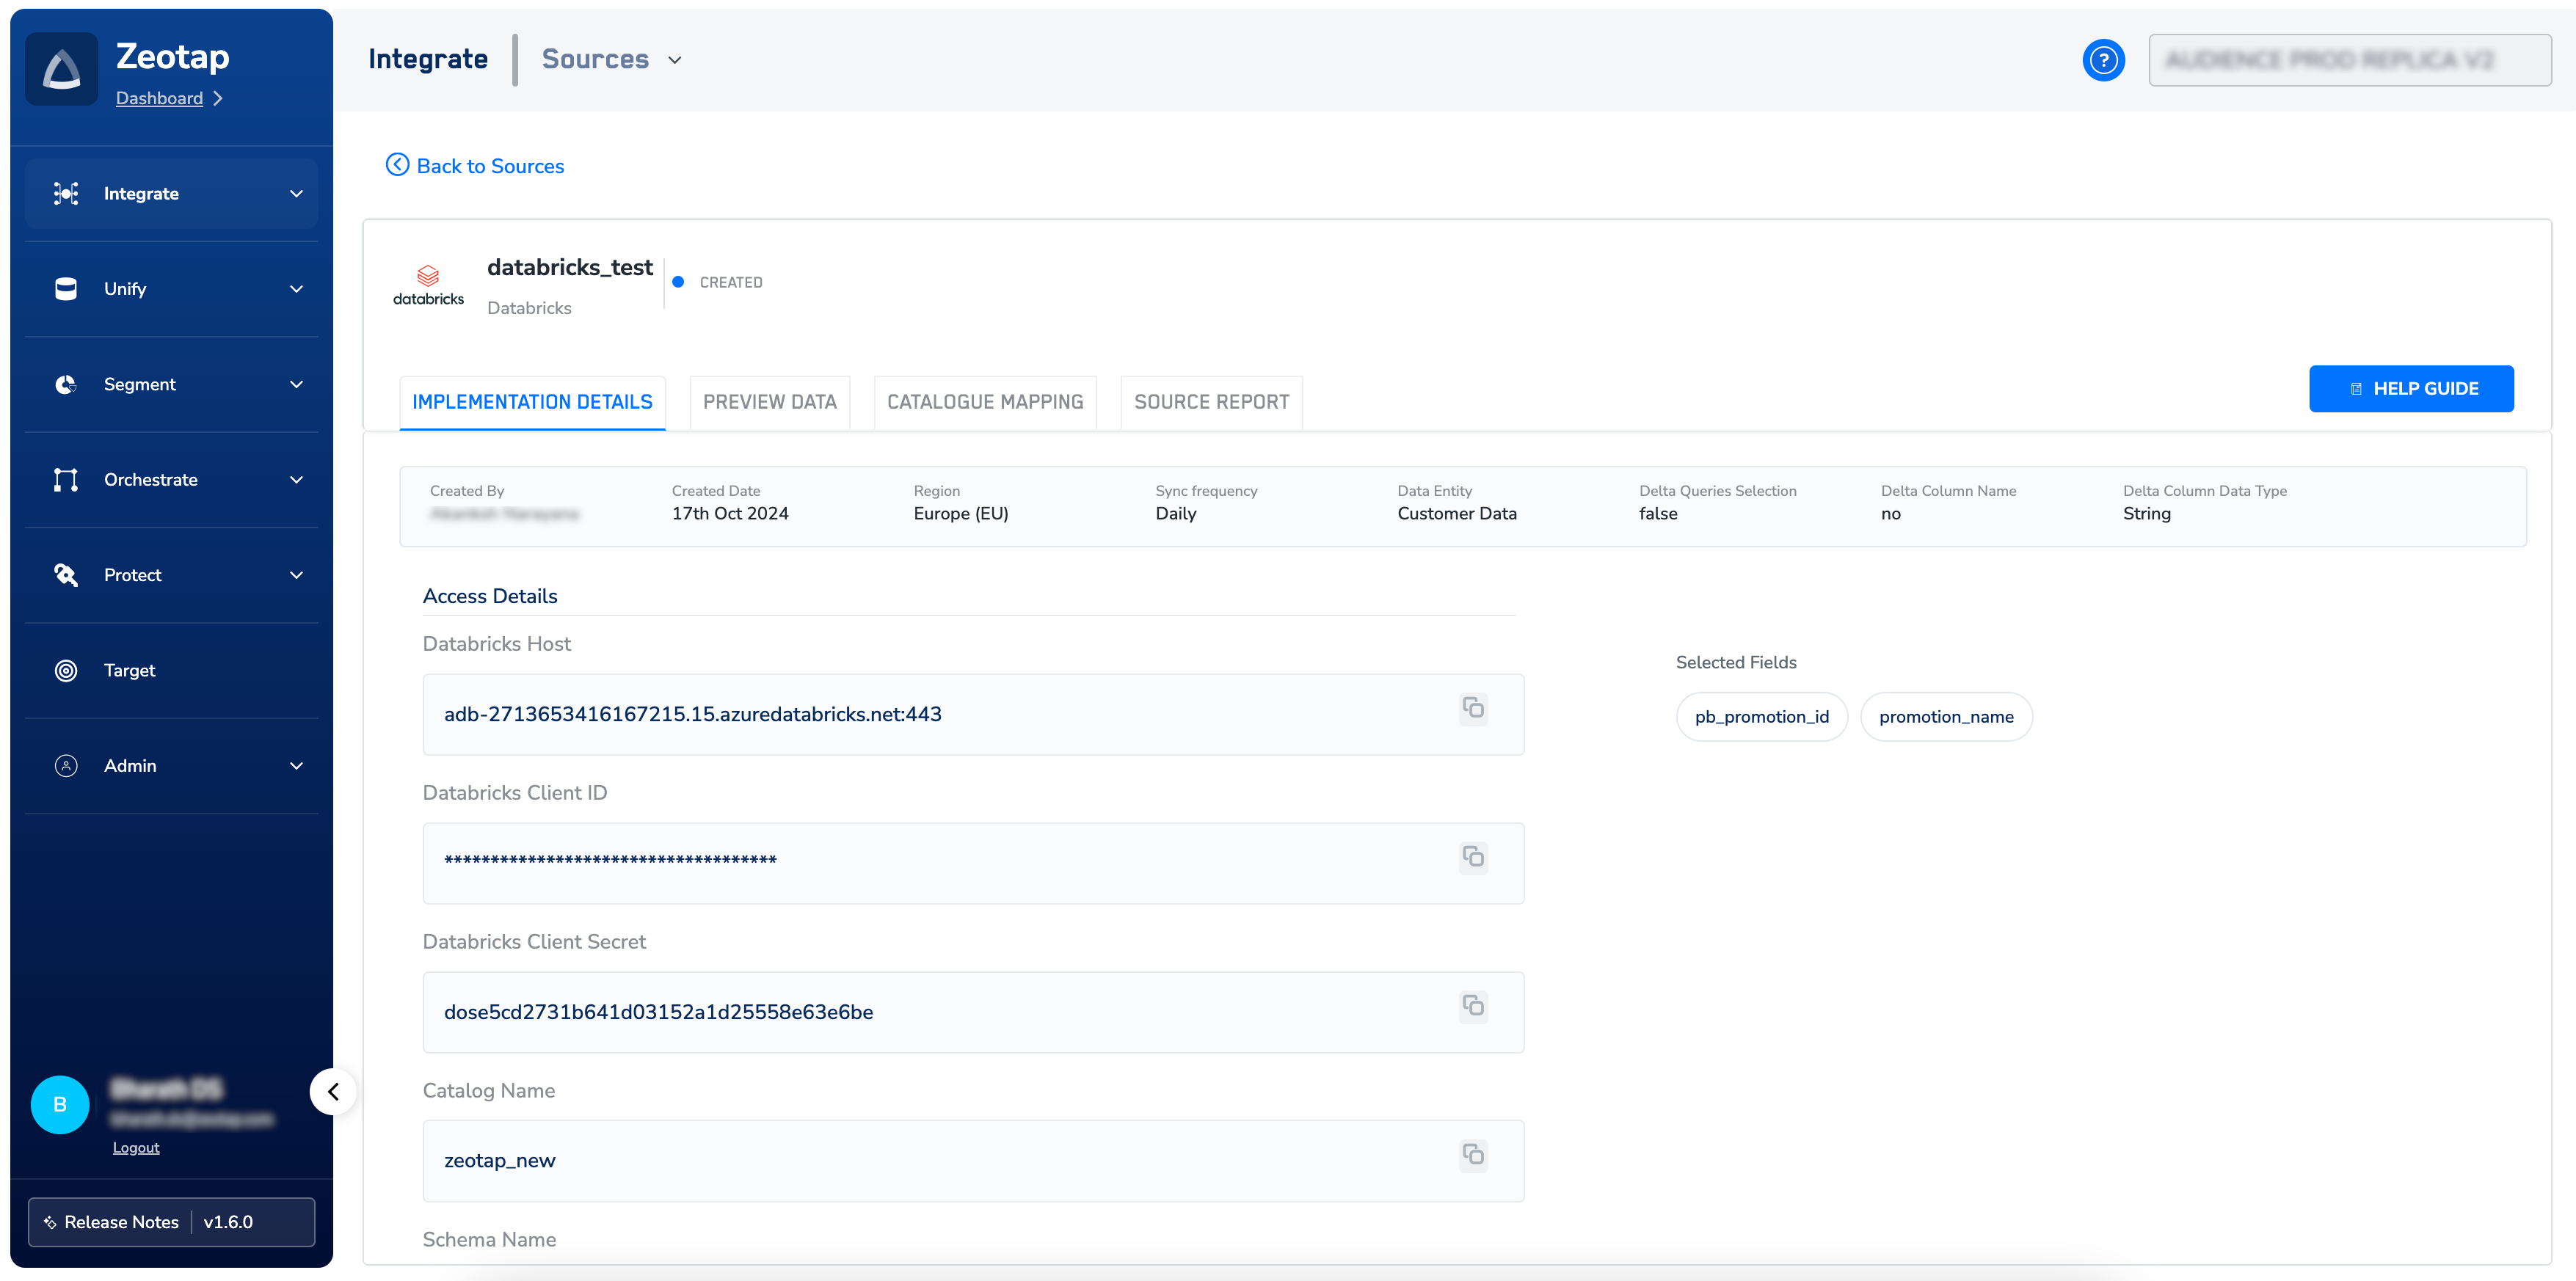
Troubleshooting
If the source does not reach Integrated, or the first sync does not produce data, check the conditions below.
If the source configuration passes every check but no data arrives after the first refresh, contact the Zeotap support team at support@zeotap.com. Include:
- The source name and connection mechanism (JDBC or Job Based), and for Job Based the Auth Type.
- The refresh frequency.
- The timestamp of the last completed sync (if any).
- The Databricks catalog, schema, and table names.
FAQ
Which connection mechanism should I pick — JDBC or Job Based?
Which connection mechanism should I pick — JDBC or Job Based?
Pick Job Based for any table above 1 million records; JDBC may encounter issues at that data volume. For smaller tables, either mechanism works — JDBC reuses an existing SQL warehouse and needs the Client ID, Client Secret, HTTP Path, and either a Partition Column or a Unique Column.
Which Auth Type should I use for the Job Based mechanism?
Which Auth Type should I use for the Job Based mechanism?
Both are supported. PAT Token needs a single Databricks personal access token carrying the jobs, secrets, sql, unity-catalog, and workspace scopes. Service Principal reuses the same Client ID and Client Secret you would generate for the JDBC mechanism, so it is the simpler choice if that service principal already exists.
What if the source table has no partition column?
What if the source table has no partition column?
Provide a Unique Column instead — a column whose values are different in every row. Zeotap CDP creates a temporary view over the table to run the read queries and drops the view after all the data is fetched.
How long does the first sync take?
How long does the first sync take?
The initial data transfer from Databricks to Zeotap CDP starts when the source is created and may take time depending on the data volume. Subsequent runs follow the Refresh Frequency and, when Delta Queries Selection is set to true, pull only the delta since the last successful sync.