

When an event occurs or fails to occur → notify the recipients you choose → via email.Alerts currently cover the Audience and Source modules, with more to follow in future releases.
Who can manage alerts
See User Roles and Access for how roles are assigned.
Where to find it
Go to Admin → Alerts & Notifications in the left sidebar. The page opens with two tabs — Source and Audience — and each tab has its own Default Alerts and Custom Alerts sections. Use Search by Alert Name to jump to an alert once you have a few.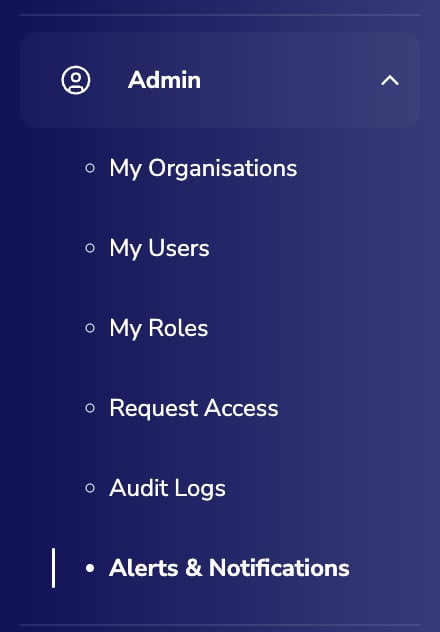
Default alerts
Default alerts are pre-configured by Zeotap, so you have monitoring coverage without setting anything up. The failure alerts are on out of the box; the rest are off until you enable them. You can toggle any of them, change their recipients, or narrow them with filters.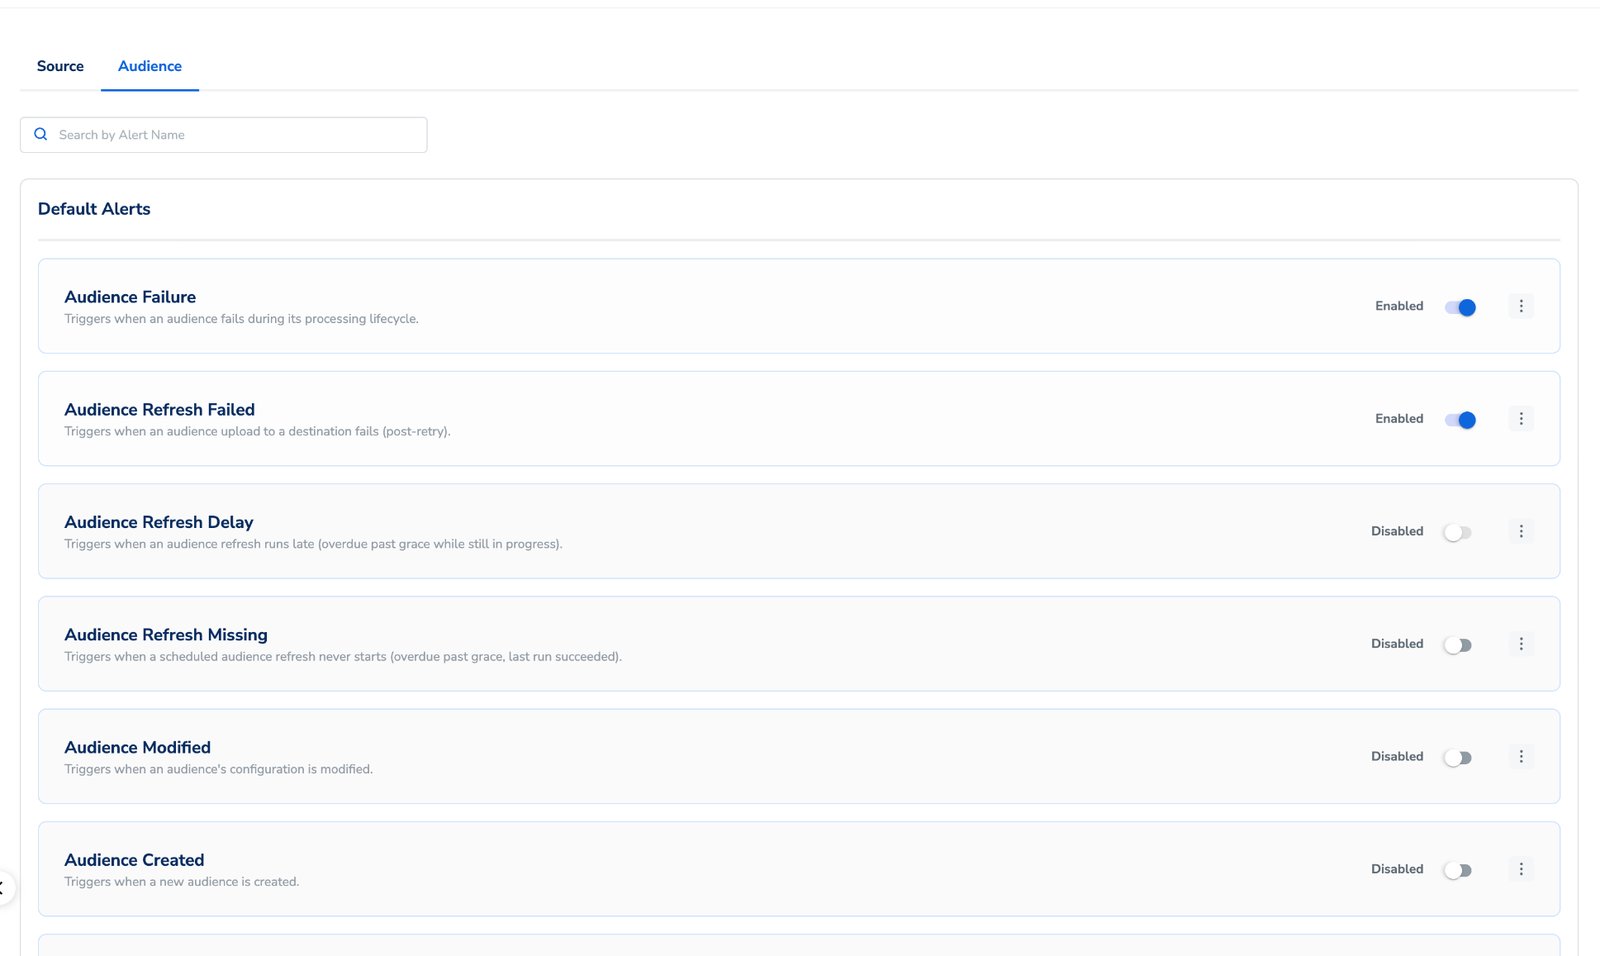
Audience alerts
Source alerts
For what each failure scenario means and how to resolve it, see Audience Alerts and Source Alerts.
Manage a default alert
Each alert card has an Enabled/Disabled toggle and a menu offering Edit, Duplicate and Delete. The trigger event on a default alert is fixed — on the Edit Alert screen, Alert Name and Trigger Alert When are read-only. You cannot repoint a “Source Pull Failed” alert at a different event. To monitor something else, create a custom alert or duplicate a default alert and use it as a template.Set a threshold or a lookback window
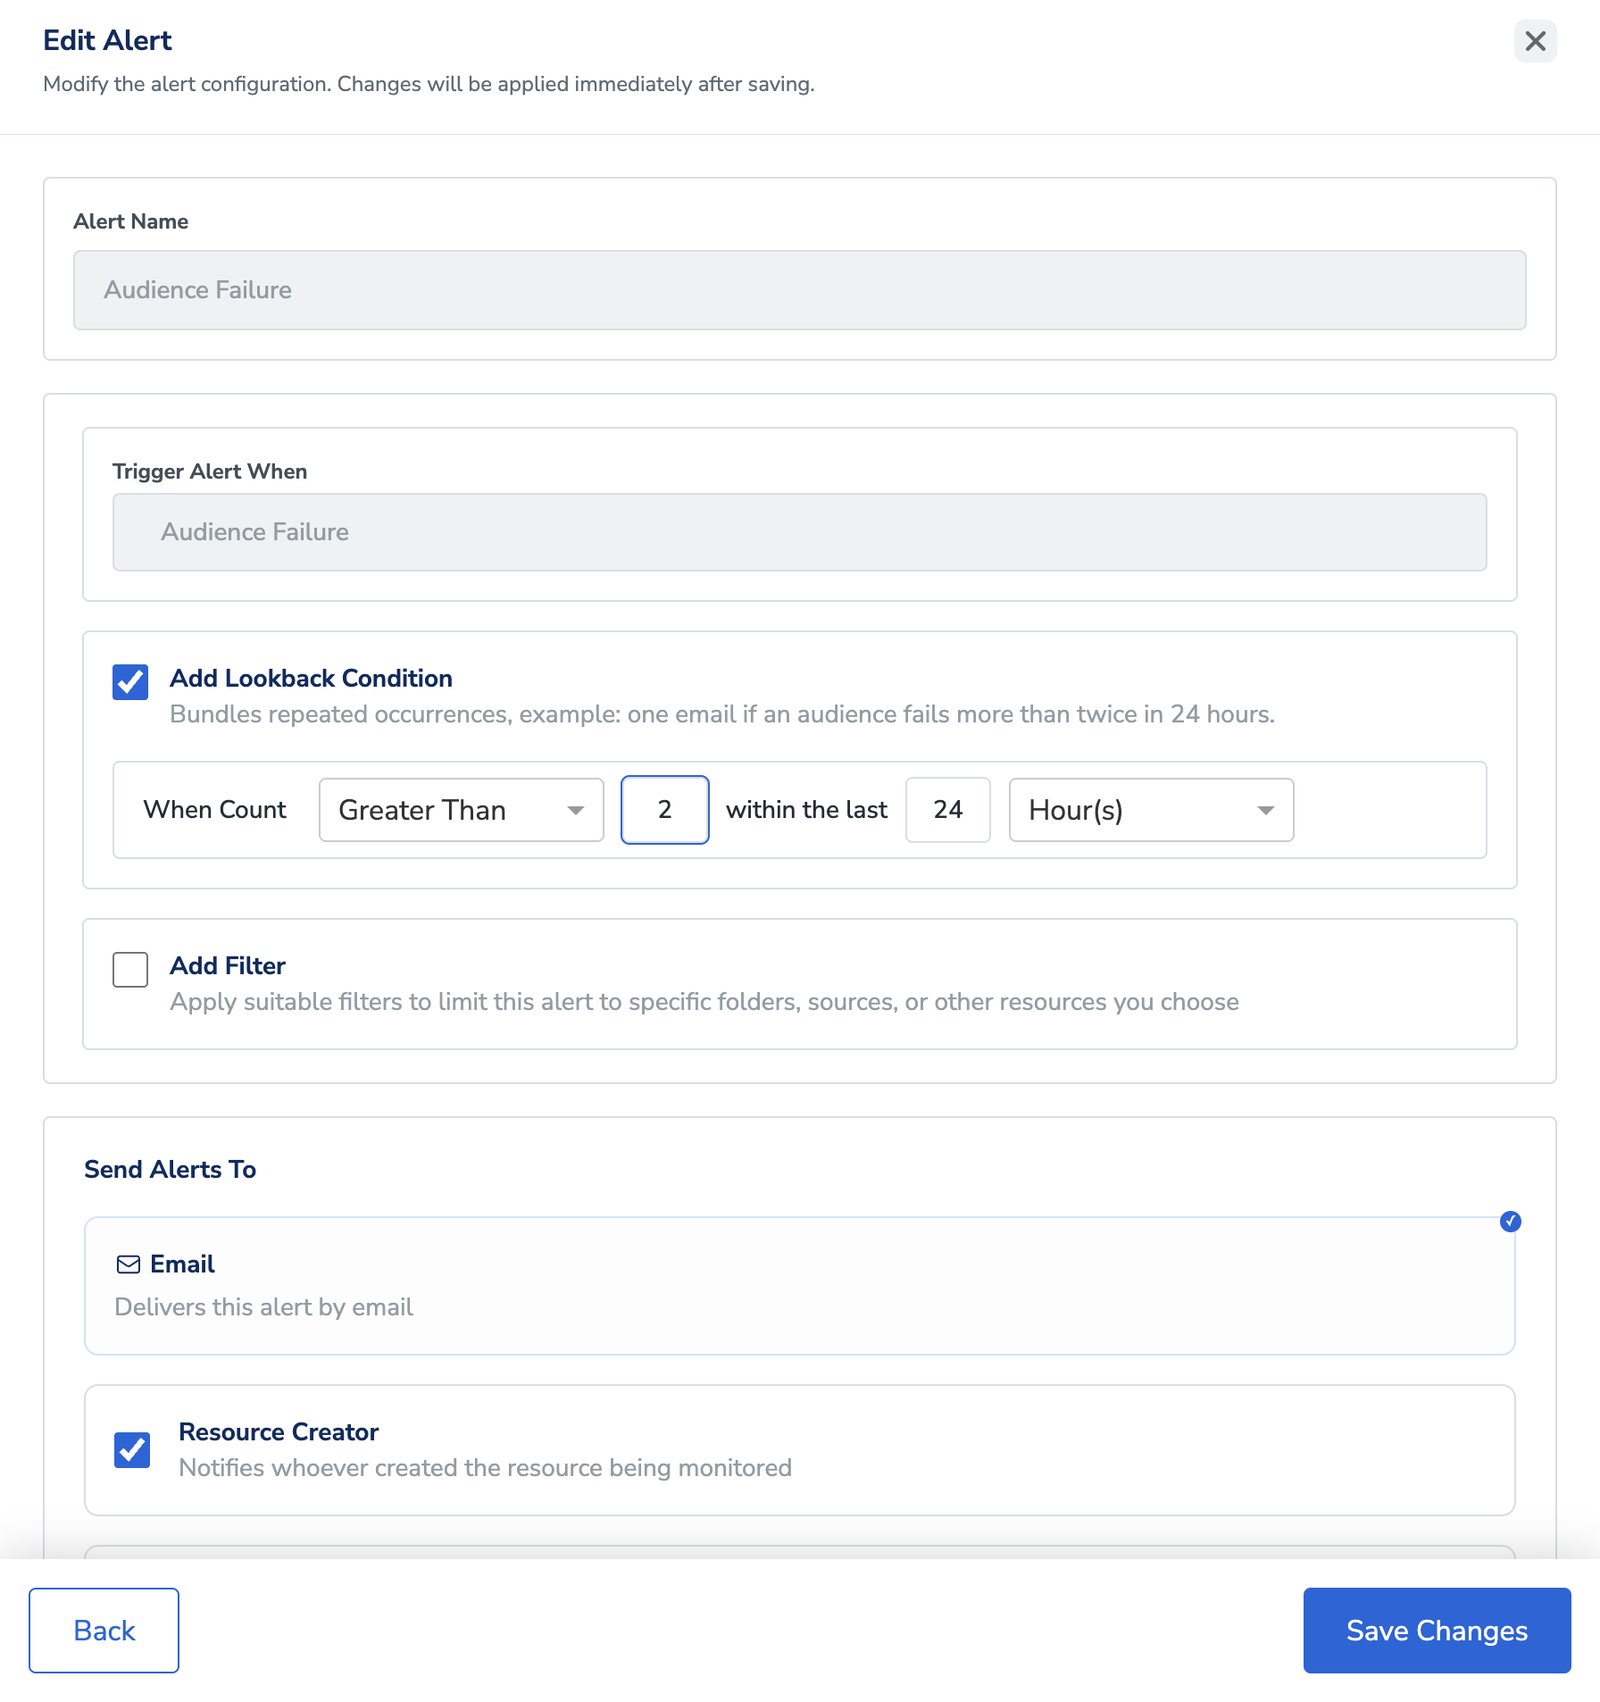
Which condition you get depends on the kind of event the alert watches. This is the part worth understanding before you tune anything. Absence-type alerts — such as Audience Refresh Missing, Audience Refresh Delay or Source Pull Missing — take an Add Missing Threshold. It sets how long to wait after the scheduled start time before the event counts as missing and the alert fires.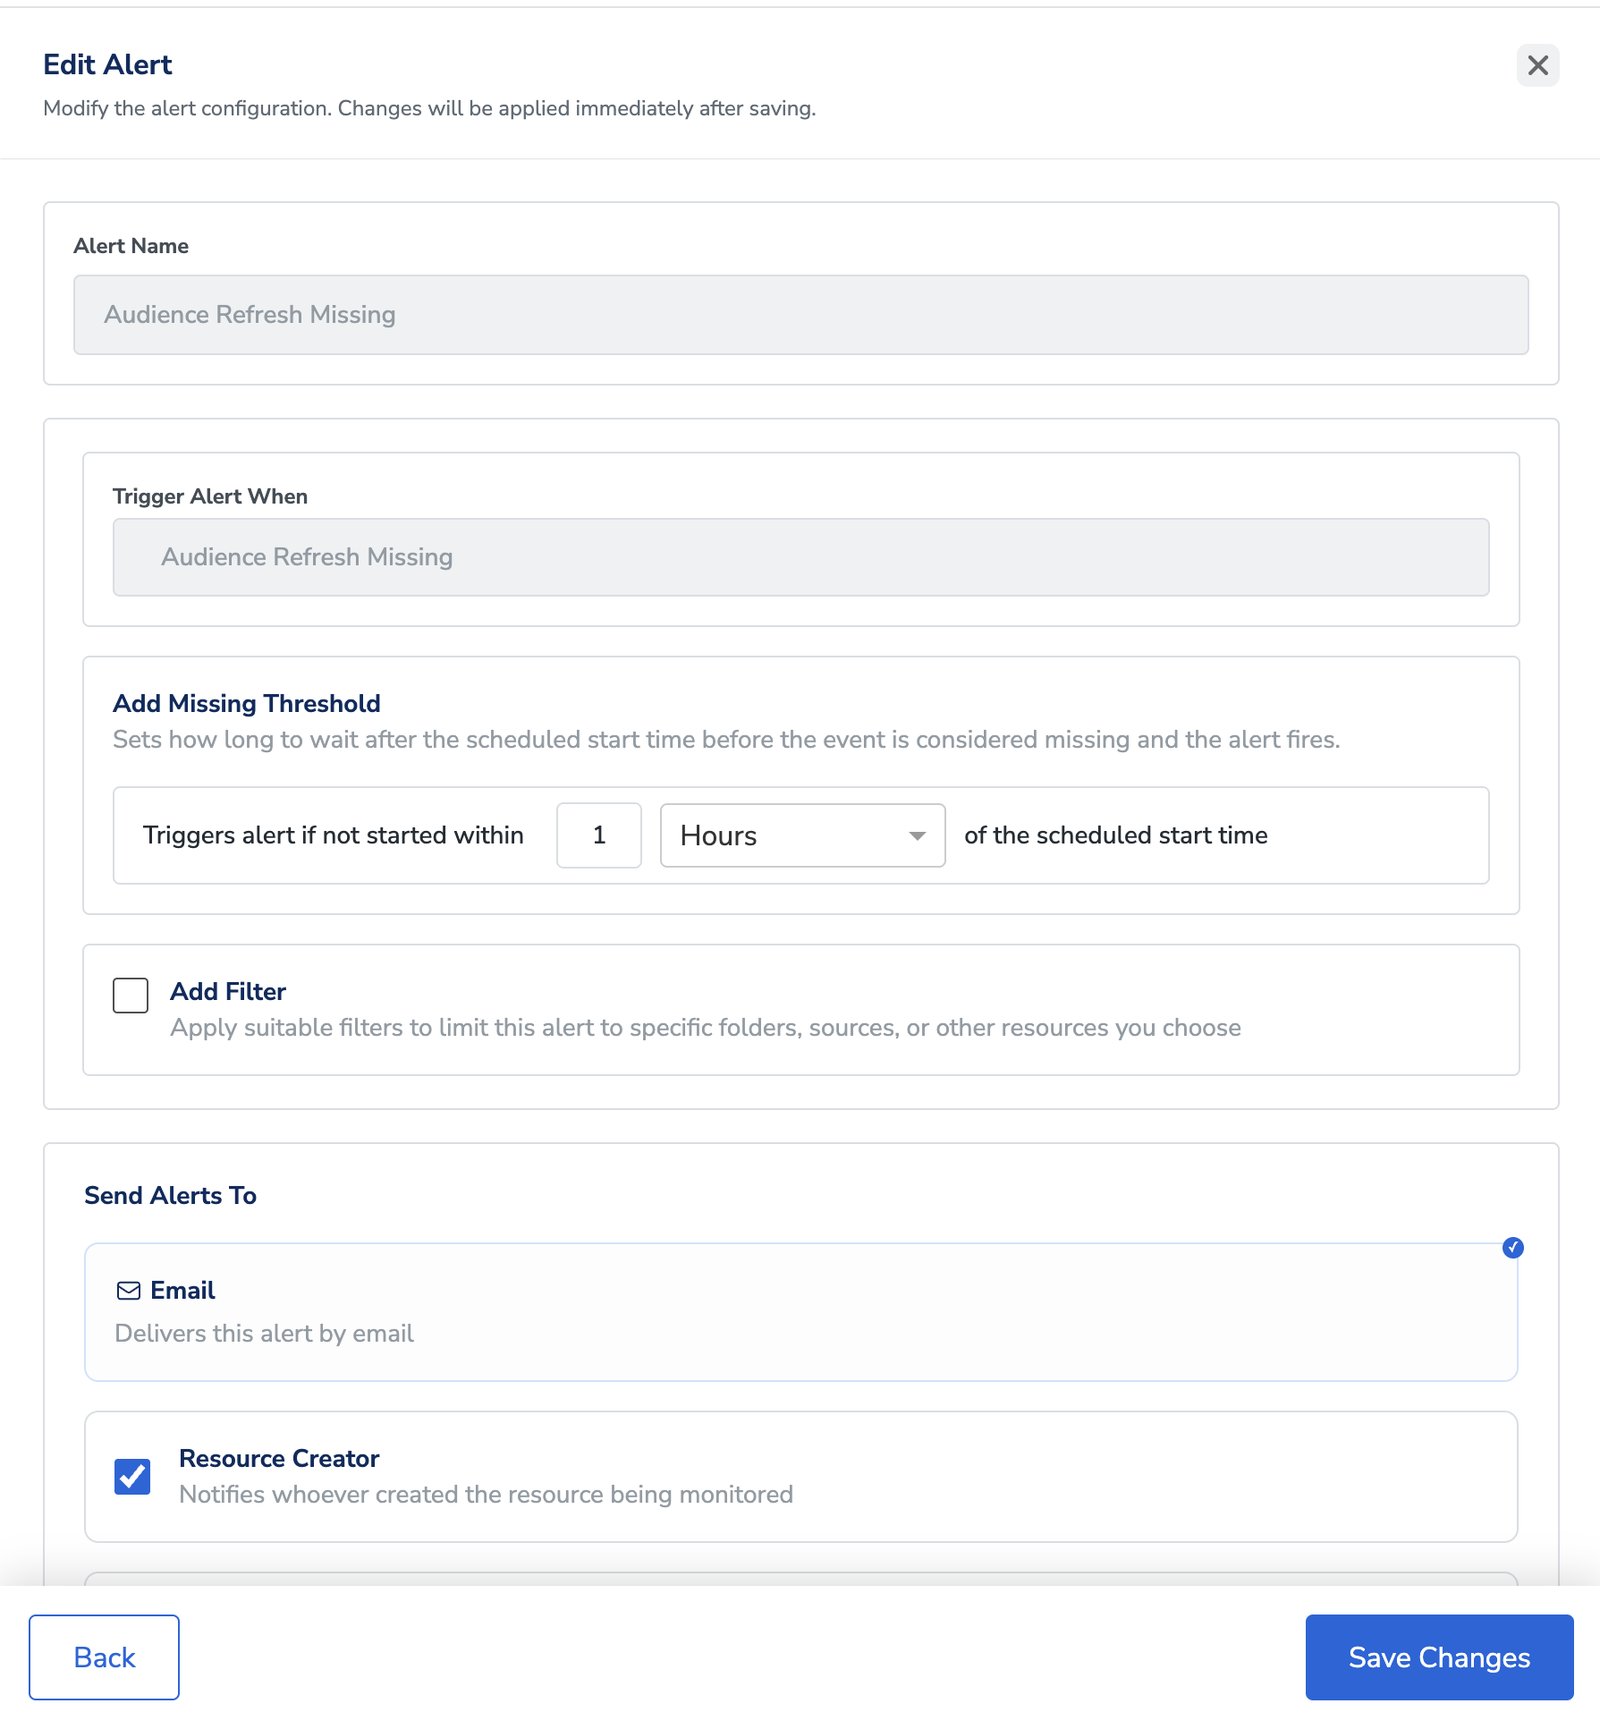
Scope an alert with filters
By default an alert covers your whole organisation. Tick Add Filter to narrow it to specific folders, sources or other resources — useful when one team only wants alerts for the audiences it owns. Filters use the same condition builder you know from audiences: pick a field, an operator and a value, combine conditions with AND/OR, and group them with + Add Condition Block.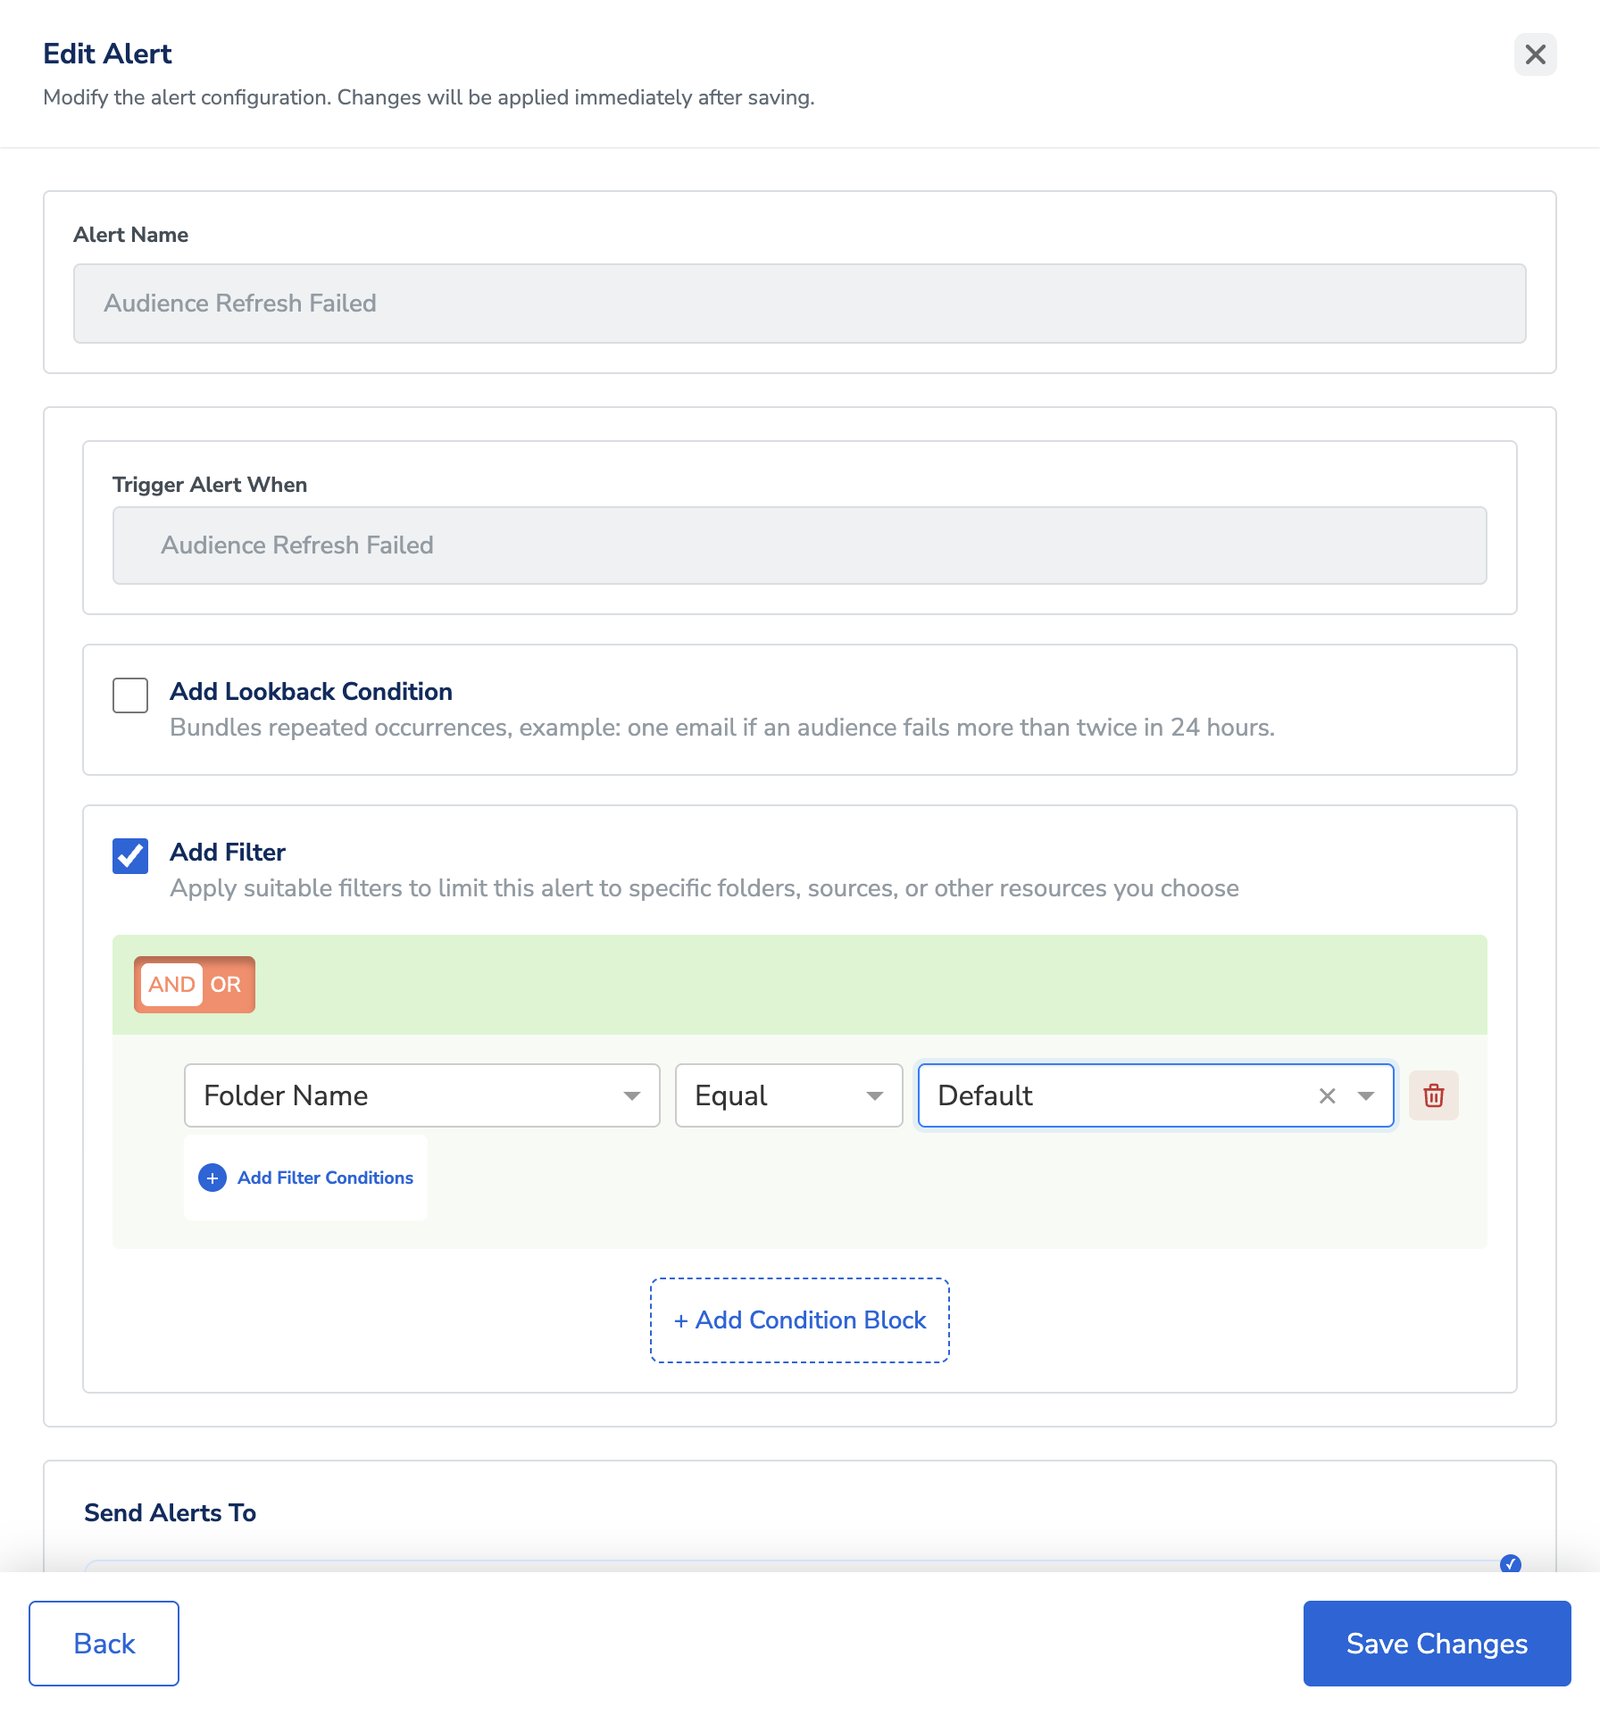
Choose who gets notified
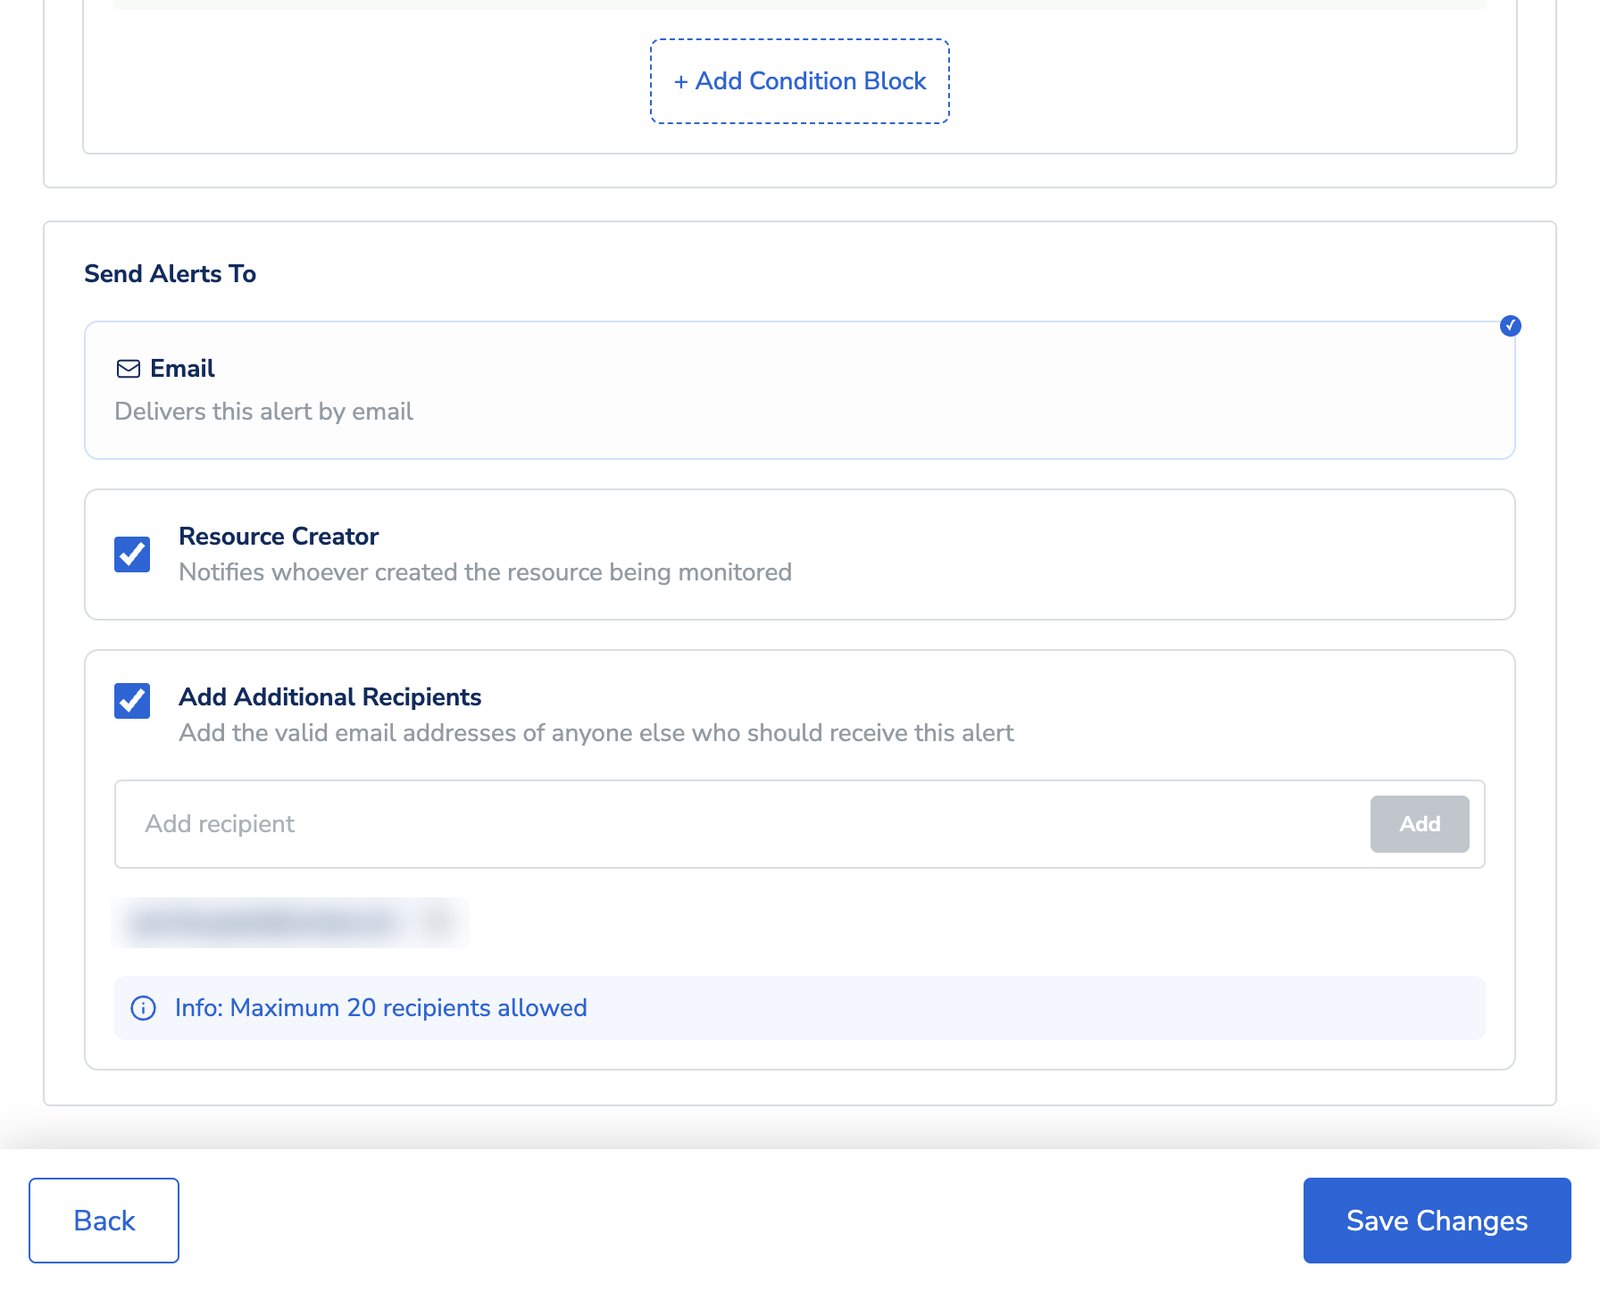
Under Send Alerts To:- Email — the delivery channel. This is currently the only channel available.
- Resource Creator — notifies whoever created the audience or source being monitored. On by default.
- Add Additional Recipients — add any other email addresses that should receive the alert, up to a maximum of 20 recipients.
Enable or disable an alert
Use the toggle on the alert card. Disabling pauses the notifications but keeps the configuration intact, which is what you want during planned maintenance or a temporary change in how a team works — you can switch it back on without rebuilding anything.Create a custom alert
Create a custom alert when the defaults do not cover what you need — for example, watching a single source, or pairing an event with your own threshold and recipient list.1
Open Alerts & Notifications
Go to Admin → Alerts & Notifications.
2
Pick the tab
Choose the Source or Audience tab, depending on what you want to monitor.
3
Start a new alert
In the Custom Alerts section, select Create Custom Alert.
4
Name the alert
Give it a clear, descriptive name. The name identifies the alert in the list and in the notification emails, so something like
Source Pull - Brand Team beats Alert 3.5
Choose the trigger event
Under Trigger Alert When, select the event to watch — for example Audience Refresh Failed, Audience Failure or Source Pull Missing.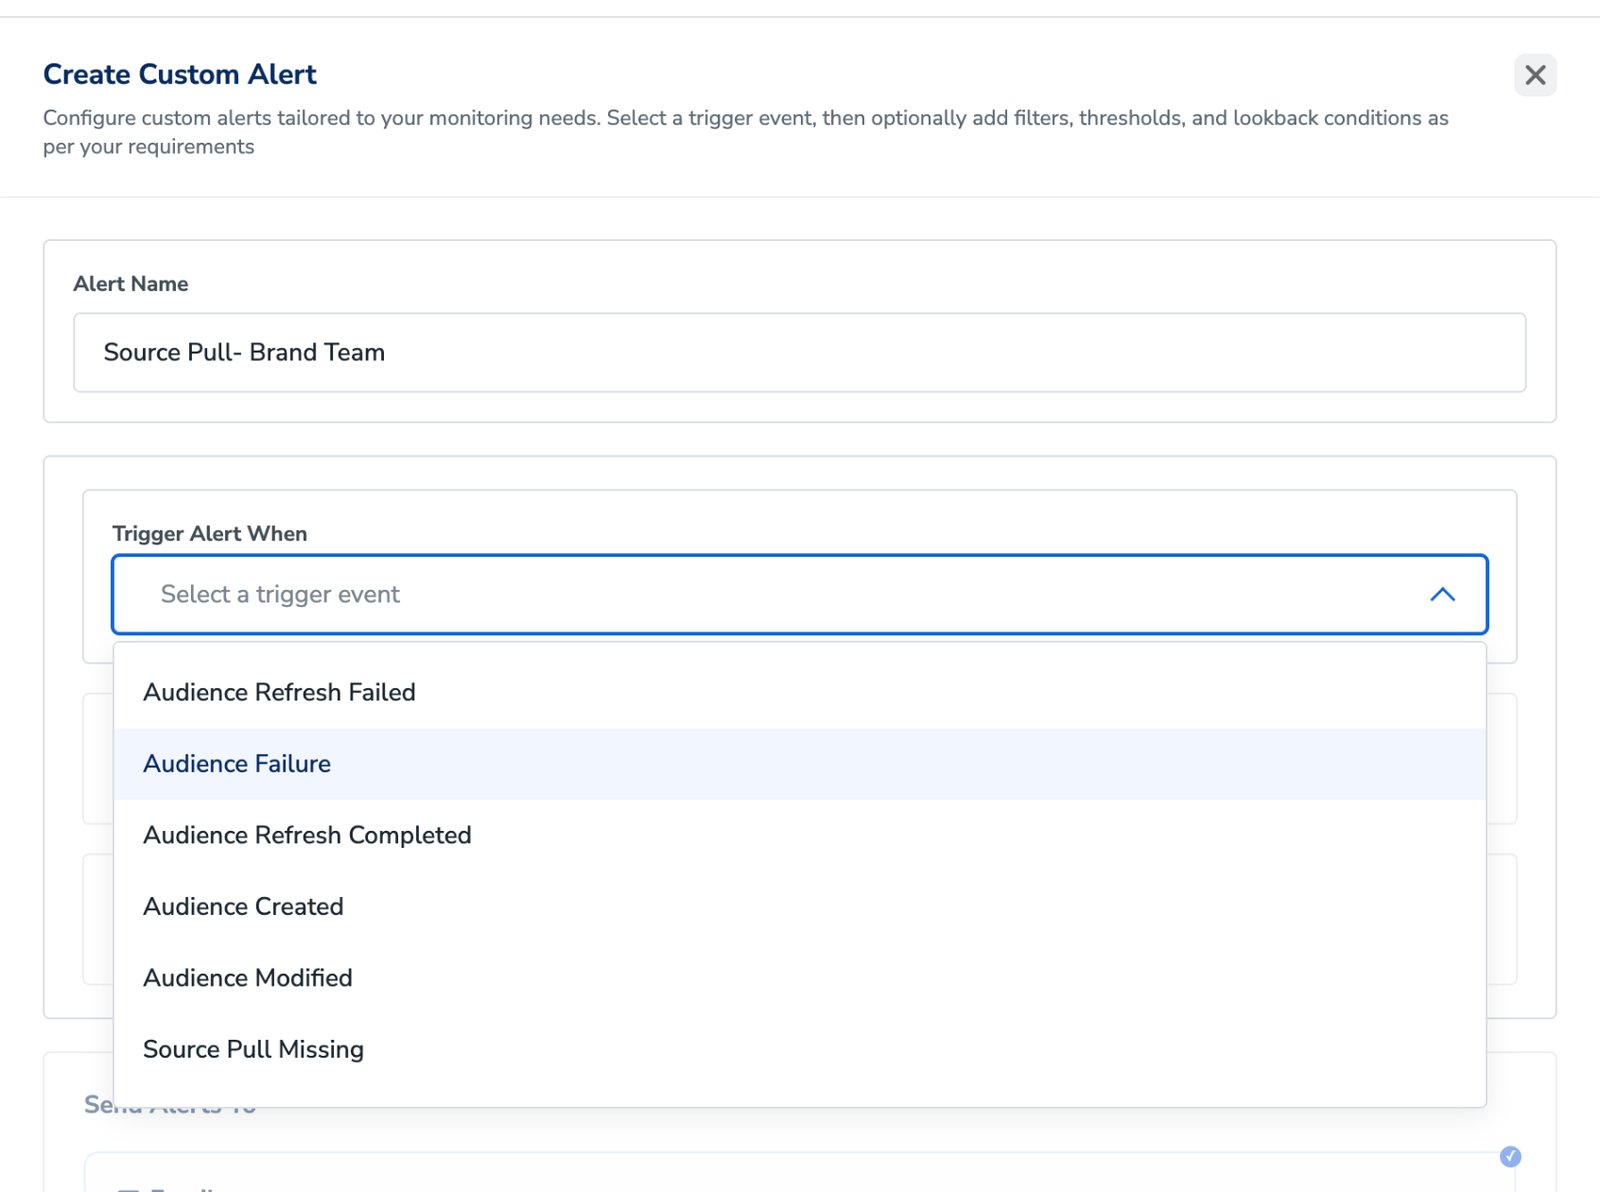
6
Set the condition, if the event has one
Depending on the event you picked, you get either an Add Missing Threshold field (absence-type events) or an Add Lookback Condition field (failure-type events). Some events have neither.
7
Add filters (optional)
Tick Add Filter to scope the alert to particular resources instead of the whole organisation. On the Audience tab you can filter on Audience ID, Audience Name or Folder Name.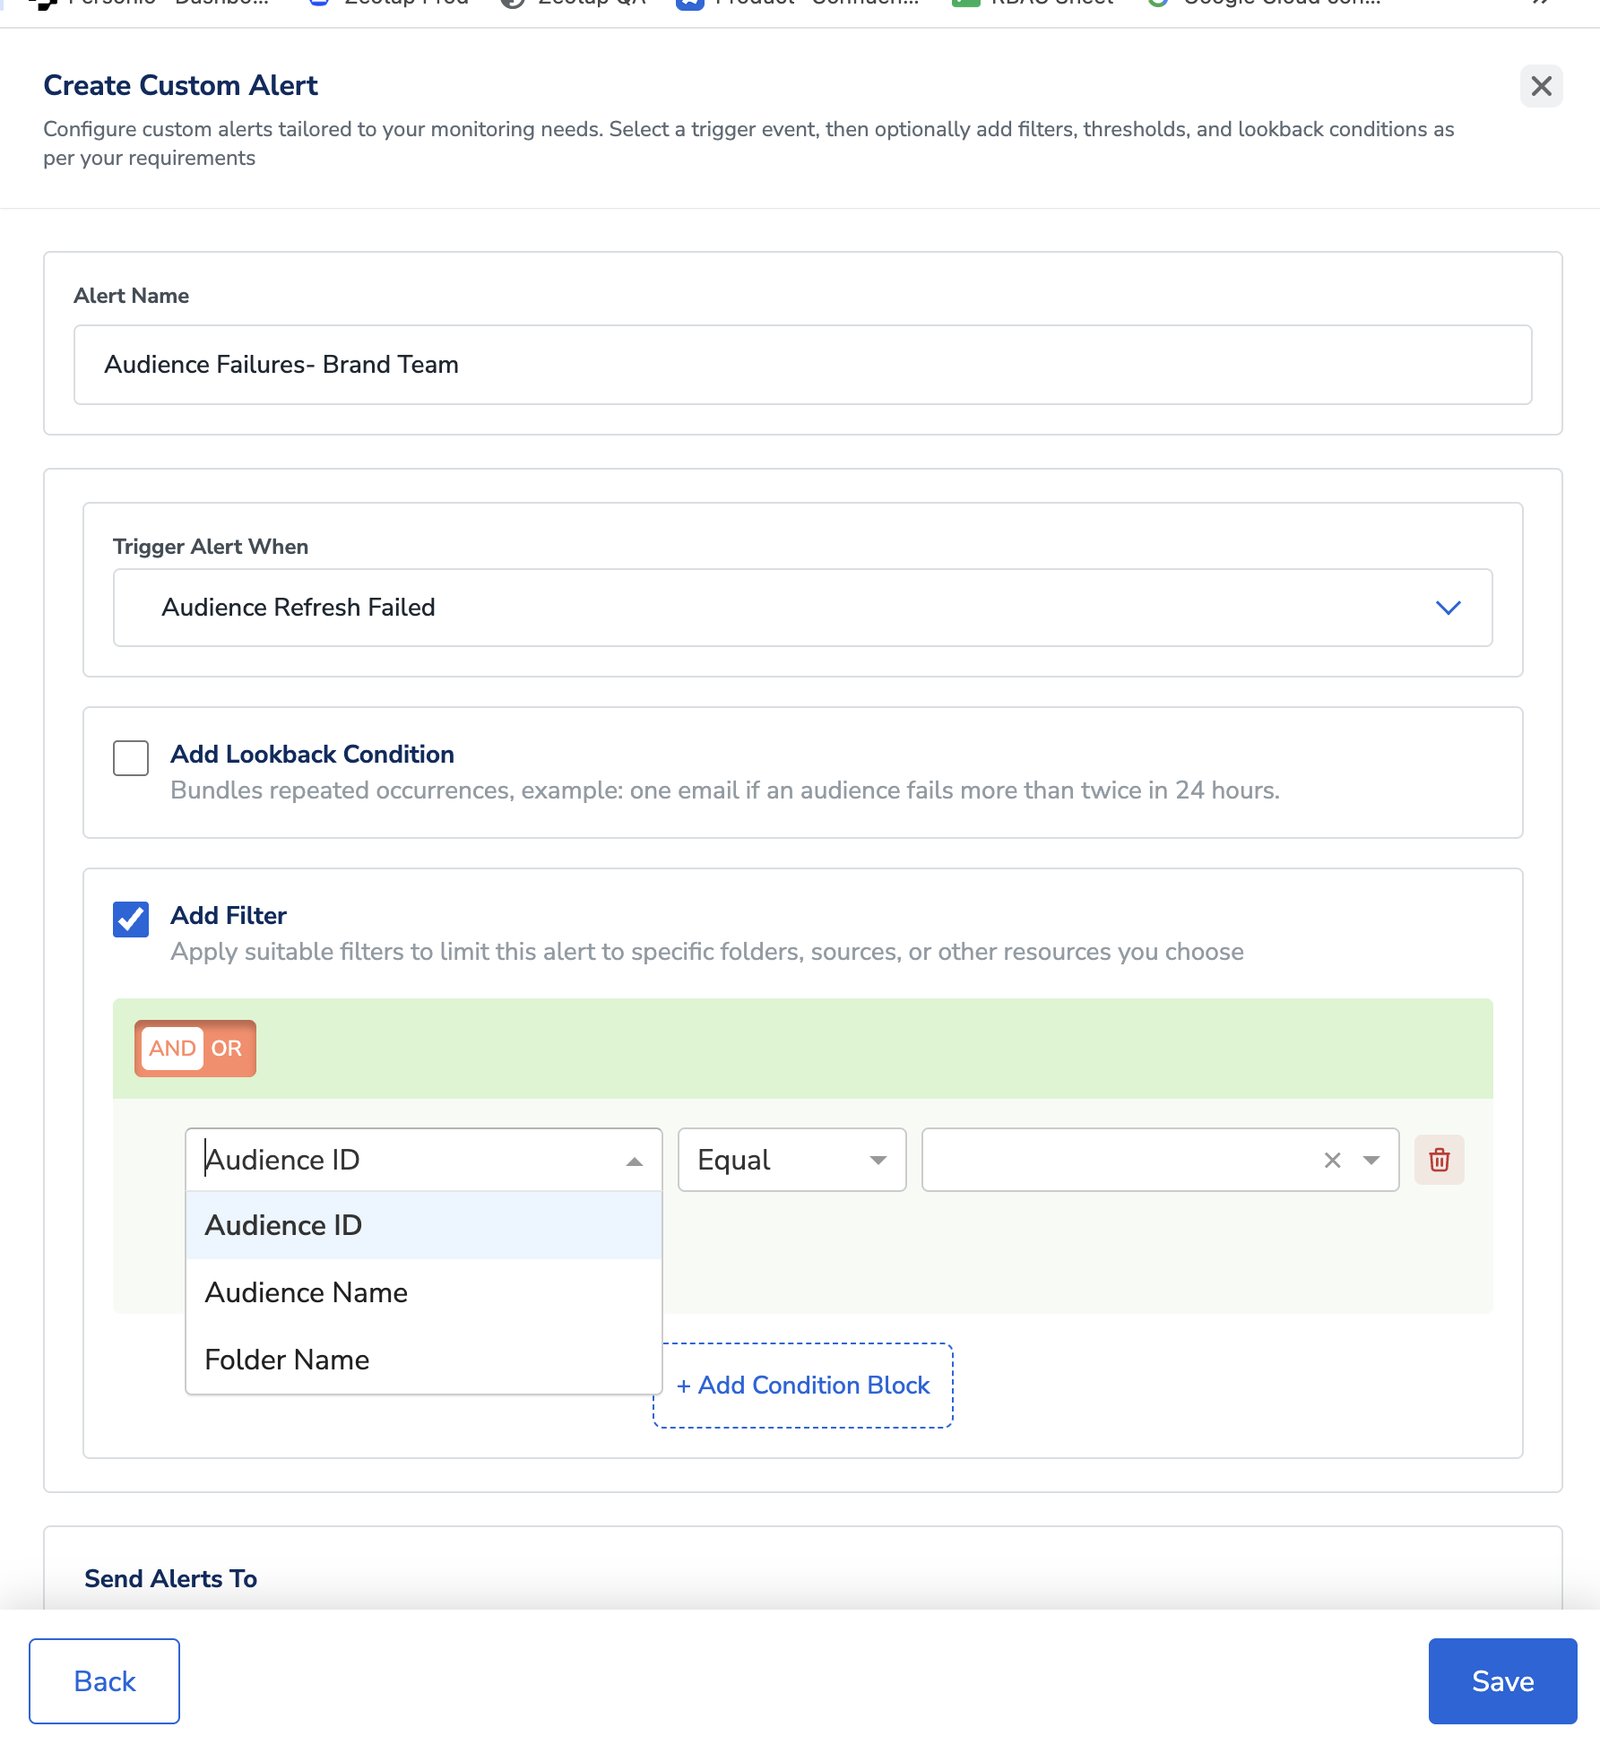
8
Choose the recipients
Email is on by default, and so is Resource Creator — clear it if the creator should not be notified. Add any other addresses under Add Additional Recipients.
9
Save
Save the configuration. The alert starts working immediately, according to its enabled state.
Field reference
FAQs
Why am I not getting emails for an alert that is enabled?
Why am I not getting emails for an alert that is enabled?
Check the alert’s filters first — a filter scoped to a folder or resource you are not using will stop it firing for anything else. Then check Send Alerts To: if Resource Creator is cleared and no additional recipients are listed, the alert has nobody to notify.
Can I stop an alert without losing its configuration?
Can I stop an alert without losing its configuration?
Yes. Disable it with the toggle on the alert card. The thresholds, filters and recipients are all kept, so switching it back on restores the same behaviour.
Can I point a default alert at a different event?
Can I point a default alert at a different event?
No — the trigger event on a default alert is fixed, and both Alert Name and Trigger Alert When are read-only when you edit one. Create a custom alert, or duplicate the default alert and adjust the copy.
Why would I use a lookback condition instead of alerting on every failure?
Why would I use a lookback condition instead of alerting on every failure?
To avoid a flood. A source that fails on every retry can generate a lot of individual emails; a lookback condition turns that into one notification when the count crosses your threshold in the window you set.
How many people can receive one alert?
How many people can receive one alert?
Up to 20 additional recipients, plus the resource creator if that option is left enabled.