Overview
My Roles module provides administrators with the ability to create and manage custom roles with granular permissions for different modules and folders within Zeotap platform. This feature also enables organisations to implement role-based access control (RBAC) by restricting user access to specific folders within the Journey and Audience modules, ensuring that team members only interact with content relevant to their responsibilities. Key Benefits:- Granular control over user permissions at both module and folder levels
- Ability to segregate access based on business requirements and team structures
- Centralised role management through a dedicated admin interface
Accessing My Roles
The My Roles screen is available under the Admin section of the Zeotap platform. This screen provides a centralized location to view, create, and manage all custom roles within your organization. To access My Roles:
My Roles screen displays following information for each role:
.png?fit=max&auto=format&n=vFAAmDAYNzRboQBn&q=85&s=aa15bc7961ea9496b5febc62905d4b9a)
- Name: The name of the custom role
- Type: Indicates whether the role is a custom role
- Created By: The user who created the role and creation timestamp
- Last Updated By: The user who last modified the role and update timestamp
- Actions: Edit button to modify role permissions
Creating a Custom Role
Custom roles allow you to define specific permissions and folder access for different users. Follow these steps to create a new custom role: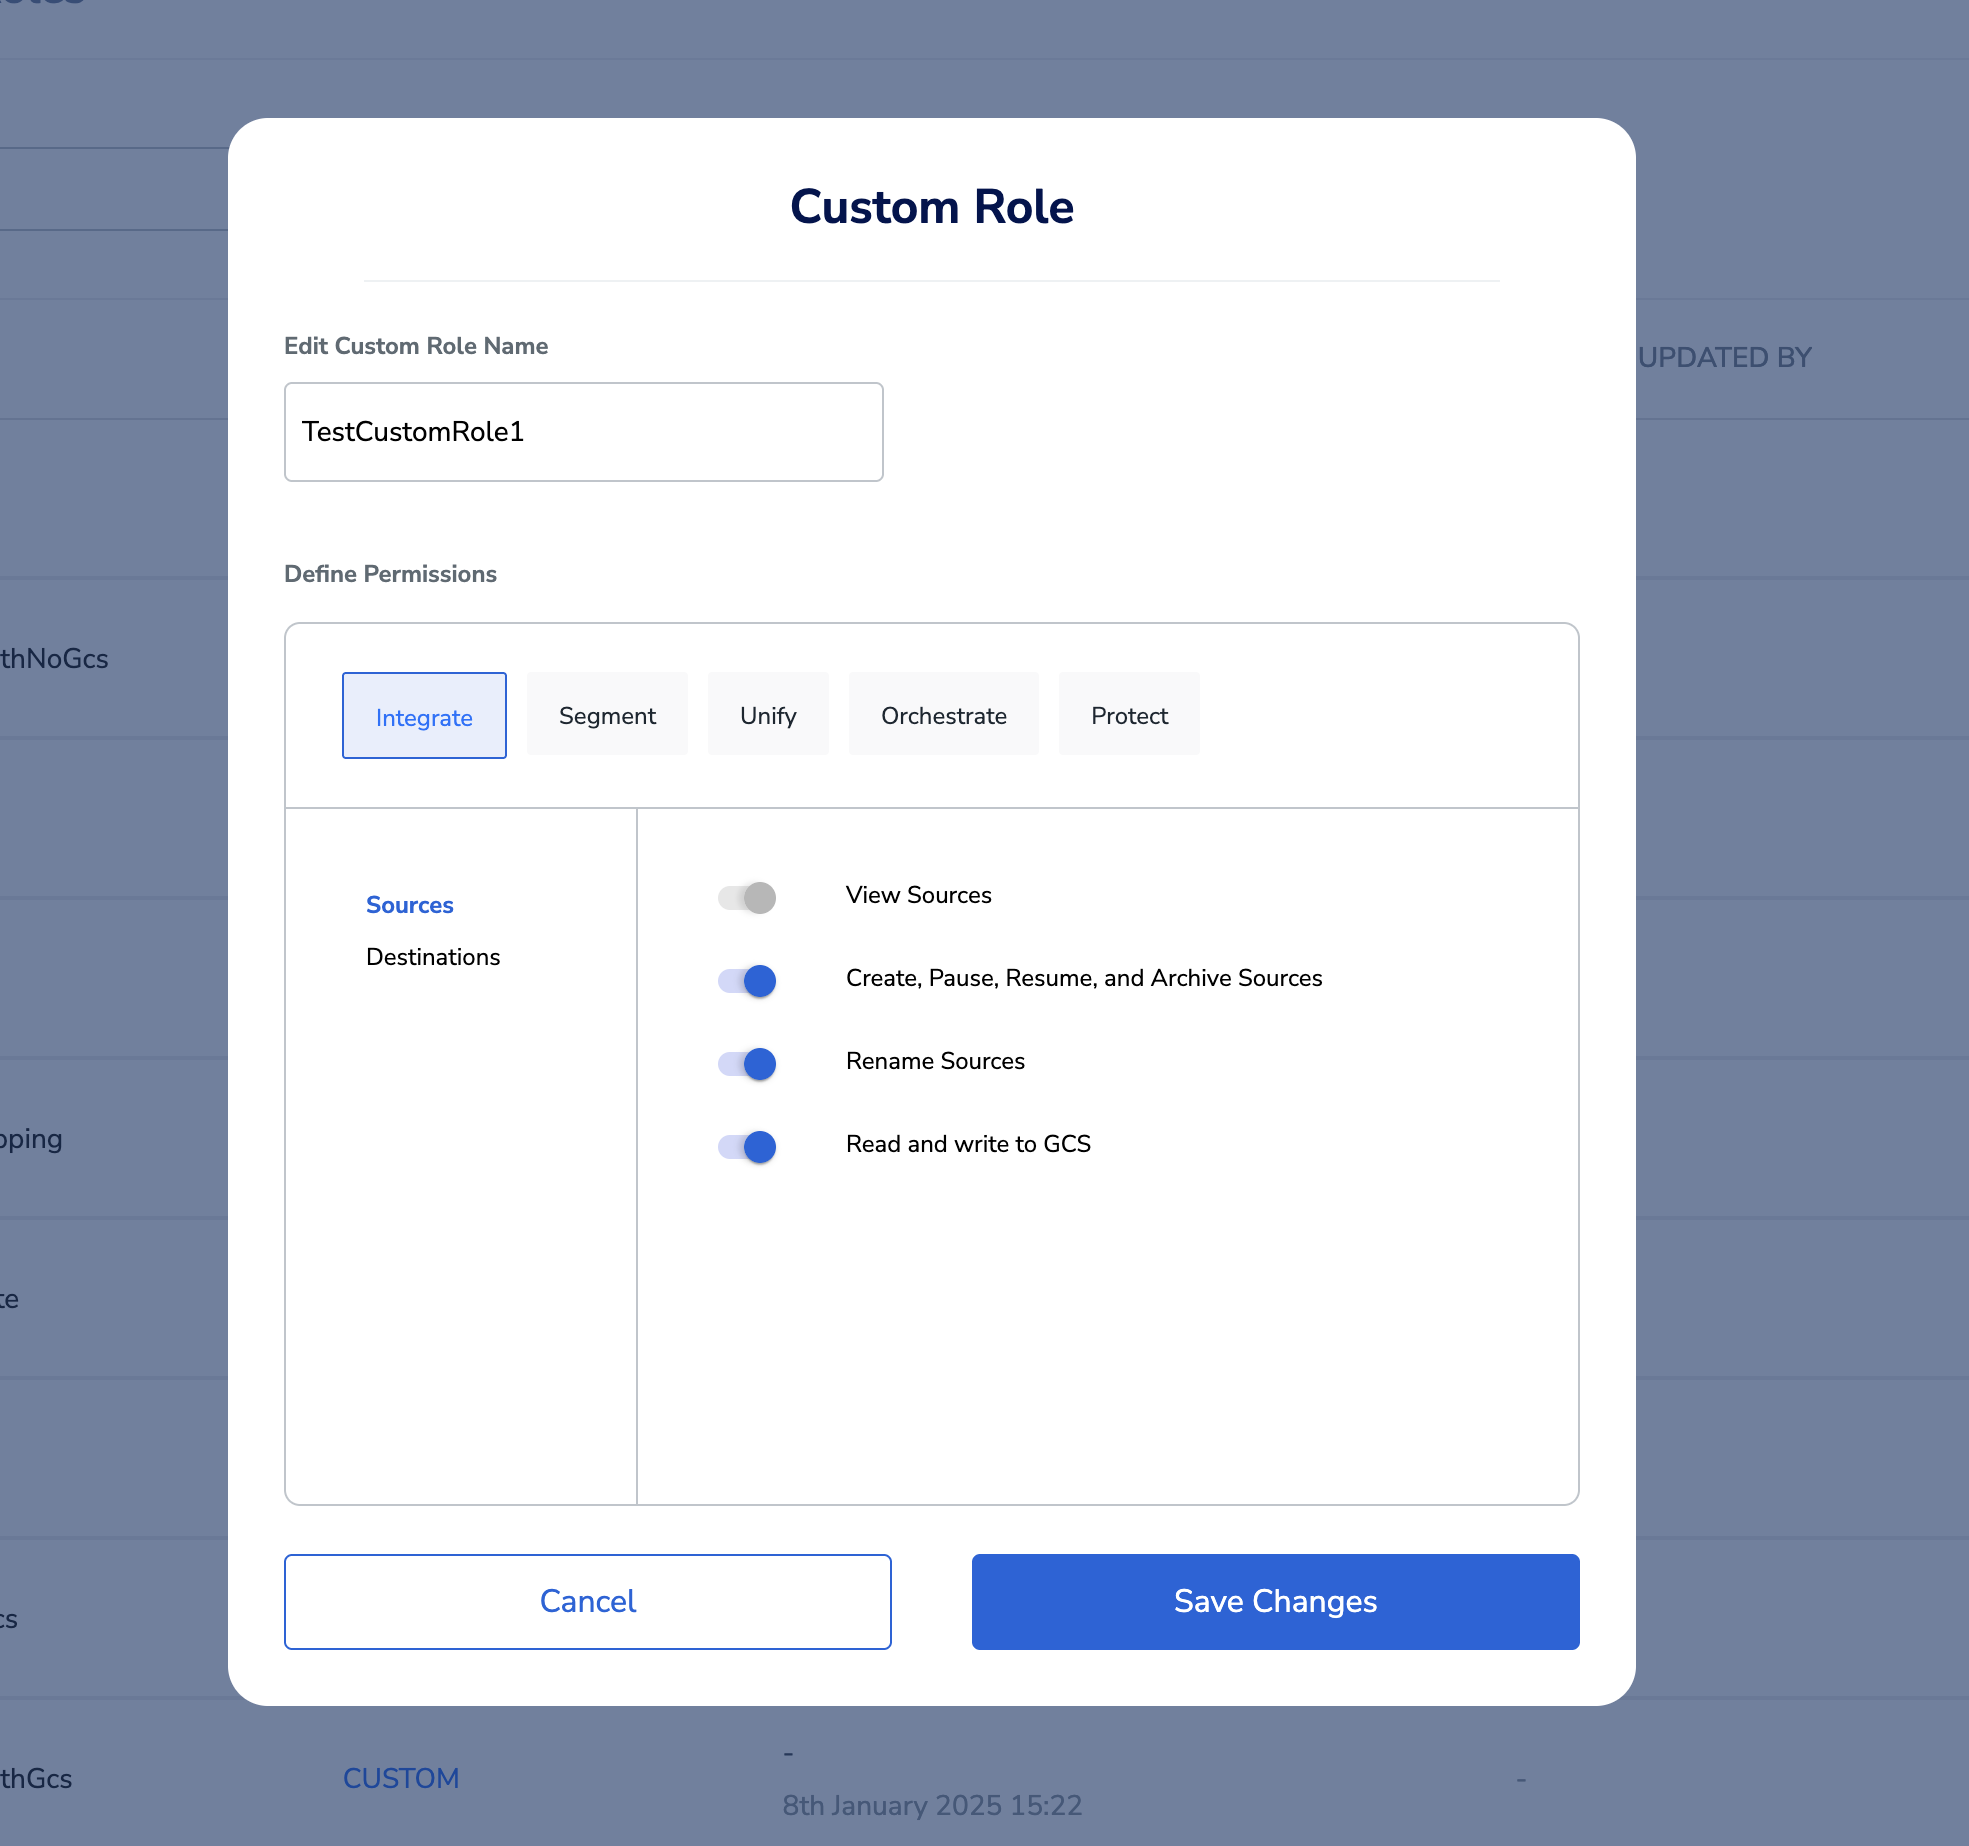
Managing Folder Access for Journey Module
Folder access management allows you to control which folders users can see and interact with in the Journey module. This is particularly useful for organizations that need to segregate data based on teams, projects, or customer types.Option 1: All Folders (Default)
By default, any custom role has access to All Folders. This means:- Users assigned to this role can access all current folders in the Journey module
- They will automatically have access to any new folders created in the future
- This option provides the most flexibility and is recommended for general-purpose roles
Option 2: Specific Folders
Select ‘Specific Folders’ when you need to restrict access to only certain folders. This option is ideal for teams that should only work with specific campaigns, projects, teams. When you select Specific Folders, an expanded panel appears with two toggle modes:- Include — Only the checked folders will be accessible to users with this role. All other folders are hidden.
- Exclude — All folders are accessible except the checked folders. Use this when you want to hide a small number of folders.
Only one mode (Include or Exclude) can be configured per role. The active mode is highlighted in blue. You can switch between the two modes at any time before saving.
- A searchable, paginated list of all existing folders will be displayed
- Access to ‘Default’ and ‘Archived’ folders is automatically granted and cannot be removed
- When you select a parent folder, access to all its sub-folders is automatically granted
- Users can also directly create a new folder from here and restrict it’s permissions

Managing Folder Access for Audience Module
Folder access management for the Audience module allows you to control which audience folders users can see and interact with. This is configured within the Segment tab of the custom role modal.Option 1: All Folders (Default)
By default, any custom role has access to All Folders. This means:- Users assigned to this role can access all current folders in the Audiences module
- They will automatically have access to any new folders created in the future
- This option provides the most flexibility and is recommended for general-purpose roles
Option 2: Specific Folders
Select ‘Specific Folders’ when you need to restrict access to only certain audience folders. At the bottom of the Segment permissions checklist, a Folder Access section appears with the two options.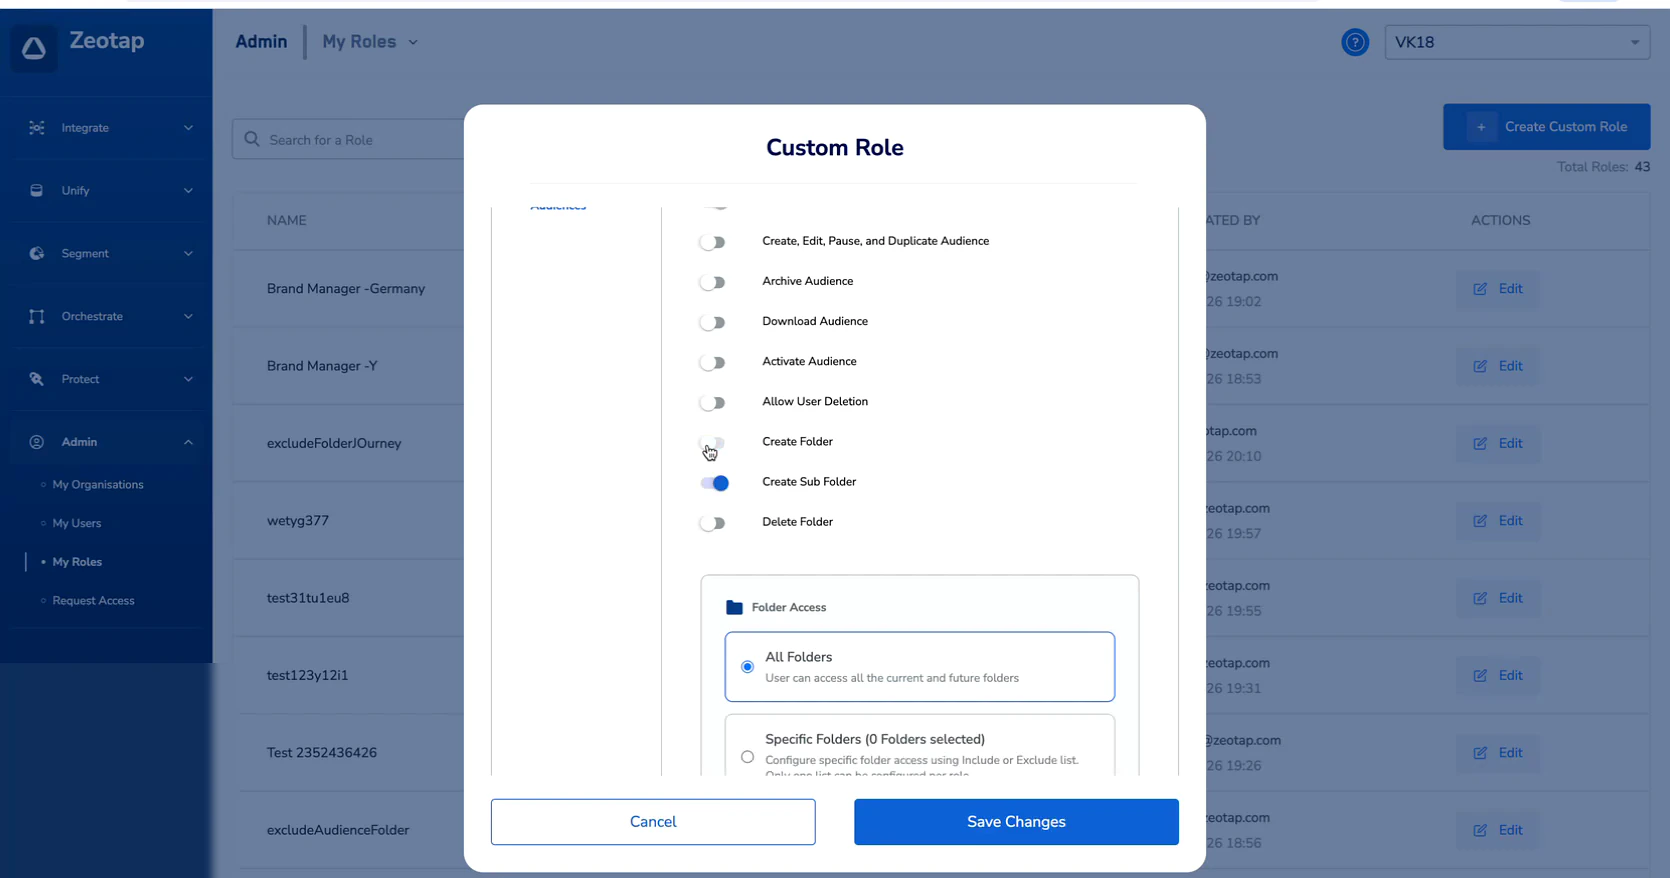
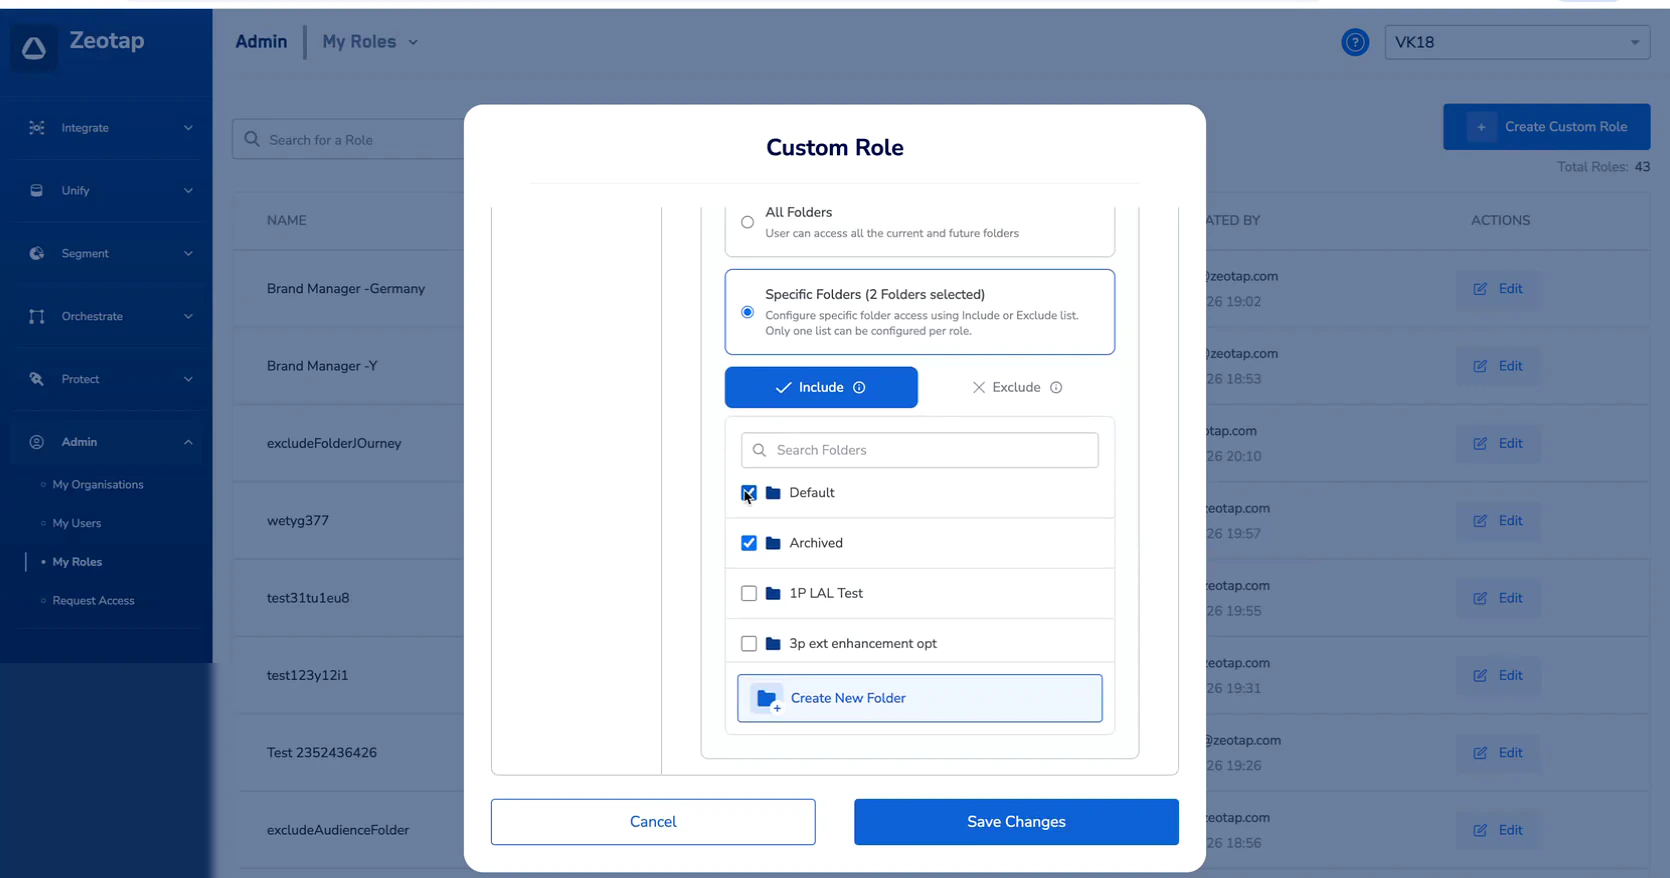
- Include — Only the checked folders will be accessible to users with this role. All other folders are hidden.
- Exclude — All folders are accessible except the checked folders. Use this when you want to hide a small number of folders.
The Include/Exclude toggle is displayed as a pair of pill-shaped buttons directly above the folder tree. The active mode is highlighted in blue. You can switch between the two modes at any time before saving. Only one mode (Include or Exclude) can be configured per role.
- Search for specific folders using the search field
- Expand the tree to view and select sub-folders
- Create a new folder directly from the selection panel using the Create New Folder button
Folder Access in Action
Once a user is assigned a role with specific folder access, navigating to Segment > Audiences will only display the folders permitted by their role.
Saving Role Changes
After configuring permissions and folder access, click Save Changes. A confirmation dialog will appear warning that the changes will be applied to all users assigned to this role.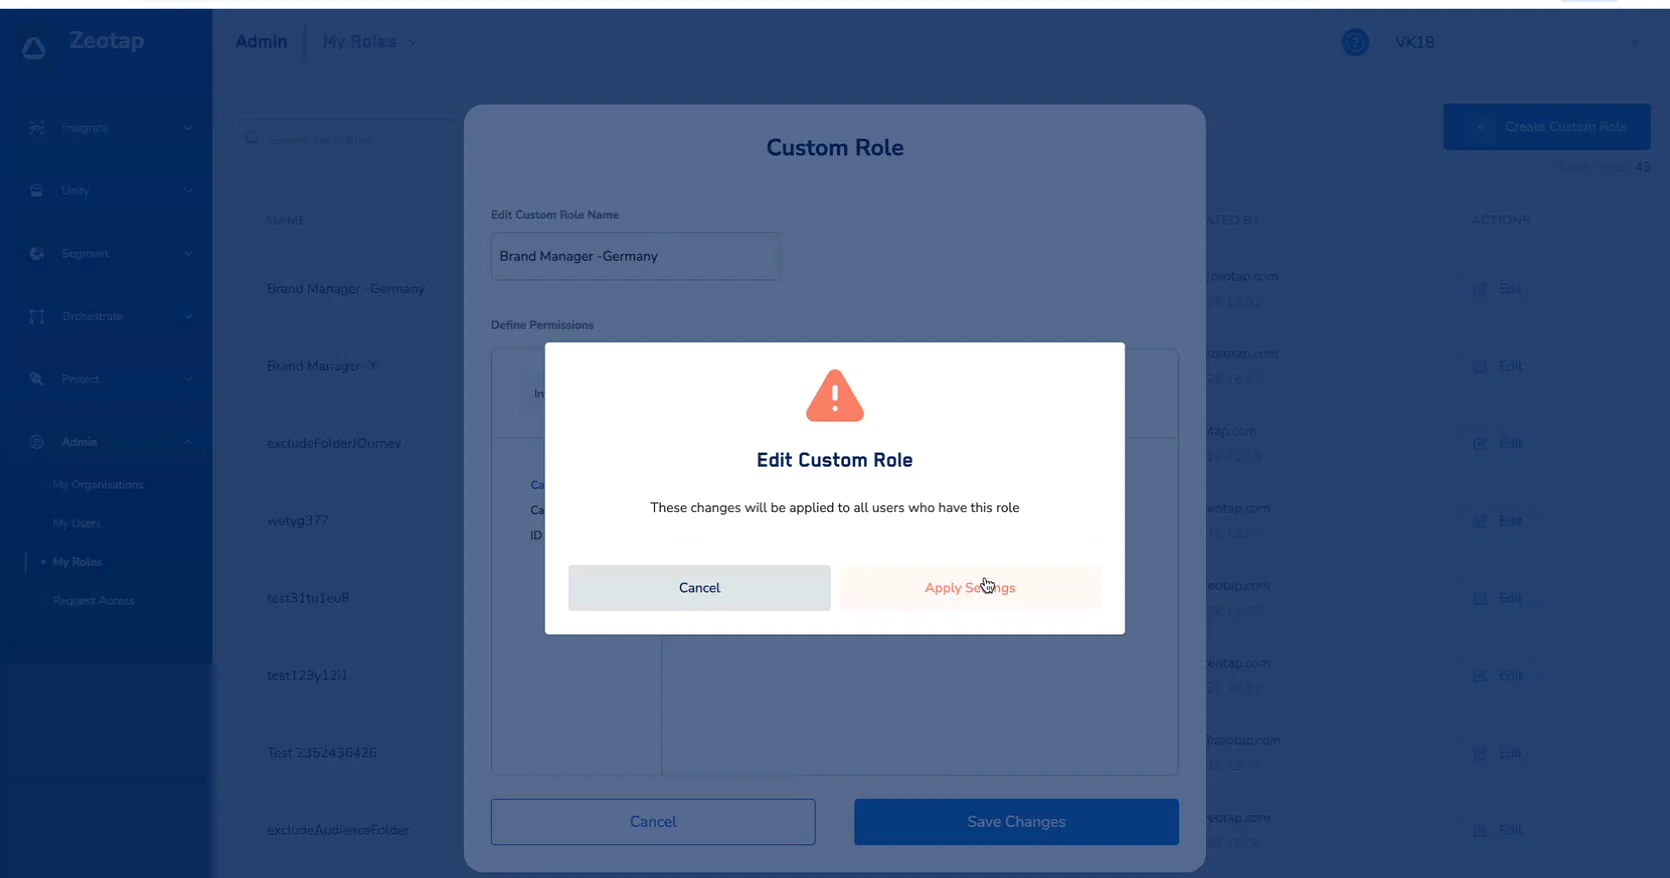
Assigning Roles to Users
The user will immediately inherit all permissions and folder access restrictions defined in the assigned role.
Frequently Asked Questions
Can I assign multiple roles to a single user?
Can I assign multiple roles to a single user?
A user can be assigned single role per organization. Users can be assigned different roles across different organizations.
If I delete a folder, what happens to roles that had access to it?
If I delete a folder, what happens to roles that had access to it?
When a folder is deleted, the corresponding folder permission is automatically removed from all custom roles that had access to it.
Does folder access control apply to sub-folders?
Does folder access control apply to sub-folders?
Yes, when you grant access to a parent folder, users automatically receive access to all current and future sub-folders within that parent folder. This inheritance applies recursively to all nested sub-folders.
How do I know which folders a user has access to?
How do I know which folders a user has access to?
You can navigate to ‘My Roles’ screen, select the relevant custom role and view the folders that role has access to.
Can I use both Include and Exclude rules on the same role?
Can I use both Include and Exclude rules on the same role?
No. Only one mode (Include or Exclude) can be configured per role for folder access. You must choose one approach for each custom role.
What happens when a new folder is created?
What happens when a new folder is created?
If the role uses All Folders or Exclude mode, the new folder is automatically accessible. If the role uses Include mode, the new folder must be manually added to the role configuration.
Does folder access affect activation or downloads?
Does folder access affect activation or downloads?
Yes. Users can only view, activate, or download audiences within the folders they have access to. Audiences in restricted folders are completely hidden from the user.