Admin setup — complete once before your first partnership
These steps are done once per organisation. If your org has already done this, skip ahead to Step 1.- Enable the Collaborate module — Contact your Zeotap account team to have the Collaborate module activated on your org. It will not appear in the left navigation until this is done.
- Confirm composable CDP plan — Subscriber orgs must be on the Zeotap composable CDP plan (warehouse-native BigQuery setup). Confirm this with your account team if unsure.
- Enable collaboration consent — Your org must opt in to data collaboration on Zeotap before it can appear in another org’s partner dropdown. Ask your account team to enable this.
- Notify CDP admins — When a Contributor creates a partnership, the invitation email goes to all CDP admins of the Subscriber org. Make sure the right people have admin access so they receive it. Contact the support team if you need to change this setting.
Before you begin
Make sure both organisations have completed the admin setup above, and that:- You have at least one ID-type attribute in common — for example, both sides hold Email MD5 data.
- The Contributor has a data source onboarded, and the Subscriber has a source tagged as a customer parent model.
Step 1 — Contributor: Create the partnership
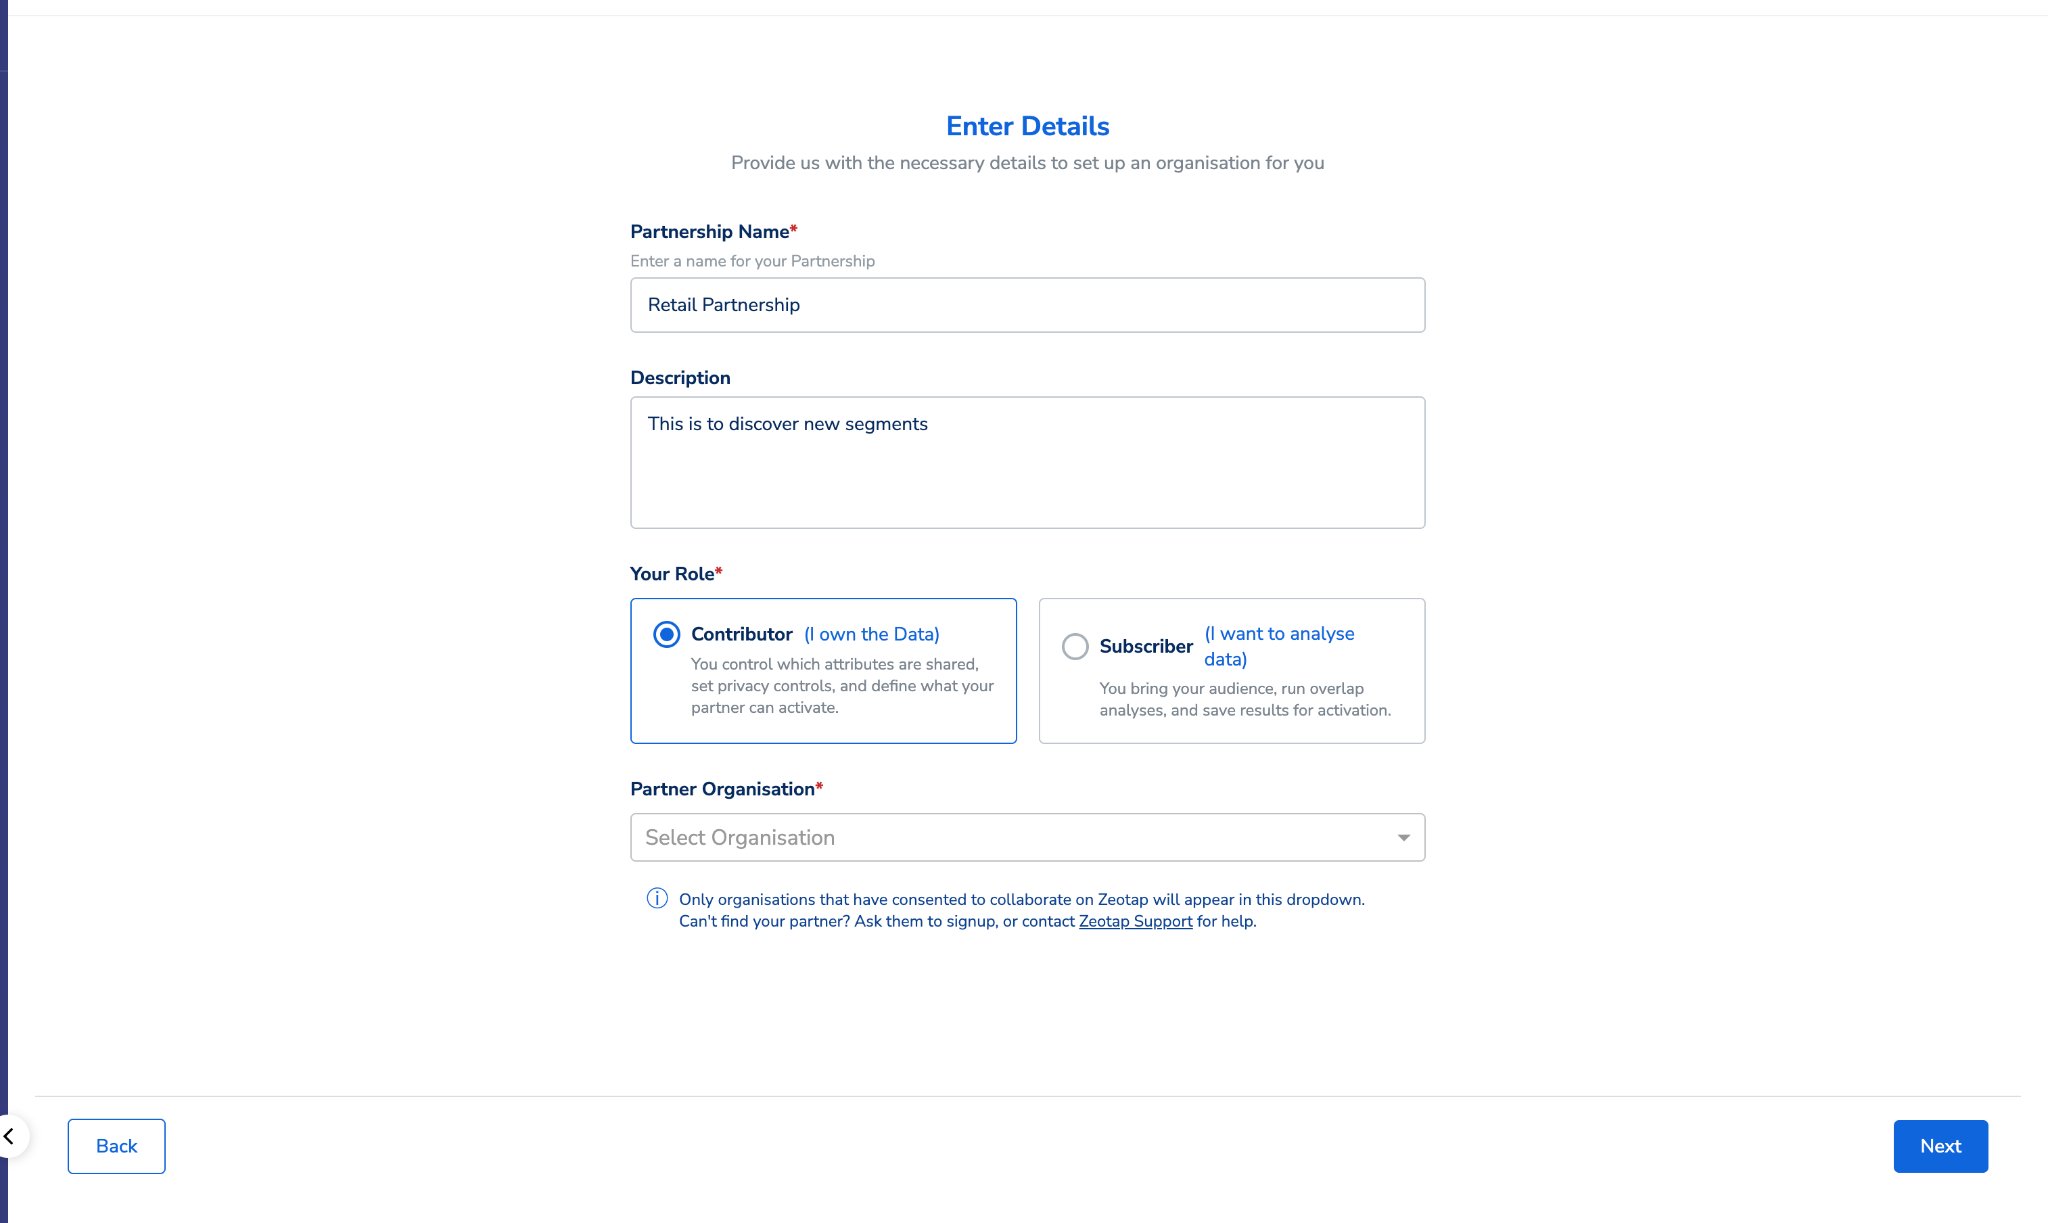
Fill in:
- Partnership Name — choose something descriptive that both teams will recognise.
- Description (optional) — a brief note on the purpose.
- Your Role — select Contributor (I own the Data).
- Partner Organisation — select your partner from the dropdown. Only organisations with collaboration consent enabled appear here. If you cannot find your partner, ask them to contact their Zeotap account team.
Step 2 — Contributor: Configure data sharing
You will see a two-step configuration wizard.Step 1 of 2 — Data Collaboration
Browse your available composable data sources on the left and expand a source to see its attributes.
For each attribute you want to share: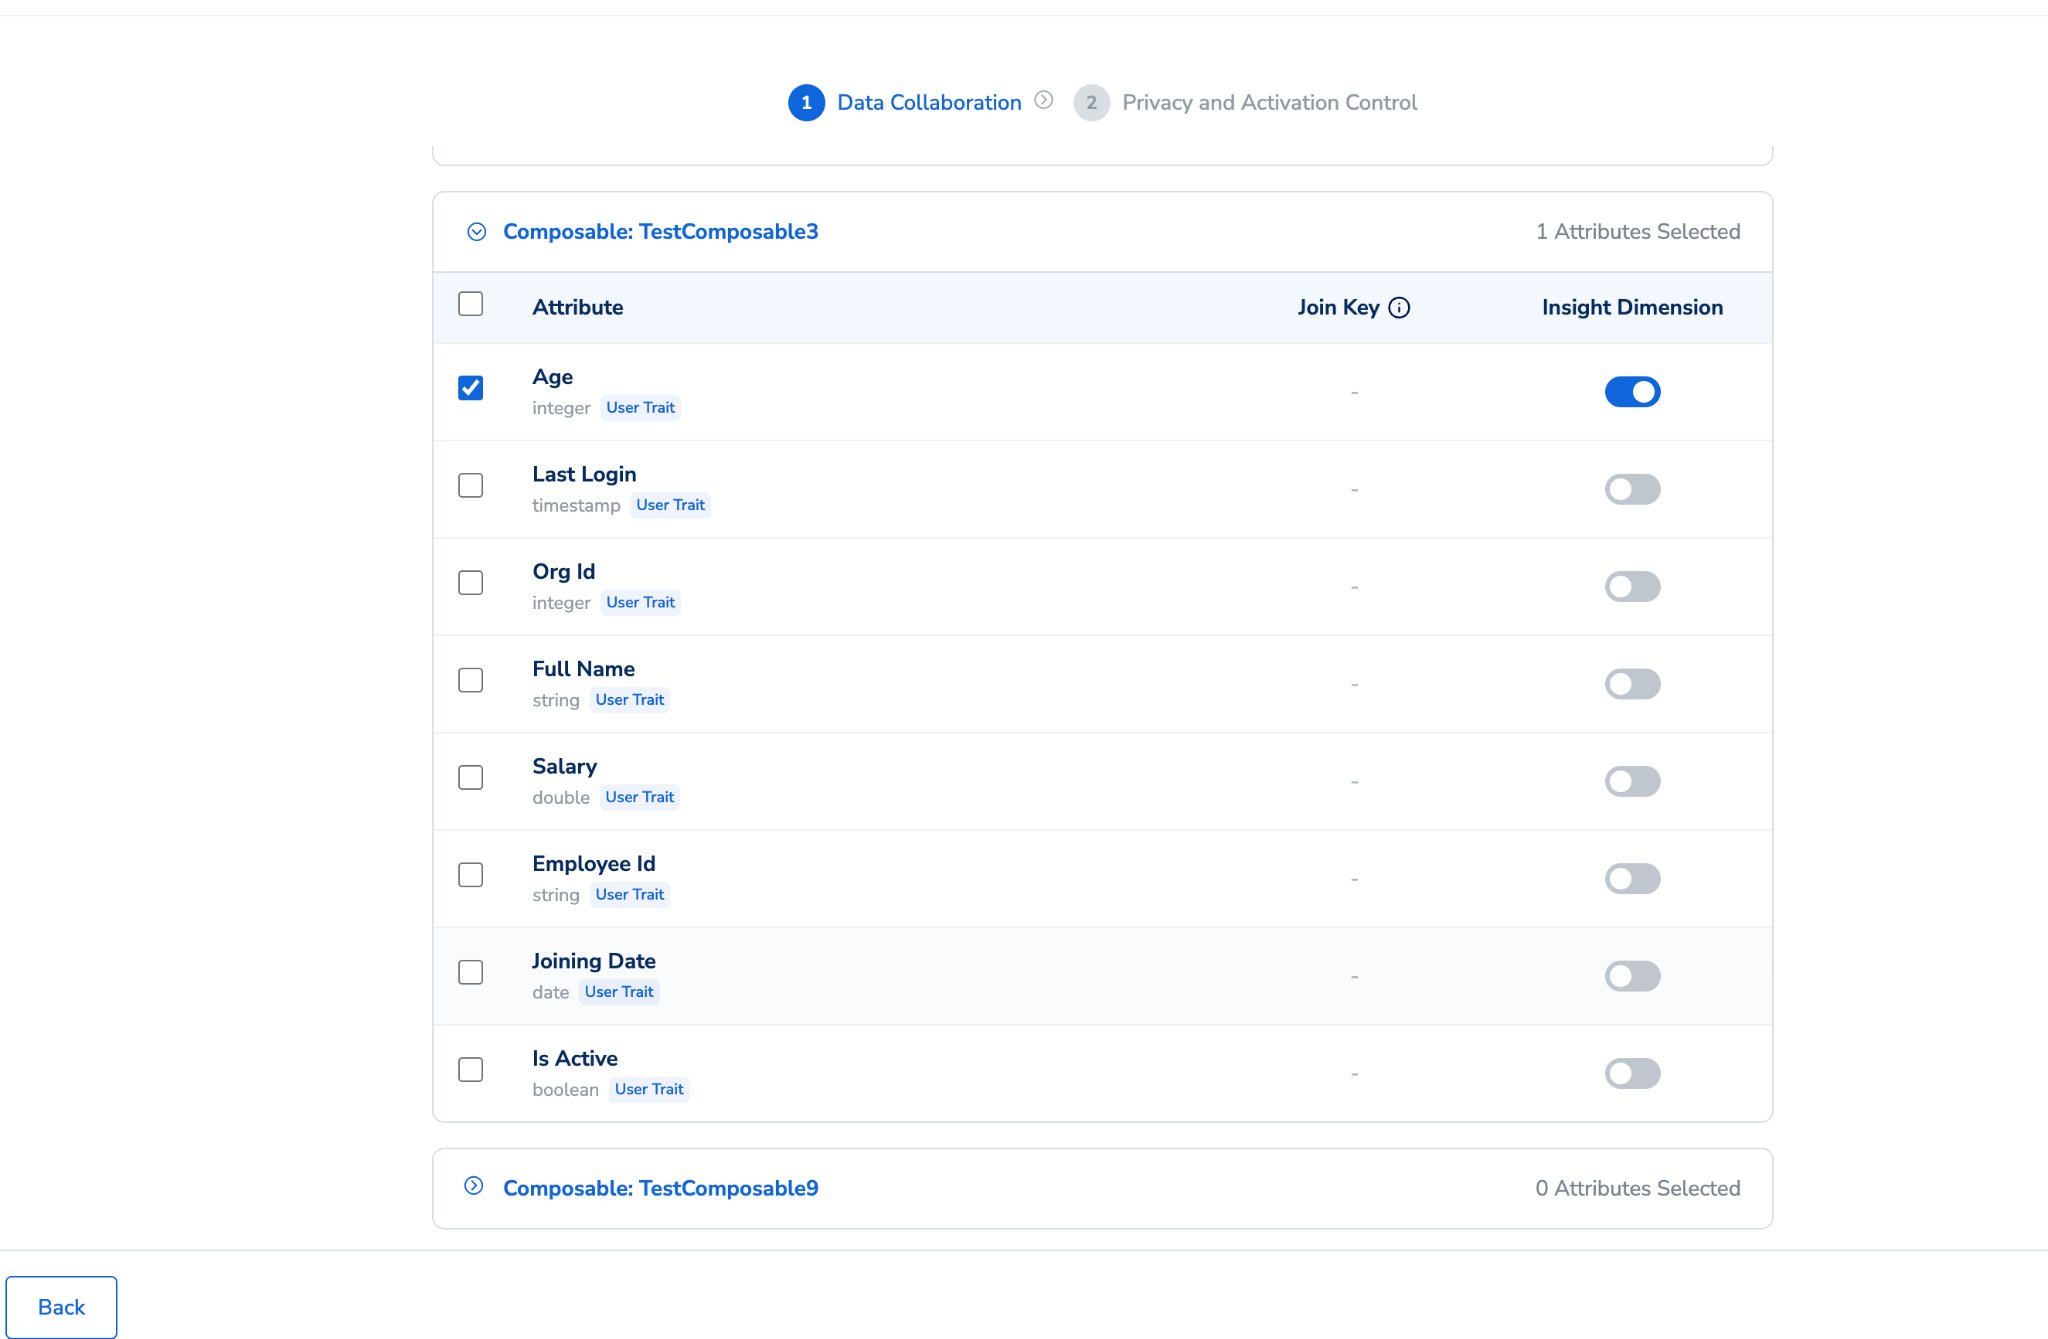
- Enable Join Key — turn this on for the identity attribute that will be used to match records with your partner. Join keys are available on ID-type attributes (such as Email MD5 or Phone MD5) and on the primary key column of composable datasets. At least one join key is required to proceed.
- Insight Dimension — turn this on for any attribute you want your partner to use in segment analysis (for example, gender, age group, or loyalty tier).
Publishers can only share attributes either from composable sources or from ingested sources — not a combination of both. Sharing both types together may result in duplicate records.
Step 2 of 2 — Privacy and Activation Control
Aggregate Threshold — the minimum group size for a cohort to appear in analysis results. Cohorts smaller than this are not shown to your partner. The default is 1,000. This ensures that overlaps below a certain size are not exposed, to avoid user re-identification.
Activation Settings — select Allow Activation if you want your partner to be able to save overlap results as audiences, then select which channels they can activate to.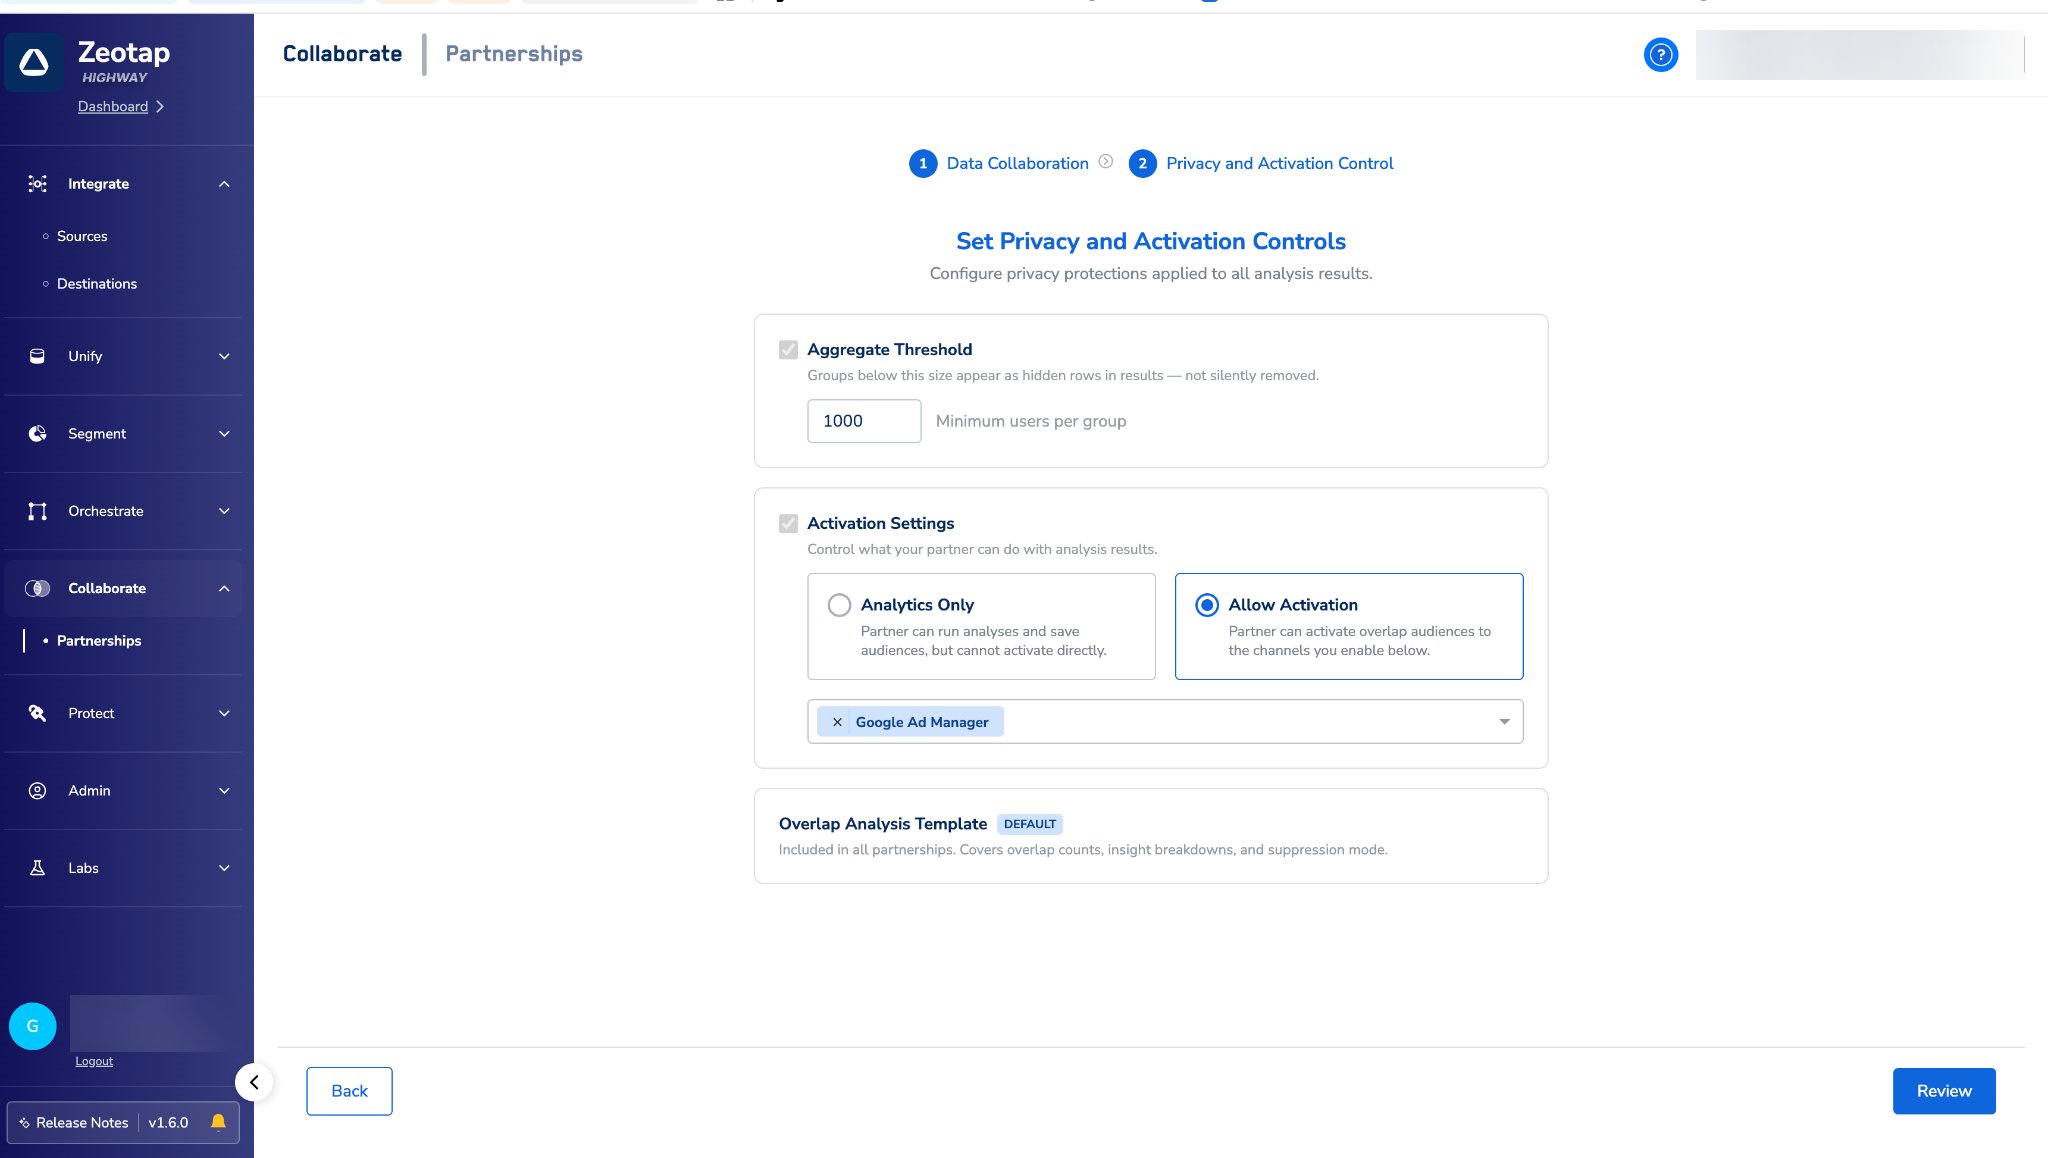
Step 3 — Subscriber: Accept the invitation
Your CDP admins received an invitation email when the Contributor created the partnership. To accept:
Once accepted, the partnership status moves to In Setup and you can begin your configuration.
Step 4 — Subscriber: Map your join keys
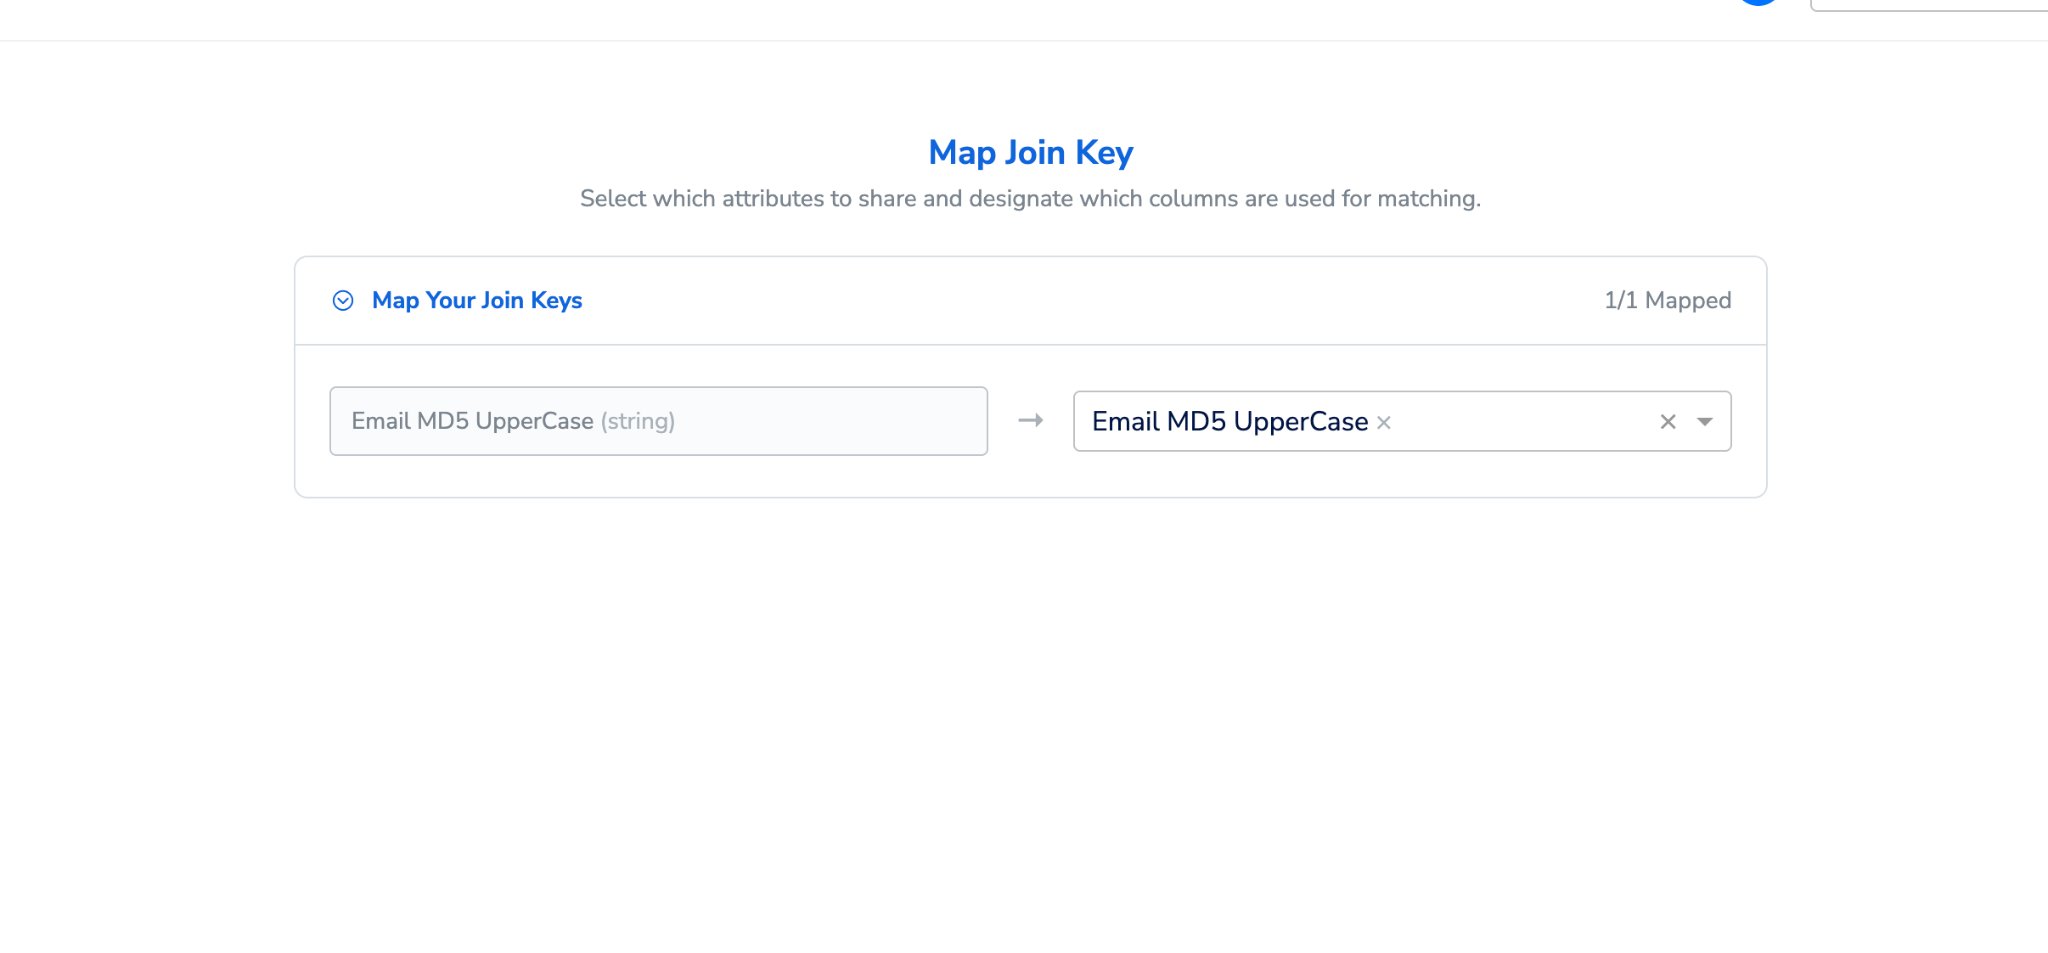
The configuration screen shows the join keys the Contributor has set on their side. You map each to the equivalent attribute in your data.The Subscriber configuration step is only available once the Contributor has completed their configuration. If the Contributor has not yet submitted their side, you will not see the mapping screen.
For each partner join key shown (for example, “Email MD5 Lowercase”), select the matching attribute from your own data.
Step 5 — Subscriber: Discover
Discover is the overlap analysis step — understand how your audience aligns with your partner’s and what those shared customers look like.
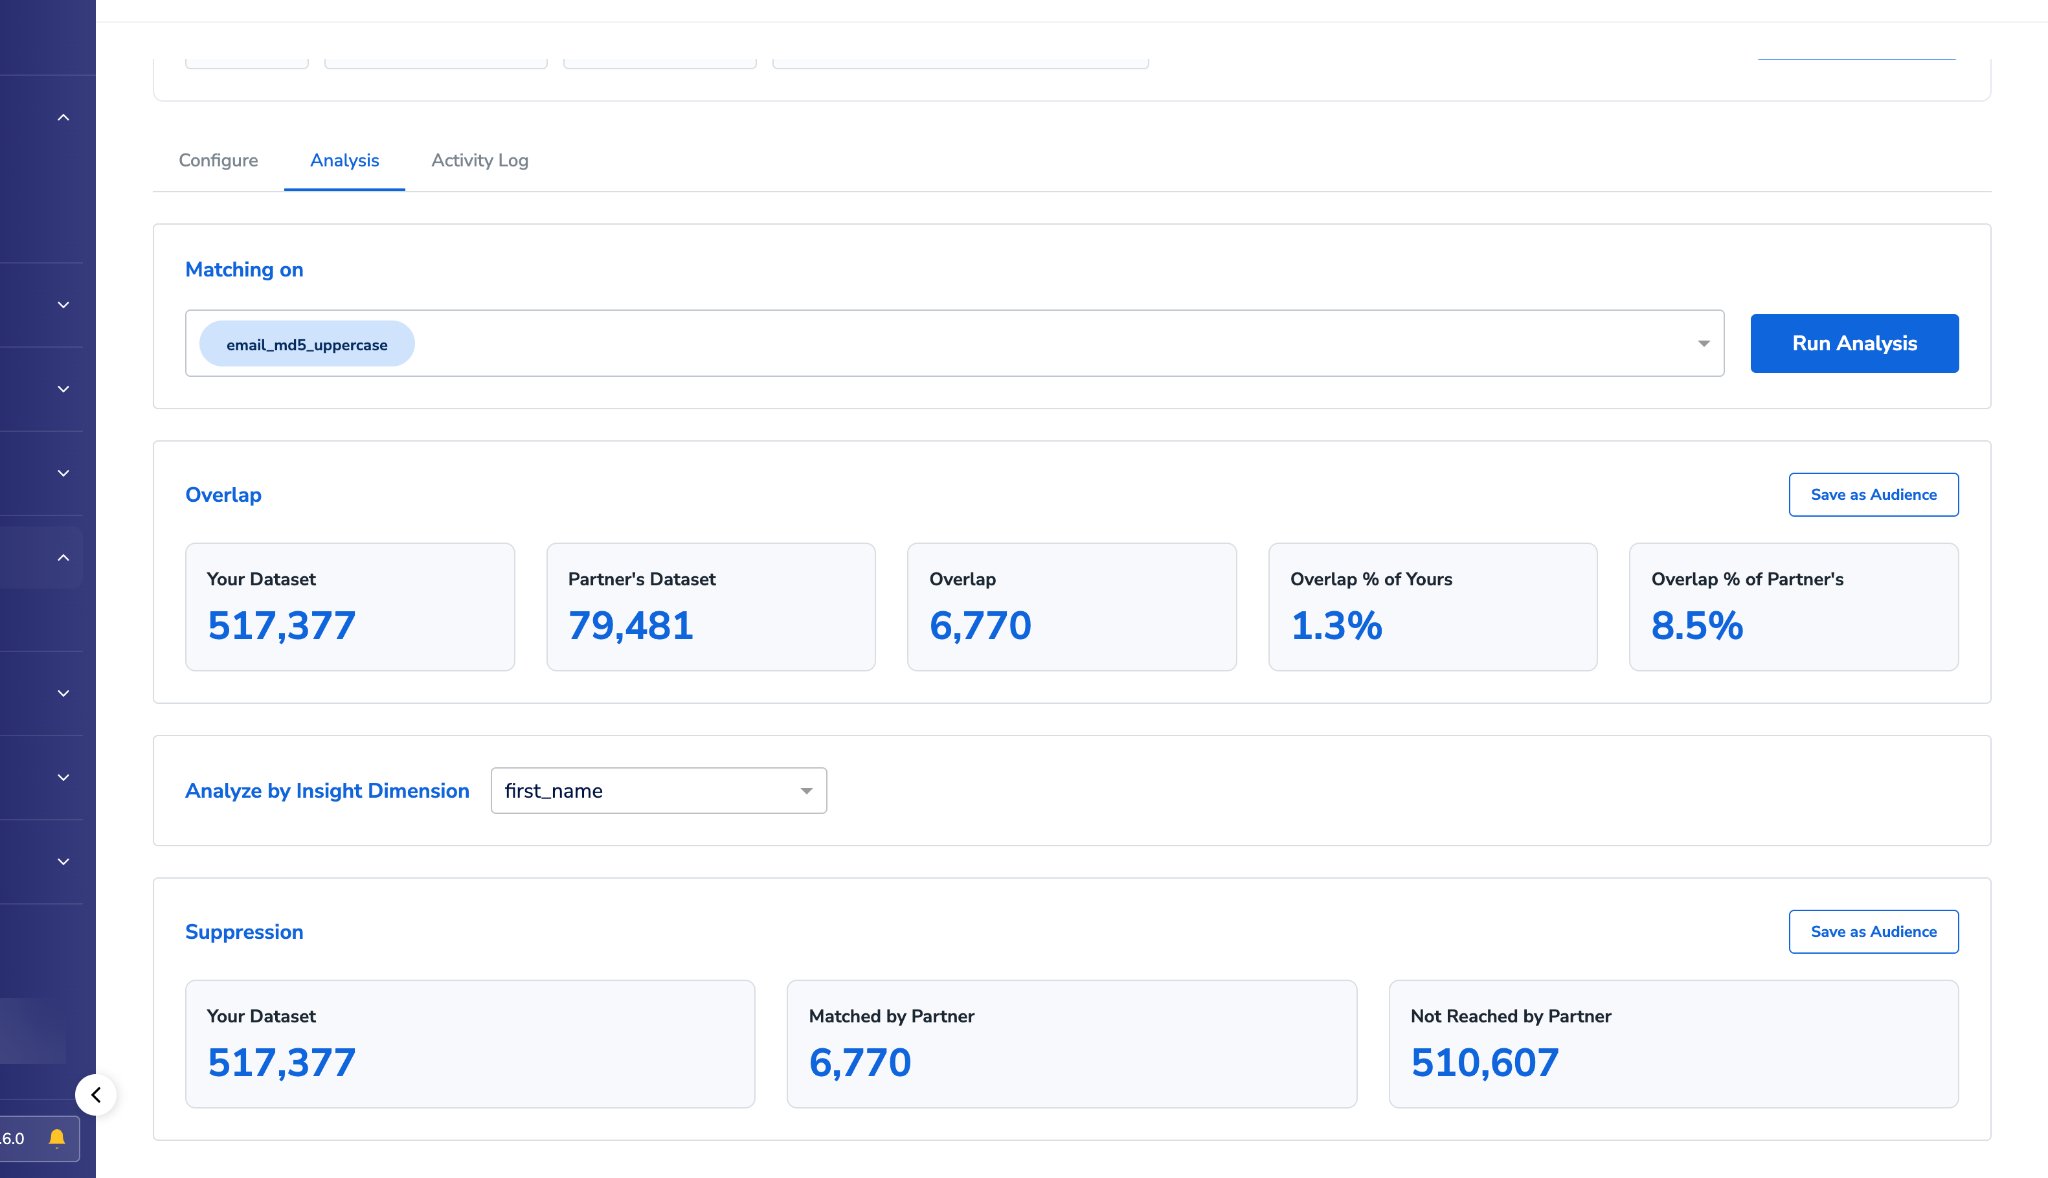
Analysis typically completes within a few minutes. When done, the page displays:
| Metric | What it shows |
|---|---|
| Your Dataset | Total records in your data. |
| Partner’s Dataset | Total records in the Contributor’s data. |
| Overlap | Records matched between both datasets. |
| Overlap % of Yours | Matched records as a percentage of your total. |
| Overlap % of Partner’s | Matched records as a percentage of the Contributor’s total. |
Step 6 — Subscriber: Activate
Activate — save matched segments as audiences and push them to ad channels.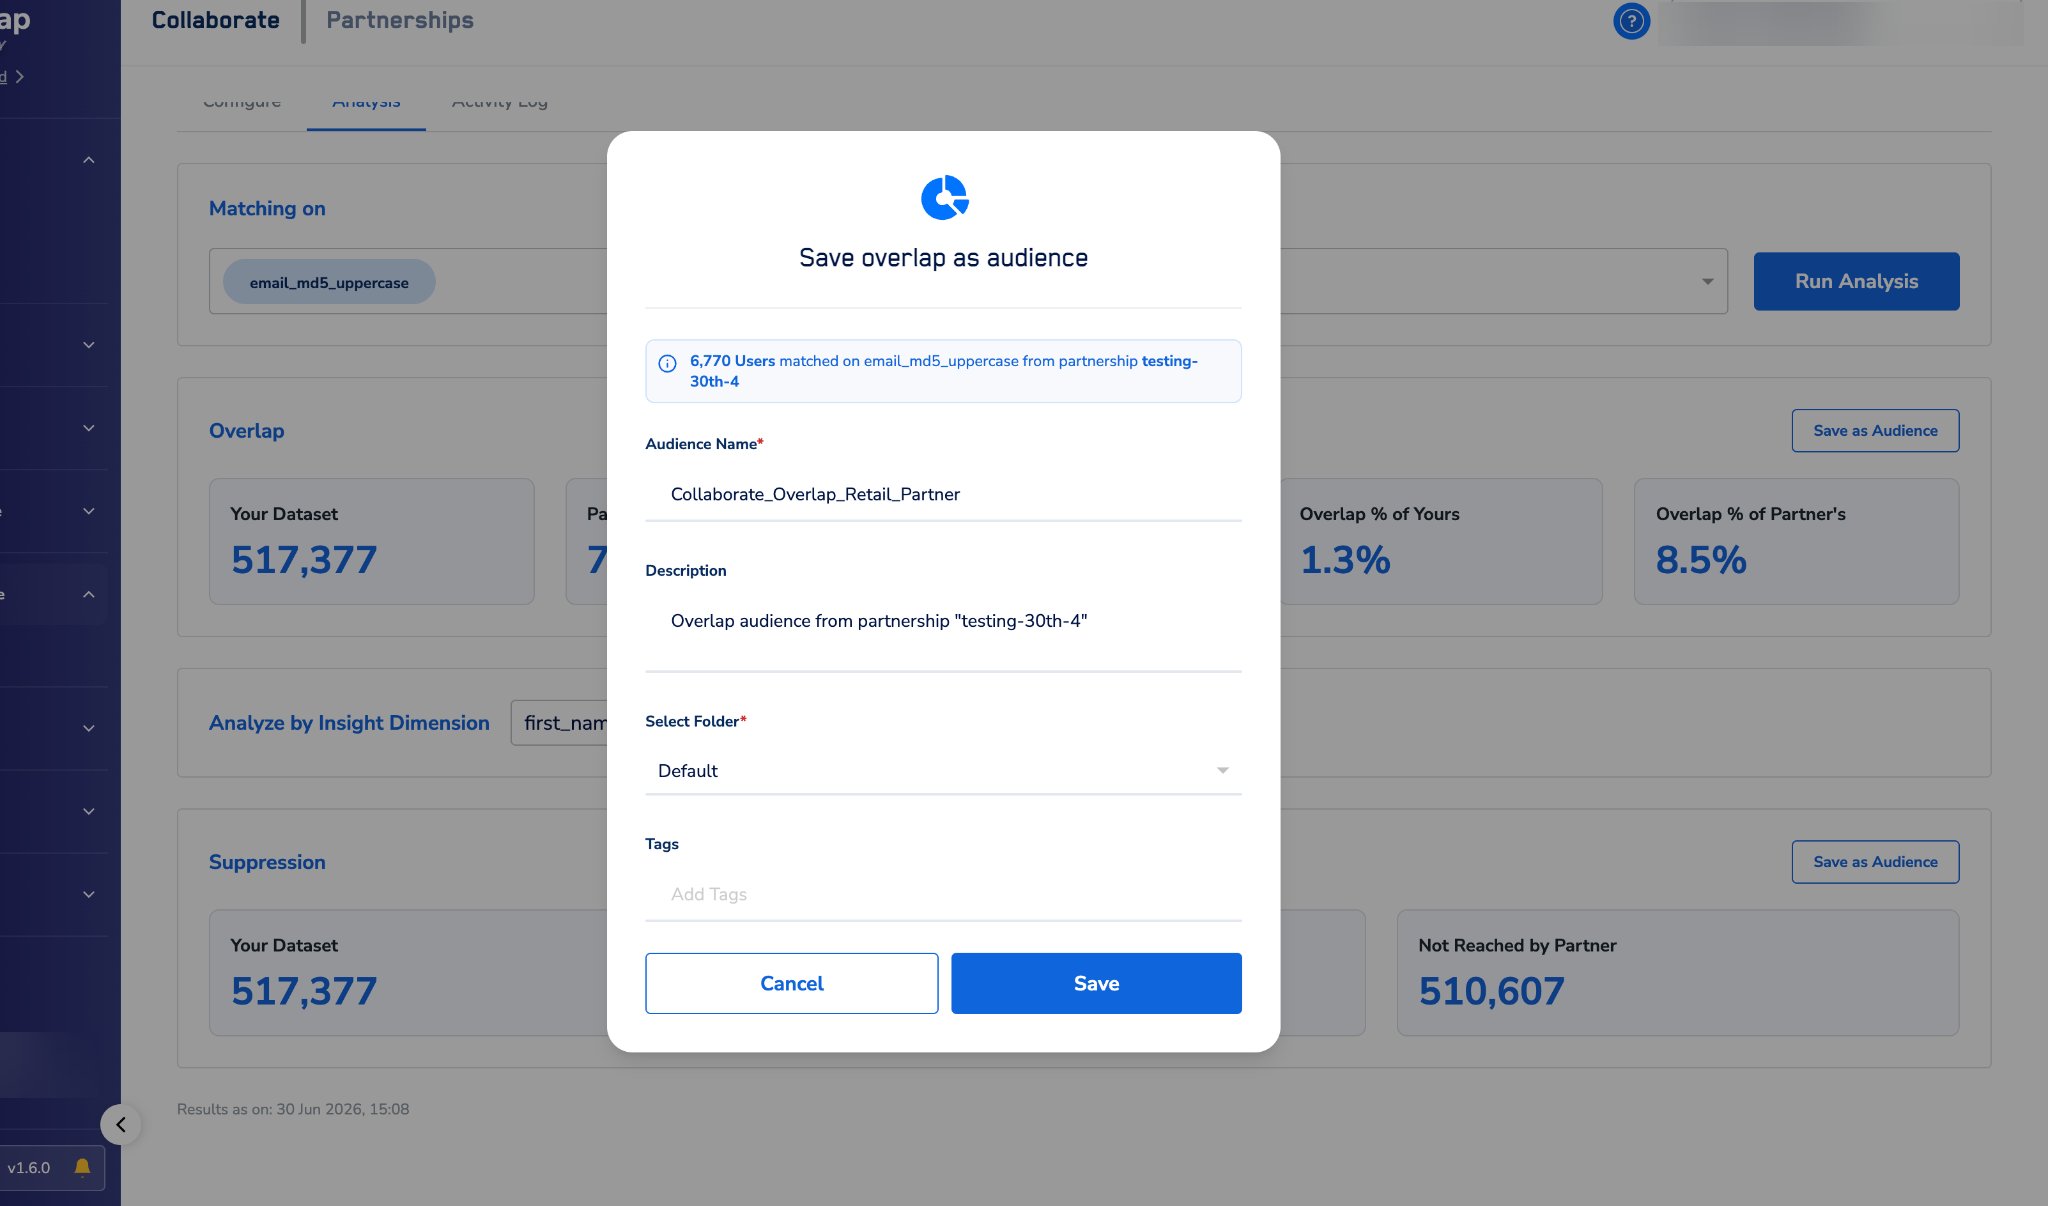
In the Analyse by Insight Dimension table, click Save as Audience next to a specific segment to save that breakdown as a separate audience (for example, save “Female” matched users only).
Cohorts below the aggregate threshold (default 1,000 users) cannot be saved. The Save as Audience button is disabled for those rows.
Step 7 — Subscriber: Suppress
Suppress — identify customers not reached by your partner, for exclusion targeting or incrementality measurement.In the Suppression section of the Analysis tab, view the count of users in your dataset who were not matched by the Contributor.
Tracking progress
Both sides can monitor the partnership at any time via the Activity Log tab. As you work through the steps above, you will see these events appear in the log:- Invite Sent — when the Contributor created the partnership.
- Invite Accepted — when the Subscriber accepted.
- Configuration Saved — when either side submits their configuration.
- Analysis Run — when an analysis run completed, with the overlap count.
- Audience Saved — when the Subscriber saved an audience.