Prerequisites
Before creating a partnership, confirm that:- Your organisation is on the Zeotap composable CDP plan and has the Collaborate module enabled.
- Your organisation has given collaboration consent (contact your account team if unsure).
- You have at least one data source onboarded.
- That data source contains at least one ID-type attribute (for example, Email MD5 or Phone MD5) to serve as the join key, or you have a primary key column on a composable dataset.
- You know which Zeotap organisation your partner belongs to, and they have also consented to collaborate.
Creating a partnership
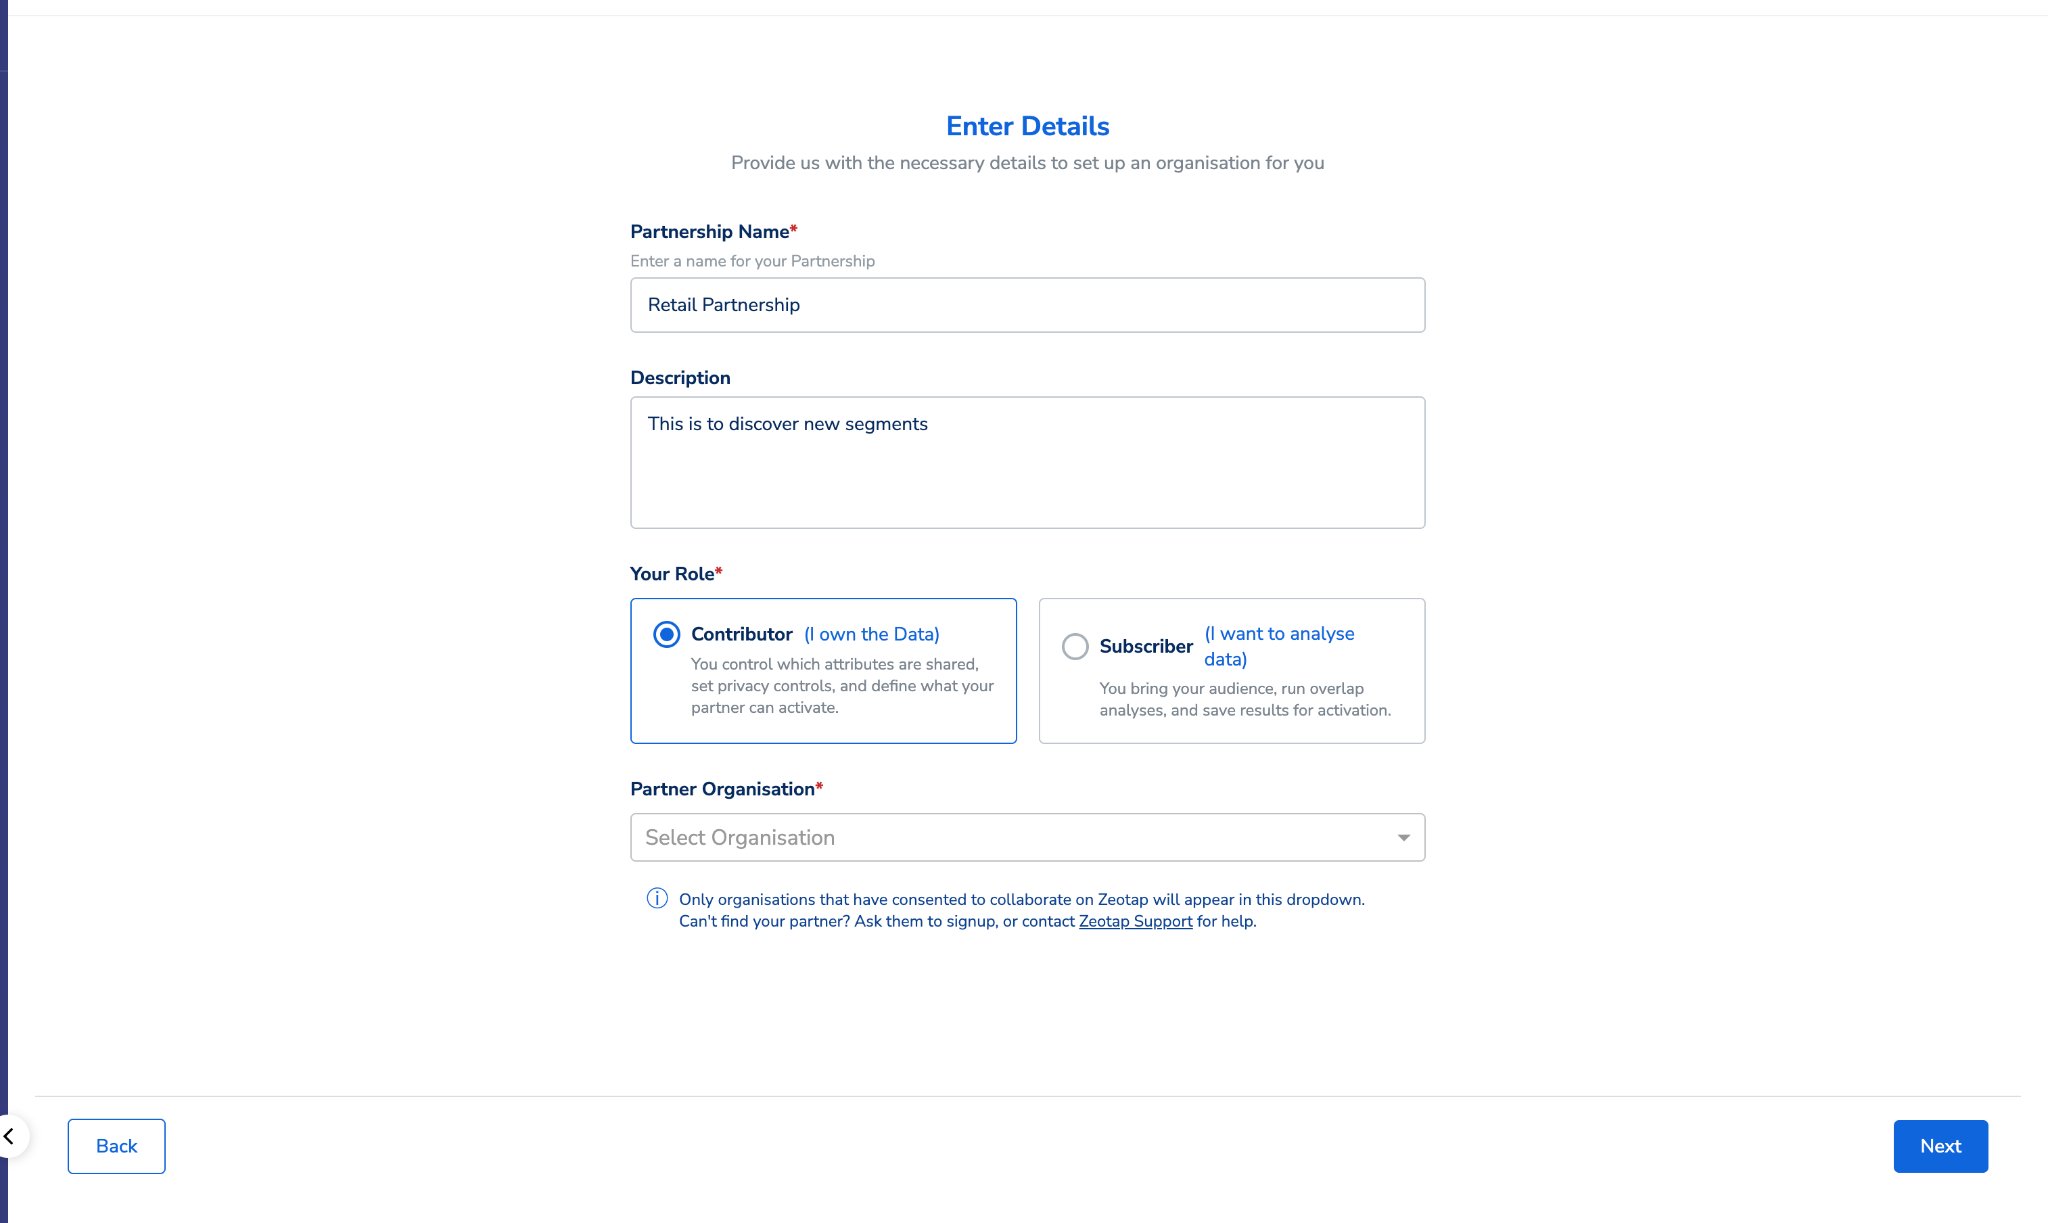
Fill in the following fields:
| Field | What to enter |
|---|---|
| Partnership Name | Choose a name meaningful to both teams — for example, “BrandX × RetailerY — Summer 2024”. |
| Description (optional) | A short note on the purpose. Visible to both sides. |
| Your Role | Select Contributor (I own the Data). |
| Partner Organisation | Select your partner from the dropdown. Only organisations with collaboration consent enabled appear here. |
Configuring data sharing
The configuration wizard has two steps. Complete both before your Subscriber can begin their side.Step 1 — Data Collaboration
This is where you choose which attributes your partner can use for identity matching and segment analysis. Your available composable data sources are listed on the left. Expand a source to see its attributes, then toggle on the attributes you want to share.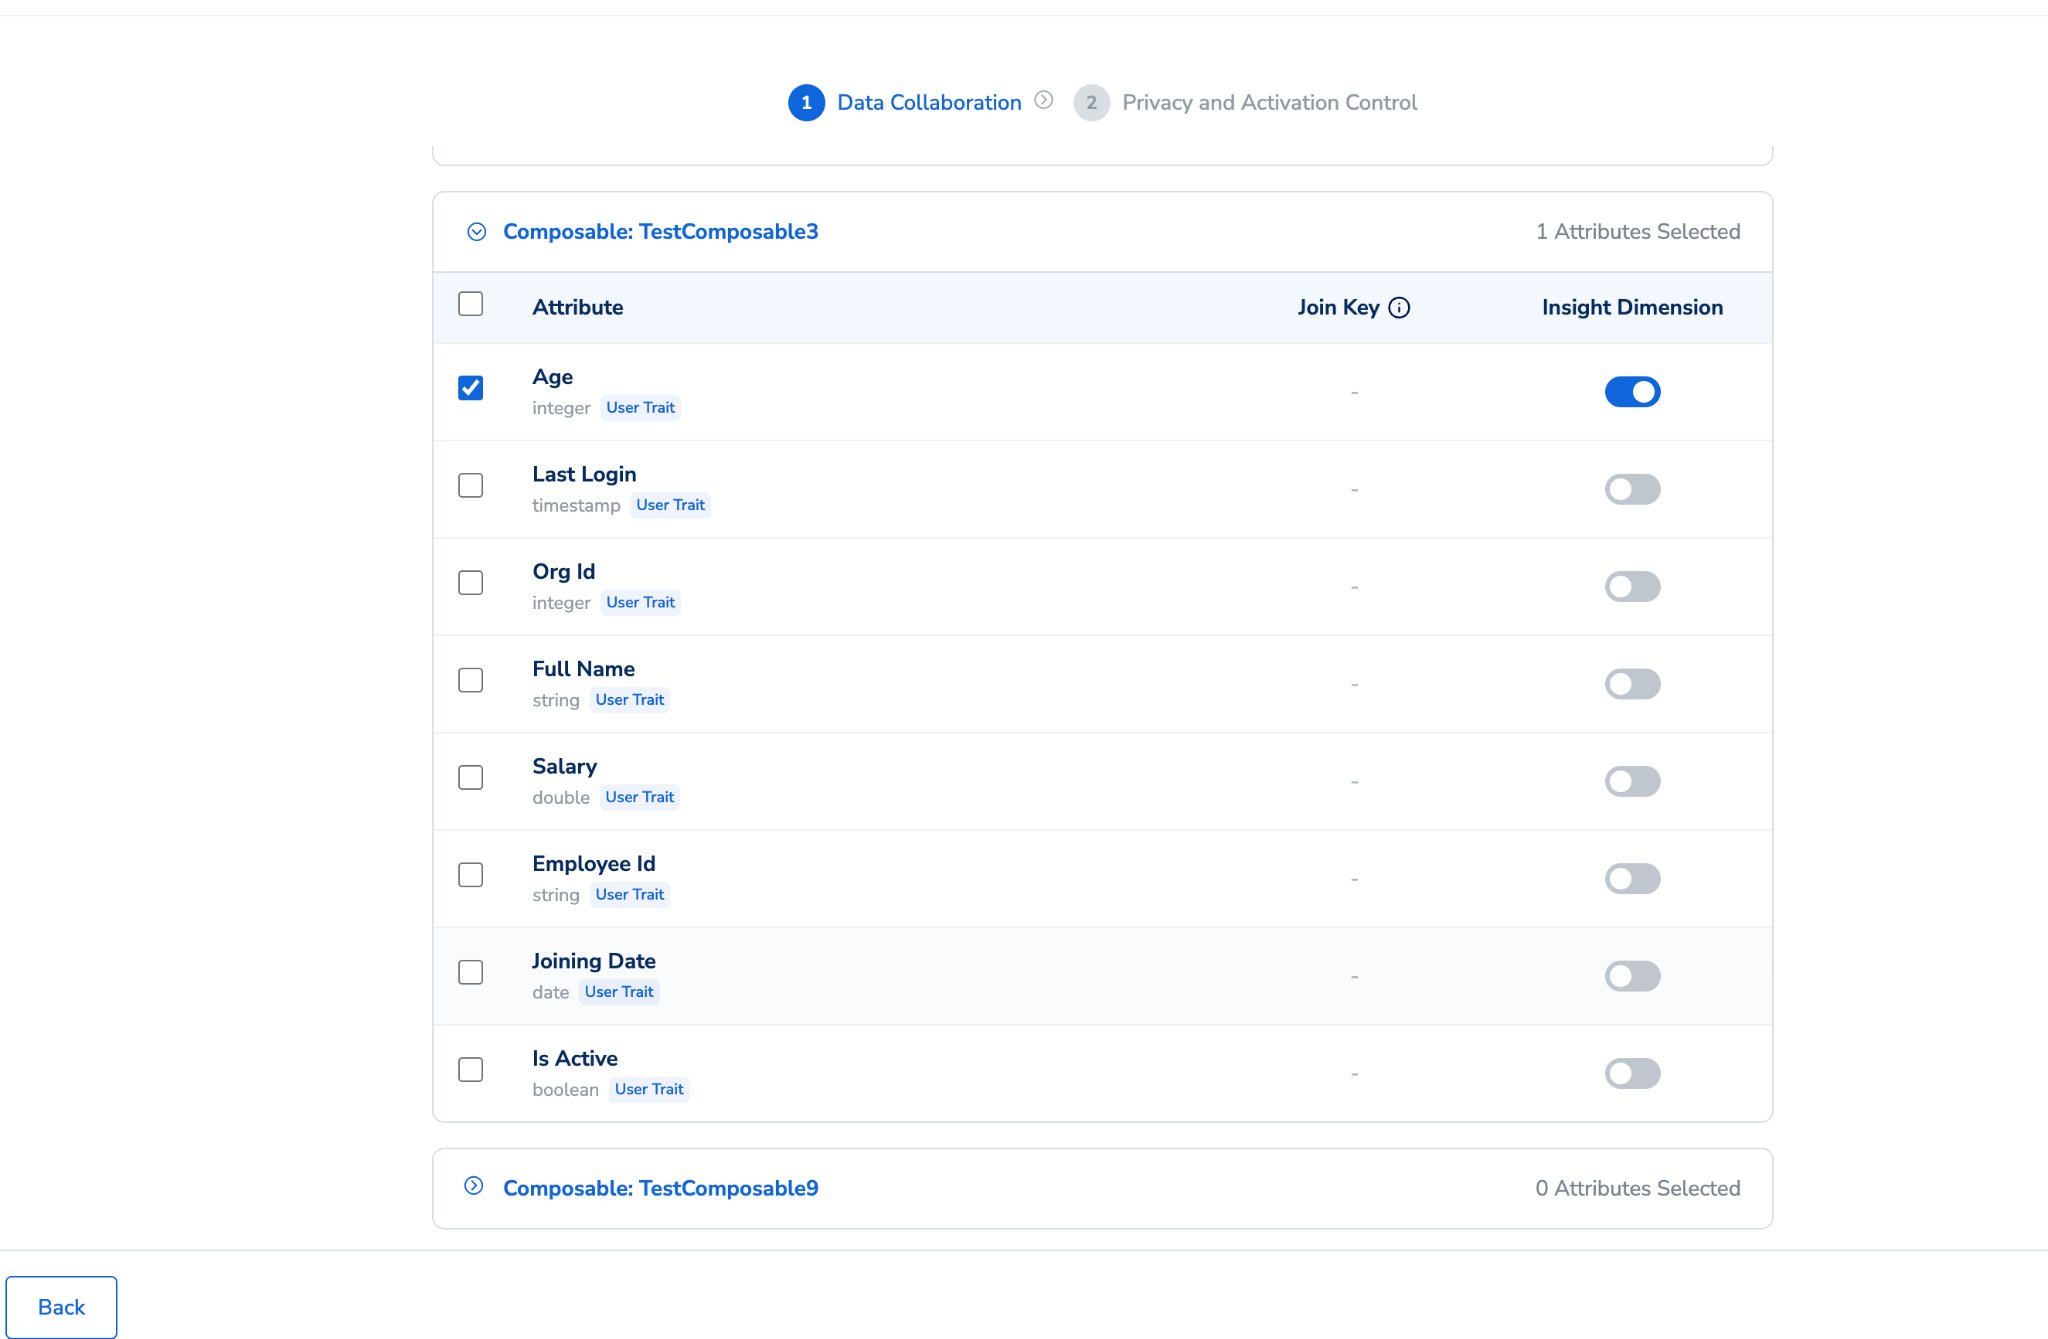
- ID-type attributes — such as Email MD5 Lowercase, Phone MD5, and similar hashed identifiers.
- Primary key columns of composable datasets.
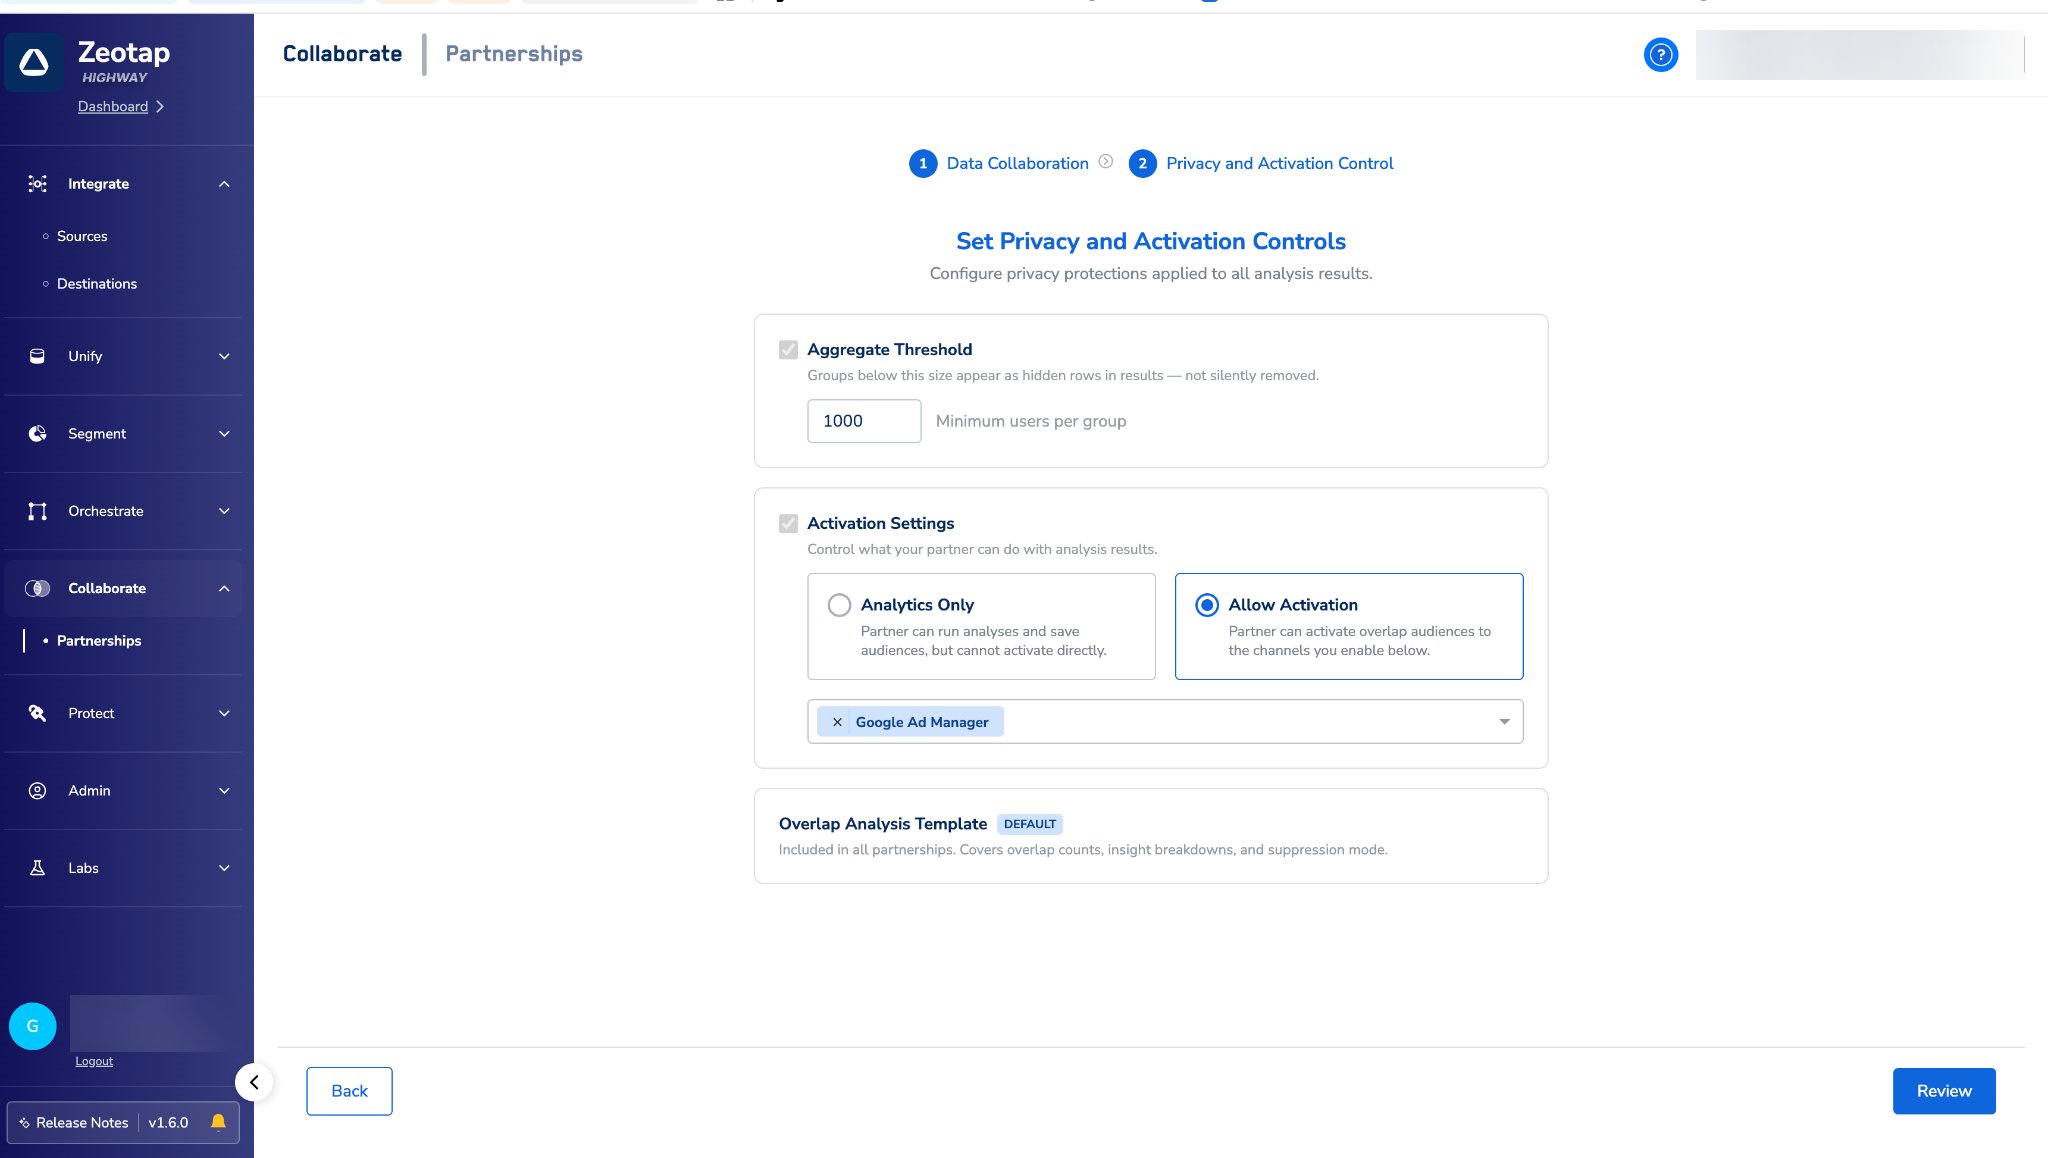
Step 2 — Privacy and Activation Control
Aggregate Threshold The minimum number of matched users required for a cohort to appear in analysis results. Any segment bucket smaller than this number is not shown to your partner — it does not appear as a low number, it is suppressed entirely. The default is 1,000. You can increase this for stronger privacy protection.Example: If the threshold is 2,000 and your partner runs a gender breakdown, a bucket showing “Female: 1,450” would be hidden. “Male: 3,200” would be visible.
- Allow Activation — toggle on to permit your partner to save audiences from analysis results.
- Activation Channels — if activation is enabled, select which channels your partner may activate to (for example, TTD or Google DV360).
- Save the full overlap as an audience.
- Save individual insight dimension breakdowns as separate audiences (for example, save just the “Female” matched segment).
- Activate those audiences to the channels you have permitted.
After you submit
Your partner’s invitation remains open for them to accept. Once they accept, the partnership status moves to In Setup. The Subscriber can begin mapping their join keys once you have submitted your configuration. When both sides have submitted, the partnership becomes Active. You can track progress in the Activity Log tab.Activity log
The Activity Log tab records all key events for the partnership, visible to both sides. As the Contributor, you will see events generated by both you and your Subscriber in the same log:- Invite Sent
- Invite Accepted
- Invite Declined
- Configuration Saved (both sides)
- Analysis Run
- Audience Saved
- Partnership Terminated
Editing your configuration
You can edit your configuration at any time, including while the partnership is Active.Make your changes — you can add more attributes, adjust the threshold, or change activation settings.
- Updated settings do not apply to audiences that subscribers have already saved.
- You cannot remove join keys once they are added to the partnership.
- Editing your configuration may require the Subscriber to re-run analysis to see results based on the updated attribute set.
Archiving a partnership
When a partnership is no longer needed, you can archive it from the partnership detail view. Both organisations receive an email notification when the partnership is archived.Constraints and limitations
- A combination of attributes across composable data sources and ingested sources cannot be shared in a single partnership. At any time, you can share either ingested attributes or attributes across composable sources — not both.
- A partnership has exactly one Contributor and one Subscriber.
- The Subscriber can only start their configuration after you have submitted yours.
- Join keys must be ID-type attributes or primary key columns on composable datasets.
- Your partner can only activate to channels you have explicitly permitted.