> ## Documentation Index
> Fetch the complete documentation index at: https://docs.zeotap.com/llms.txt
> Use this file to discover all available pages before exploring further.
# Working with Catalogue Fields
> This topic explains when you need to add a new field to your organization's catalogue, and walks you through the steps to create one.
# When to Create a Catalogue Field
**Scenario 1 —** If you already know the data points you're going to bring into Zeotap, you can set up the catalogue field(s) for them ahead of time, before the source itself even exists. Go to the **CATALOGUE** tab and look up the field you want to add — if a matching field already exists, you're prompted to use it; otherwise, you can create a new one. As part of creating it, you define the **Source Field** name that should map to it, which the system checks against the list of unmapped fields already identified across your account. This mapping is saved immediately and picked up automatically the moment a source is onboarded with a matching source field name — data only starts flowing in once that mapping is approved in the source's own **Catalogue Mapping** section. See **Create a Catalogue Field** below for the steps.
**Scenario 2 —** After creating a source. Once a source is created and starts sharing data, it moves from a created to an integrated state, and you complete its catalogue mapping to finish the integration. This begins with mapping your Country/ID field, then your remaining source fields — if a mapping already exists for a field, the matching catalogue field appears pre-selected; if not, you can select from your existing organisation catalogue fields or create a new one on the spot. From there, you map your consent and marketing preference fields, then review and save. Once saved, Zeotap begins ingesting the mapped fields into your account — any source fields left unmapped at this stage are not ingested. For the full mapping walkthrough, see [Map the Catalogue](/articles/unify-customer/map-the-catalogue); for the field-creation steps themselves, see **Create a Catalogue Field** below.
# Before You Begin
Know your data points. Identify the source field(s) you're going to ingest, and what each one represents.
* **Check for an existing field first.** Search the **CATALOGUE** tab before creating a new one — if a matching field already exists, use it instead of creating a duplicate.
* **Have a category in mind.** Every catalogue field belongs to a category (for example, User Trait, Event, or Consent). You don't need to know the full taxonomy up front, just a rough idea of where your field fits — see [Categories & Taxonomy](/articles/unify-customer/categories-in-catalogue).
* **Know whether you need Basic or Advanced settings.** Most fields only need the basic setup, but some cases call for advanced configuration — see [Understand the Basic Fields](/articles/unify-customer/understand-the-basic-fields) and [Understand the Advance Fields](/articles/unify-customer/understand-the-advance-fields)
# Create a catalogue field
Under Unify, go to the **CATALOGUE** tab and click **Add Catalogue Field**.
Start with defining your catalogue field and mapping with the source field.
In the **Catalogue Field**, look up for the field that you want to add. If the field is present in the system, then you are prompted to use the existing field and you are taken to the details page. However, if the existing field is not as per your requirement, then you can create a new field. While creating a new field, you can go with the system recommendation or add your own field.
**Note**
If you are able to create a catalogue field with the same name as an existing catalogue field, that could be because the underlying DB field name is different. The requirement is to have a unique DB field name in the DB schema, but the
display name may repeat. However, this is not recommended by Zeotap CDP.
Click **+Add Description** if you want to add any description of info for the future about this field.
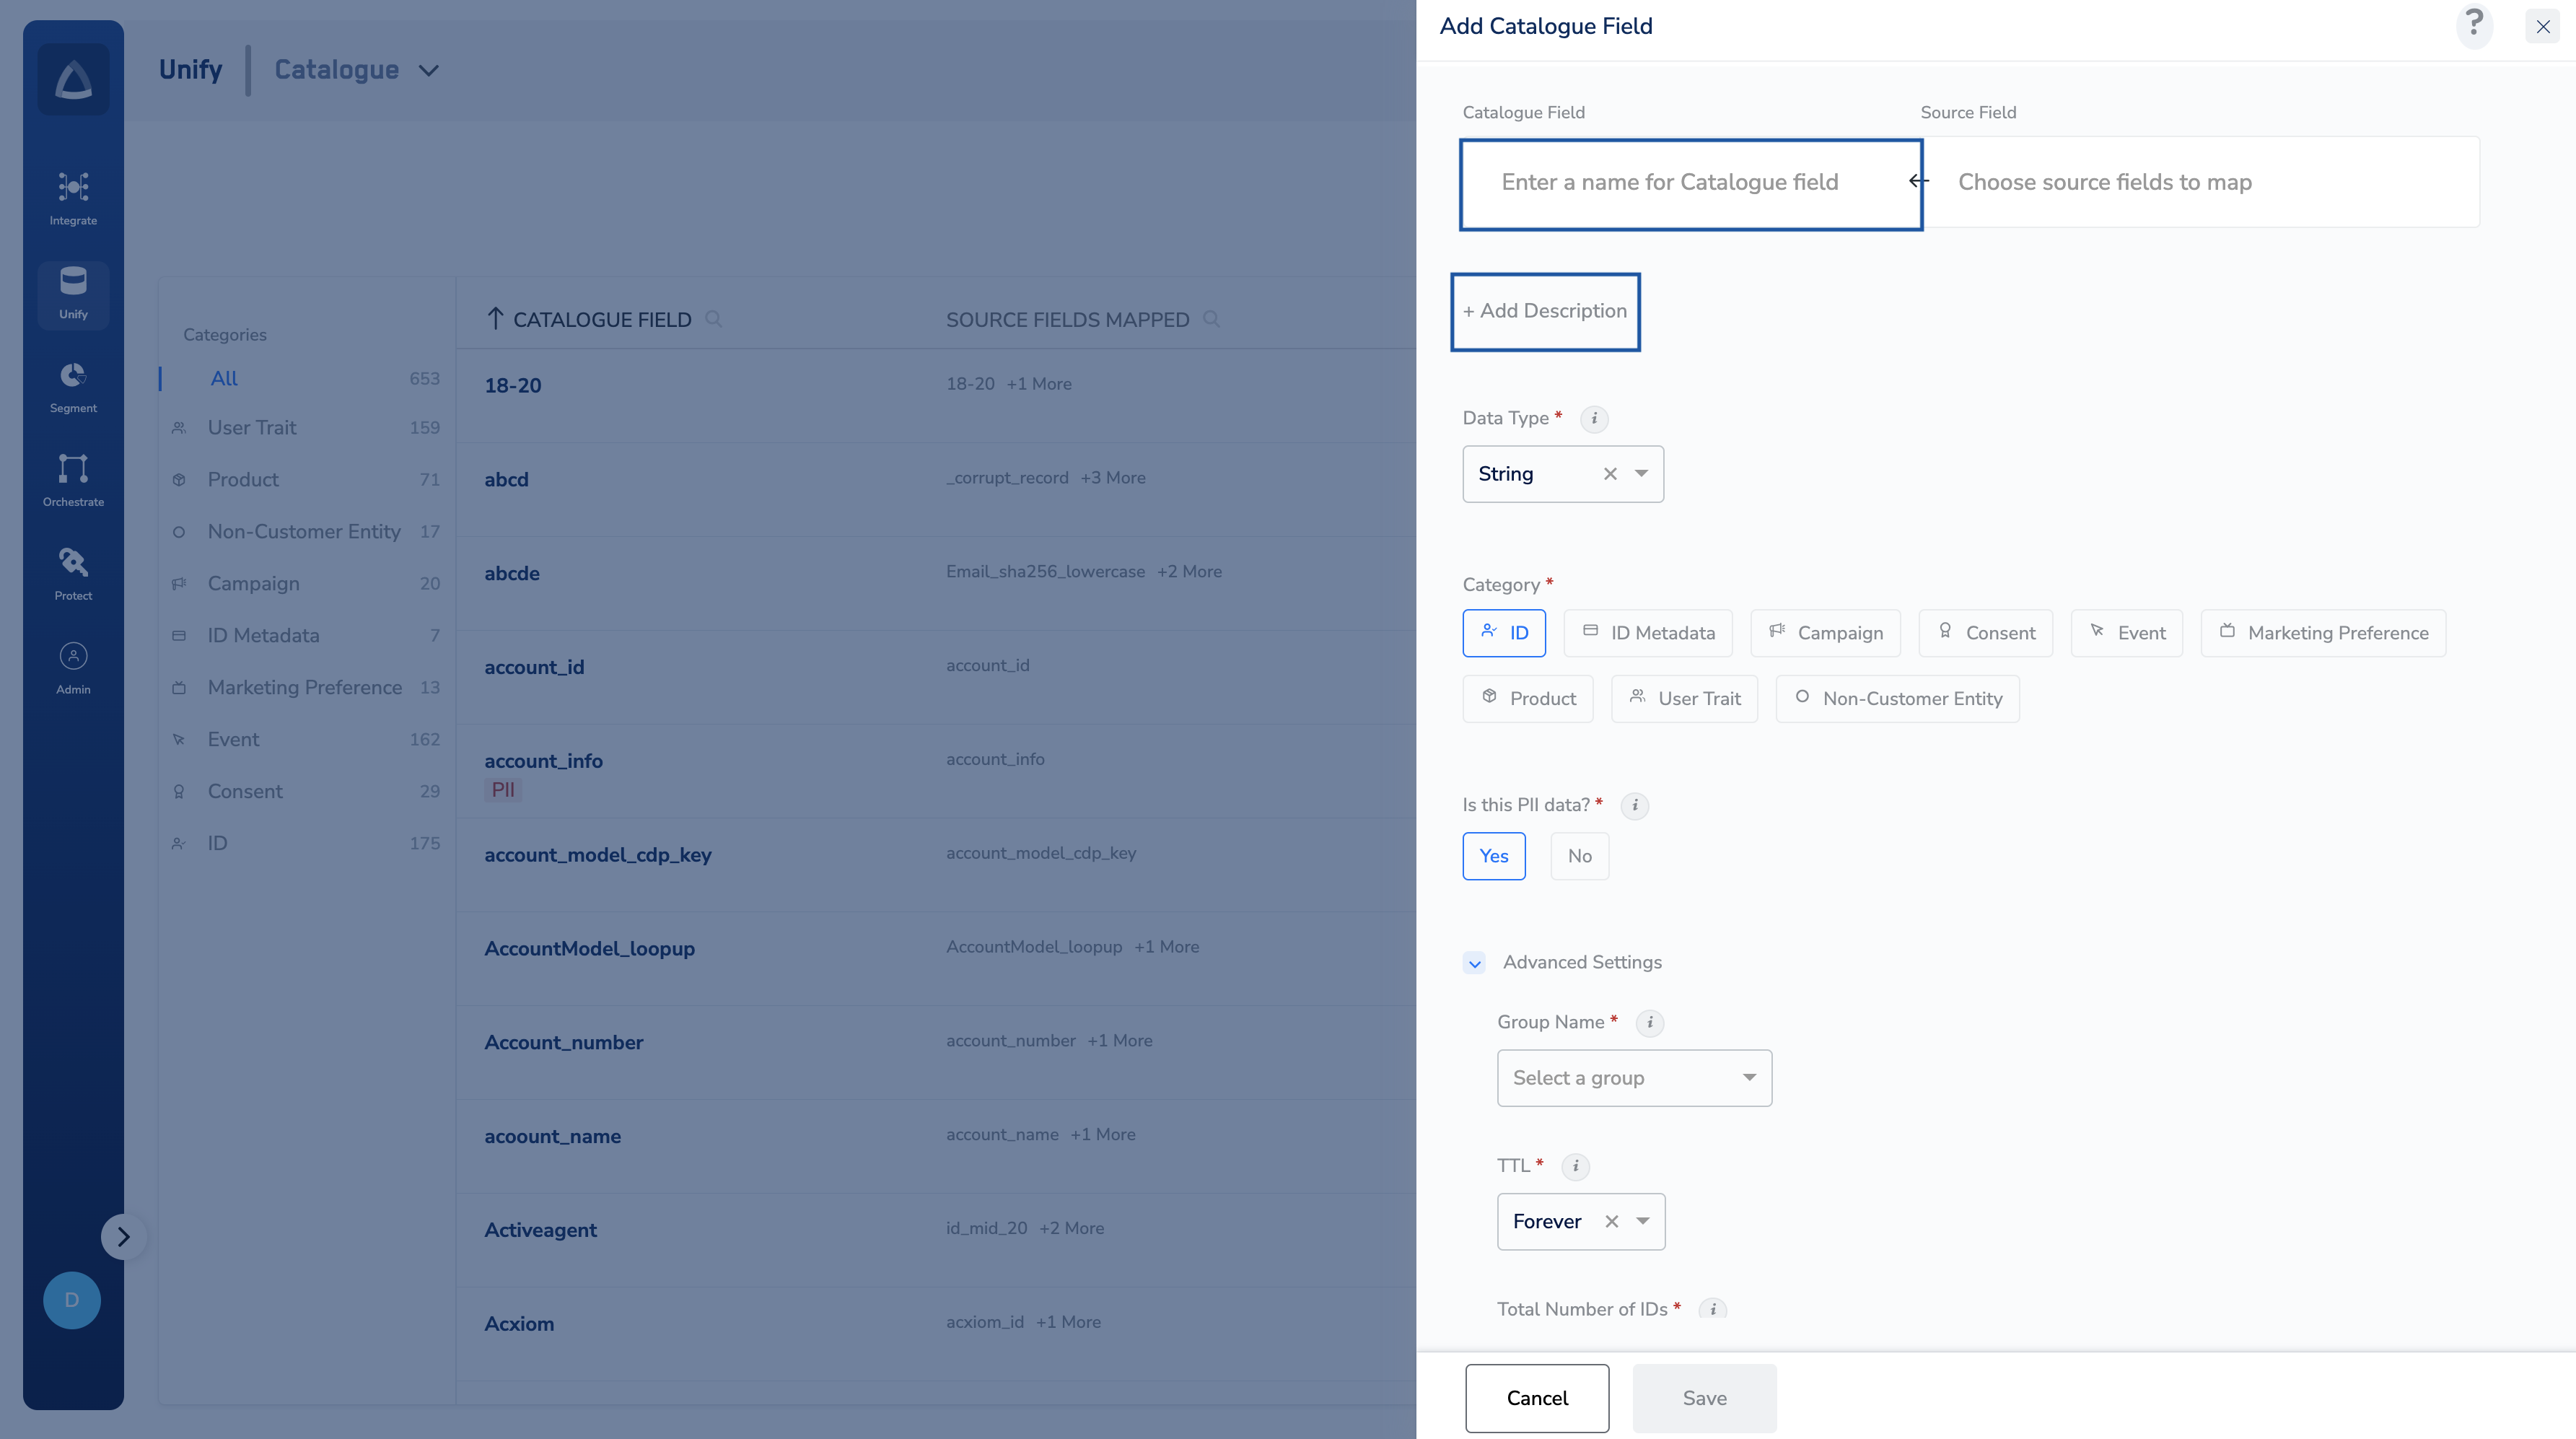 In the **Source Field**, define the name of the field in your source that has to be mapped to this catalogue field. While typing the name of your source field, the system first looks up in the list of unmapped fields. If already available, then select the same.
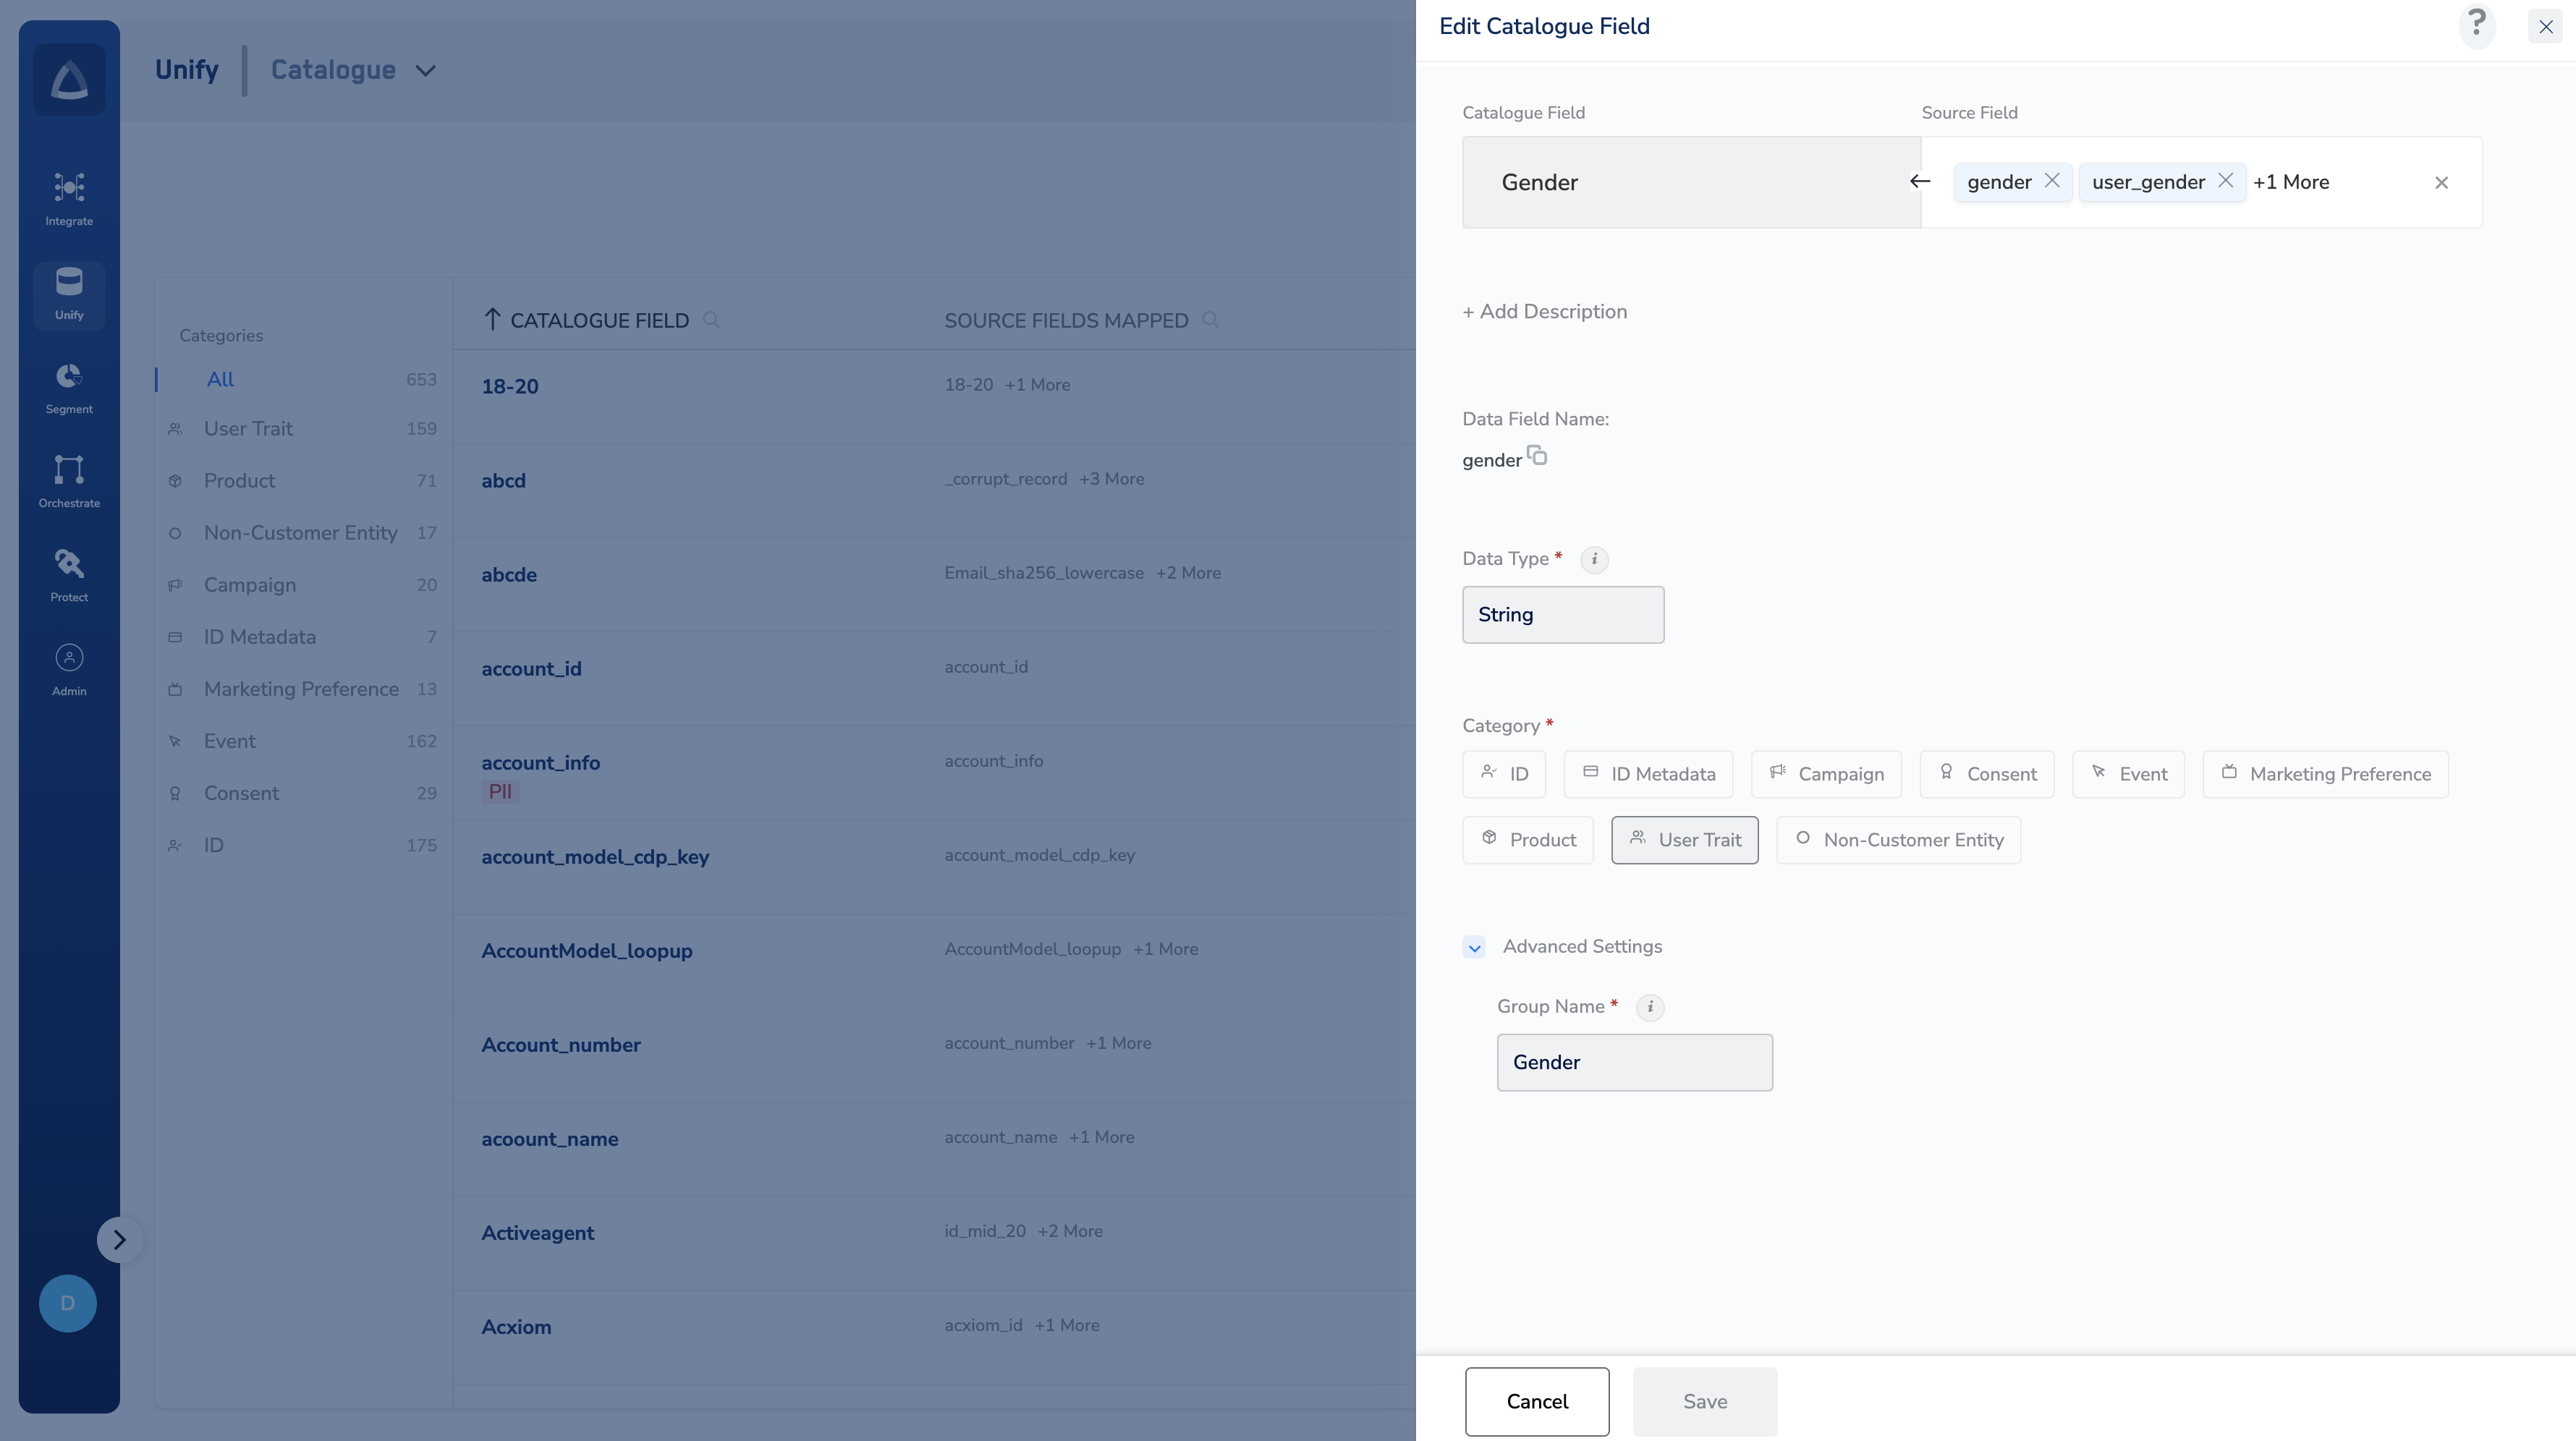 Choose one of the [categories](/articles/unify-customer/categories-in-catalogue) for your catalogue field.
Next, you can refer to [Basic](/articles/unify-customer/understand-the-basic-fields) or [Advance](/articles/unify-customer/understand-the-advance-fields) settings as per your requirement.
Review your selections and click **Save**. Upon saving, the (auto) mapping defined here gets reflected when a source is onboarded and if the same source field name appears in your source (in the source’s Catalogue Mapping section).
## After Creation
Need to change something later? Not all fields are fully editable after creation — see [Edit a Catalogue Field](/articles/unify-customer/edit-a-catalogue-field) for what can and can't be changed.
* **Wondering if a standard field already covers this?** Check [Standard Fields in Catalogue](/articles/unify-customer/standard-fields-in-catalogue) before building out custom fields for common identifiers.
* **Need the full list of categories?** See [Categories & Taxonomy](/articles/unify-customer/categories-in-catalogue) for how categories and the catalogue taxonomy are organised.
## Related Topics
Choose one of the [categories](/articles/unify-customer/categories-in-catalogue) for your catalogue field.
Next, you can refer to [Basic](/articles/unify-customer/understand-the-basic-fields) or [Advance](/articles/unify-customer/understand-the-advance-fields) settings as per your requirement.
Review your selections and click **Save**. Upon saving, the (auto) mapping defined here gets reflected when a source is onboarded and if the same source field name appears in your source (in the source’s Catalogue Mapping section).
## After Creation
Need to change something later? Not all fields are fully editable after creation — see [Edit a Catalogue Field](/articles/unify-customer/edit-a-catalogue-field) for what can and can't be changed.
* **Wondering if a standard field already covers this?** Check [Standard Fields in Catalogue](/articles/unify-customer/standard-fields-in-catalogue) before building out custom fields for common identifiers.
* **Need the full list of categories?** See [Categories & Taxonomy](/articles/unify-customer/categories-in-catalogue) for how categories and the catalogue taxonomy are organised.
## Related Topics