> ## Documentation Index
> Fetch the complete documentation index at: https://docs.zeotap.com/llms.txt
> Use this file to discover all available pages before exploring further.
# Create a Batch Calculated Attribute
To help you understand the Calculated Attributes better let us consider an example. Assume that you are creating a calculated attribute with the name “`3 months purchase value`”. You are creating this attribute to capture the total cart checkout value for the “`last 3 months`”. In the process, you are going to do a “summation” to aggregate the revenue associated with the “`Order_Completed`” event name. You can further build the condition for the “`Order_Completed`” event name using the values from its mapped Zeotap Catalogue Field. These values can be associated with a product category like brand = Puma.
Now that you have a fair understanding of the sample scenario, perform the following steps to create a calculated attribute:
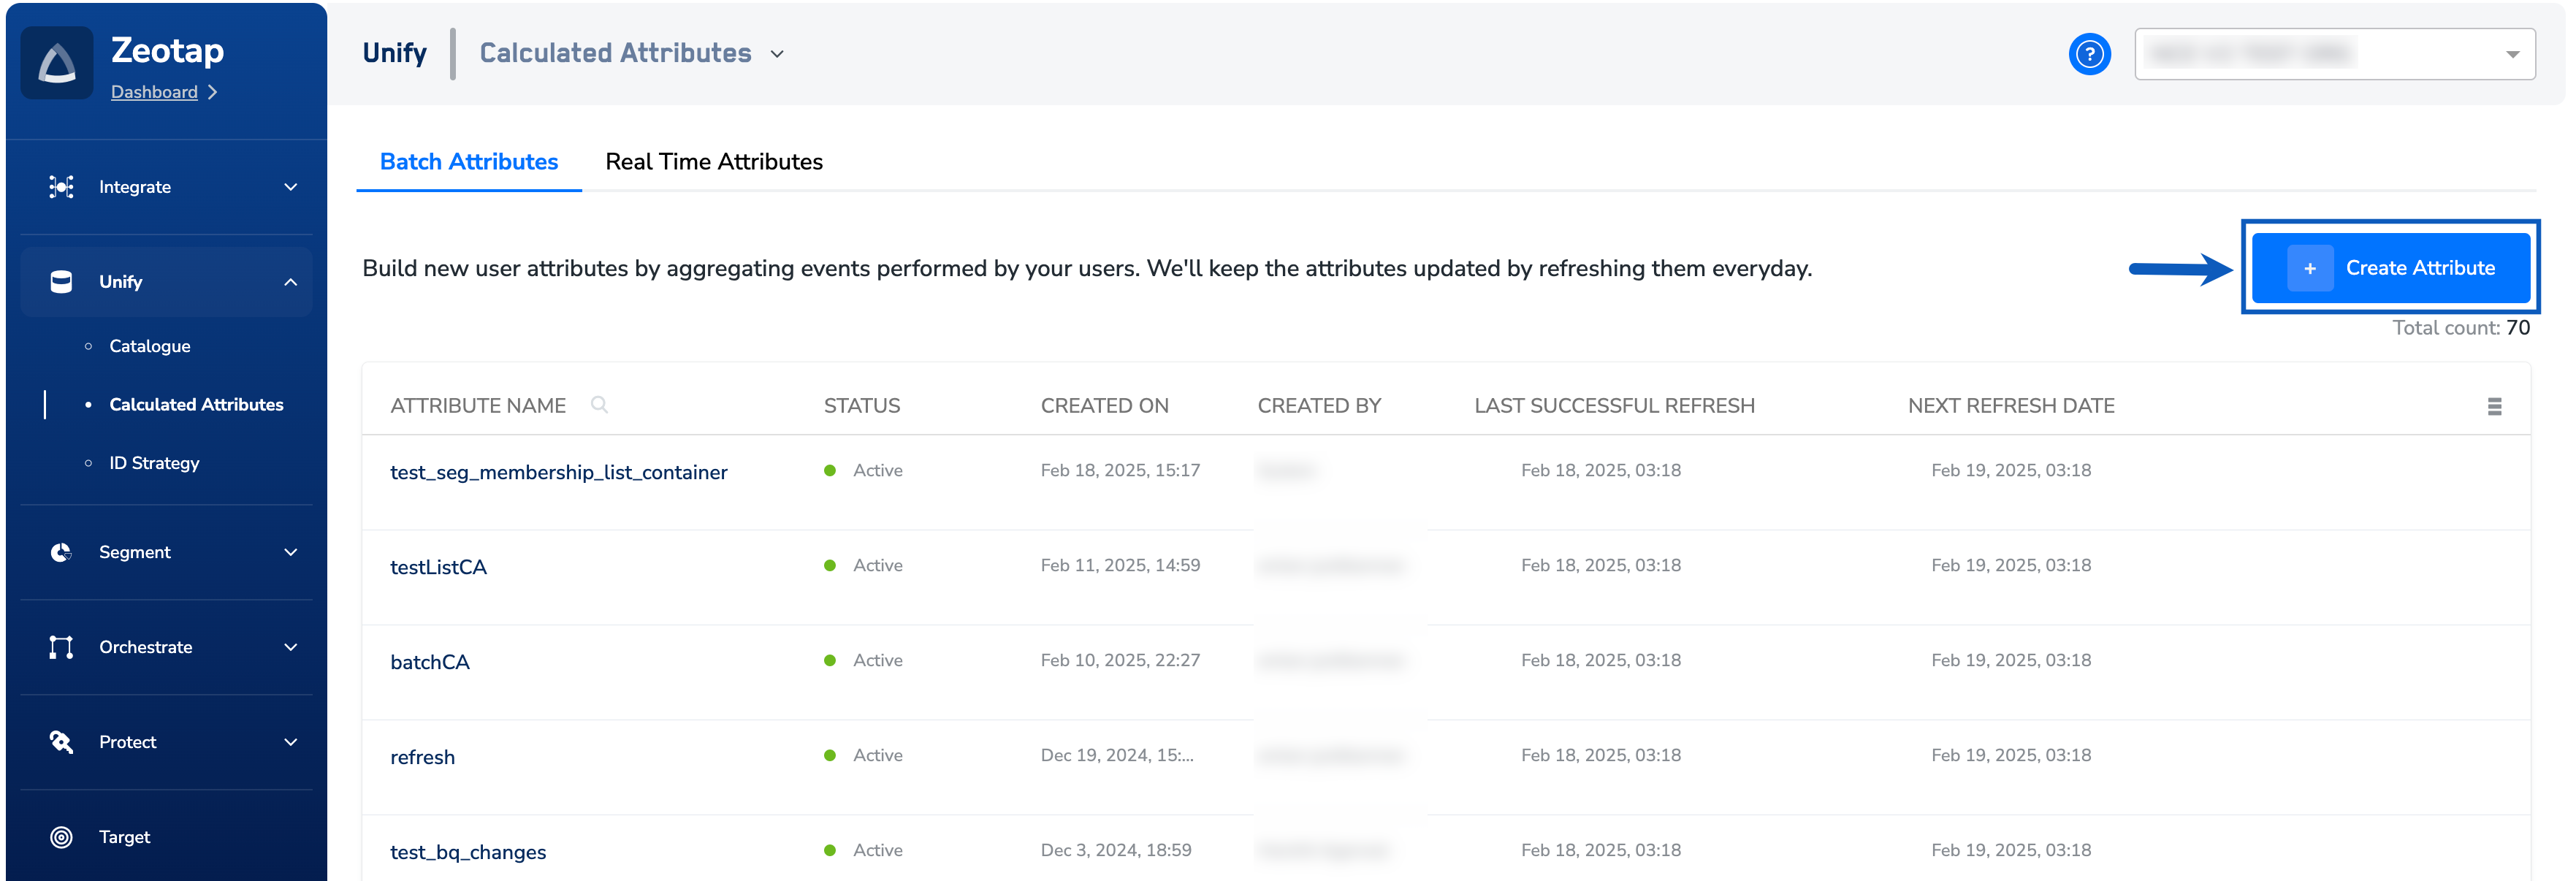
Navigate to **Calculated Attributes** under **Unify**.
Under the **Batch Attributes** tab,
click + **Create Attribute**.
 In the **Attribute name** field, enter a descriptive name to refer to the calculated attribute.
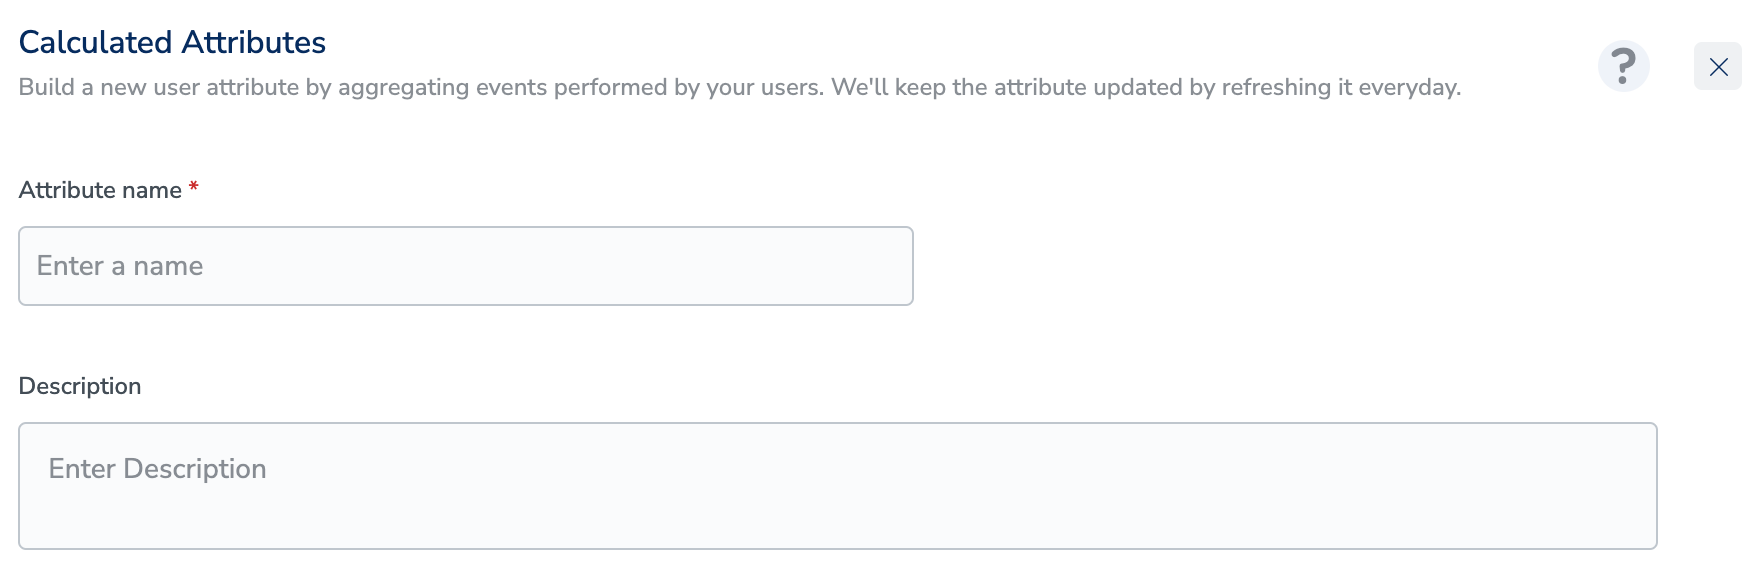 In the **Description** field, enter a description to remember details about the attribute.
Select the appropriate Aggregation type using the drop-down menu. The values can be `Average`, `Count`, `First Timestamp` and more.
In the **Description** field, enter a description to remember details about the attribute.
Select the appropriate Aggregation type using the drop-down menu. The values can be `Average`, `Count`, `First Timestamp` and more.
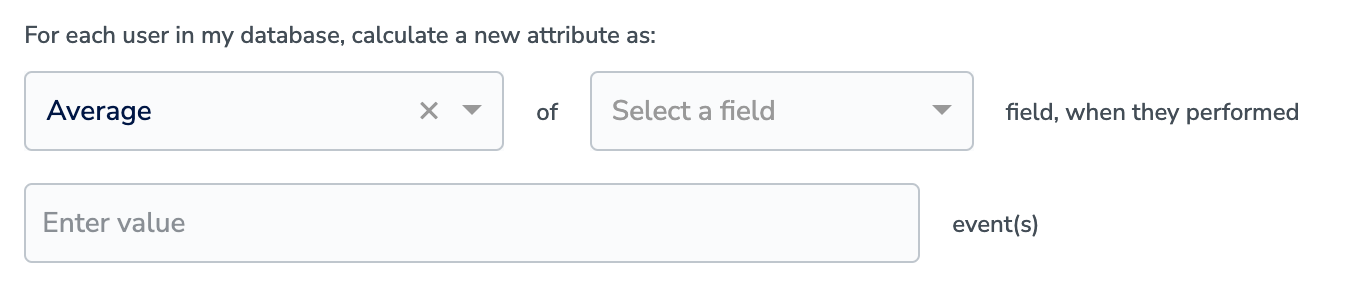 In **Select a field**, choose the attribute on which the calculation works based on the chosen aggregation type. Note that the fields available for Aggregation depends on the type of Aggregation choosen in the first step.
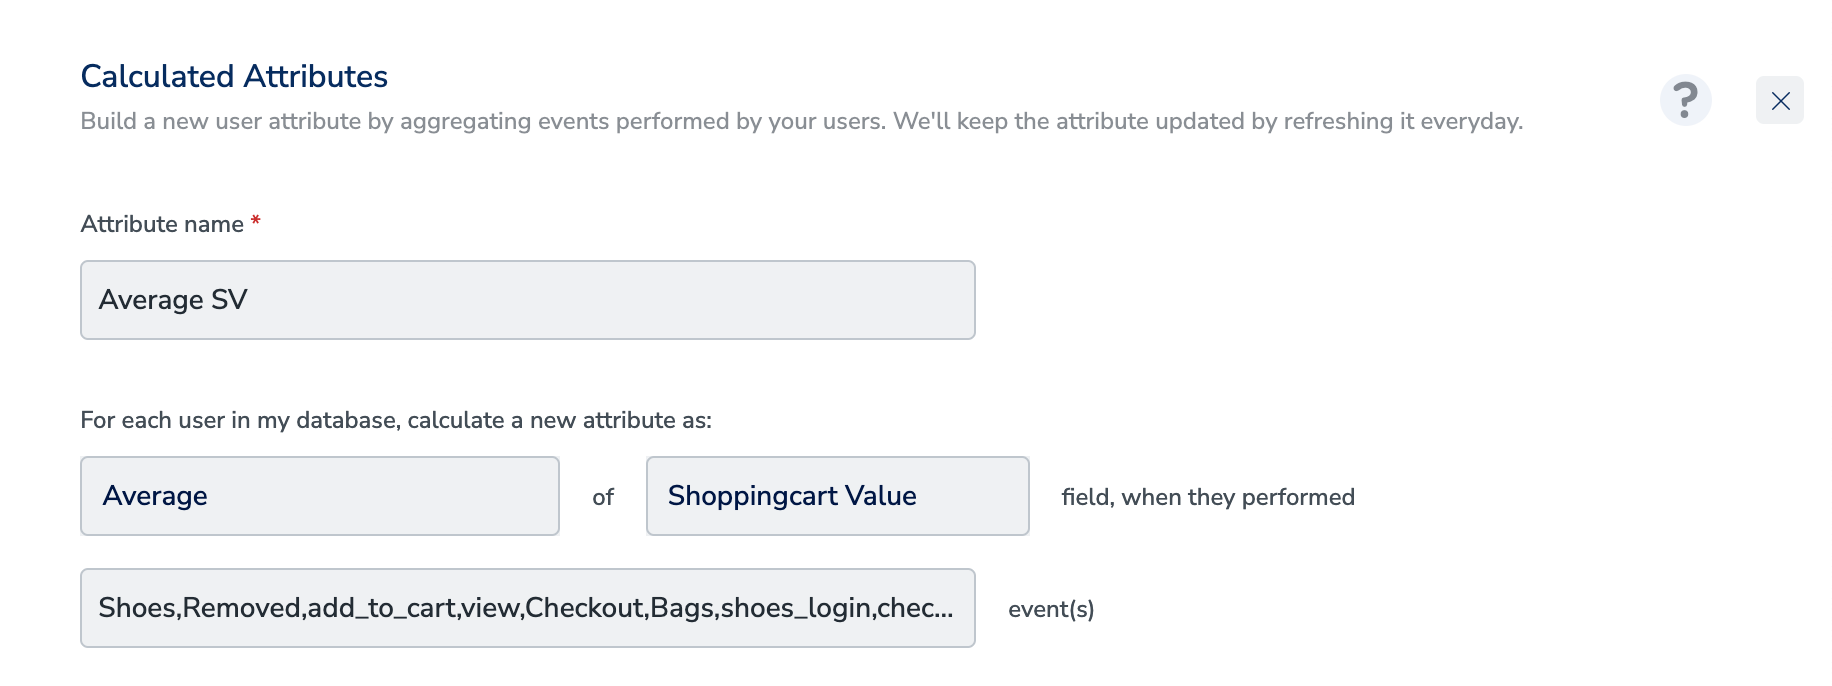
In **event(s)** field, provide the event names as shown in the image below(Non-mandatory step).
In **Select a field**, choose the attribute on which the calculation works based on the chosen aggregation type. Note that the fields available for Aggregation depends on the type of Aggregation choosen in the first step.
In **event(s)** field, provide the event names as shown in the image below(Non-mandatory step).
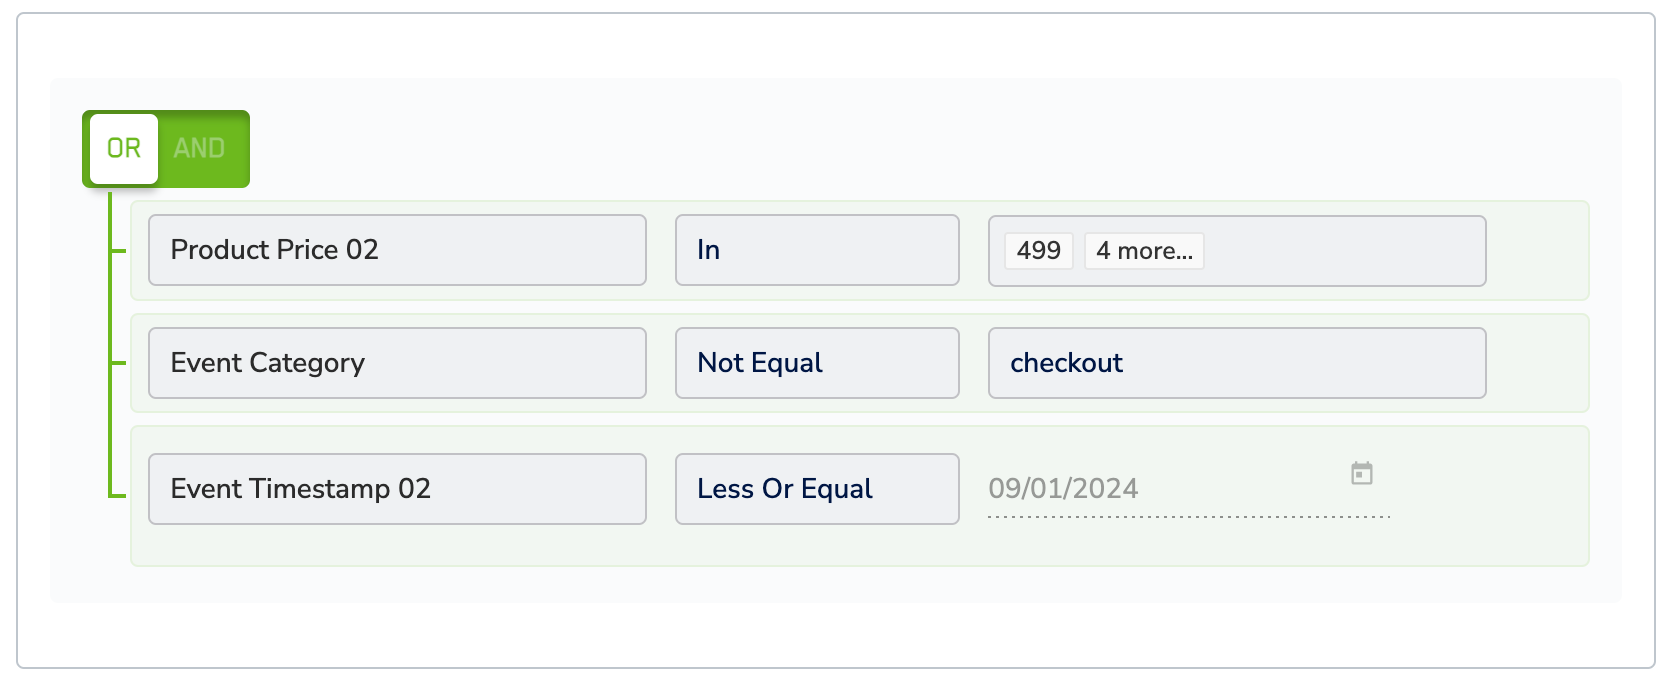
 You can further specify conditions for your Calculated Attributes by clicking **Add Condition**. Note that you can also include [Non-customer entity data](/articles/unify-customer/non-customer-entity-data) in the conditions based on your requirement.
 In the **Run Computation** section, choose the time period for the calculation.
In the **Group by** field, select one or more attributes (up to 3) to define how the aggregated values should be grouped. Group by helps you break down one calculated attribute into multiple values.
**Example**: Instead of calculating a single “3 months purchase value”, you can group it by Product Category to get the total purchase value separately for each category per user.
Only attributes that are at the same level as the selected aggregation field are shown for Group by.
For example, if the aggregation is performed on a property inside an object, then only the other properties of that same object (and any joined Non-Customer Entity attributes linked to it) will be available for Group by. Attributes from unrelated objects or levels will not be available.
In the **Run Computation** section, choose the time period for the calculation.
In the **Group by** field, select one or more attributes (up to 3) to define how the aggregated values should be grouped. Group by helps you break down one calculated attribute into multiple values.
**Example**: Instead of calculating a single “3 months purchase value”, you can group it by Product Category to get the total purchase value separately for each category per user.
Only attributes that are at the same level as the selected aggregation field are shown for Group by.
For example, if the aggregation is performed on a property inside an object, then only the other properties of that same object (and any joined Non-Customer Entity attributes linked to it) will be available for Group by. Attributes from unrelated objects or levels will not be available.
 Click **Save** to create the Calculated Attribute.
## Create a Calculated Attribute Using the SQL CA Editor
The **SQL CA Editor** is an alternative to the form-based builder. It lets you write the aggregation logic as a SQL query directly, which is useful when the calculation cannot be expressed through the standard form (for example, when you need to filter across different attribute types, combine subqueries, or reference NCE tables). It is available for batch calculated attributes only.
Navigate to **Calculated Attributes** under **Unify**, switch to the **Batch Attributes** tab, and click **+ Create Attribute**.
Fill in the **Attribute name** and **Description** as you would for the form-based flow.
On the attribute definition screen, switch the **Definition Type** toggle from **Standard** to **SQL**. The form-based builder is replaced by a SQL query editor.
Author the aggregation in the editor. The query must follow the validation rules listed in the Help Guide (see the next step). You can reference Zeotap macro tables such as `%%EVENT_STORE%%`, `%%PROFILE_STORE%%`, and others using the `%%MACRO_NAME%%` syntax — Zeotap resolves these to the correct underlying tables for your workspace at runtime.
Click **Save** to create the Calculated Attribute.
## Create a Calculated Attribute Using the SQL CA Editor
The **SQL CA Editor** is an alternative to the form-based builder. It lets you write the aggregation logic as a SQL query directly, which is useful when the calculation cannot be expressed through the standard form (for example, when you need to filter across different attribute types, combine subqueries, or reference NCE tables). It is available for batch calculated attributes only.
Navigate to **Calculated Attributes** under **Unify**, switch to the **Batch Attributes** tab, and click **+ Create Attribute**.
Fill in the **Attribute name** and **Description** as you would for the form-based flow.
On the attribute definition screen, switch the **Definition Type** toggle from **Standard** to **SQL**. The form-based builder is replaced by a SQL query editor.
Author the aggregation in the editor. The query must follow the validation rules listed in the Help Guide (see the next step). You can reference Zeotap macro tables such as `%%EVENT_STORE%%`, `%%PROFILE_STORE%%`, and others using the `%%MACRO_NAME%%` syntax — Zeotap resolves these to the correct underlying tables for your workspace at runtime.
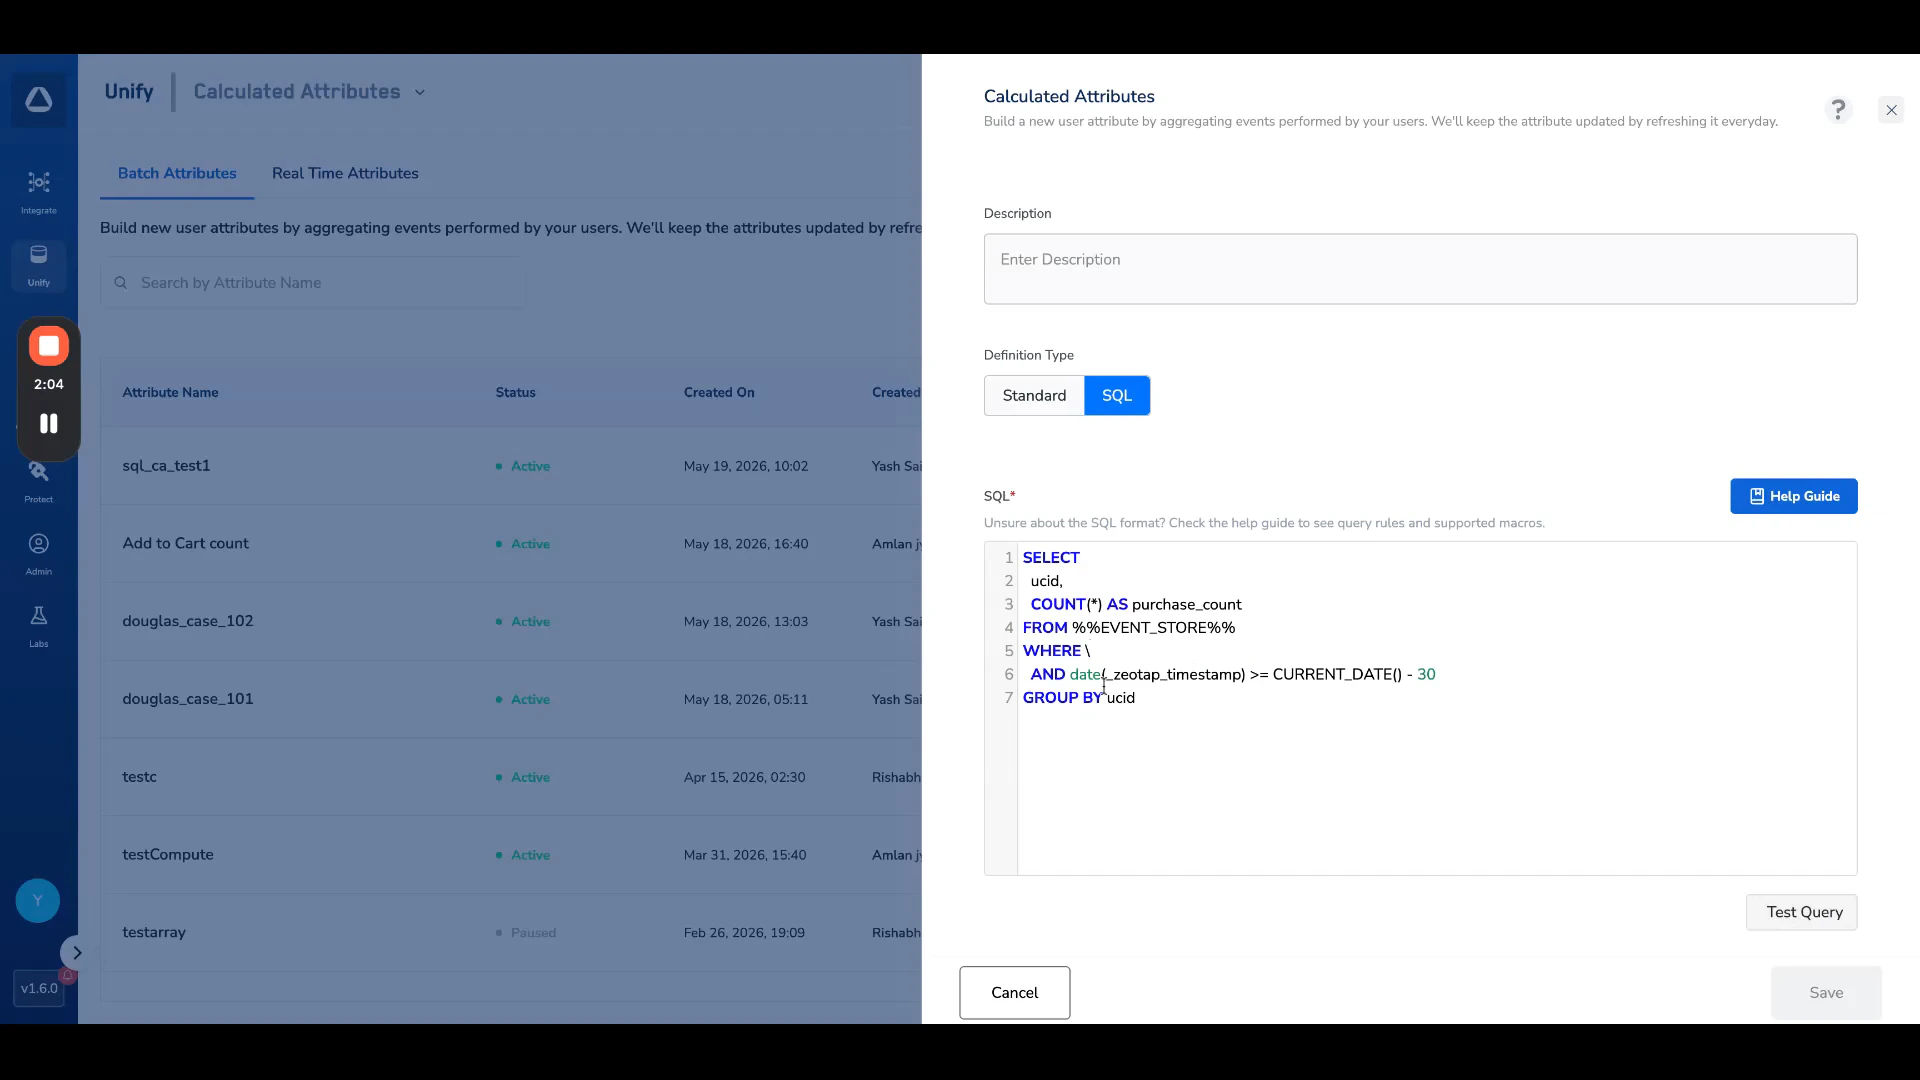 Click **Help Guide** to open the SQL Editor reference panel. It documents the validation rules your query must satisfy and the macro tables you can reference.
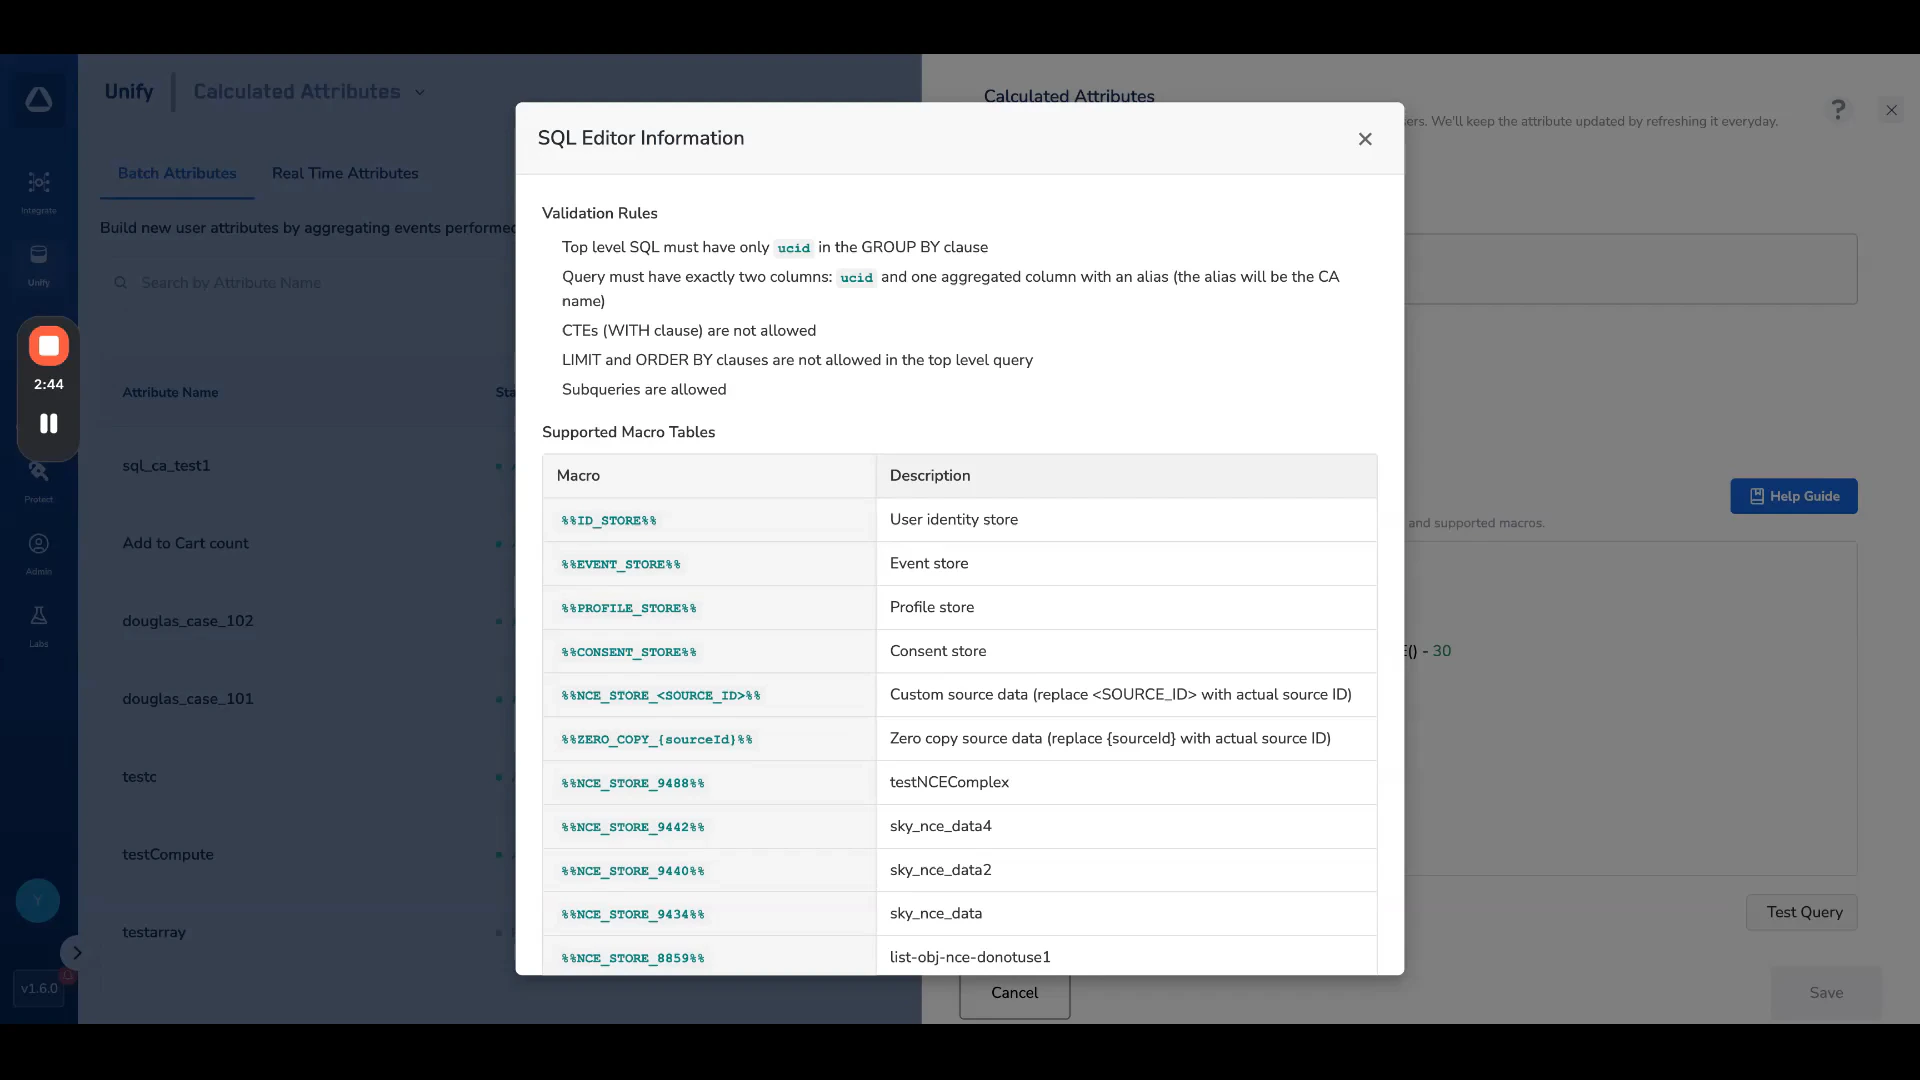 **Validation rules**
* The top-level `SELECT` must return exactly two columns: `ucid` and one aggregated value (with an alias).
* `ucid` is the only column allowed in the top-level `GROUP BY`.
* Top-level `LIMIT` and `ORDER BY` are not allowed.
* CTEs (`WITH` clauses) are not allowed.
* Subqueries are allowed inside the top-level query.
**Supported macro tables**
| Macro | Description |
| --------------------------- | ------------------------------------------------ |
| `%%ID_STORE%%` | Identity store for the workspace. |
| `%%EVENT_STORE%%` | Event data store for the workspace. |
| `%%PROFILE_STORE%%` | Profile data store for the workspace. |
| `%%CONSENT_STORE%%` | Consent data store for the workspace. |
| `%%NCE_STORE_%%` | Non-Customer Entity store for a specific source. |
| `%%ZERO_COPY_%%` | Zero-copy table for a specific source. |
Click **Test Query** to run the query against a sample of your workspace data. The **SQL Test Results** modal shows the first set of rows returned, along with the total result count, so you can confirm the output before saving.
**Validation rules**
* The top-level `SELECT` must return exactly two columns: `ucid` and one aggregated value (with an alias).
* `ucid` is the only column allowed in the top-level `GROUP BY`.
* Top-level `LIMIT` and `ORDER BY` are not allowed.
* CTEs (`WITH` clauses) are not allowed.
* Subqueries are allowed inside the top-level query.
**Supported macro tables**
| Macro | Description |
| --------------------------- | ------------------------------------------------ |
| `%%ID_STORE%%` | Identity store for the workspace. |
| `%%EVENT_STORE%%` | Event data store for the workspace. |
| `%%PROFILE_STORE%%` | Profile data store for the workspace. |
| `%%CONSENT_STORE%%` | Consent data store for the workspace. |
| `%%NCE_STORE_%%` | Non-Customer Entity store for a specific source. |
| `%%ZERO_COPY_%%` | Zero-copy table for a specific source. |
Click **Test Query** to run the query against a sample of your workspace data. The **SQL Test Results** modal shows the first set of rows returned, along with the total result count, so you can confirm the output before saving.
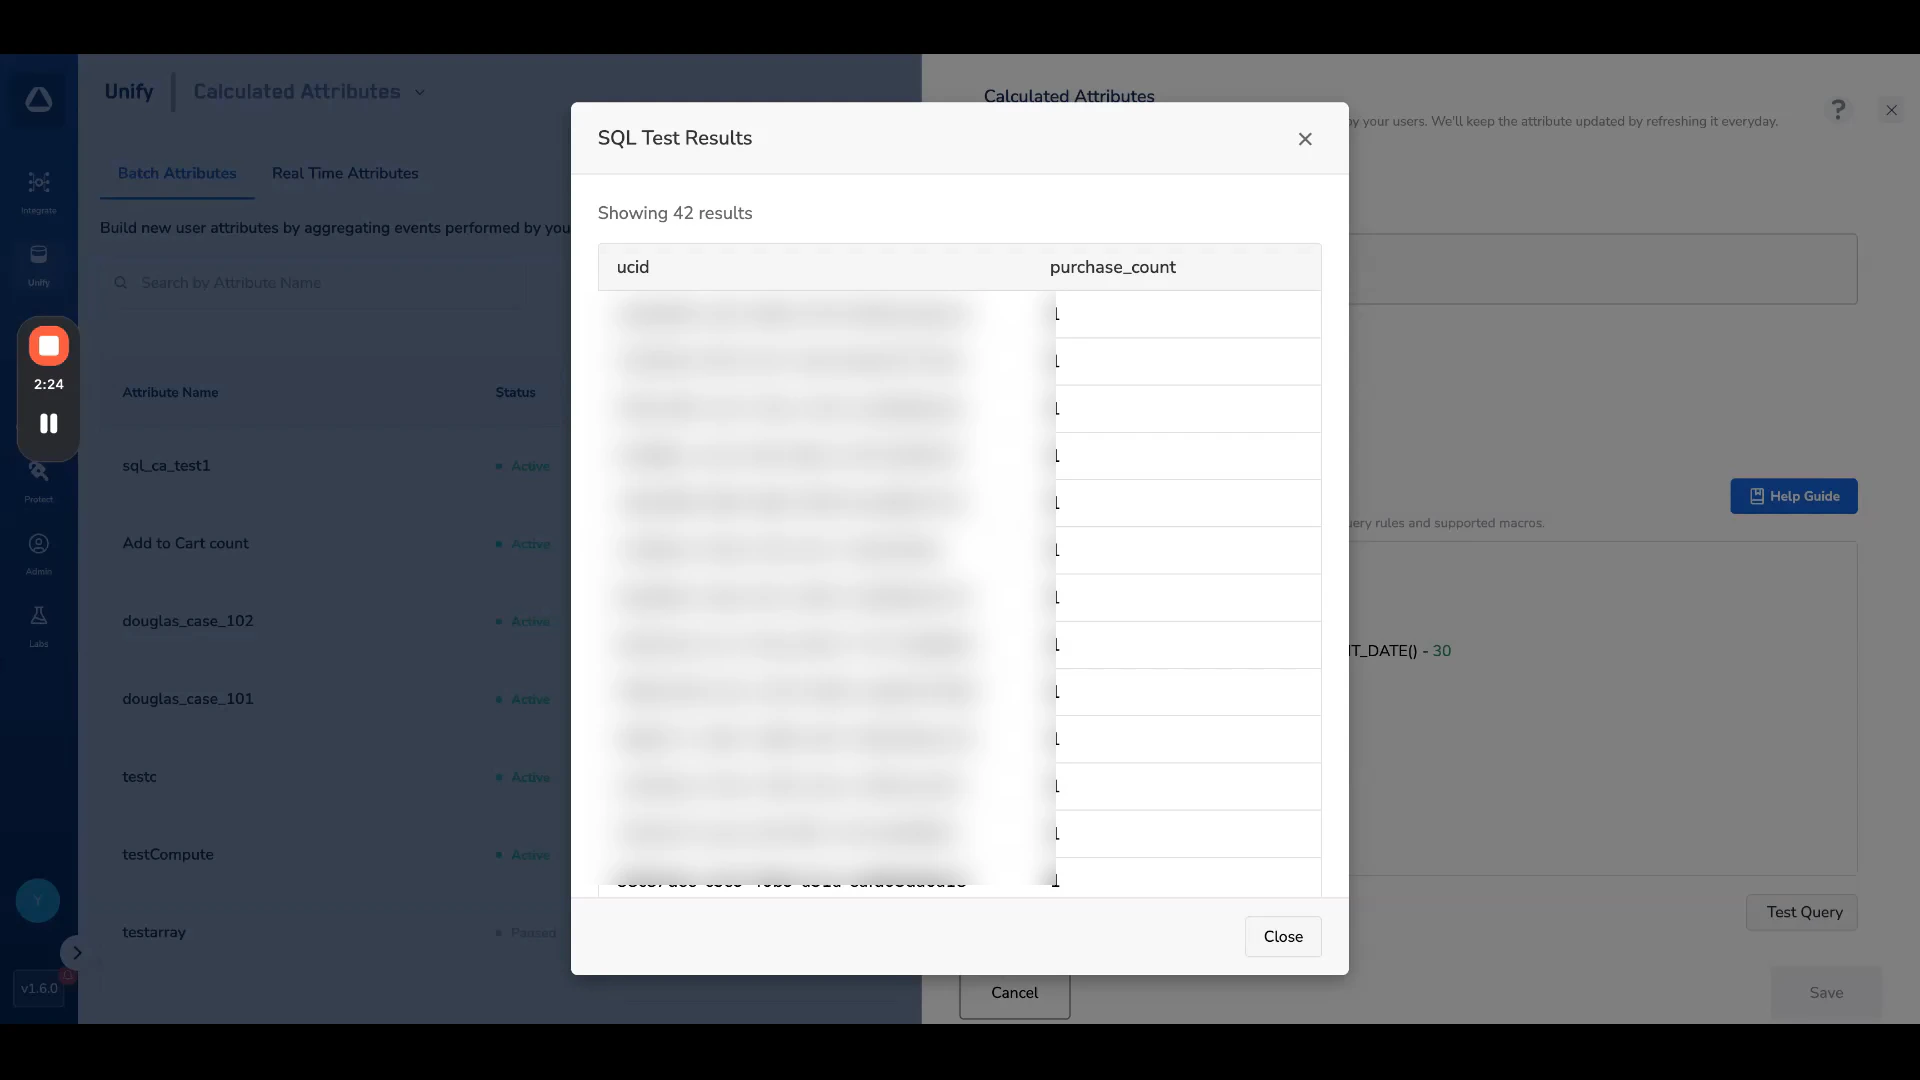 If the query violates a validation rule (for example, more than two top-level columns or a column other than `ucid` in `GROUP BY`), the test will fail with an error pointing at the offending part of the query.
Once the test query returns the expected results, click **Save** to create the calculated attribute. From this point on it behaves exactly like a form-based batch calculated attribute — it appears on the **Batch Attributes** tab and is available for use in segments and audiences.
## Related Topics
If the query violates a validation rule (for example, more than two top-level columns or a column other than `ucid` in `GROUP BY`), the test will fail with an error pointing at the offending part of the query.
Once the test query returns the expected results, click **Save** to create the calculated attribute. From this point on it behaves exactly like a form-based batch calculated attribute — it appears on the **Batch Attributes** tab and is available for use in segments and audiences.
## Related Topics