> ## Documentation Index
> Fetch the complete documentation index at: https://docs.zeotap.com/llms.txt
> Use this file to discover all available pages before exploring further.
# Step 5 - Validate the Configured Collect Tag
> Learn how to validate the Zeotap Collect Tag using Google Tag Manager's Preview Mode and Chrome DevTools.
**Important:** Please ensure your CMP configuration includes new **Vendor ID 1469** for 1st Party data tracking. Additionally, include **Vendor ID 301** if cookie sync is enabled. [Learn more](/articles/sdks/web-js/configurations/consent-options#shouldcheckzeotapvendorconsent)
Once you have [added](/articles/sdks/gtm/setup-guide/add-tag-to-gtm), [configured](/articles/sdks/gtm/setup-guide/configuration/overview), and [assigned a trigger](/articles/sdks/gtm/setup-guide/triggers) to the Zeotap Collect Tag, it is important to validate that everything is working as expected. Google Tag Manager provides a built-in **Preview Mode** which allows you to test your tags in a live environment without publishing changes.
Follow the steps below to validate the tag setup.
***
## Step-by-Step Validation Guide
### 1. Navigate to the Tags Section
* Open **Google Tag Manager**.
* From the left sidebar, click on **Tags**.
* Confirm that your Zeotap Collect Tag is listed and is **not paused or disabled**.
### 2. Enable Preview Mode
* In the top-right corner of GTM, click the **Preview** button.
* This will launch the **Tag Assistant** tool in a new tab.
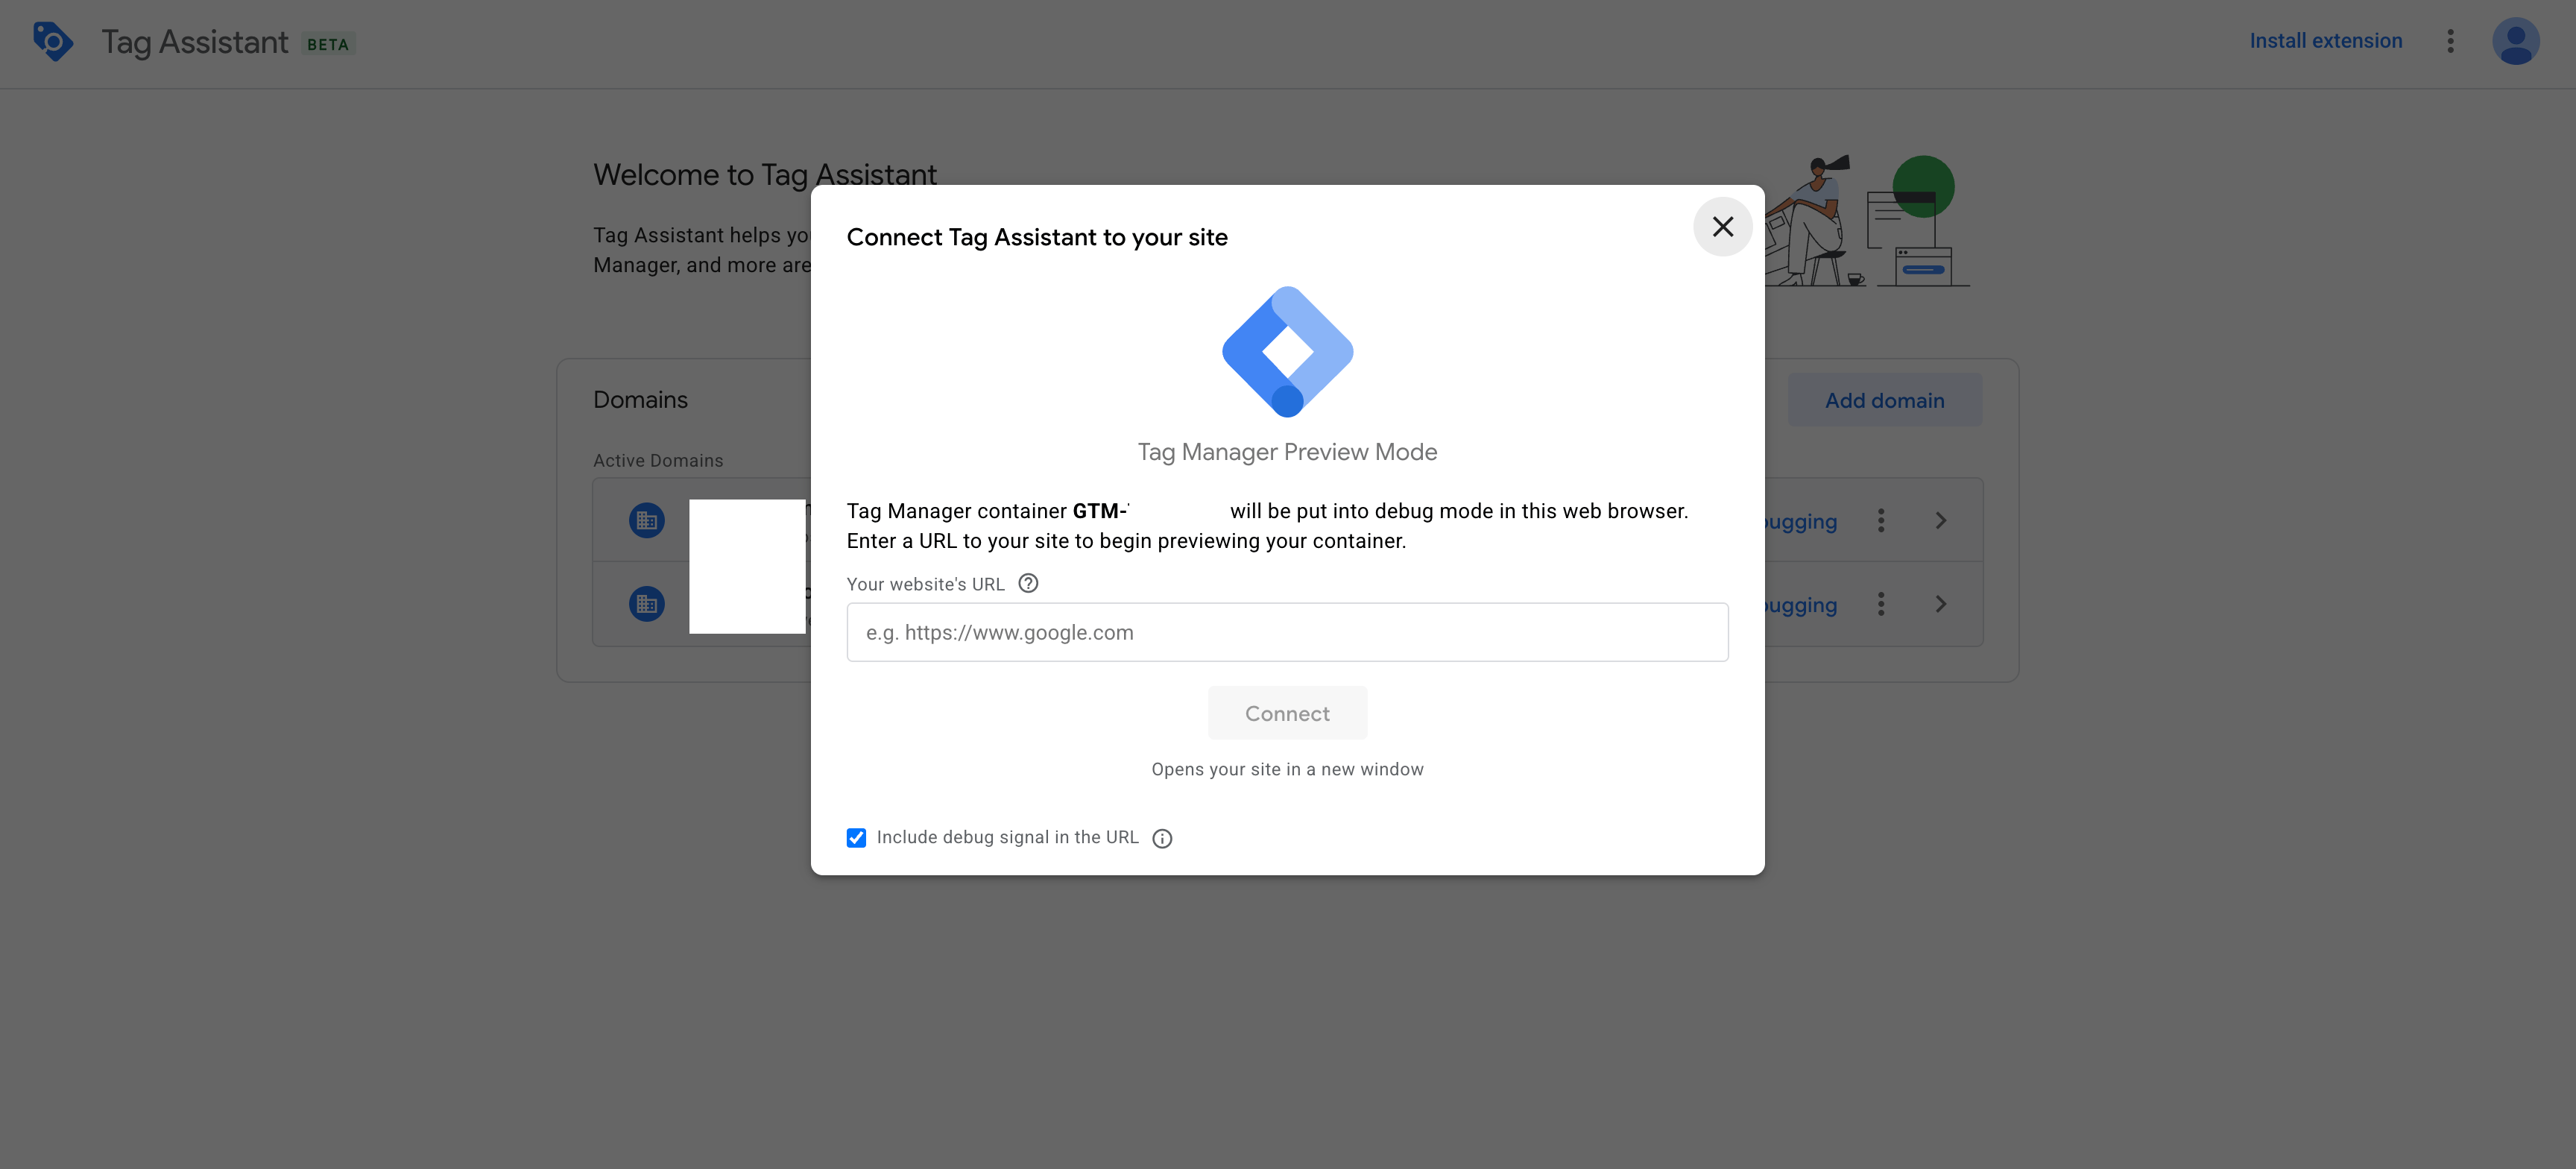
### 3. Enter Website URL
* In the **Tag Assistant** interface, enter the URL of the website where GTM is installed.
* Click **Start** to begin the preview session.
### Example
 ### 4. Interact With Your Website
* Once the Tag Assistant redirects you to your website, perform the actions that would trigger the Zeotap Collect Tag.
* Example: Navigate to different pages, perform a login, or trigger any configured custom events.
### 5. Inspect Data in Developer Tools
* Right-click on the website and choose **Inspect** to open **Chrome DevTools**.
* Navigate to the **Console** tab.
* Look for the `dataLayer` output and check if the relevant event names (e.g., `Login event`) are logged.
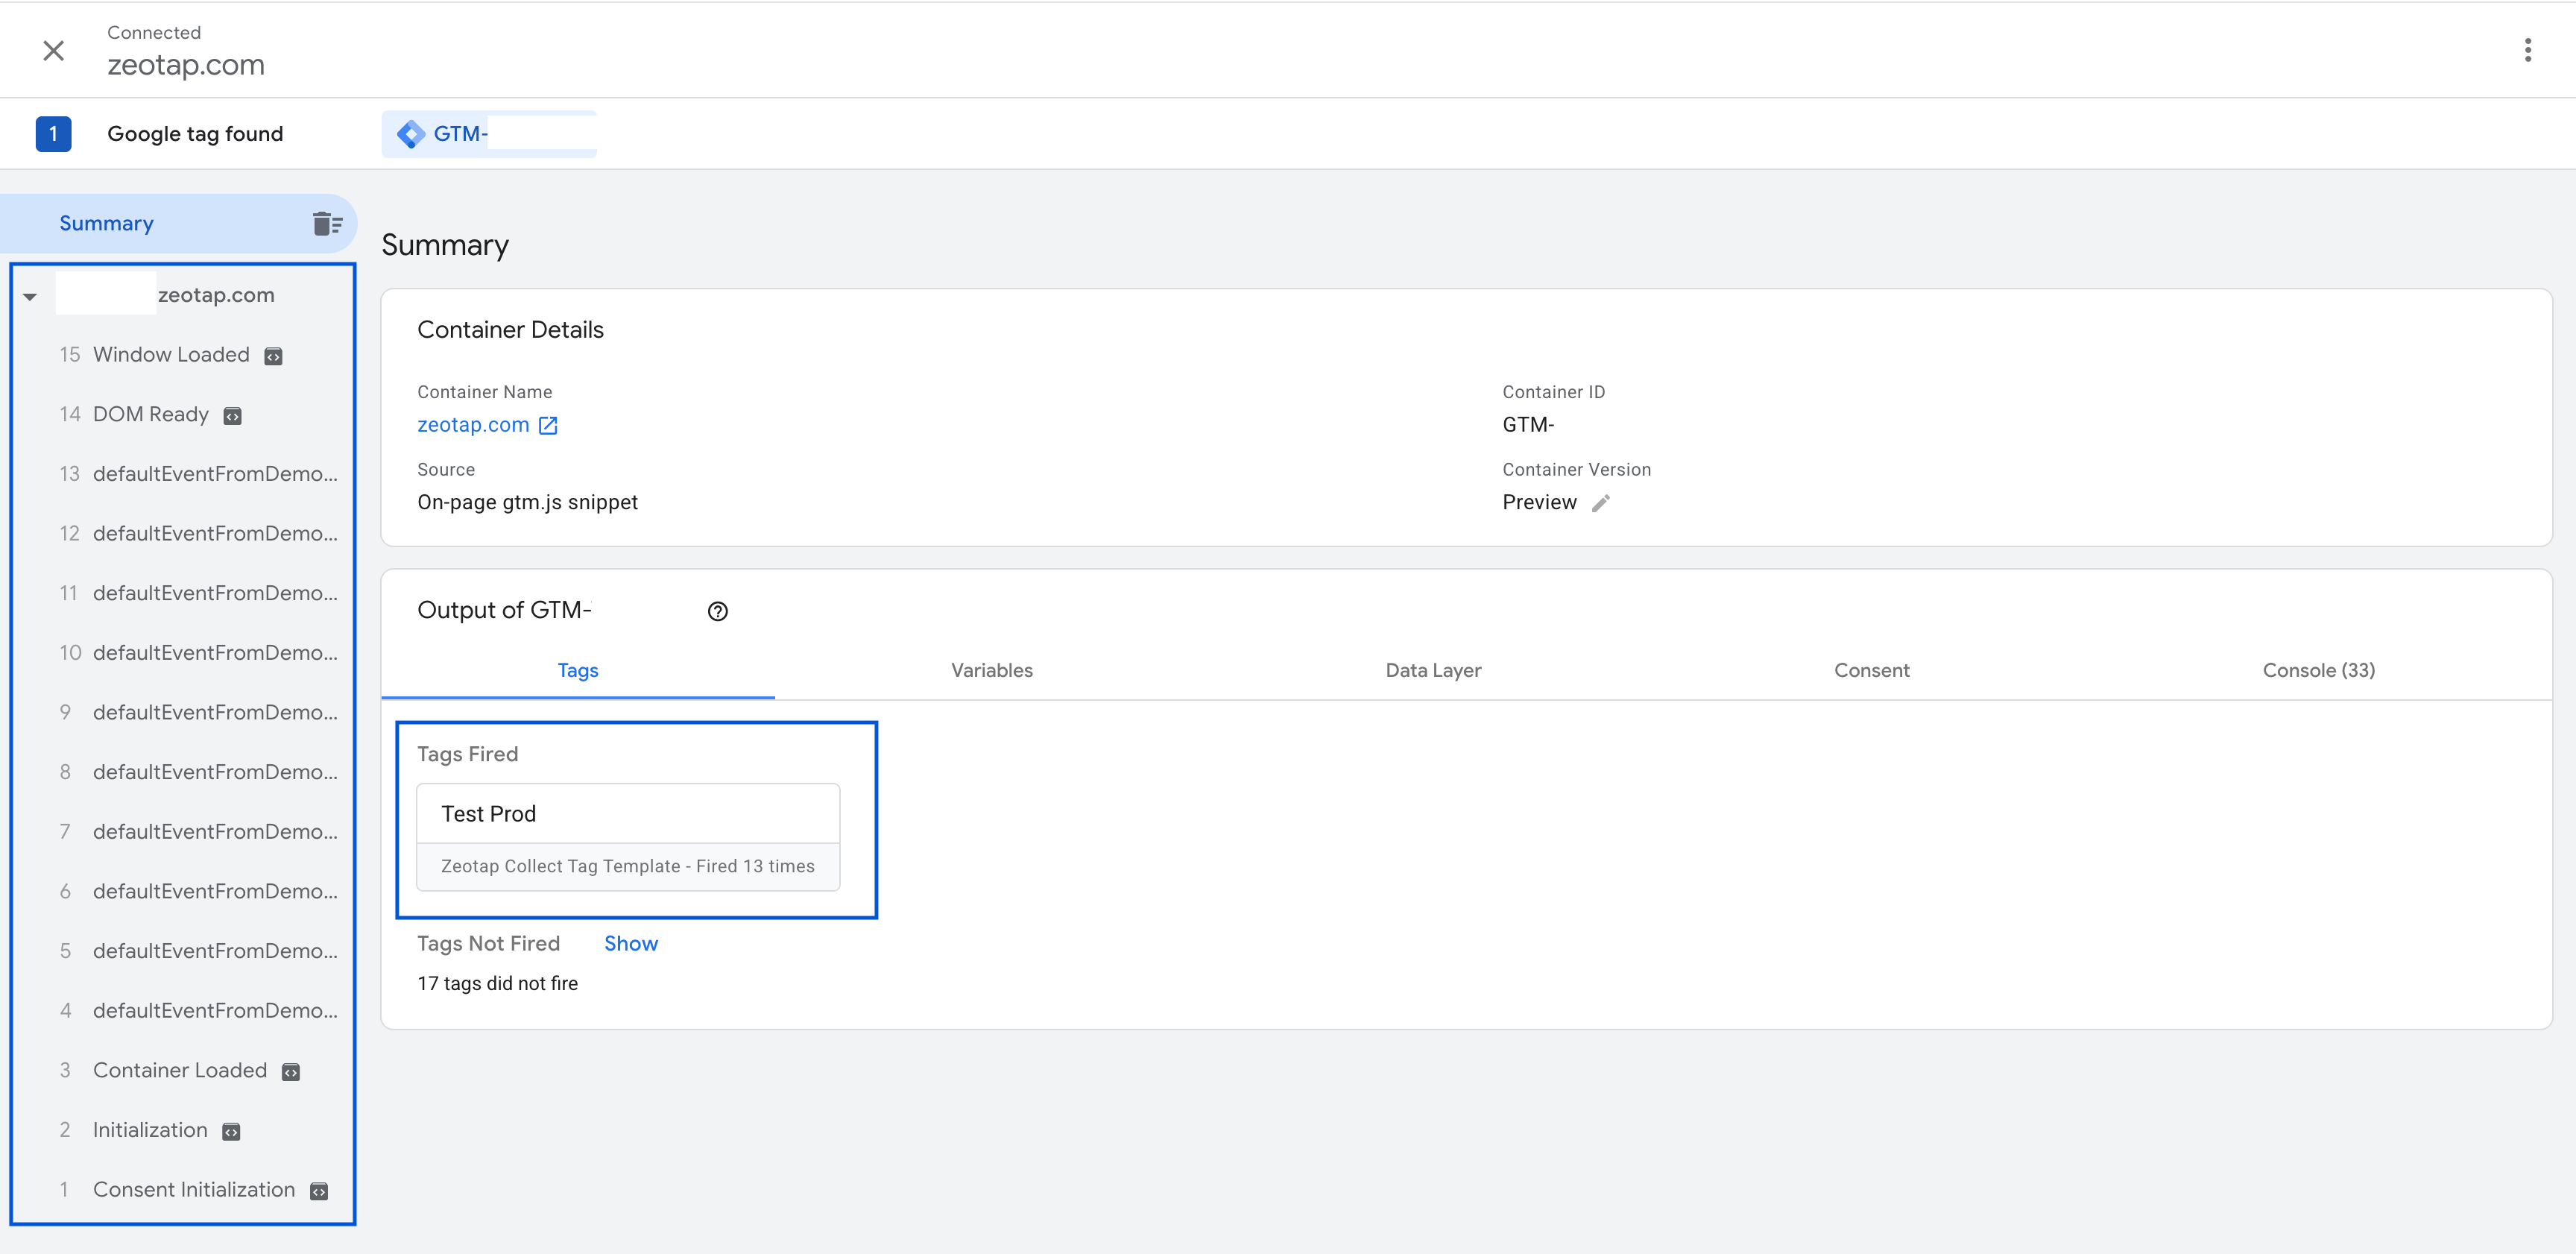
### 6. Review Tag Firing in Tag Assistant
* Return to the **Tag Assistant** tab.
* Click **Continue** to proceed to the next event.
* Under the **Tags Fired** section, verify that the **Zeotap Collect Tag** appears as fired.
### 4. Interact With Your Website
* Once the Tag Assistant redirects you to your website, perform the actions that would trigger the Zeotap Collect Tag.
* Example: Navigate to different pages, perform a login, or trigger any configured custom events.
### 5. Inspect Data in Developer Tools
* Right-click on the website and choose **Inspect** to open **Chrome DevTools**.
* Navigate to the **Console** tab.
* Look for the `dataLayer` output and check if the relevant event names (e.g., `Login event`) are logged.
### 6. Review Tag Firing in Tag Assistant
* Return to the **Tag Assistant** tab.
* Click **Continue** to proceed to the next event.
* Under the **Tags Fired** section, verify that the **Zeotap Collect Tag** appears as fired.
 ***
## Summary
By completing these steps, you can confirm:
* The tag is active and configured correctly.
* It fires only for the intended events.
* Event data is being pushed to the `dataLayer`.
This process helps ensure that the Zeotap Collect Tag is functioning properly before publishing your GTM container changes to production. If you need to make any adjustments, you can go back to the [configuration](/articles/sdks/gtm/setup-guide/configuration/overview) or [trigger](/articles/sdks/gtm/setup-guide/triggers) setup steps.
***
## Summary
By completing these steps, you can confirm:
* The tag is active and configured correctly.
* It fires only for the intended events.
* Event data is being pushed to the `dataLayer`.
This process helps ensure that the Zeotap Collect Tag is functioning properly before publishing your GTM container changes to production. If you need to make any adjustments, you can go back to the [configuration](/articles/sdks/gtm/setup-guide/configuration/overview) or [trigger](/articles/sdks/gtm/setup-guide/triggers) setup steps.