> ## Documentation Index
> Fetch the complete documentation index at: https://docs.zeotap.com/llms.txt
> Use this file to discover all available pages before exploring further.
# Installing the Zeotap Collect Extension
> Step-by-step instructions to install and add the Zeotap Collect Extension to your Adobe Launch property.
**Important:** Please ensure your CMP configuration includes new **Vendor ID 1469** for 1st Party data tracking. Additionally, include **Vendor ID 301** if cookie sync is enabled. [Learn more](/articles/sdks/web-js/configurations/consent-options#shouldcheckzeotapvendorconsent)
Before you can [configure rules](/articles/sdks/adobe-launch/actions/overview) or begin [tracking events](/articles/sdks/adobe-launch/actions/track-events), you need to install the **Zeotap Collect Extension** into your **Adobe Experience Platform Launch** property.
This section walks you through the installation process, including locating the extension, assigning it to your environment, and publishing changes.
***
## Prerequisites
Ensure you have the following before proceeding:
* Access to **Adobe Experience Platform Tags (Launch)** with **edit permissions**
* An active **Zeotap Write Key** (provided by your Zeotap representative)
* A published Adobe Launch property for your website
***
## Step-by-Step Installation Guide
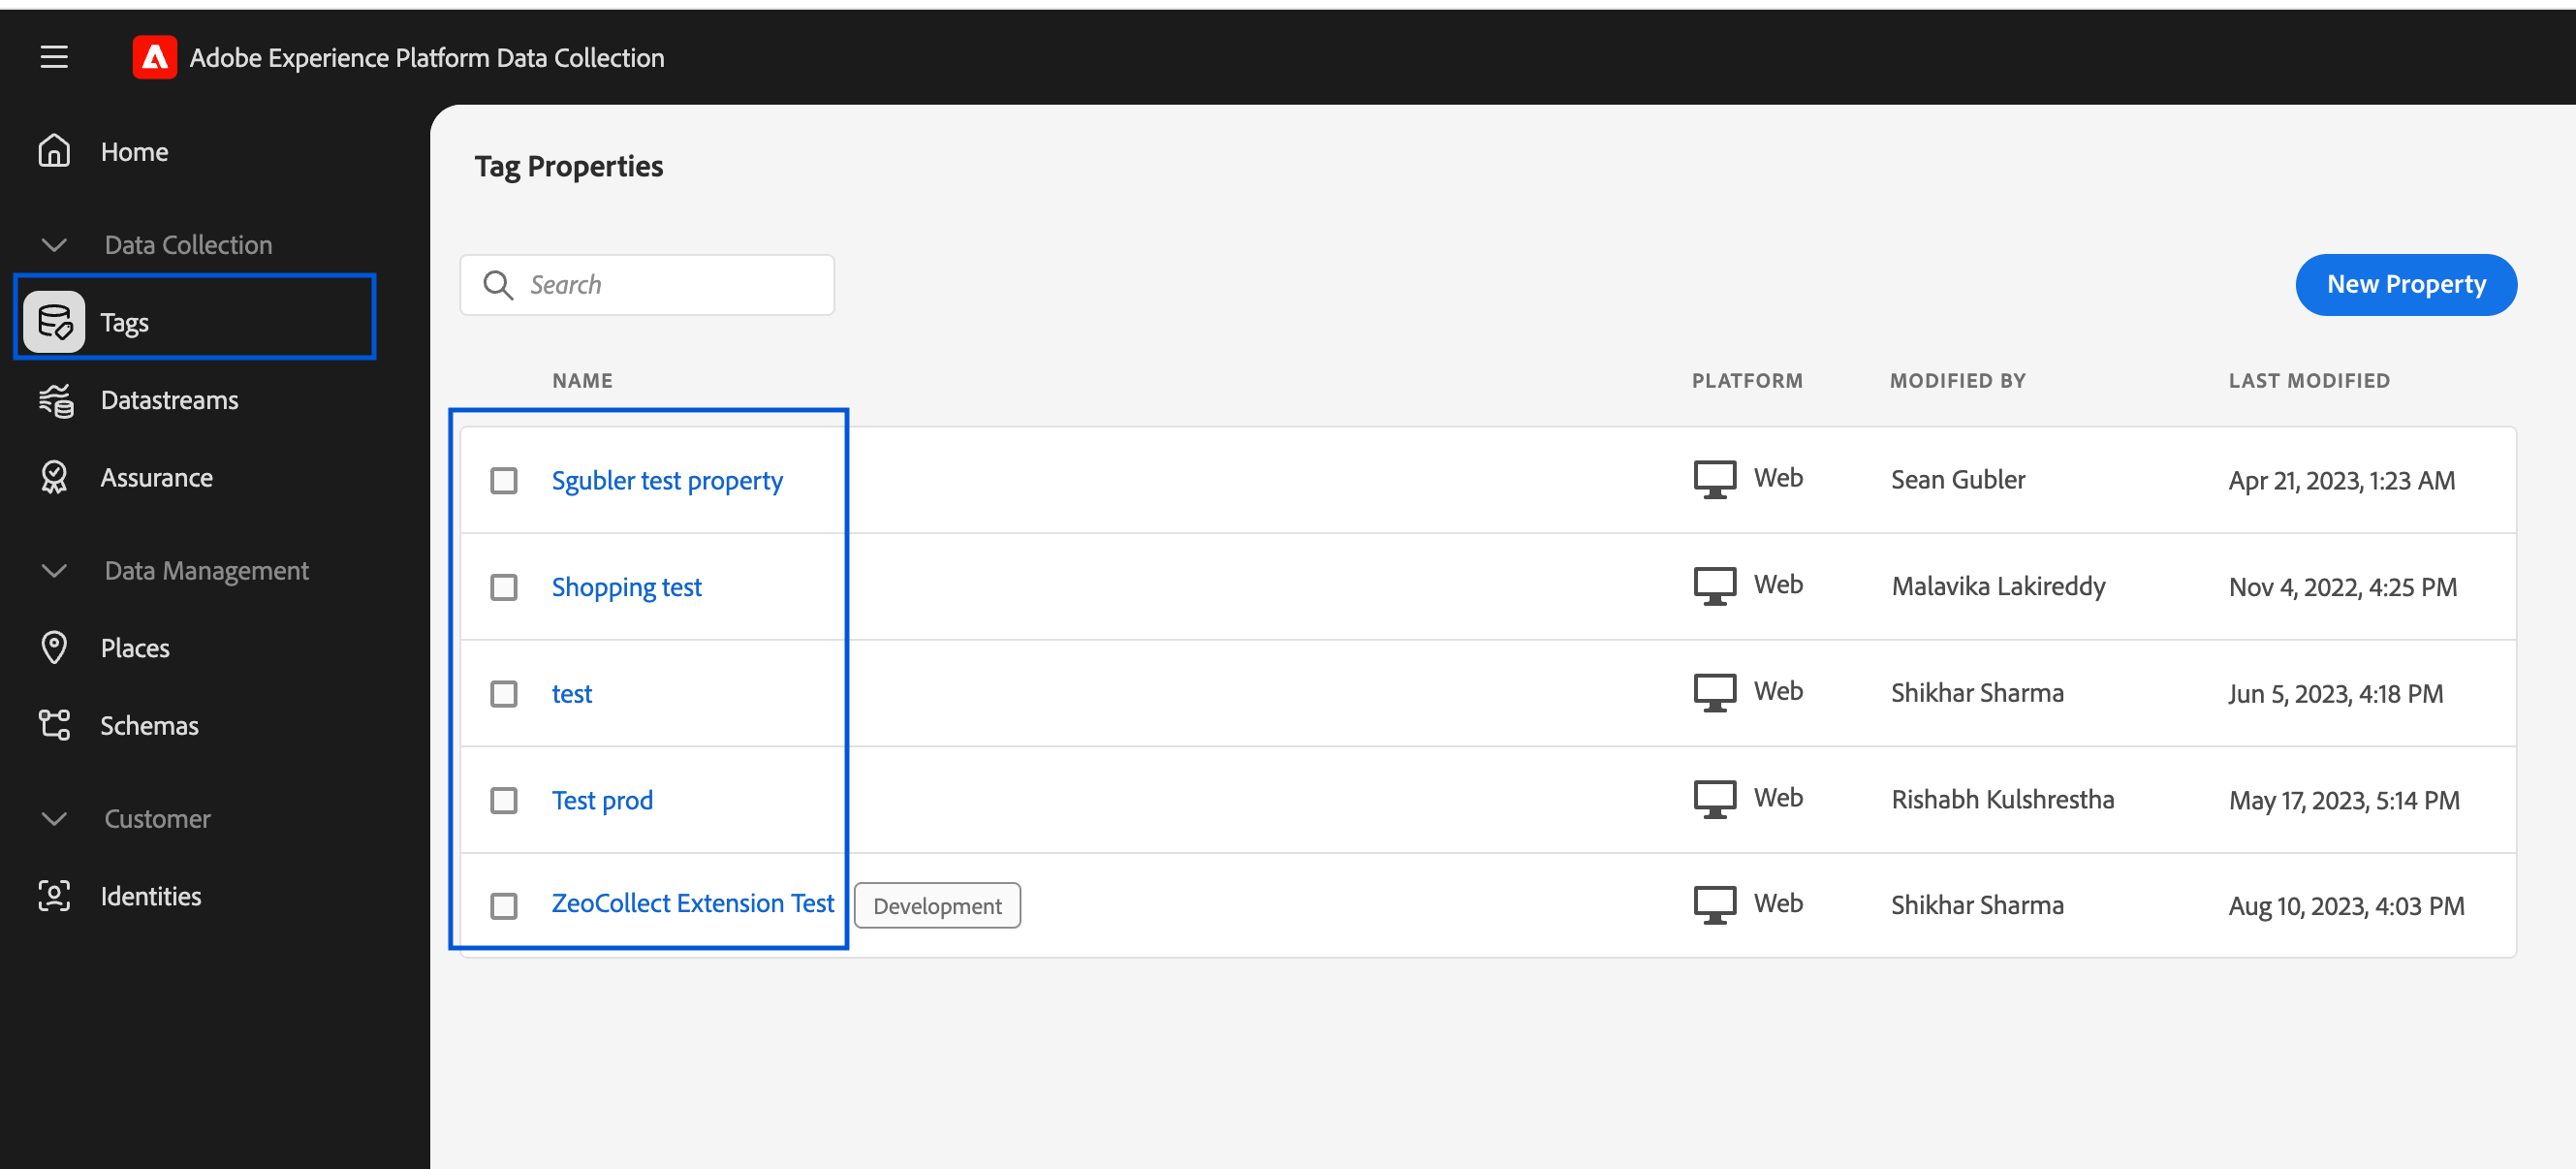
### Step 1: Log into Adobe Launch
* Visit: [https://experience.adobe.com/](https://experience.adobe.com/)
* Navigate to **Tags** under **Adobe Experience Platform**
* Choose the appropriate **Property** for your website
>  ***
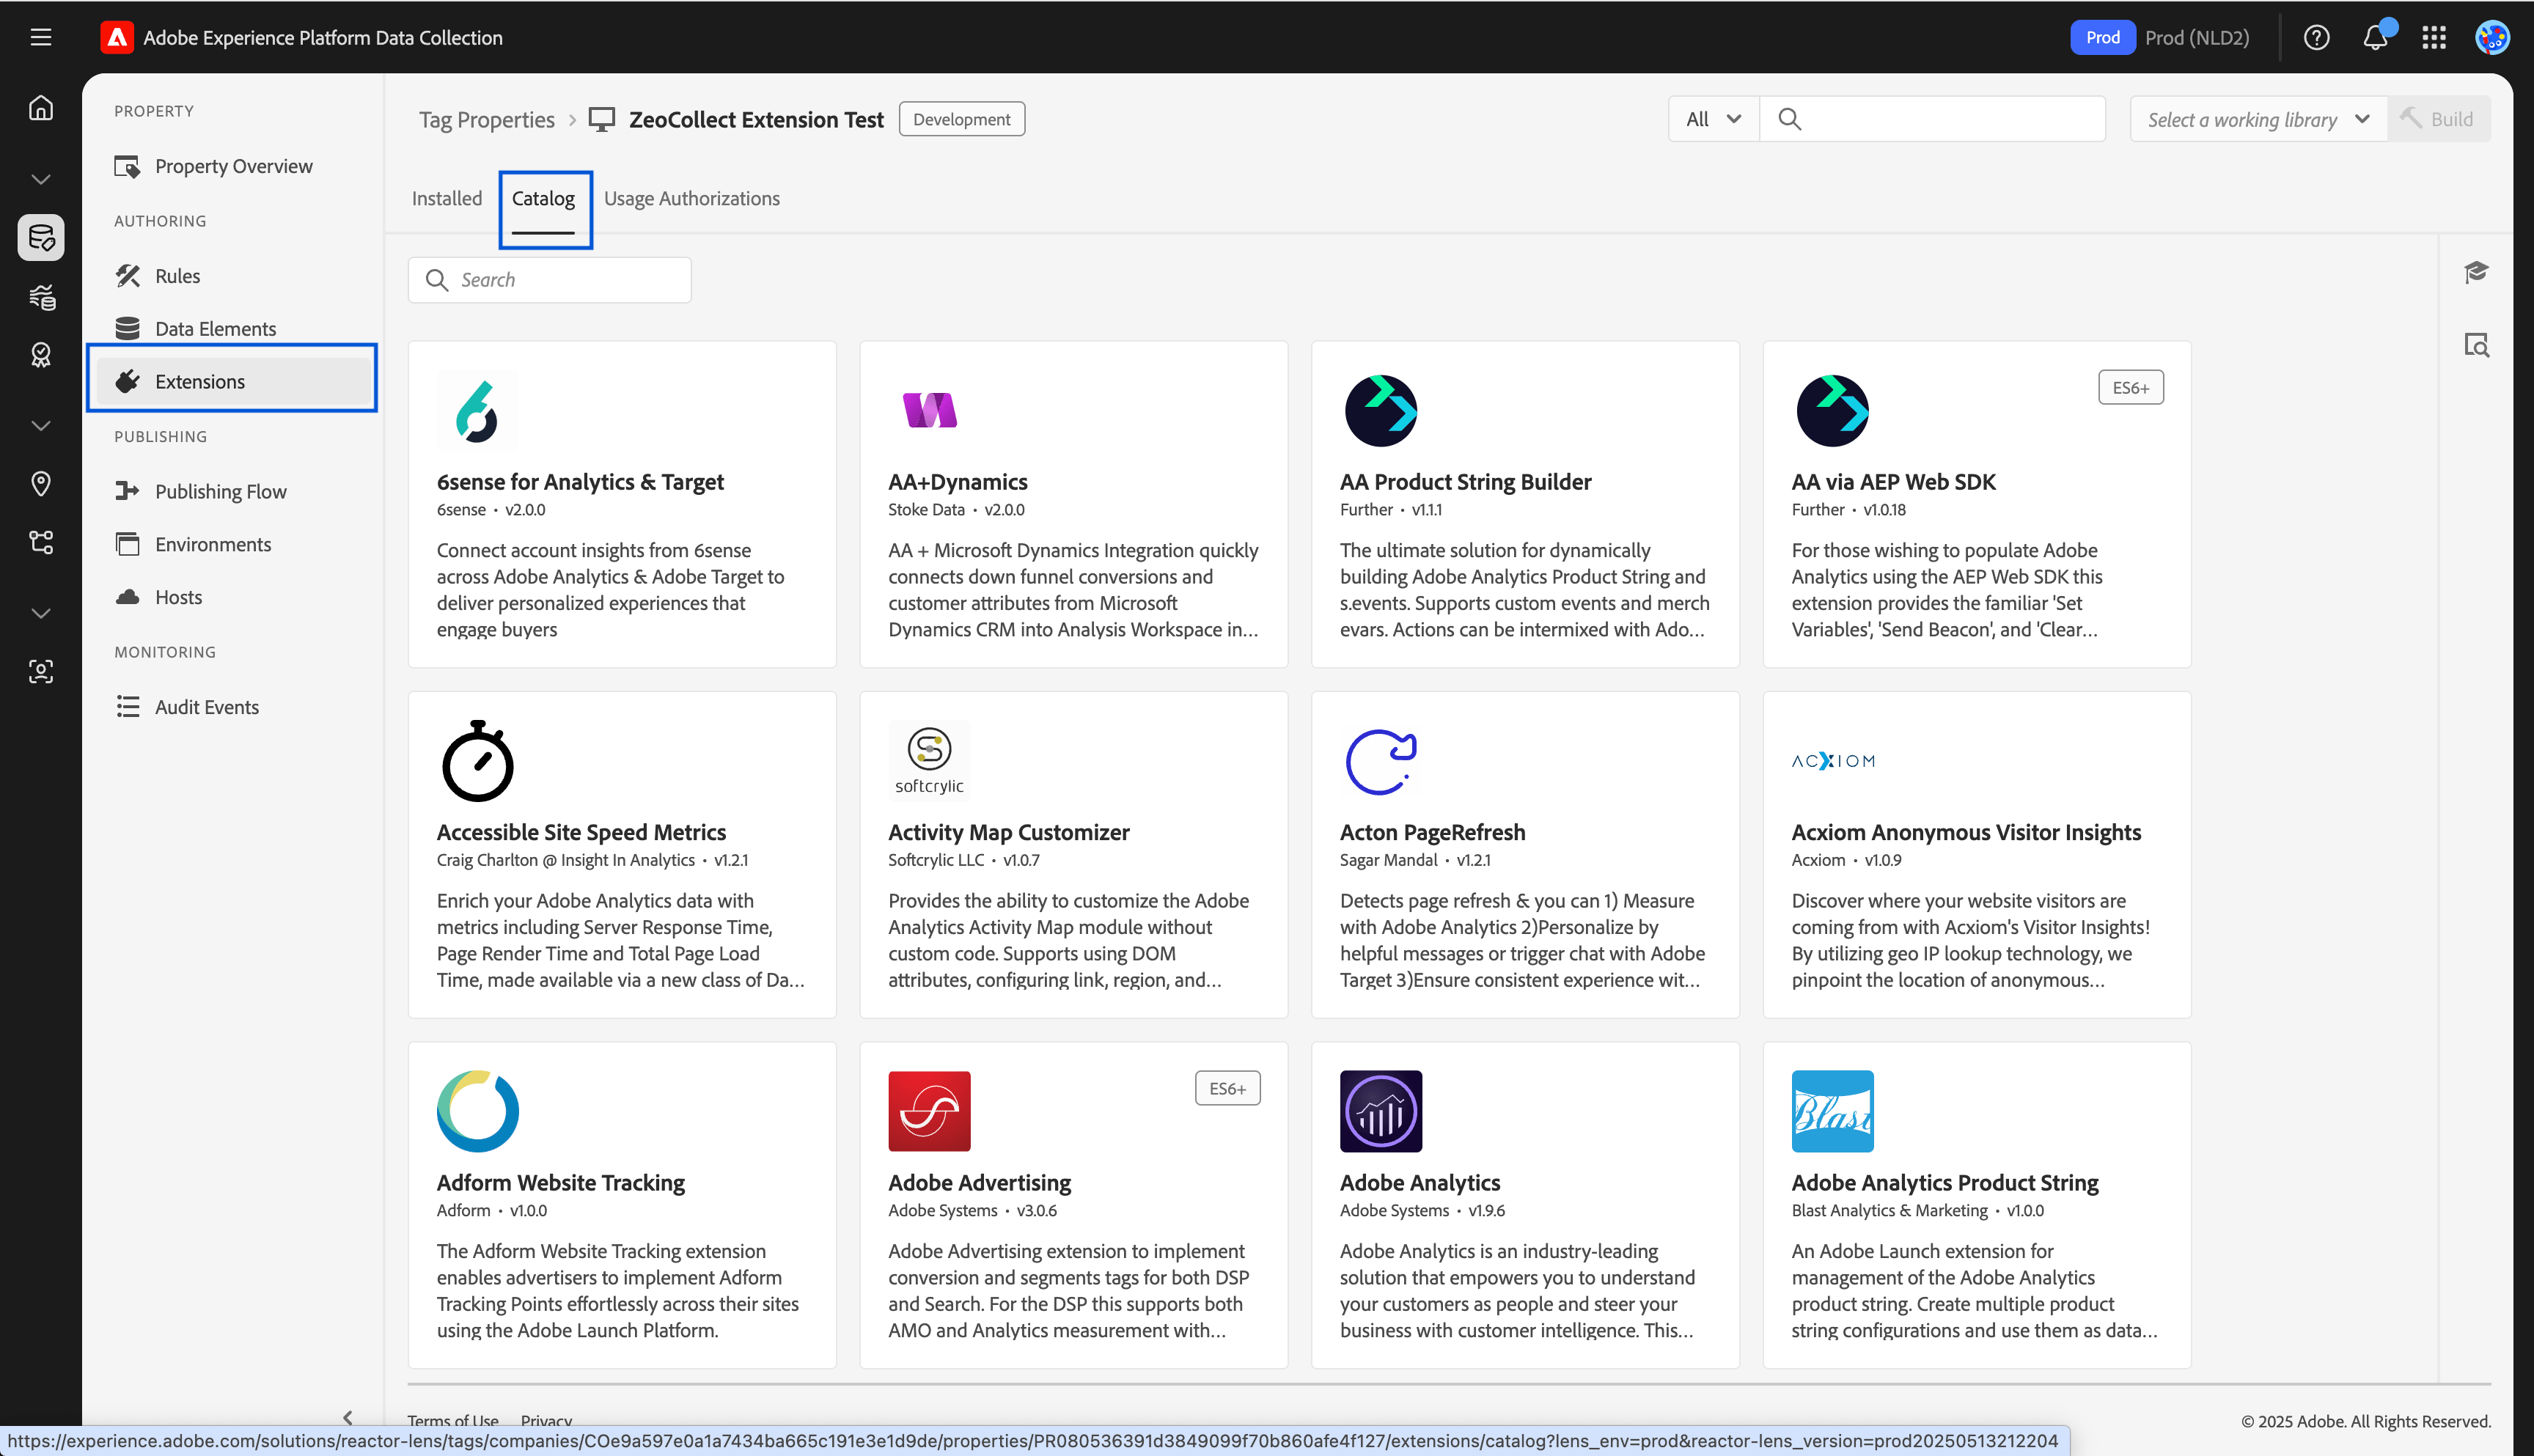
### Step 2: Open Extensions
* In the left-hand navigation, click **Extensions**
* Click the **Catalog** tab
>
***
### Step 2: Open Extensions
* In the left-hand navigation, click **Extensions**
* Click the **Catalog** tab
>  ***
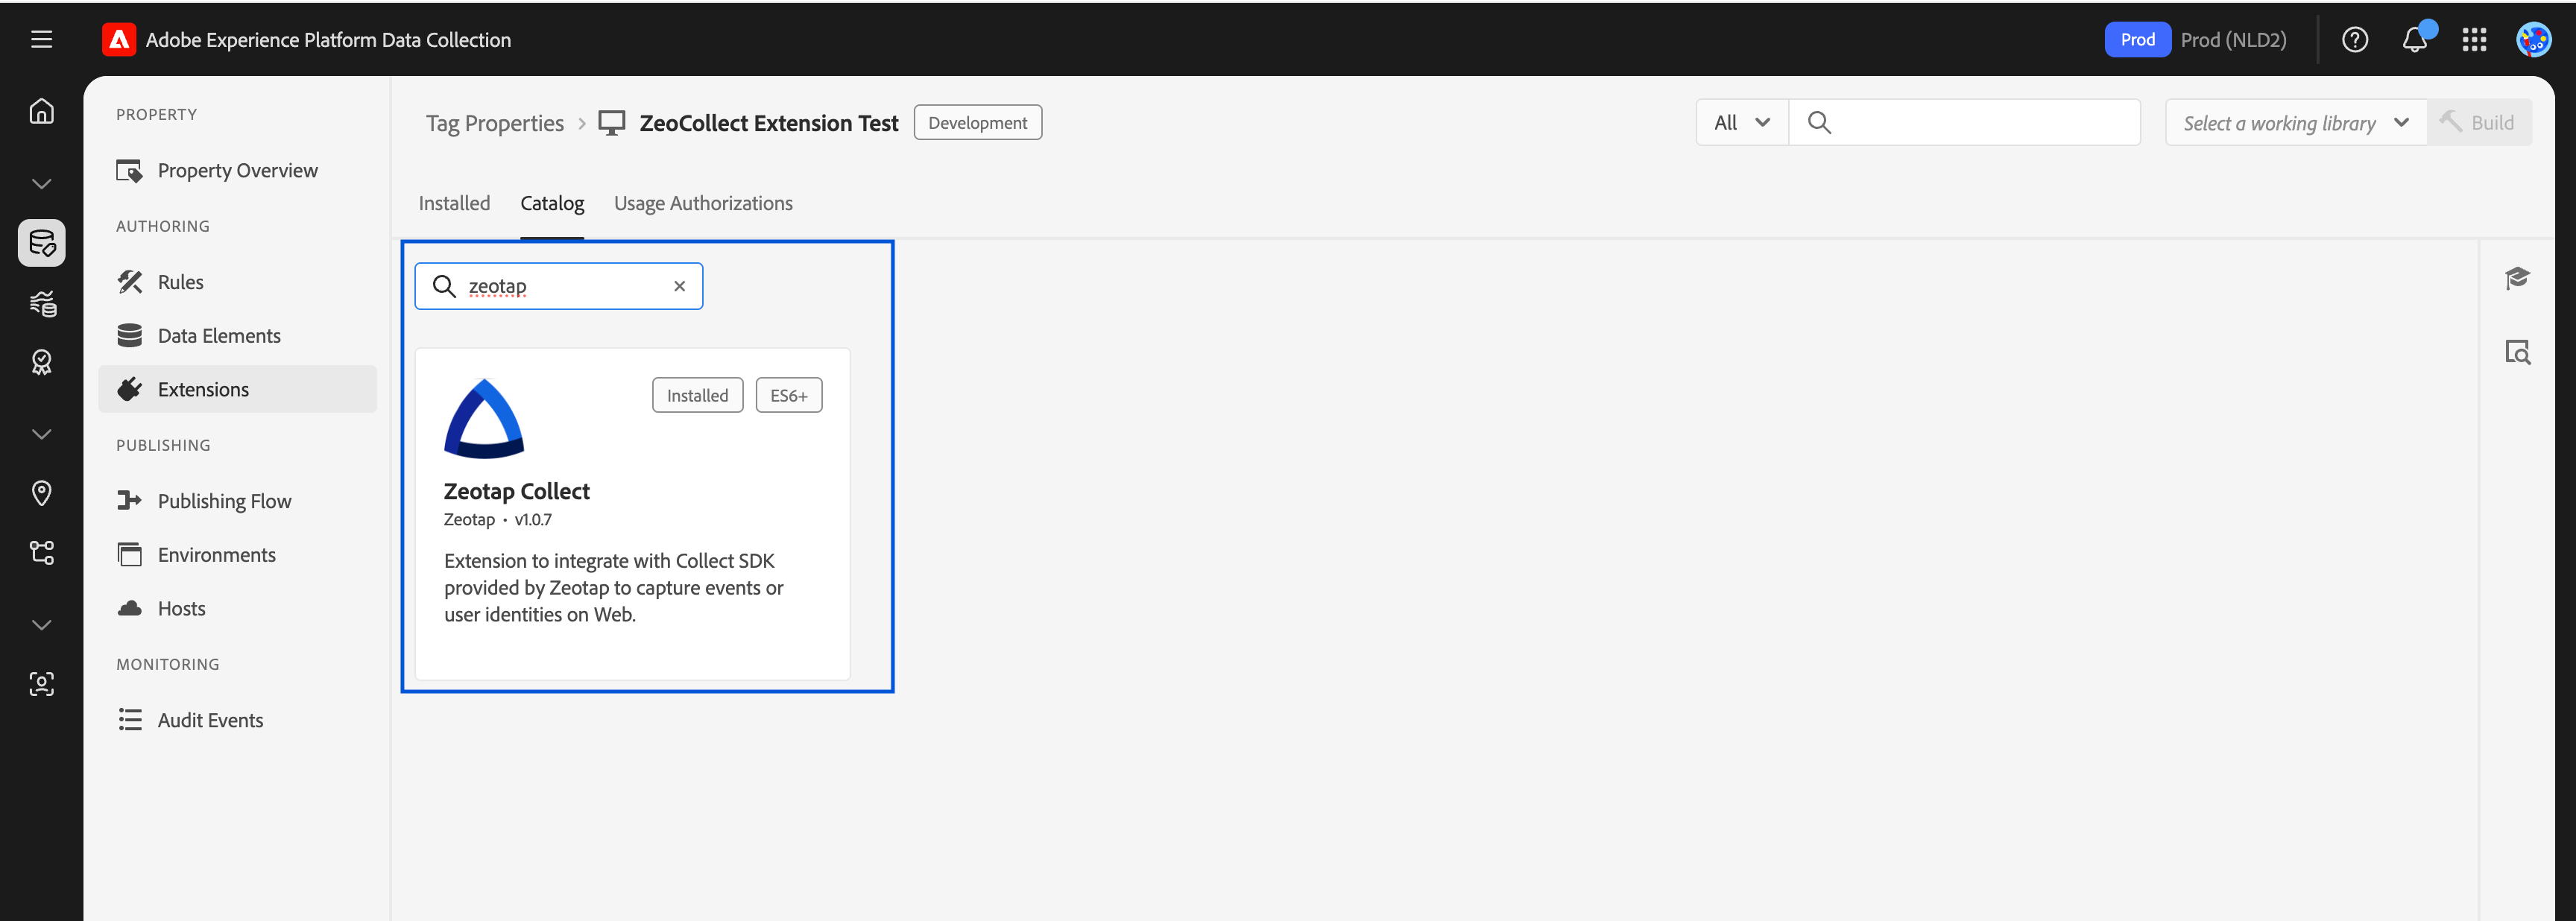
### Step 3: Locate Zeotap Collect Extension
* Use the search bar to find `Zeotap Collect`
* Click the **Install** button next to the extension
>
***
### Step 3: Locate Zeotap Collect Extension
* Use the search bar to find `Zeotap Collect`
* Click the **Install** button next to the extension
>  ***
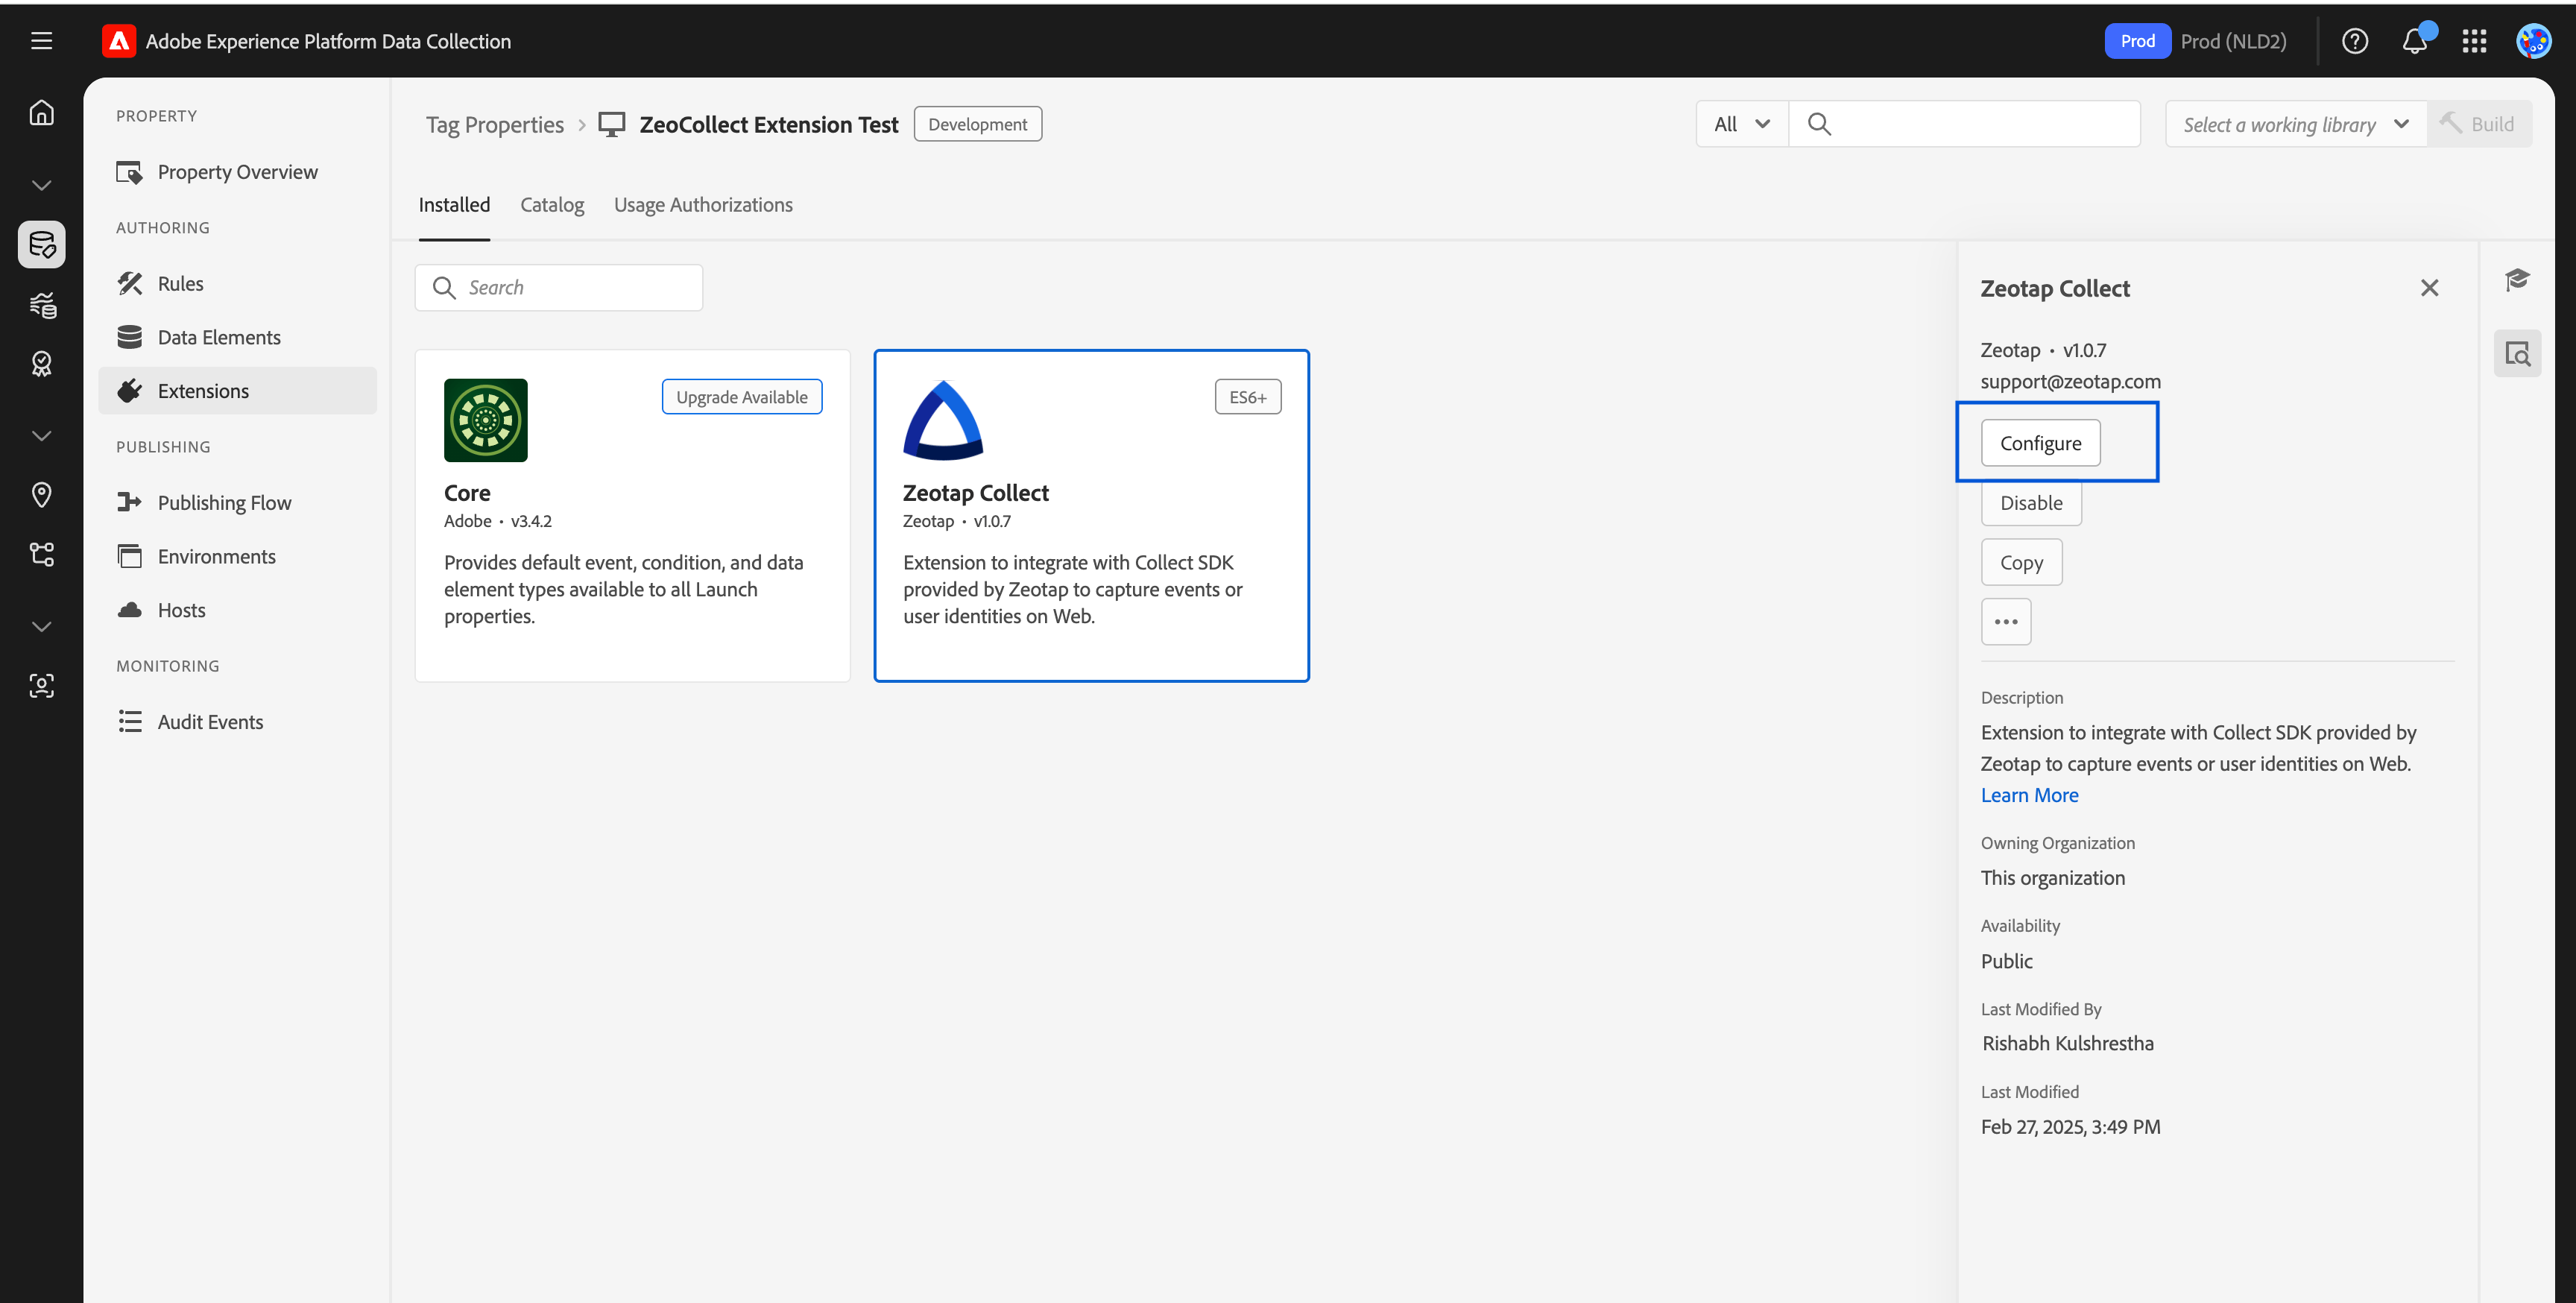
### Step 4: Add the Extension to Your Property
Once installed:
* Go to the **Installed** tab
* Click on **Zeotap Collect**
* Proceed to [configure the extension](/articles/sdks/adobe-launch/configure)
>
***
### Step 4: Add the Extension to Your Property
Once installed:
* Go to the **Installed** tab
* Click on **Zeotap Collect**
* Proceed to [configure the extension](/articles/sdks/adobe-launch/configure)
>  ***
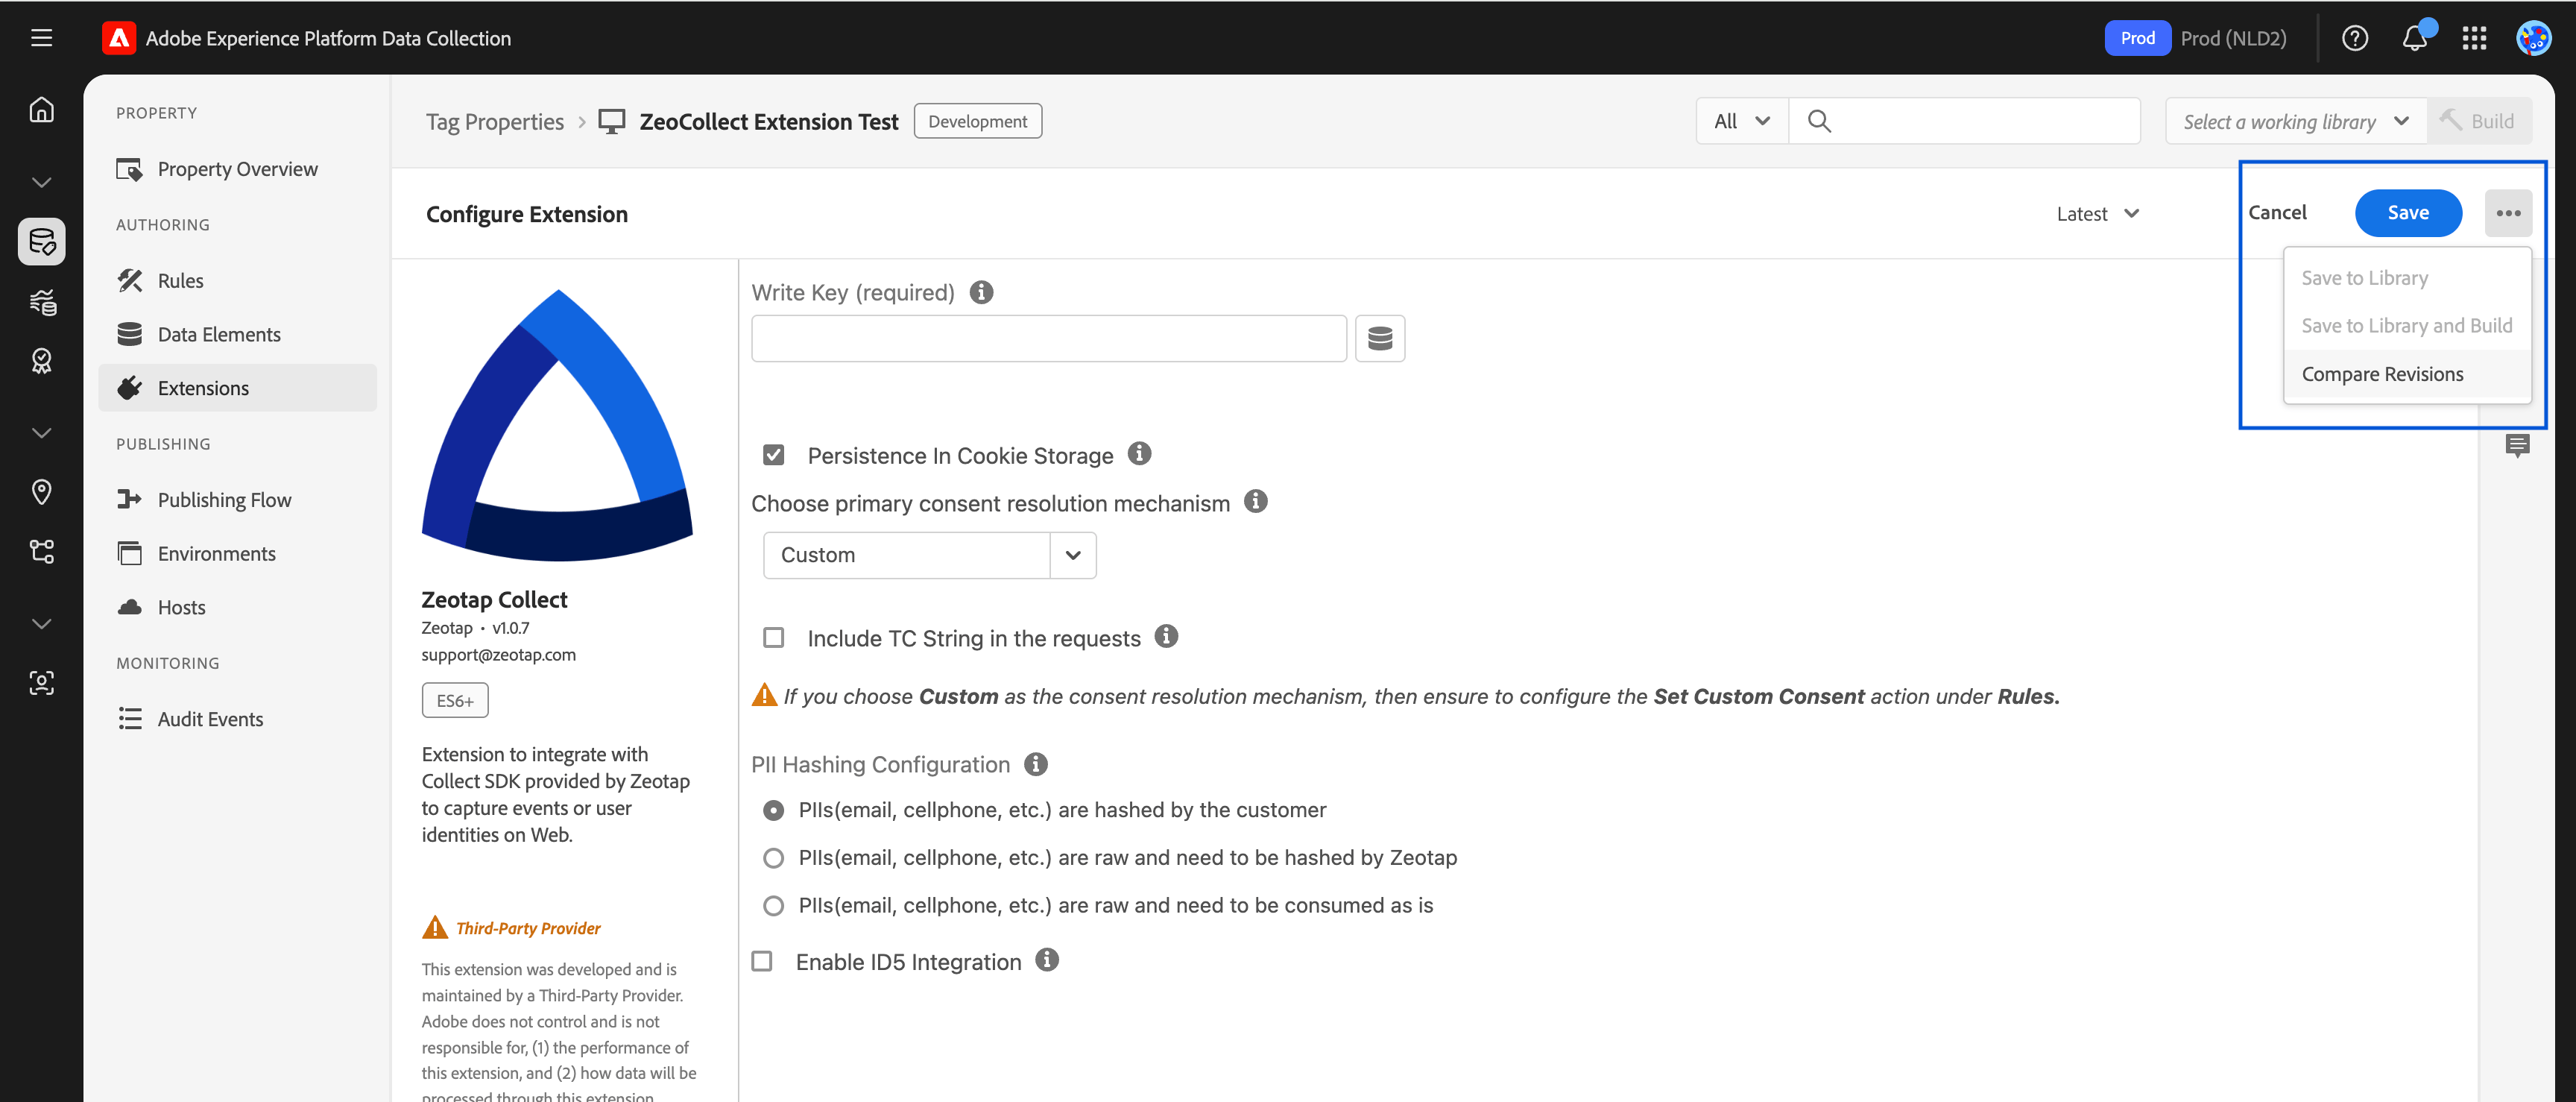
### Step 5: Save and Build
* After adding the extension, click **Save**
* Navigate to **Publishing Flow**
* Build a new library and assign it to the relevant environment (e.g., Development, Staging, Production)
* Click **Submit**, **Approve**, and **Publish** (if ready)
>
***
### Step 5: Save and Build
* After adding the extension, click **Save**
* Navigate to **Publishing Flow**
* Build a new library and assign it to the relevant environment (e.g., Development, Staging, Production)
* Click **Submit**, **Approve**, and **Publish** (if ready)
>  After installation and configuration, you can proceed to set up [rules and actions](/articles/sdks/adobe-launch/actions/overview) for tracking events, syncing user identities, and managing consent.