> ## Documentation Index
> Fetch the complete documentation index at: https://docs.zeotap.com/llms.txt
> Use this file to discover all available pages before exploring further.
# Yieldlab SSP
## Overview
Yieldlab is a leading Supply-Side Platform (SSP) that helps premium publishers manage, optimize, and monetize their digital ad inventory. By connecting publishers with demand partners, Yieldlab ensures transparency and maximized revenue through programmatic advertising.
The integration with Zeotap allows the customers to send segment data created in Zeotap to their Yieldlab instance.
## Supported Identifiers
This integration supports **MAIDs and ID5s.**
## Prerequisites
Before pushing the segments to Yieldlabs, ensure that you have the following details from you Yieldlab POC.
1. Your Adition Network ID.
### Steps to create a Subkey which is used to map to the segment attribute in Zeotap :
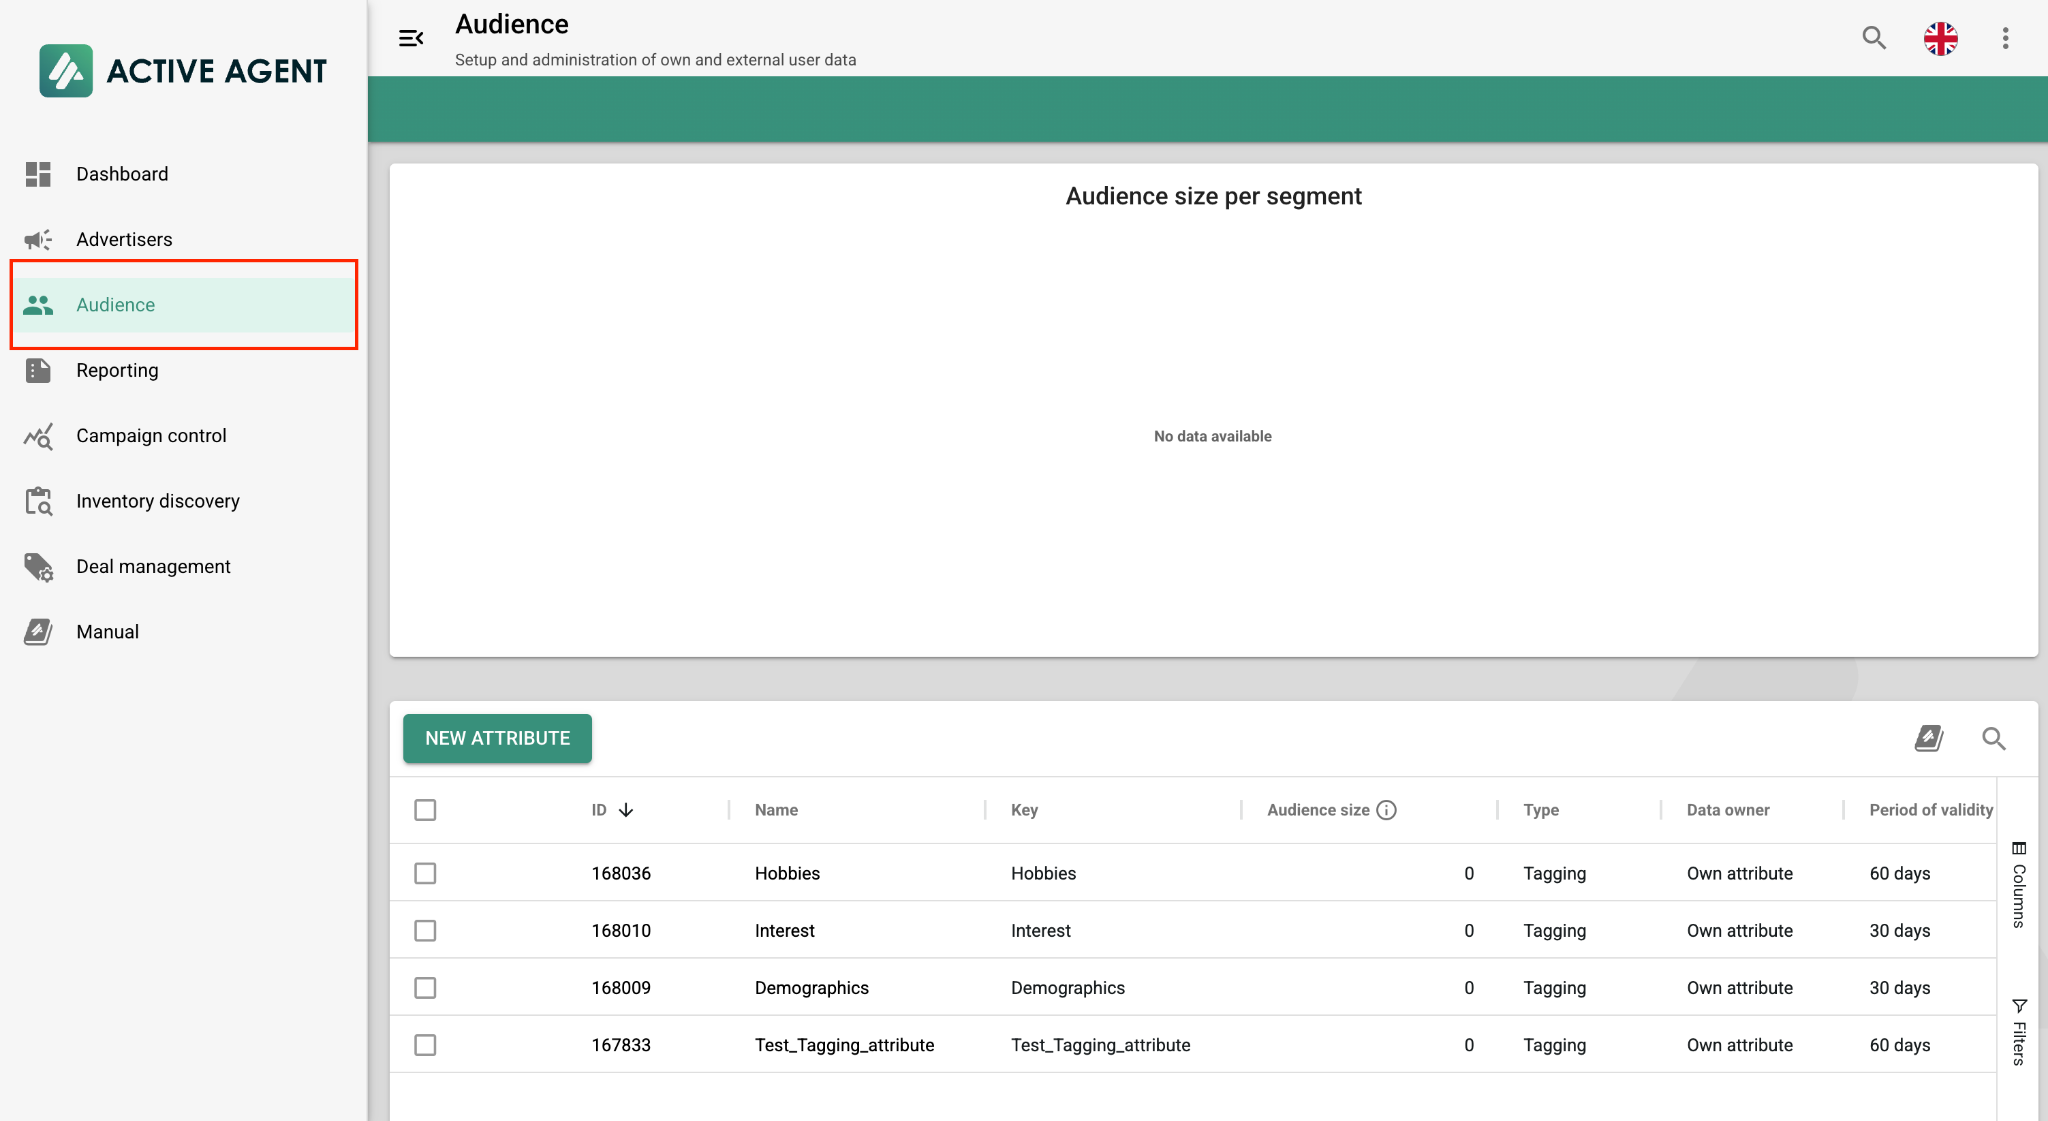
Log in to [Active Agent](https://my.active-agent.com/en/login) and navigate to the **Audiences** section.
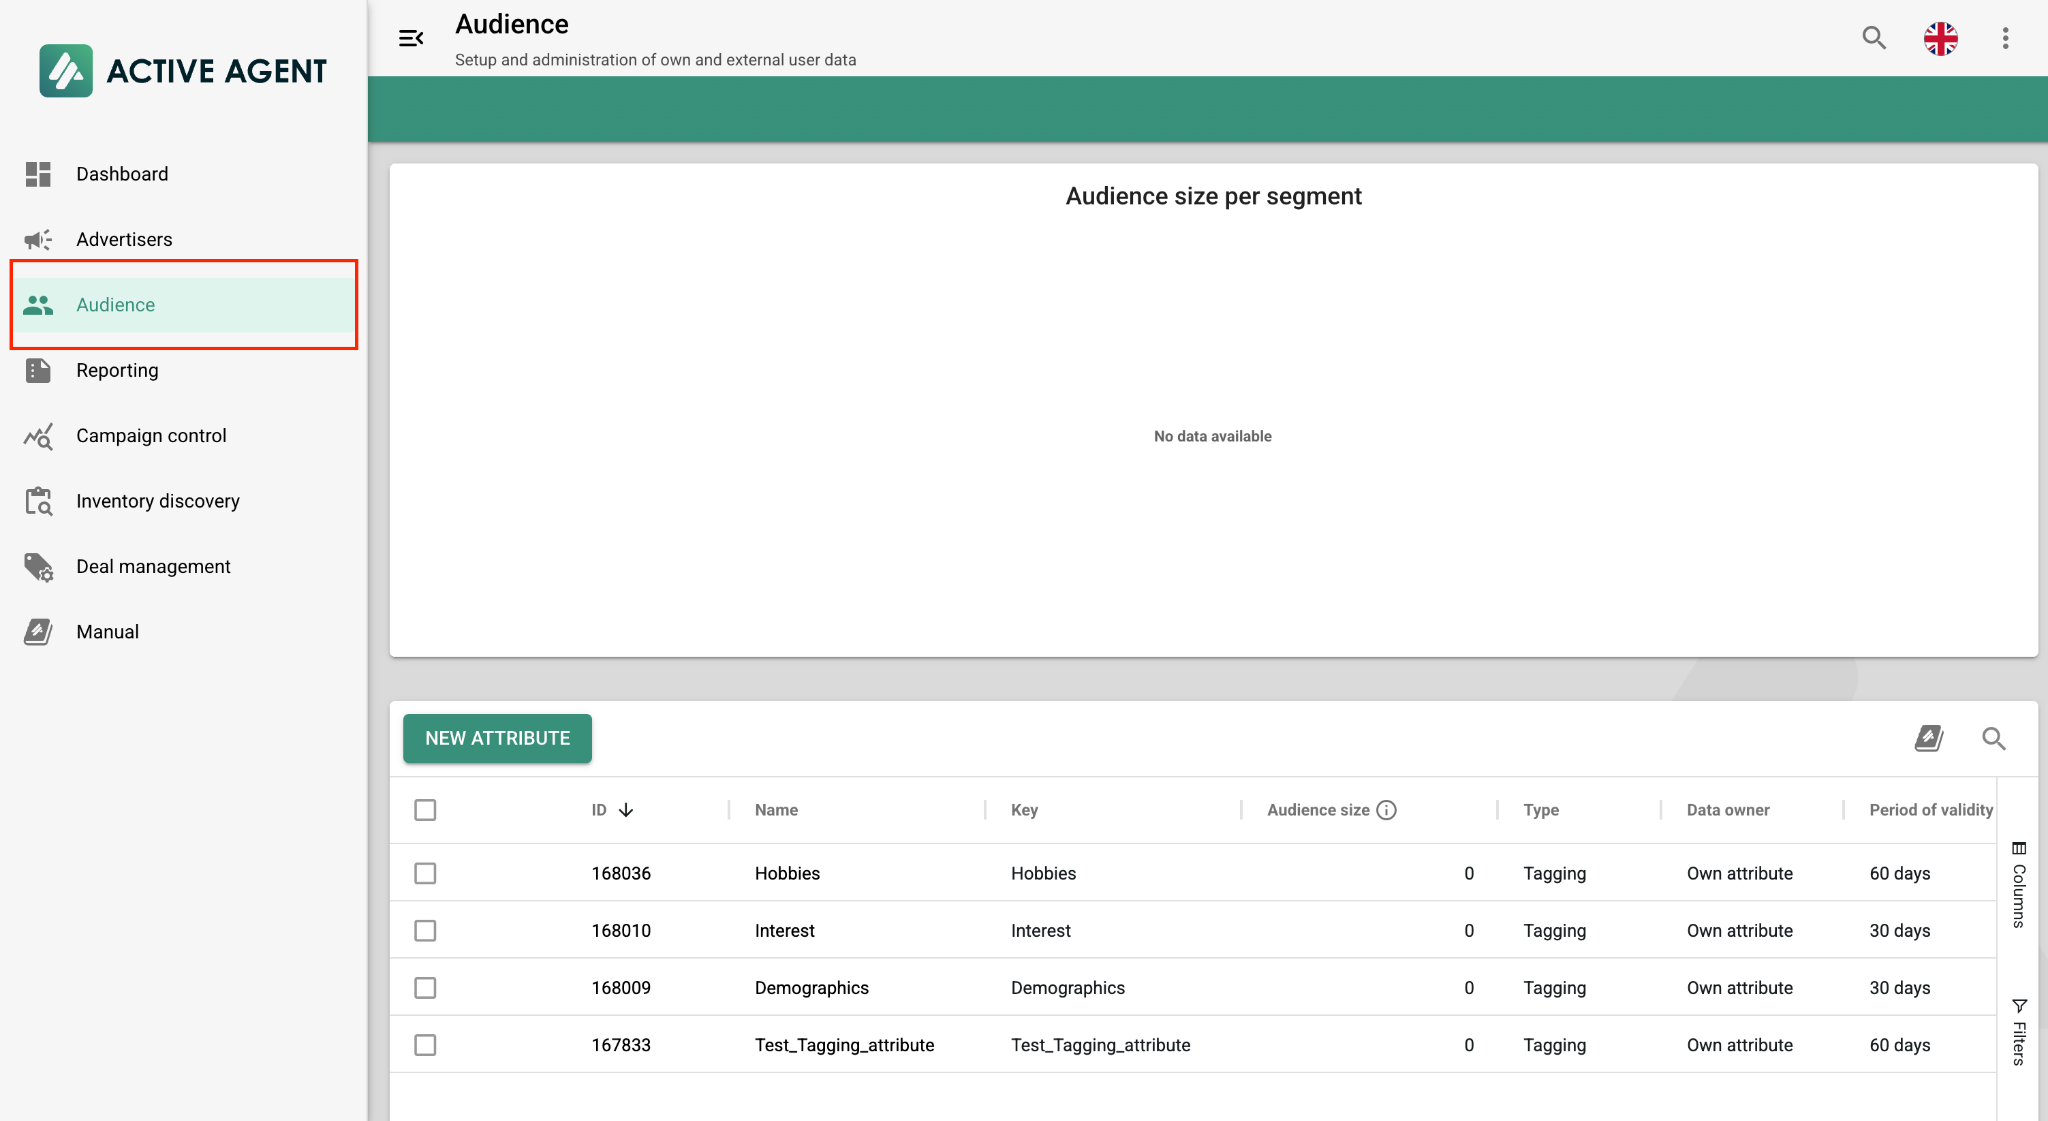 Click on the **New Attribute** button.
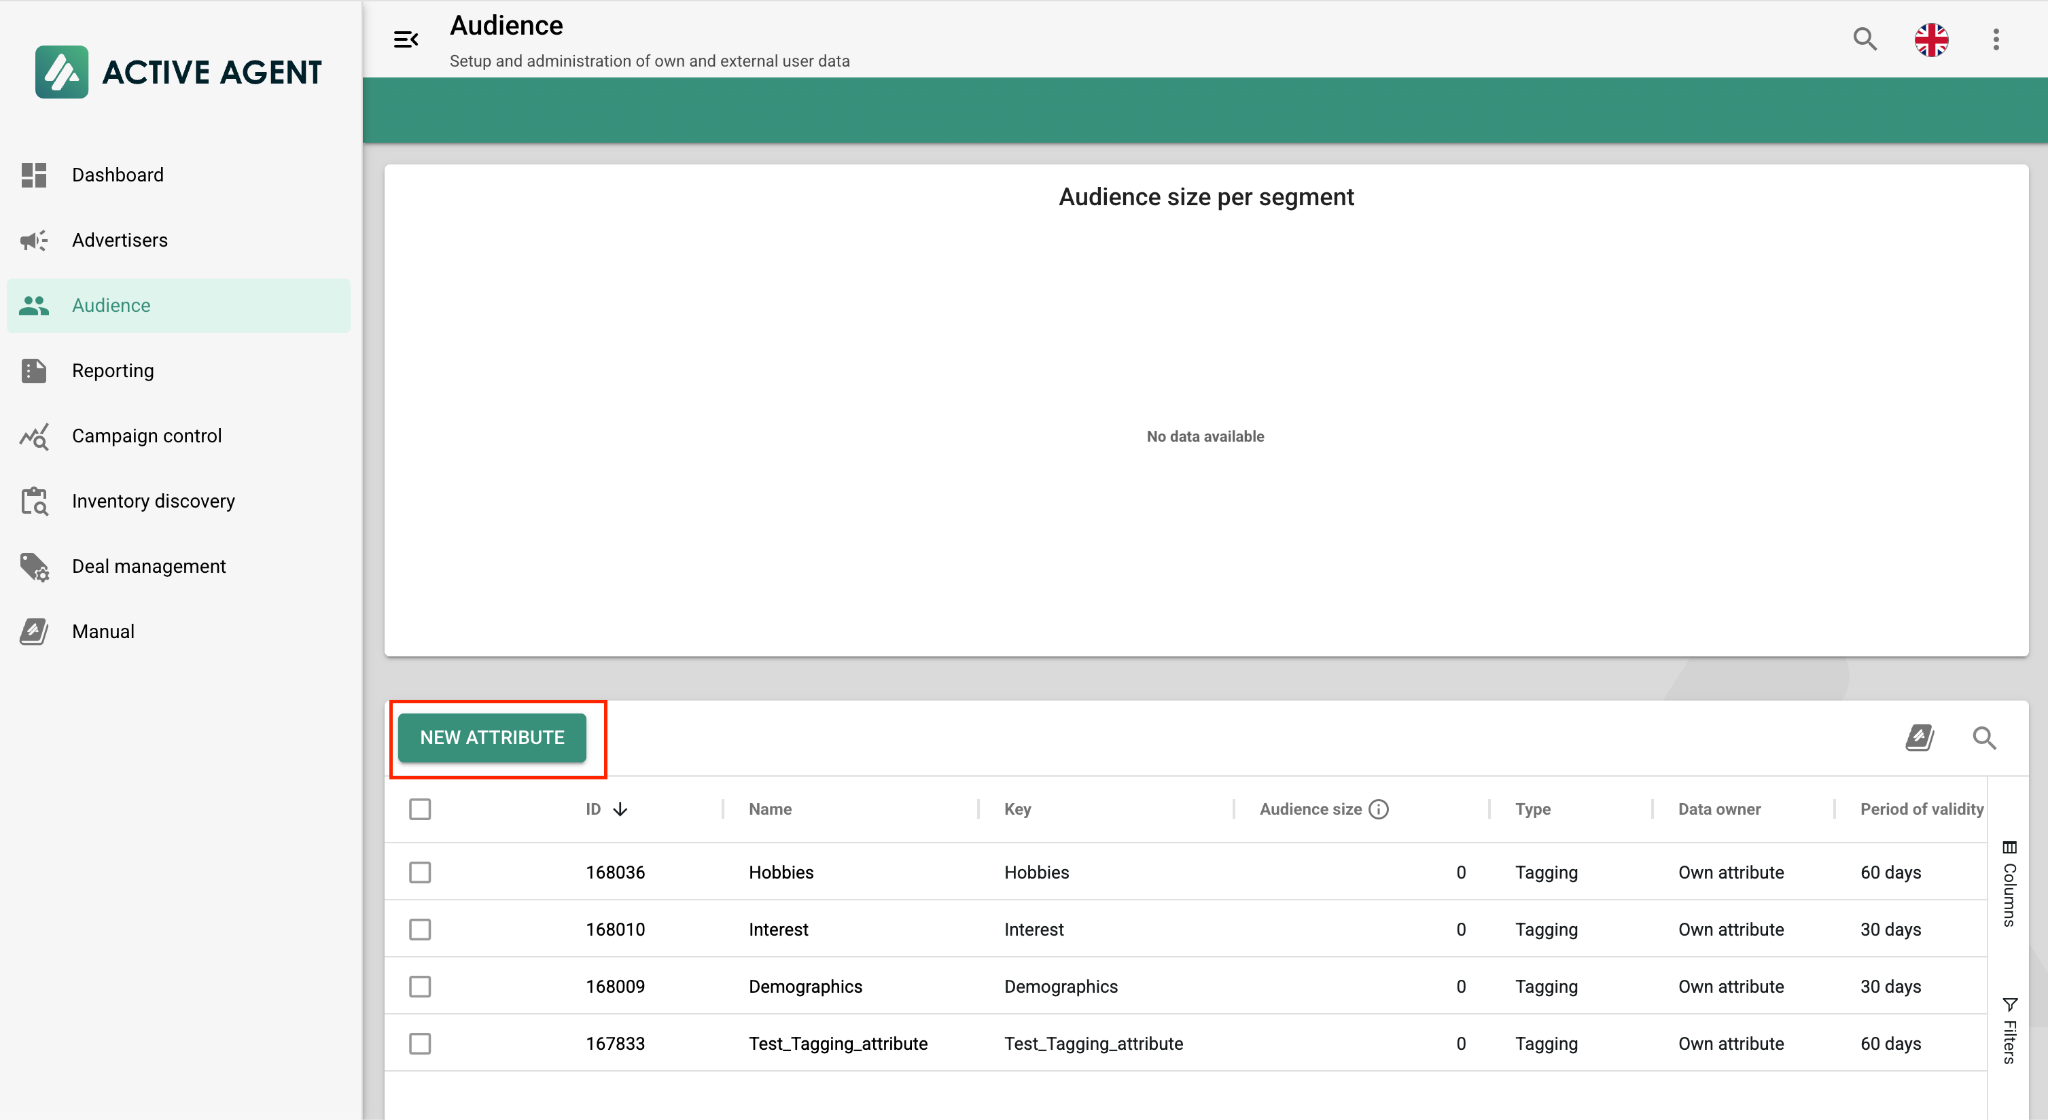 **Configure** the new attribute:
a. **Type**: Select **Tagging**.
b. **Name & Key**: Enter the desired name and key for the segment.
c. **Period of Validity**: Specify the duration in **days**.
d. Click **Save**.
**Configure** the new attribute:
a. **Type**: Select **Tagging**.
b. **Name & Key**: Enter the desired name and key for the segment.
c. **Period of Validity**: Specify the duration in **days**.
d. Click **Save**.
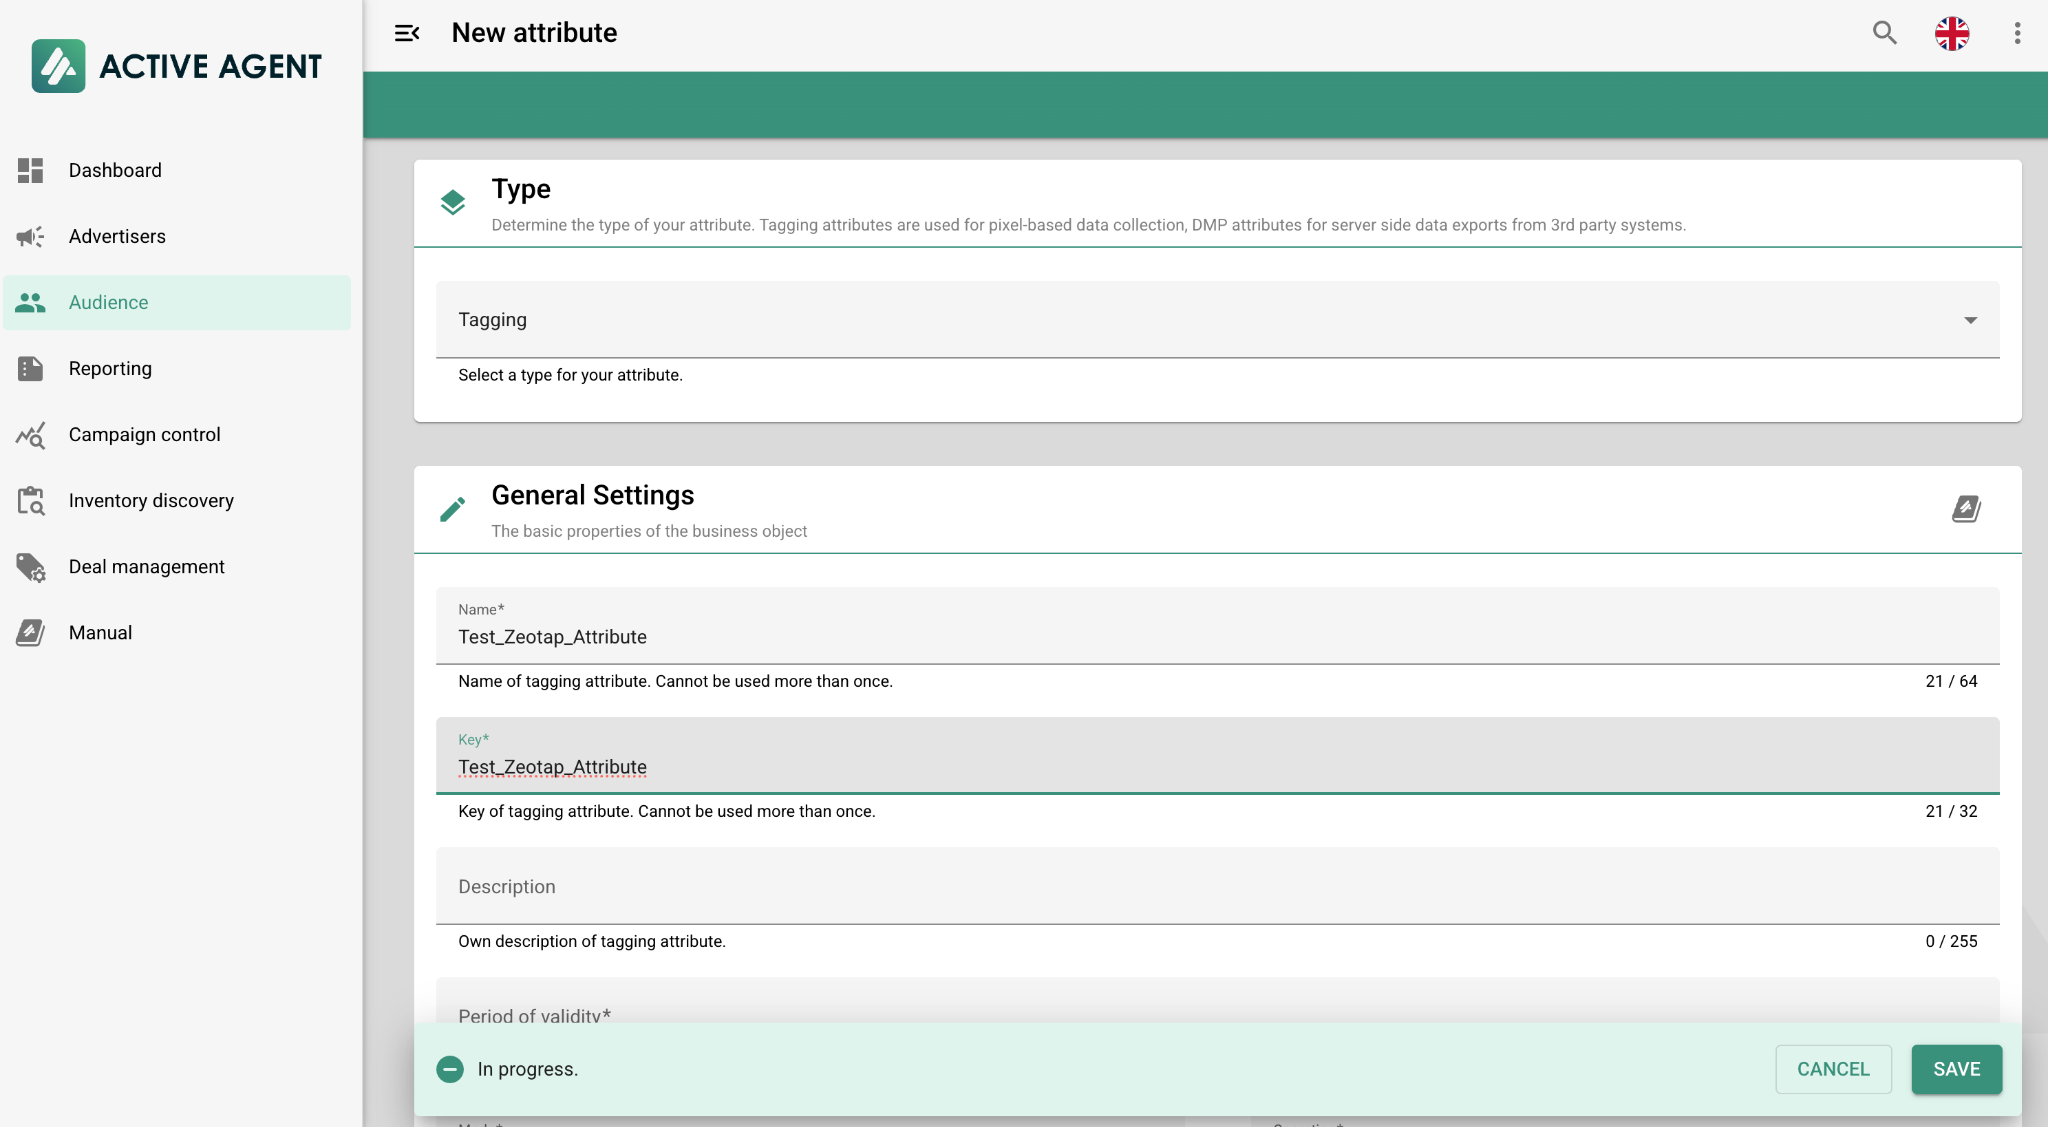 The new attribute will now be available under **Audiences**.
Go to **Segments** and click on the **New Segment** button.
The new attribute will now be available under **Audiences**.
Go to **Segments** and click on the **New Segment** button.
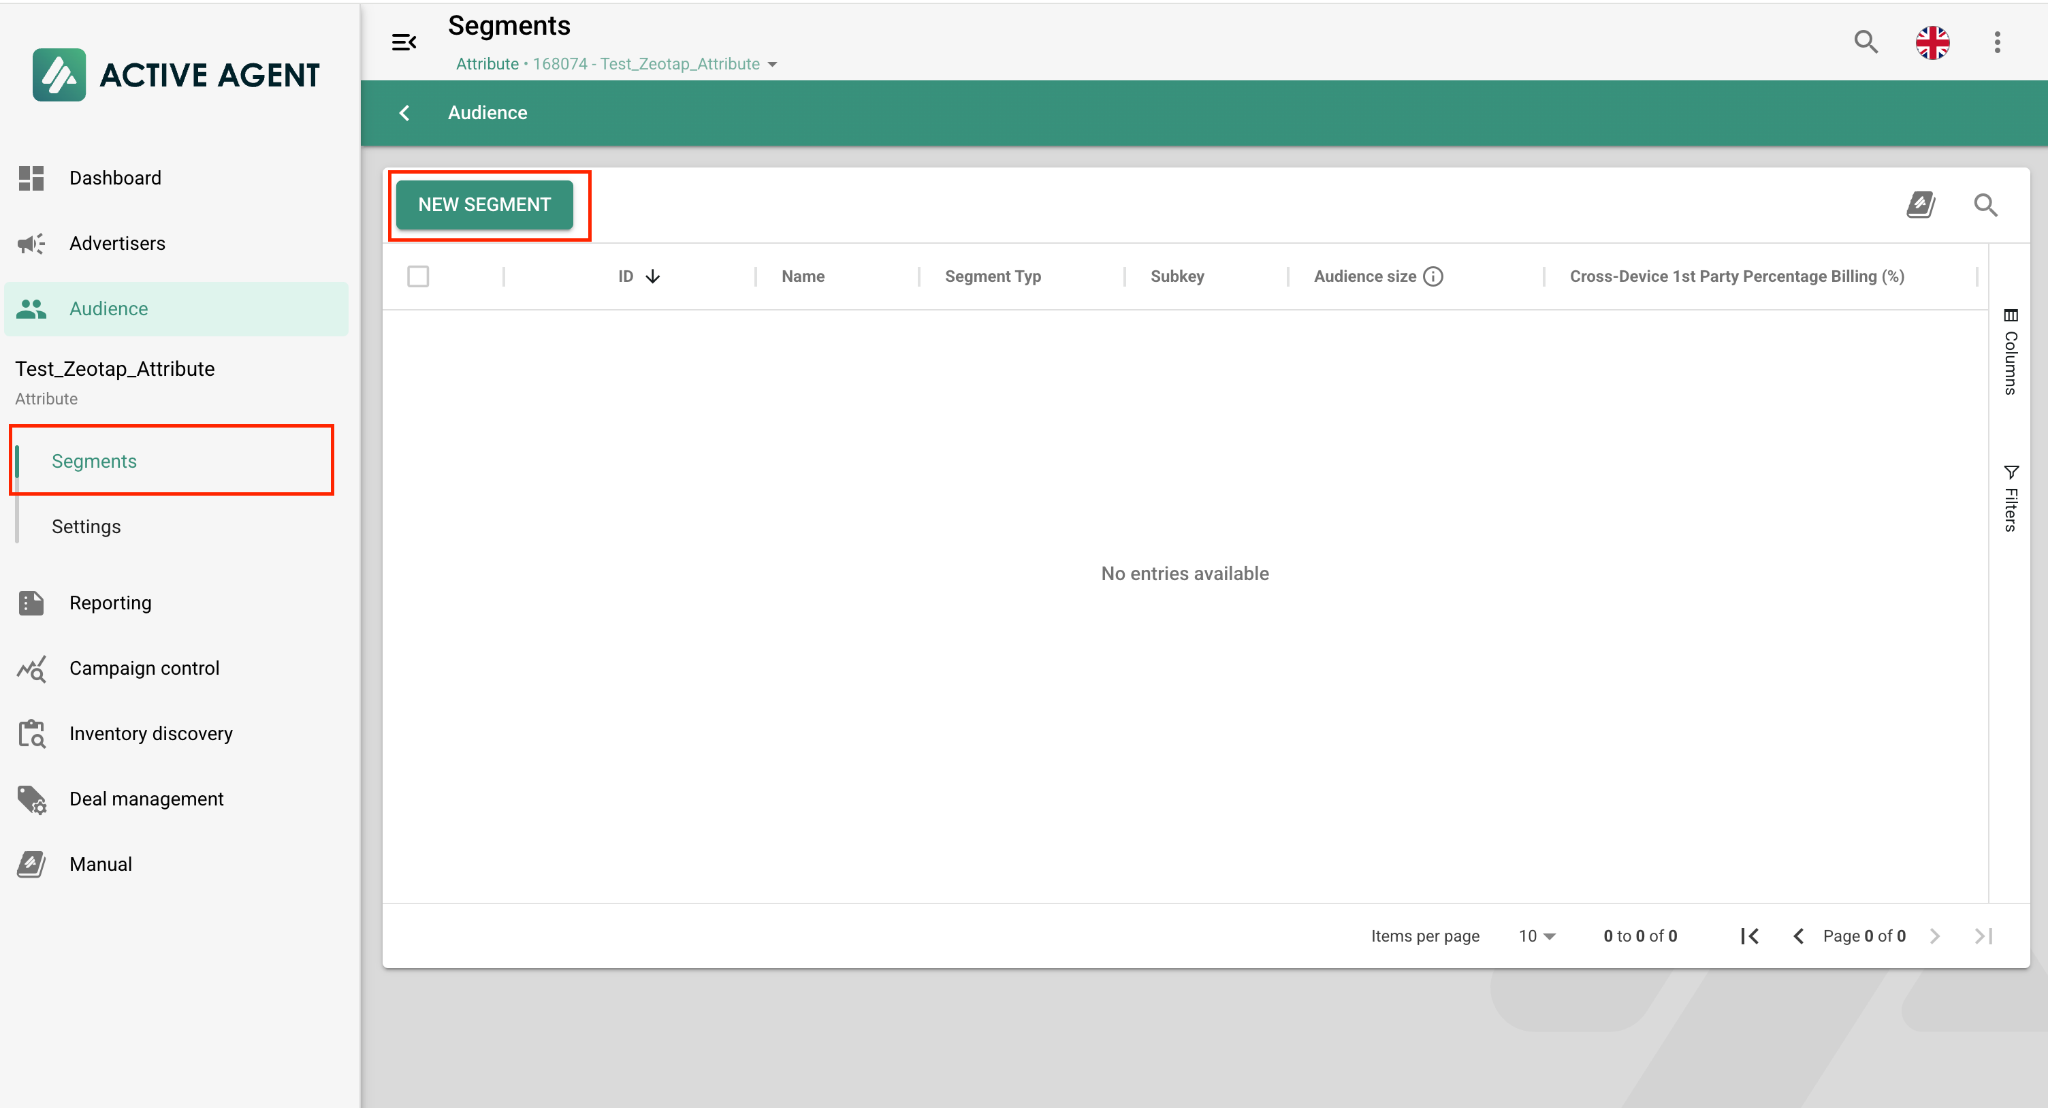 Configure the **segment**:
a. **Type**: Select **Default Segment.**
b. **Name & Subkey**: Enter the desired name and subkey for the segment.
c. Click **Save**.
**Note**:
The value entered for **Subkey** must be mapped to the **Segment field** on the **right-hand side (RHS)** of the **mapping screen in Zeotap.**
Configure the **segment**:
a. **Type**: Select **Default Segment.**
b. **Name & Subkey**: Enter the desired name and subkey for the segment.
c. Click **Save**.
**Note**:
The value entered for **Subkey** must be mapped to the **Segment field** on the **right-hand side (RHS)** of the **mapping screen in Zeotap.**
 ## Create a Destination for Yieldlabs
Once you have obtained the prerequisites mentioned in the above section, perform the following steps to create a Destination for Yieldlabs:
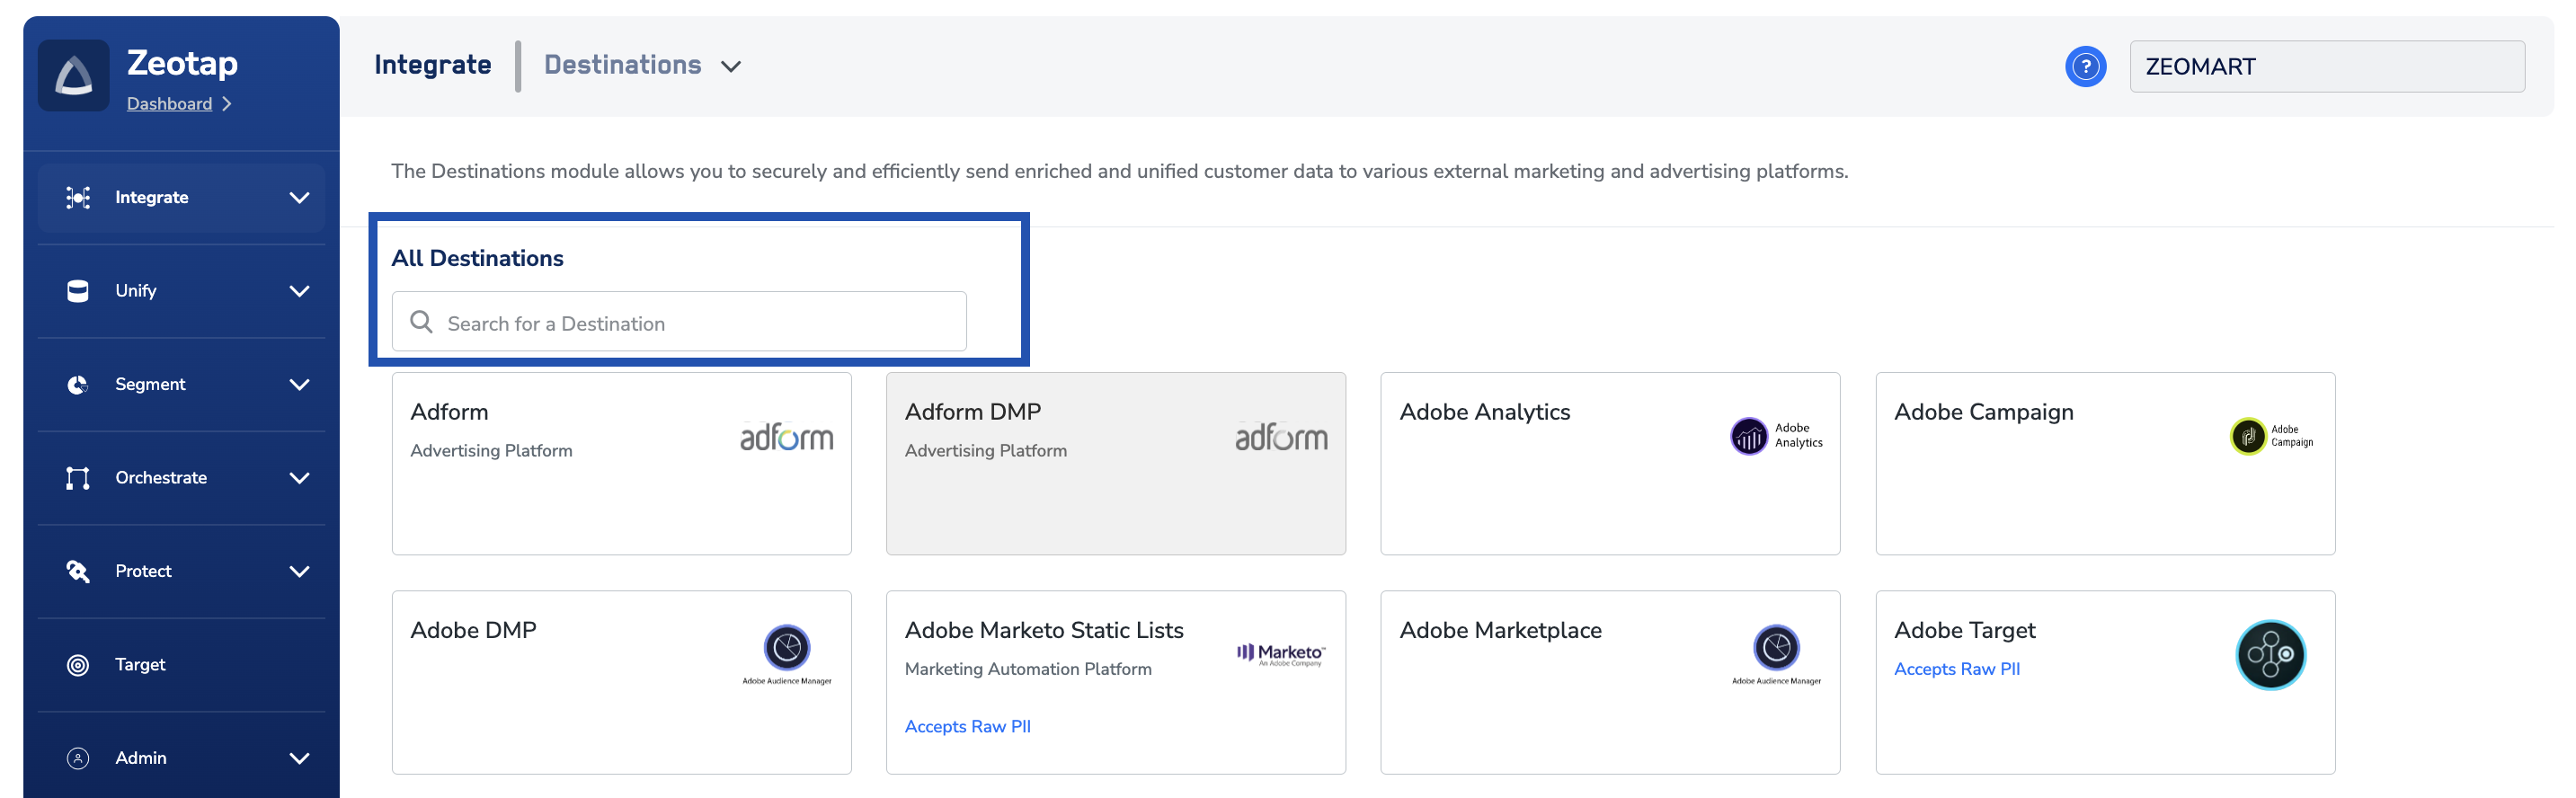
Log into the Zeotap CDP App and go to the **DESTINATIONS** application.
Click **+ Create Destination.**
## Create a Destination for Yieldlabs
Once you have obtained the prerequisites mentioned in the above section, perform the following steps to create a Destination for Yieldlabs:
Log into the Zeotap CDP App and go to the **DESTINATIONS** application.
Click **+ Create Destination.**
 Under **All Destinations**, search for **YieldLabs.**
 Click **Yieldlabs.** A screen appears displaying details about the particular destination towards the left. On the right-hand side of the screen find a list of fields that are required for the integration to be established. Enter the required details as mentioned in the following steps:
a. Enter a name for the Destination.
b. Enter the **Adition Network ID**.
Click **Yieldlabs.** A screen appears displaying details about the particular destination towards the left. On the right-hand side of the screen find a list of fields that are required for the integration to be established. Enter the required details as mentioned in the following steps:
a. Enter a name for the Destination.
b. Enter the **Adition Network ID**.
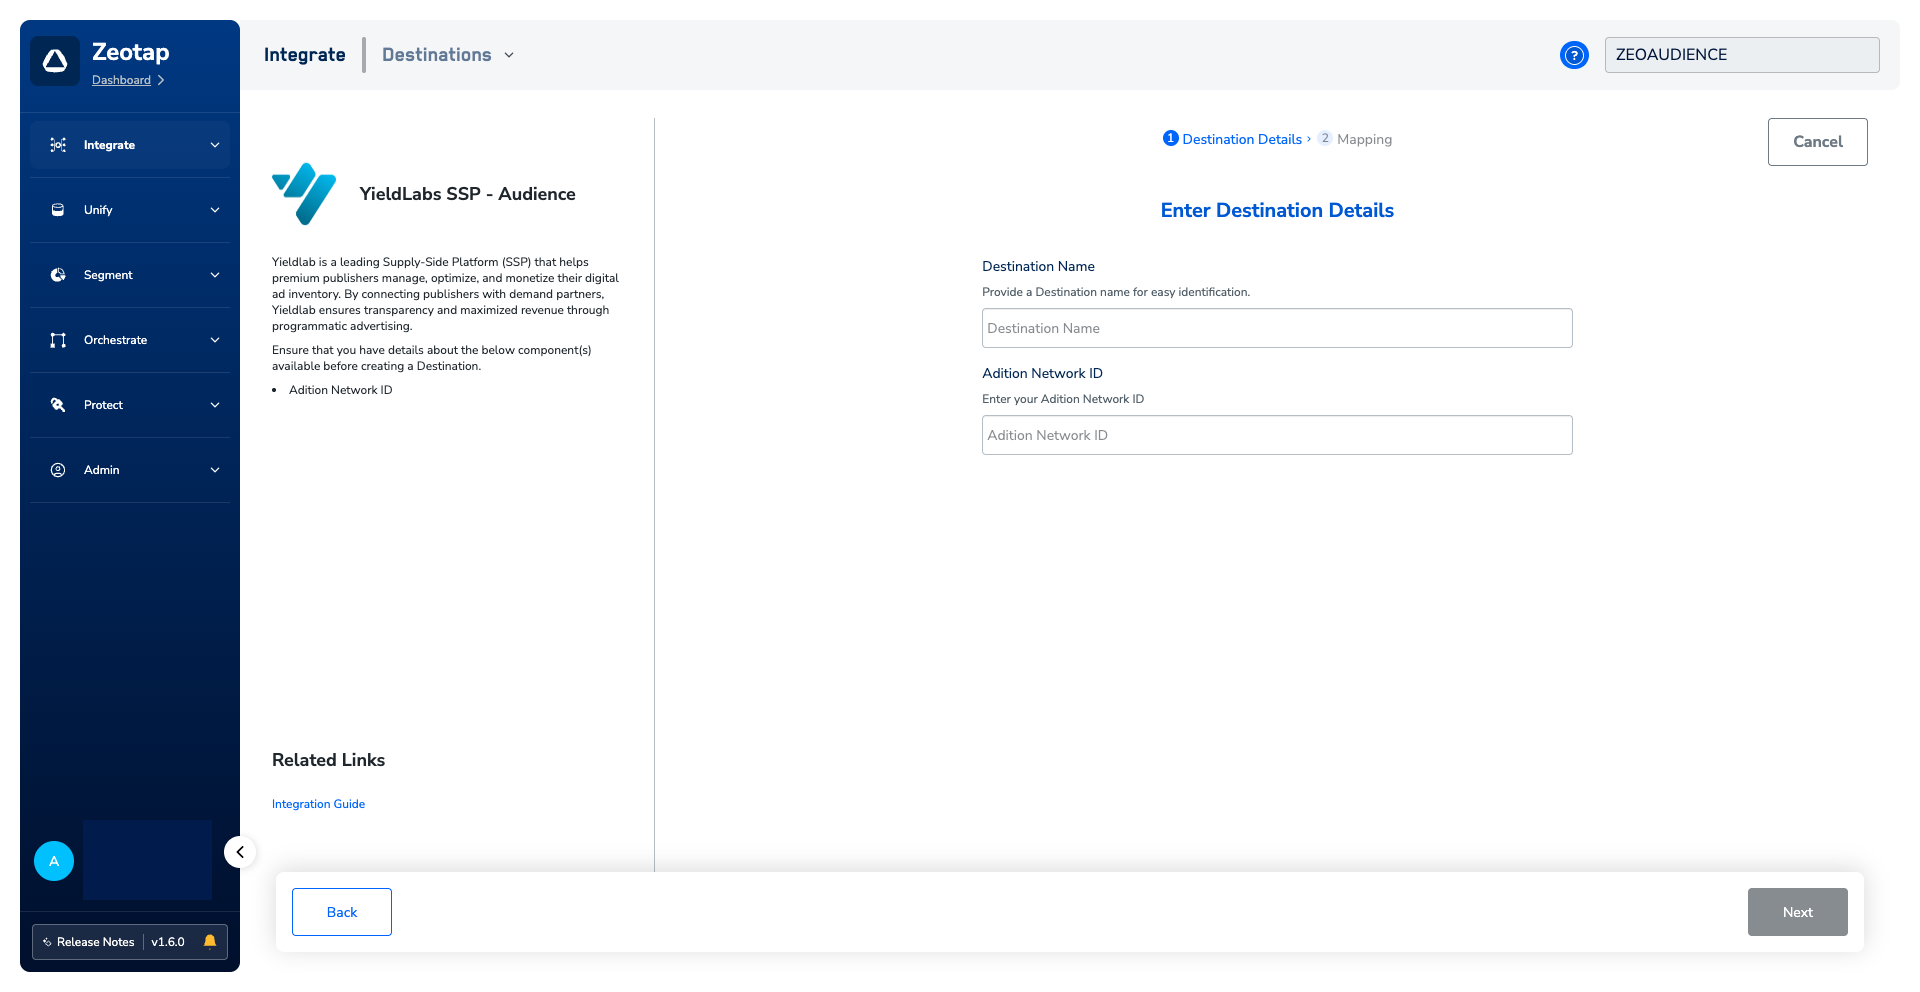 c. Review all the values entered above and then click **Next** to proceed to mapping.
On the **Action and Mapping** screen, select from **Send Identifiers and Attributes** as the action. Then, map the **Catalogue** and **Destination** fields accordingly
a. The following are the **fields** that needs to be mapped :
c. Review all the values entered above and then click **Next** to proceed to mapping.
On the **Action and Mapping** screen, select from **Send Identifiers and Attributes** as the action. Then, map the **Catalogue** and **Destination** fields accordingly
a. The following are the **fields** that needs to be mapped :
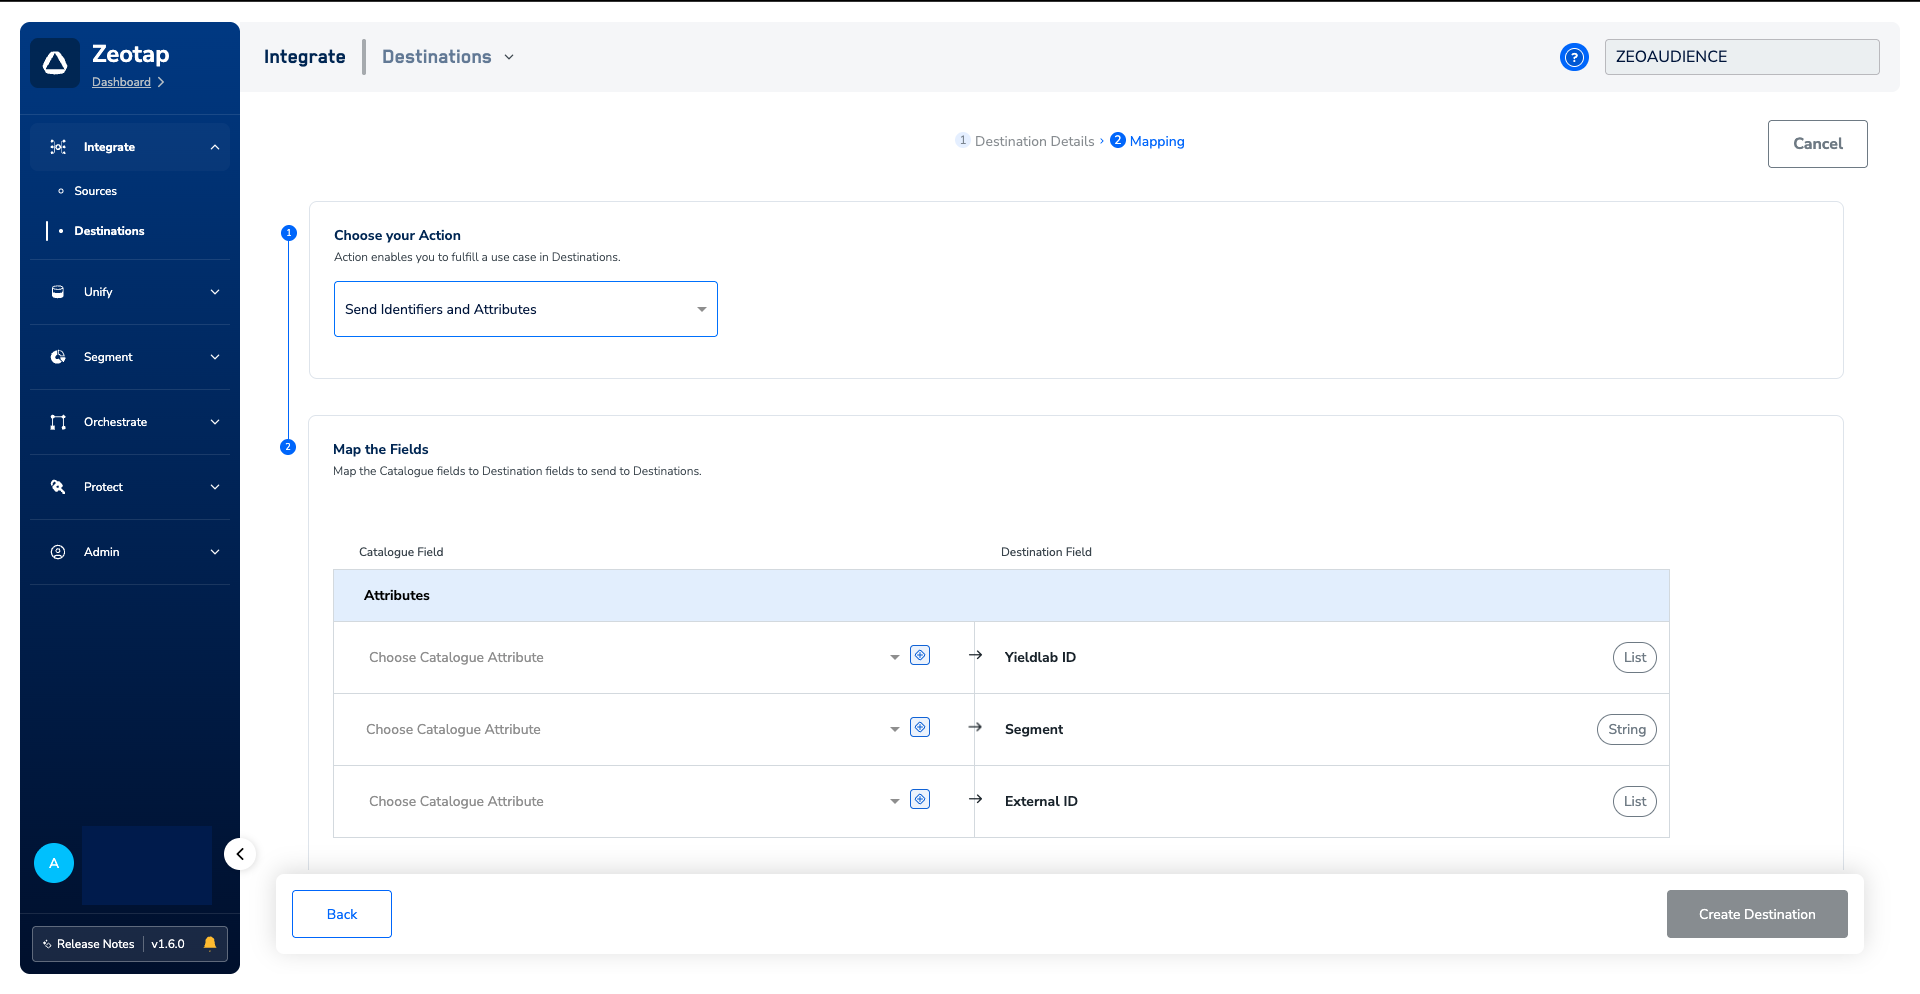 i. **Yieldlabs ID**
1. This can be MAID or Yieldlab Cookie
ii. **Segment**
1. You would need to create a subkey within Active agent and enter the exact value of the subkey here.
2. Steps to create the Subkey in Active agent is outlined in the Prerequisites section.
iii. **External ID**
1. You can send ID5 or any other ID's in this field. Reach out to the Yieldlabs POC to get a list of all the ID's that are supported by Yieldlabs.
Once the mapping is complete, click **Create Destination**. The created Destination gets listed in the **Audiences** application, which can be linked to an audience (segment).
## Link an Audience to the Yieldlabs Destination
For information about how to link an audience to the created Destination in the **Audiences** application, refer [here](/articles/integrate-customer/link-an-audience-to-the-destination).
**Note:**
The terms *Audiences* and *Segments* are used interchangeably to refer to customercohorts belonging to a specific category. For example, an Audience or a segmentcan be a specific group of customers who are over 18 years of age and have performedan `addToCart` event within the last 30 days.
i. **Yieldlabs ID**
1. This can be MAID or Yieldlab Cookie
ii. **Segment**
1. You would need to create a subkey within Active agent and enter the exact value of the subkey here.
2. Steps to create the Subkey in Active agent is outlined in the Prerequisites section.
iii. **External ID**
1. You can send ID5 or any other ID's in this field. Reach out to the Yieldlabs POC to get a list of all the ID's that are supported by Yieldlabs.
Once the mapping is complete, click **Create Destination**. The created Destination gets listed in the **Audiences** application, which can be linked to an audience (segment).
## Link an Audience to the Yieldlabs Destination
For information about how to link an audience to the created Destination in the **Audiences** application, refer [here](/articles/integrate-customer/link-an-audience-to-the-destination).
**Note:**
The terms *Audiences* and *Segments* are used interchangeably to refer to customercohorts belonging to a specific category. For example, an Audience or a segmentcan be a specific group of customers who are over 18 years of age and have performedan `addToCart` event within the last 30 days.