> ## Documentation Index
> Fetch the complete documentation index at: https://docs.zeotap.com/llms.txt
> Use this file to discover all available pages before exploring further.
# Talon One
## Overview
Talon.One is a leading API-first promotion and loyalty engine, empowering businesses to design, manage, and scale highly personalized incentive campaigns. It allows marketers to build complex rules without coding, triggering dynamic discounts, coupons, loyalty points, and gamified rewards in real-time based on any customer data. Integrating seamlessly with existing tech stacks via its robust APIs, Talon.One helps drive customer acquisition, conversion, and retention across all channels (online, in-store, mobile). It provides granular control and analytics to optimize promotional strategies for improved ROI. This integration with Zeotap enables the user to send custom events data to Talon One.
## Pre requisites
1. You must have an **active Talon.One Account** and Application
2. You must have **Talon.One Base URL**
a. Eg : [https://retailstore.talon.one](https://retailstore.talon.one)
3. **Integration API Key**
a. You find the **API key in Talon.One** by navigating: **Application > Settings > Integration API Keys > Create API Key.**
4. Defined **[Custom Events and Attributes](https://docs.talon.one/docs/dev/concepts/entities/events#creating-a-custom-event)**
## Creating a Destination
Log into the **Zeotap CDP** App and go to the **DESTINATIONS** application.
Click + **Create Destination**.
Under All Destinations, search for **Talon.One : Trigger Custom Events**.
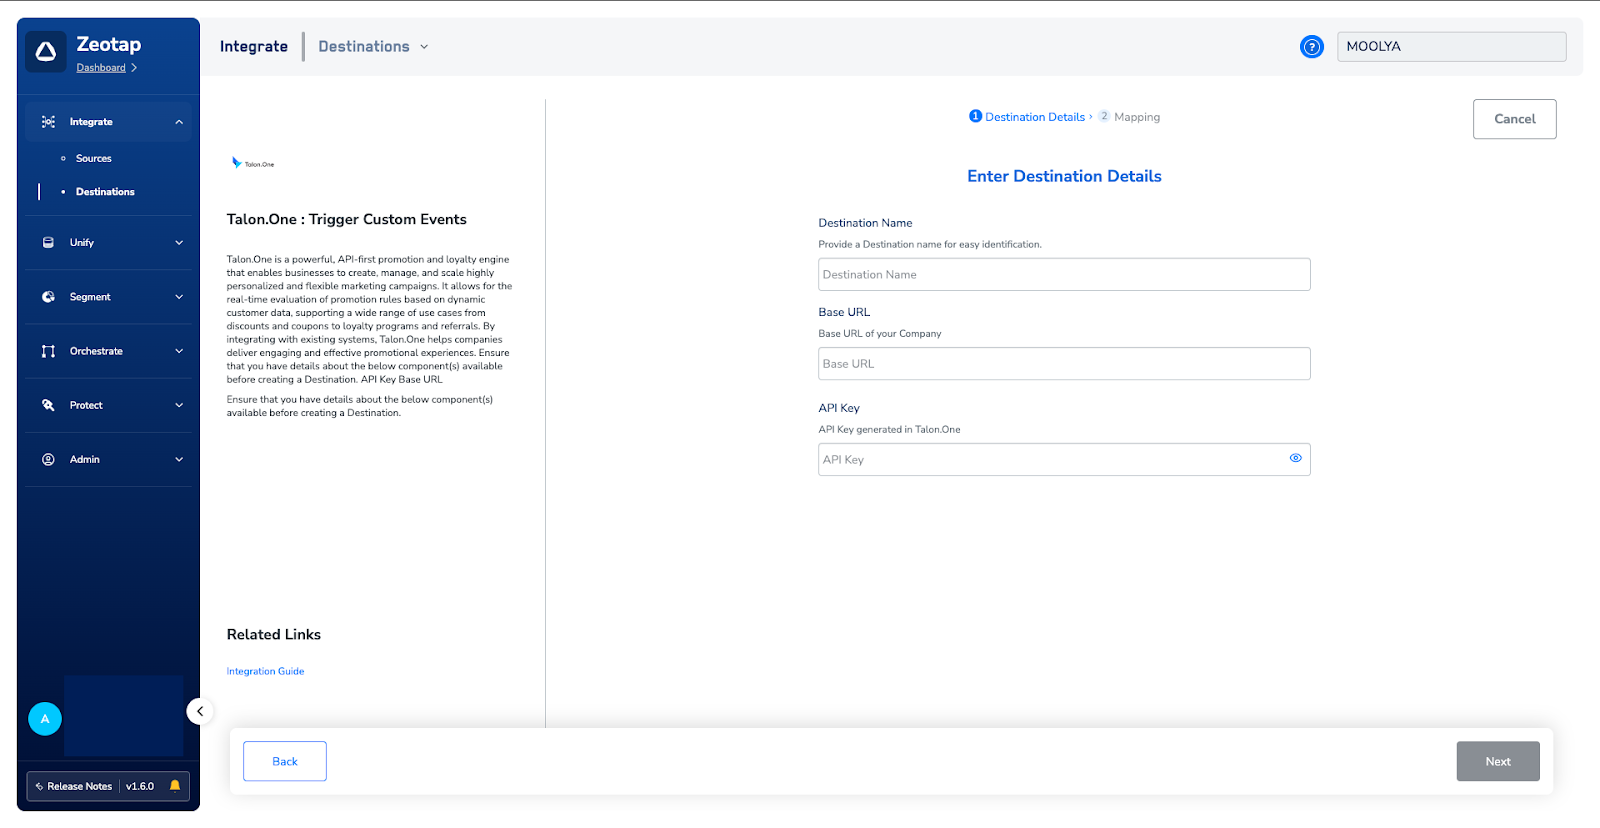
Click on **Talon One** . A screen appears displaying details about the particular destination towards the left. On the right-hand side of the screen find a list of fields that are required for the integration to be established. Enter the required details as mentioned in the following steps:
a. Enter a name for the Destination.
b. Enter the **Base URL**.
c. Enter the **API Key**.
 In the new screen that appears, choose the appropriate Action and mapping as explained below.
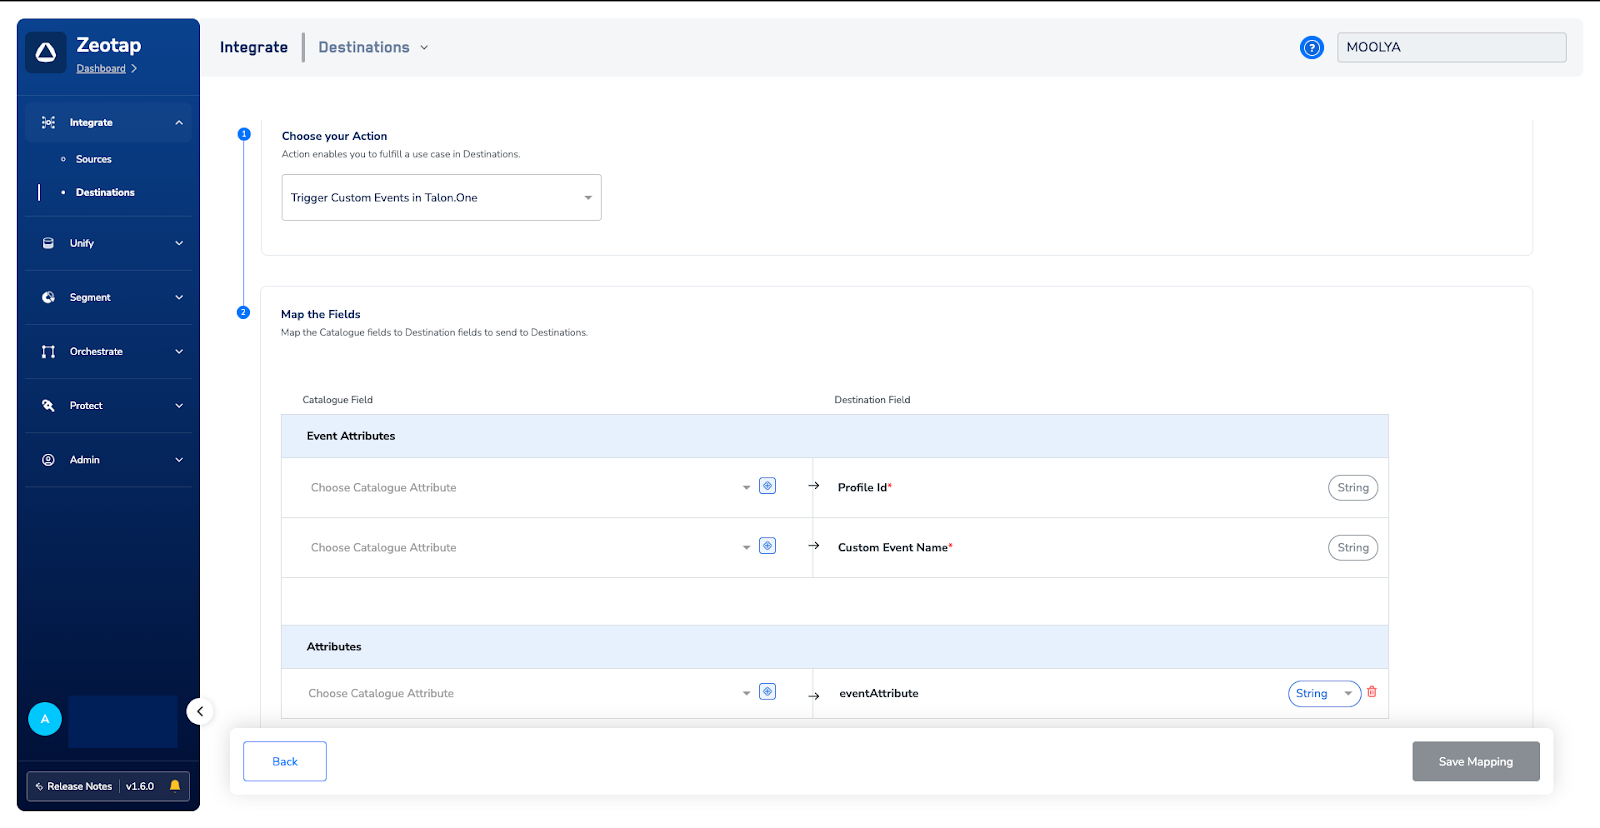
a. Choose the desired action under **Choose your Action** and then choose the corresponding identifiers under Map the Fields. By default, the Output Identifiers that are accepted by the platform, Profile ID is displayed. However, you can edit, add, or remove an identifier from the list.
In the new screen that appears, choose the appropriate Action and mapping as explained below.
a. Choose the desired action under **Choose your Action** and then choose the corresponding identifiers under Map the Fields. By default, the Output Identifiers that are accepted by the platform, Profile ID is displayed. However, you can edit, add, or remove an identifier from the list.
b. Mandatory Fields
i. **Profile ID**
ii. **Custom Event Name**
c. Click **Save Mapping**.
 ## Activate the Destination on Journeys
After creating a destination, next, you need to link it in the Send to Destination node within the workflow, as explained below.
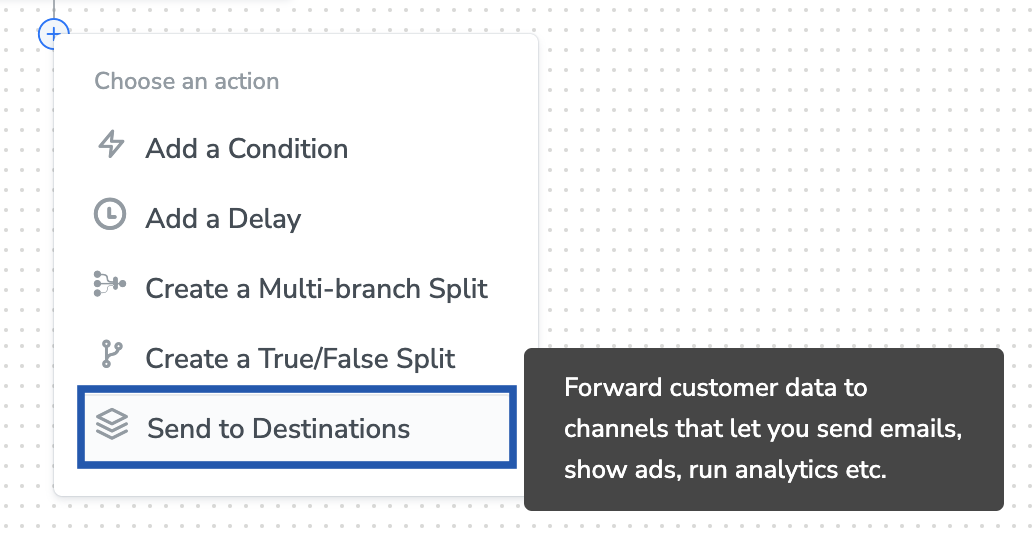
In the workflow, click + and choose **Send to Destinations**.
## Activate the Destination on Journeys
After creating a destination, next, you need to link it in the Send to Destination node within the workflow, as explained below.
In the workflow, click + and choose **Send to Destinations**.
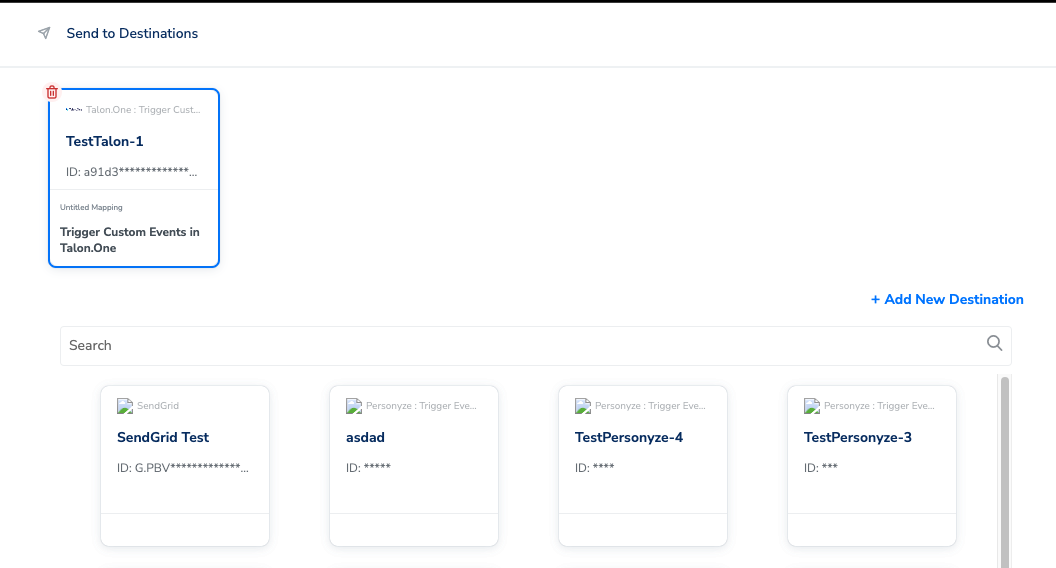
 Choose the **destination from the list** of available destinations by using the search feature.
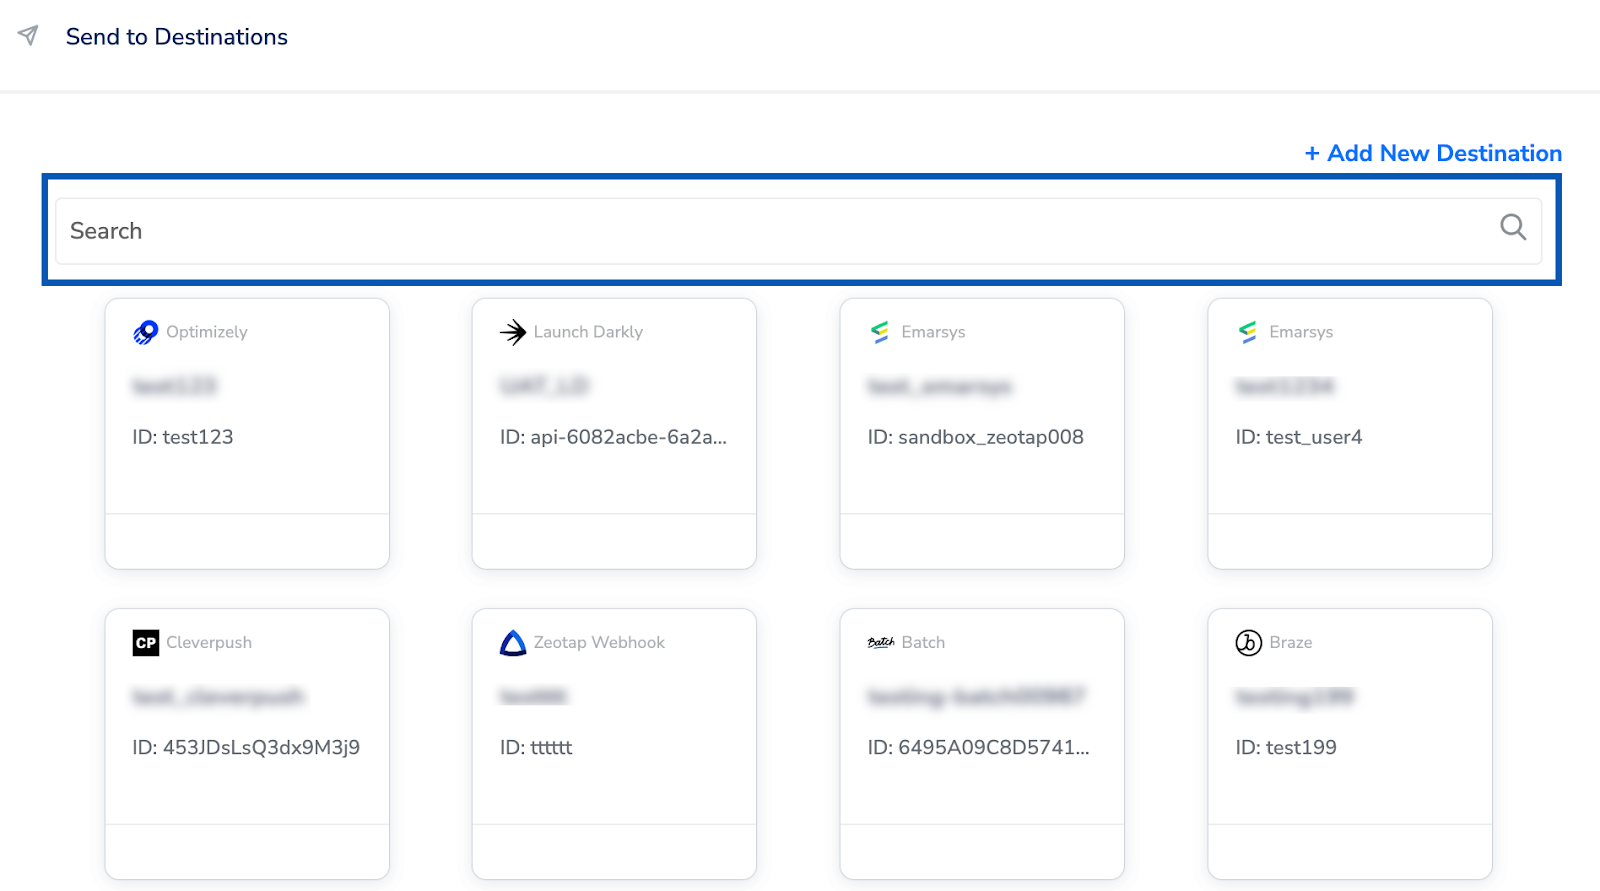 Under the **Destination Details** **tab,** the **Access Token and Ad Account ID** fields are automatically populated based on the value that you have entered while creating the destination.
Under the **Destination Settings tab**, **choose the Action** and **mapping** as per your requirement.
Upon clicking **Save Destination**. The destination is attached as shown in the image below.
Under the **Destination Details** **tab,** the **Access Token and Ad Account ID** fields are automatically populated based on the value that you have entered while creating the destination.
Under the **Destination Settings tab**, **choose the Action** and **mapping** as per your requirement.
Upon clicking **Save Destination**. The destination is attached as shown in the image below.