> ## Documentation Index
> Fetch the complete documentation index at: https://docs.zeotap.com/llms.txt
> Use this file to discover all available pages before exploring further.
# SFMC Journey Builder
## Overview
Salesforce Marketing Cloud (SFMC) Journey Builder offers visibility into consumer interactions across various marketing channels, including email, mobile, social ads and more. By connecting these actions or conversations, you gain a deeper understanding of your customers, improve message building, design and automate campaigns, deliver a seamless customer experience, and secure customer loyalty.
Integrating with Zeotap enhances these capabilities by enabling marketers to base campaigns on real-time data sent from Zeotap.
## Supported Identifiers/Attributes
This integration allows you to send any identifiers of your choice and custom attributes.
## Prerequisites
Ensure that you have addressed the following prerequisites before starting the integration:
* You must create a data extension table in SFMC Journey Builder with the relevant fields. You can use this data extension as an entry source in Salesforce Marketing Cloud Journey Builder. Note that you have Admin access to SFMC Journey Builder. For more information about how to create a data extension table, refer [here](/articles/integrate-customer/appendix-for-sfmc-journey-builder#create-a-data-extension-table).
* You must create package in SFMC Journey Builder and provide certain API permissions. For more information about how to create a package, refer [here](/articles/integrate-customer/appendix-for-sfmc-journey-builder#create-a-package).
* Obtain the event definition key associated with the journey created in Journey Builder to which you need to push data from Zeotap CDP.
* Ensure that you validate and save the journey in Journey Builder before testing it. Validation confirms that all elements of the journey design are complete and ready for testing. Note that Journey Testing is unavailable for Single Send journeys.
## Components of Salesforce Marketing Cloud - Journey Builder
Ensure that you have the details about the below components of Salesforce Marketing Cloud account before starting this integration.
### Client ID, Client Secret and SFMC Subdomain
Perform the following steps to obtain the Client ID, Client Secret and Domain details from your Salesforce Marketing Cloud account:
Log into your SMFC account and navigate to **Journey Builder.**
Under **Summary** of the installed package, you can find the following components that are essential for creating a Destination:
a. **Client Id** - Marked as **1** in the below image
b. **Client Secret** - Marked as **2** in the below image
**Sub Domain** - Your subdomain is a 28-character string that starts with the letters “mc” in any of your base URIs. For example, in the base URI [https://mc6x3p75x6j07021qz11gk9xg8cq.rest.marketingcloudapis.com](https://mc6x3p75x6j07021qz11gk9xg8cq.rest.marketingcloudapis.com) the subdomain is . You can find it marked as **3** in the below image.
 ### Account ID
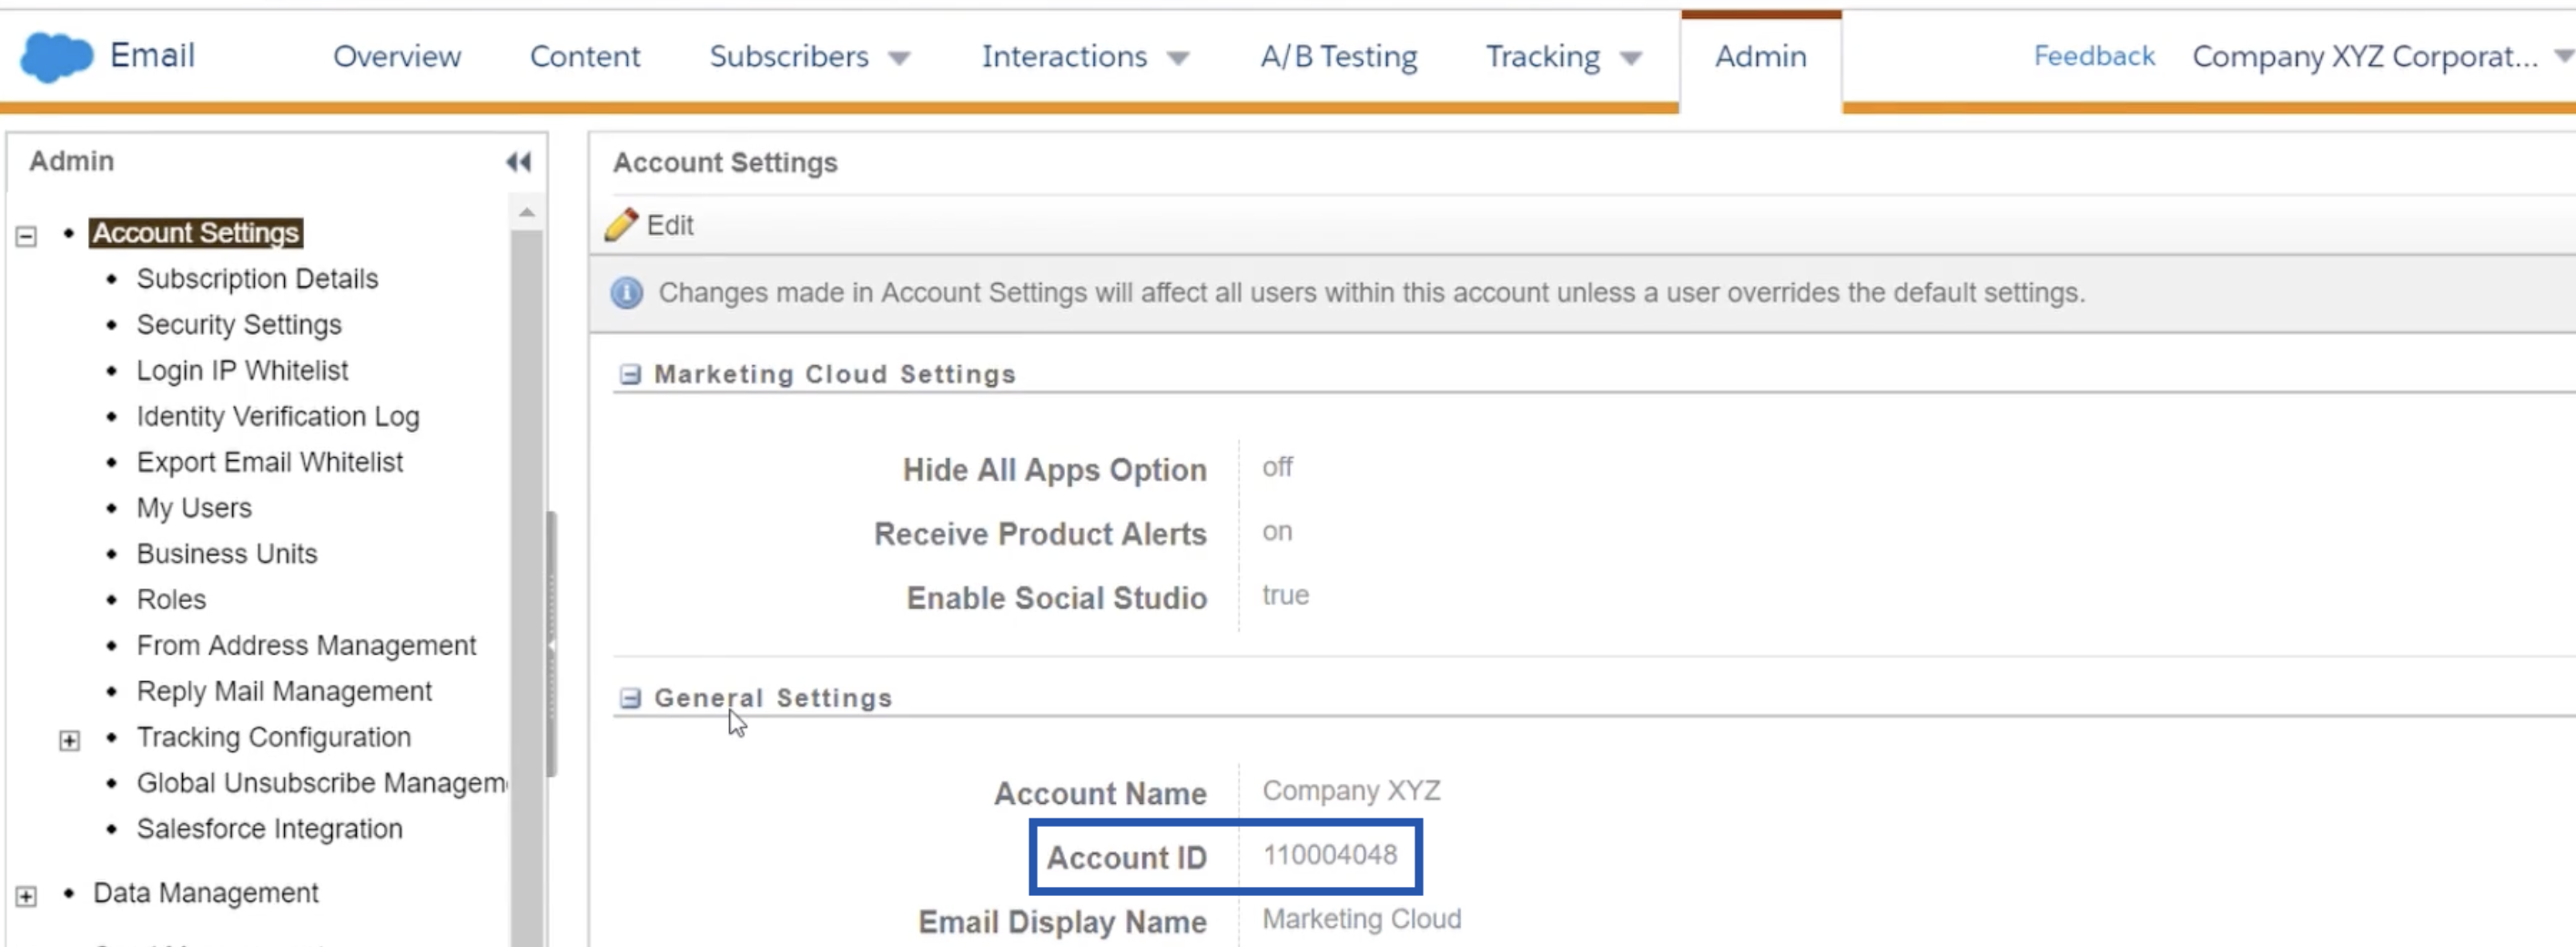
This is the member ID (MID) of your Salesforce Marketing Cloud account. You can obtain this ID in the following two ways:
#### Option 1
Log into SFMC.
Hover over your account name in the top right corner.
Copy the MID value. This is your `account_id`.
### Account ID
This is the member ID (MID) of your Salesforce Marketing Cloud account. You can obtain this ID in the following two ways:
#### Option 1
Log into SFMC.
Hover over your account name in the top right corner.
Copy the MID value. This is your `account_id`.
 #### Option 2
Log into SFMC and navigate to **Email Studio.**
In the top navigation bar, click the **Admin** tab.
Locate your **Account ID** under the **General Settings** section.
#### Option 2
Log into SFMC and navigate to **Email Studio.**
In the top navigation bar, click the **Admin** tab.
Locate your **Account ID** under the **General Settings** section.
 ### Event Definition Key
This is a unique identifier assigned to a journey created in Journey Builder. This key helps determine which journey in Journey Builder to use when pushing data from Zeotap CDP. Perform the following steps to obtain the Event Definition Key:
Log in to SFMC and navigate to **Journey Builder**.
In the top panel, click **Events** > **Entry Source**.
Select any listed entry source.
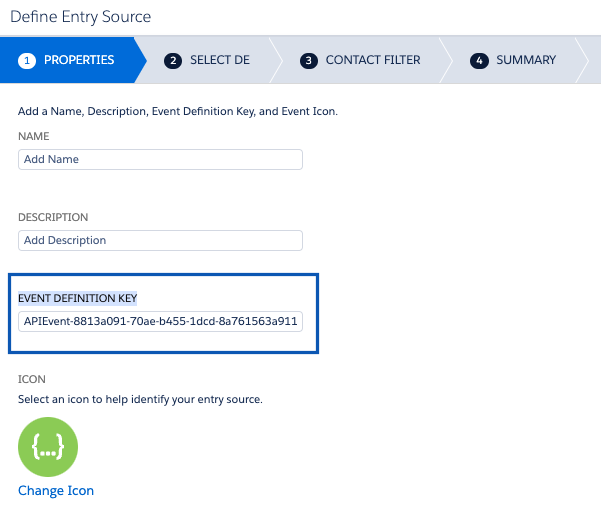
Find the event definition key under the **Properties** tab as shown in the image below.
### Event Definition Key
This is a unique identifier assigned to a journey created in Journey Builder. This key helps determine which journey in Journey Builder to use when pushing data from Zeotap CDP. Perform the following steps to obtain the Event Definition Key:
Log in to SFMC and navigate to **Journey Builder**.
In the top panel, click **Events** > **Entry Source**.
Select any listed entry source.
Find the event definition key under the **Properties** tab as shown in the image below.
 ### Contact Key
This is a unique ID used to differentiate records in a data extension. This is typically the primary key of the data extension but is not always the case.
## Destination Setup
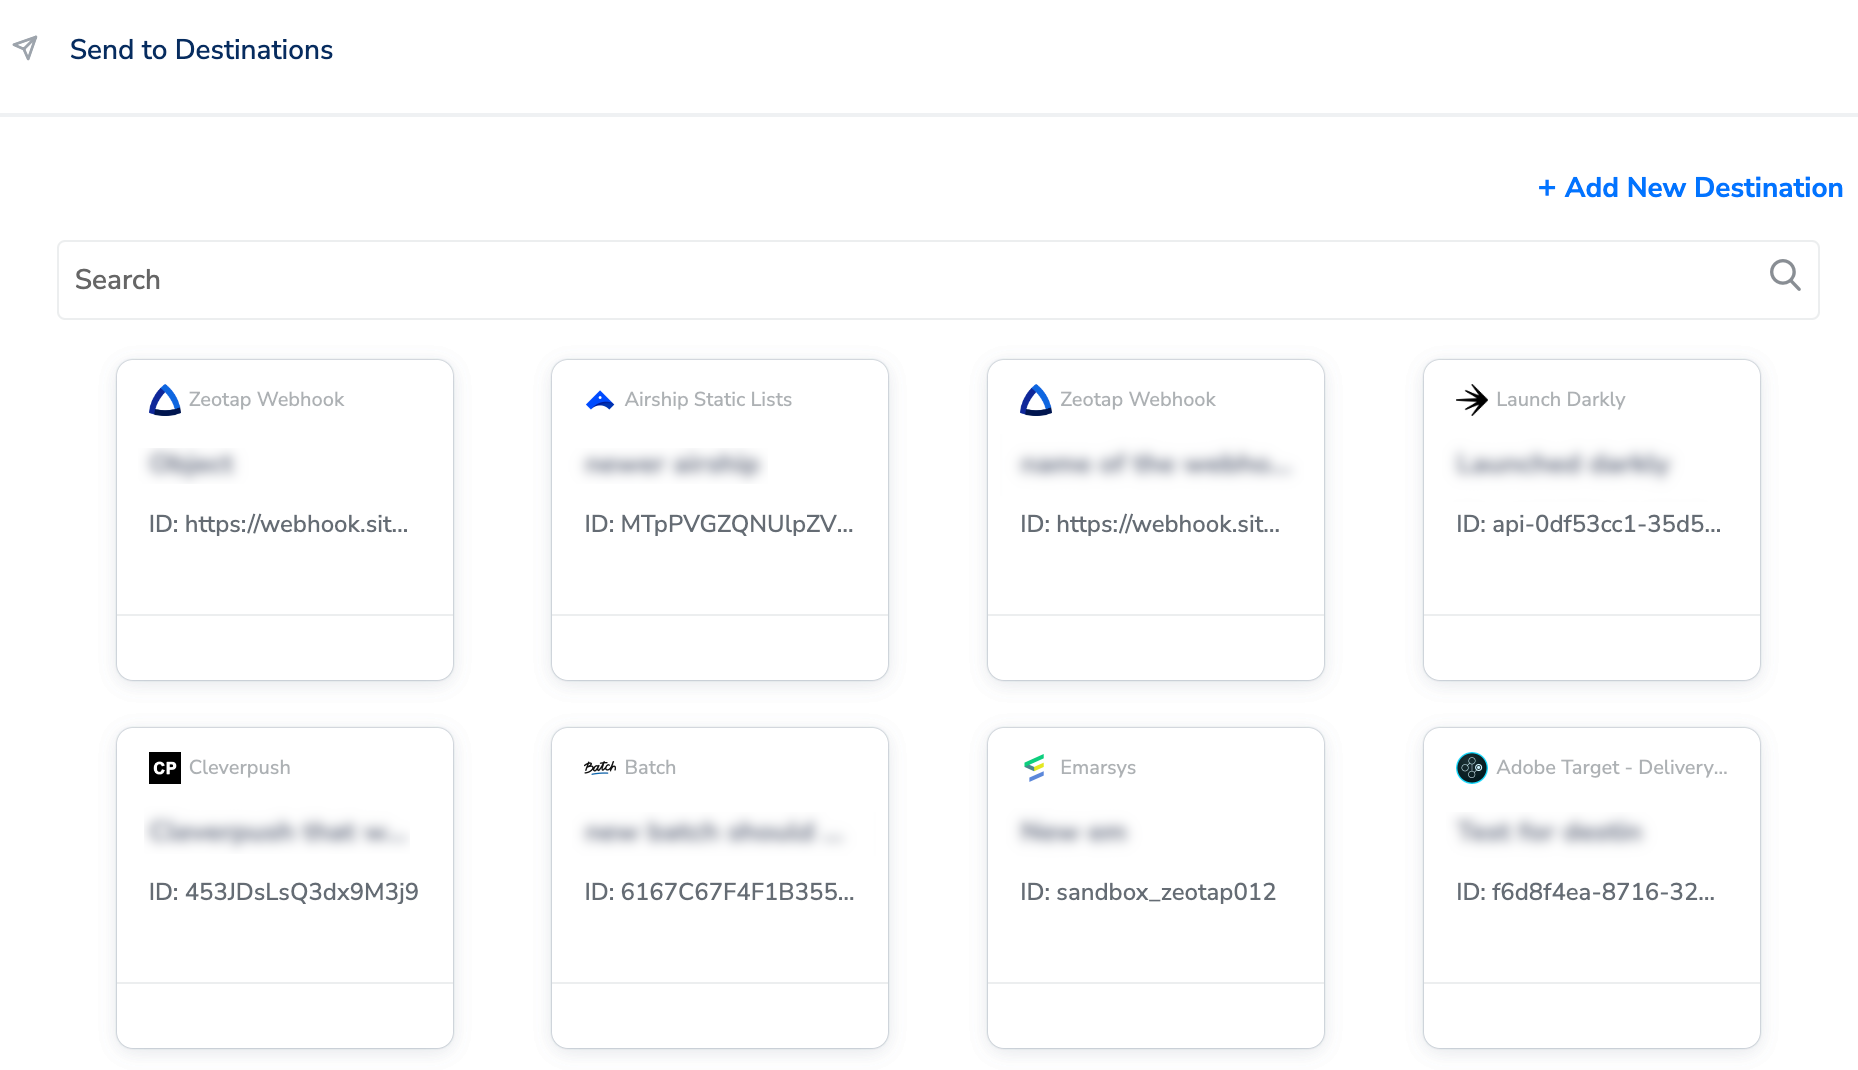
After you have applied filters or added conditions for your users in Journeys, you can activate them in SFMC Journey Builder under **Send to Destinations.** A new window appears, where you can set up your destination. You can use an already existing destination from the list of available Destinations or create a new one by clicking **+ Add New Destination**.
### Contact Key
This is a unique ID used to differentiate records in a data extension. This is typically the primary key of the data extension but is not always the case.
## Destination Setup
After you have applied filters or added conditions for your users in Journeys, you can activate them in SFMC Journey Builder under **Send to Destinations.** A new window appears, where you can set up your destination. You can use an already existing destination from the list of available Destinations or create a new one by clicking **+ Add New Destination**.
 ### Add New Destination
Perform the following steps to add a new destination:
Click **Add New Destination.**
Search for **SFMC Journey Builder.**
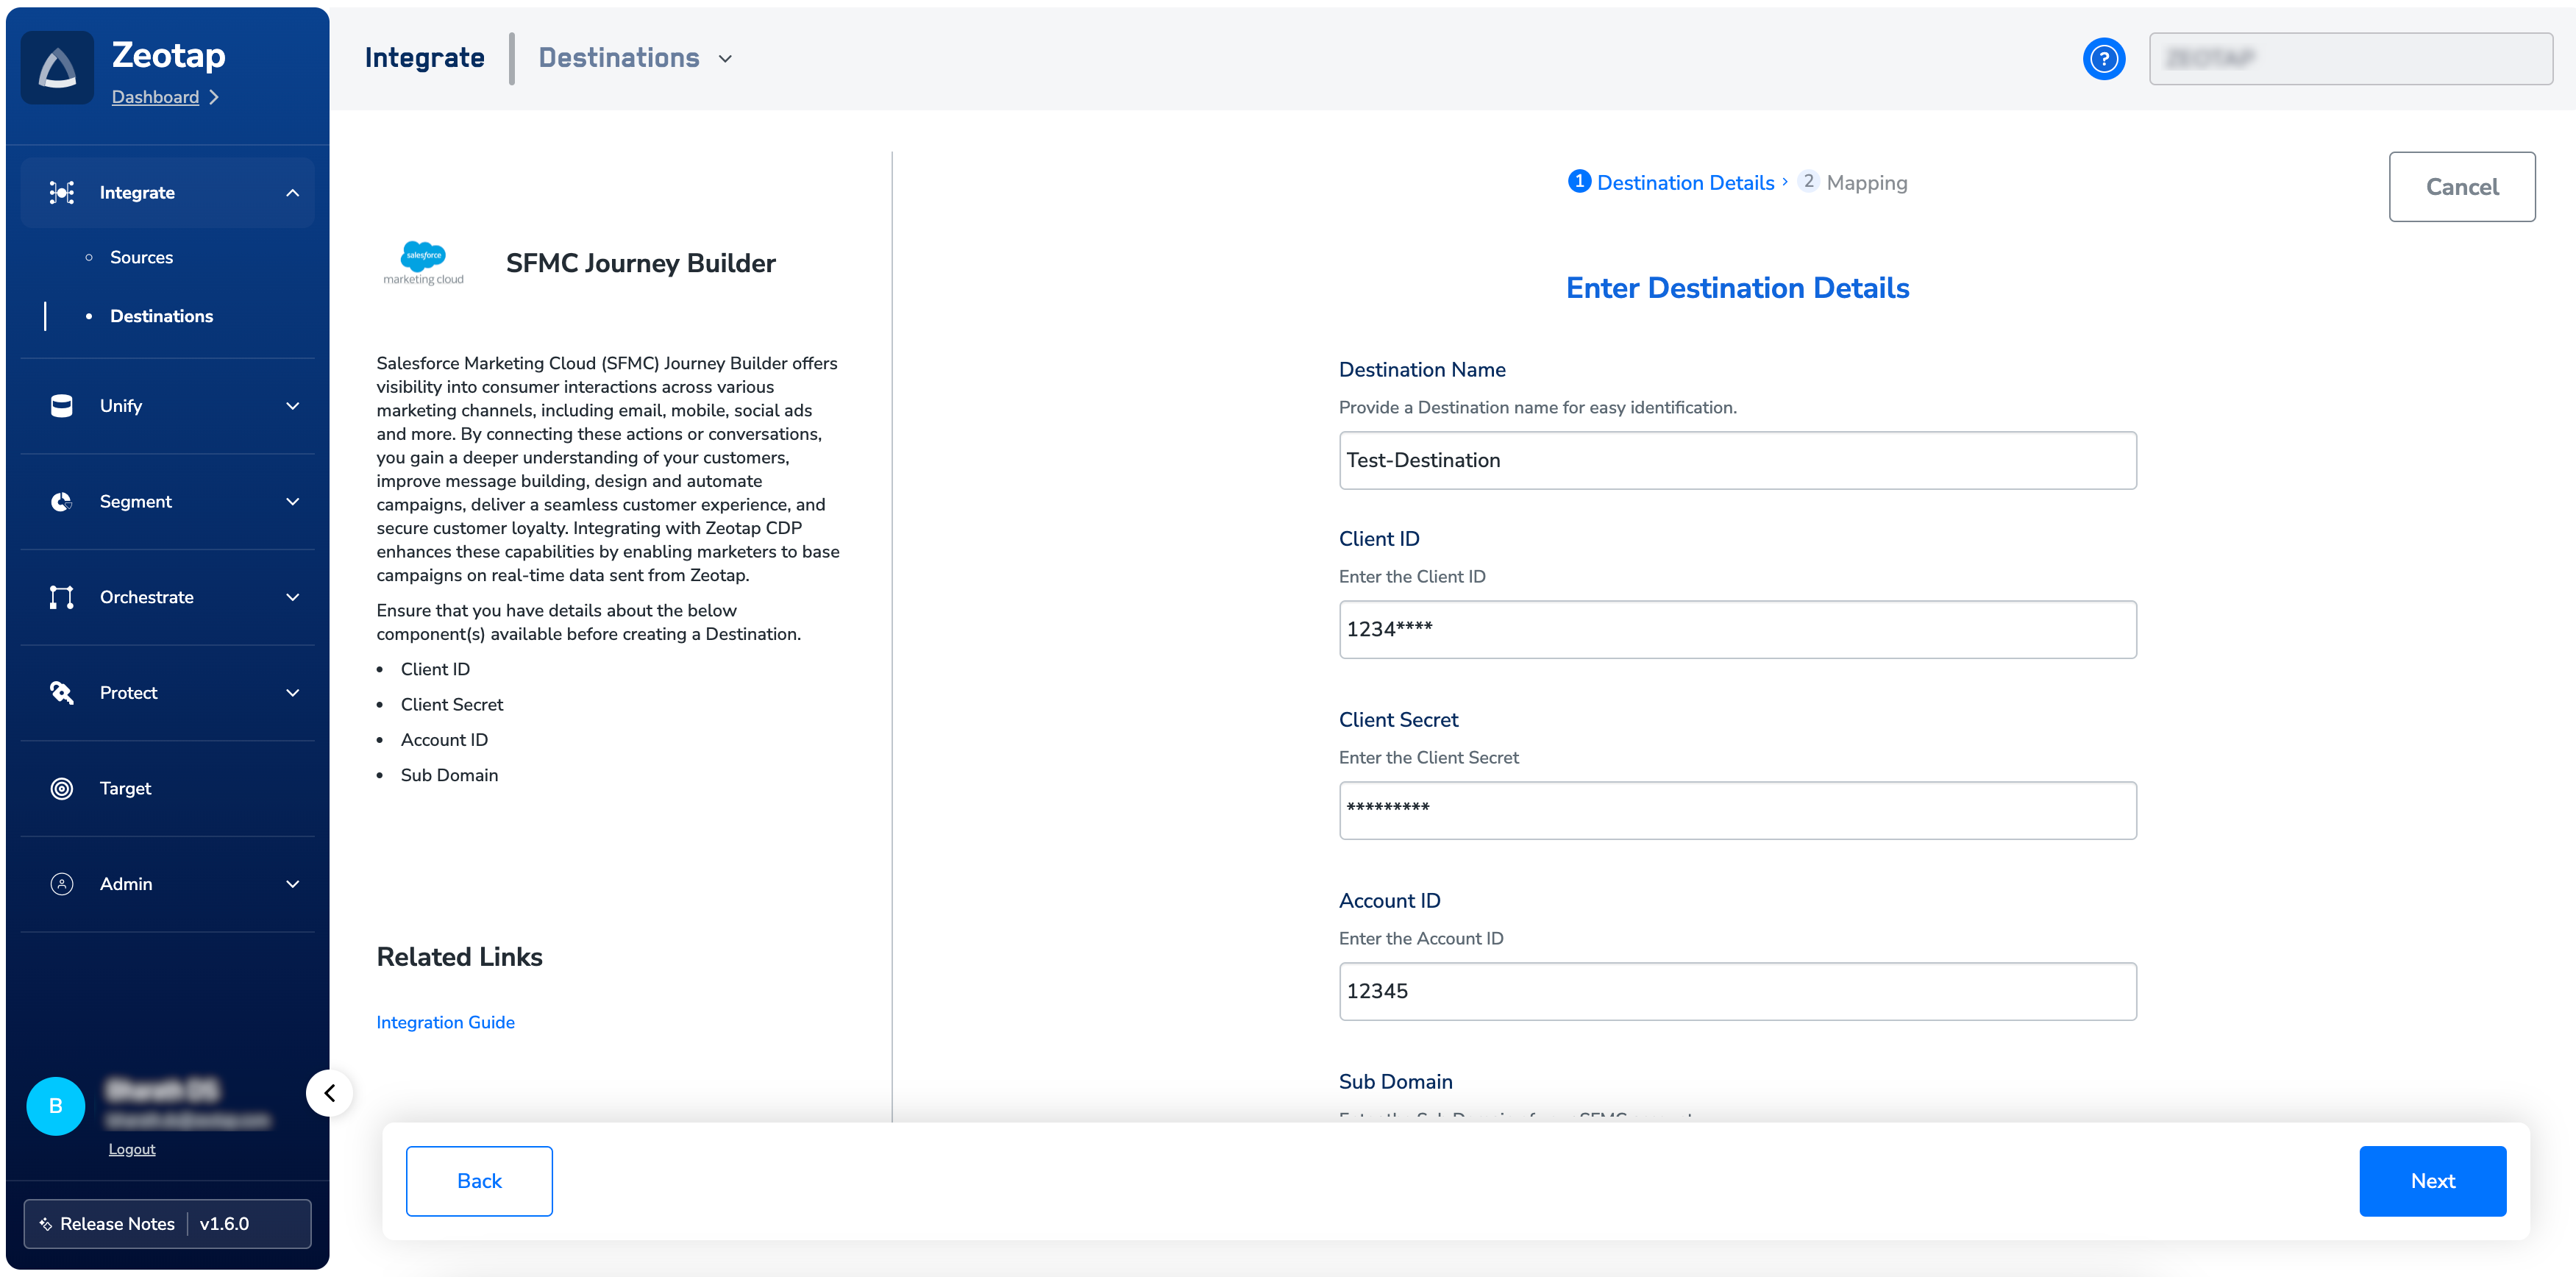
Click **SFMC Journey Builder** and enter a name for the Destination.
Enter the **Client ID, Client Secret, Sub Domain details** obtained from the Salesforce Marketing Cloud Summary Screen. [Learn more](https://zeotap.atlassian.net/wiki/spaces/DD/pages/edit-v2/4078501920#Components-of-Salesforce-Marketing-Cloud---Journey-Builder)
Enter the **Account ID** associated with your SFMC Journey Builder account.
### Add New Destination
Perform the following steps to add a new destination:
Click **Add New Destination.**
Search for **SFMC Journey Builder.**
Click **SFMC Journey Builder** and enter a name for the Destination.
Enter the **Client ID, Client Secret, Sub Domain details** obtained from the Salesforce Marketing Cloud Summary Screen. [Learn more](https://zeotap.atlassian.net/wiki/spaces/DD/pages/edit-v2/4078501920#Components-of-Salesforce-Marketing-Cloud---Journey-Builder)
Enter the **Account ID** associated with your SFMC Journey Builder account.
 In the mapping screen that appears, under **Choose your Action**, select **Stream Events to SFMC Journey Builder** as the action for sending data from the workflow created in Journeys. Under **Map the Fields**, use **+ Add Mapping Field** to add any number of identifiers and attributes you wish to send to SFMC Journey Builder.
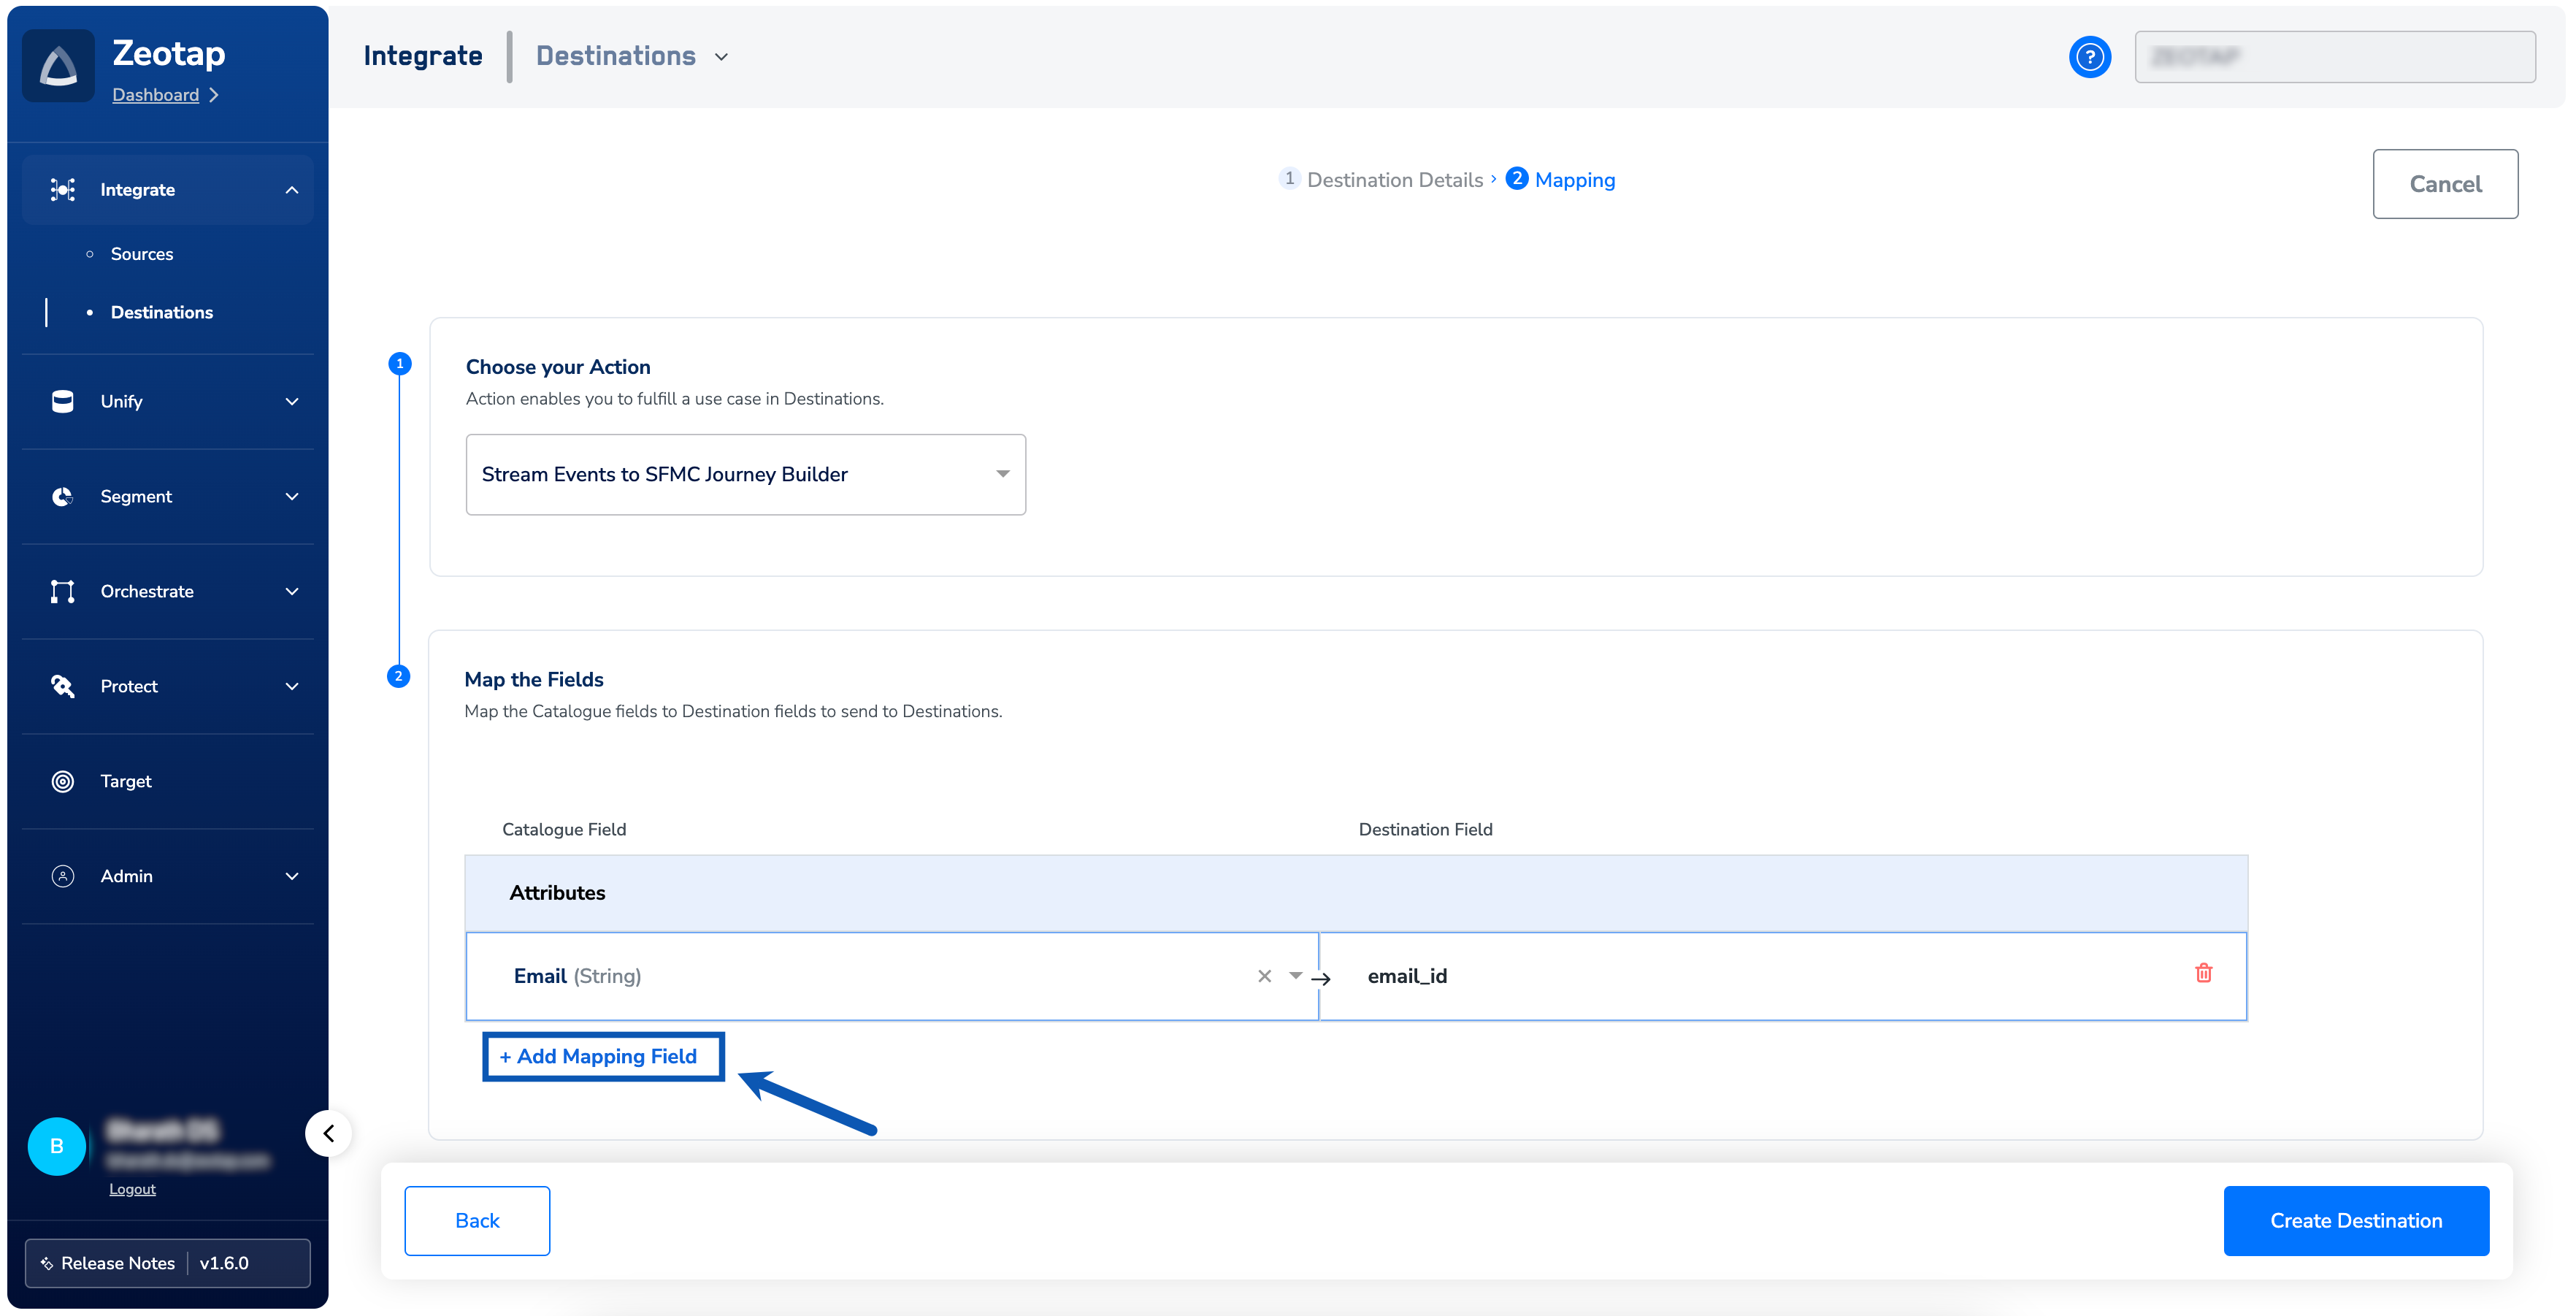 Once the mapping is complete, click **Create Destination**. The destination is created and made available for activation on Journeys.
## Activate the Destination on Journeys
After creating a destination, next, you need to link it in the **Send to Destination** node within the workflow, as explained below.
In the workflow, click **+** and choose **Send to Destinations**.
Once the mapping is complete, click **Create Destination**. The destination is created and made available for activation on Journeys.
## Activate the Destination on Journeys
After creating a destination, next, you need to link it in the **Send to Destination** node within the workflow, as explained below.
In the workflow, click **+** and choose **Send to Destinations**.
 Choose the destination from the list of available destinations by using the search feature.
 Under the **Destination Details** tab, the **Client ID, Client Secret, Sub Domain** and **Account ID** fields are automatically populated based on the value that you had entered while creating the destination. However, you need to enter the following values:
a. **Event Definition Key,** which is a unique identifier assigned to a journey created in Journey Builder. This key helps determine which journey in Journey Builder to use when pushing data from Zeotap. For information about how to obtain this, refer [here](#event-definition-key).
Under the **Destination Details** tab, the **Client ID, Client Secret, Sub Domain** and **Account ID** fields are automatically populated based on the value that you had entered while creating the destination. However, you need to enter the following values:
a. **Event Definition Key,** which is a unique identifier assigned to a journey created in Journey Builder. This key helps determine which journey in Journey Builder to use when pushing data from Zeotap. For information about how to obtain this, refer [here](#event-definition-key).
b. **Contact Key**, which is a unique ID used to differentiate records in a data extension. This is typically the primary key of the data extension but not always the case.
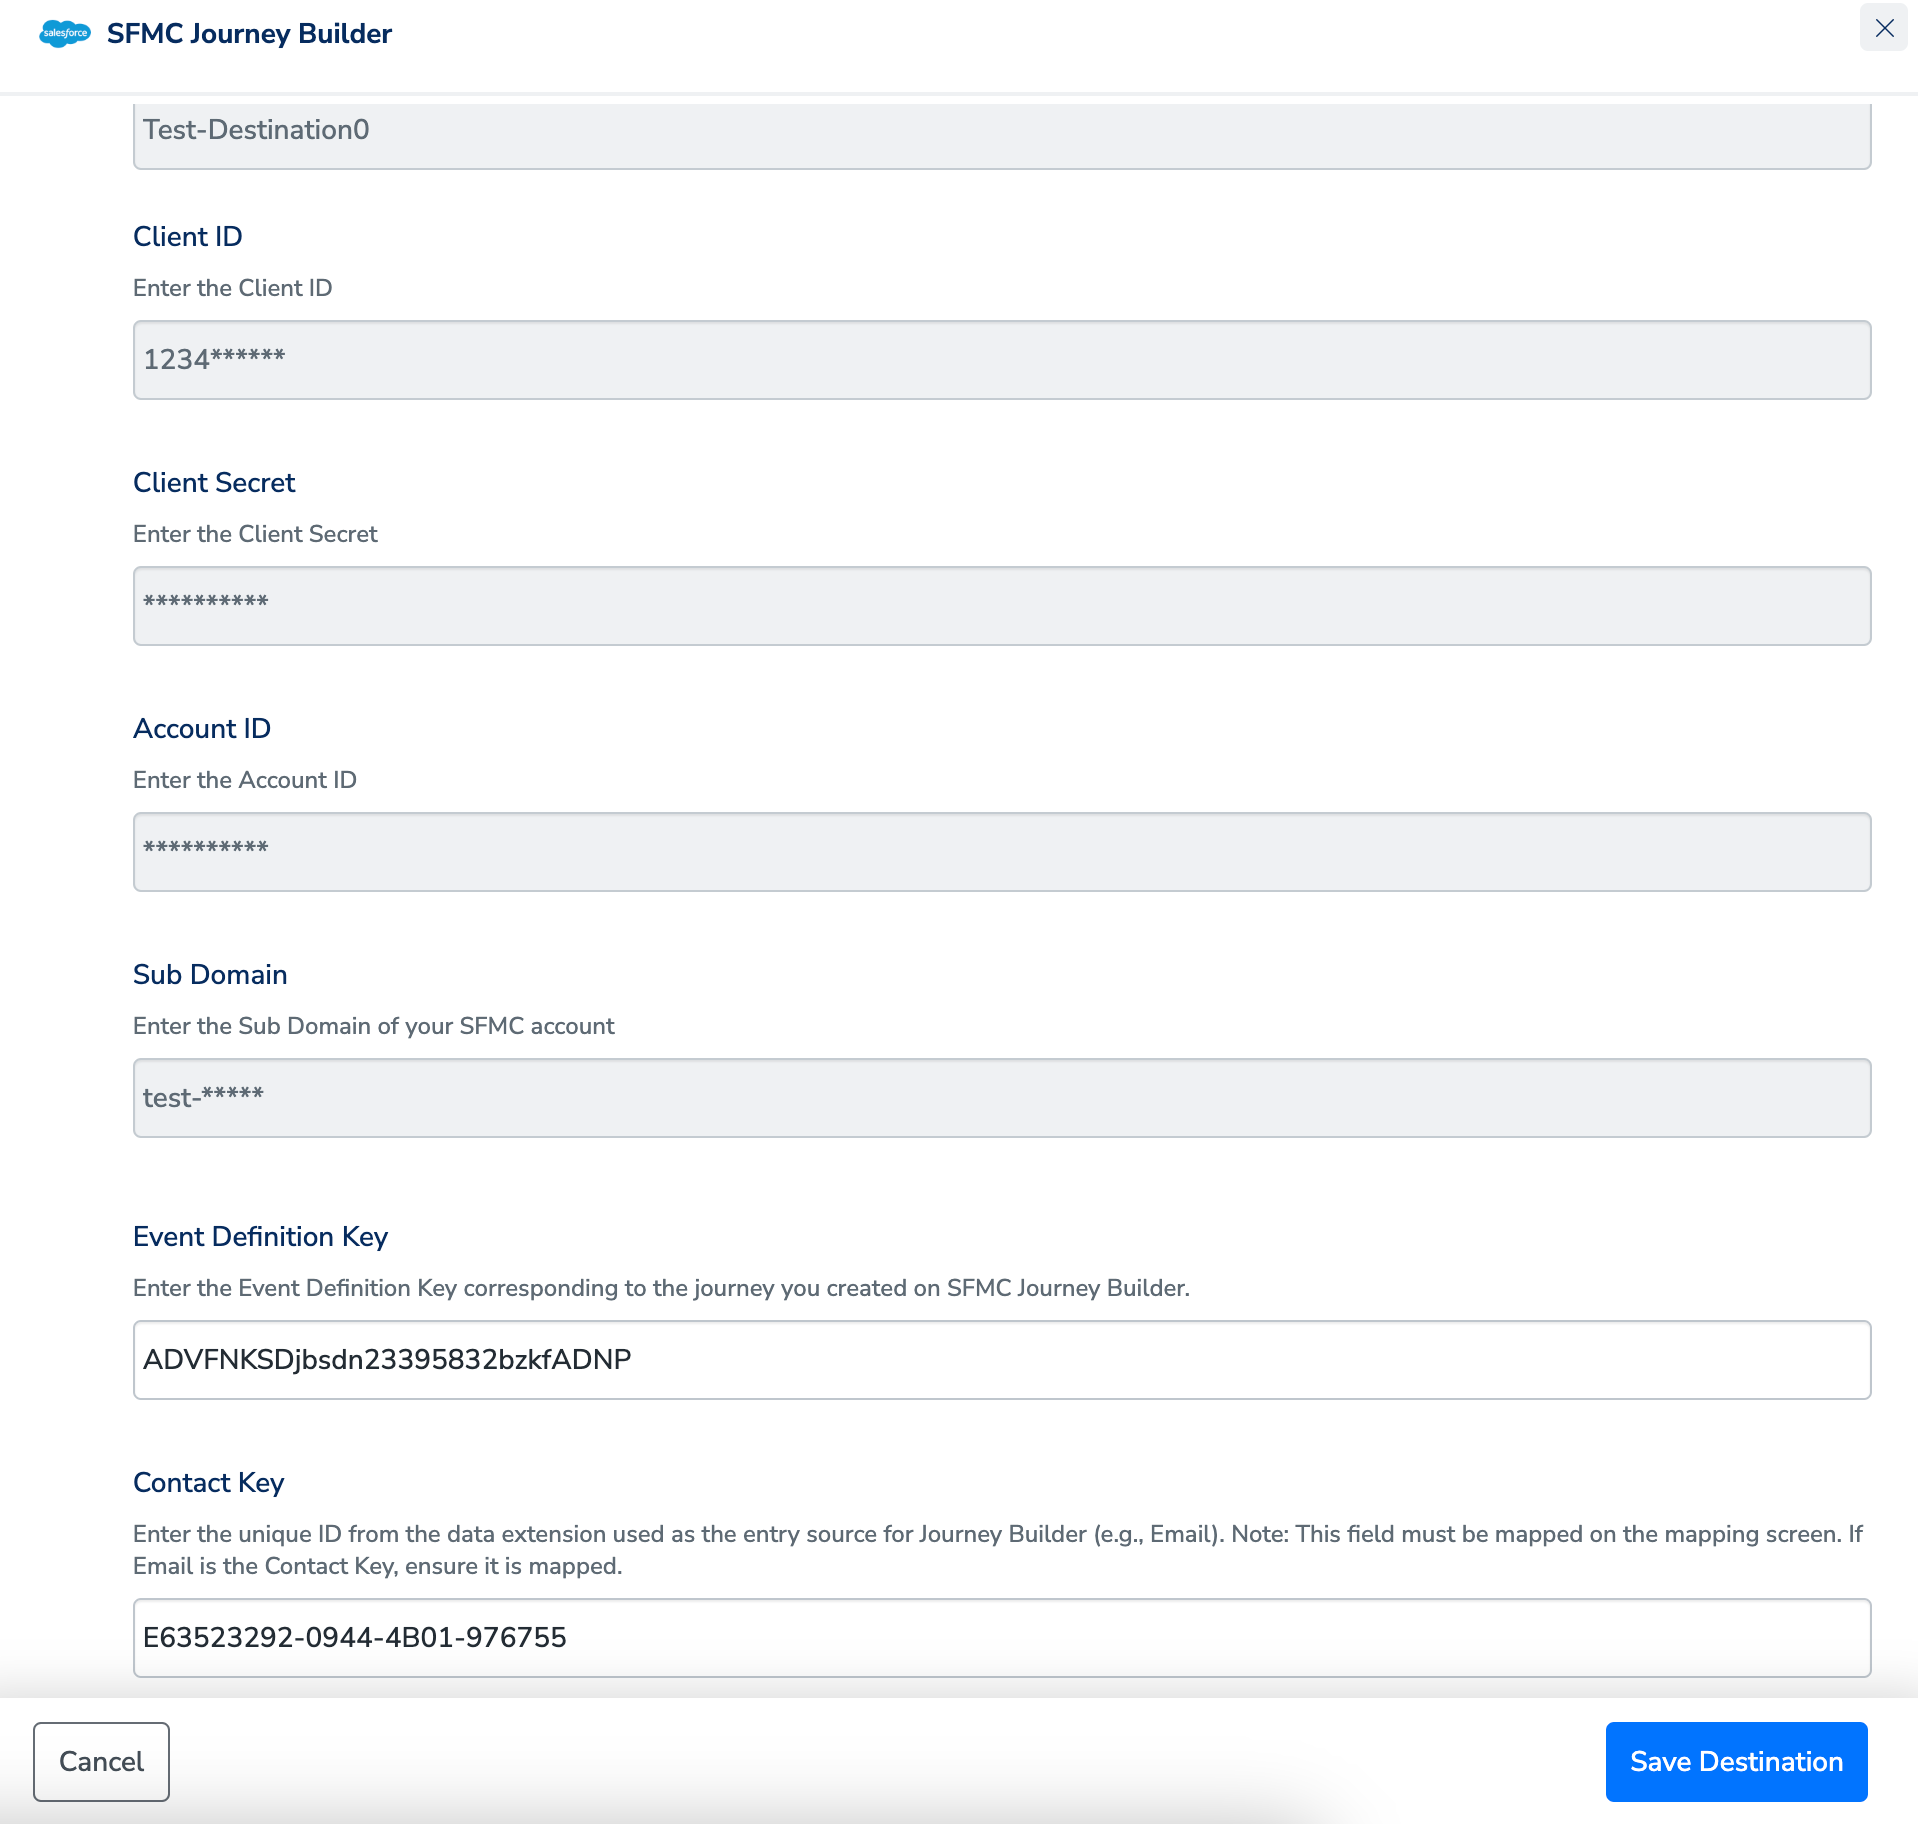 Under the **Destination Settings** tab, choose the Action and mapping as per your requirement.
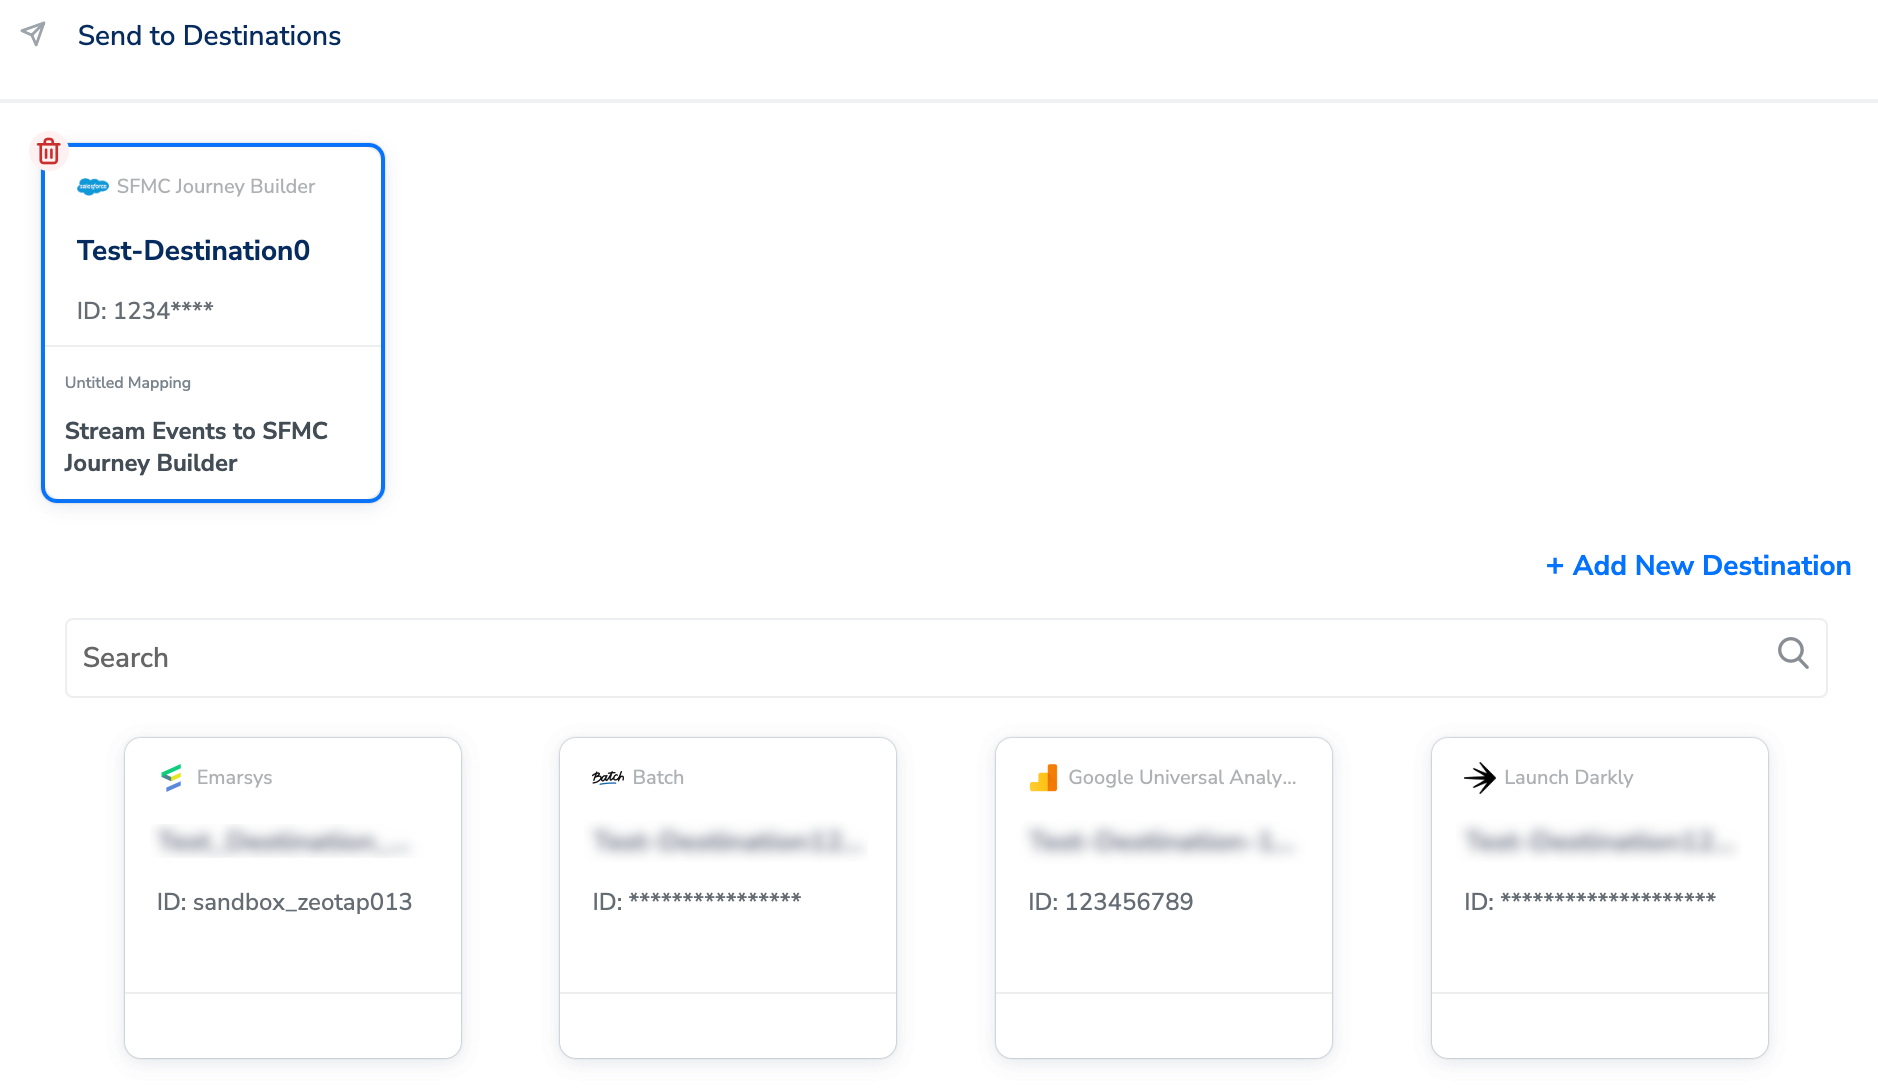
Upon clicking **Save Destination**. The destination is attached as shown in the image below.
Under the **Destination Settings** tab, choose the Action and mapping as per your requirement.
Upon clicking **Save Destination**. The destination is attached as shown in the image below.