> ## Documentation Index
> Fetch the complete documentation index at: https://docs.zeotap.com/llms.txt
> Use this file to discover all available pages before exploring further.
# Quantcast
## Overview
Quantcast is an advertising technology company that empowers brands, agencies and publishers to know and grow their audiences online through the usage of their patented AI and machine learning engine. They deliver automated insights, marketing performance, and results at scale to drive business growth.
## Supported Identifiers
This integrations only supports Quantcast Cookies.
## Available Actions and Supported Features
The following table lists the available action types for the integration and the supported features for each action type:
| Action Name | [ID EXTENSION](/articles/segment-customer/extend-your-audience#id-extension) | [DELETE](https://docs.zeotap.com/articles/#!integrate-customer/delta-upload-and-delete-functions) | [DELTA UPLOAD](https://docs.zeotap.com/articles/#!integrate-customer/delta-upload-and-delete-functions) |
| :---------------------------- | :--------------------------------------------------------------------------- | :------------------------------------------------------------------------------------------------ | :------------------------------------------------------------------------------------------------------ |
| Send identifiers to Quantcast | ✅ | - | - |
## Components of Quantcast
Ensure that you have the **Data owner pcode** available with you to go ahead with the destination creation. The Data owner pcode refers to the customer's code given by Quantcast.
## Create a Destination for Quantcast
Perform the following steps to create a Destination for Quantcast:
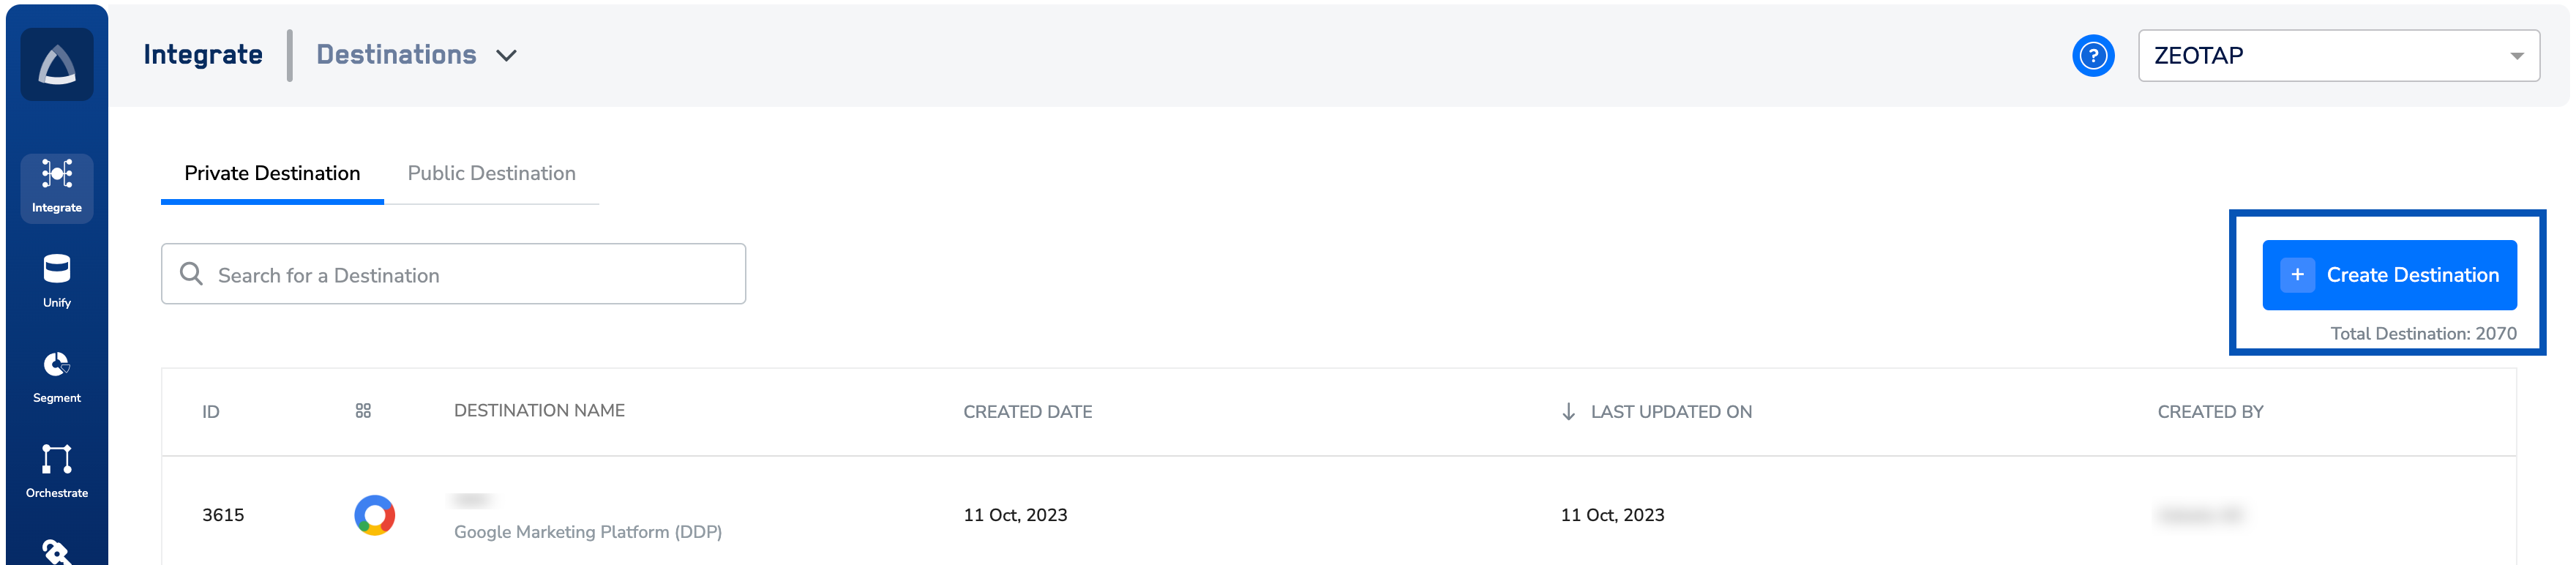
Log into the Zeotap CDP App and go to the **DESTINATIONS** application.
Click **+ Create Destination.**
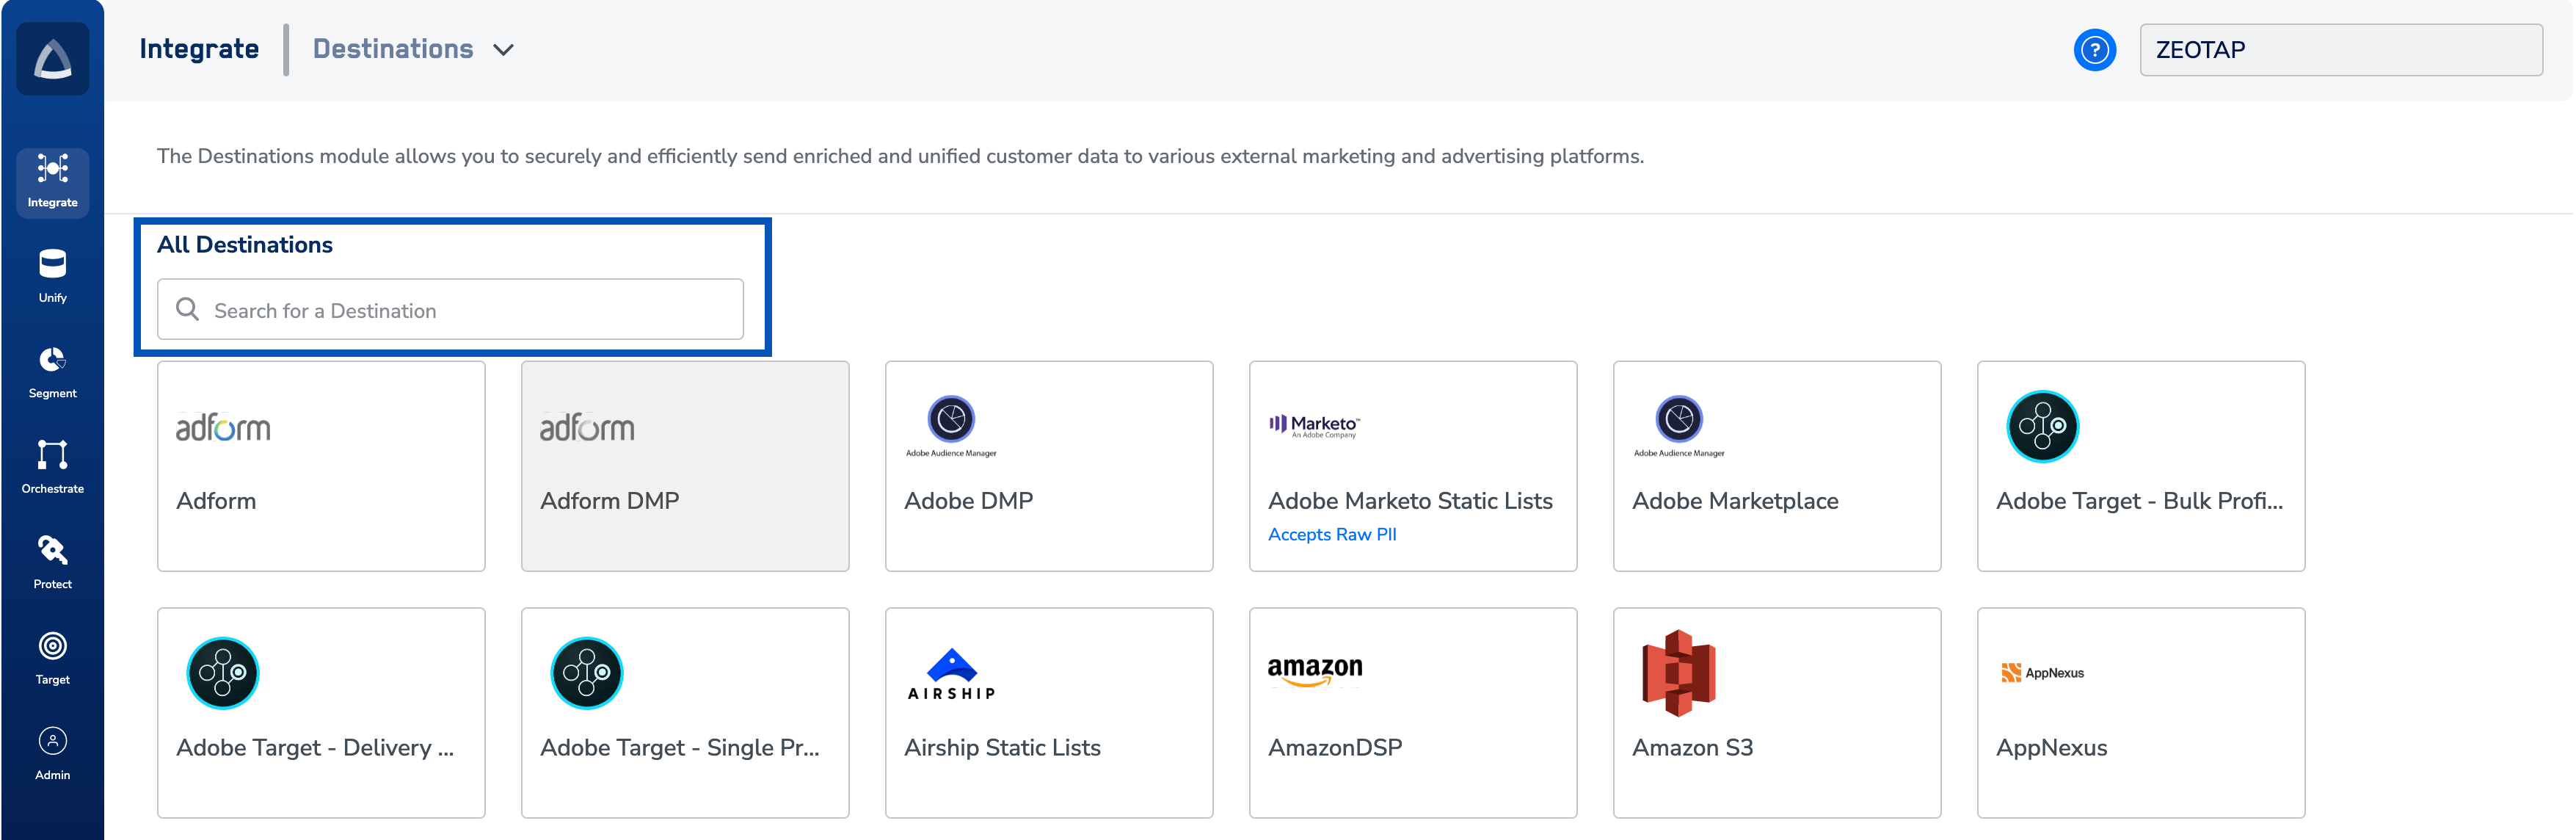
 Under **All Destinations**, search for **Quantcast**.
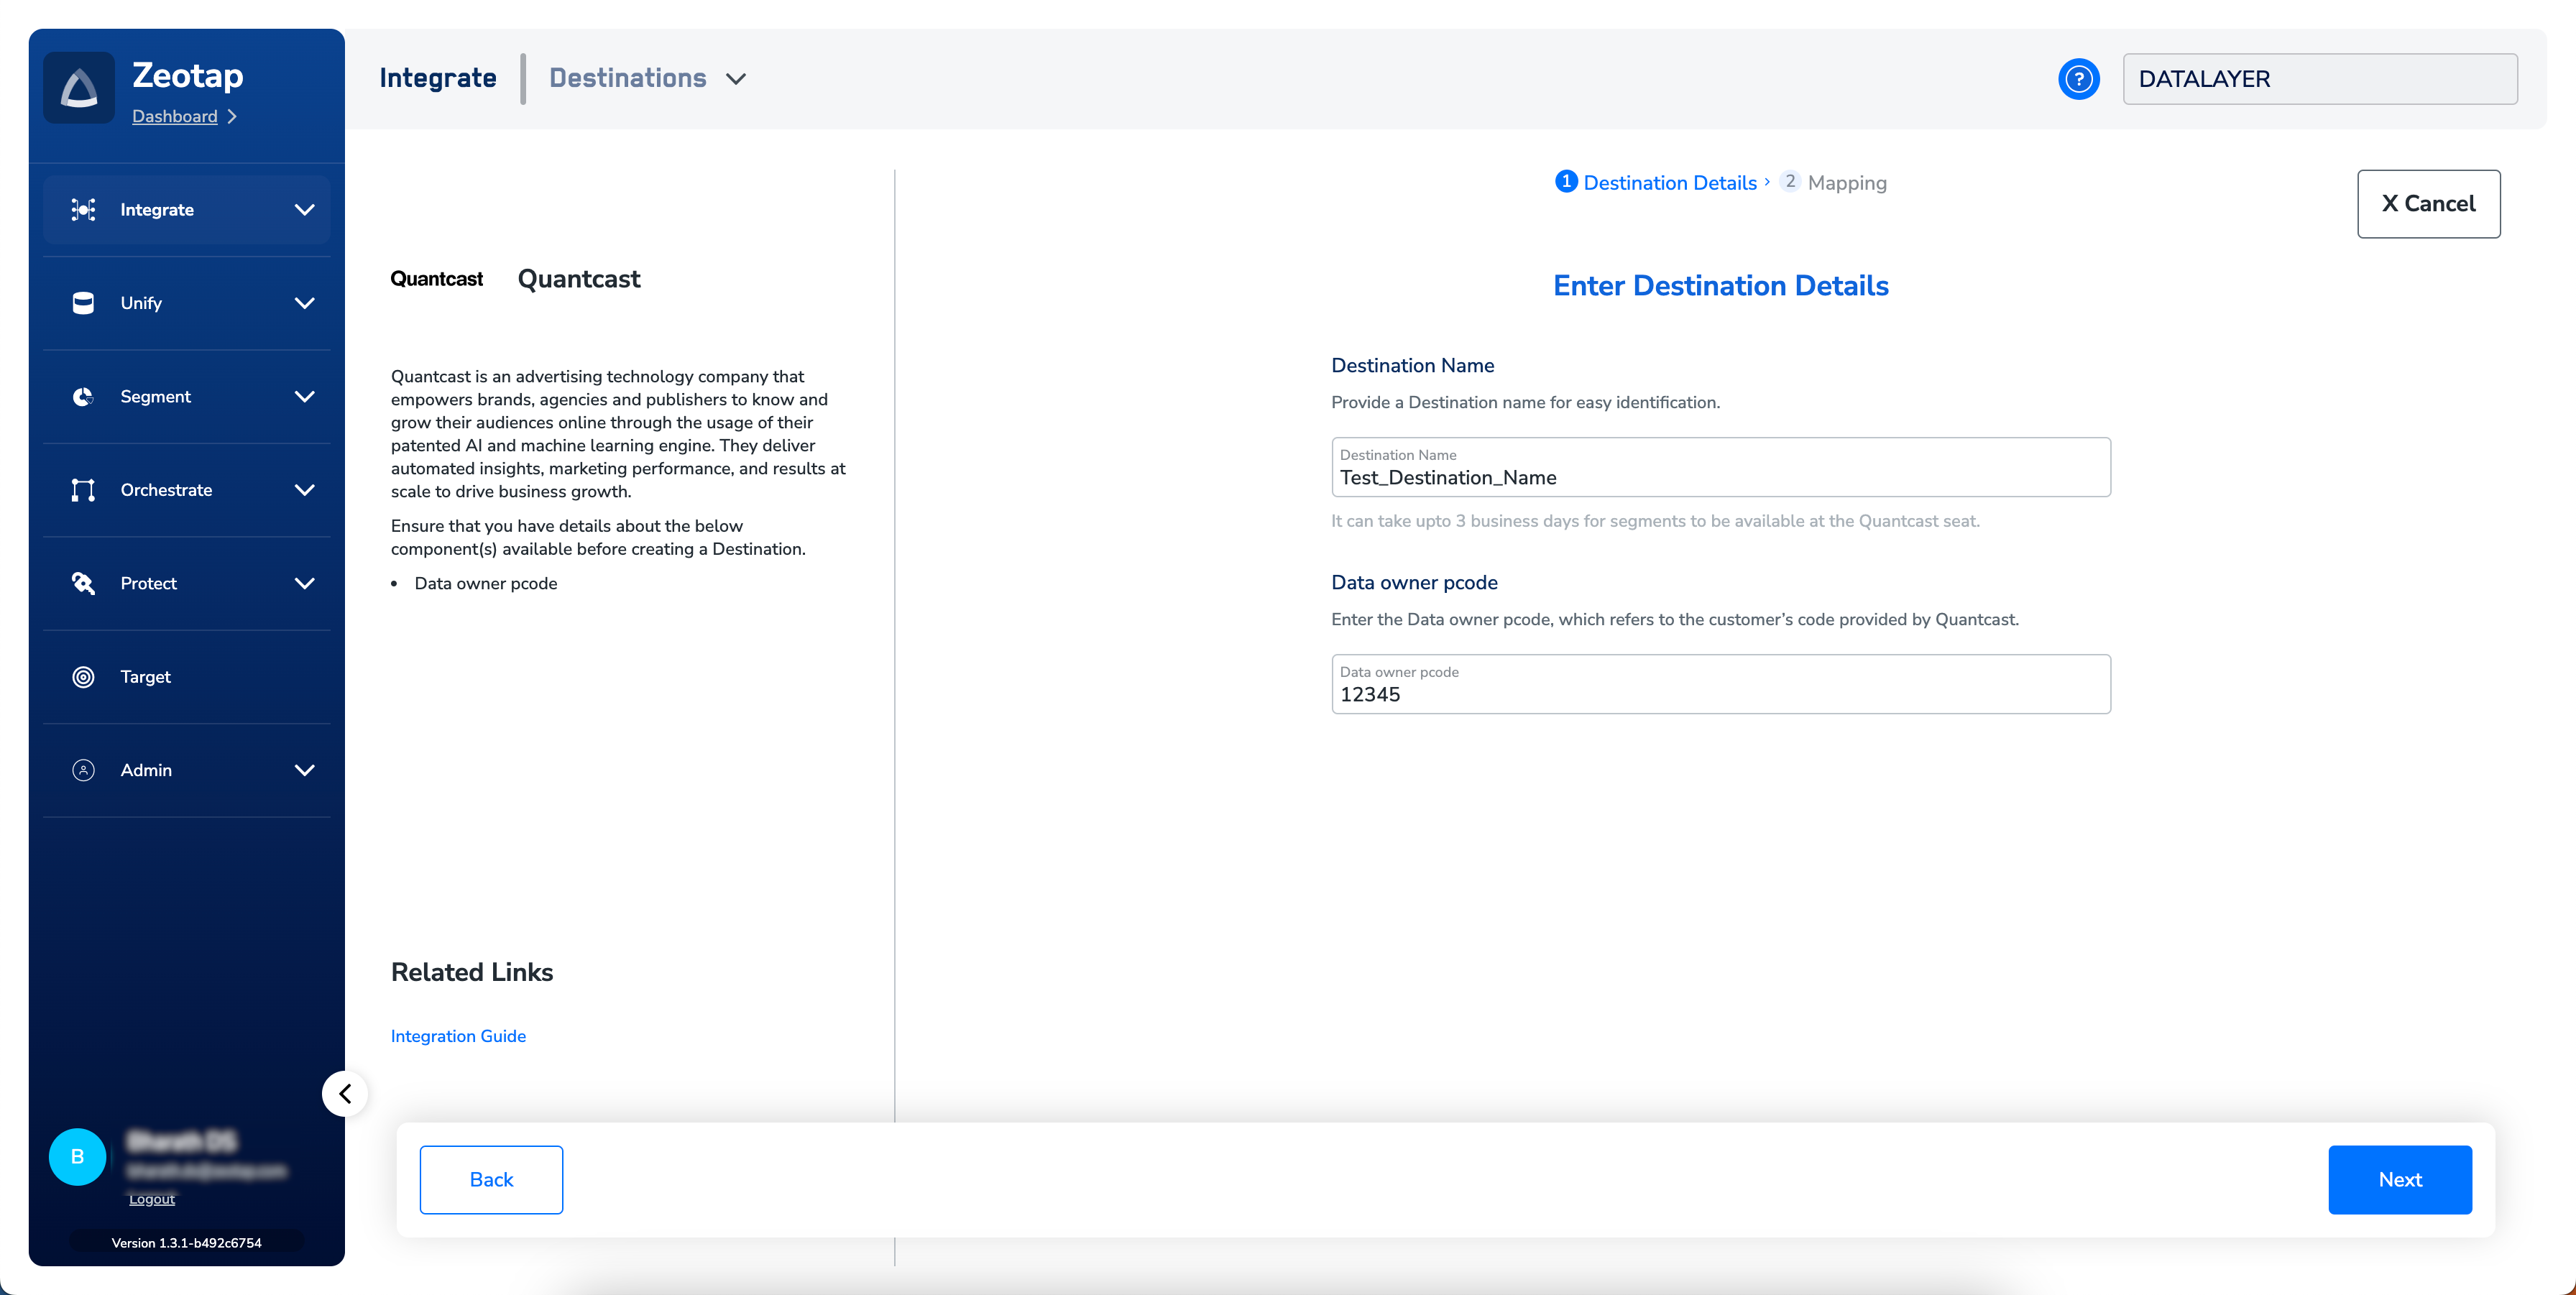
 Click **Quantcast.** A screen appears displaying details about the particular destination towards the left. On the right-hand side of the screen find a list of fields that are required for the integration to be established. Enter the required details as mentioned in the following steps:
a. Enter a name for the Destination.
b. Enter the **Data owner pcode**.
c. Review all the values entered above and then click **Next** to proceed.
Click **Quantcast.** A screen appears displaying details about the particular destination towards the left. On the right-hand side of the screen find a list of fields that are required for the integration to be established. Enter the required details as mentioned in the following steps:
a. Enter a name for the Destination.
b. Enter the **Data owner pcode**.
c. Review all the values entered above and then click **Next** to proceed.
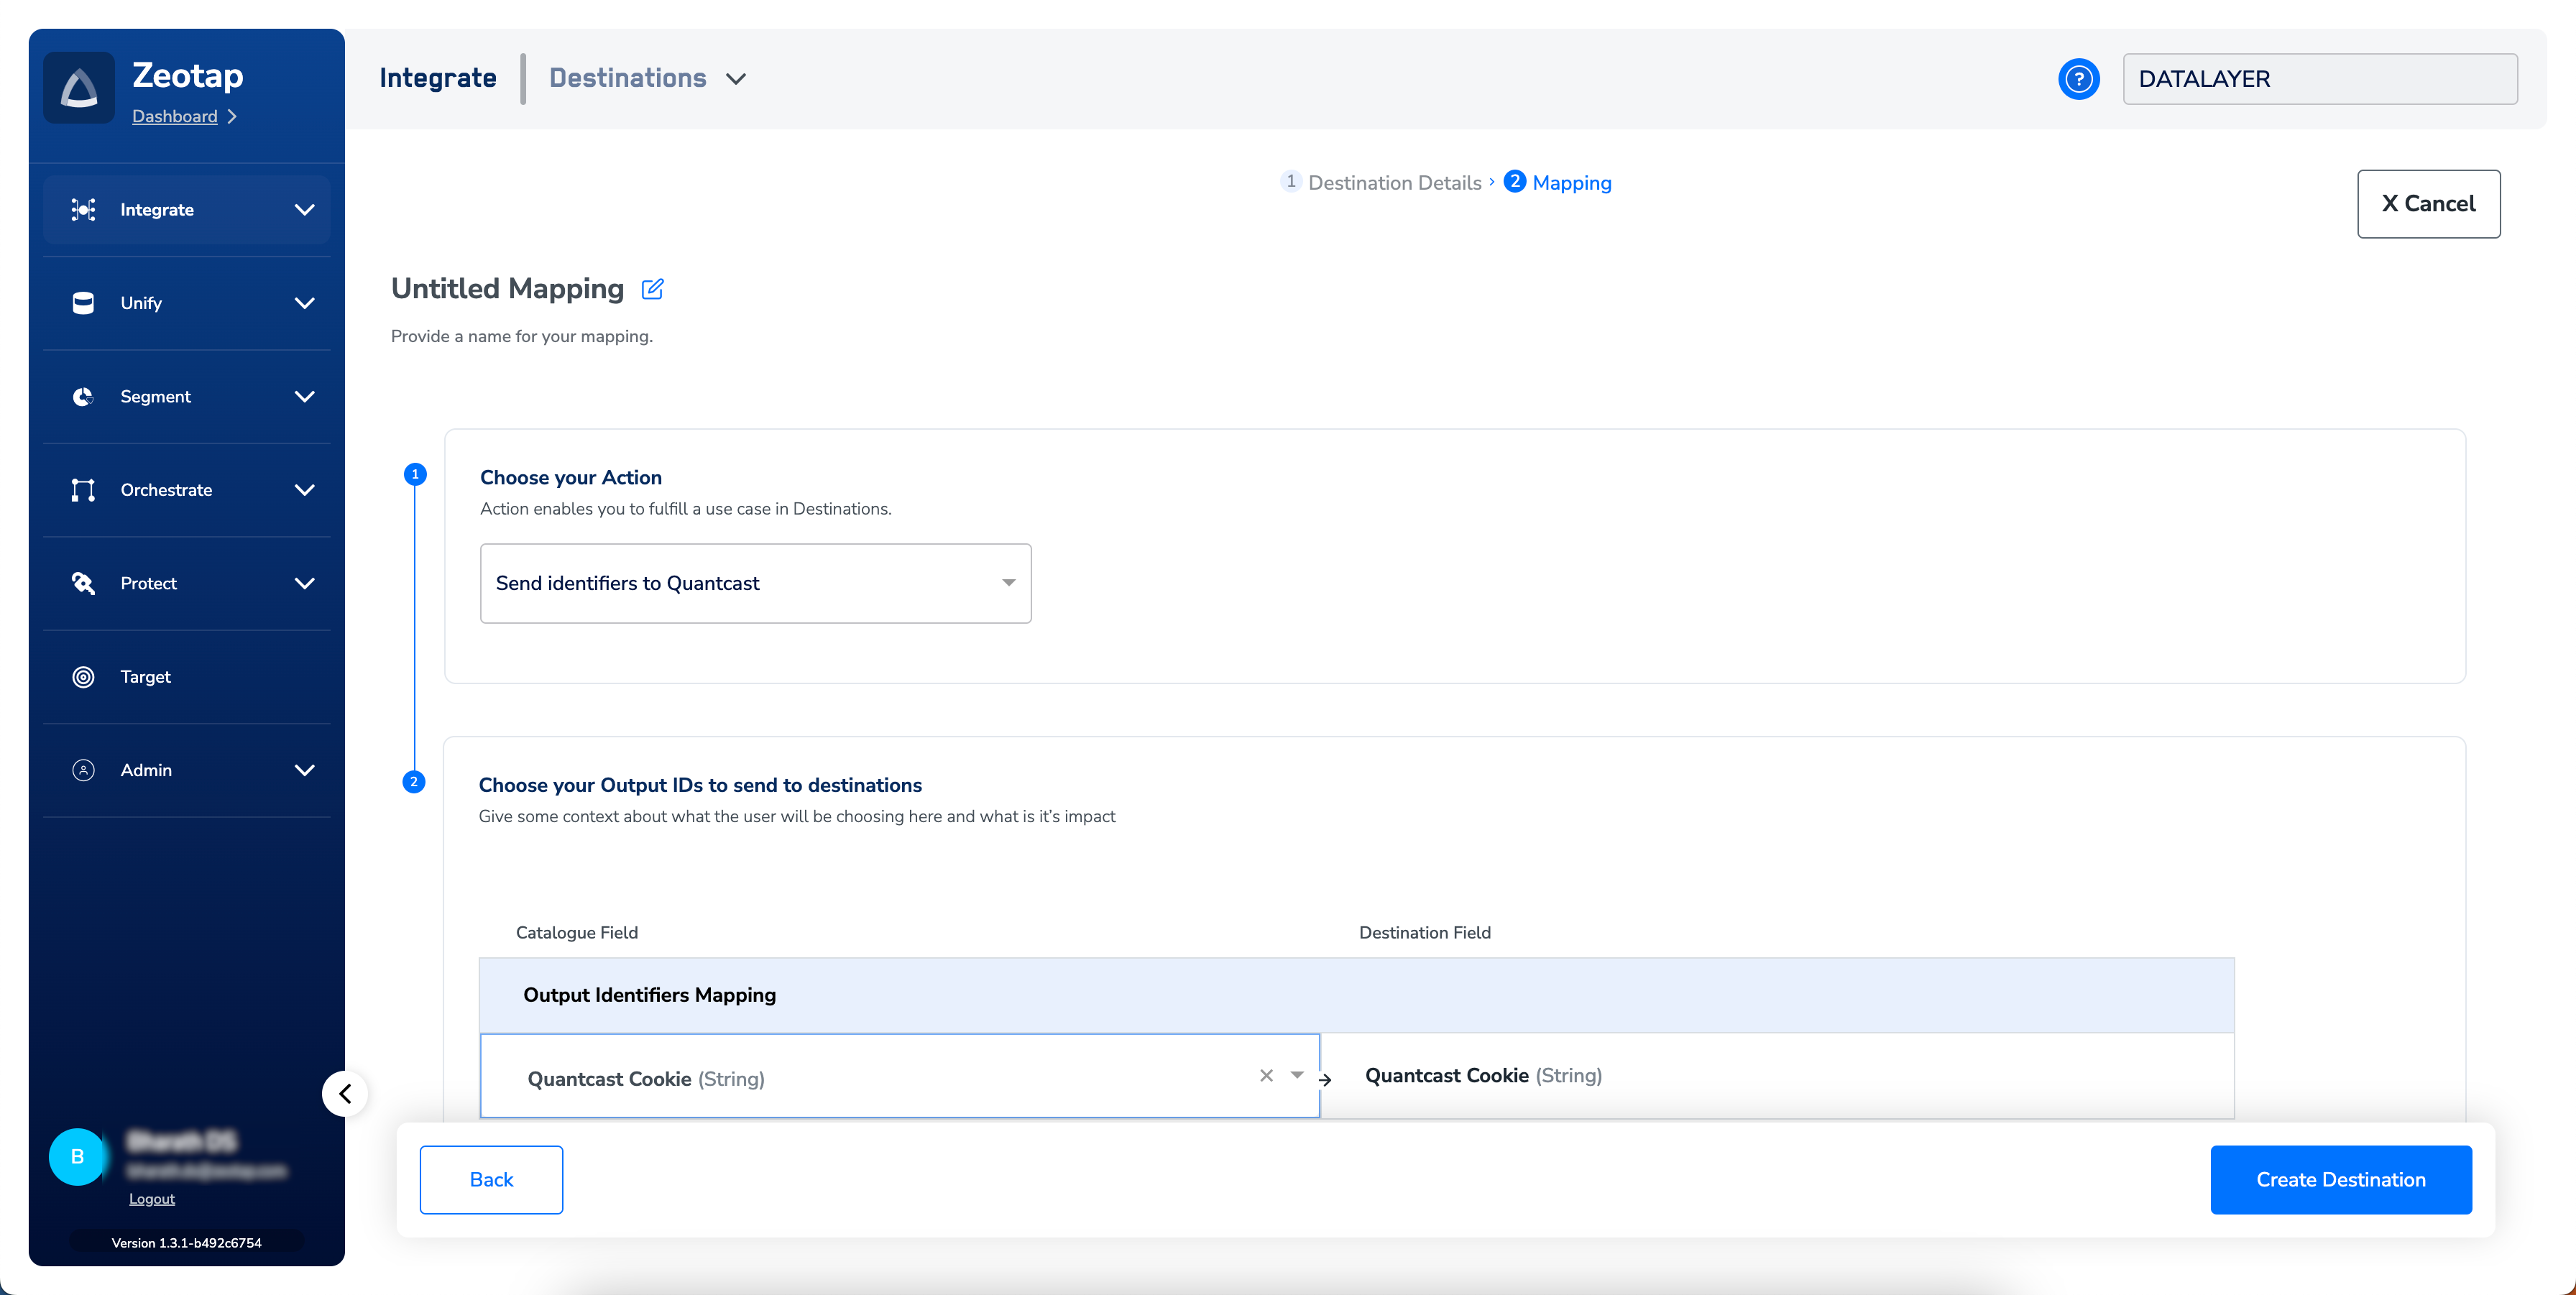
 In the new screen that appears, choose the appropriate Action and mapping as explained below.
a. Choose the desired [action](/articles/integrate-customer/destinations#actionsanchor) under **Choose your Action** and then choose the corresponding identifiers under **Map the Fields**. By default, the [Output Identifiers](https://docs.zeotap.com/articles/segment-customer/choose-the-output-identifiers) that are accepted by the platform such as, MAIDs, Cookies, email Ids and more are displayed. However, you can edit, add or remove an identifier from the list. To do so, refer [here](/articles/integrate-customer/destinations#mappingsanchor).
b. Click **Create Destination**. The created Destination gets listed in the **Audiences** applications, which can be linked to an Audience/segment.
In the new screen that appears, choose the appropriate Action and mapping as explained below.
a. Choose the desired [action](/articles/integrate-customer/destinations#actionsanchor) under **Choose your Action** and then choose the corresponding identifiers under **Map the Fields**. By default, the [Output Identifiers](https://docs.zeotap.com/articles/segment-customer/choose-the-output-identifiers) that are accepted by the platform such as, MAIDs, Cookies, email Ids and more are displayed. However, you can edit, add or remove an identifier from the list. To do so, refer [here](/articles/integrate-customer/destinations#mappingsanchor).
b. Click **Create Destination**. The created Destination gets listed in the **Audiences** applications, which can be linked to an Audience/segment.
 ## Link an Audience to the Quantcast Destination
For information about how to link an Audience or segment to the created Destination in the **Audiences** application, refer [here](/articles/integrate-customer/link-an-audience-to-the-destination). Note that it can take up to three business days for segments to be available at the Quantcast seat.
**Note:**
Ensure that the following points are taken care of, while linking an Audience/segment to the Quantcast Destination:
* If a segment contains less than 10,000 customers, then the effectiveness of ad targeting may be limited.
* Ensure that a minimum of 2000 customers are available in the segment. Otherwise, the segment might fail.
## Link an Audience to the Quantcast Destination
For information about how to link an Audience or segment to the created Destination in the **Audiences** application, refer [here](/articles/integrate-customer/link-an-audience-to-the-destination). Note that it can take up to three business days for segments to be available at the Quantcast seat.
**Note:**
Ensure that the following points are taken care of, while linking an Audience/segment to the Quantcast Destination:
* If a segment contains less than 10,000 customers, then the effectiveness of ad targeting may be limited.
* Ensure that a minimum of 2000 customers are available in the segment. Otherwise, the segment might fail.