> ## Documentation Index
> Fetch the complete documentation index at: https://docs.zeotap.com/llms.txt
> Use this file to discover all available pages before exploring further.
# Pinterest
## Overview
Pinterest is a visual discovery and bookmarking platform that allows users to save and discover ideas through images and videos. Integrated with Zeotap it helps marketers to engage with their audience, measure and optimise the campaigns.
## Supported Identifiers
Pinterest supports MAIDs and sha256-emails.
## Available Actions and Supported Features
The following table lists the available action types for the integration and the supported features for each action type:
| Action Name | [ID EXTENSION](/articles/segment-customer/extend-your-audience#id-extension) | [DELETE](https://docs.zeotap.com/articles/#!integrate-customer/delta-upload-and-delete-functions) | [DELTA UPLOAD](https://docs.zeotap.com/articles/#!integrate-customer/delta-upload-and-delete-functions) |
| :------------------------------------------- | :--------------------------------------------------------------------------- | :------------------------------------------------------------------------------------------------ | :------------------------------------------------------------------------------------------------------ |
| Send identifiers to Pinterest Customer Lists | ✅ | ✅ | - |
## Components of Pinterest
Navigate to the Pinterest Business Manager account and find the Advertiser ID as shown in the image below.
 ## Creating a Destination
Pinterest is a private Channel and allows only one destination per segment. Perform the following steps to create a Destination for Pinterest:
Log into the Zeotap CDP App and go to the **DESTINATIONS** application.
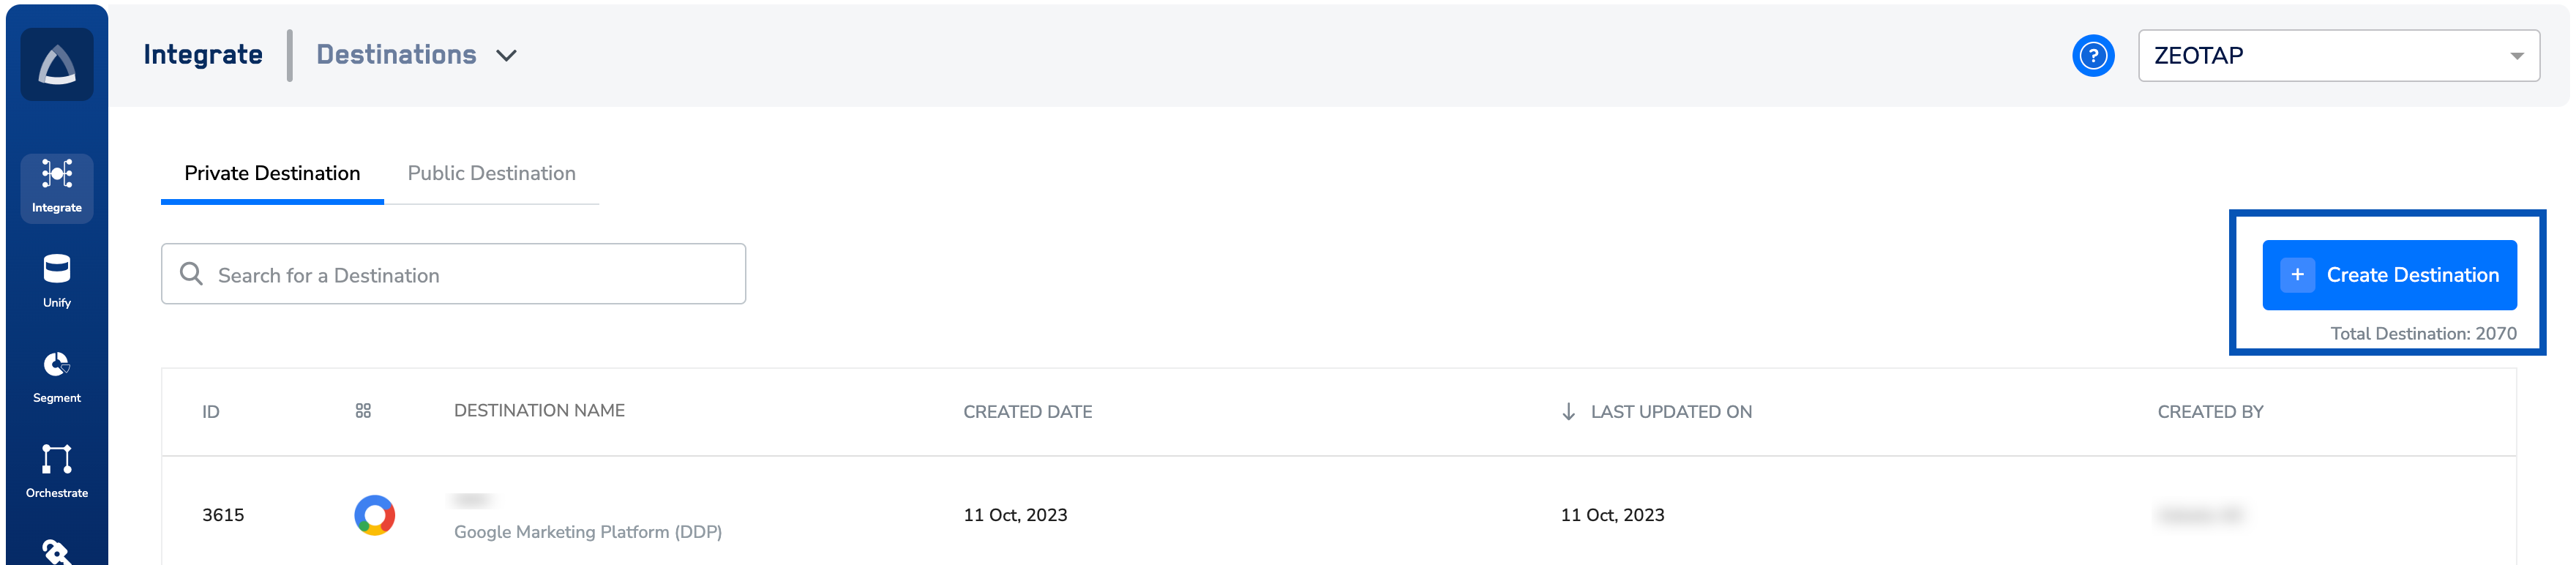
Click **+ Create Destination.**
## Creating a Destination
Pinterest is a private Channel and allows only one destination per segment. Perform the following steps to create a Destination for Pinterest:
Log into the Zeotap CDP App and go to the **DESTINATIONS** application.
Click **+ Create Destination.**
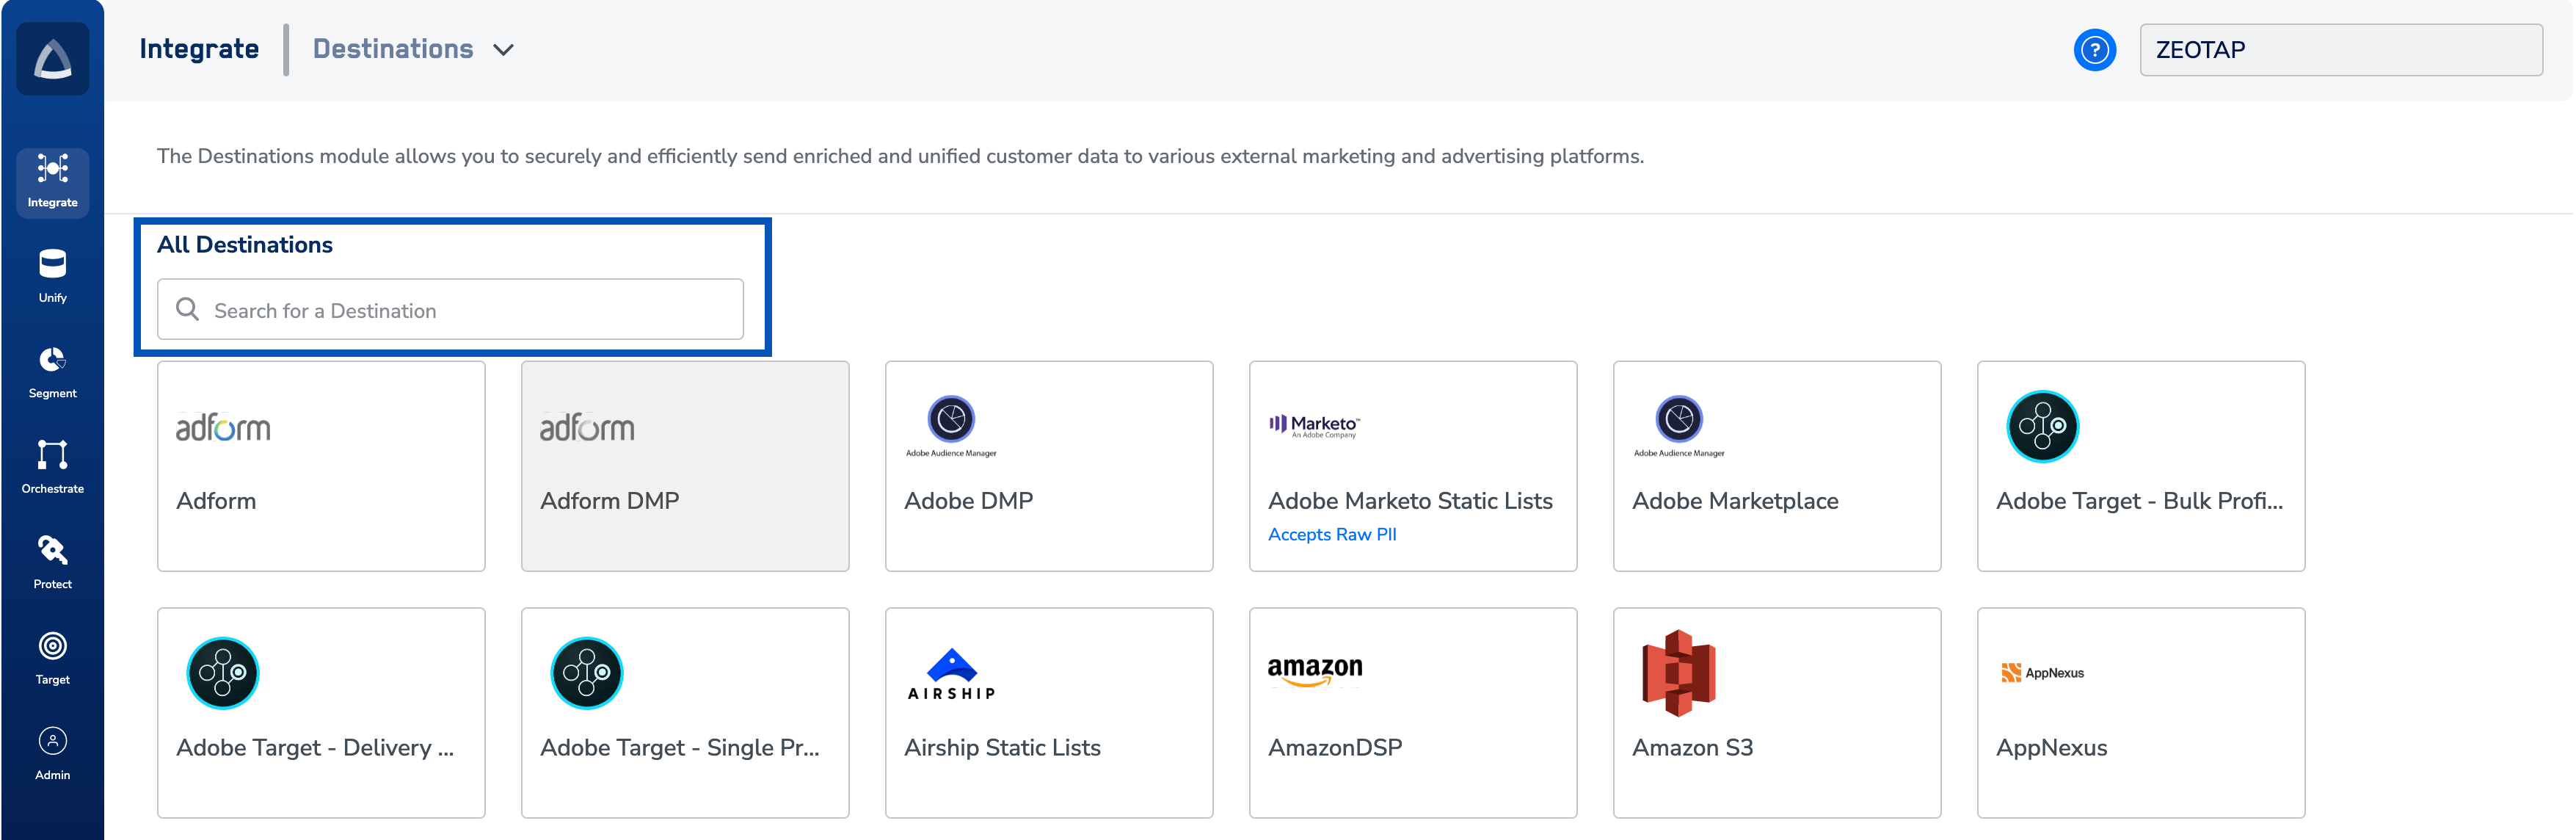
 Under **All Destinations**, search for **Pinterest Customer Lists**.
 Click **Pinterest** **Customer Lists.** A screen appears displaying details about the particular destination towards the left. On the right-hand side of the screen find a list of fields that are required for the integration to be established. Enter the required details as mentioned in the following steps:
a. Enter a name for the Destination.
b. Enter the **Advertiser ID.**
c. Enter the **Client name.**
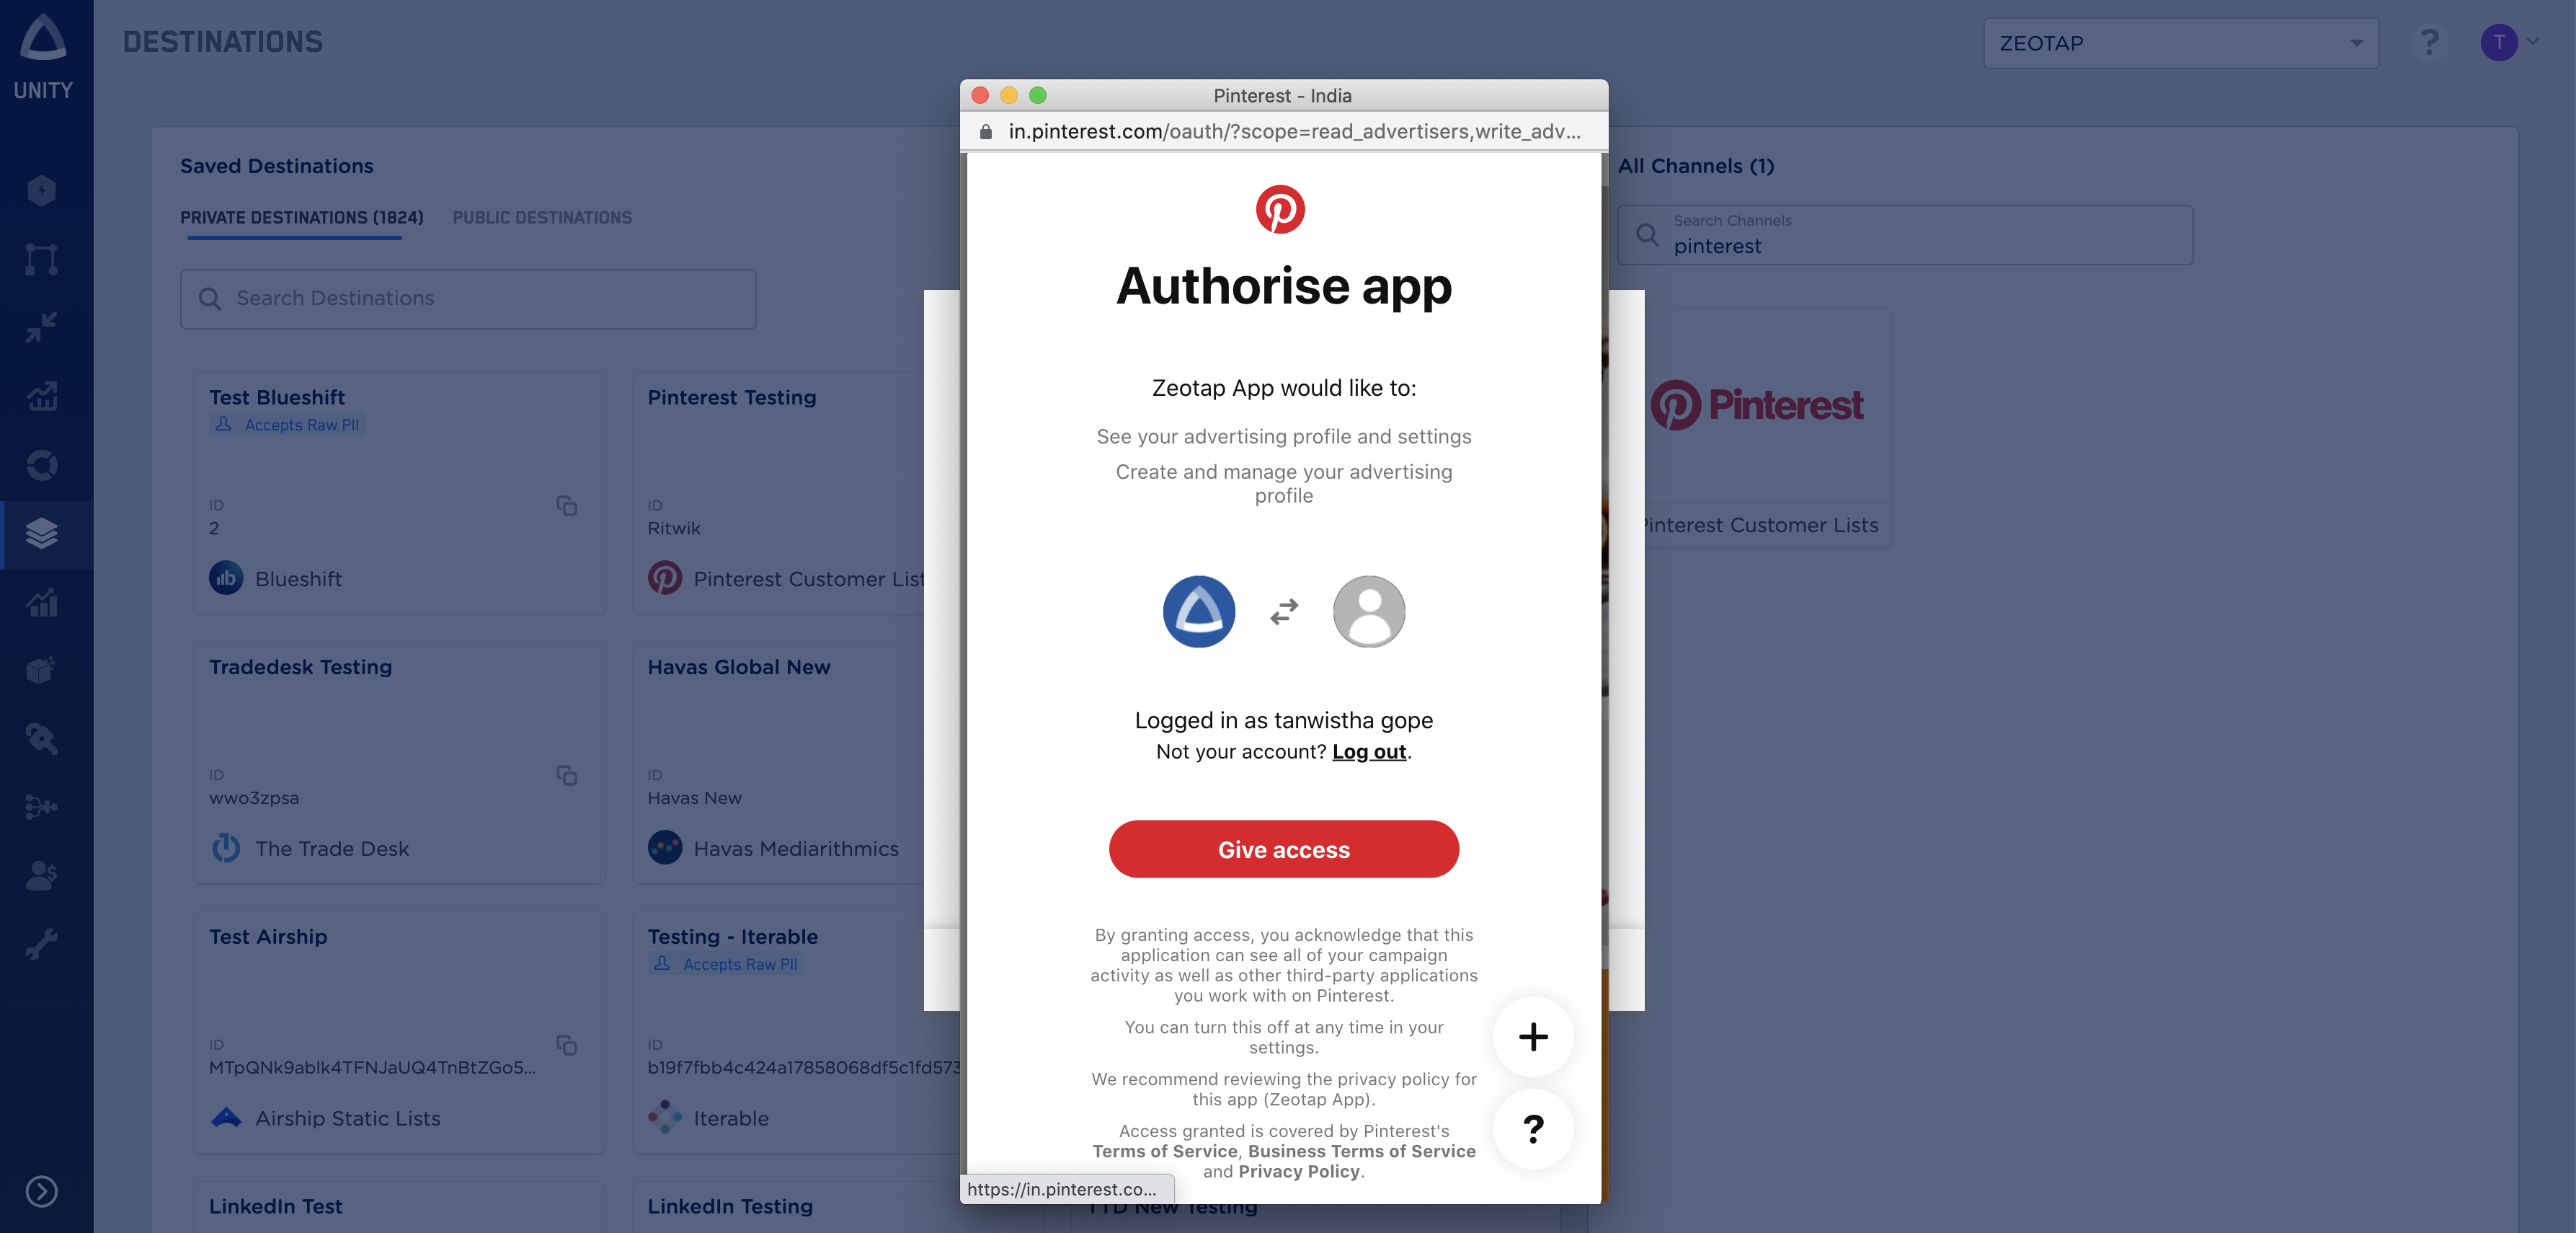
d. Click **CONNECT PINTEREST CUSTOMER LISTS.** Ensure that you have a Pinterest account handy that has access to your Pinterest Business Manager where you can activate the segment.
Click **Pinterest** **Customer Lists.** A screen appears displaying details about the particular destination towards the left. On the right-hand side of the screen find a list of fields that are required for the integration to be established. Enter the required details as mentioned in the following steps:
a. Enter a name for the Destination.
b. Enter the **Advertiser ID.**
c. Enter the **Client name.**
d. Click **CONNECT PINTEREST CUSTOMER LISTS.** Ensure that you have a Pinterest account handy that has access to your Pinterest Business Manager where you can activate the segment.
 e. Click **Give access** to authorise the app.
 f. Upon authorisation, the **Access Token** and the expiry period are populated on the destination creation screen.
g. Click **Next** to proceed to mapping.
In the new screen that appears, choose the appropriate Action and mapping as explained below.
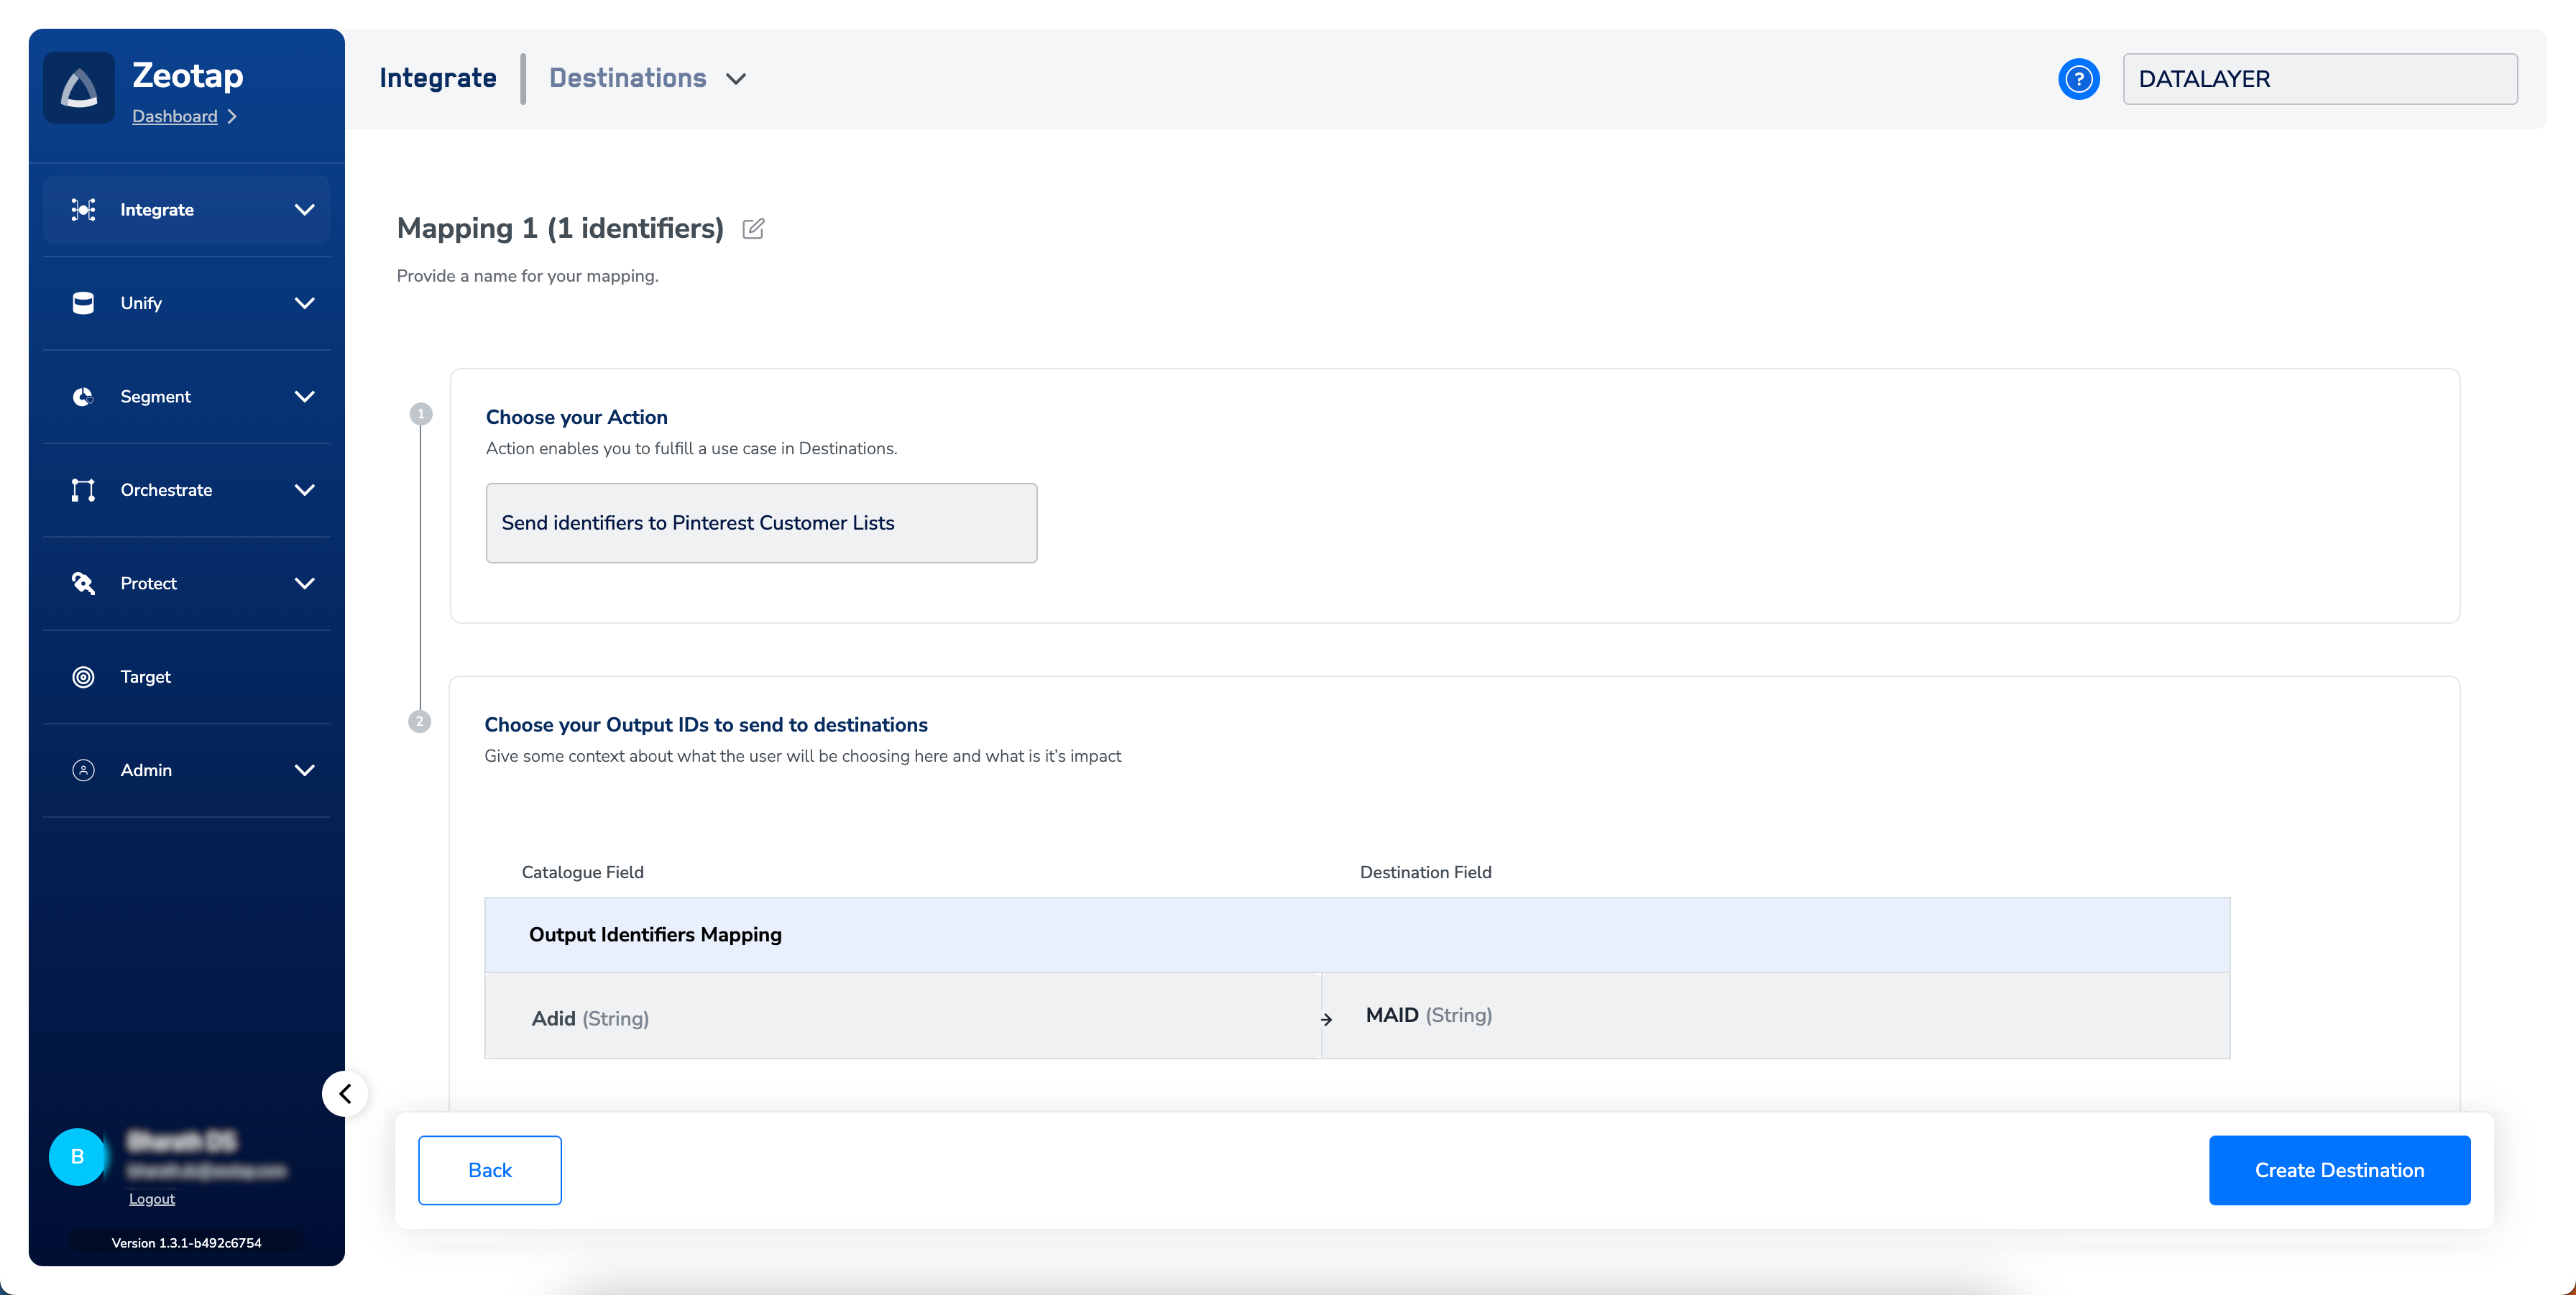
a. Choose the desired [action](/articles/integrate-customer/destinations#actionsanchor) under **Choose your Action** and then choose the corresponding identifiers under **Map the Fields**. By default, the [Output Identifiers](https://docs.zeotap.com/articles/segment-customer/choose-the-output-identifiers) that are accepted by the platform such as, MAIDs, Cookies, email Ids and more are displayed. However, you can edit, add or remove an identifier from the list. To do so, refer [here](/articles/integrate-customer/destinations#mappingsanchor).
b. Click **Save Mapping**. The created Destination gets listed in the **Audiences** application, which can be linked to an Audience/segment.
f. Upon authorisation, the **Access Token** and the expiry period are populated on the destination creation screen.
g. Click **Next** to proceed to mapping.
In the new screen that appears, choose the appropriate Action and mapping as explained below.
a. Choose the desired [action](/articles/integrate-customer/destinations#actionsanchor) under **Choose your Action** and then choose the corresponding identifiers under **Map the Fields**. By default, the [Output Identifiers](https://docs.zeotap.com/articles/segment-customer/choose-the-output-identifiers) that are accepted by the platform such as, MAIDs, Cookies, email Ids and more are displayed. However, you can edit, add or remove an identifier from the list. To do so, refer [here](/articles/integrate-customer/destinations#mappingsanchor).
b. Click **Save Mapping**. The created Destination gets listed in the **Audiences** application, which can be linked to an Audience/segment.
 ## Link an Audience to the Pinterest Destination
For information about how to link an Audience or segment to the created Destination in the **Audiences** application, refer [here](/articles/integrate-customer/link-an-audience-to-the-destination). Note that it can take up to two business days for the segment to be available at the Pinterest seat.
**Note:**
The terms *Audiences* and *Segments* are used interchangeably to refer to customer cohorts belonging to a specific category. For example, an Audience or a segment can be a specific group of customers who are over 18 years of age and have performed an `addToCart` event within the last 30 days.
## View Audiences on Pinterest Console
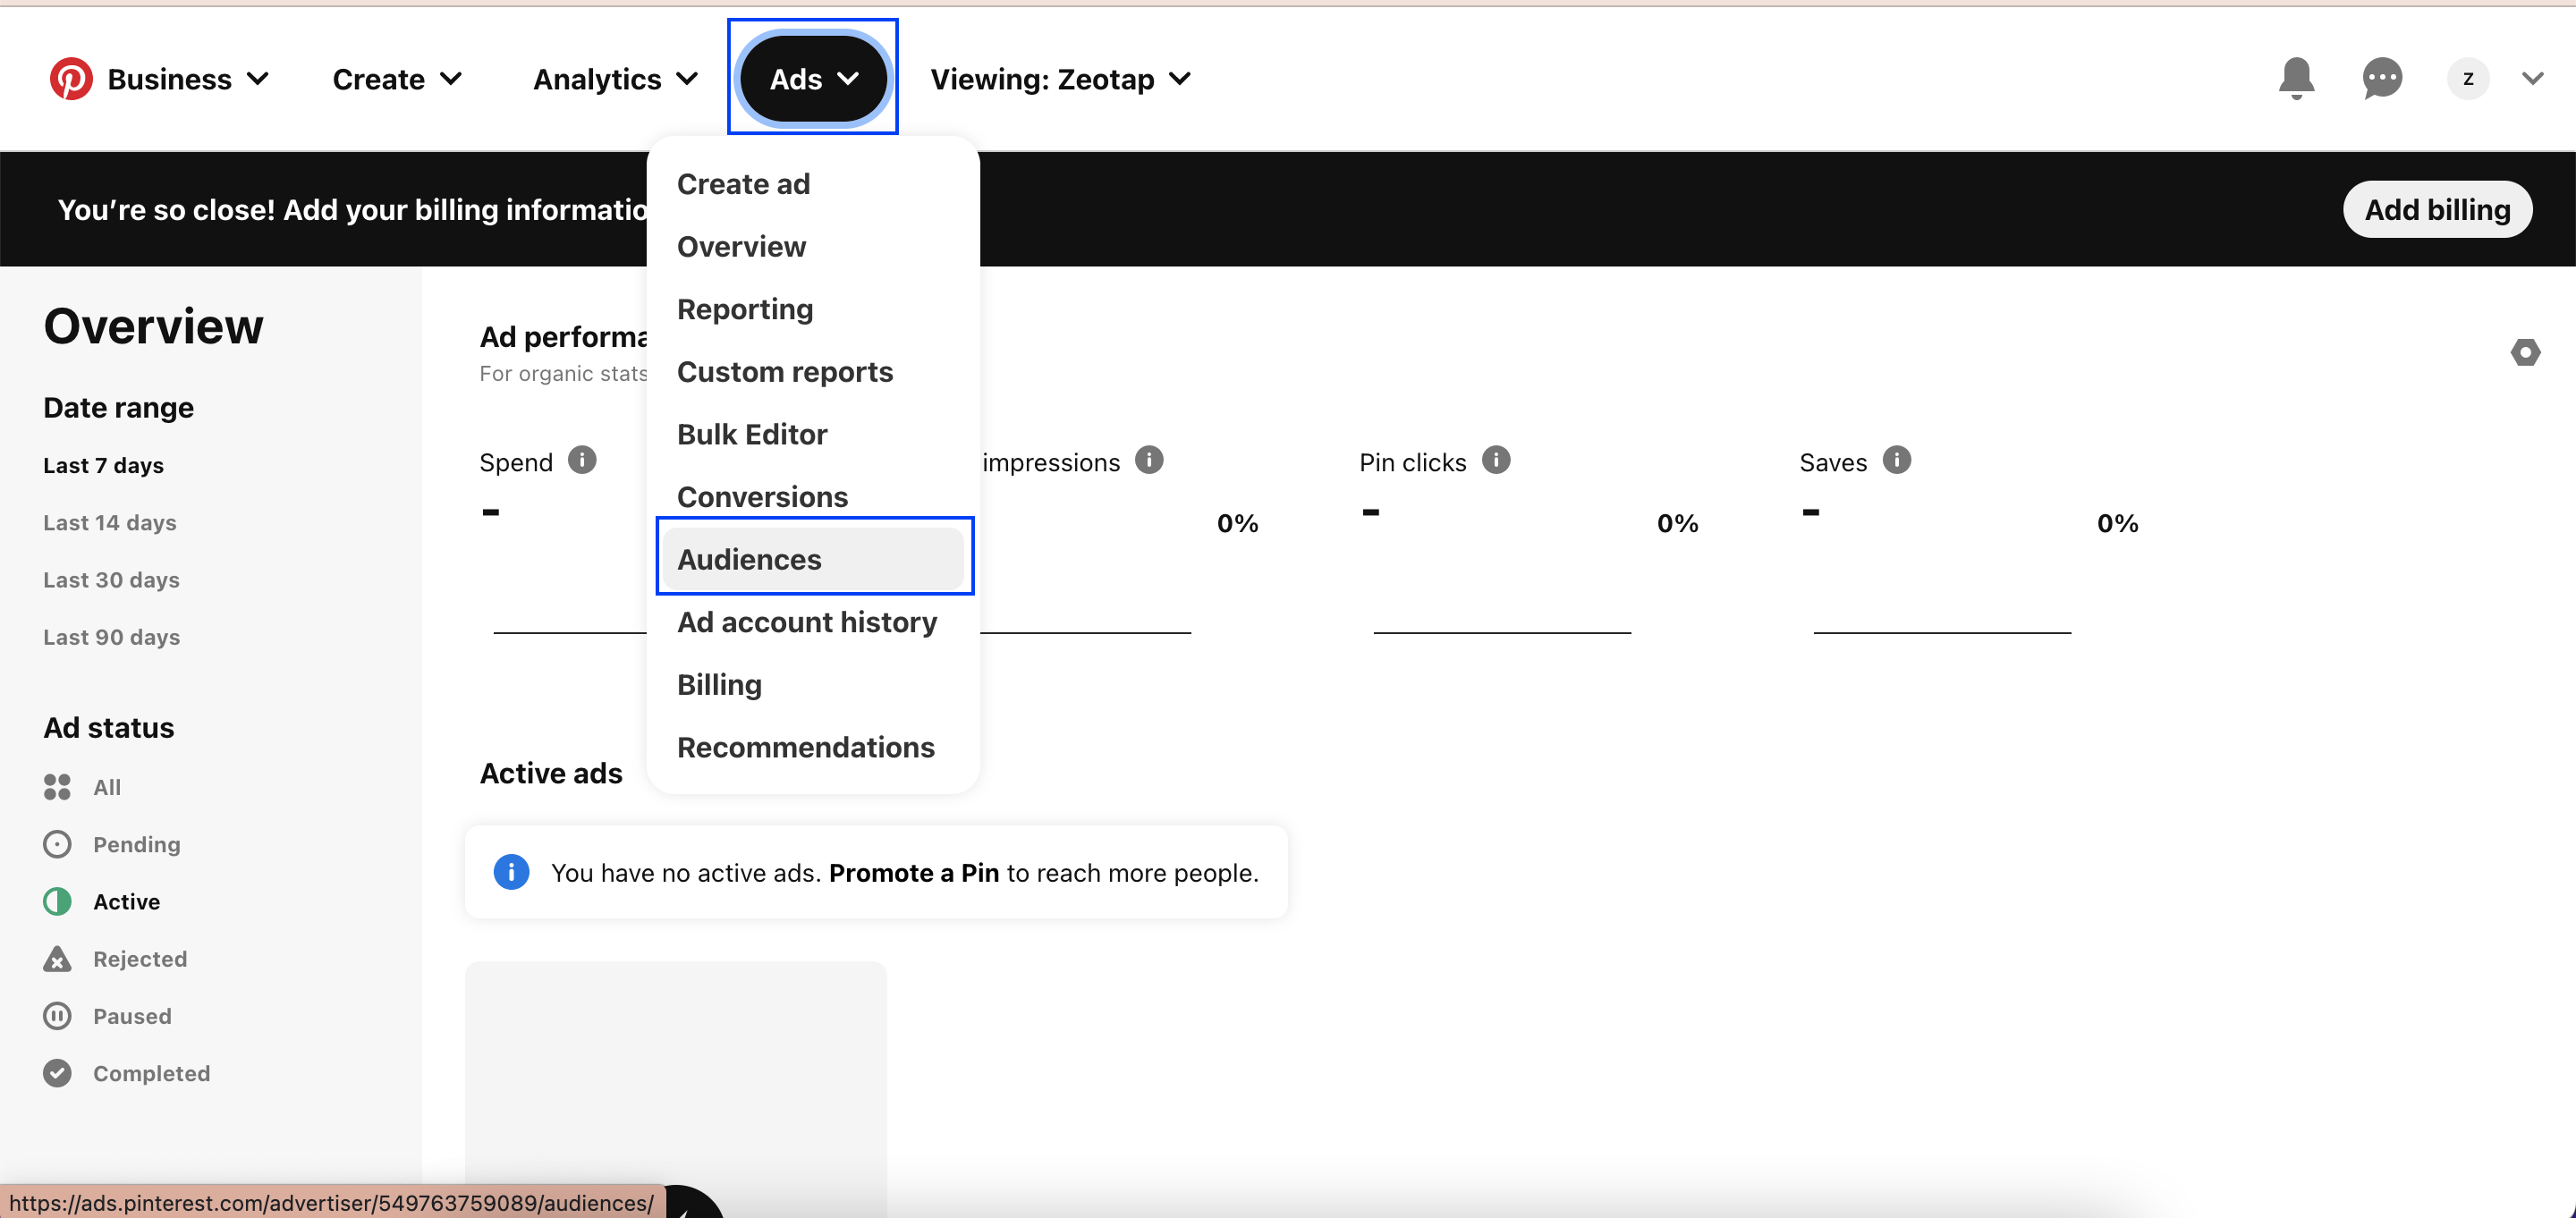
You can find the segments pushed by Zeotap under **Ads** > **Audiences**. The segments are displayed as Customer Lists. It takes 2 to 3 days for the segments to appear on this console. You can expect a lower match rate on Pinterest as the number of Pinterest accounts itself is quite lower as compared to Facebook, Twitter and so on. Therefore, the same segment may show a much lower match rate here.
Segments with considerable size and the status as **Ready** appear here. When segments are not ready or too small they show up with sizes less than \<100. Once the audience is created, we can see more volume.
## Link an Audience to the Pinterest Destination
For information about how to link an Audience or segment to the created Destination in the **Audiences** application, refer [here](/articles/integrate-customer/link-an-audience-to-the-destination). Note that it can take up to two business days for the segment to be available at the Pinterest seat.
**Note:**
The terms *Audiences* and *Segments* are used interchangeably to refer to customer cohorts belonging to a specific category. For example, an Audience or a segment can be a specific group of customers who are over 18 years of age and have performed an `addToCart` event within the last 30 days.
## View Audiences on Pinterest Console
You can find the segments pushed by Zeotap under **Ads** > **Audiences**. The segments are displayed as Customer Lists. It takes 2 to 3 days for the segments to appear on this console. You can expect a lower match rate on Pinterest as the number of Pinterest accounts itself is quite lower as compared to Facebook, Twitter and so on. Therefore, the same segment may show a much lower match rate here.
Segments with considerable size and the status as **Ready** appear here. When segments are not ready or too small they show up with sizes less than \<100. Once the audience is created, we can see more volume.
 ## Create Campaigns in Pinterest
Once the Customer List is ready, you can create a campaign as per your requirement.
Below is an example of a dummy campaign that was set for reference. Follow the below steps for your reference.
Navigate to **Create** > **Create ad**.
## Create Campaigns in Pinterest
Once the Customer List is ready, you can create a campaign as per your requirement.
Below is an example of a dummy campaign that was set for reference. Follow the below steps for your reference.
Navigate to **Create** > **Create ad**.
 Add the required details to the Ad.
Under the **Audience** **lists** section, click **Use existing list**.
Add the required details to the Ad.
Under the **Audience** **lists** section, click **Use existing list**.
 Select the **Customer lists** checkbox to view all the ready-to-use Customer Lists.
Click the Customer List that you want to link and then click **Select**.
Select the **Customer lists** checkbox to view all the ready-to-use Customer Lists.
Click the Customer List that you want to link and then click **Select**.
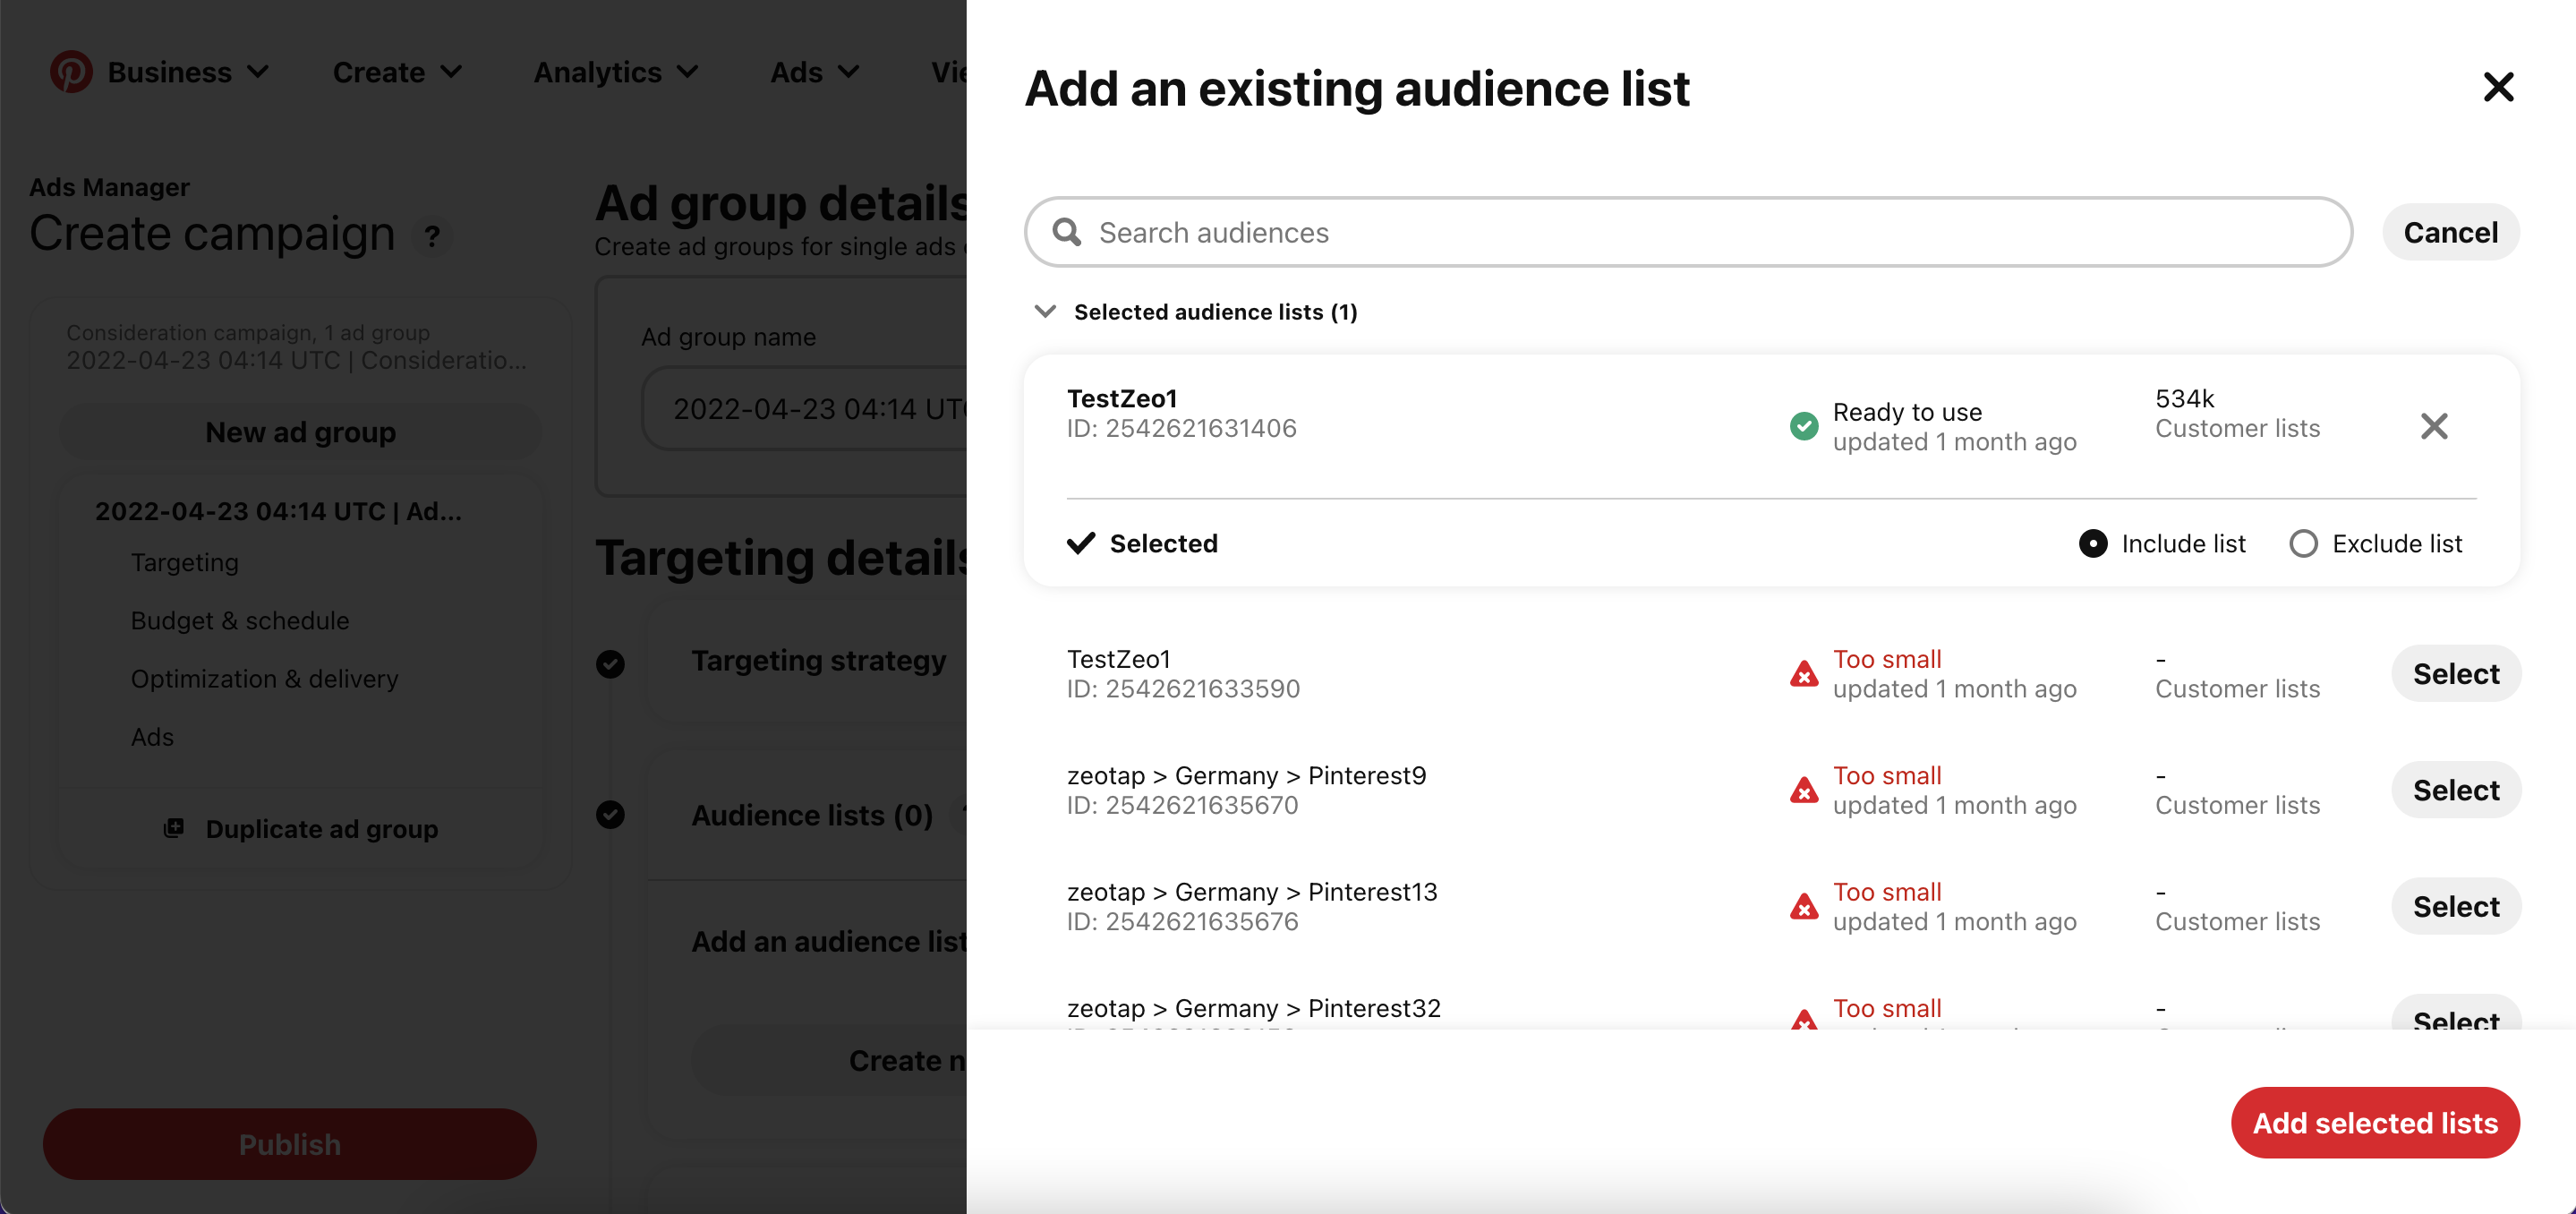
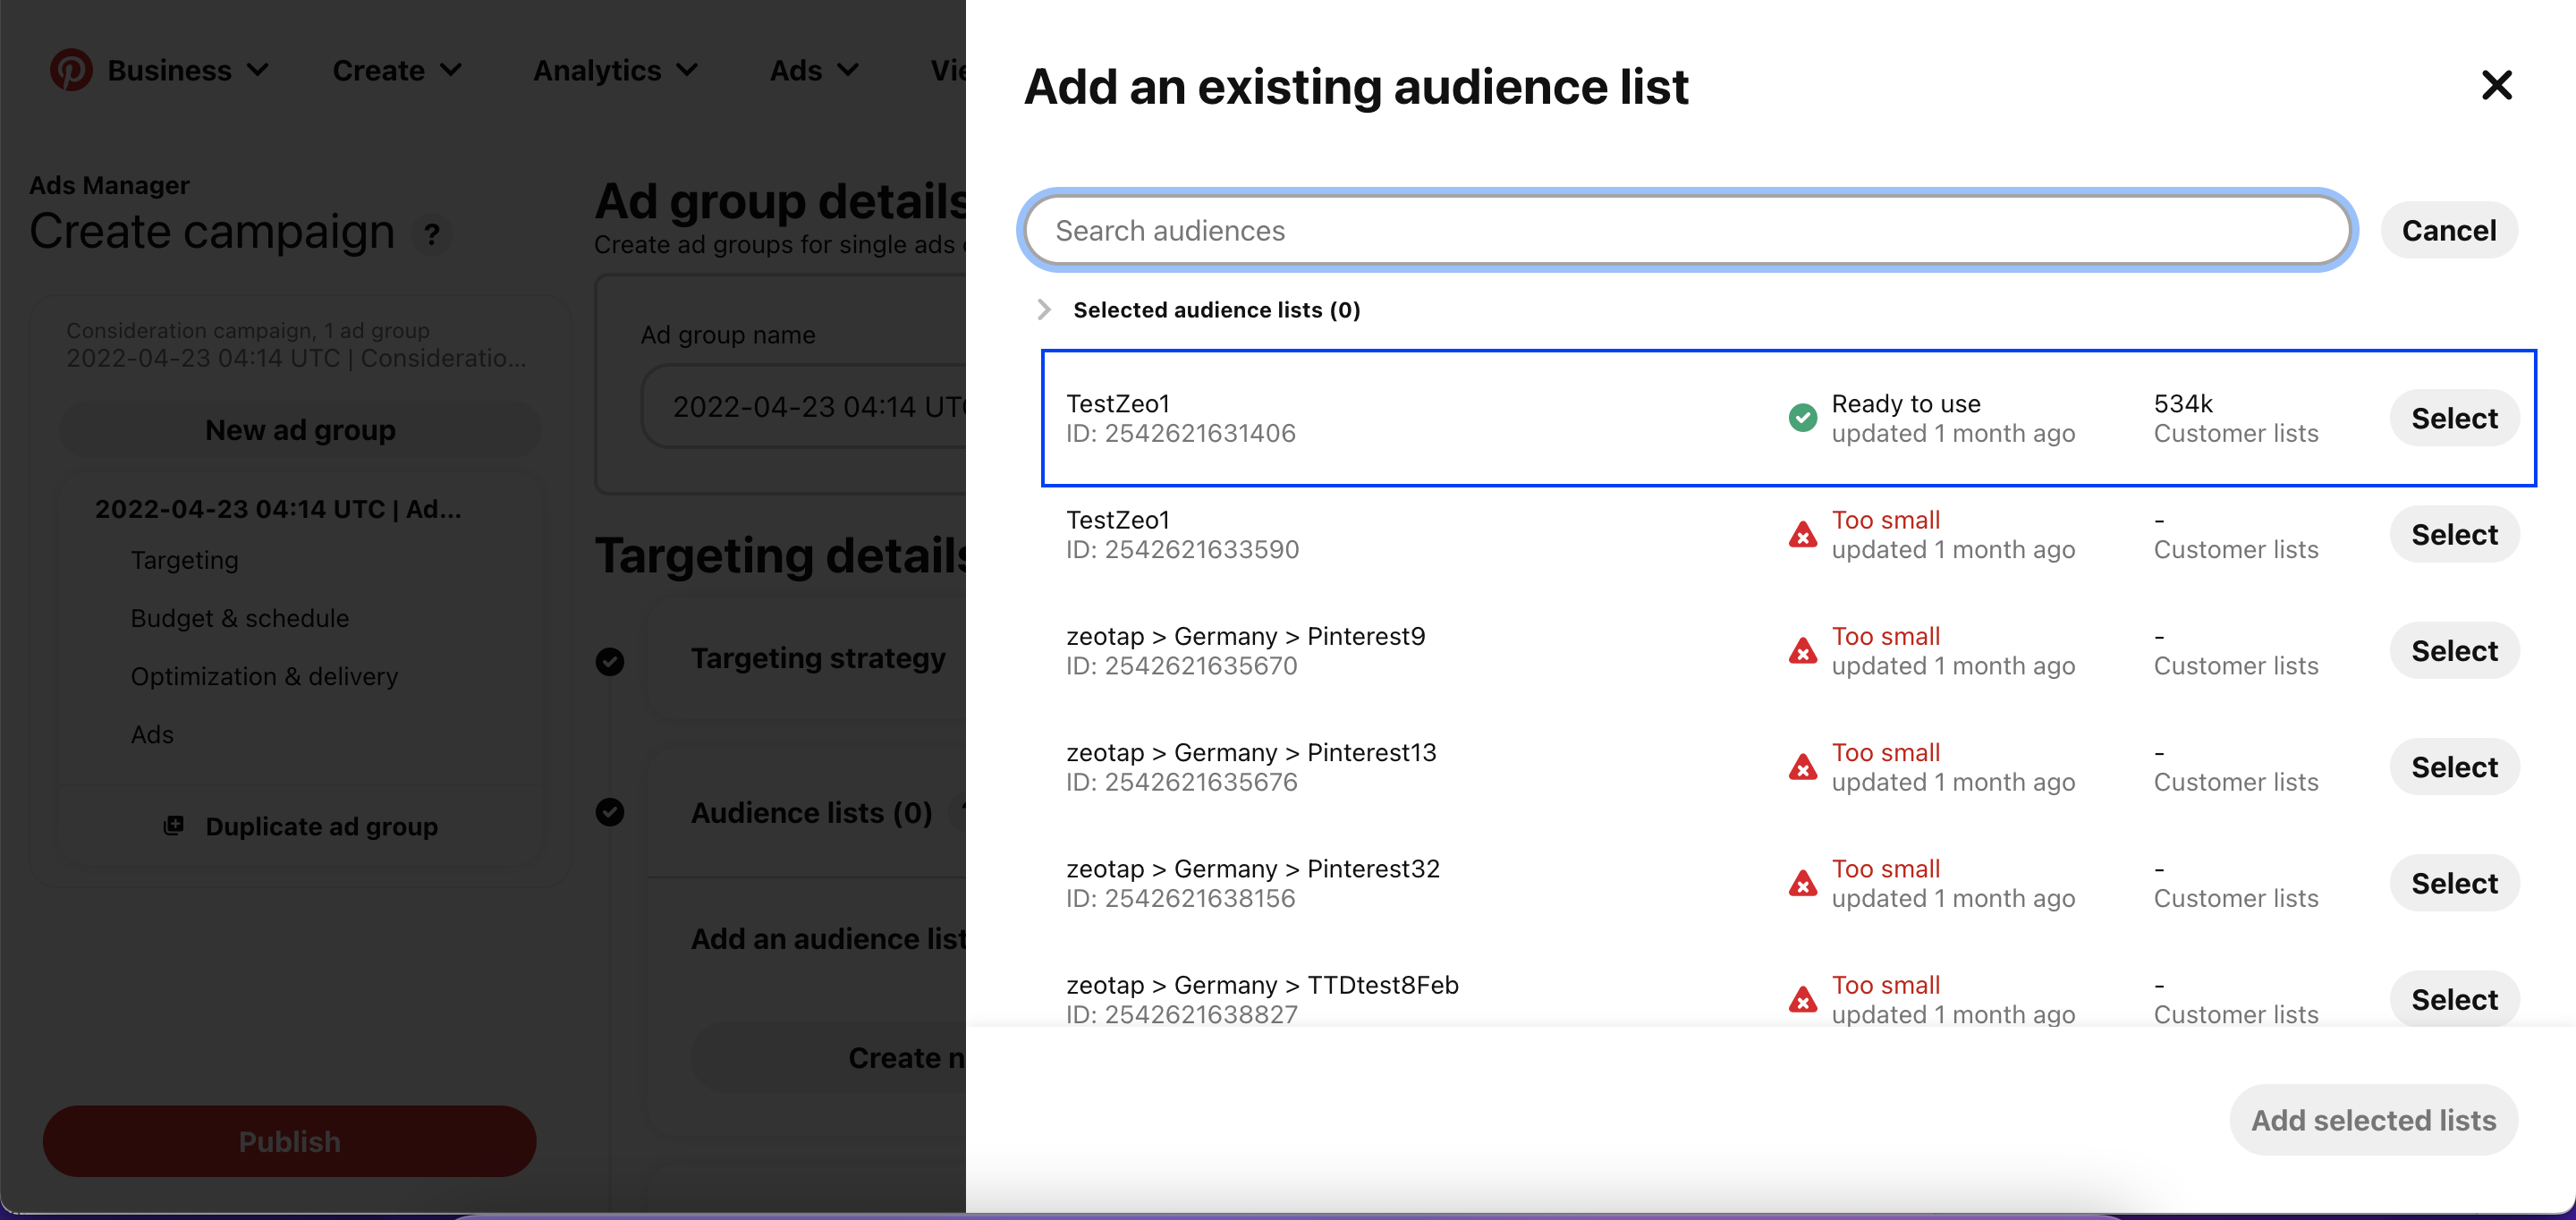 Click **Add selected lists** to create the Ad campaign for the selected Customer List.
 ## User Disqualification from Audiences
This integration supports user disqualification from audiences. That is, a user can be disqualified from an audience (segment) for various reasons, such as not meeting audience criteria, consent requirements or other conditions set for a particular audience.
* When a user disqualifies from an audience, Zeotap CDP initiates a user deletion request in the next refresh cycle. These requests are sent to the audiences linked to the specific destination.
* The disqualified users are excluded from the audiences based on the configured refresh frequency for a particular audience.
* User disqualification is a programmatic process that works automatically. You do not need to specify anything to trigger the disqualification and exclusion of users from audiences.
## User Disqualification from Audiences
This integration supports user disqualification from audiences. That is, a user can be disqualified from an audience (segment) for various reasons, such as not meeting audience criteria, consent requirements or other conditions set for a particular audience.
* When a user disqualifies from an audience, Zeotap CDP initiates a user deletion request in the next refresh cycle. These requests are sent to the audiences linked to the specific destination.
* The disqualified users are excluded from the audiences based on the configured refresh frequency for a particular audience.
* User disqualification is a programmatic process that works automatically. You do not need to specify anything to trigger the disqualification and exclusion of users from audiences.