> ## Documentation Index
> Fetch the complete documentation index at: https://docs.zeotap.com/llms.txt
> Use this file to discover all available pages before exploring further.
# Pinterest CAPI
## Overview
Pinterest is a visual discovery engine where people find inspiration for their lives, from planning a meal to redecorating a home. The Pinterest Conversions API helps businesses by creating a direct, reliable connection between your server and Pinterest. This server-to-server method tracks customer actions more accurately than browser-based tools, bypassing issues like ad blockers.
The Pinterest CAPI integration with Zeotap enables sending this complete and trustworthy data to your Pinterest instance enabling you to better measure your campaign's true impact, improve ad targeting, and achieve a higher return on your ad spend.
## Supported Identifiers
This integration supports SHA 256 Email, SHA 256 MAID's and SHA 256 Phone Numbers
## Pre requisites
Please ensure the following steps are completed in Pinterest before configuring the destination in Zeotap.
* [Set up a business account](https://www.pinterest.com/business/create/)
* Generate Token
* Go to **Ads Manager**, and select **Ad Account Overview > Conversions > Conversions API > Set up API**.


 * Select **Conversion access token**, and click **Generate new token**.
* **Copy** your newly generated **token**, which is displayed with your **ad account ID.**
* Select **Conversion access token**, and click **Generate new token**.
* **Copy** your newly generated **token**, which is displayed with your **ad account ID.**
 ## Creating a Destination
Log into the **Zeotap CDP** App and go to the **DESTINATIONS** application.
Click **+ Create Destination**.
Under **All Destinations**, search for **Pinterest CAPI.**
Click on Pinterest CAPI . A screen appears displaying details about the particular destination towards the left. On the right-hand side of the screen find a list of fields that are required for the integration to be established. Enter the required details as mentioned in the following steps:
a. Enter a **N** **ame** for the Destination.
b. Enter the **Access Token.**
c. Enter the **Ad Account ID.**
d. Enter the **Destination Instance Name**.
e. Click **Next** to proceed to **mapping**.
## Creating a Destination
Log into the **Zeotap CDP** App and go to the **DESTINATIONS** application.
Click **+ Create Destination**.
Under **All Destinations**, search for **Pinterest CAPI.**
Click on Pinterest CAPI . A screen appears displaying details about the particular destination towards the left. On the right-hand side of the screen find a list of fields that are required for the integration to be established. Enter the required details as mentioned in the following steps:
a. Enter a **N** **ame** for the Destination.
b. Enter the **Access Token.**
c. Enter the **Ad Account ID.**
d. Enter the **Destination Instance Name**.
e. Click **Next** to proceed to **mapping**.
 In the new screen that appears, choose the appropriate **Action** and **mapping** as explained below.
a. Choose the desired action under **Choose your Action** and then choose the **corresponding identifiers** under **Map the Fields**. By default, the output Identifiers that are accepted by the platform, such as **hashed email IDs** list and **hashed phone numbers**, etc are displayed.
b. The following are the **mandatory fields** that needs to be mapped :
i. **Event ID**
ii. **Event Time**
iii. Please note that you must send either a **hashed email, hashed phone number, or hashed IP address**, along with the **Event ID** and **Event Time** fields.
c. Click **Save Mapping**.
In the new screen that appears, choose the appropriate **Action** and **mapping** as explained below.
a. Choose the desired action under **Choose your Action** and then choose the **corresponding identifiers** under **Map the Fields**. By default, the output Identifiers that are accepted by the platform, such as **hashed email IDs** list and **hashed phone numbers**, etc are displayed.
b. The following are the **mandatory fields** that needs to be mapped :
i. **Event ID**
ii. **Event Time**
iii. Please note that you must send either a **hashed email, hashed phone number, or hashed IP address**, along with the **Event ID** and **Event Time** fields.
c. Click **Save Mapping**.
 ## Activate the Destination on Journeys
After creating a **destination**, next, you need to link it in the **Send to Destination** node within the workflow, as explained below.
In the workflow, **click +** and choose **Send to Destinations.**
## Activate the Destination on Journeys
After creating a **destination**, next, you need to link it in the **Send to Destination** node within the workflow, as explained below.
In the workflow, **click +** and choose **Send to Destinations.**
 Choose the destination from the list of available destinations by using the search feature.
 Under the Destination Details tab, the **Access Token** and **Ad Account ID** fields are automatically populated based on the value that you have entered while creating the destination.
Under the Event Name, choose the appropriate option based on your requirement.
* Add to Cart
* Checkout
* Custom
* Lead
* Page Visit
* Search
* Sign Up
* View Category
* Watch Video
Under Action Source, choose the source using the drop-down menu.
* Android
* iOS
* Web
* Offline
Under the Destination Details tab, the **Access Token** and **Ad Account ID** fields are automatically populated based on the value that you have entered while creating the destination.
Under the Event Name, choose the appropriate option based on your requirement.
* Add to Cart
* Checkout
* Custom
* Lead
* Page Visit
* Search
* Sign Up
* View Category
* Watch Video
Under Action Source, choose the source using the drop-down menu.
* Android
* iOS
* Web
* Offline
 Under the **Destination Settings tab**, choose the **Action** and **mapping** as per your requirement.
Upon clicking **Save Destination**. The destination is attached as shown in the image below.
Under the **Destination Settings tab**, choose the **Action** and **mapping** as per your requirement.
Upon clicking **Save Destination**. The destination is attached as shown in the image below.
 ## Viewing Your Conversion Data in Pinterest Ads Manager
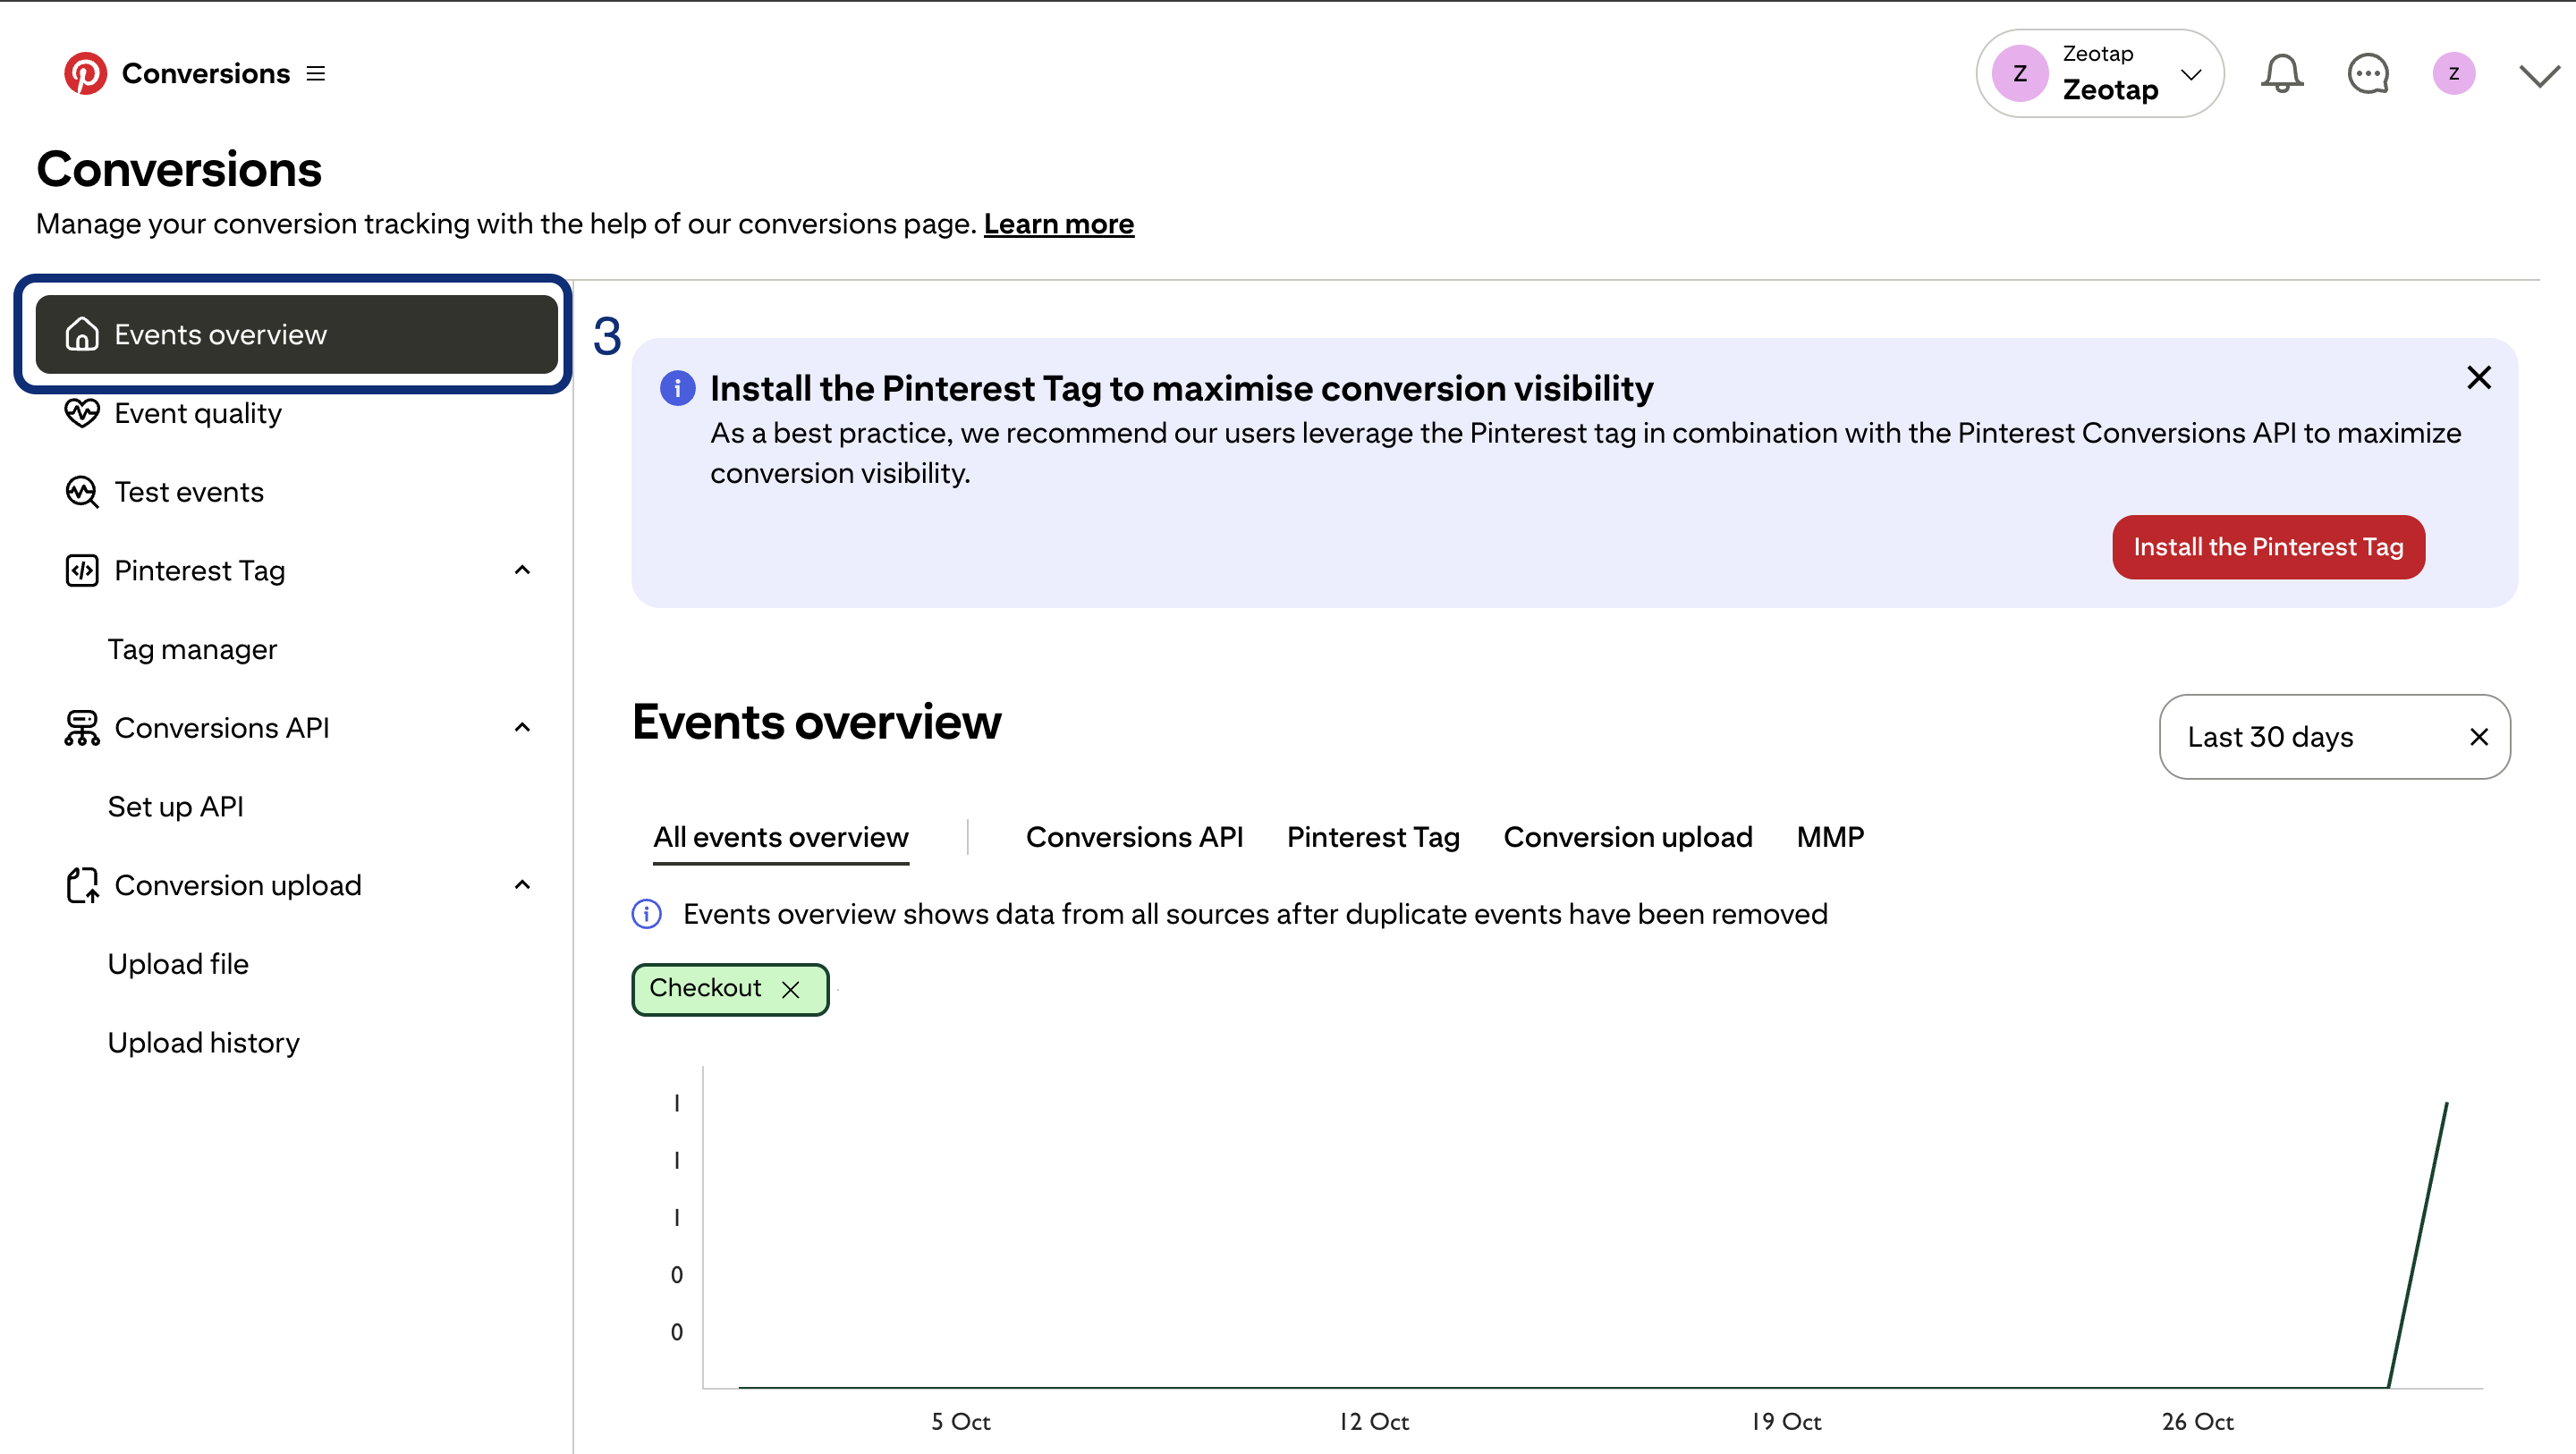
* Go to **Ads Manager**, and select **Ad Account Overview > Conversions > Conversions API > Events Overview**.
## Viewing Your Conversion Data in Pinterest Ads Manager
* Go to **Ads Manager**, and select **Ad Account Overview > Conversions > Conversions API > Events Overview**.