> ## Documentation Index
> Fetch the complete documentation index at: https://docs.zeotap.com/llms.txt
> Use this file to discover all available pages before exploring further.
# Optimizely Campaigns (Real Time)
## Overview
Optimizely Campaign is an omni channel marketing platform that allows businesses to create, manage, and analyse personalised marketing campaigns across channels such as email, SMS, print, and push notifications.
The platform includes features like marketing automation, A/B testing, send-time optimisation, and advanced analytics to help marketers deliver targeted messages and improve customer engagement.
When integrated with Zeotap, users qualified for workflows can be sent to Optimizely, enabling email campaign triggers.
## Supported Identifiers/Attributes
This integration allows you to send raw email address as **Recipient ID** and any attributes of your choice.
## Prerequisites
Ensure that you obtain the following prerequisites before starting this integration:
### API Username and Password
API Username and Password are credentials required for you to create a Optimizely Campaign destination in Zeotap CDP and send data to Optimizely Campaign. Ensure that you obtain these credentials from the Optimizely Campaign Support Team.
### Client ID
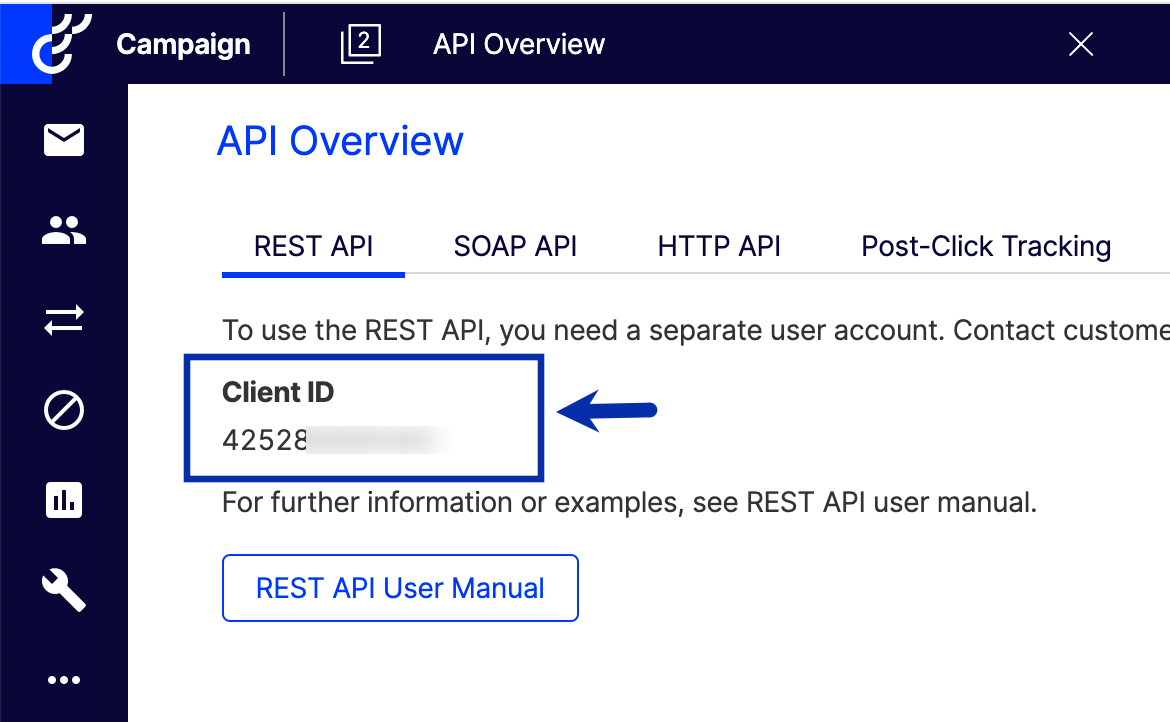
This is the unique ID created by Optimizely Campaign that enables you to send data. Ensure that the Optimizely Campaign Support Team sets up an API client for you. Once done, you can perform the following steps to obtain it:
log into your Optimizely Campaign account.
In the left navigation panel, click **Administration** > **API Overview**.
In the REST API tab, locate the **Client ID** as shown below.
 ### Transactional Mail ID
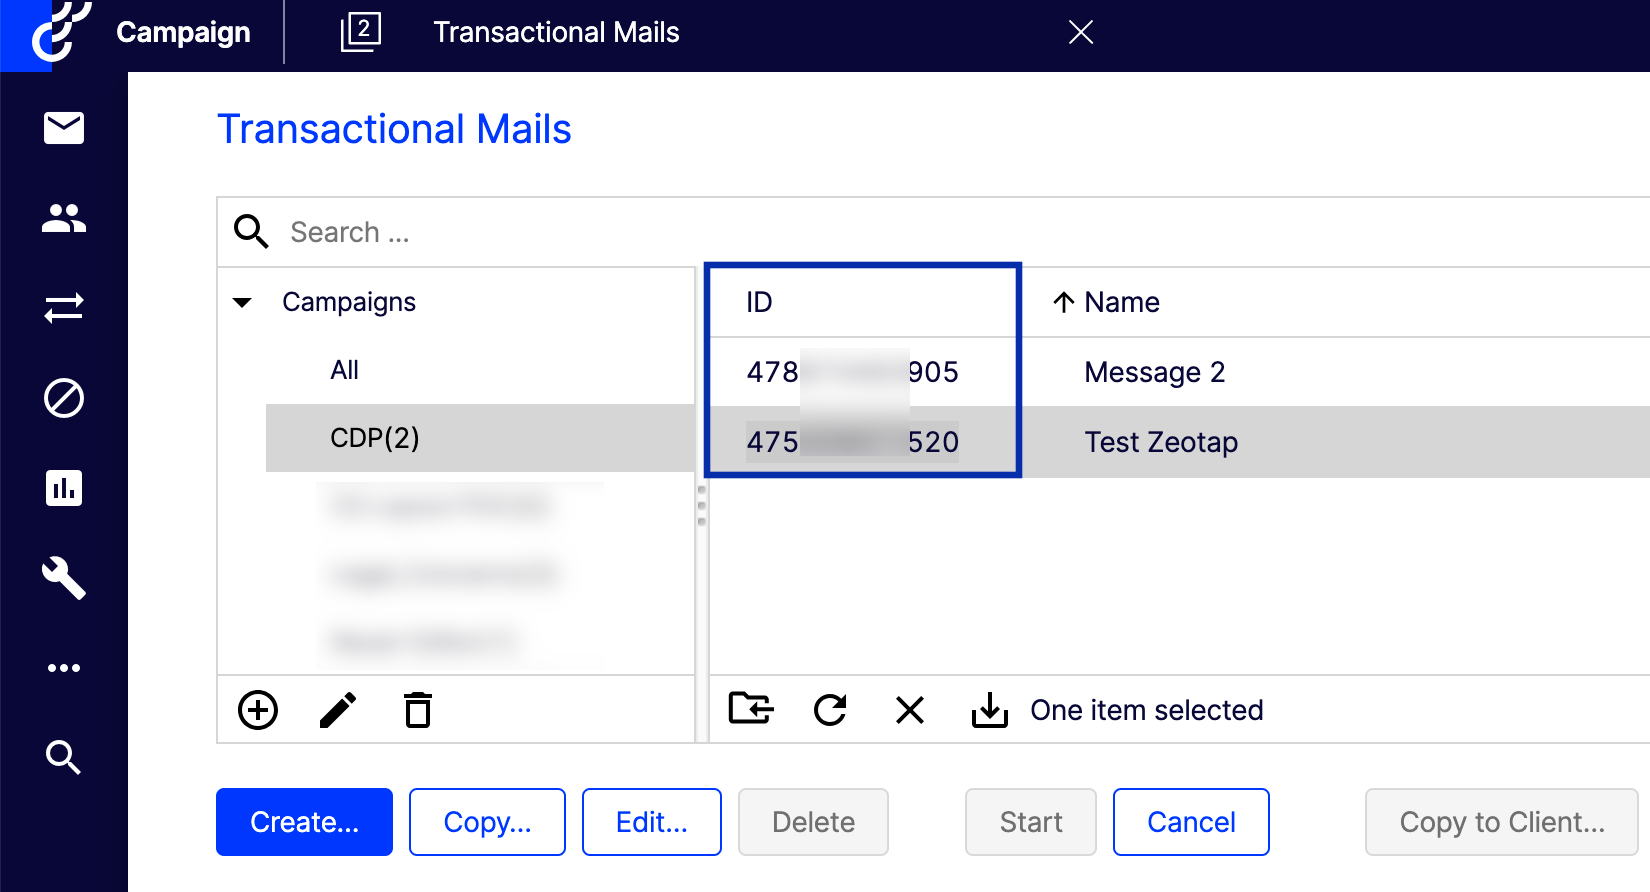
To trigger a transactional email in Optimizely from Zeotap, obtain the Transactional Mail ID from your Optimizely Campaign account. To do so, perform the following steps:
log into your Optimizely Campaign account.
In the left navigation panel, click **Campaigns** > **Transactional Emails**.
Click the relevant transactional email from the list.
Locate the ID associated with the selected email.
### Transactional Mail ID
To trigger a transactional email in Optimizely from Zeotap, obtain the Transactional Mail ID from your Optimizely Campaign account. To do so, perform the following steps:
log into your Optimizely Campaign account.
In the left navigation panel, click **Campaigns** > **Transactional Emails**.
Click the relevant transactional email from the list.
Locate the ID associated with the selected email.
 **Note:**
*If the ID field is not visible, then ensure the ID checkbox is selected in the drop-down, as shown below.*
**Note:**
*If the ID field is not visible, then ensure the ID checkbox is selected in the drop-down, as shown below.*
 ### Recipient List ID
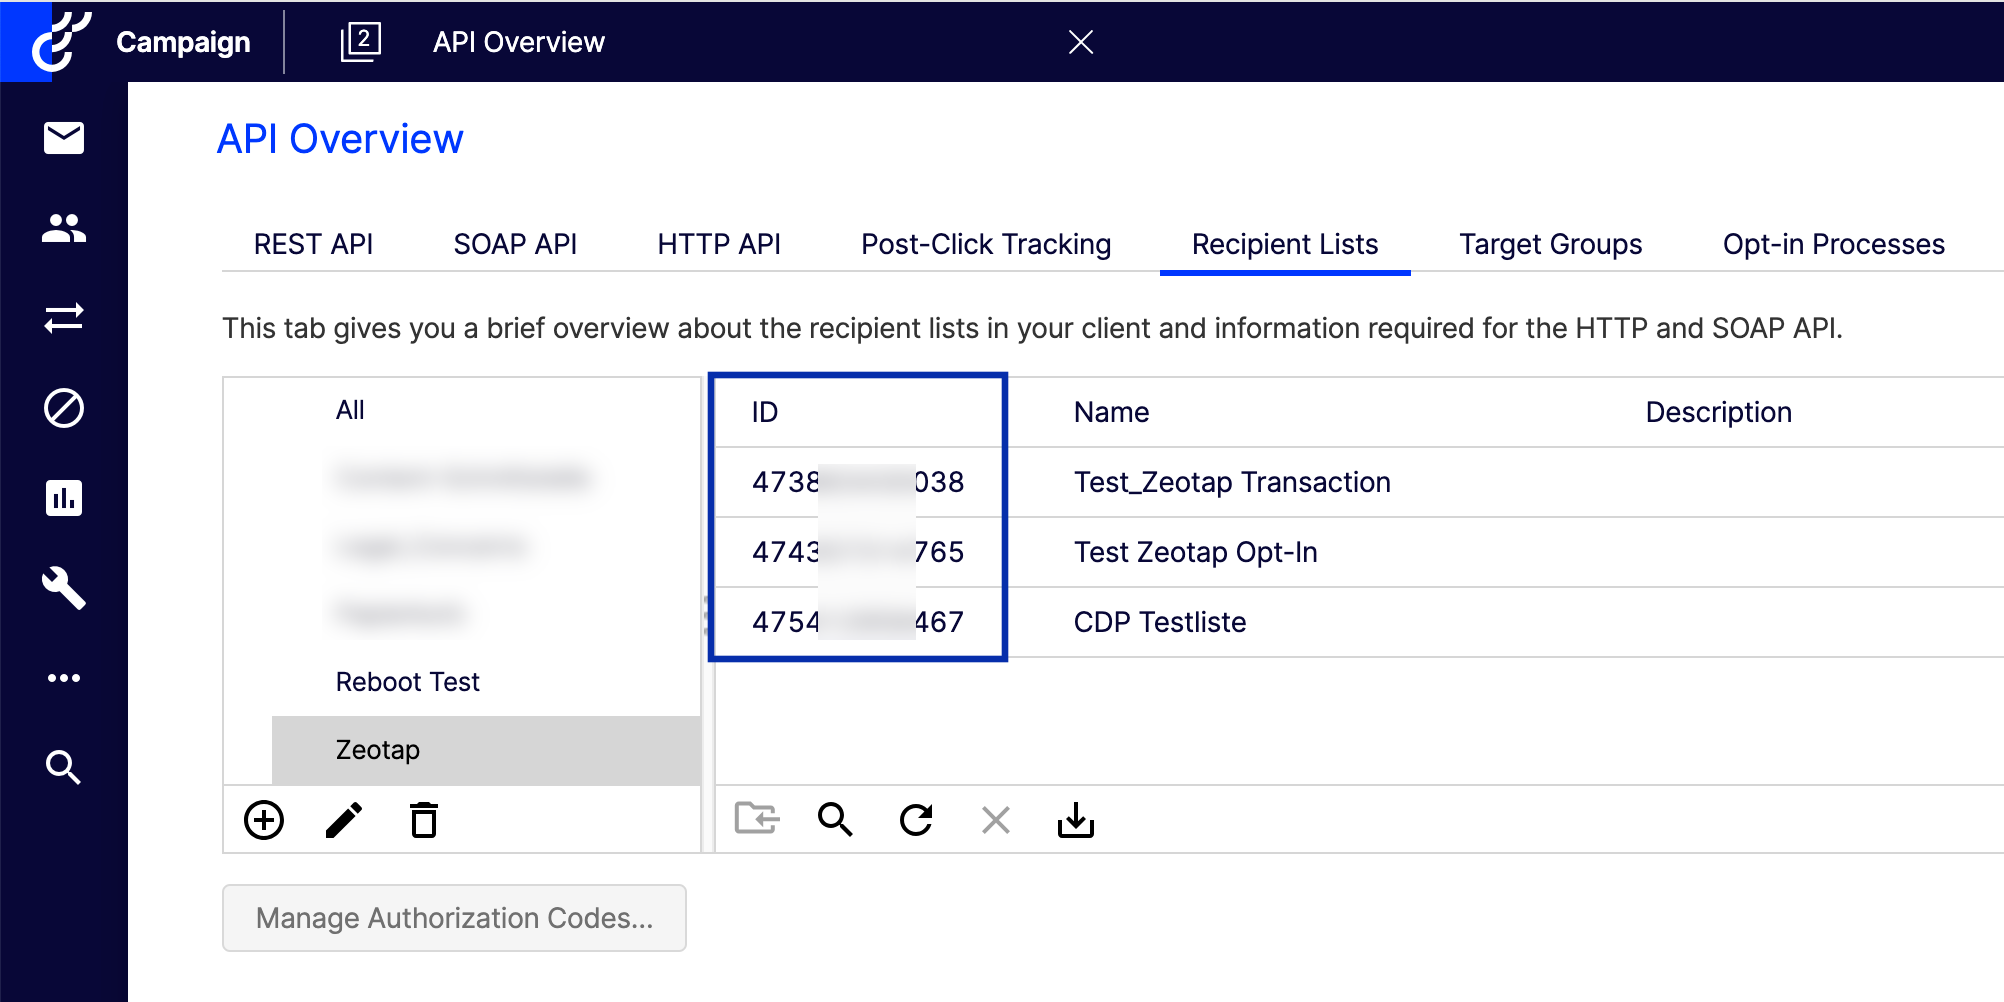
Ensure that you obtain the Recipient ID from your Optimizely Campaign account. To do so, perform the following steps:
log into your Optimizely Campaign account.
In the left navigation panel, click **Administration** > **API Overview**.
Go to the **Recipient Lists** tab, click the desired recipient list from the displayed list.
Locate the ID associated with the selected recipient list as shown below.
### Recipient List ID
Ensure that you obtain the Recipient ID from your Optimizely Campaign account. To do so, perform the following steps:
log into your Optimizely Campaign account.
In the left navigation panel, click **Administration** > **API Overview**.
Go to the **Recipient Lists** tab, click the desired recipient list from the displayed list.
Locate the ID associated with the selected recipient list as shown below.
 ## Destination Setup
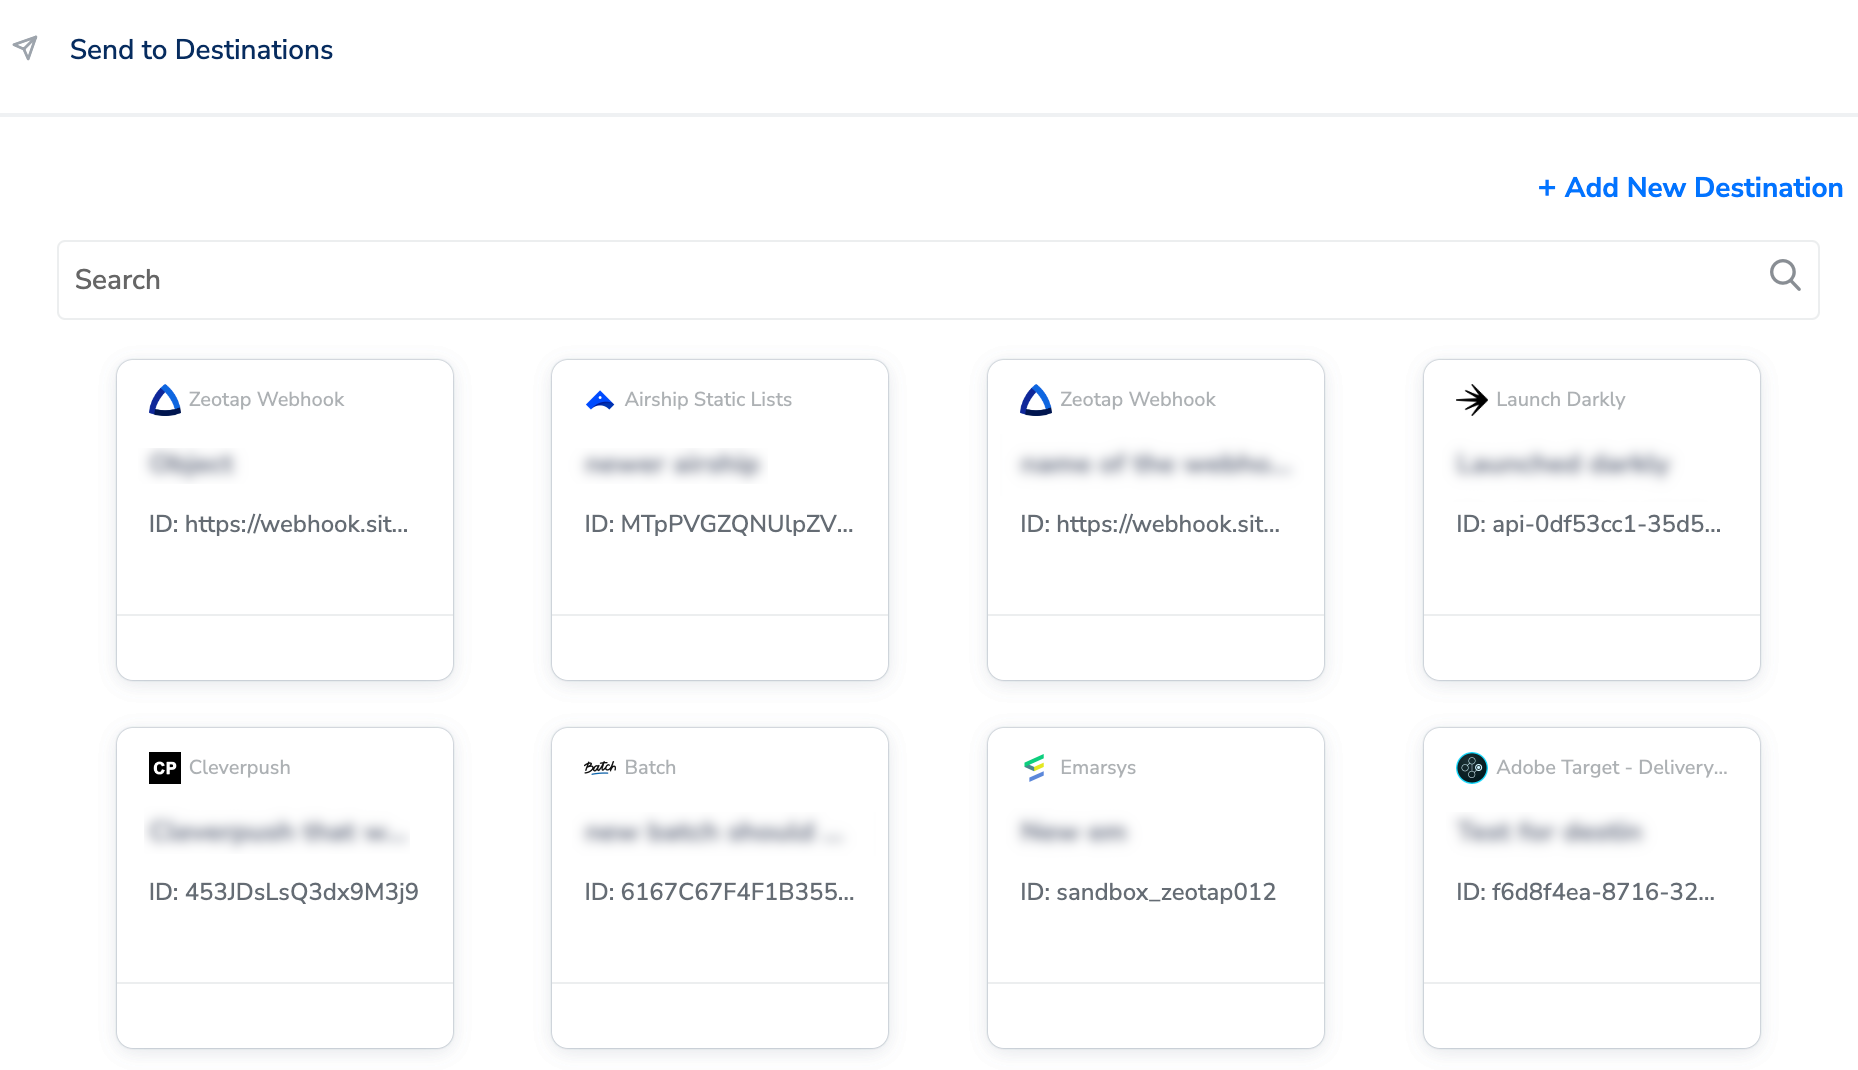
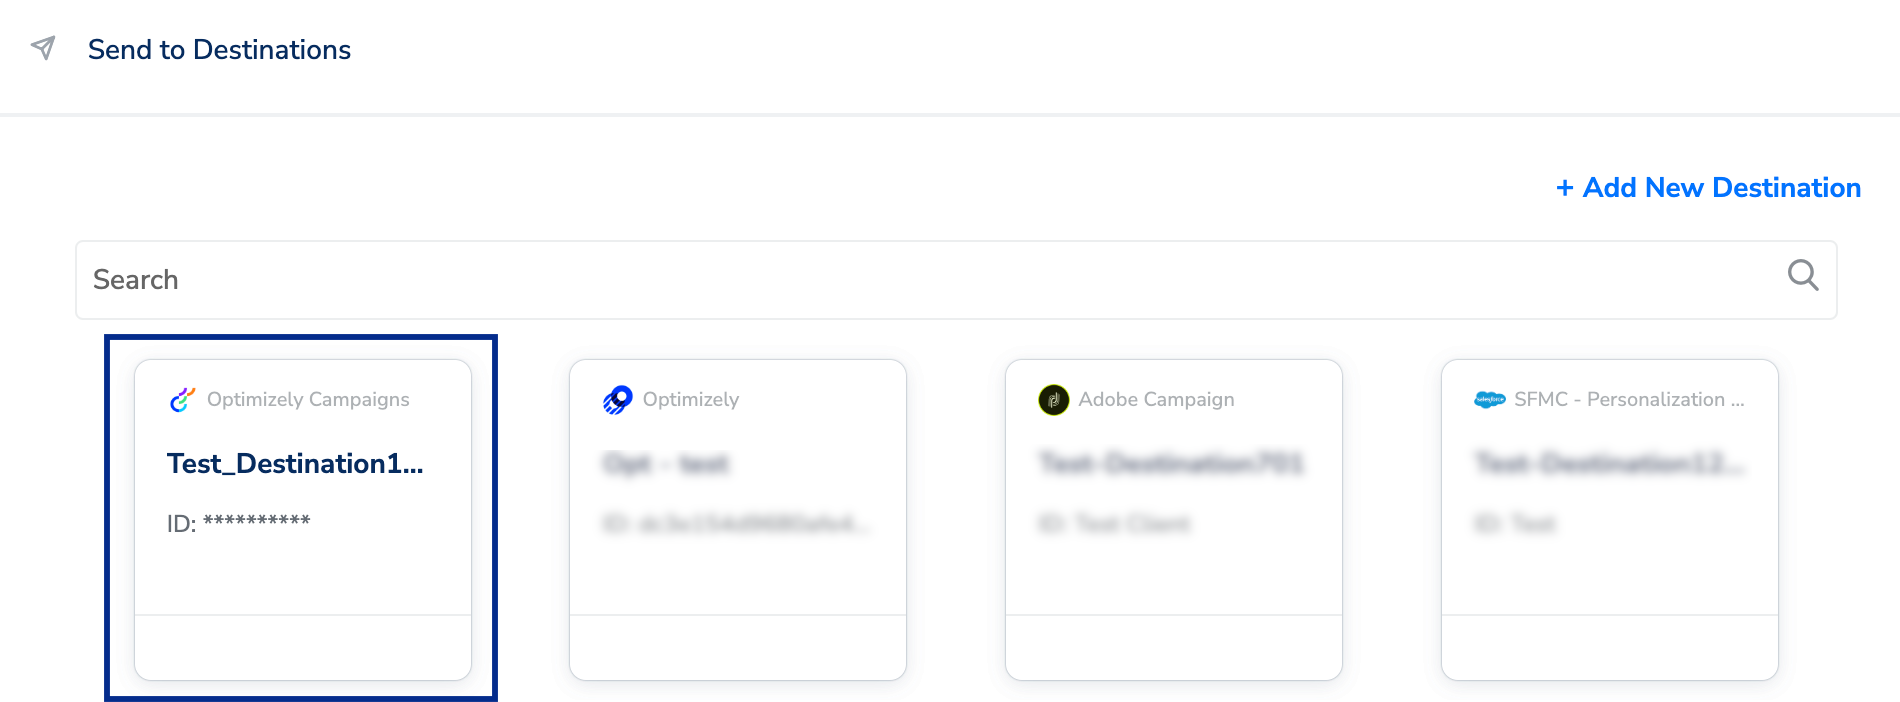
After you have applied filters or added conditions for your users in Journeys, you can activate them in Optimizely under **Send to Destinations.** A new window appears, where you can set up your destination. You can use an already existing destination from the list of available Destinations or create a new one by clicking **+ Add New Destination**.
## Destination Setup
After you have applied filters or added conditions for your users in Journeys, you can activate them in Optimizely under **Send to Destinations.** A new window appears, where you can set up your destination. You can use an already existing destination from the list of available Destinations or create a new one by clicking **+ Add New Destination**.
 ### Add New Destination
Perform the following steps to add a new destination:
Click + **Add New Destination.**
Search for **Optimizely Campaigns.**
### Add New Destination
Perform the following steps to add a new destination:
Click + **Add New Destination.**
Search for **Optimizely Campaigns.**
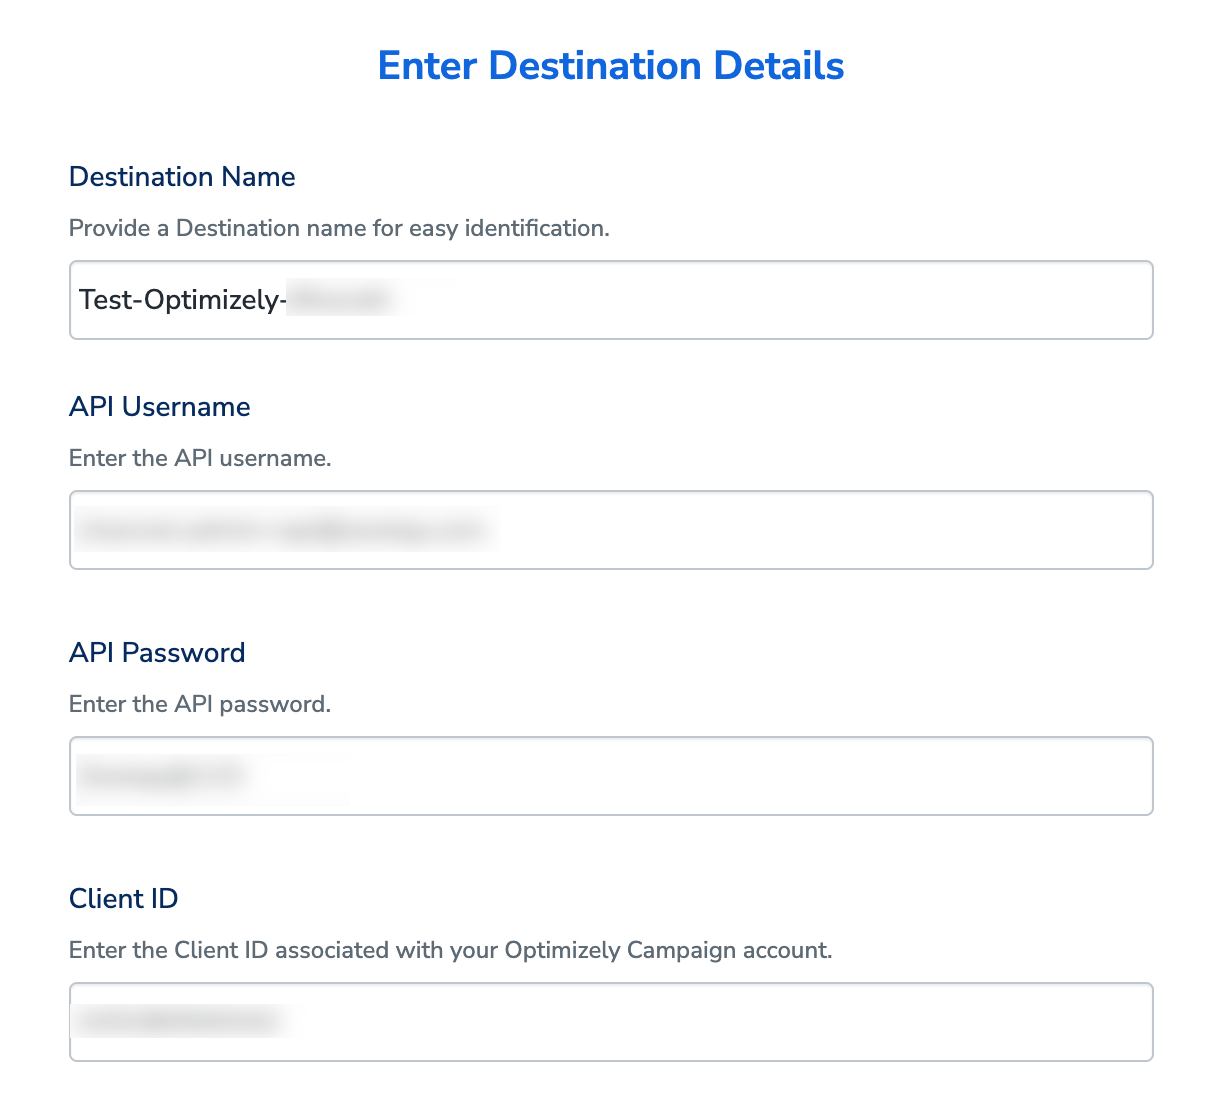
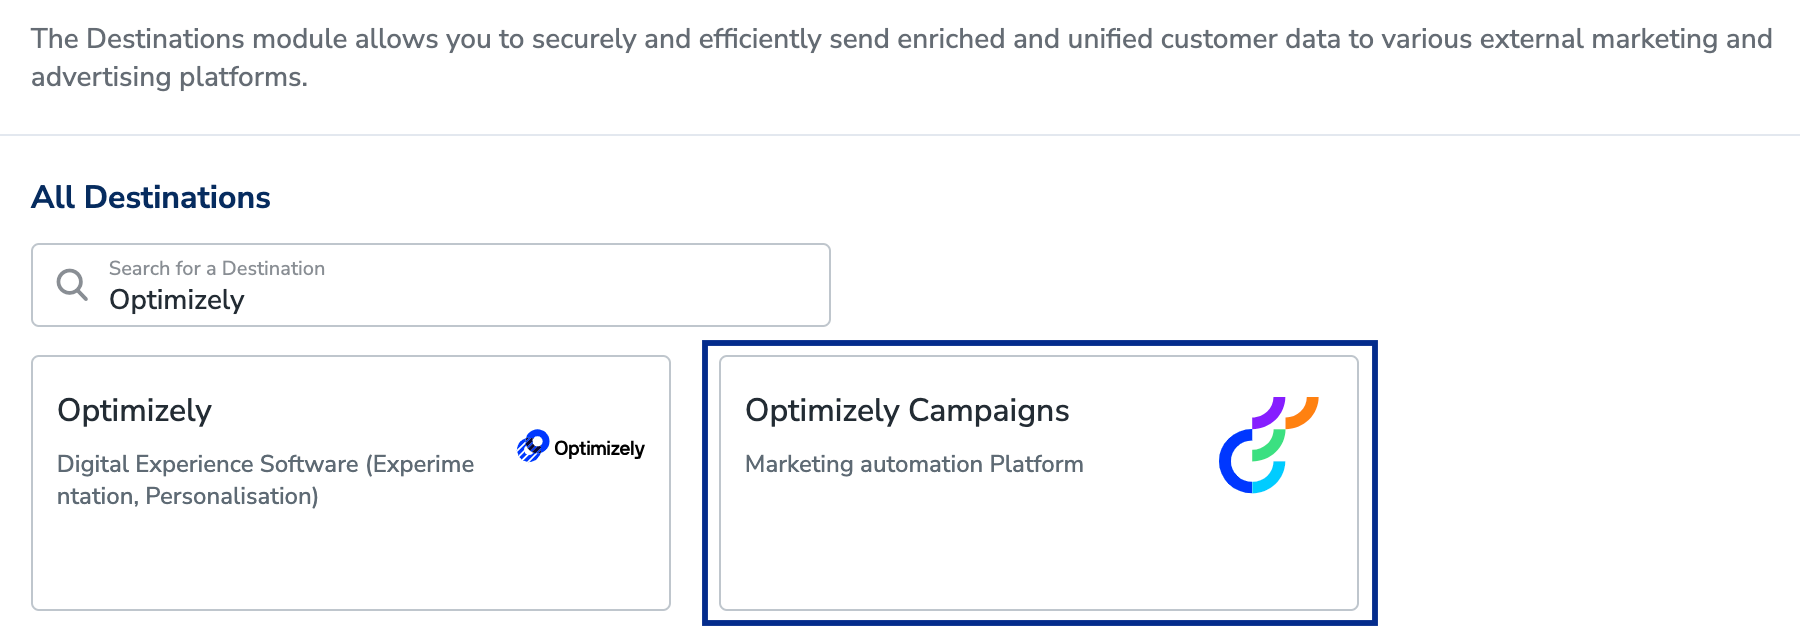 Click **Optimizely Campaigns** and enter a name for the Destination.
Enter the **API Username, Password**, and **Client ID** that you have obtained from Optimizely Campaign by following the steps mentioned in the [Prerequisites](/articles/integrate-customer/optimizely-campaigns#h2_1644201065) section.
Click **Optimizely Campaigns** and enter a name for the Destination.
Enter the **API Username, Password**, and **Client ID** that you have obtained from Optimizely Campaign by following the steps mentioned in the [Prerequisites](/articles/integrate-customer/optimizely-campaigns#h2_1644201065) section.
 Click **Next** to proceed to the **Actions and Mapping** screen.
On the **Mapping** screen, under **Choose your Action**, select **Send attributes and identifiers to Optimizely Campaigns** as the action to send data from the workflow created in Journeys. Under **Map the Fields**, map the Catalogue fields to the Destination fields as explained below.
a. Under **Identifiers**, ensure to map the **Recipient ID** mandatorily. In most cases, it is email address column or phone number, depending on your use case. **Note that you need to add all required fields to the desired recipient list in Optimizely Campaigns before mapping them in Zeotap CDP. In addition, ensure that you map the mandatory fields in Zeotap CDP. Skipping this step can result in Destination failure. [Learn more](https://support.optimizely.com/hc/en-us/articles/4413192289805-Introduction-to-recipient-lists)**
b. After mapping the Recipient ID, **ensure that all other column names in the recipient list in the Optimizely Campaign interface match exactly with the Destination Fields in Zeotap CDP.**
Click **Next** to proceed to the **Actions and Mapping** screen.
On the **Mapping** screen, under **Choose your Action**, select **Send attributes and identifiers to Optimizely Campaigns** as the action to send data from the workflow created in Journeys. Under **Map the Fields**, map the Catalogue fields to the Destination fields as explained below.
a. Under **Identifiers**, ensure to map the **Recipient ID** mandatorily. In most cases, it is email address column or phone number, depending on your use case. **Note that you need to add all required fields to the desired recipient list in Optimizely Campaigns before mapping them in Zeotap CDP. In addition, ensure that you map the mandatory fields in Zeotap CDP. Skipping this step can result in Destination failure. [Learn more](https://support.optimizely.com/hc/en-us/articles/4413192289805-Introduction-to-recipient-lists)**
b. After mapping the Recipient ID, **ensure that all other column names in the recipient list in the Optimizely Campaign interface match exactly with the Destination Fields in Zeotap CDP.**
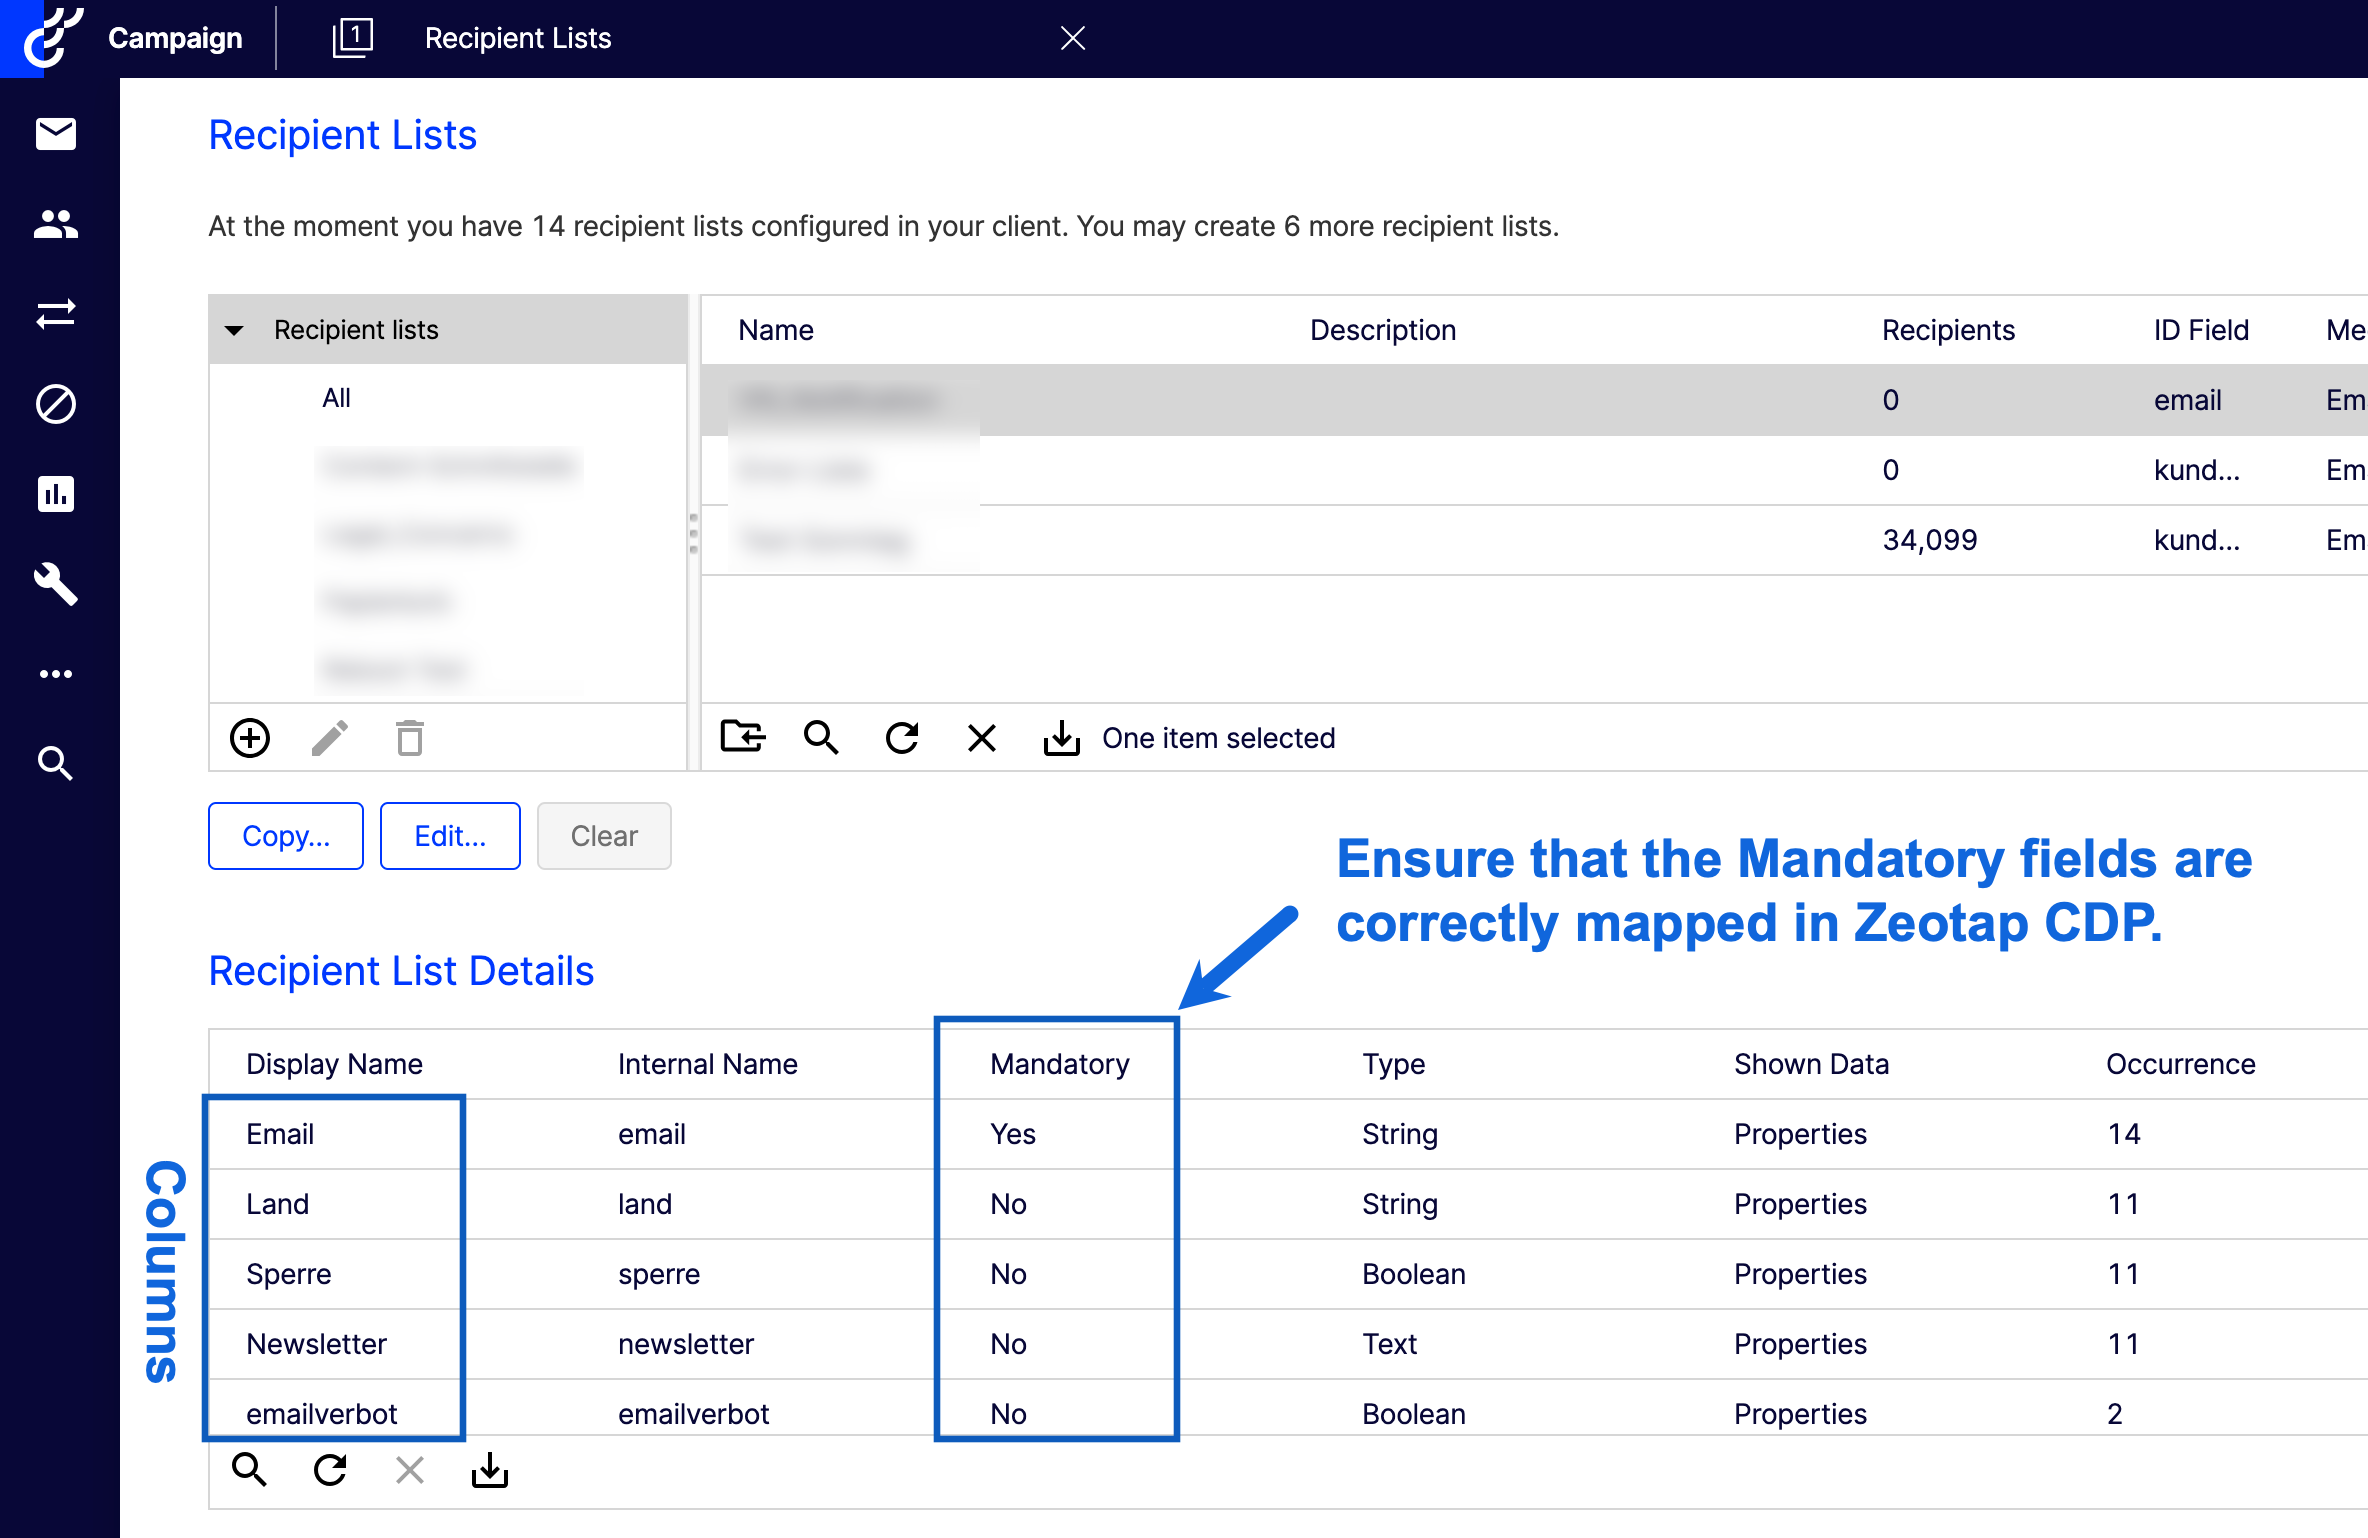 c. Map the required columns to the Destination Field (Right hand side) on the Mapping screen as shown below.
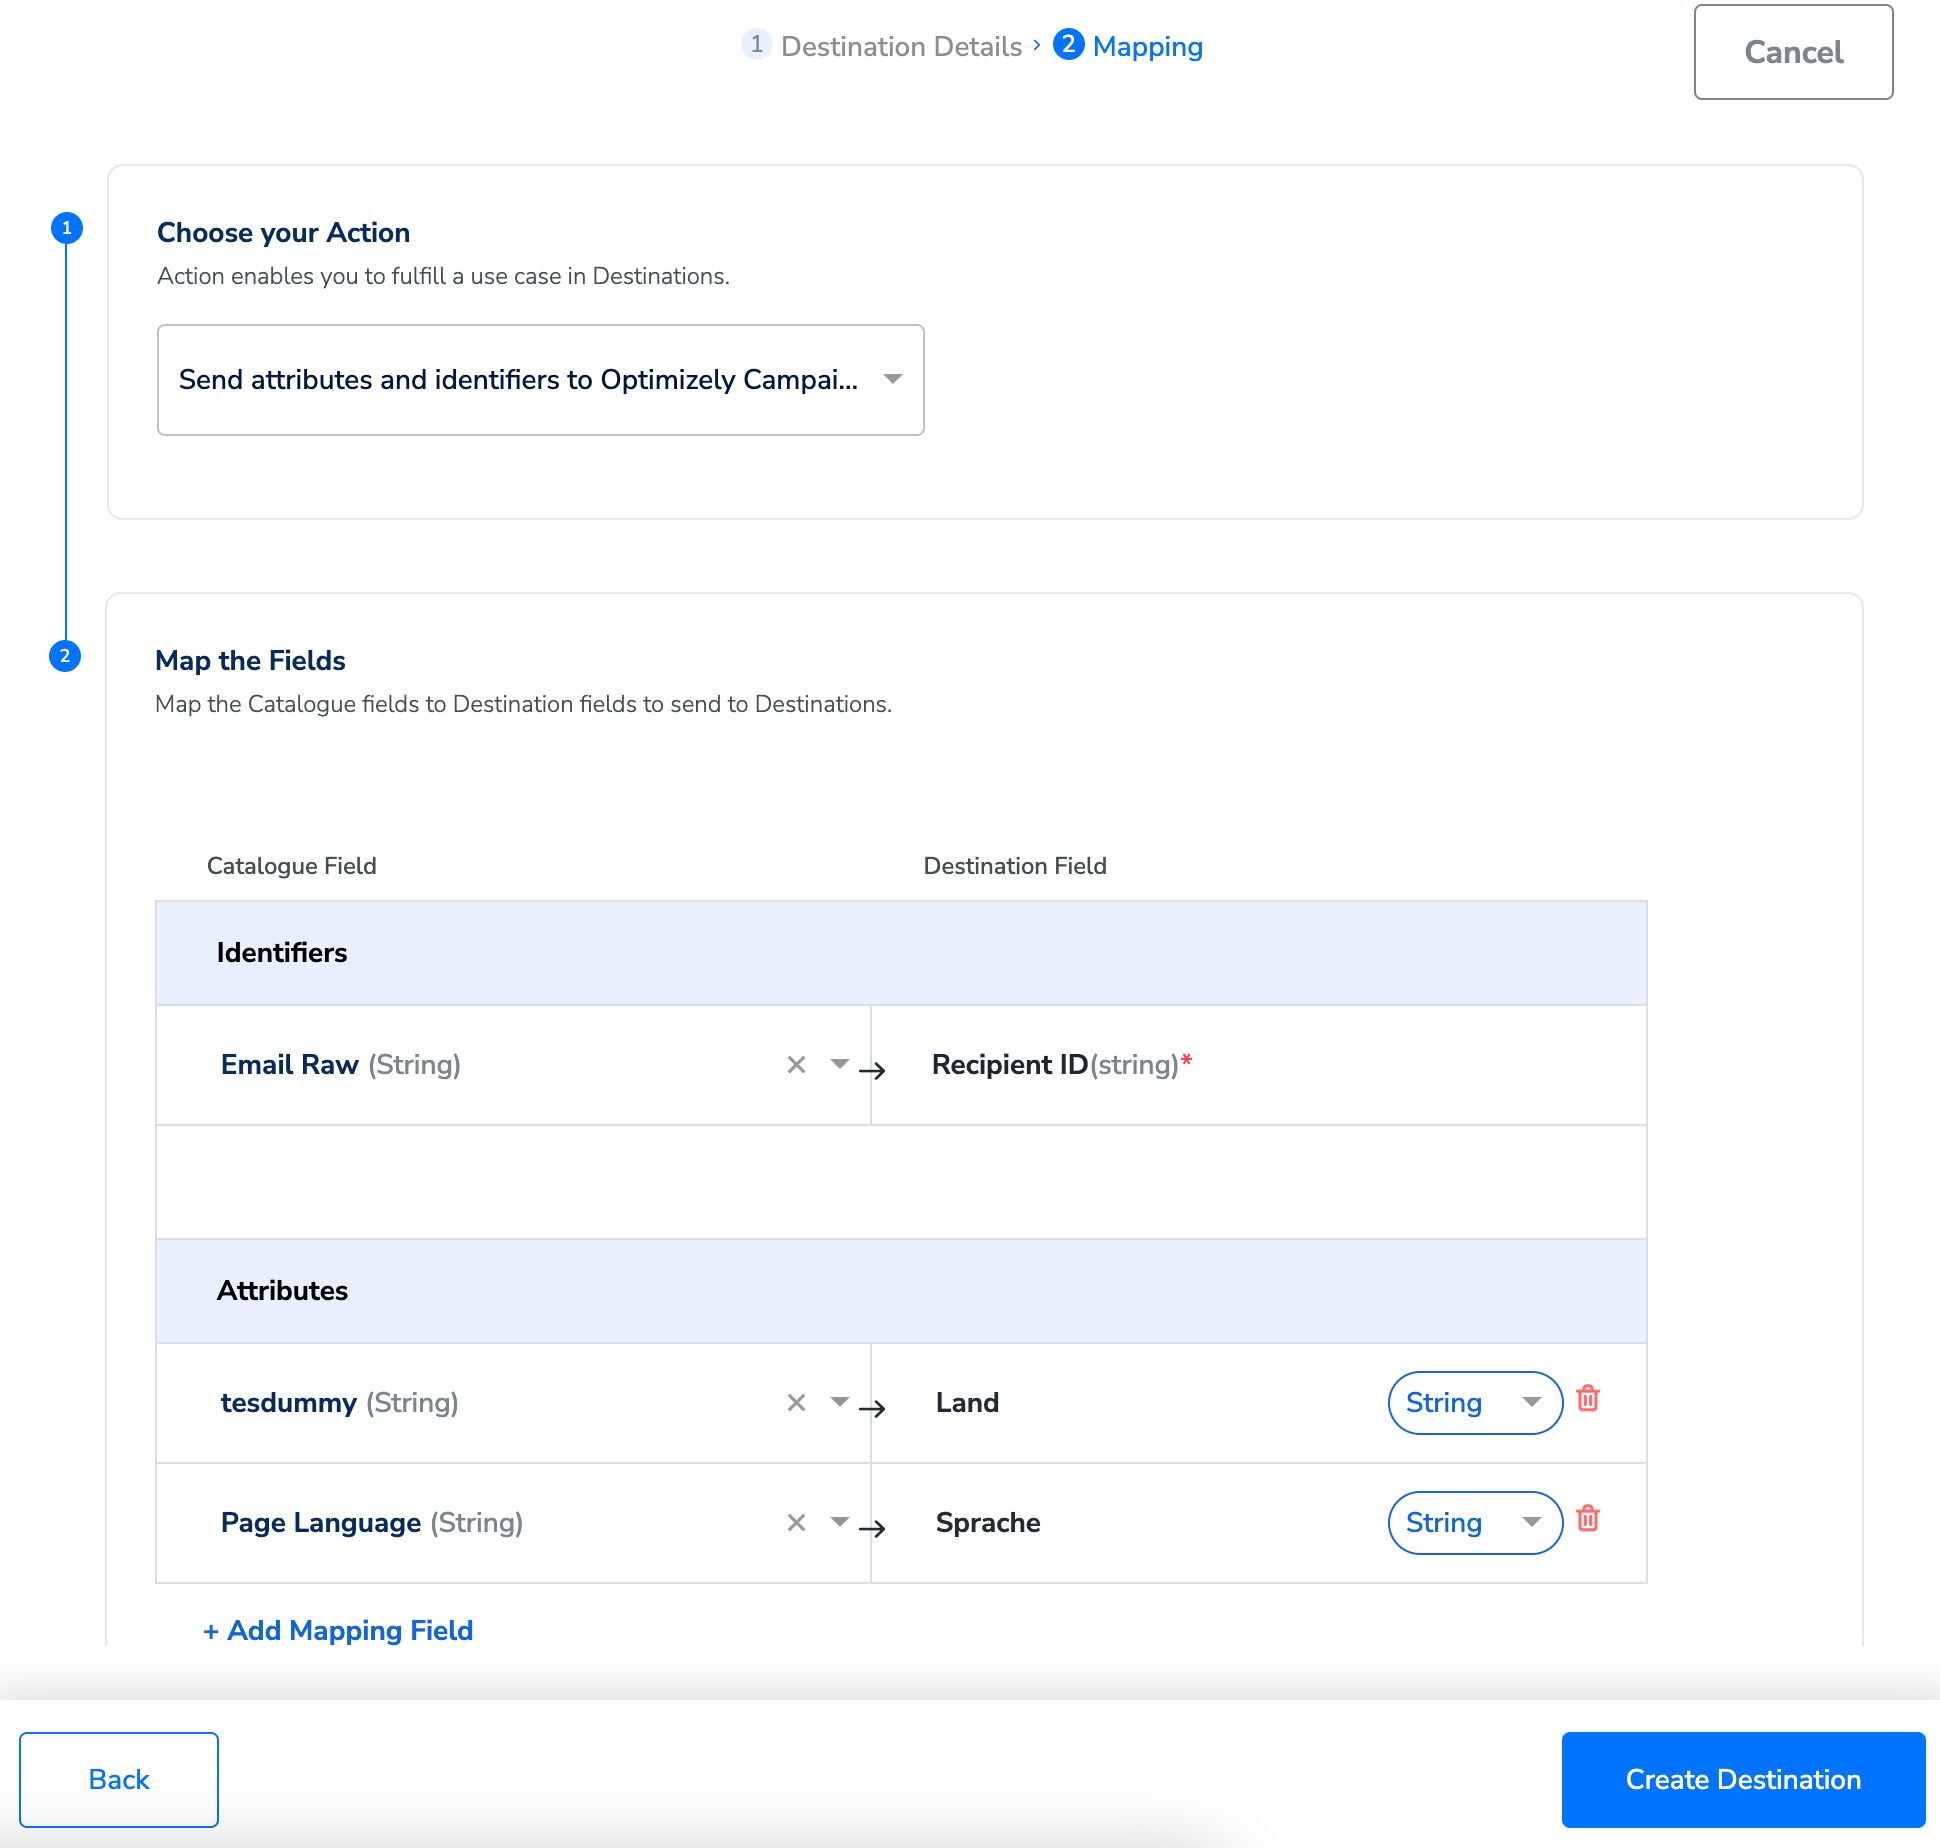 Once the mapping is complete, click **Create Destination**. The destination is created and made available for activation on Journeys.
 ## Activate the Destination on Journeys
After creating a destination, next, you need to link it in the **Send to Destination** node within the workflow, as explained below.
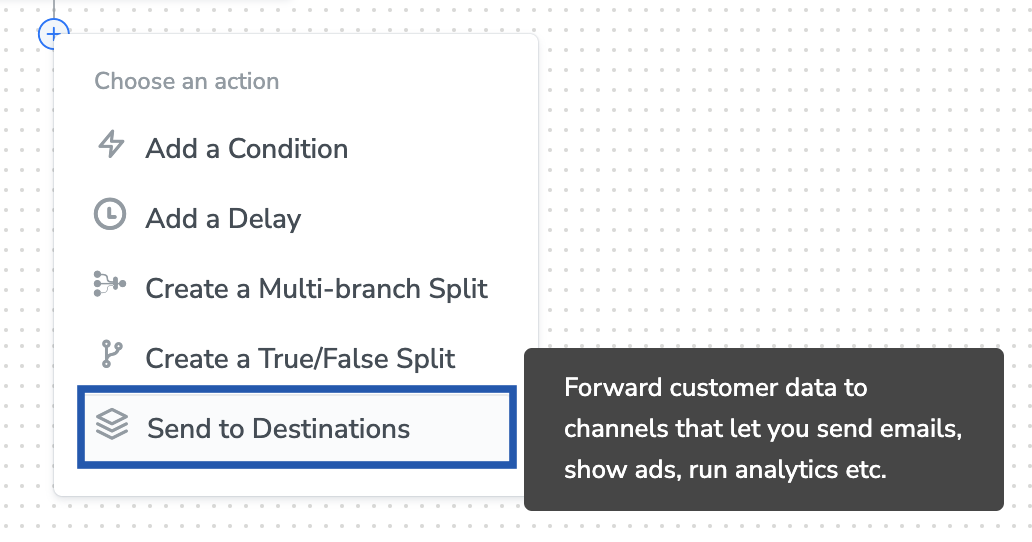
In the workflow, click **+** and choose **Send to Destinations**.
## Activate the Destination on Journeys
After creating a destination, next, you need to link it in the **Send to Destination** node within the workflow, as explained below.
In the workflow, click **+** and choose **Send to Destinations**.
 Choose the destination from the list of available destinations by using the search feature.
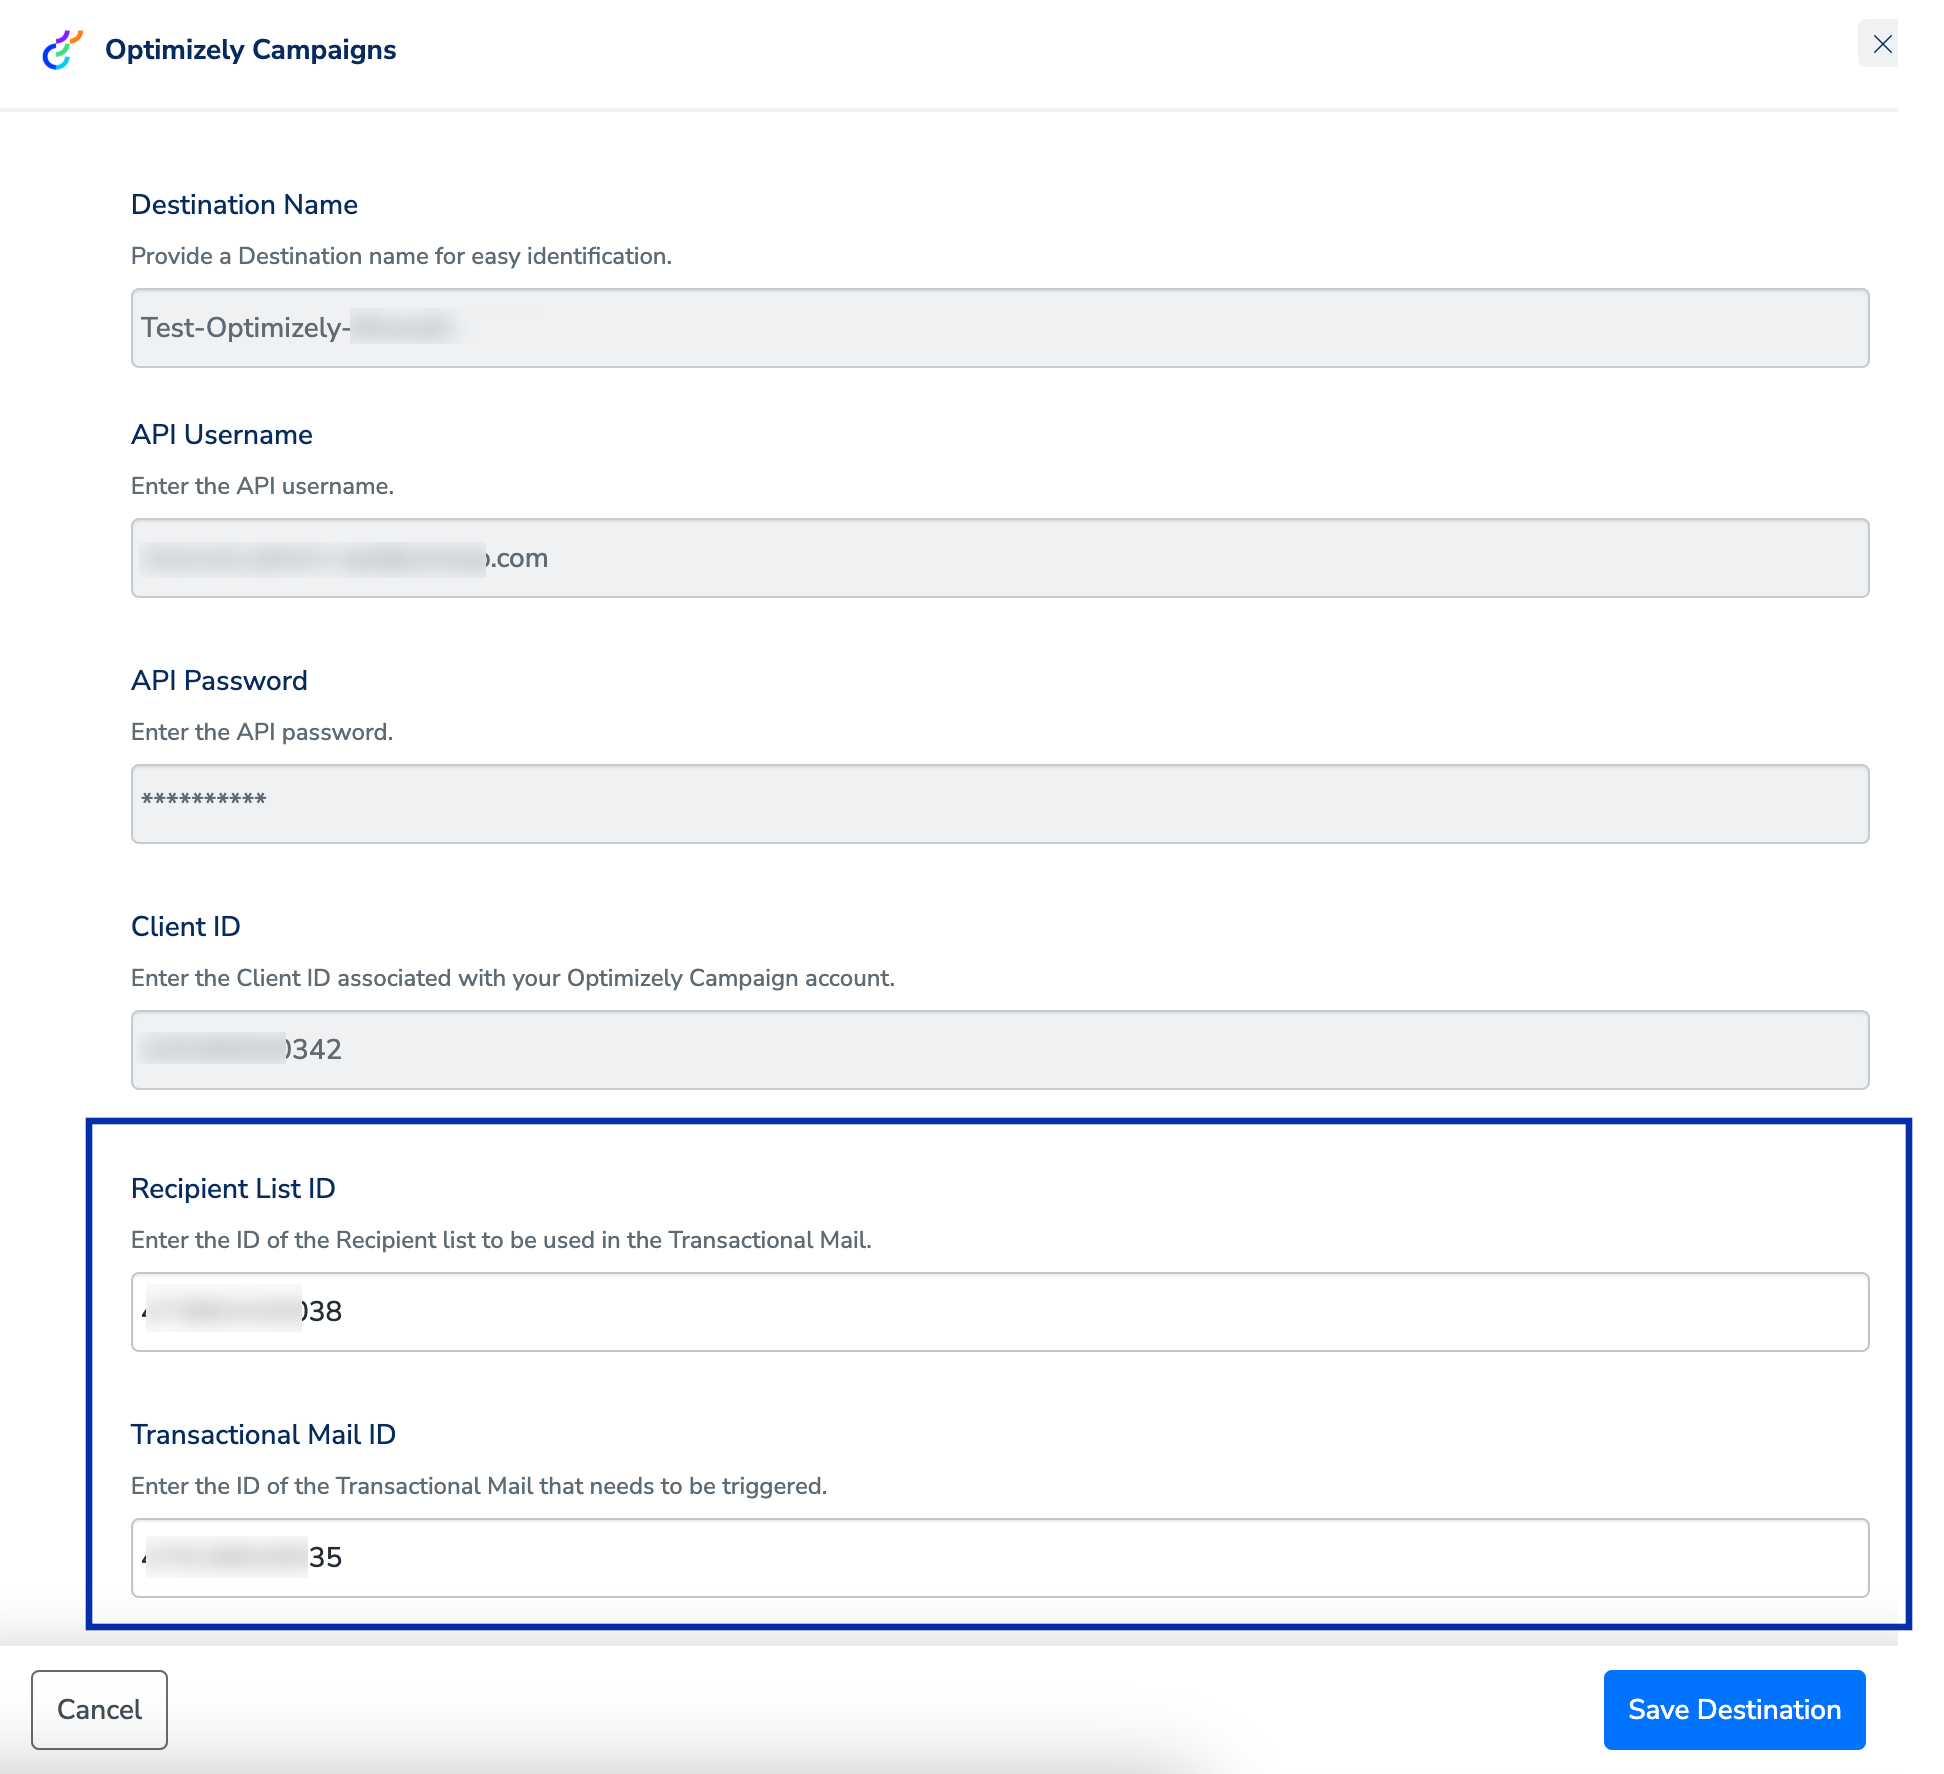
Under the **Destination Details** tab, the **API Username, Password**, and **Client ID** fields are automatically populated based on the value that you had entered while creating the destination. However, you must enter the **Recipient List ID** and **Transactional Email ID** that you have obtained from your Optimizely Campaign account. [Learn more](/articles/integrate-customer/optimizely-campaigns#h3_1097219856)
Choose the destination from the list of available destinations by using the search feature.
Under the **Destination Details** tab, the **API Username, Password**, and **Client ID** fields are automatically populated based on the value that you had entered while creating the destination. However, you must enter the **Recipient List ID** and **Transactional Email ID** that you have obtained from your Optimizely Campaign account. [Learn more](/articles/integrate-customer/optimizely-campaigns#h3_1097219856)
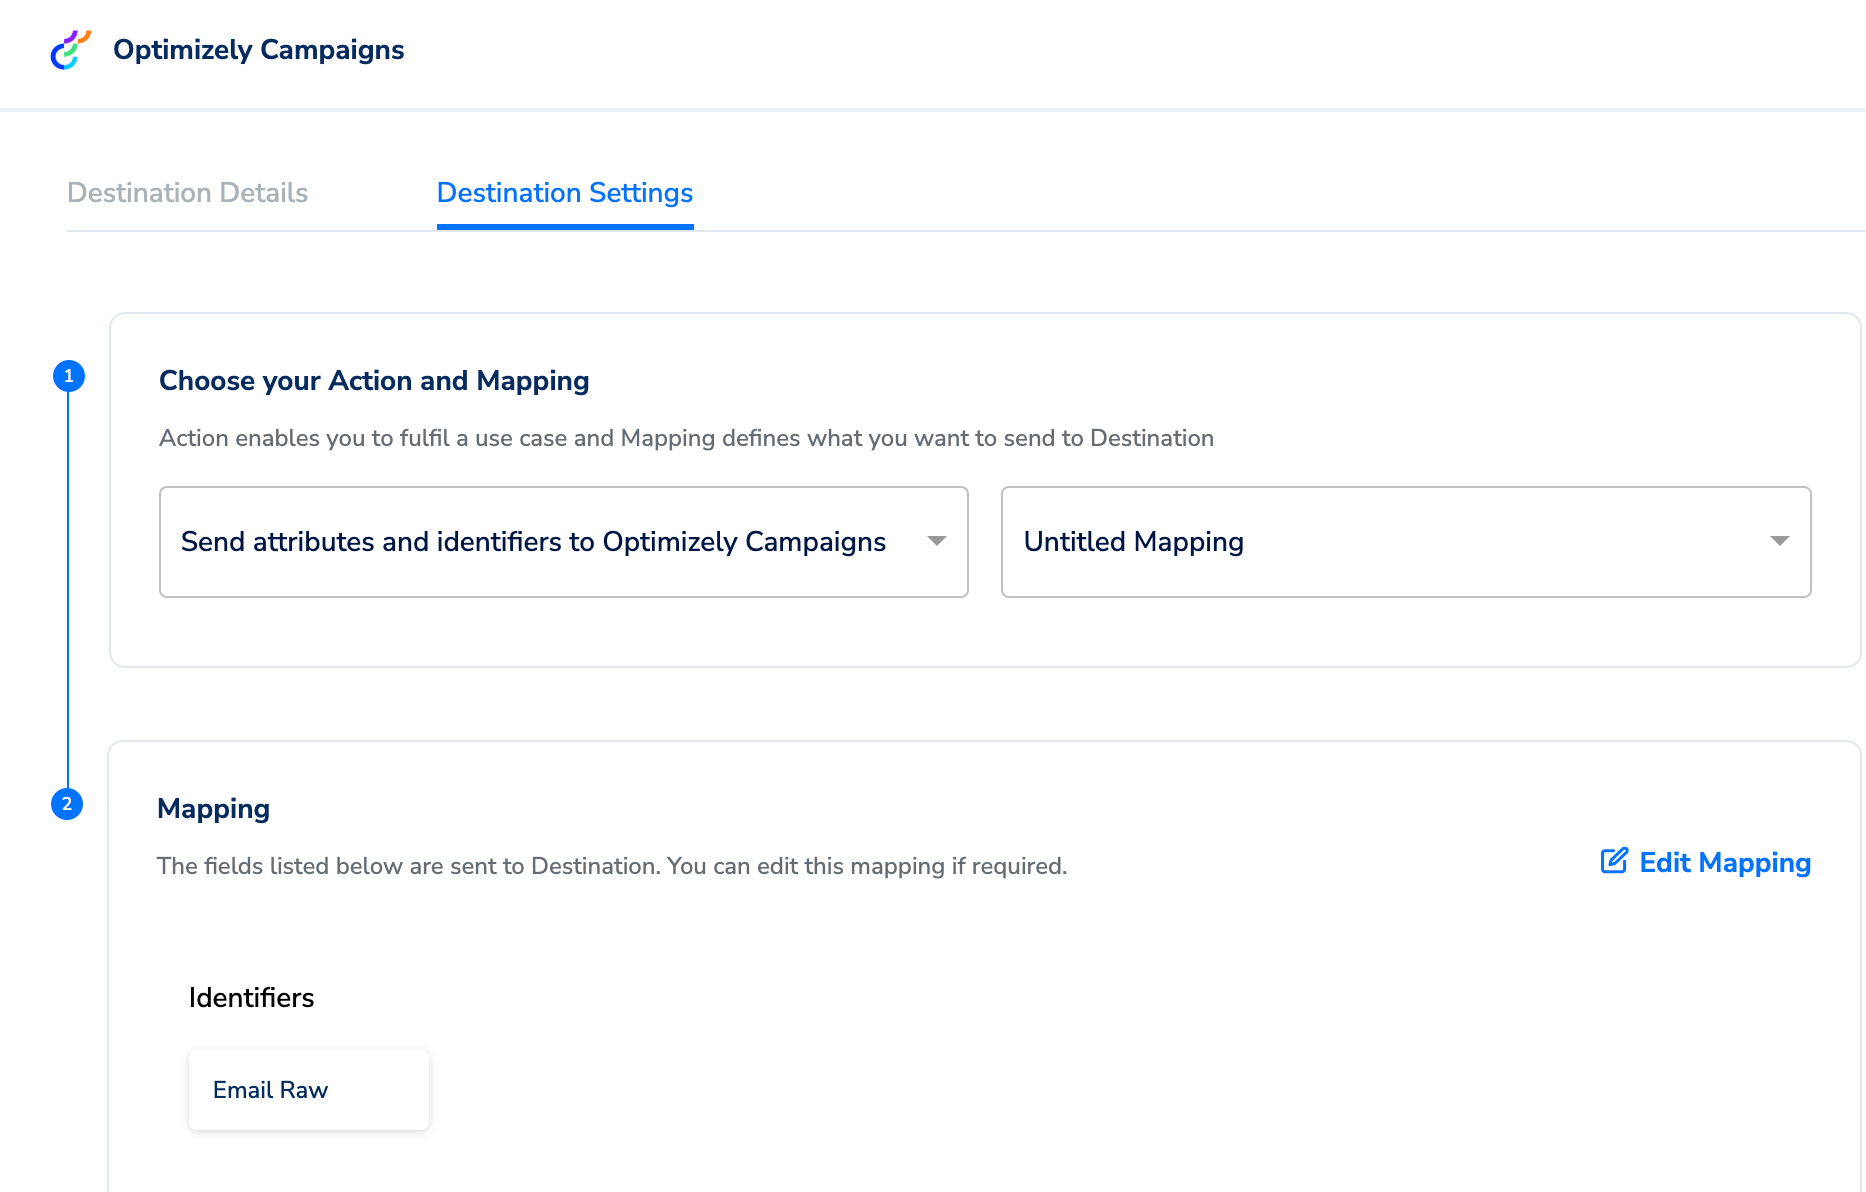
 Go to the **Destination Settings** tab and choose the correct mapping using the drop-down option. You can confirm the identifier and attributes you are sending to Optimizely Campaigns platform under **Mapping**.
 Click **Save Destination** and then click **Add Destination**.
The linked Destinations appear in the **Send to Destinations** node within the workflow as shown below. Further, you can then build and customise your workflow as needed by clicking '+' . Note that you must enter a name for your workflow in the provided text box to save it.
Click **Save Destination** and then click **Add Destination**.
The linked Destinations appear in the **Send to Destinations** node within the workflow as shown below. Further, you can then build and customise your workflow as needed by clicking '+' . Note that you must enter a name for your workflow in the provided text box to save it.
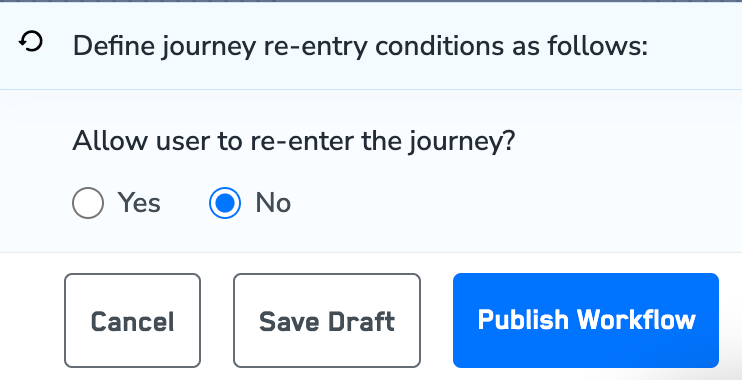
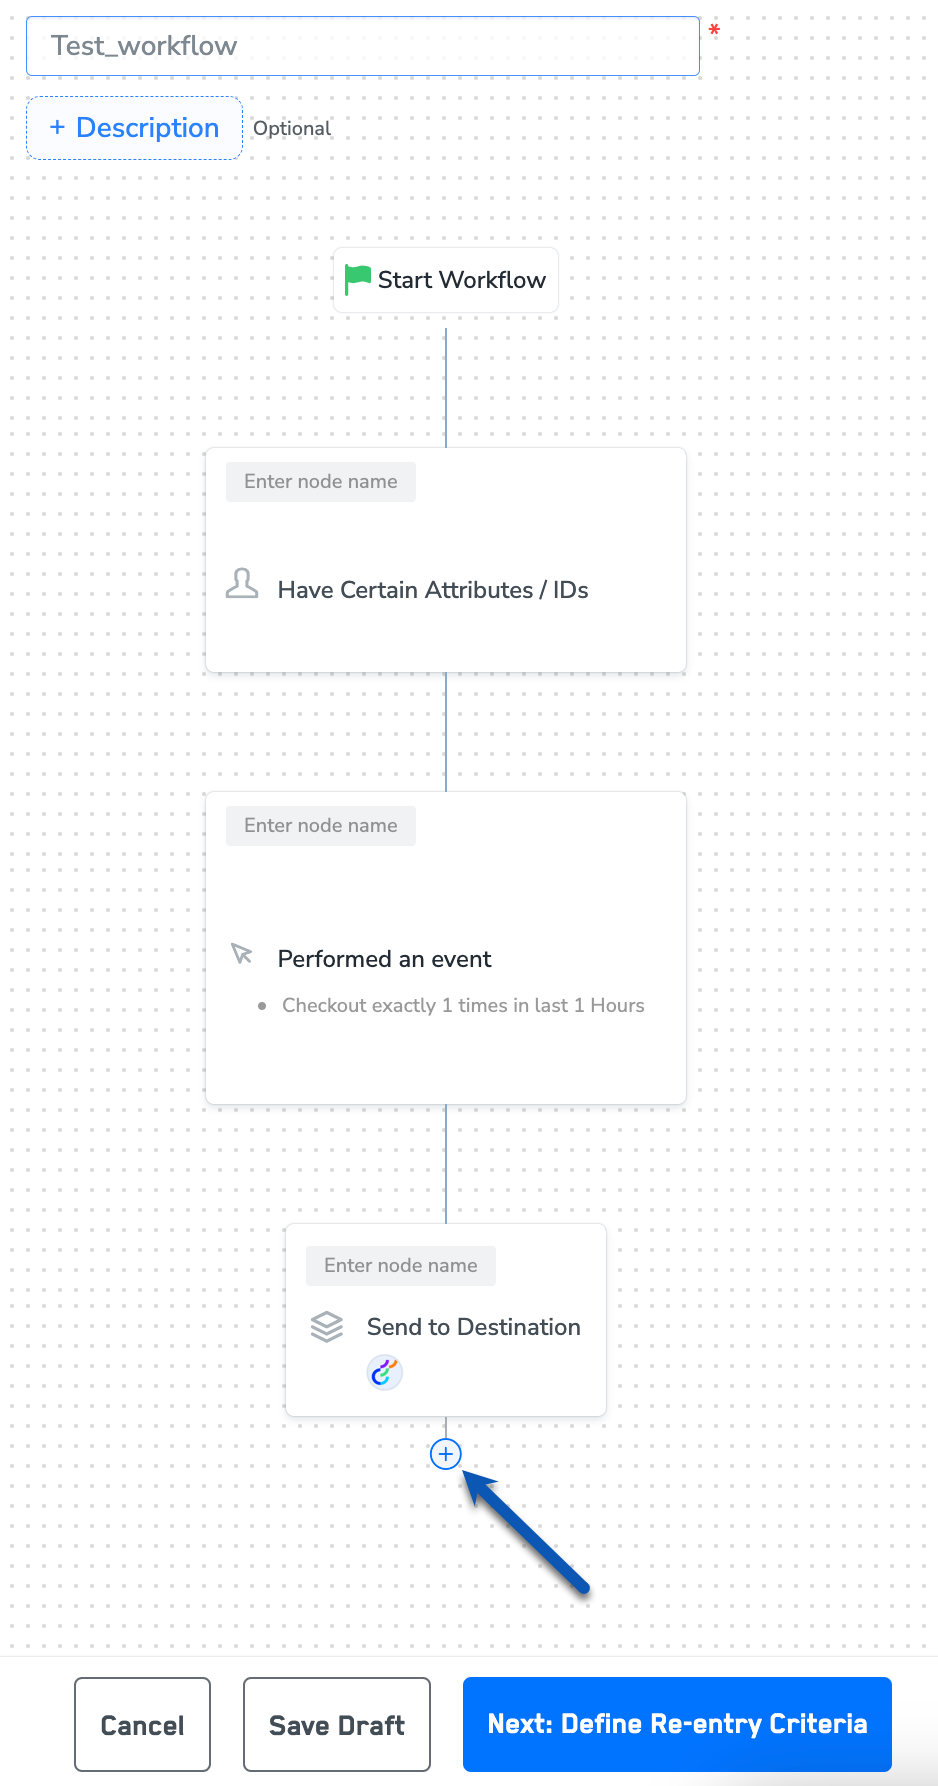 After adding conditions and filters for users, choose one of the following options:
* **Save Draft**: Enables you to revisit and edit the workflow before publishing.
* **Next: Re-entry Condition**: Determines whether a user can re-enter the same workflow.
After defining the re-entry criteria, click **Publish Workflow**. The workflow appears in the Workflow listing screen with a **Published** status.
After adding conditions and filters for users, choose one of the following options:
* **Save Draft**: Enables you to revisit and edit the workflow before publishing.
* **Next: Re-entry Condition**: Determines whether a user can re-enter the same workflow.
After defining the re-entry criteria, click **Publish Workflow**. The workflow appears in the Workflow listing screen with a **Published** status.
 ## View Recipient Lists in Optimizely Campaigns
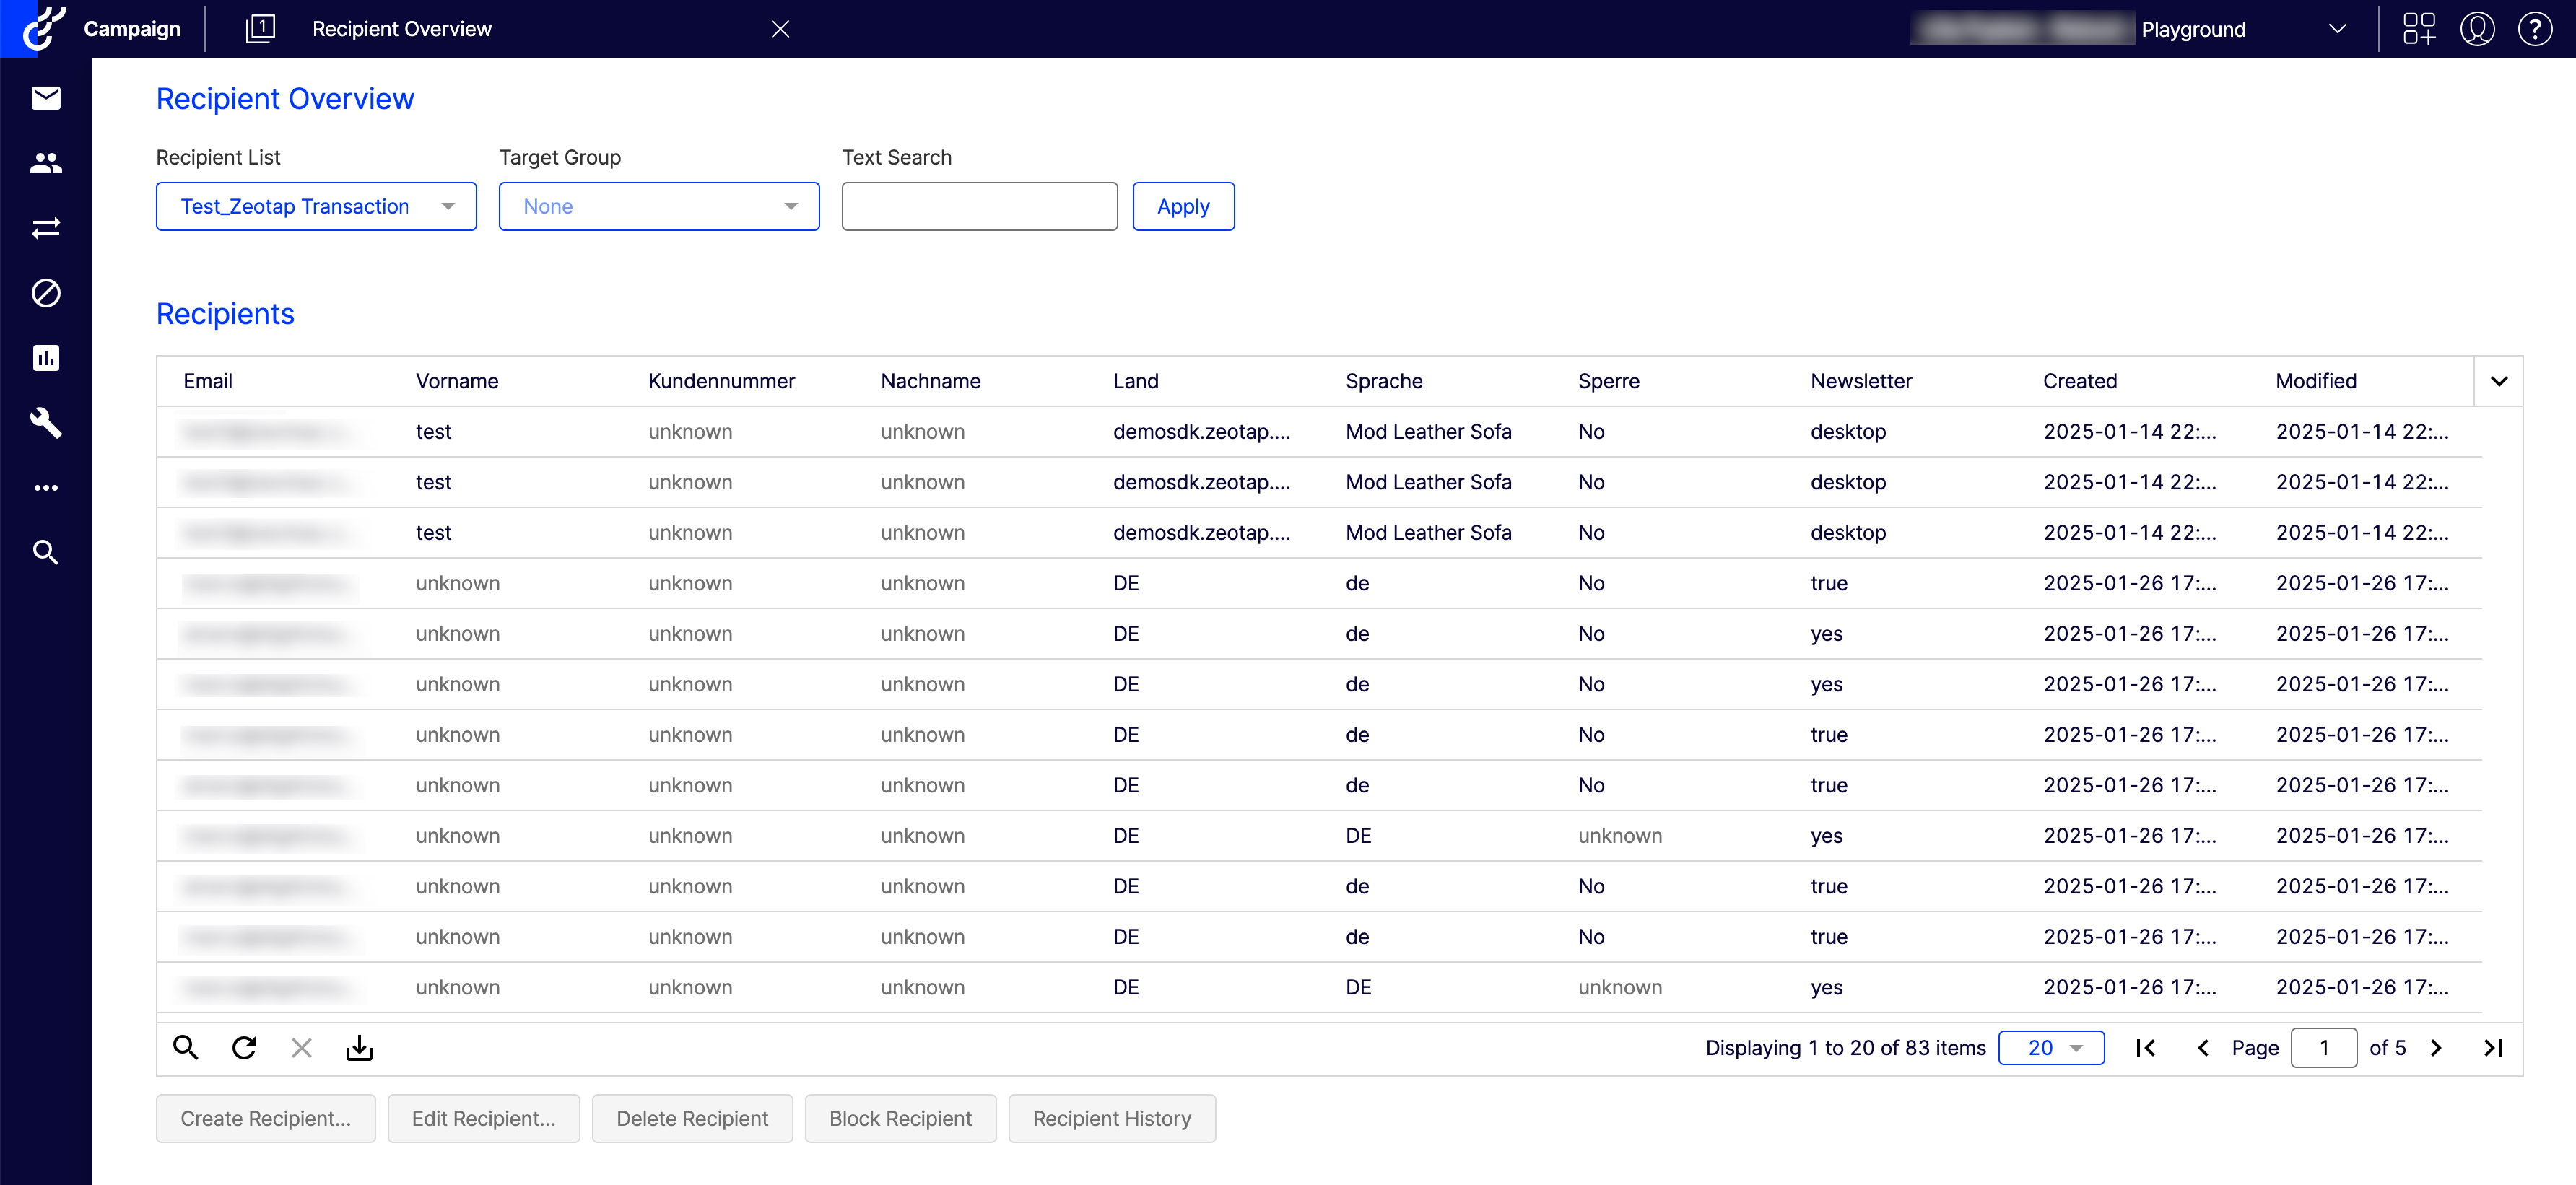
To view the recipient lists sent from Journeys (Zeotap CDP) to Optimizely Campaigns, perform the following steps:
Log into your Optimizely Campaigns account.
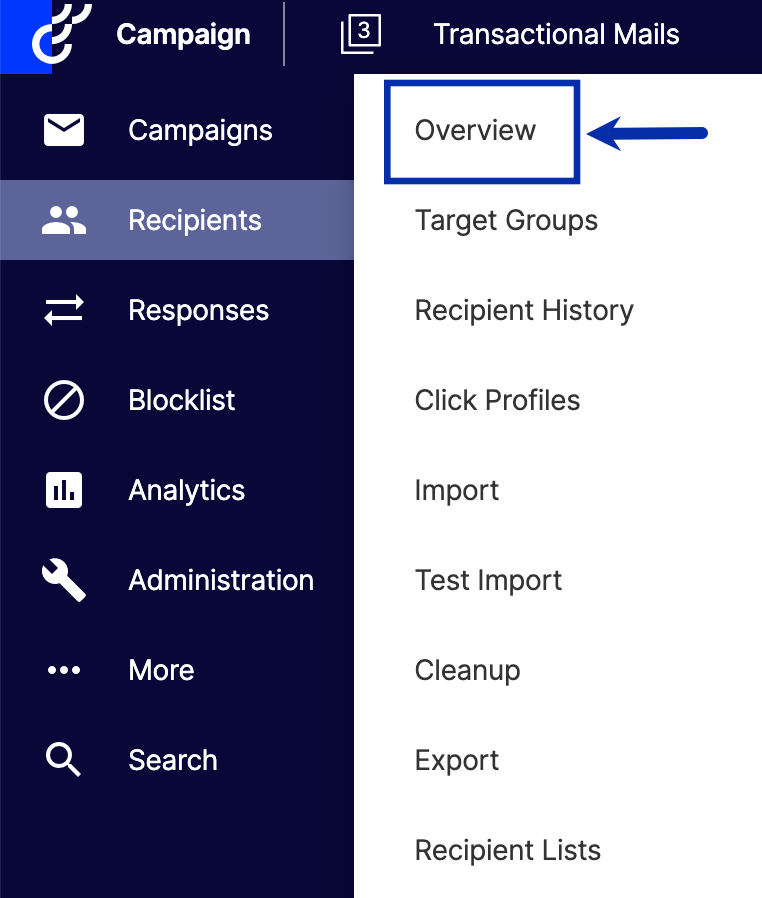
In the left panel, click **Recipients** > **Overview**.
## View Recipient Lists in Optimizely Campaigns
To view the recipient lists sent from Journeys (Zeotap CDP) to Optimizely Campaigns, perform the following steps:
Log into your Optimizely Campaigns account.
In the left panel, click **Recipients** > **Overview**.
 Under **Recipient List**, select the desired list from the left panel and on the right hand side of the screen, as shown in the image below.
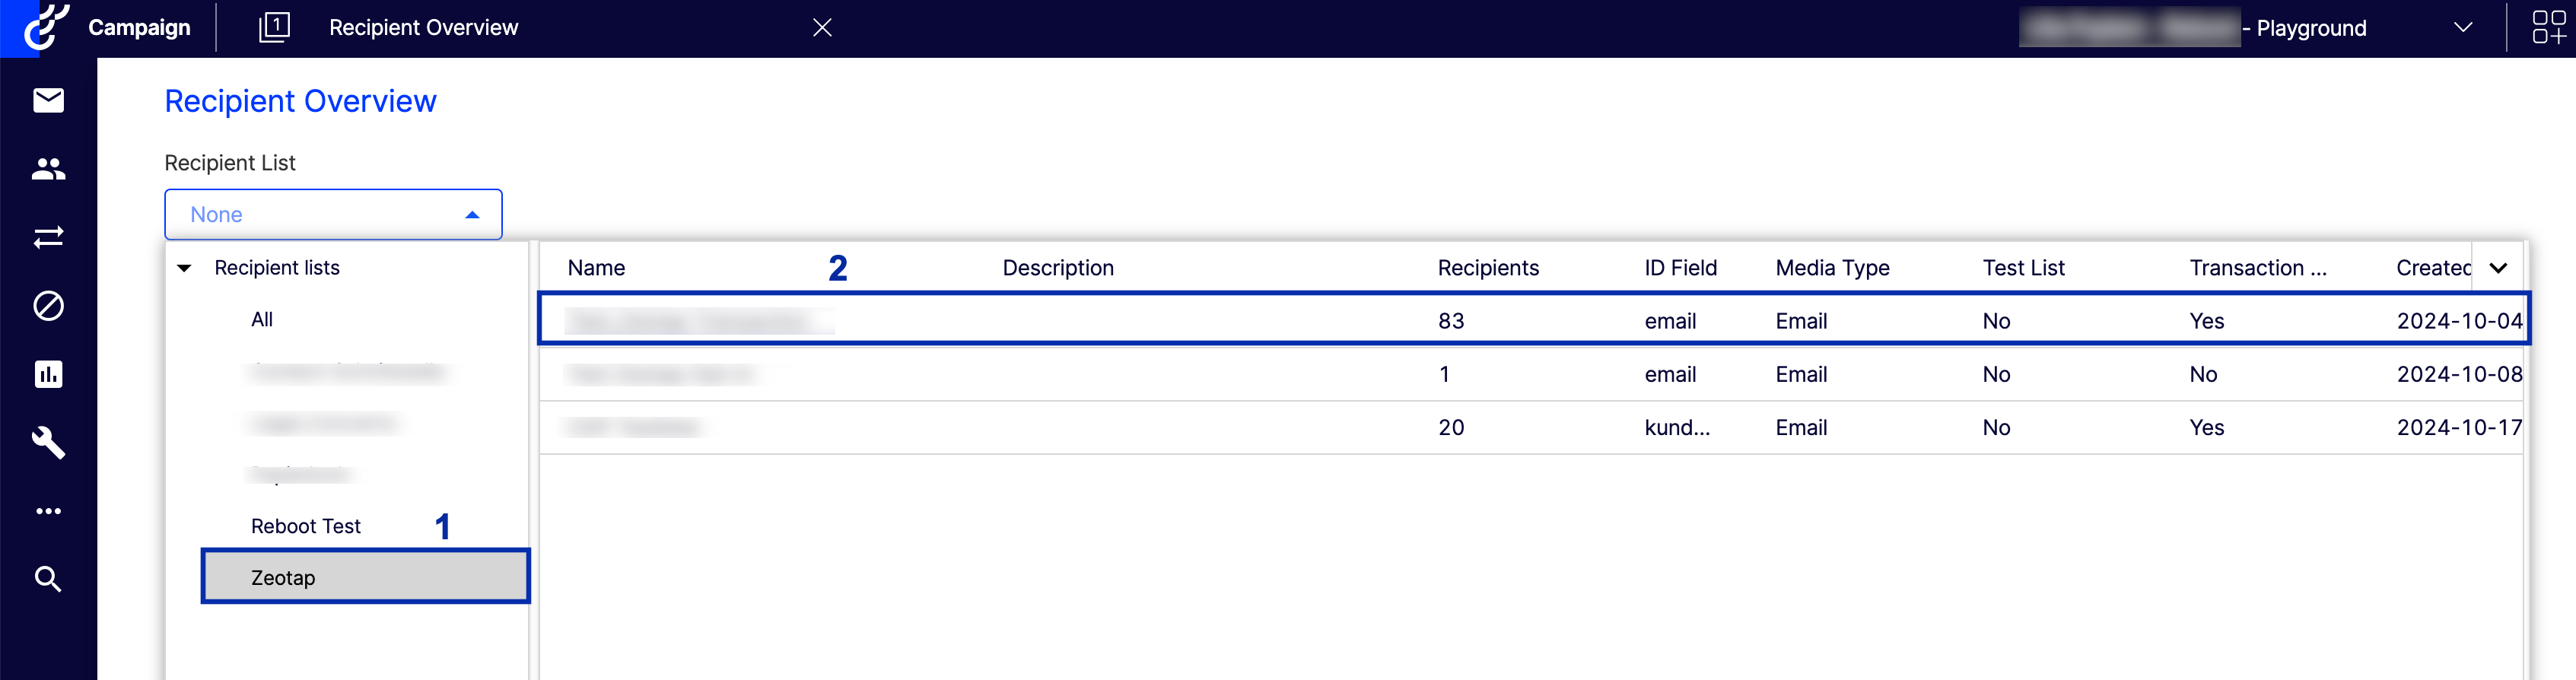 In the new screen that appears, you can find all the recipients within the selected recipient list as shown below.
 ## Create Campaigns in Optimizely Campaigns
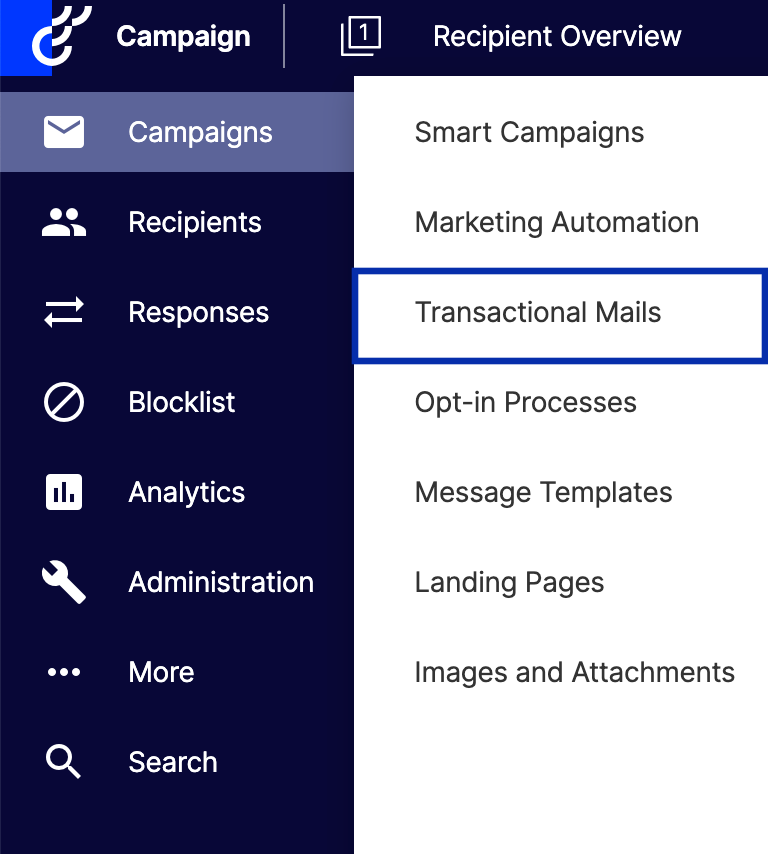
To set up an email campaign, perform the following steps:
Log into your Optimizely Campaigns account.
In the left panel, click **Campaigns** > **Transactional Mails**.
## Create Campaigns in Optimizely Campaigns
To set up an email campaign, perform the following steps:
Log into your Optimizely Campaigns account.
In the left panel, click **Campaigns** > **Transactional Mails**.
 Click **Create** and follow the instructions in the [Optimizely Campaign Help Documentation](https://support.optimizely.com/hc/en-us/articles/4413200600973-Creating-and-editing-campaigns) to set up your email campaign.