> ## Documentation Index
> Fetch the complete documentation index at: https://docs.zeotap.com/llms.txt
> Use this file to discover all available pages before exploring further.
# Moloco
## Overview
Moloco is a mobile attribution and retargeting platform that helps mobile app publishers and marketers maximise the effectiveness of their mobile advertising campaigns. It provides accurate attribution and measurement of ad campaigns across various channels, including social media, search, and app ads. Integrating with Zeotap enables sending audiences to Moloco for improved personalisation and customer experience.
## Supported Identifiers
This integration supports MAIDs.
## Available Actions and Supported Features
The following table lists the available action types for the integration and the supported features for each action type:
| Action Name | [ID EXTENSION](/articles/segment-customer/extend-your-audience#id-extension) | [DELETE](https://docs.zeotap.com/articles/#!integrate-customer/delta-upload-and-delete-functions) | [DELTA UPLOAD](https://docs.zeotap.com/articles/#!integrate-customer/delta-upload-and-delete-functions) |
| :----------------------------- | :--------------------------------------------------------------------------- | :------------------------------------------------------------------------------------------------ | :------------------------------------------------------------------------------------------------------ |
| Send identifiers to Moloco DSP | ✅ | - | - |
## Components of Moloco
Ensure that you have details about the below components of Moloco available before creating a Destination.
### API Key
This is a unique string that is used to authenticate your API calls to Moloco. It allows you to retrieve data, track user behaviour and optimise advertising campaigns. For more information about how to create and manage API Keys on Moloco, refer [here](https://help.moloco.com/hc/en-us/articles/22420665601559-Create-and-manage-API-key).
### Ad Account ID
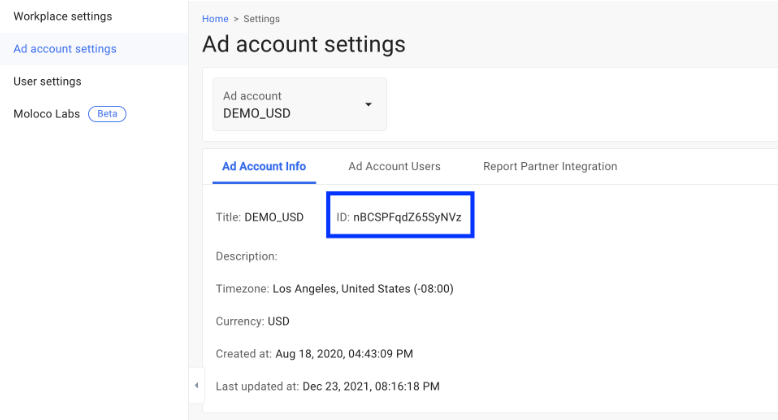
This is the Ad Account ID associated with the Moloco DSP account. It serves as a modifier to authenticate and authorize specific ad operations within Moloco's platform. To obtain this information, log into Moloco Ads and click **Ad account settings** below your profile. Under the **Ad Account Info** tab, you can find your Ad Account ID as shown in the image below.
 ## Create a Destination for Moloco
Perform the following steps to create a Destination for Moloco:
Log into the Zeotap CDP App and go to the **DESTINATIONS** application.
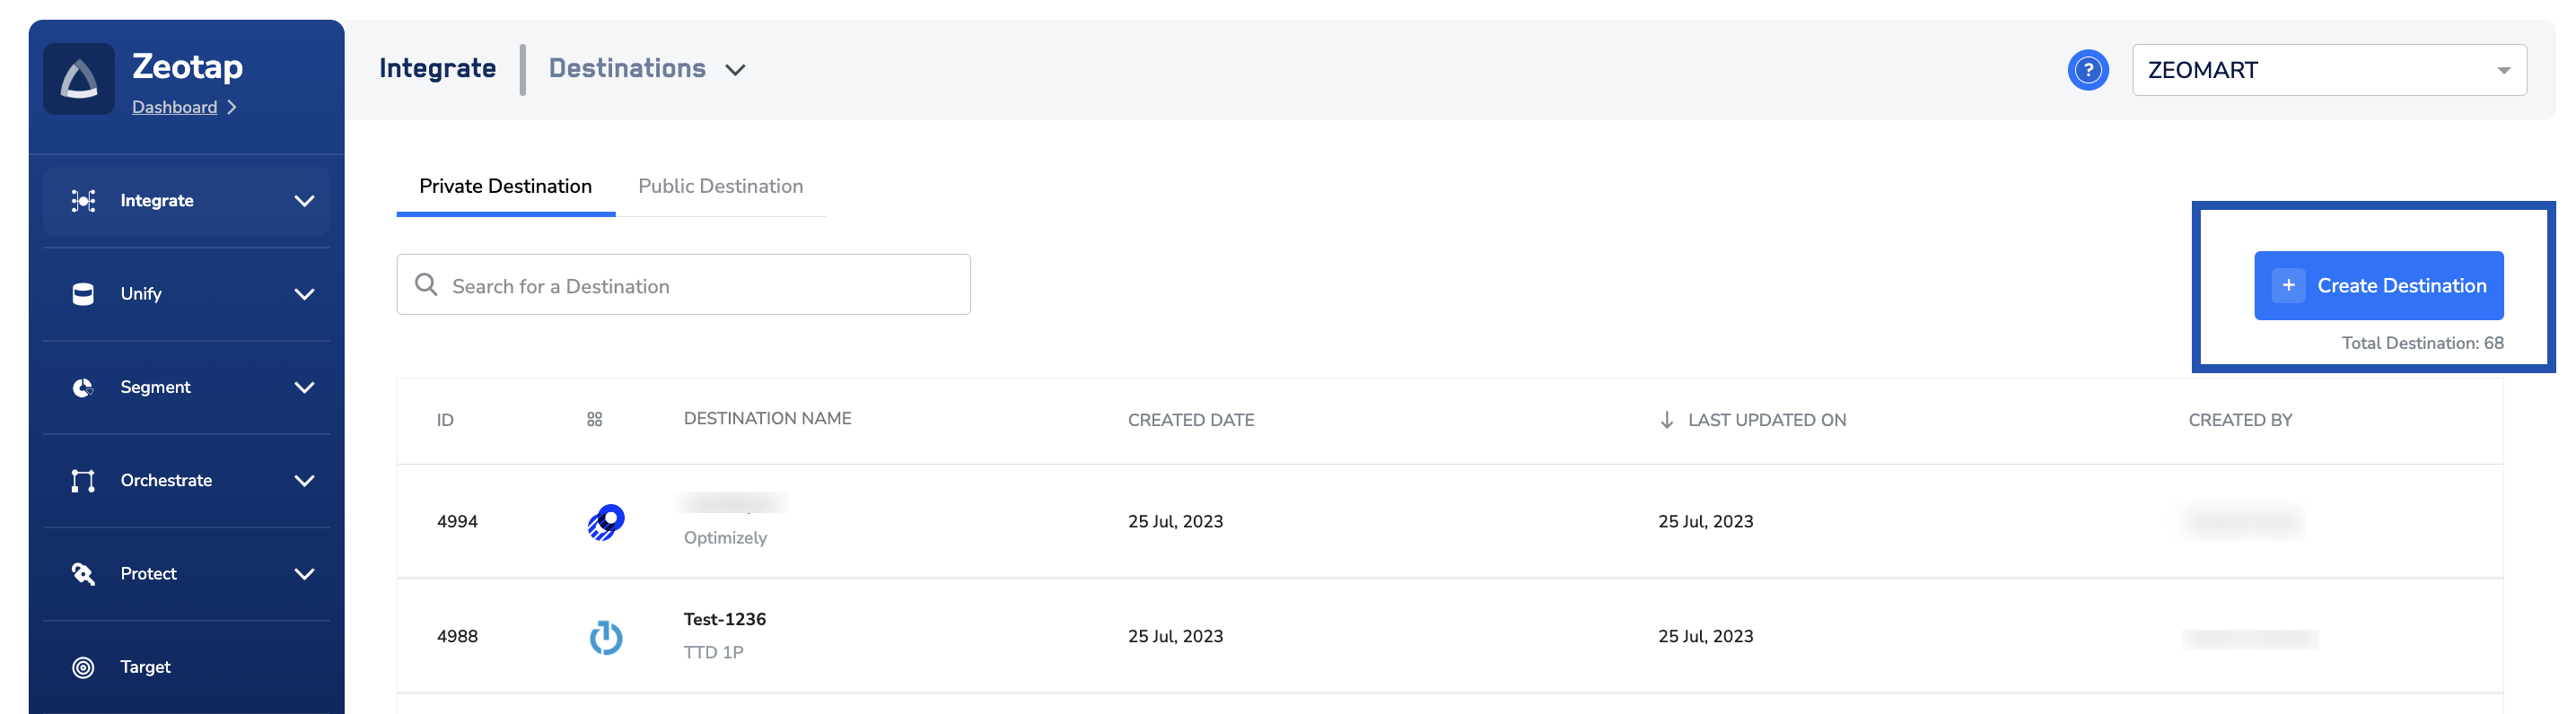
Click **+ Create Destination.**
## Create a Destination for Moloco
Perform the following steps to create a Destination for Moloco:
Log into the Zeotap CDP App and go to the **DESTINATIONS** application.
Click **+ Create Destination.**
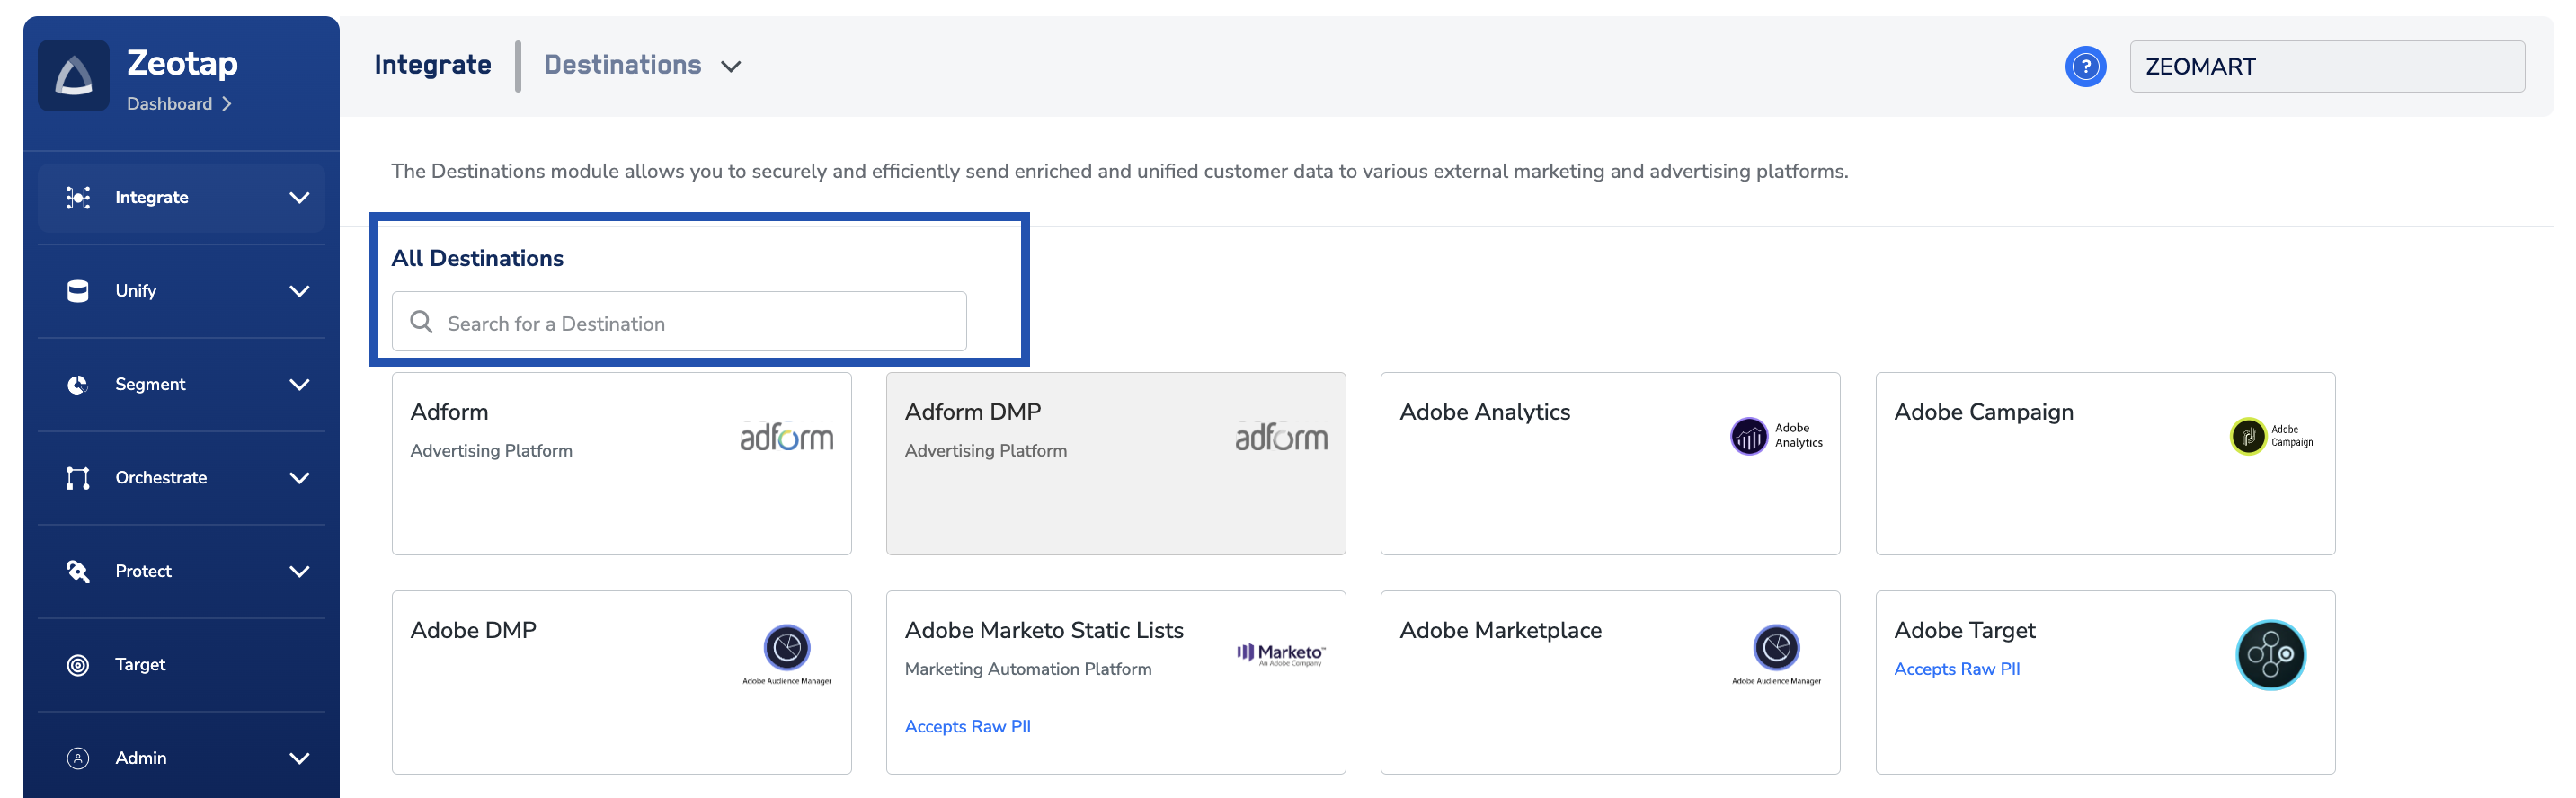
 Under the **All Destinations** section, search for **Moloco**.
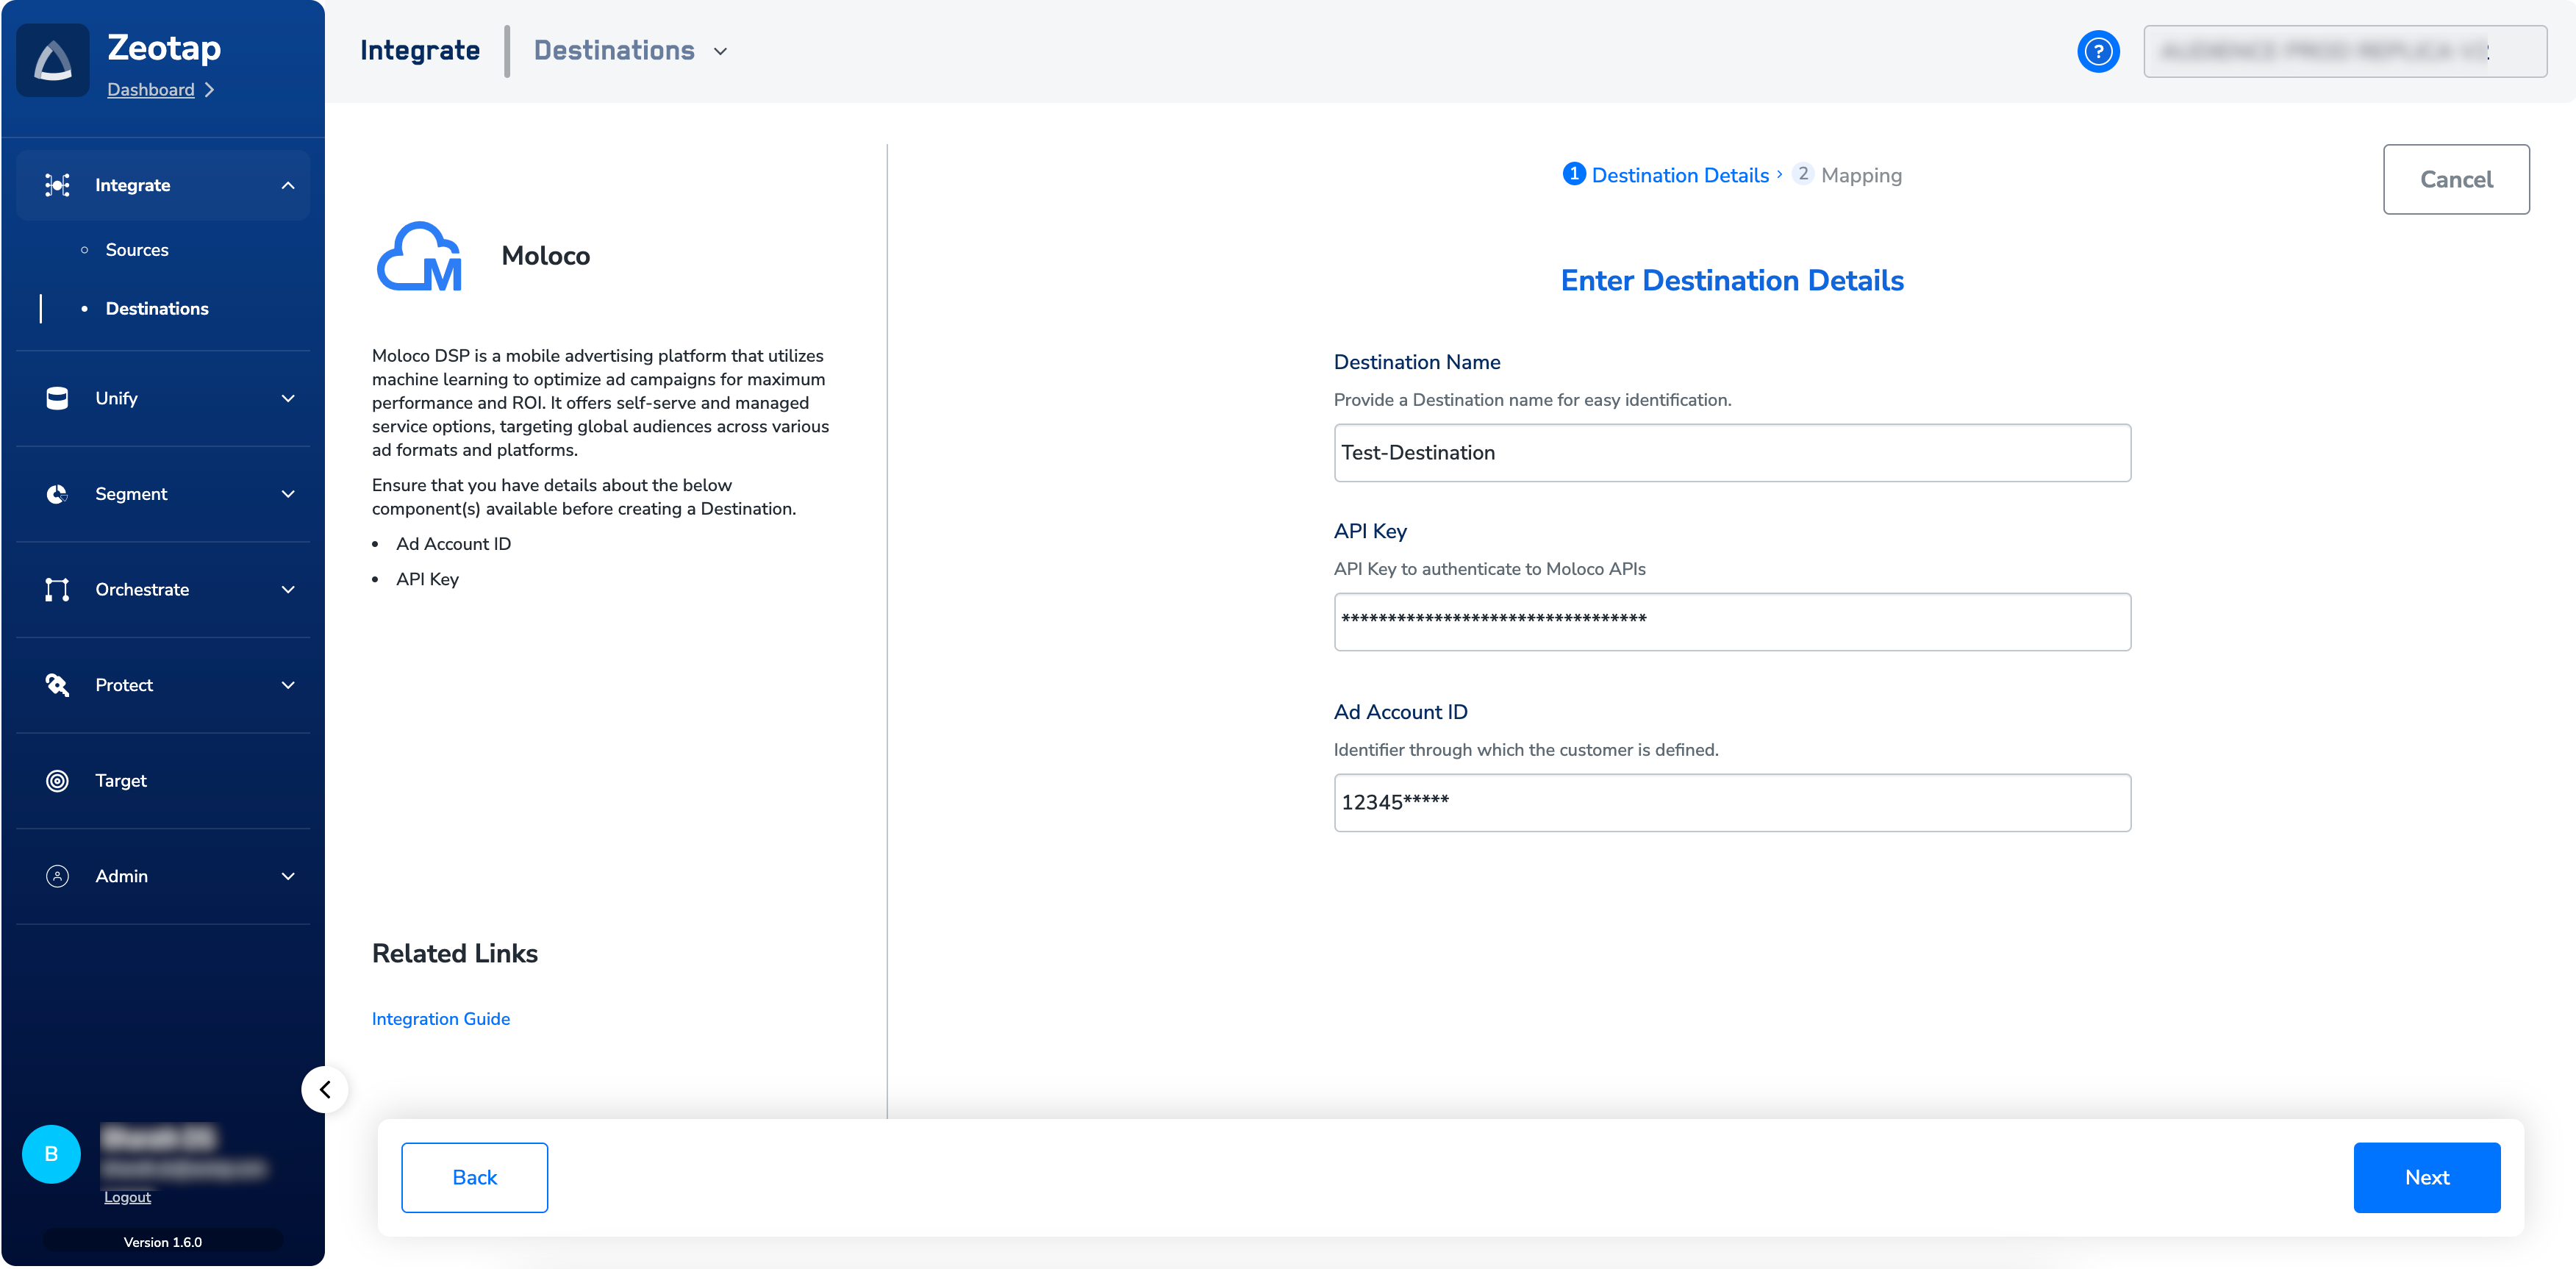
 Click **Moloco**. A screen appears displaying details about the particular destination towards the left. On the right-hand side of the screen find a list of fields that are required for the integration to be established. Enter the required details as mentioned in the following steps:
a. Enter a descriptive name for the Destination.
b. Enter the **API Key** associated with your Moloco account.
c. Enter the **Ad Account ID** obtained from your Moloco account.
d. Review all the values entered above and then click **Next** to proceed.
Click **Moloco**. A screen appears displaying details about the particular destination towards the left. On the right-hand side of the screen find a list of fields that are required for the integration to be established. Enter the required details as mentioned in the following steps:
a. Enter a descriptive name for the Destination.
b. Enter the **API Key** associated with your Moloco account.
c. Enter the **Ad Account ID** obtained from your Moloco account.
d. Review all the values entered above and then click **Next** to proceed.
 In the new screen that appears, under **Choose your Action**, select **Send Identifiers to Moloco DSP** as the action for activating your audience (segment) on the *Audiences* module. Under **Map the Fields**, you can map the desired output identifier to MAID.
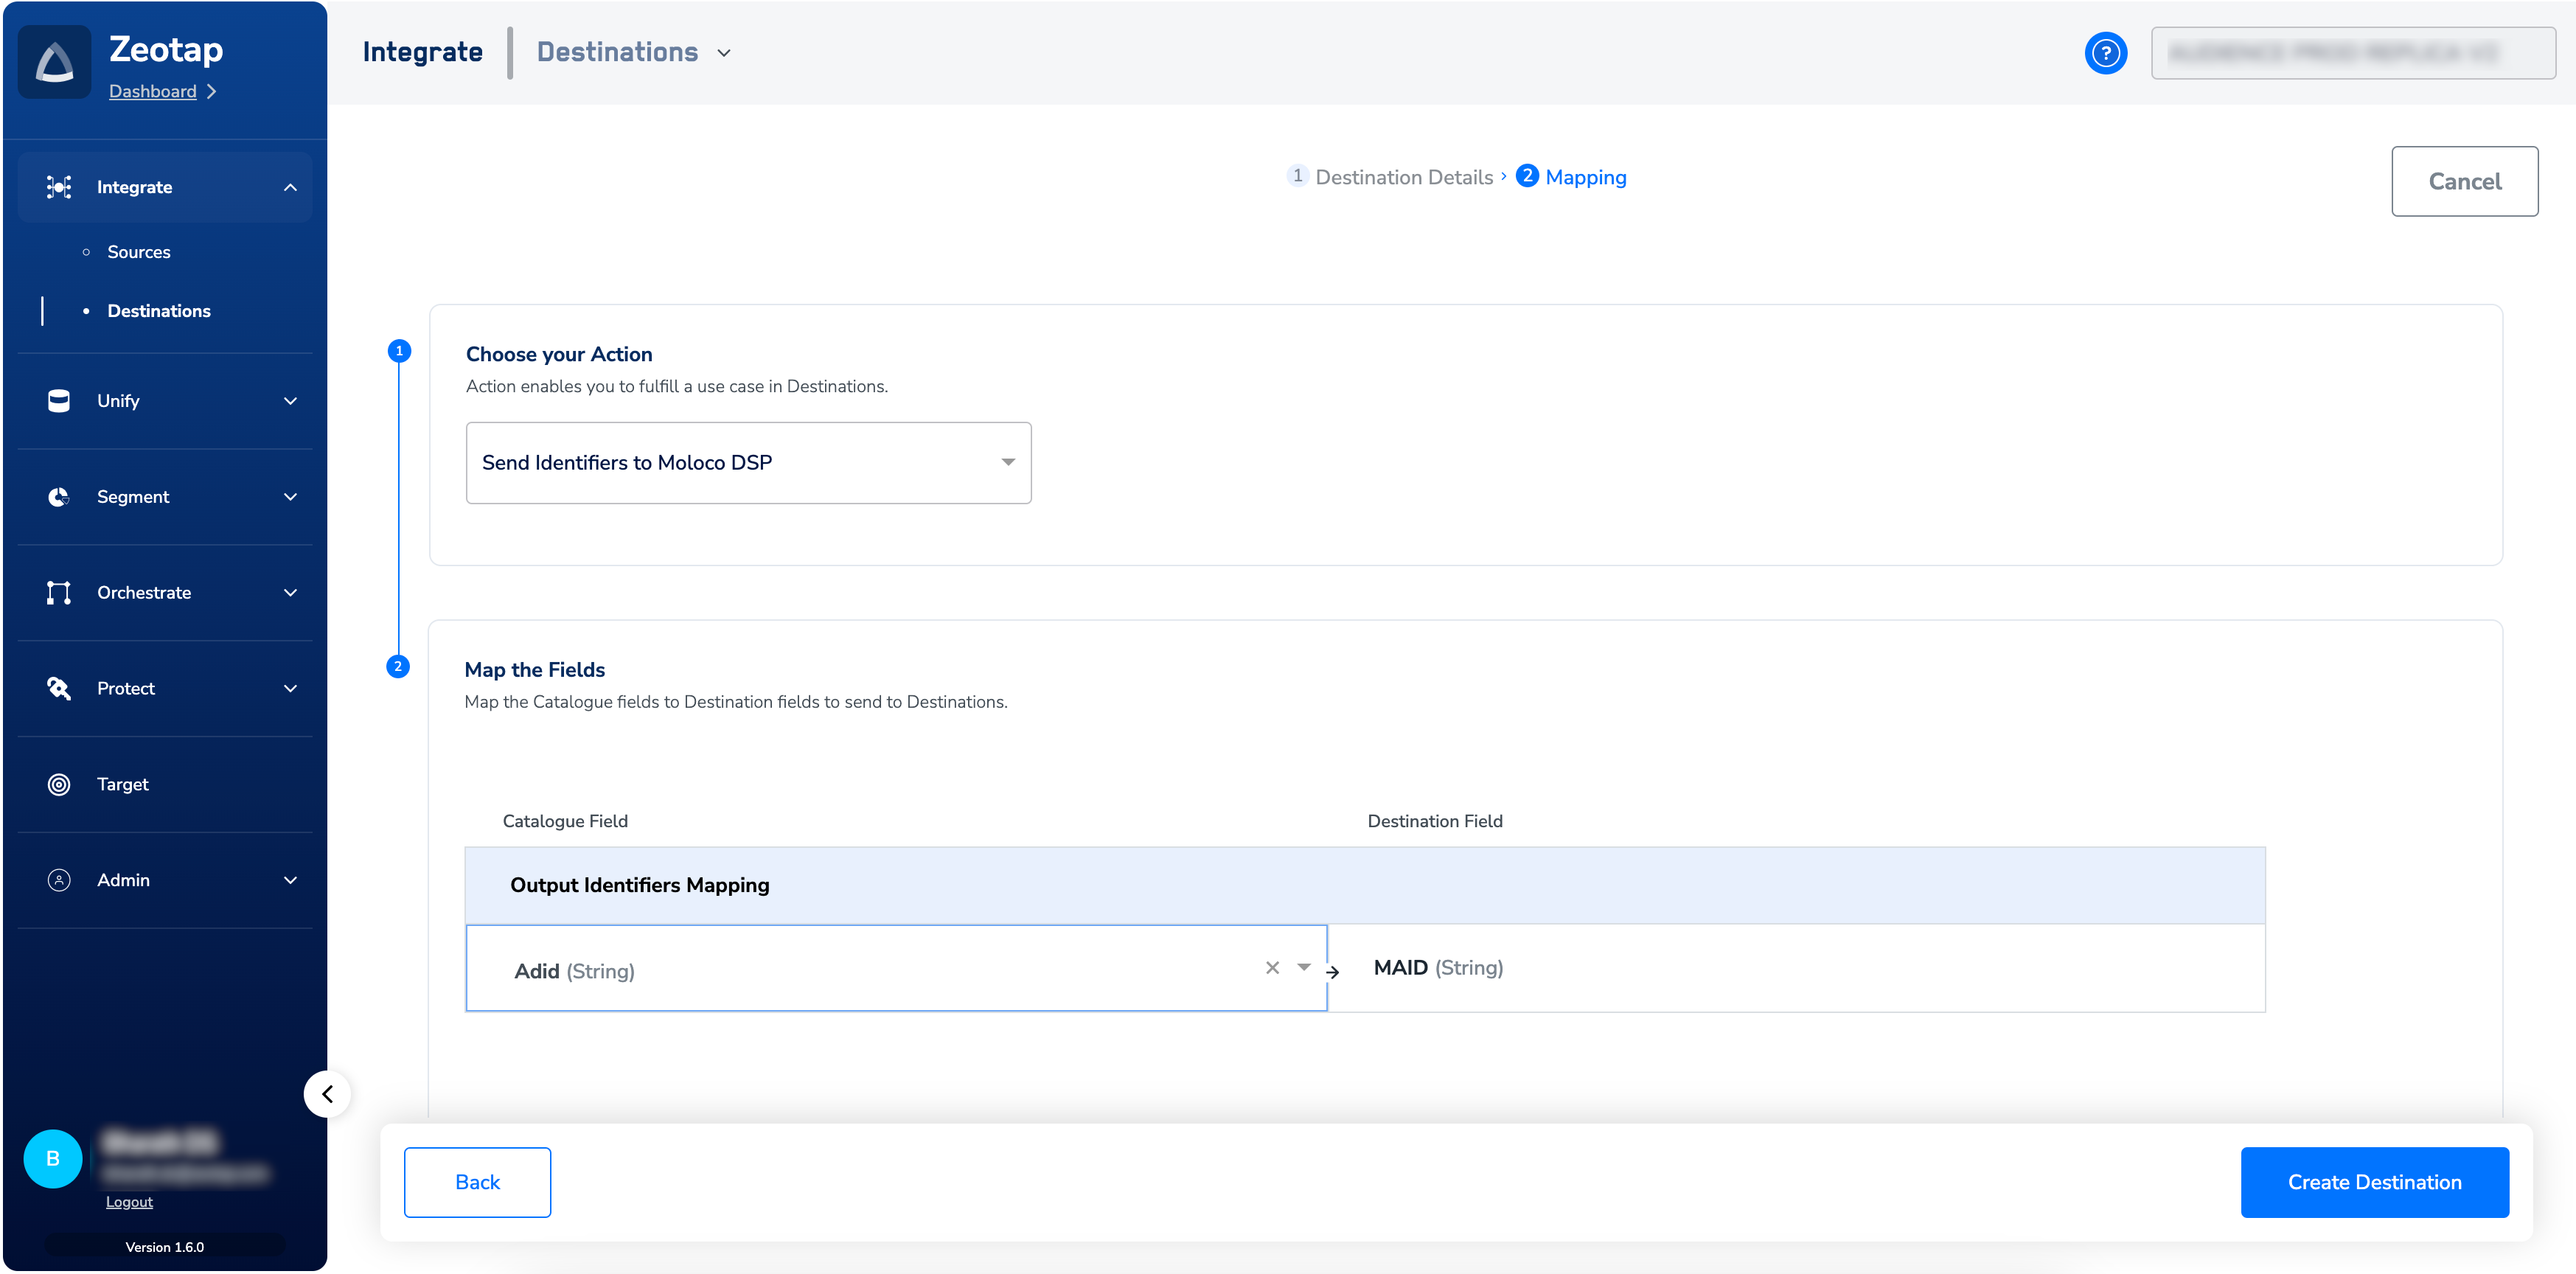 Click **Create Destination**. The created Destination gets listed in the **Audiences** application, which can be linked to an audience/segment.
## Link an Audience to the Moloco Destination
For information about how to link an audience or segment to the created Destination in **Audiences** application, refer [here](/articles/integrate-customer/link-an-audience-to-the-destination).
**Note:**
The terms *Audiences* and *Segments* are used interchangeably to refer to customer cohorts belonging to a specific category. For example, an Audience or a segment could be a specific group of customers who are over 18 years of age and who have performed an *addToCart* event within the last 30 days.
## View the Pushed Data on Moloco
To view the Audiences (segments) sent from Zeotap CDP to Moloco, perform the following steps:
Log into your Moloco account.
Select the Ad Account that you used while creating the Destination in Zeotap CDP, using the drop-down menu.
In the left panel, click **Assets** and click **User Lists**. Under the User `List-Zeotap_audience_id-Zeotap_audience_name`, you can find all the audiences sent from Zeotap CDP.
Click **Create Destination**. The created Destination gets listed in the **Audiences** application, which can be linked to an audience/segment.
## Link an Audience to the Moloco Destination
For information about how to link an audience or segment to the created Destination in **Audiences** application, refer [here](/articles/integrate-customer/link-an-audience-to-the-destination).
**Note:**
The terms *Audiences* and *Segments* are used interchangeably to refer to customer cohorts belonging to a specific category. For example, an Audience or a segment could be a specific group of customers who are over 18 years of age and who have performed an *addToCart* event within the last 30 days.
## View the Pushed Data on Moloco
To view the Audiences (segments) sent from Zeotap CDP to Moloco, perform the following steps:
Log into your Moloco account.
Select the Ad Account that you used while creating the Destination in Zeotap CDP, using the drop-down menu.
In the left panel, click **Assets** and click **User Lists**. Under the User `List-Zeotap_audience_id-Zeotap_audience_name`, you can find all the audiences sent from Zeotap CDP.