> ## Documentation Index
> Fetch the complete documentation index at: https://docs.zeotap.com/llms.txt
> Use this file to discover all available pages before exploring further.
# LaunchDarkly Real Time Integration
## Overview
LaunchDarkly is a feature management platform that empowers development teams to safely deliver, control and measure their software through feature flags. With LaunchDarkly, you can run experiments on any feature flag. Integrated with Zeotap CDP, this Destination allows you to send the segments created in Zeotap CDP to be used in LaunchDarkly feature flags.
## Prerequisites
Ensure that you obtain the following prerequisites from LauchDarkly before proceeding with this integration:
* Access Token
* Client-side ID
### Access Token
An Access token in LaunchDarkly is a unique identifier that allows you to authenticate and control access to your LaunchDarkly feature flags and experiments. Perform the following steps to obtain the API Access token:
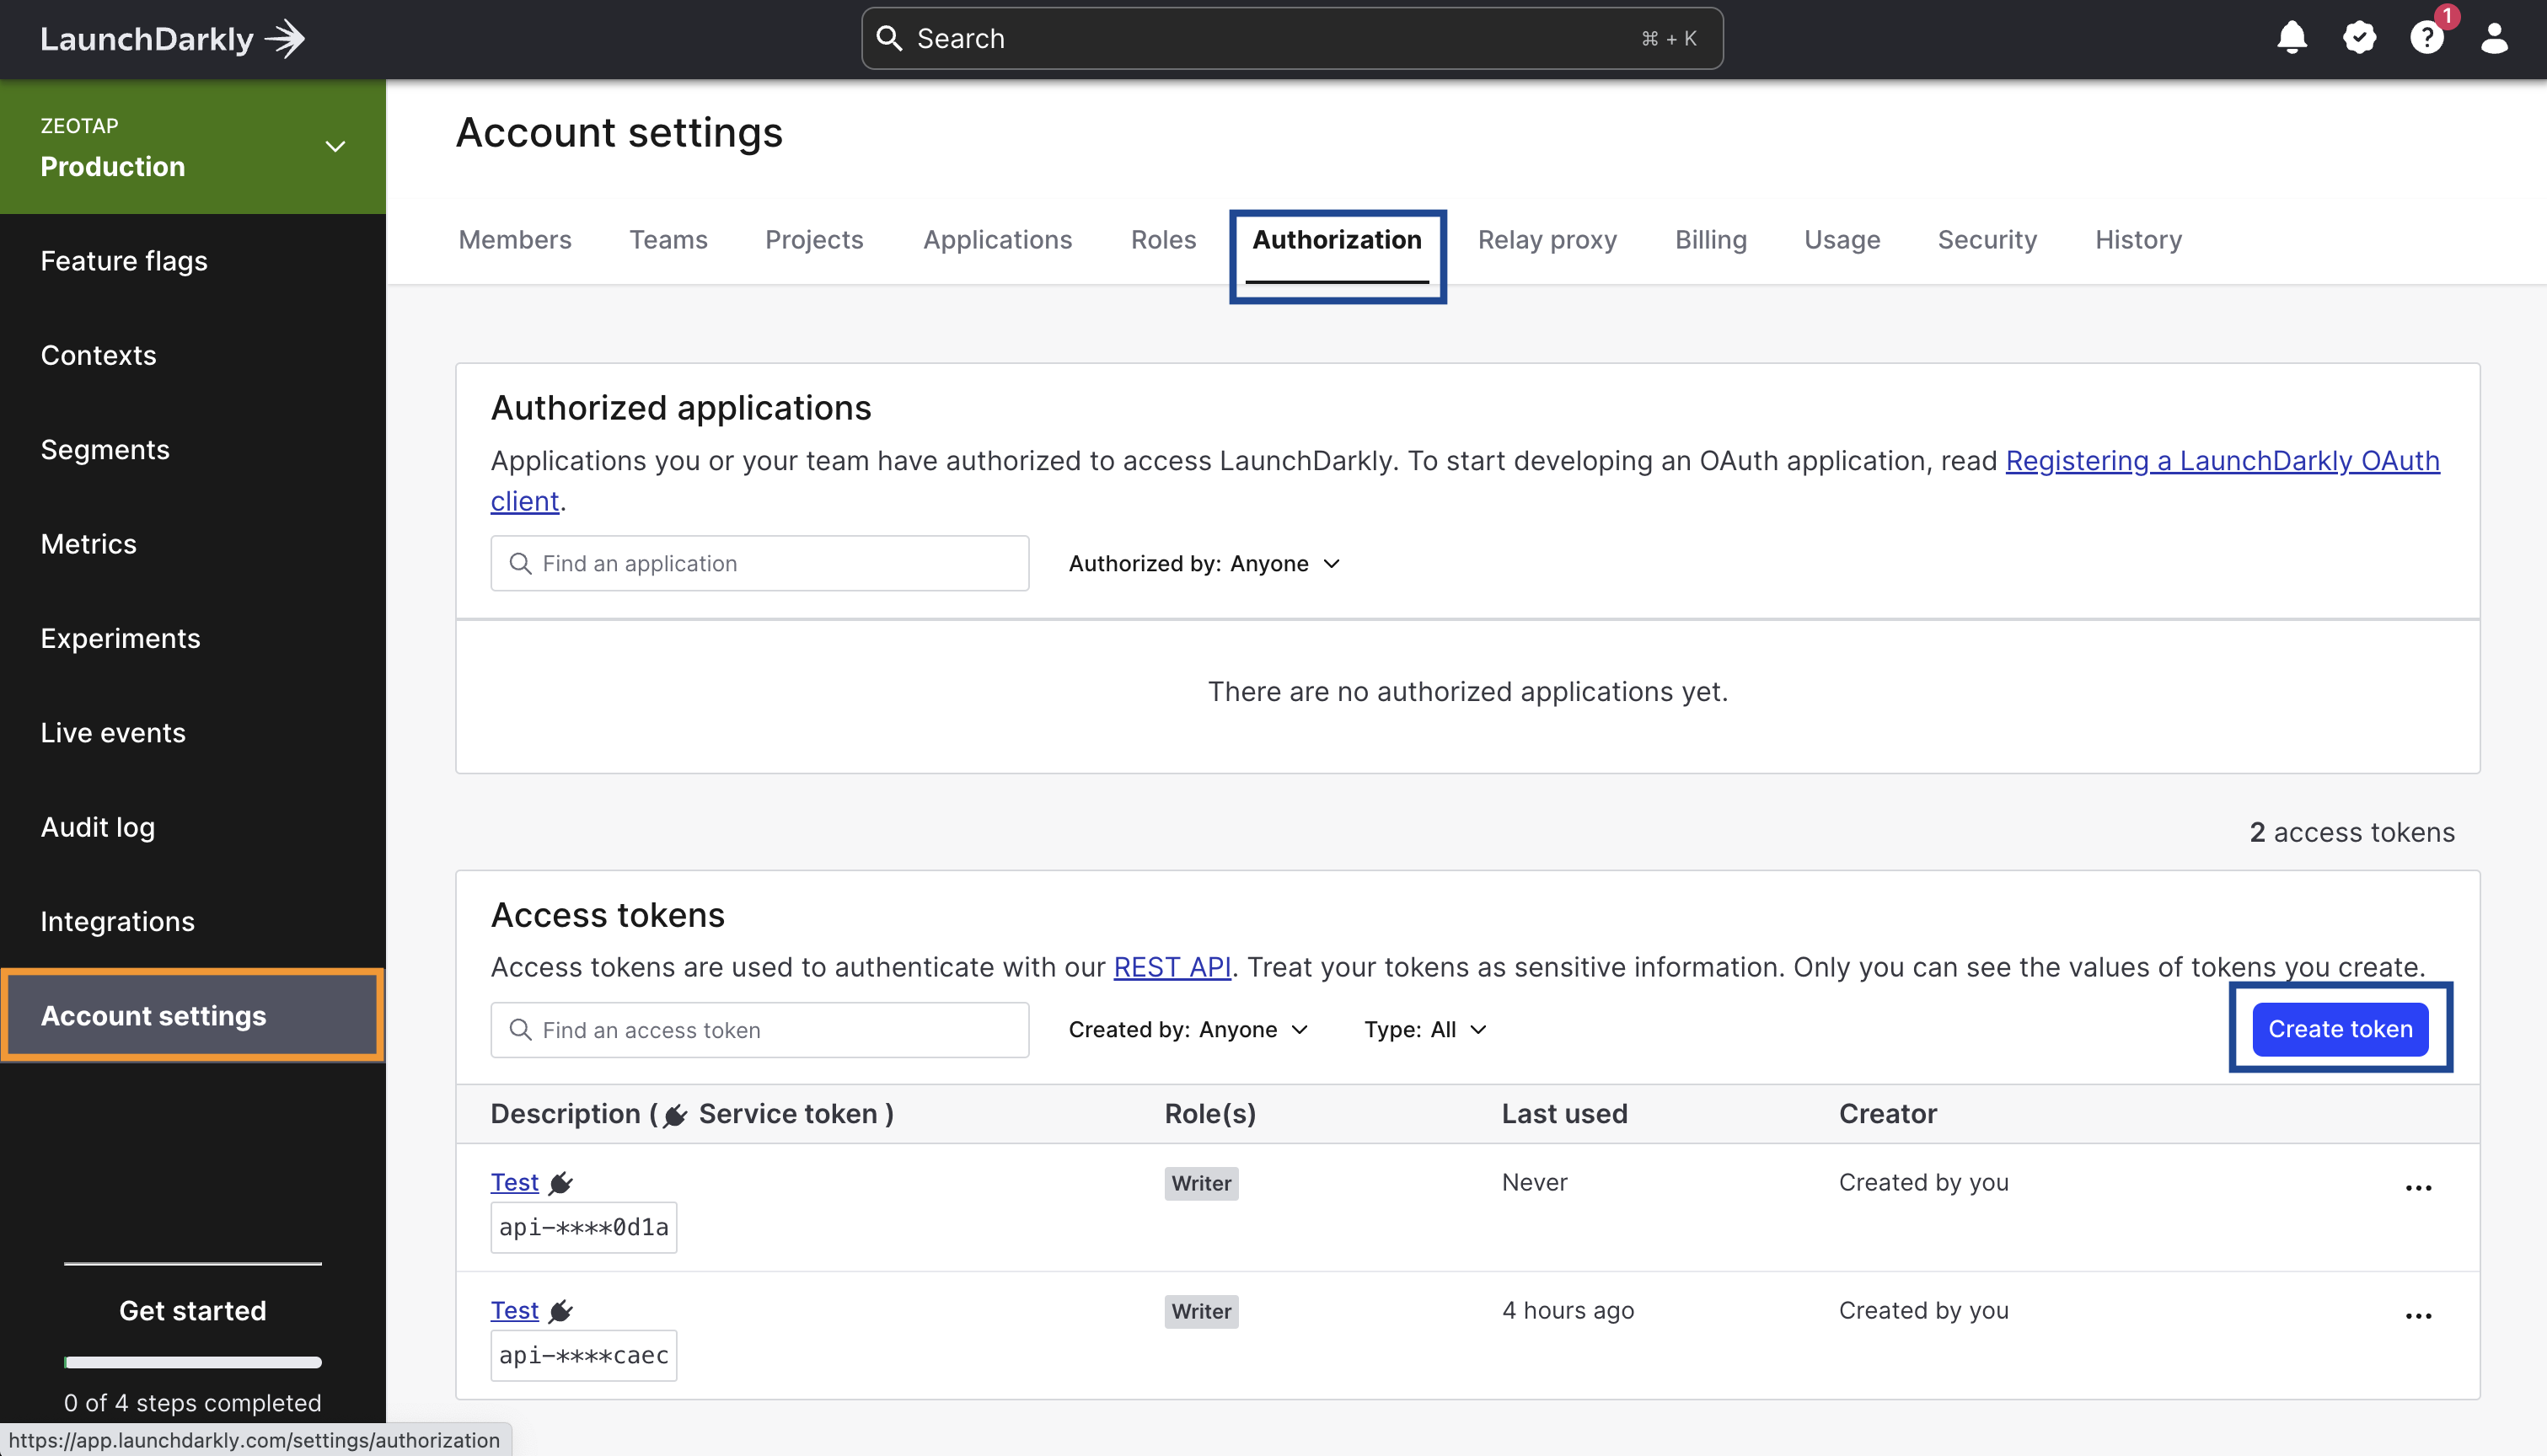
Log into the LaunchDarkly console and navigate to **Account settings** **>** **Authorization**.
Under **Access tokens**, click **Create token**.
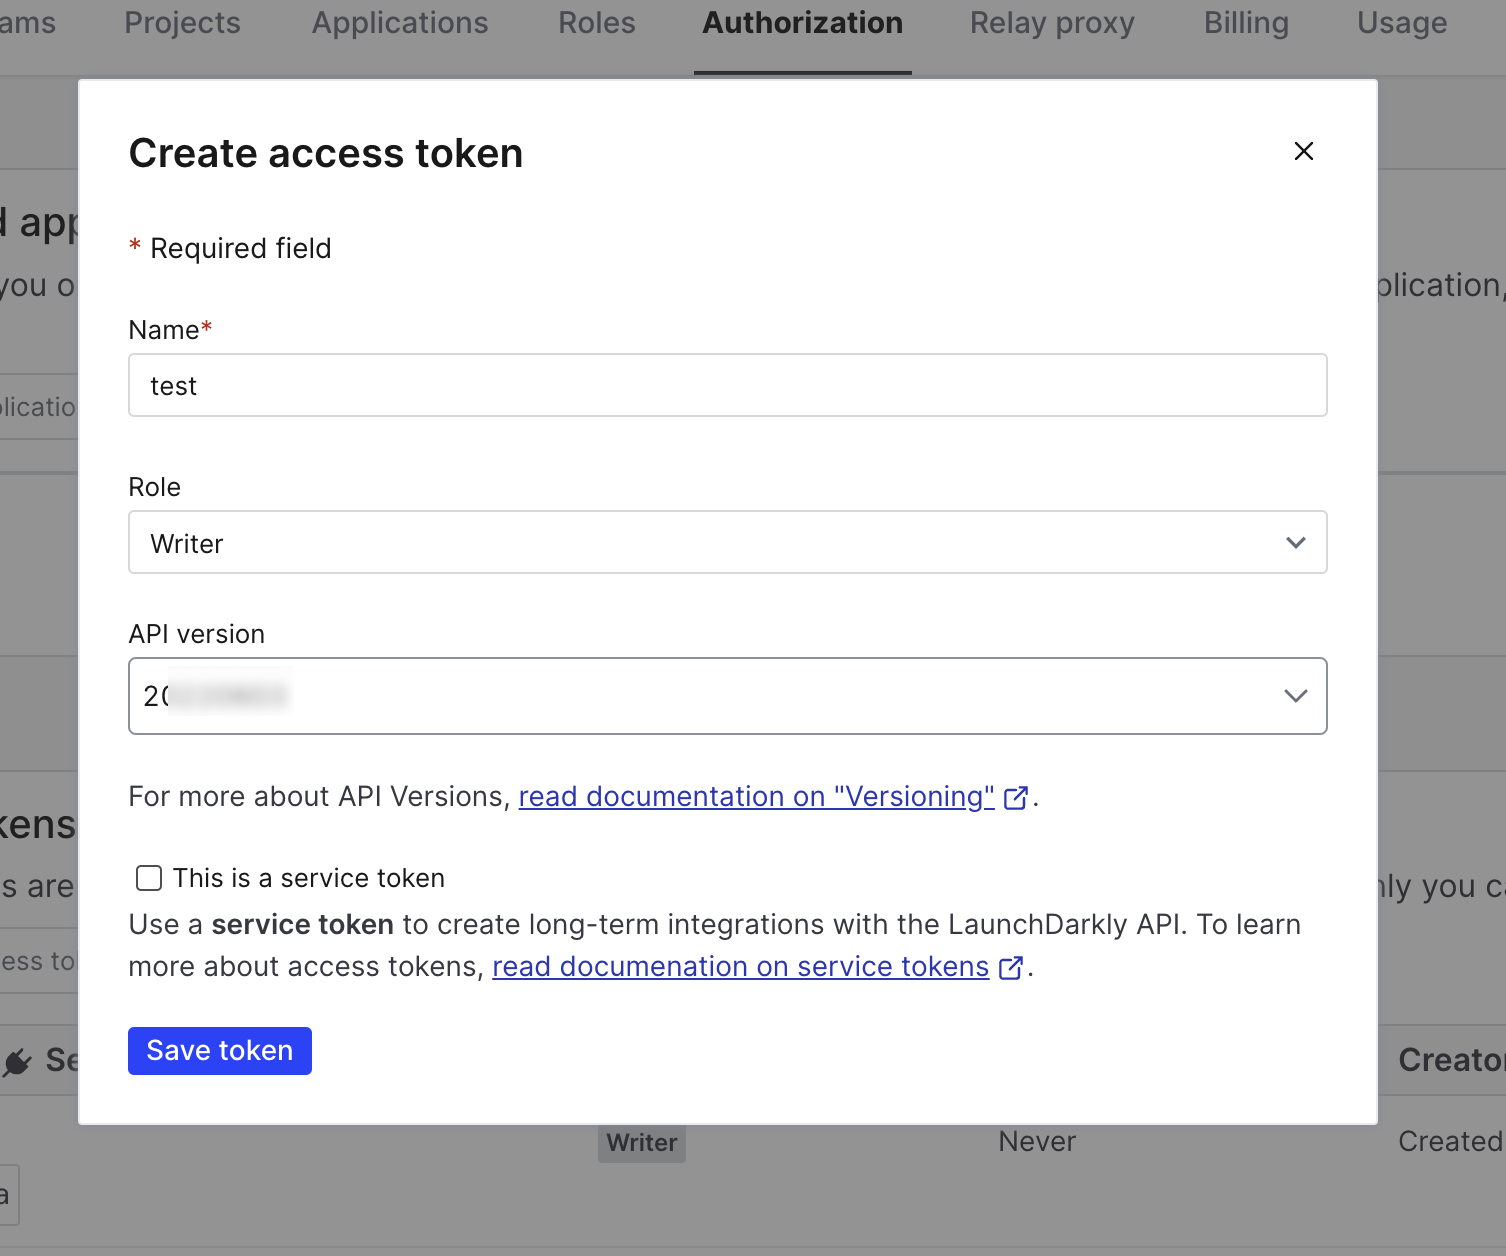
 In the **Create access token** window that appears, provide the following details:
a. Enter a **Name** for your access token.
b. Choose the **Role** as **Writer** for your access token from the drop-down menu.
c. Choose the **API version** for your token from the drop-down menu. By default, the API requests you send using this token will use this API version. For more information about how the API versioning works in LaunchDarkly, refer [here](https://apidocs.launchdarkly.com/#section/Overview/Versioning).
d. If you are Enterprise customer, you can click **This is a service token** checkbox if you wish to create a service token.
In the **Create access token** window that appears, provide the following details:
a. Enter a **Name** for your access token.
b. Choose the **Role** as **Writer** for your access token from the drop-down menu.
c. Choose the **API version** for your token from the drop-down menu. By default, the API requests you send using this token will use this API version. For more information about how the API versioning works in LaunchDarkly, refer [here](https://apidocs.launchdarkly.com/#section/Overview/Versioning).
d. If you are Enterprise customer, you can click **This is a service token** checkbox if you wish to create a service token.
 Review the entered details and click **Save Token**. The newly created Access token gets listed on the **Authorization** page as shown in the image below. Ensure to copy and save the token securely as it is hidden once you leave the page.
.png?fit=max&auto=format&n=N2x6le2iGwMeelJt&q=85&s=e643cfaed57d2abe61630b51e6049653) ### Client-side ID
This is the Client-side ID of your LaunchDarkly account. Perform the following steps to obtain the Client-side ID:
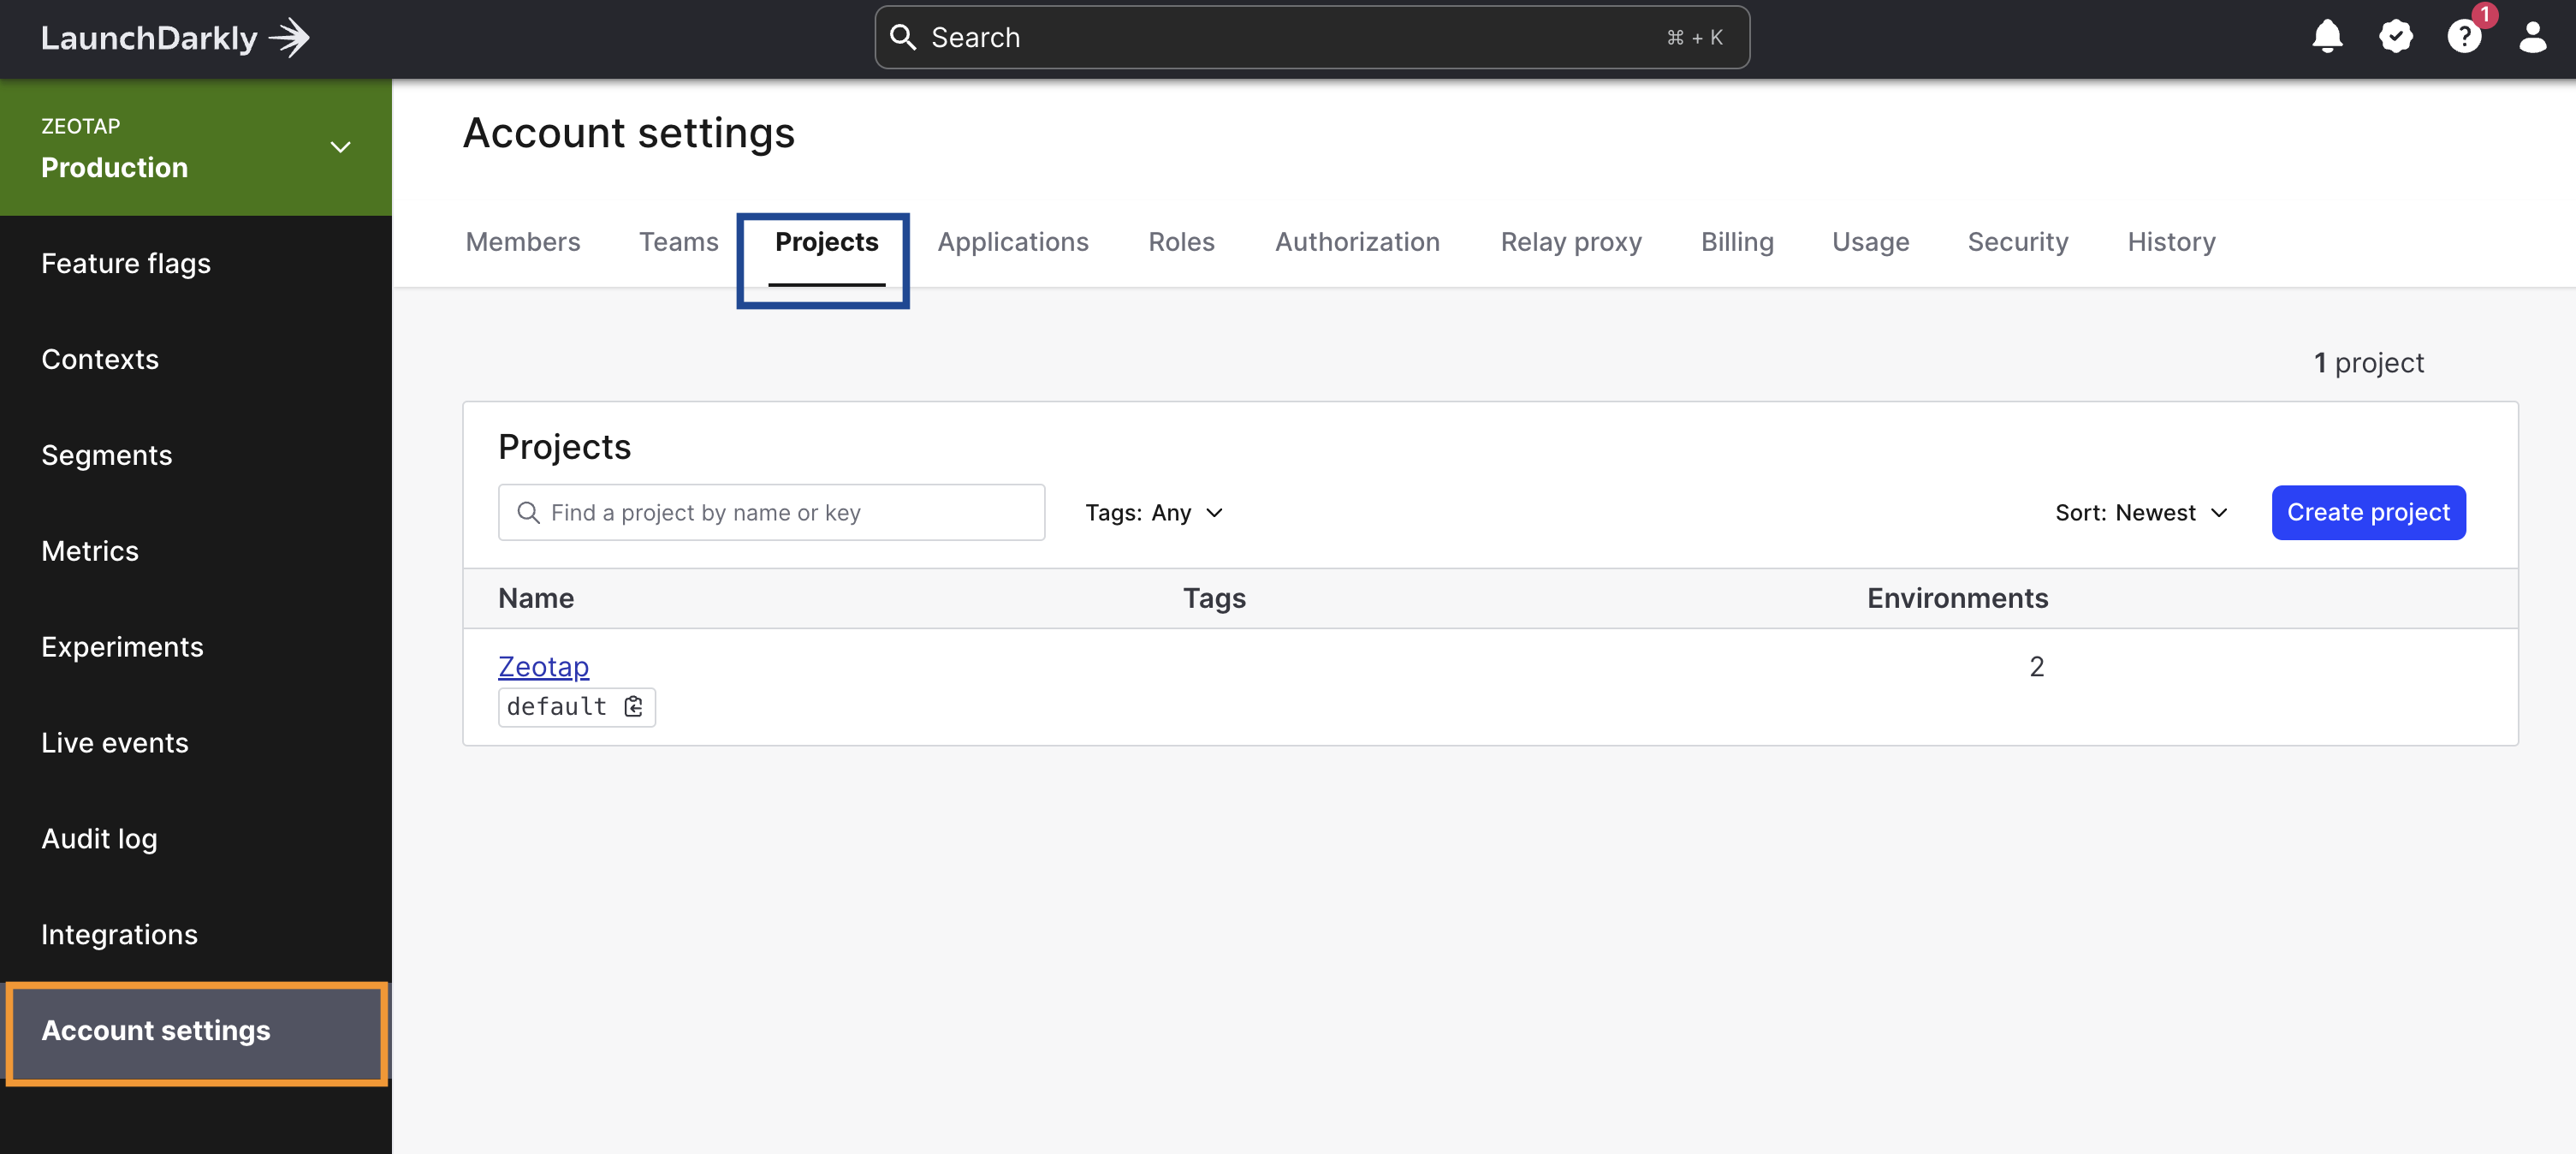
Log into LaunchDarkly account and navigate to **Account Settings**.
Click **Projects** tab and select the project you want to link to Zeotap CDP.
### Client-side ID
This is the Client-side ID of your LaunchDarkly account. Perform the following steps to obtain the Client-side ID:
Log into LaunchDarkly account and navigate to **Account Settings**.
Click **Projects** tab and select the project you want to link to Zeotap CDP.
 In the new screen that appears, under the **Environments** tab, copy the **Client-side ID** next to the environment that you wish to link with Zeotap CDP. You can use this information while creating a Destination in Zeotap CDP.
.png?fit=max&auto=format&n=N2x6le2iGwMeelJt&q=85&s=06467d555f18bf53da89c72ed2e74886) ## Destination Setup
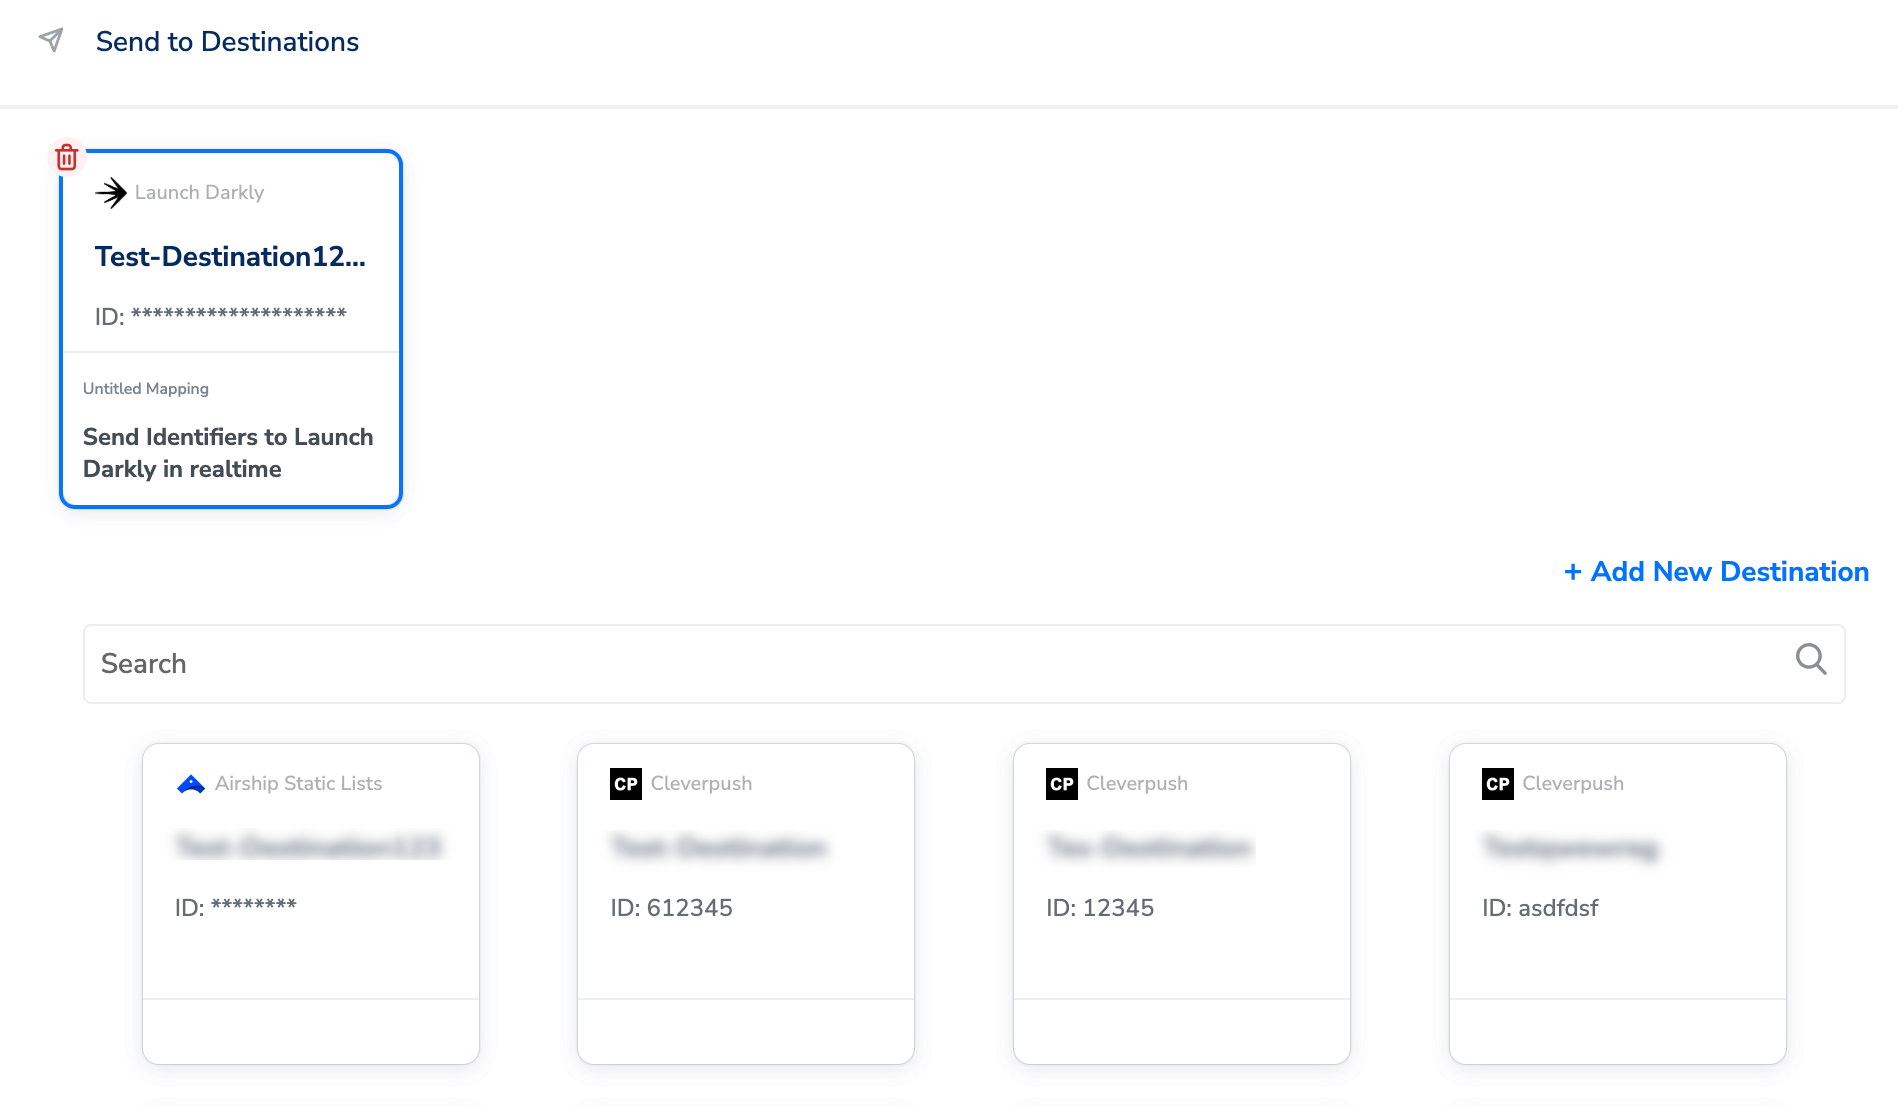
After you have applied filters or added conditions for your users in Journeys, you can activate them in Emarsys under **Send to Destinations.** A new window appears, where you can set up your destination. You can use an already existing destination from the list of available Destinations or create a new one by clicking **+ Add New Destination**.
## Destination Setup
After you have applied filters or added conditions for your users in Journeys, you can activate them in Emarsys under **Send to Destinations.** A new window appears, where you can set up your destination. You can use an already existing destination from the list of available Destinations or create a new one by clicking **+ Add New Destination**.
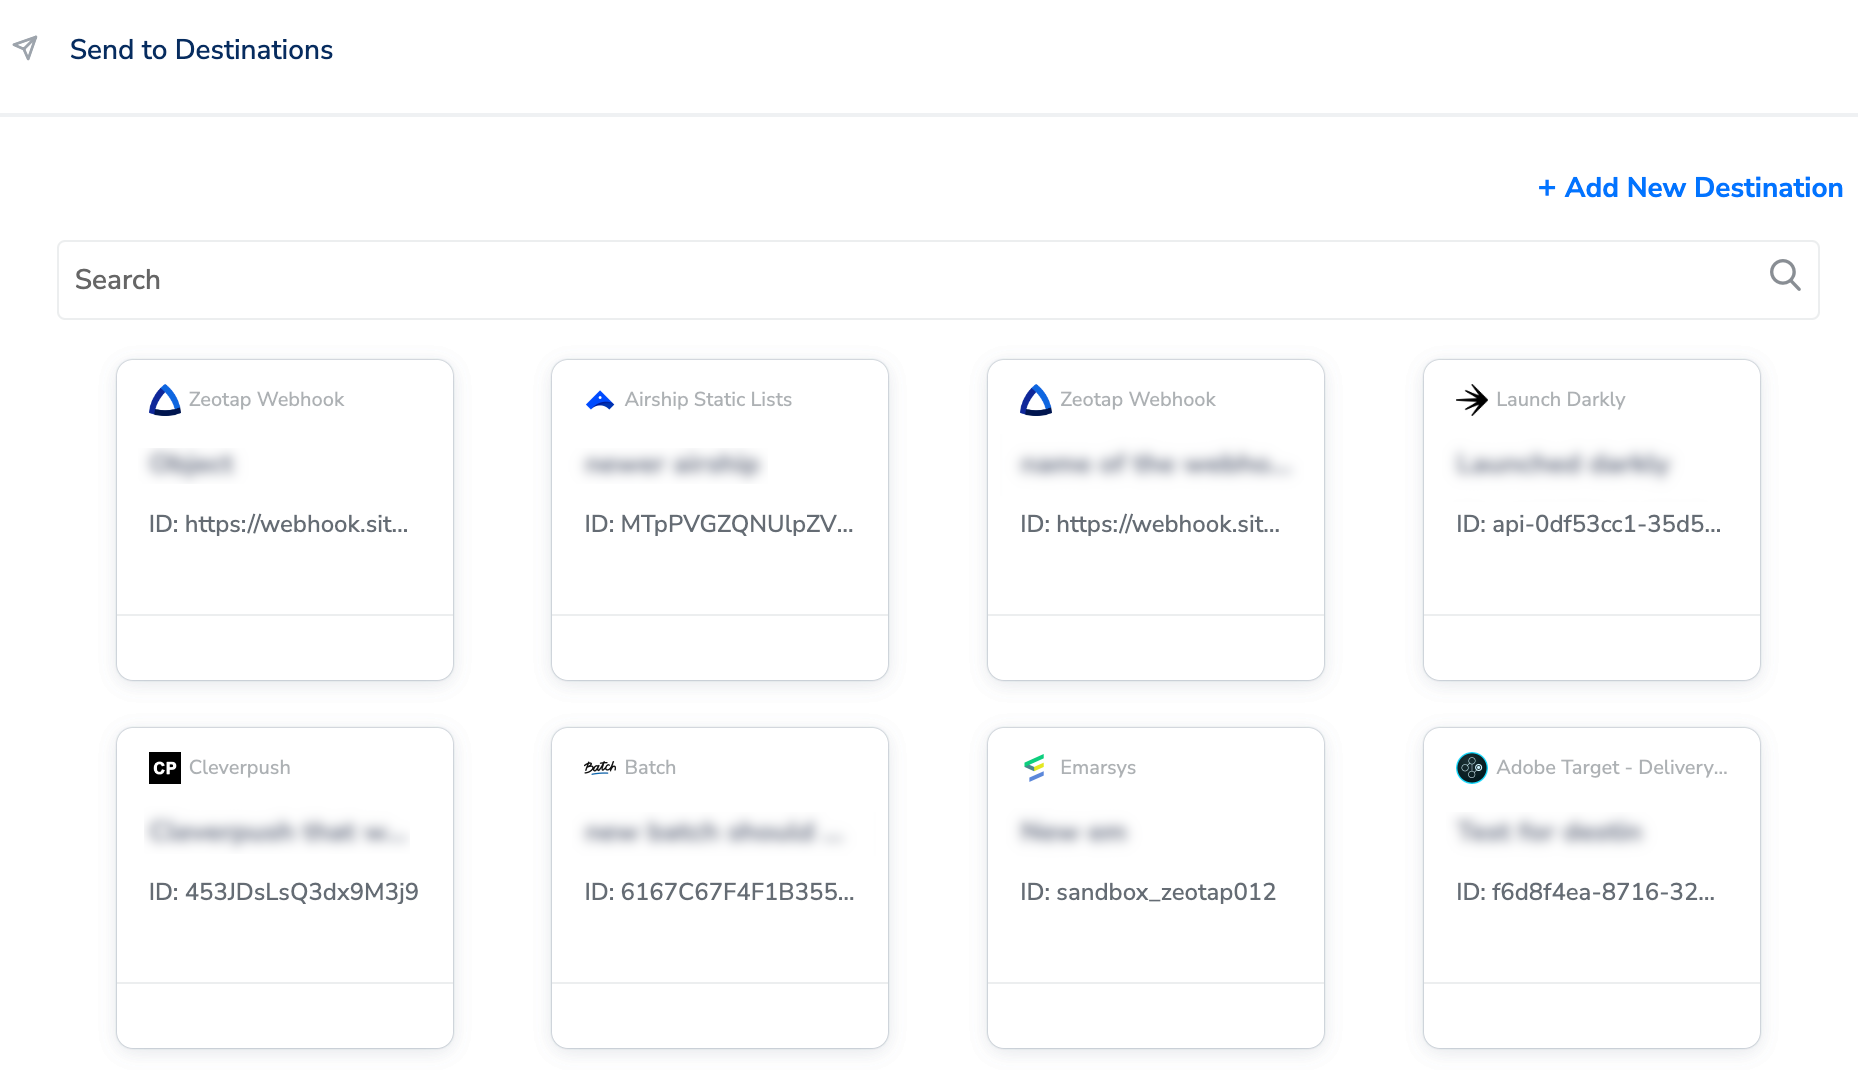 ### Add New Destination
Perform the following steps to add a new destination:
Click **Add New Destination.**
Search for **launchDarkly.**
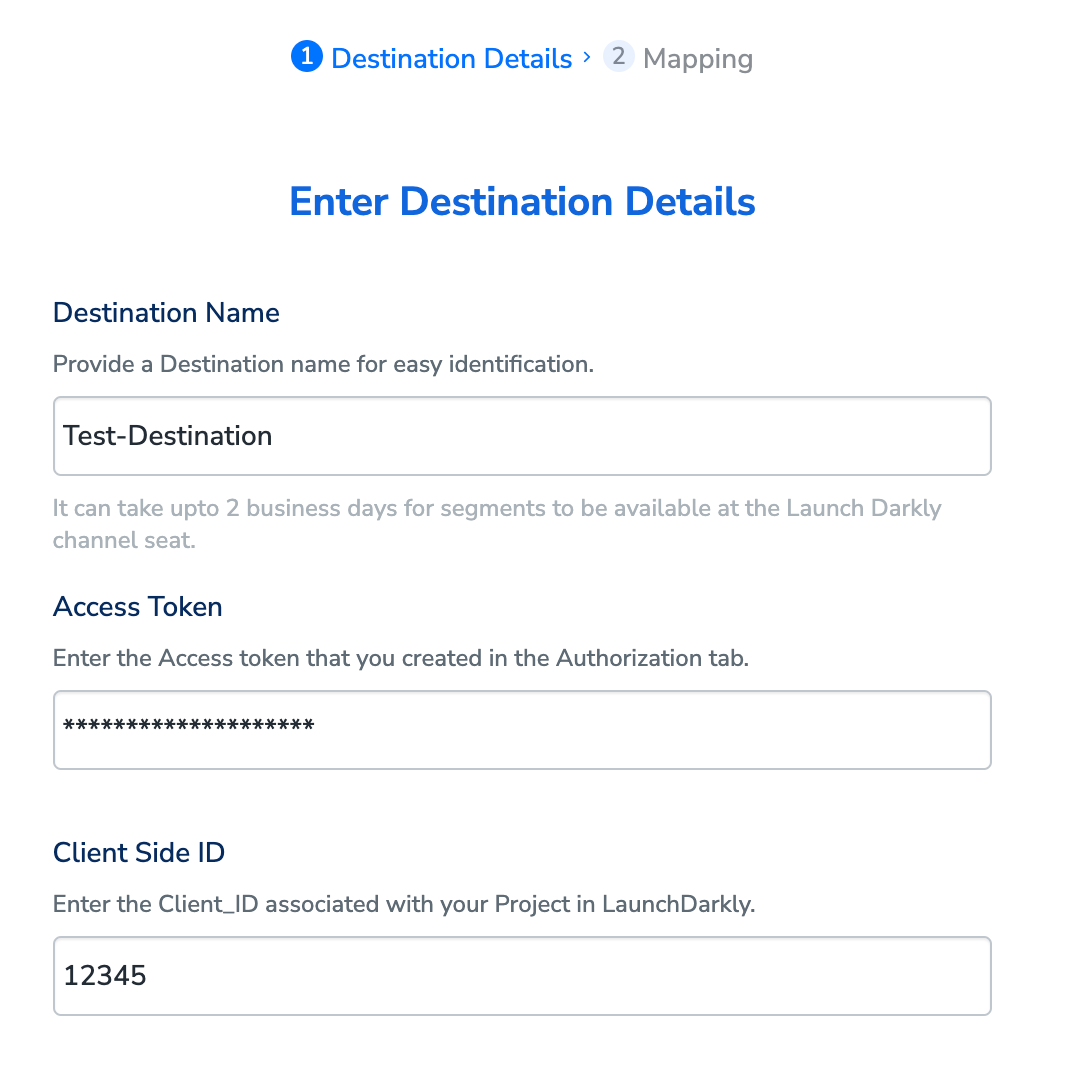
Click **launchDarkly** and enter a name for the Destination.
Enter the **Access Token** and **Client Side ID** obtained from your LauchDarkly account and click **Next**.
### Add New Destination
Perform the following steps to add a new destination:
Click **Add New Destination.**
Search for **launchDarkly.**
Click **launchDarkly** and enter a name for the Destination.
Enter the **Access Token** and **Client Side ID** obtained from your LauchDarkly account and click **Next**.
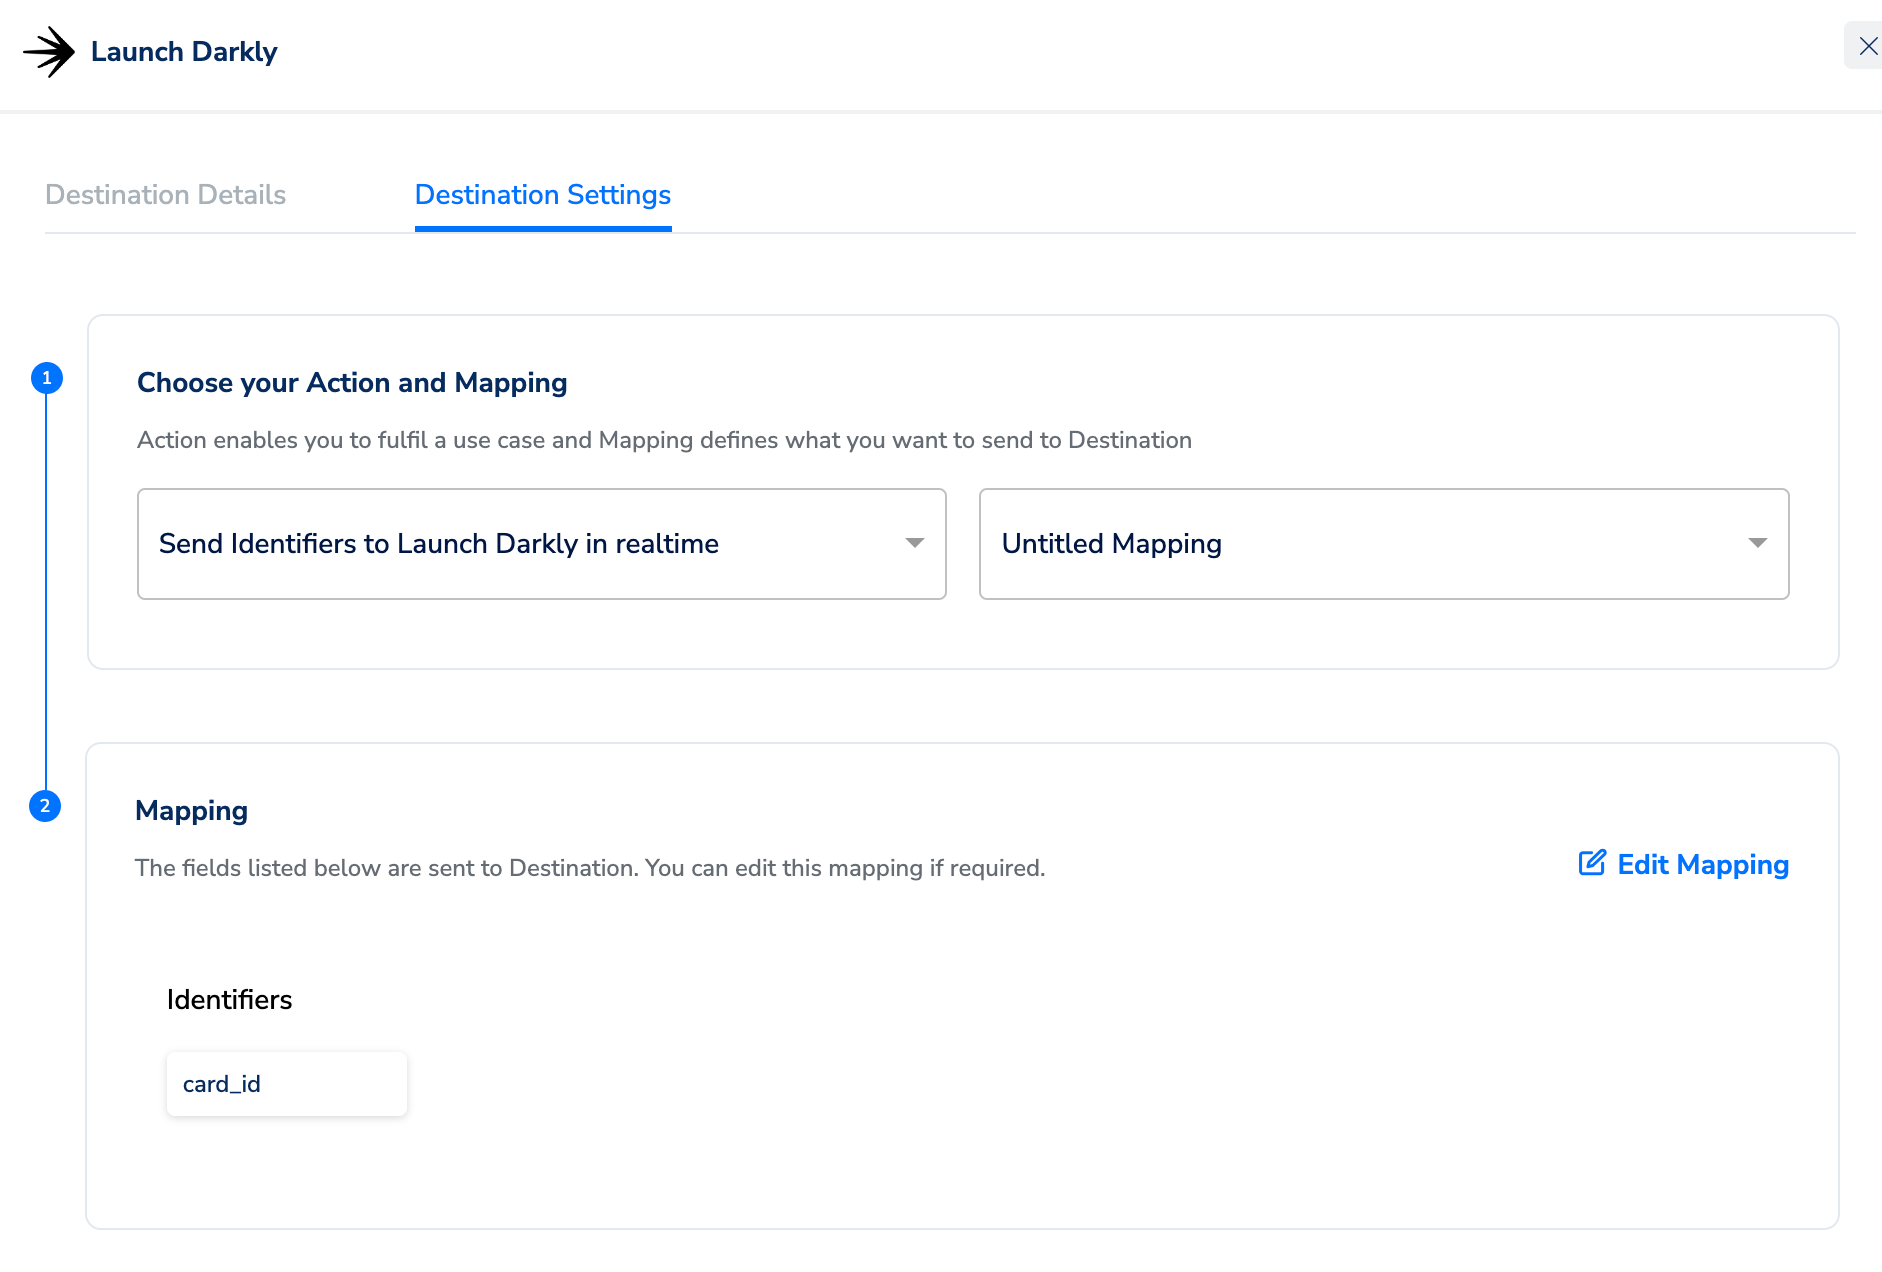
 In the mapping screen that appears, under **Choose your Action**, select **Send Identifiers to LaunchDarkly in realtime** as the action for sending data to the workflow created in Journeys. Under **Map the Fields**, map the appropriate Catalogue fields to the Destination fields to send to Destination.
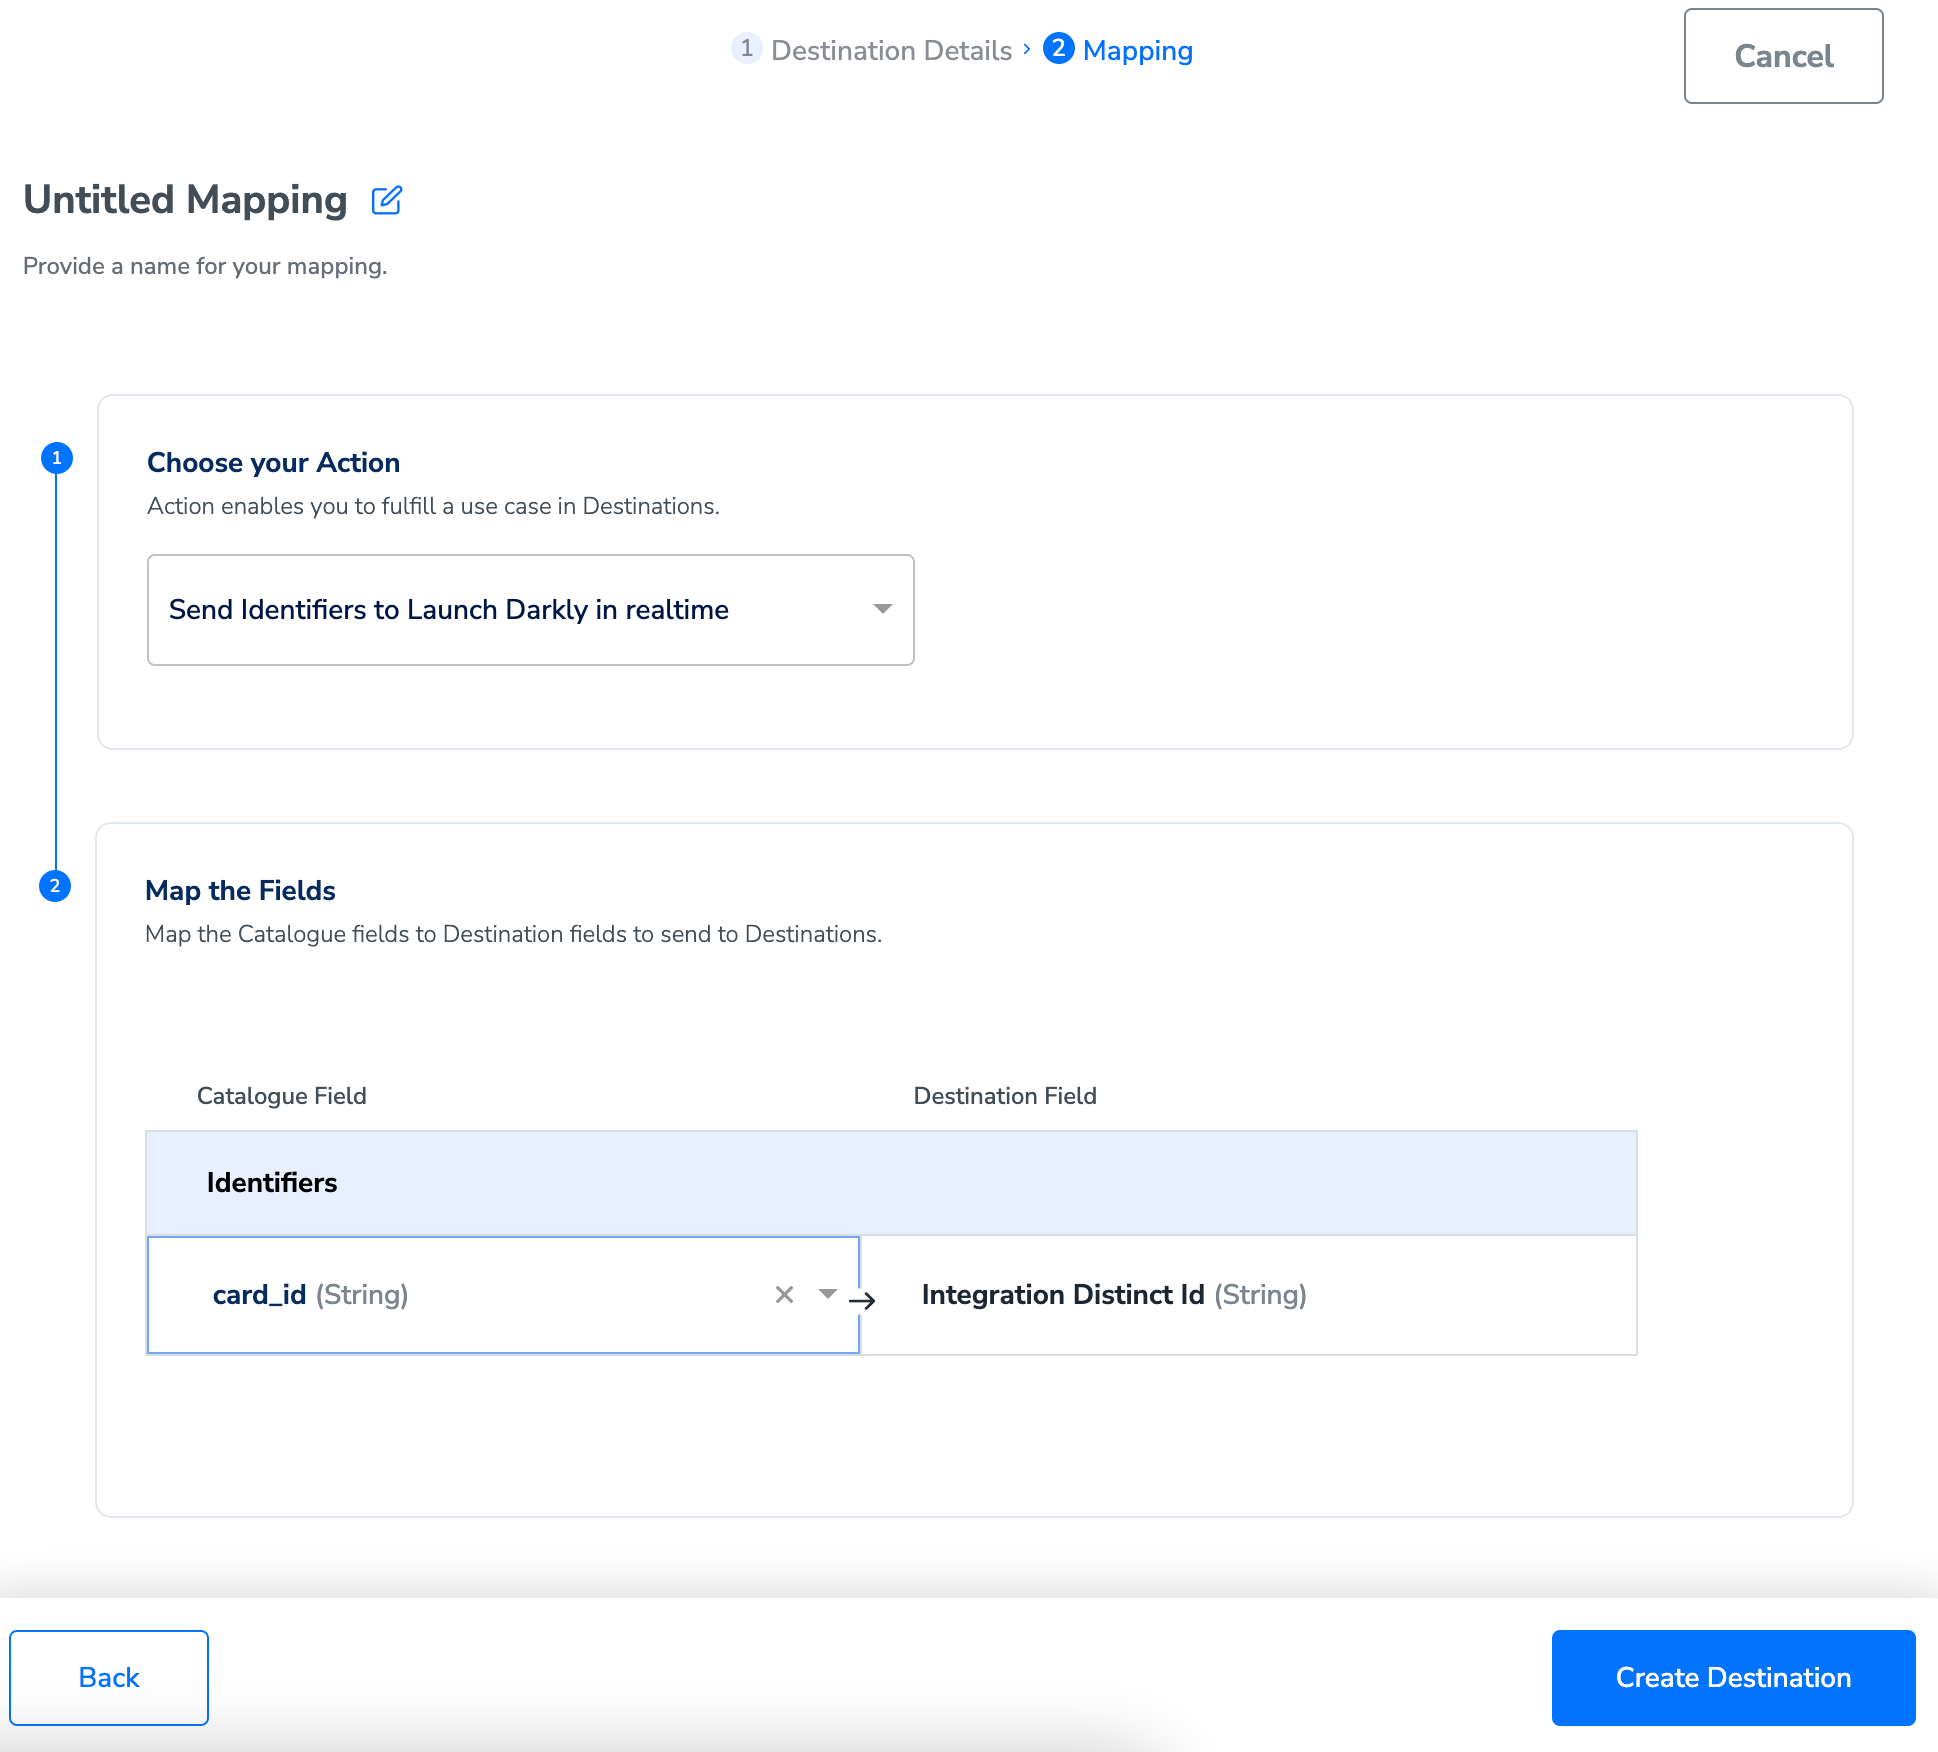 Once the mapping is complete, click **Create Destination**. The destination is created and made available for activation on Journeys.
## Activate the Destination on Journeys
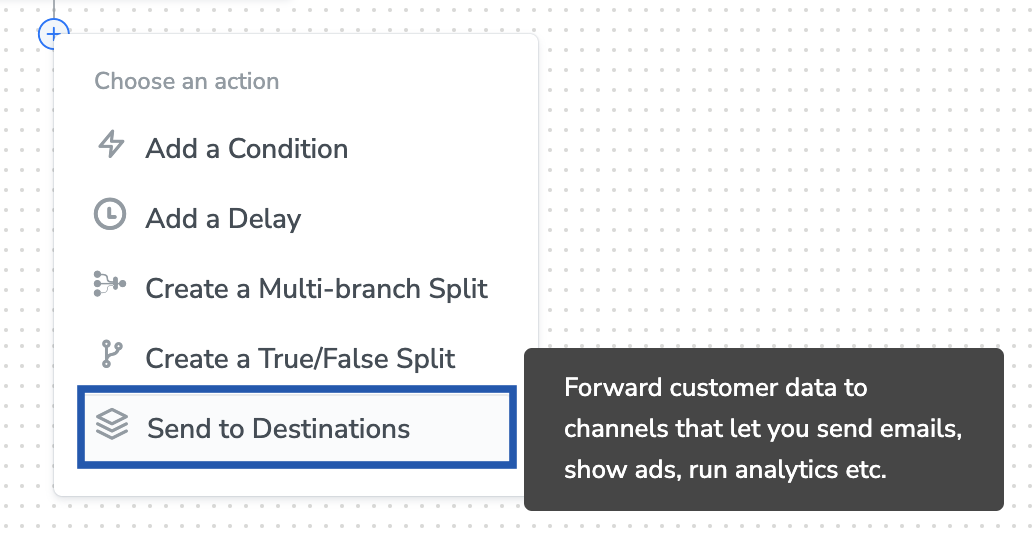
After creating a destination, next, you need to link it in the **Send to Destination** node within the workflow, as explained below.
In the workflow, click **+** and choose **Send to Destinations**.
Once the mapping is complete, click **Create Destination**. The destination is created and made available for activation on Journeys.
## Activate the Destination on Journeys
After creating a destination, next, you need to link it in the **Send to Destination** node within the workflow, as explained below.
In the workflow, click **+** and choose **Send to Destinations**.
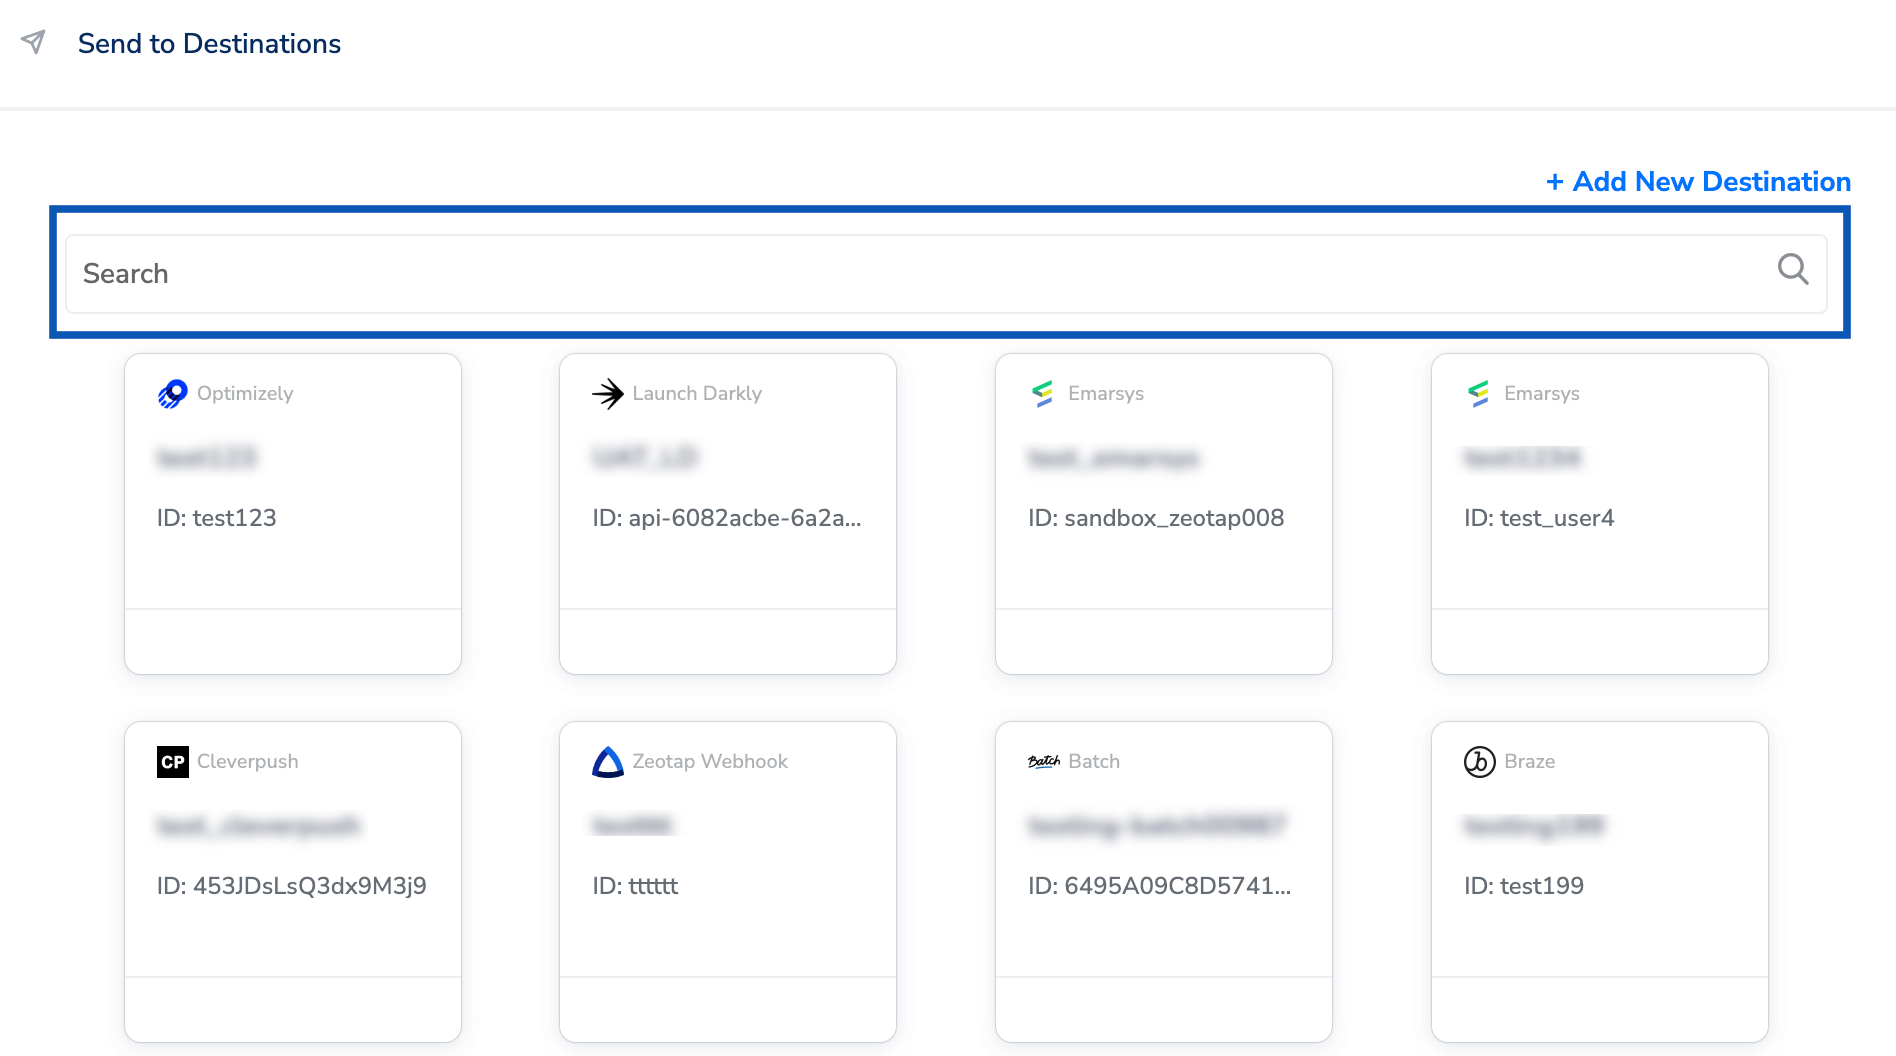
 Choose the destination from the list of available destinations by using the search feature.
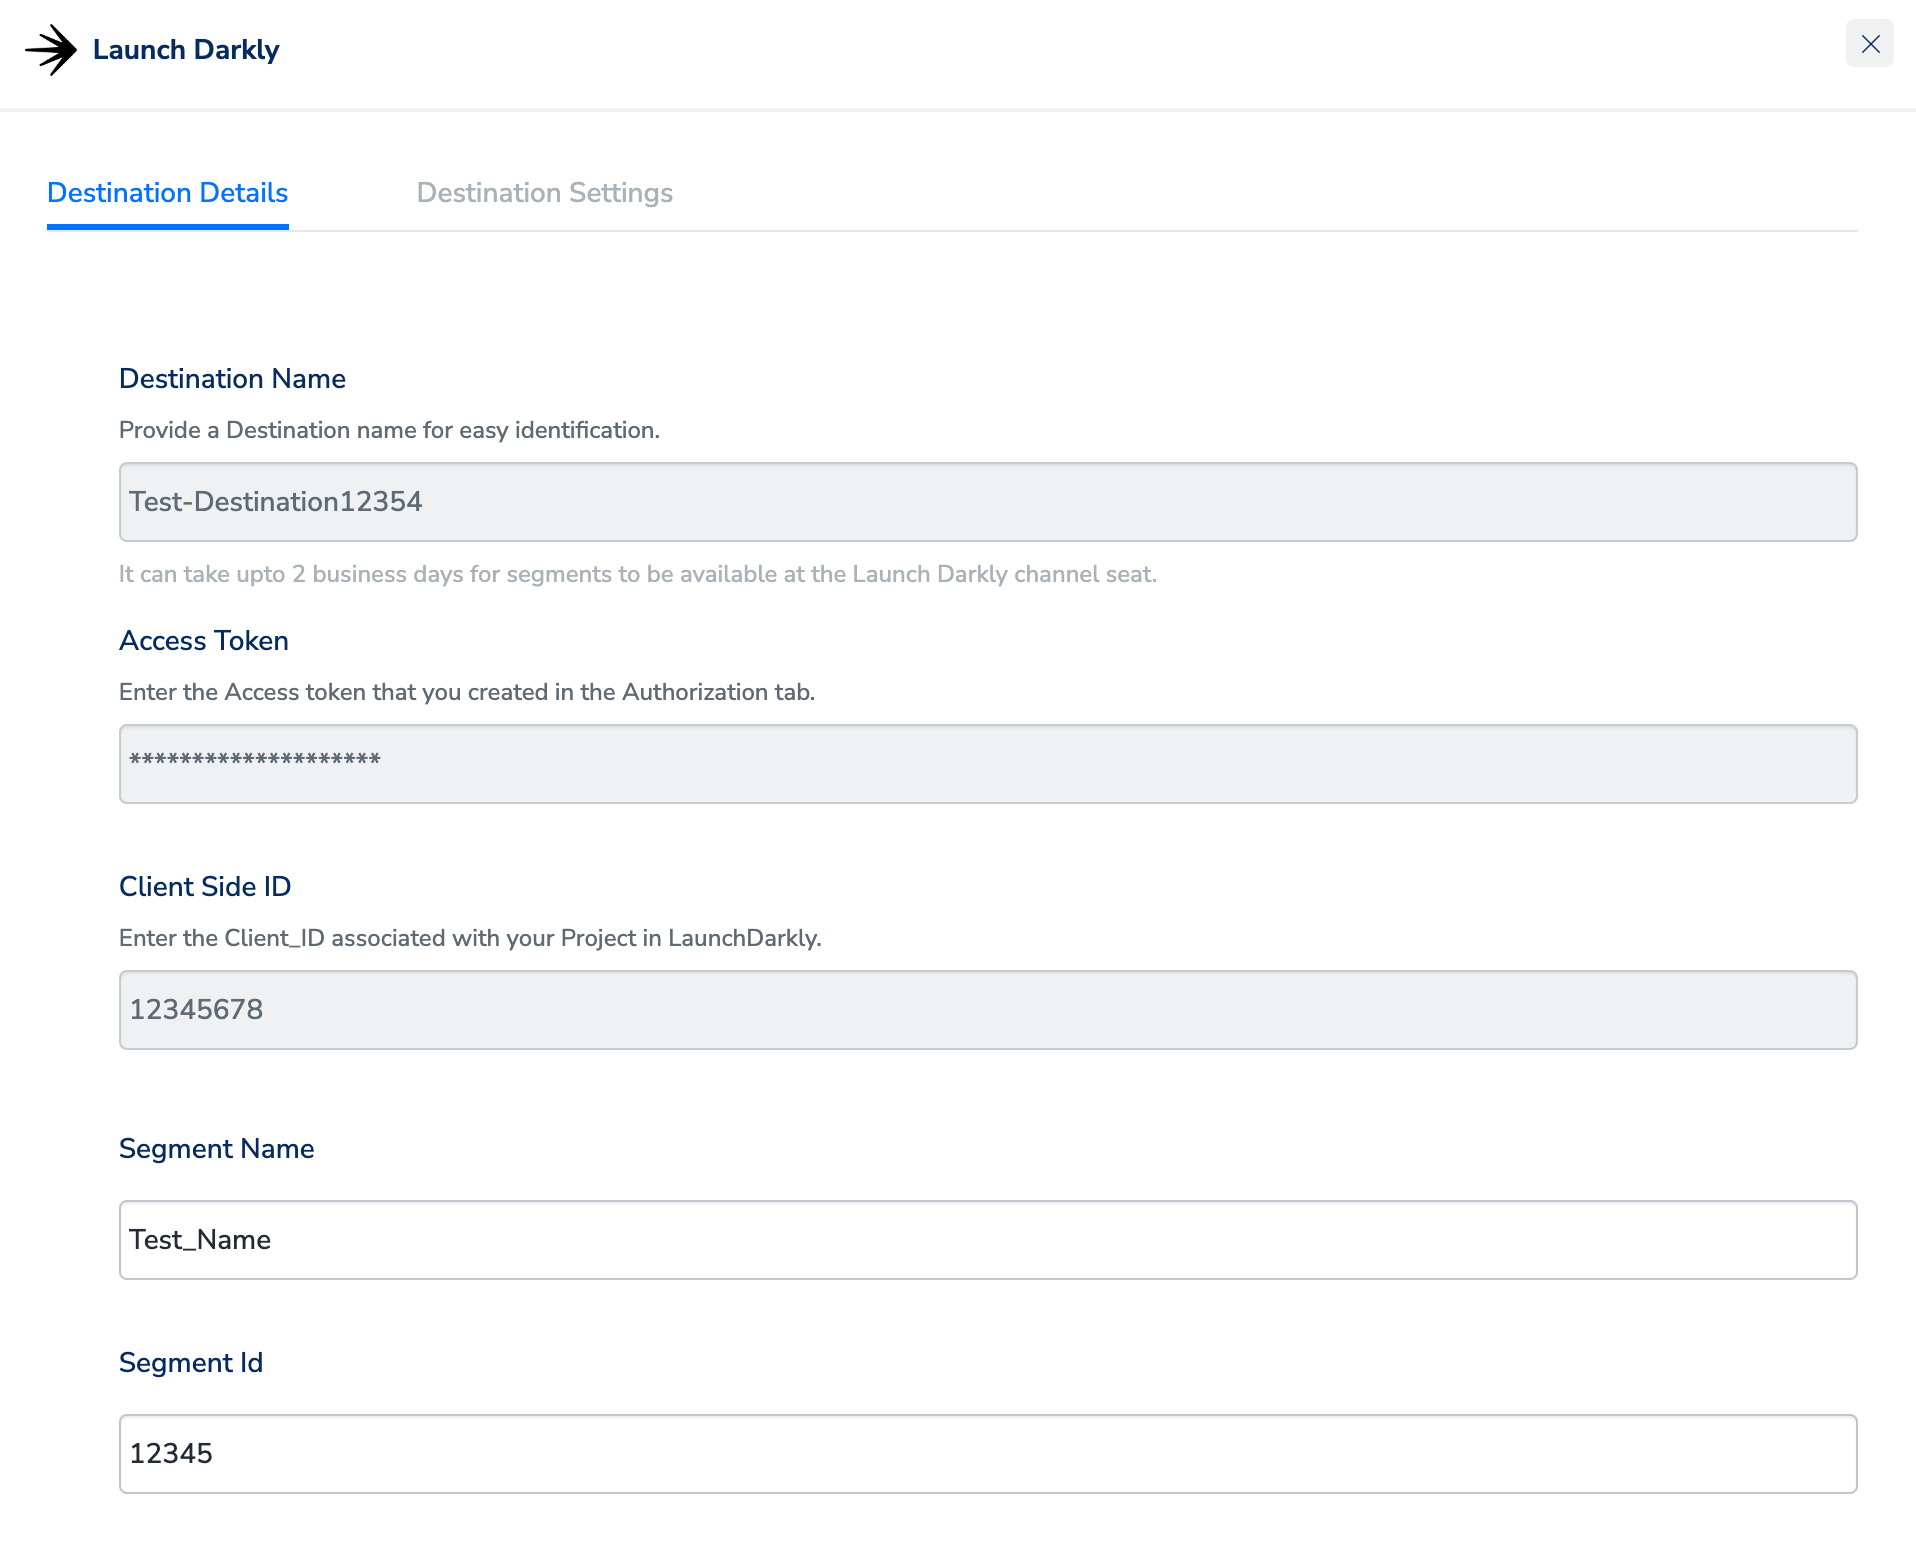
 Under the **Destination Details** tab, the **Access Token** and **Client Side ID** fields are automatically populated based on the value that you had entered while creating the destination. However, in the **Segment Name** and **Segment Id** fields, enter a name and Id to categorise your users.
 Under the **Destination Settings** tab, choose the Action and mapping as per your requirement.
 Upon clicking **Save Destination**. The destination is attached as shown in the image below.