> ## Documentation Index
> Fetch the complete documentation index at: https://docs.zeotap.com/llms.txt
> Use this file to discover all available pages before exploring further.
# Google Universal Analytics Integration
## Overview
Google Universal Analytics provides comprehensive analytics solutions including Event, Page Views, E-commerce, Crash, and Exception reporting. Its integration with Zeotap allows you to send real-time audiences through Symphony. You can also send data to custom dimensions and custom metrics. This will allow you to send enhanced user traits and profile attributes. In addition to this, it also allows you to send offline data that you cannot send through direct Google Analytics (GA) integration.
Zeotap uses Measurement Protocol APIs to send data to GA through server-to-server calls. With the enhanced user profile sent to GA, you can create audiences and activate them further in various Google products like Google Ads, Optimize 360 and so on.
## Prerequisites for the GA Integration
Ensure that you have the following set-up ready
* Set up a property and get the Tracking ID.
* Set up Custom Dimensions and Custom Metrics in Google Universal Analytics so that Zeotap can send data to them.
### Set up a Property and Get the Tracking ID
Perform the following steps to set up a Property and get the Tracking ID:
Log in to the Google Analytics (GA) account.
Go to **Admin** > **Create Property**.
Enter a **Property Name** and then click **Show Advanced Options**.
Select the toggle on **Create a Universal Analytics property** and enter the URL of the website that you want to track. Select the **Create a Universal Analytics property** **only** option.
Enter your **Business Information** and then click **Create**. The **UA** property is created.
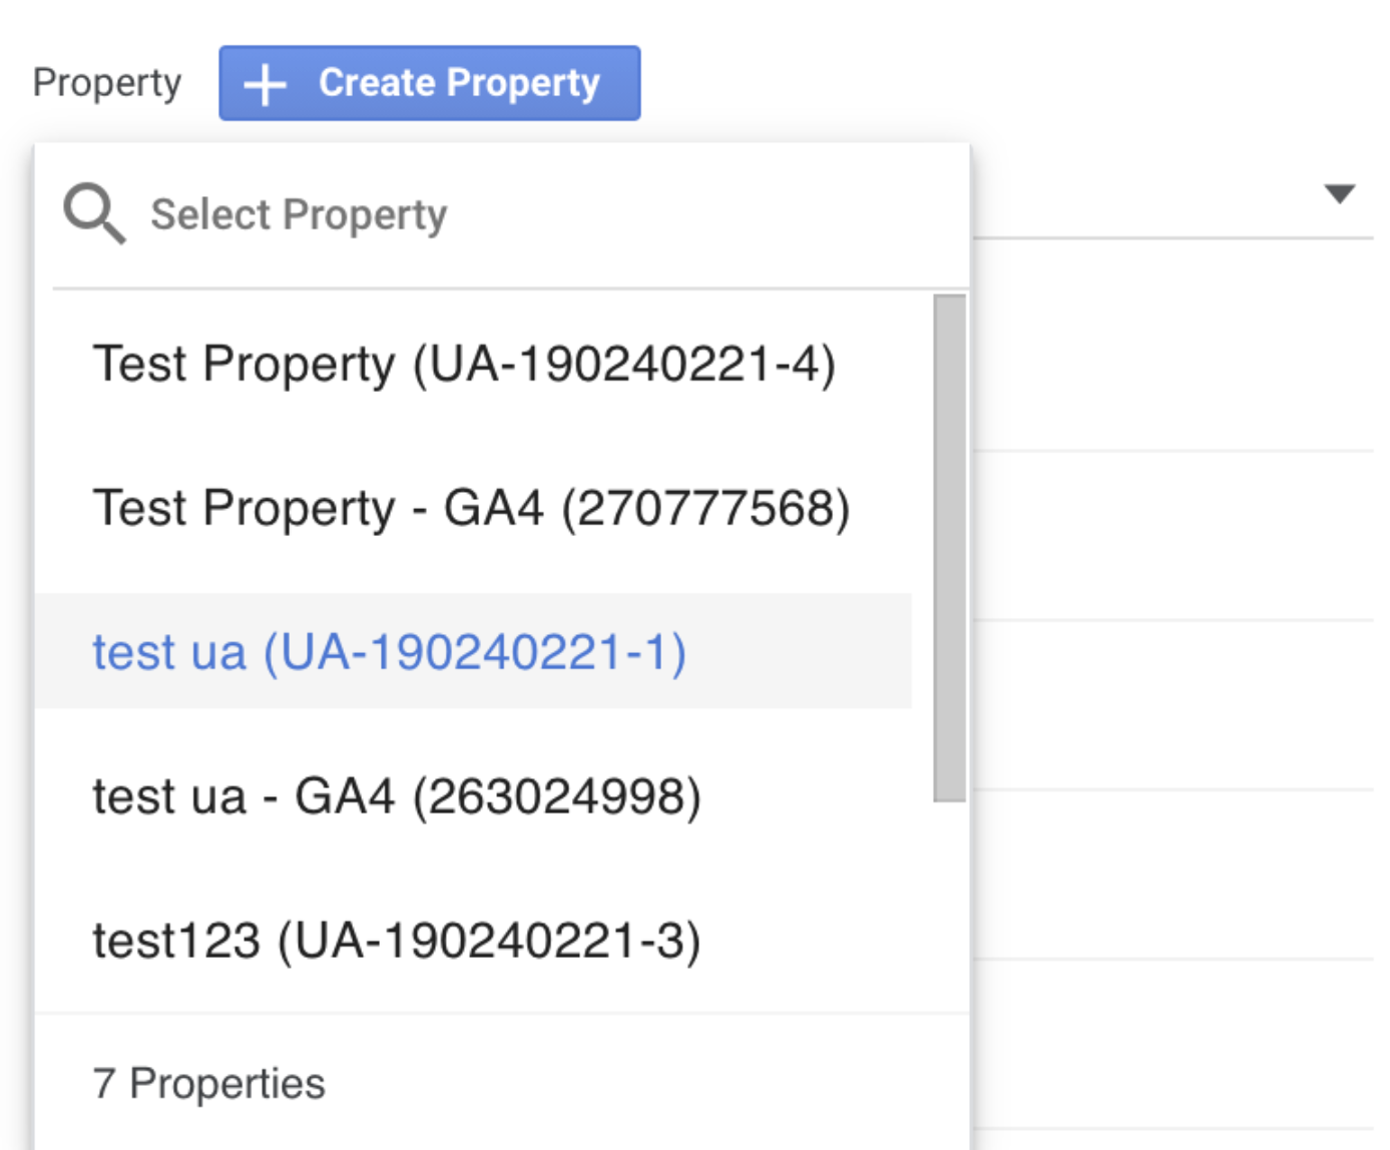
Under the **Property** section, search for the **Property Name**, you just created.
Click **Property Settings**. A section appears on the right side with all the relevant information about the property. Search for the **Tracking ID** and copy the details.
 **Note:**
The Tracking ID is required while creating a Google Universal Analytics destination under Journeys.
### Set up Custom Dimension and Custom Metric in Google Analytics
Perform the following steps to set up Custom Dimension and Custom Metric in Google Analytics:
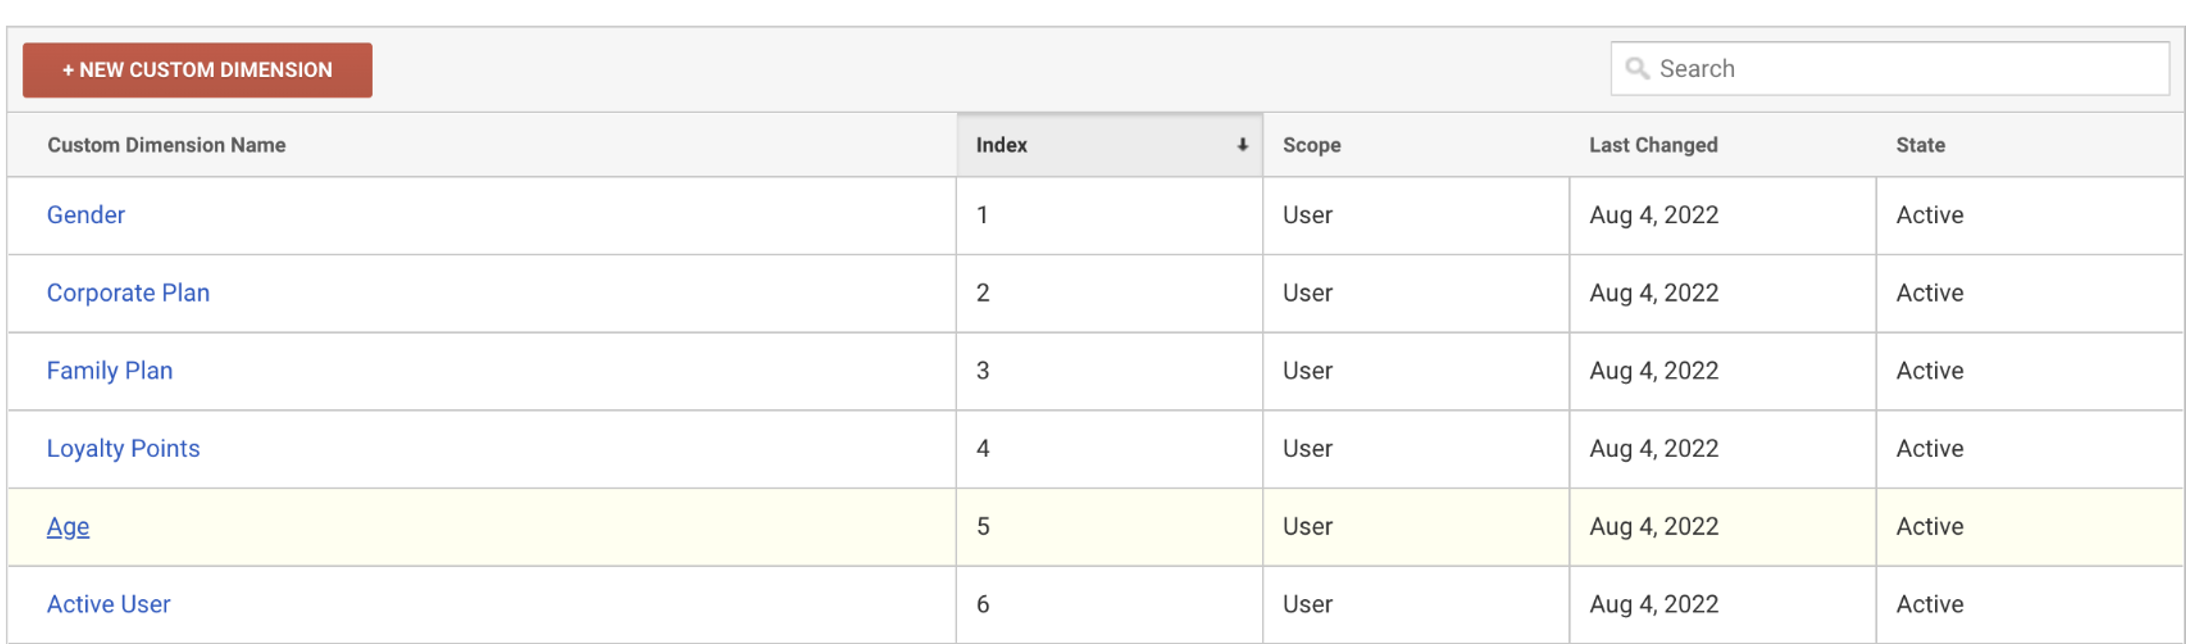
Go to **Admin** > **Custom Definitions** under **Property**.
Choose Custom Dimension or Custom Metric based on your requirement and click **+New Custom Dimension/Metric** based on the selection.
Add name, scope and click the **Active** checkbox to activate a Custom Dimension. Similarly, for Custom Metric, add name, scope, formatting type, minimum and maximum value and click **Active** checkbox to activate a custom metric.
For Custom Dimensions, four scopes are provided, namely, **Hit, Session, User** and **Product**. Mostly, you may have to use the **User** scope as you need to add users based on Custom Dimensions. Similarly, for Custom Metric, two scopes are provided, namely, **Hit** and **Product**. To know more about the scopes, refer [here](https://support.google.com/analytics/answer/2709828?hl=en#zippy=%2Cin-this-article).
Ensure that the custom dimensions are mapped to the correct index in Zeotap, else attributes will be mapped to the wrong values.
**Note:**
The Tracking ID is required while creating a Google Universal Analytics destination under Journeys.
### Set up Custom Dimension and Custom Metric in Google Analytics
Perform the following steps to set up Custom Dimension and Custom Metric in Google Analytics:
Go to **Admin** > **Custom Definitions** under **Property**.
Choose Custom Dimension or Custom Metric based on your requirement and click **+New Custom Dimension/Metric** based on the selection.
Add name, scope and click the **Active** checkbox to activate a Custom Dimension. Similarly, for Custom Metric, add name, scope, formatting type, minimum and maximum value and click **Active** checkbox to activate a custom metric.
For Custom Dimensions, four scopes are provided, namely, **Hit, Session, User** and **Product**. Mostly, you may have to use the **User** scope as you need to add users based on Custom Dimensions. Similarly, for Custom Metric, two scopes are provided, namely, **Hit** and **Product**. To know more about the scopes, refer [here](https://support.google.com/analytics/answer/2709828?hl=en#zippy=%2Cin-this-article).
Ensure that the custom dimensions are mapped to the correct index in Zeotap, else attributes will be mapped to the wrong values.
 ## Destination Setup
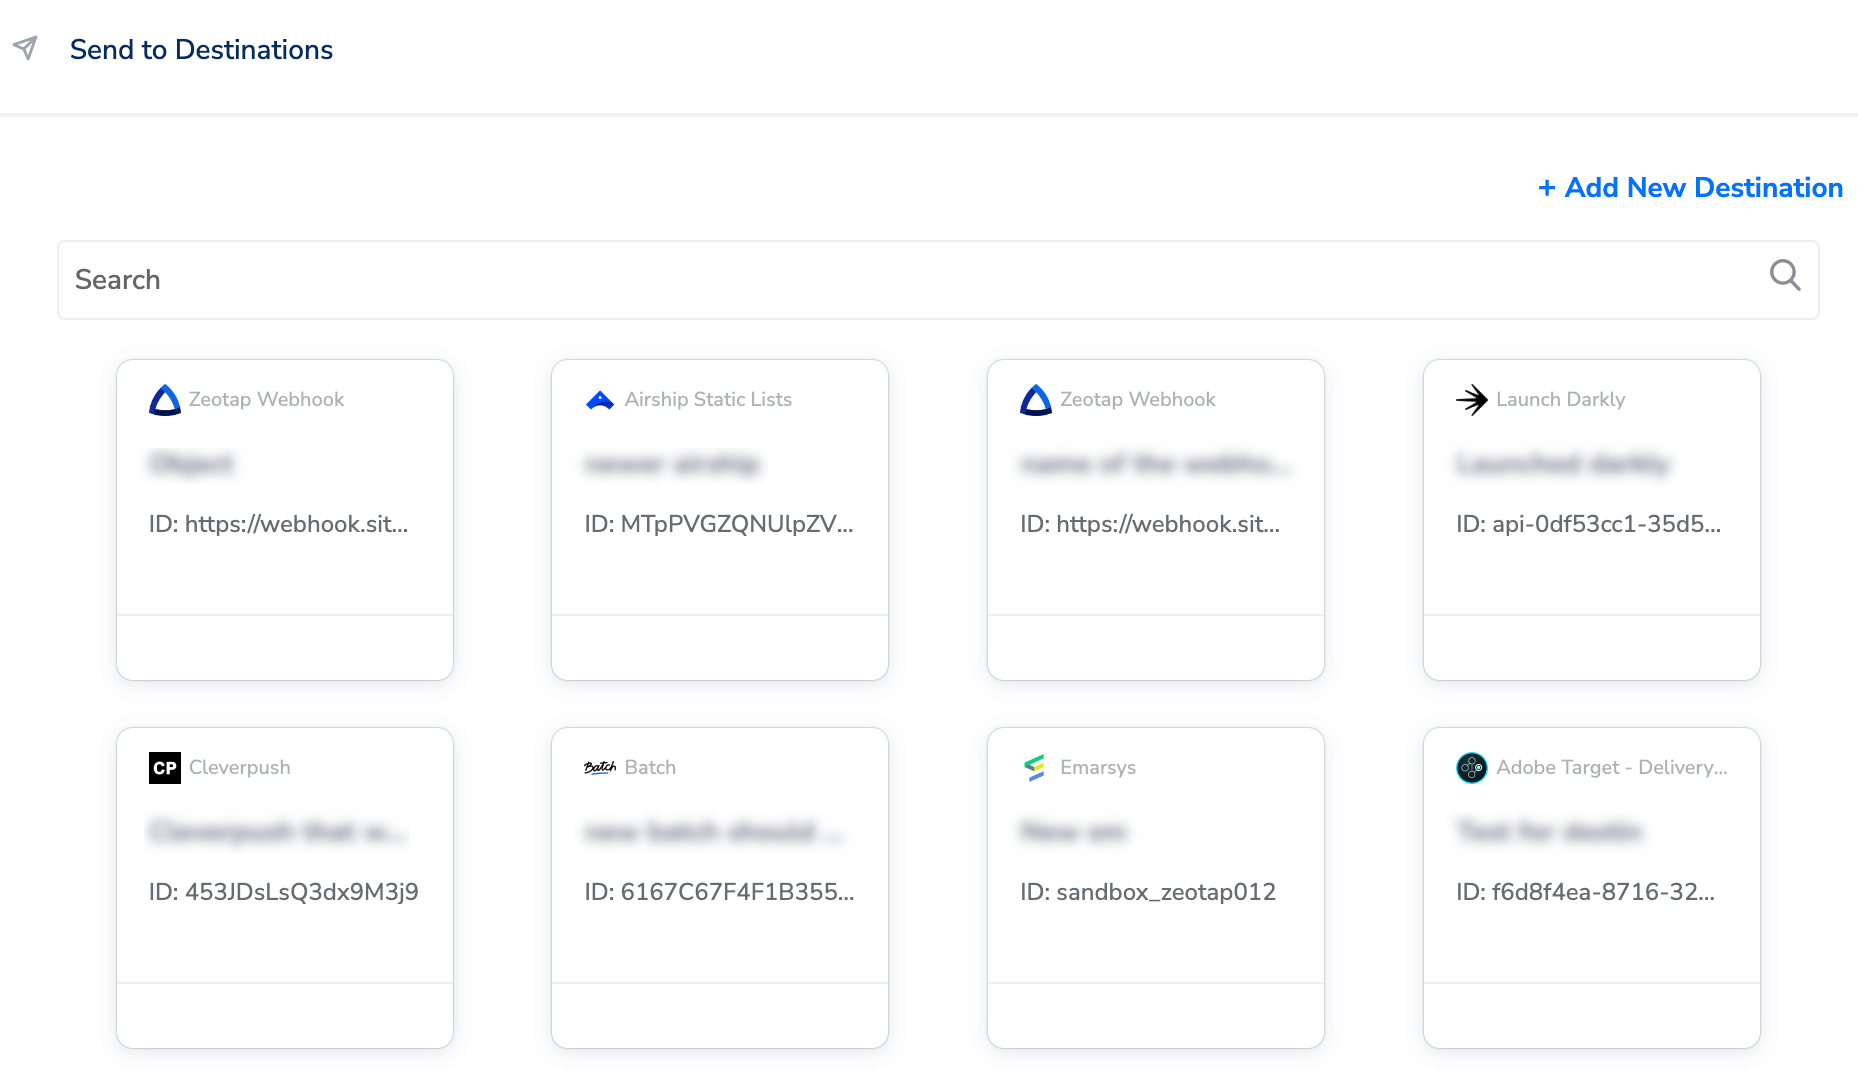
After you have applied filters or added conditions for your users in Journeys, you can activate them in Google Universal Analytics under **Send to Destinations.** A new window appears, where you can set up your destination. You can use an already existing destination from the list of available Destinations or create a new one by clicking **+ Add New Destination**.
## Destination Setup
After you have applied filters or added conditions for your users in Journeys, you can activate them in Google Universal Analytics under **Send to Destinations.** A new window appears, where you can set up your destination. You can use an already existing destination from the list of available Destinations or create a new one by clicking **+ Add New Destination**.
 ### Add New Destination
Perform the following steps to add a new destination:
Click **Add New Destination.**
Search for **Google Universal Analytics.**
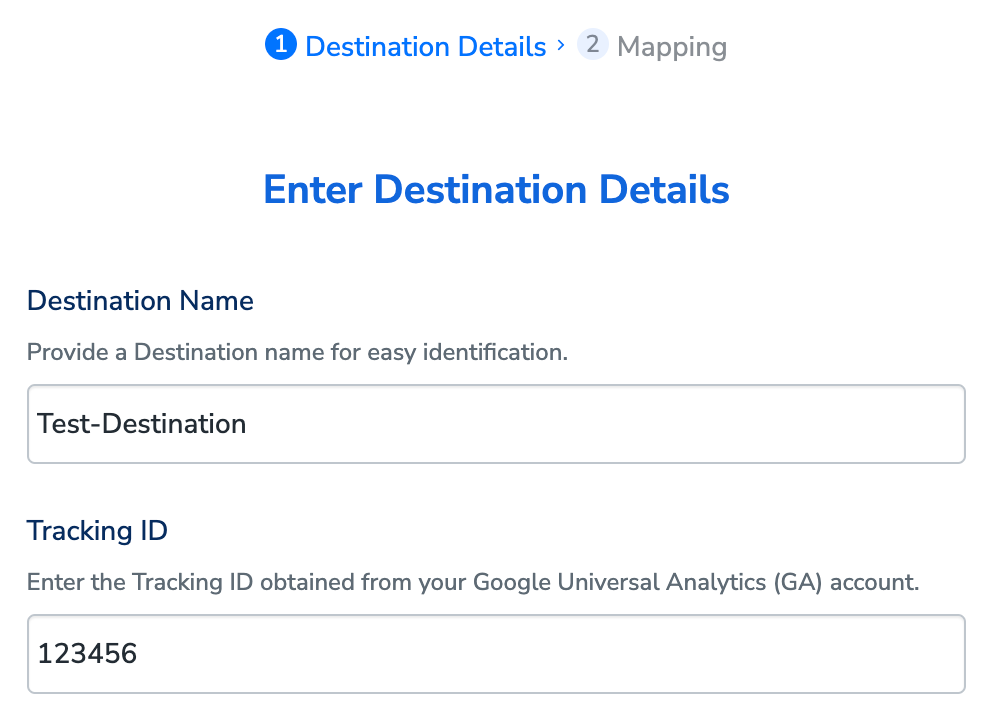
Click **Google Universal Analytics** and enter a name for the Destination.
Add the **Destination Name** and **Tracking ID** (that you received above) and save the destination.
### Add New Destination
Perform the following steps to add a new destination:
Click **Add New Destination.**
Search for **Google Universal Analytics.**
Click **Google Universal Analytics** and enter a name for the Destination.
Add the **Destination Name** and **Tracking ID** (that you received above) and save the destination.
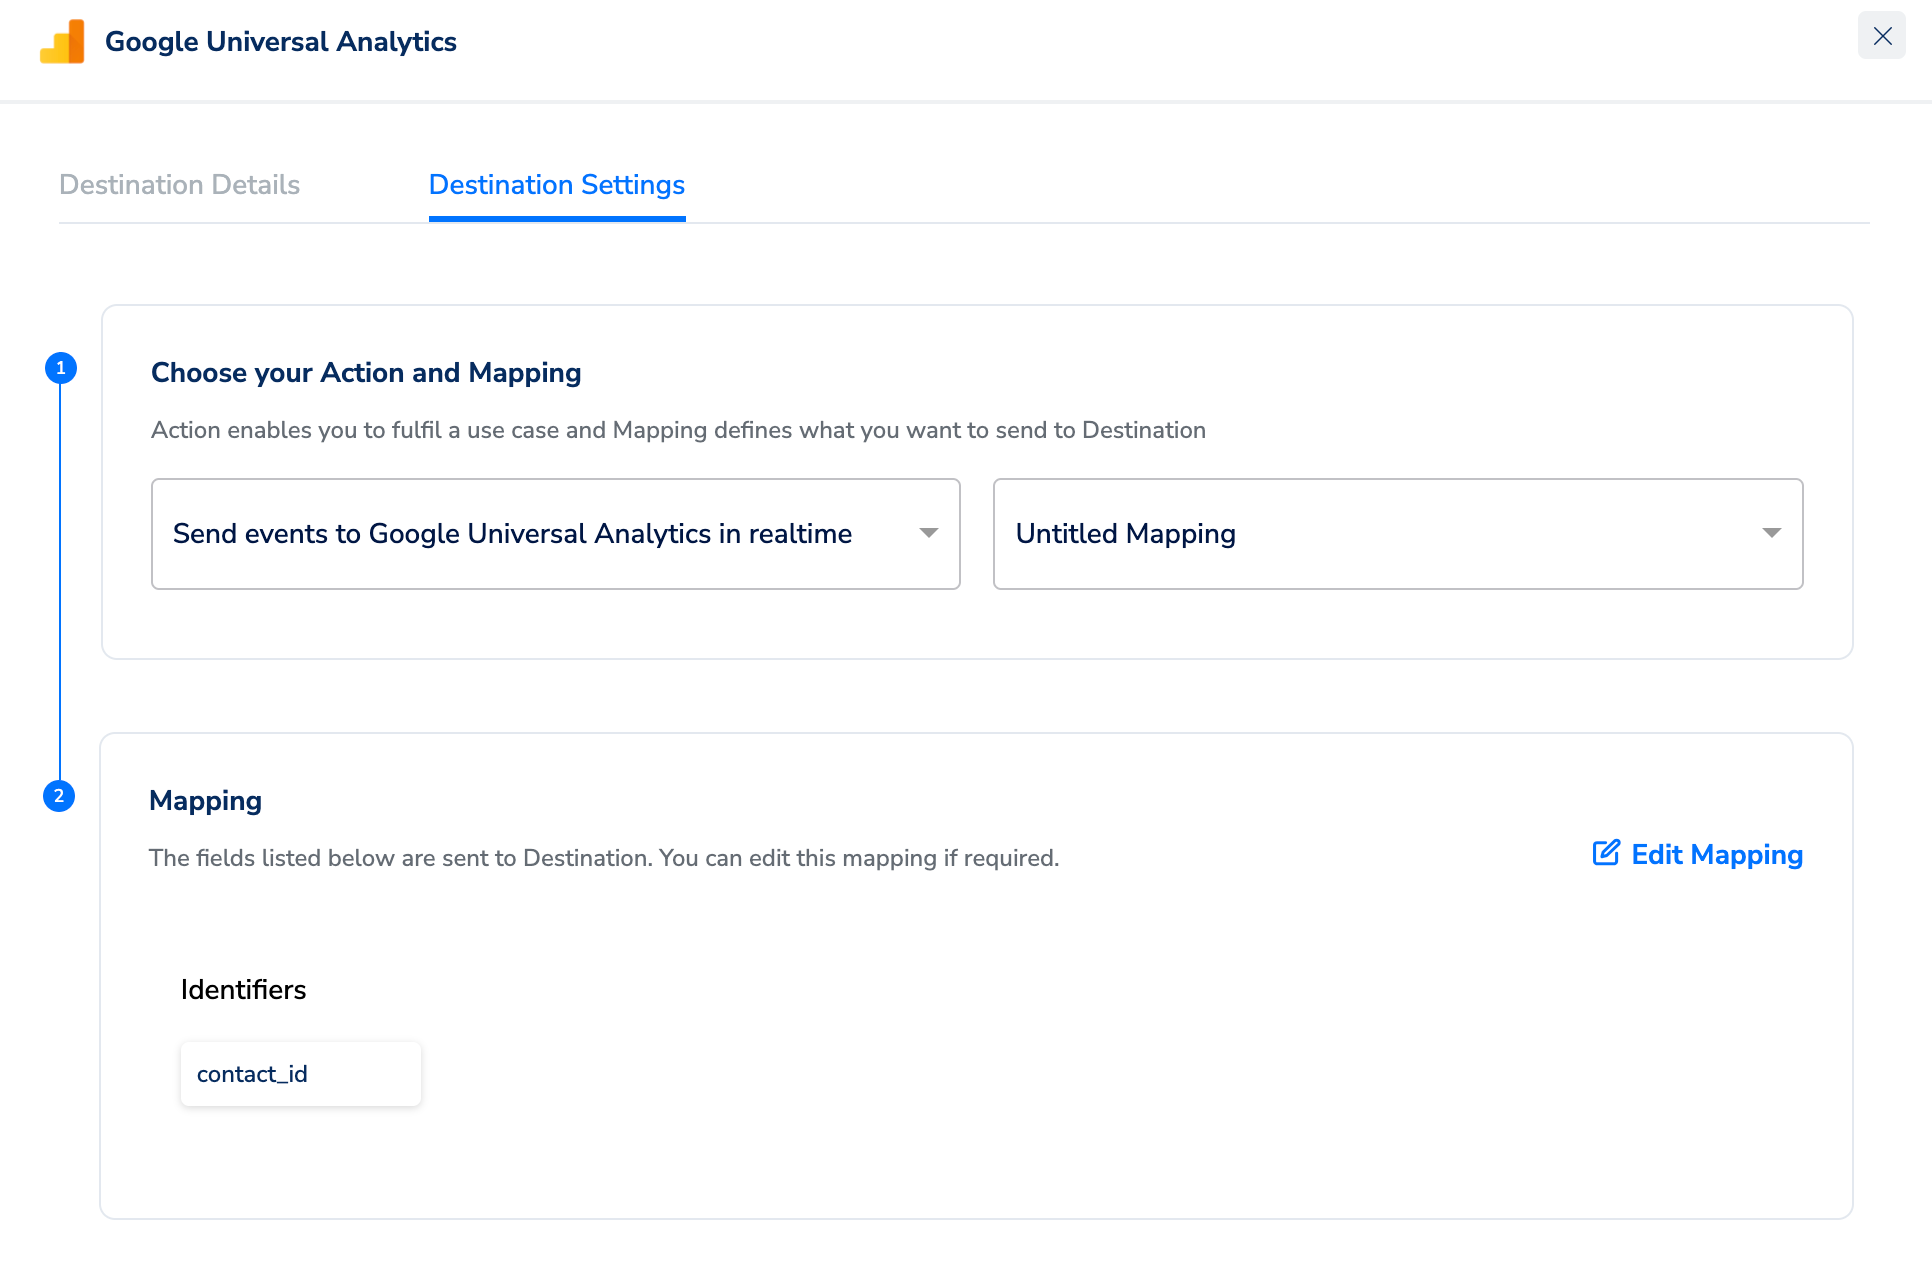
 In the mapping screen that appears, under **Choose your Action**, select **Send events to Google Universal Analytics in realtime** as the action for sending data from the workflow created in Journeys. Under **Map the Fields**, you need to map an identifier to Google Client ID. You can also add more fields as required.
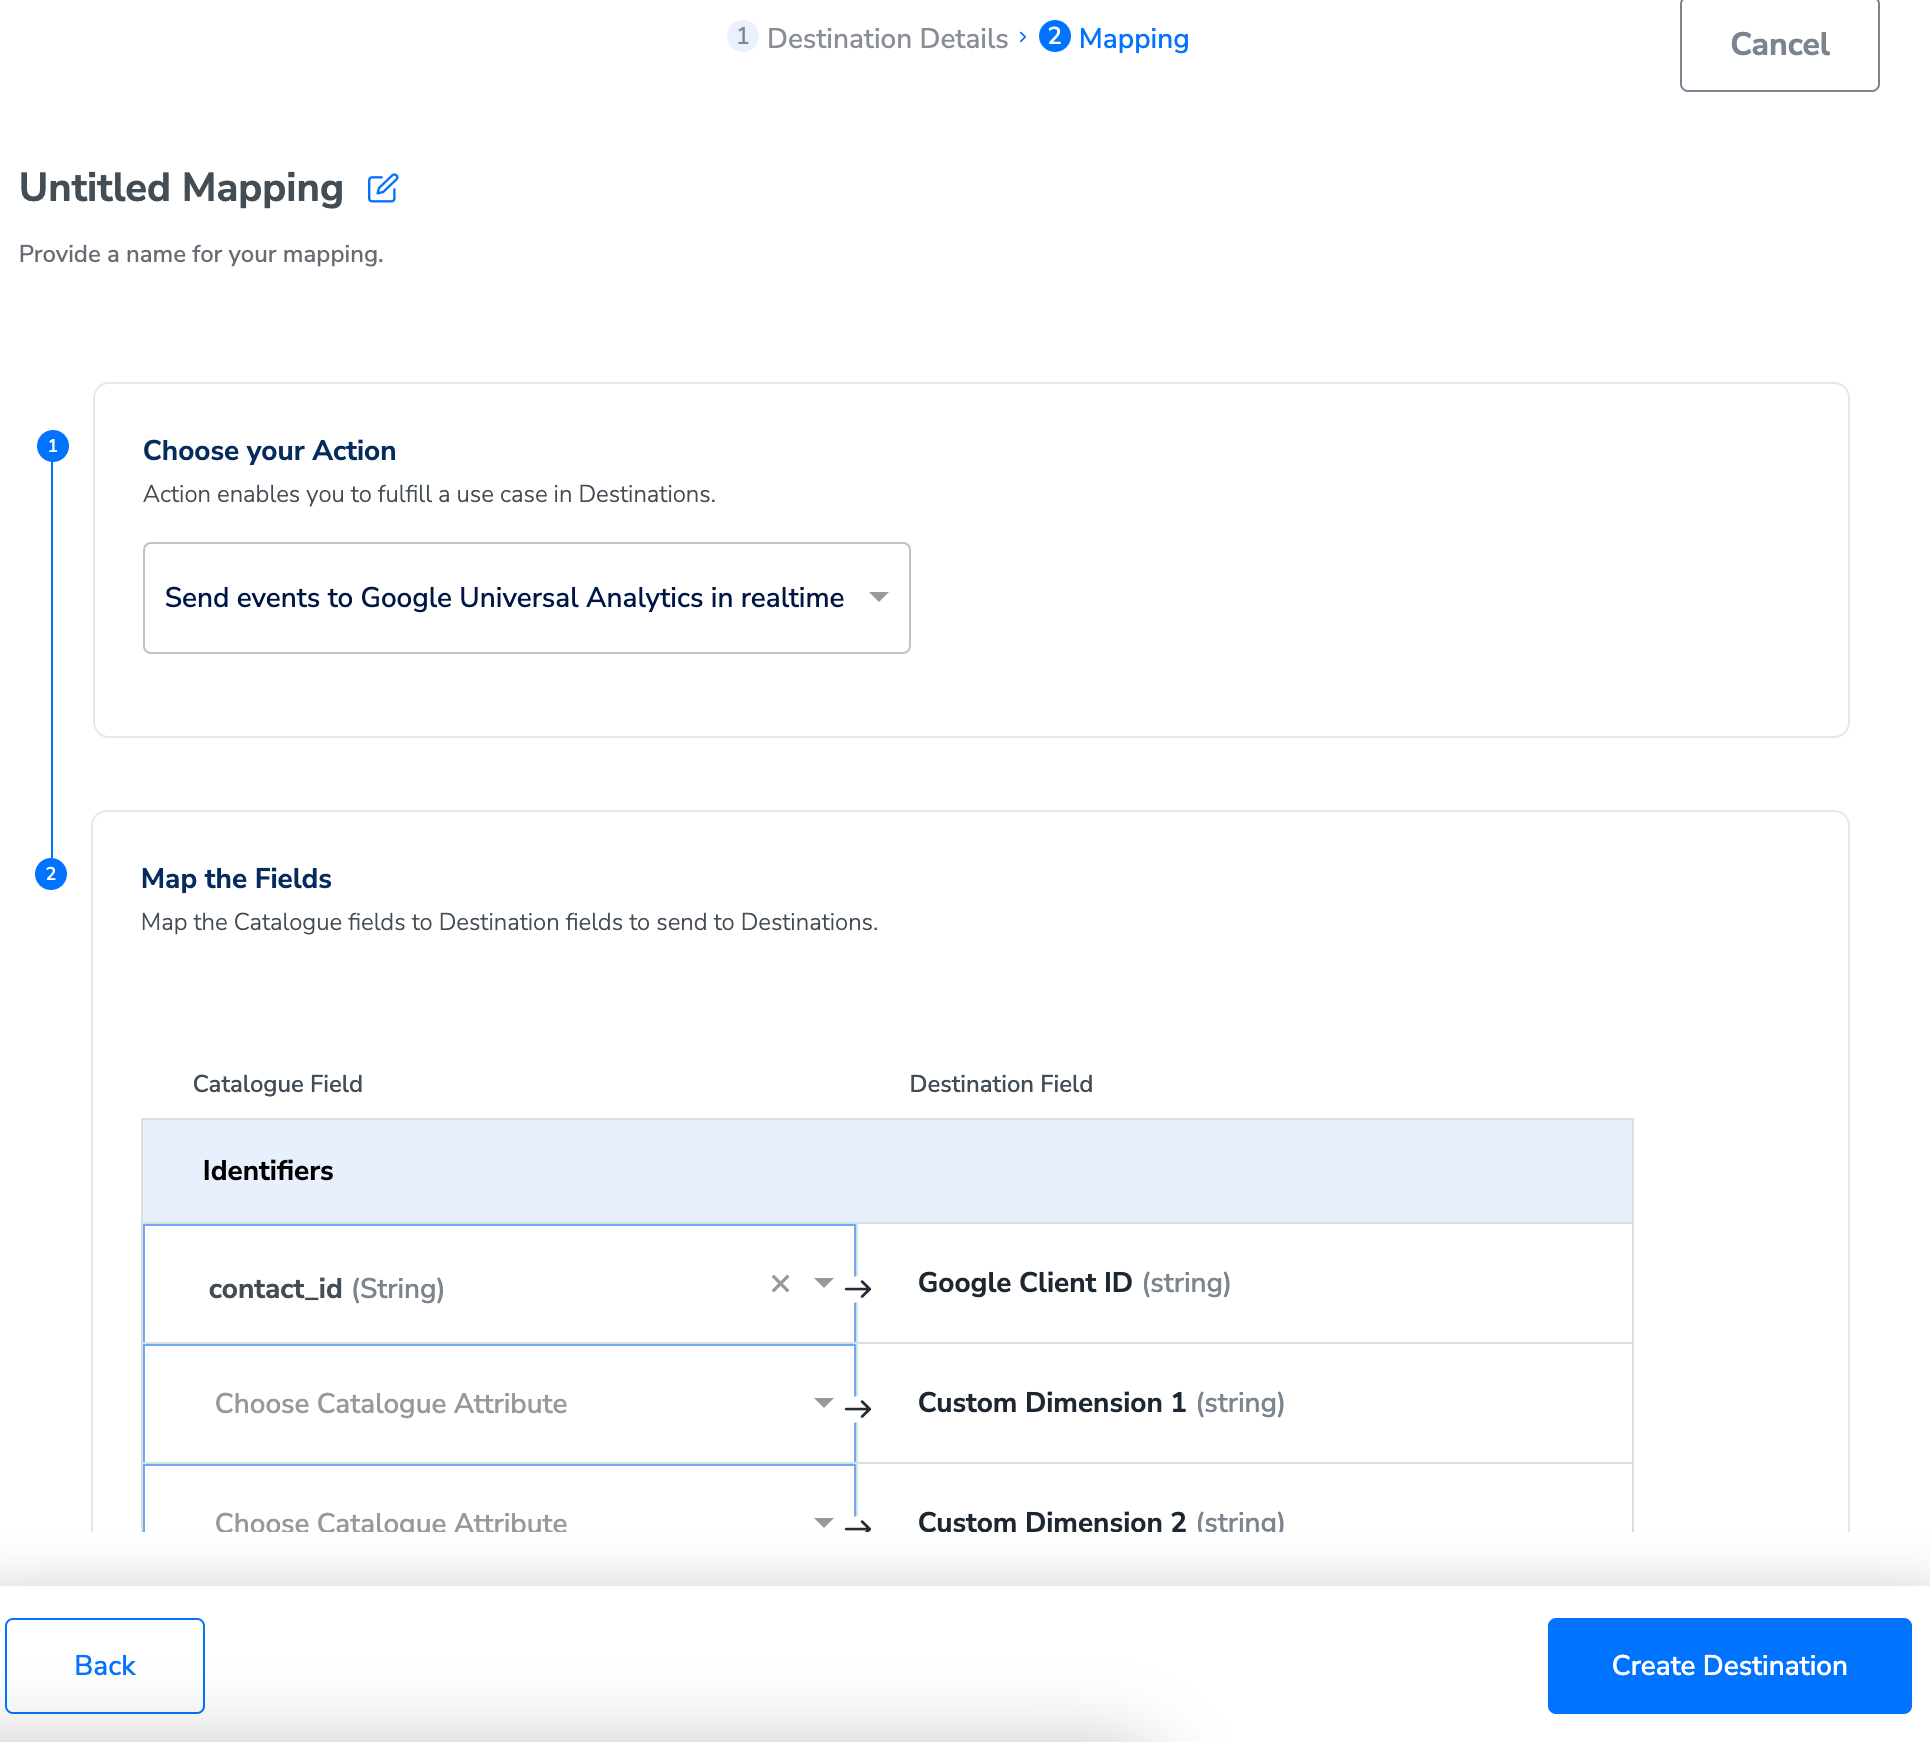 Once the mapping is complete, click **Create Destination**. The destination is created and made available for activation on Journeys.
Ensure that you map at least one attribute. Otherwise, the data does not flow to the Destination.
## Activate the Destination on Journeys
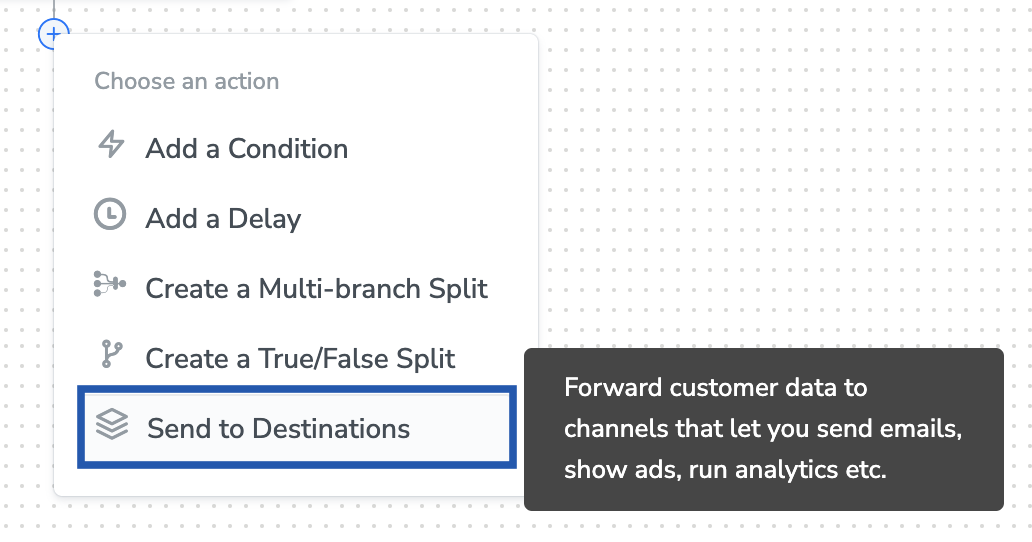
After creating a destination, next, you need to link it in the **Send to Destination** node within the workflow, as explained below.
In the workflow, click **+** and choose **Send to Destinations**.
Once the mapping is complete, click **Create Destination**. The destination is created and made available for activation on Journeys.
Ensure that you map at least one attribute. Otherwise, the data does not flow to the Destination.
## Activate the Destination on Journeys
After creating a destination, next, you need to link it in the **Send to Destination** node within the workflow, as explained below.
In the workflow, click **+** and choose **Send to Destinations**.
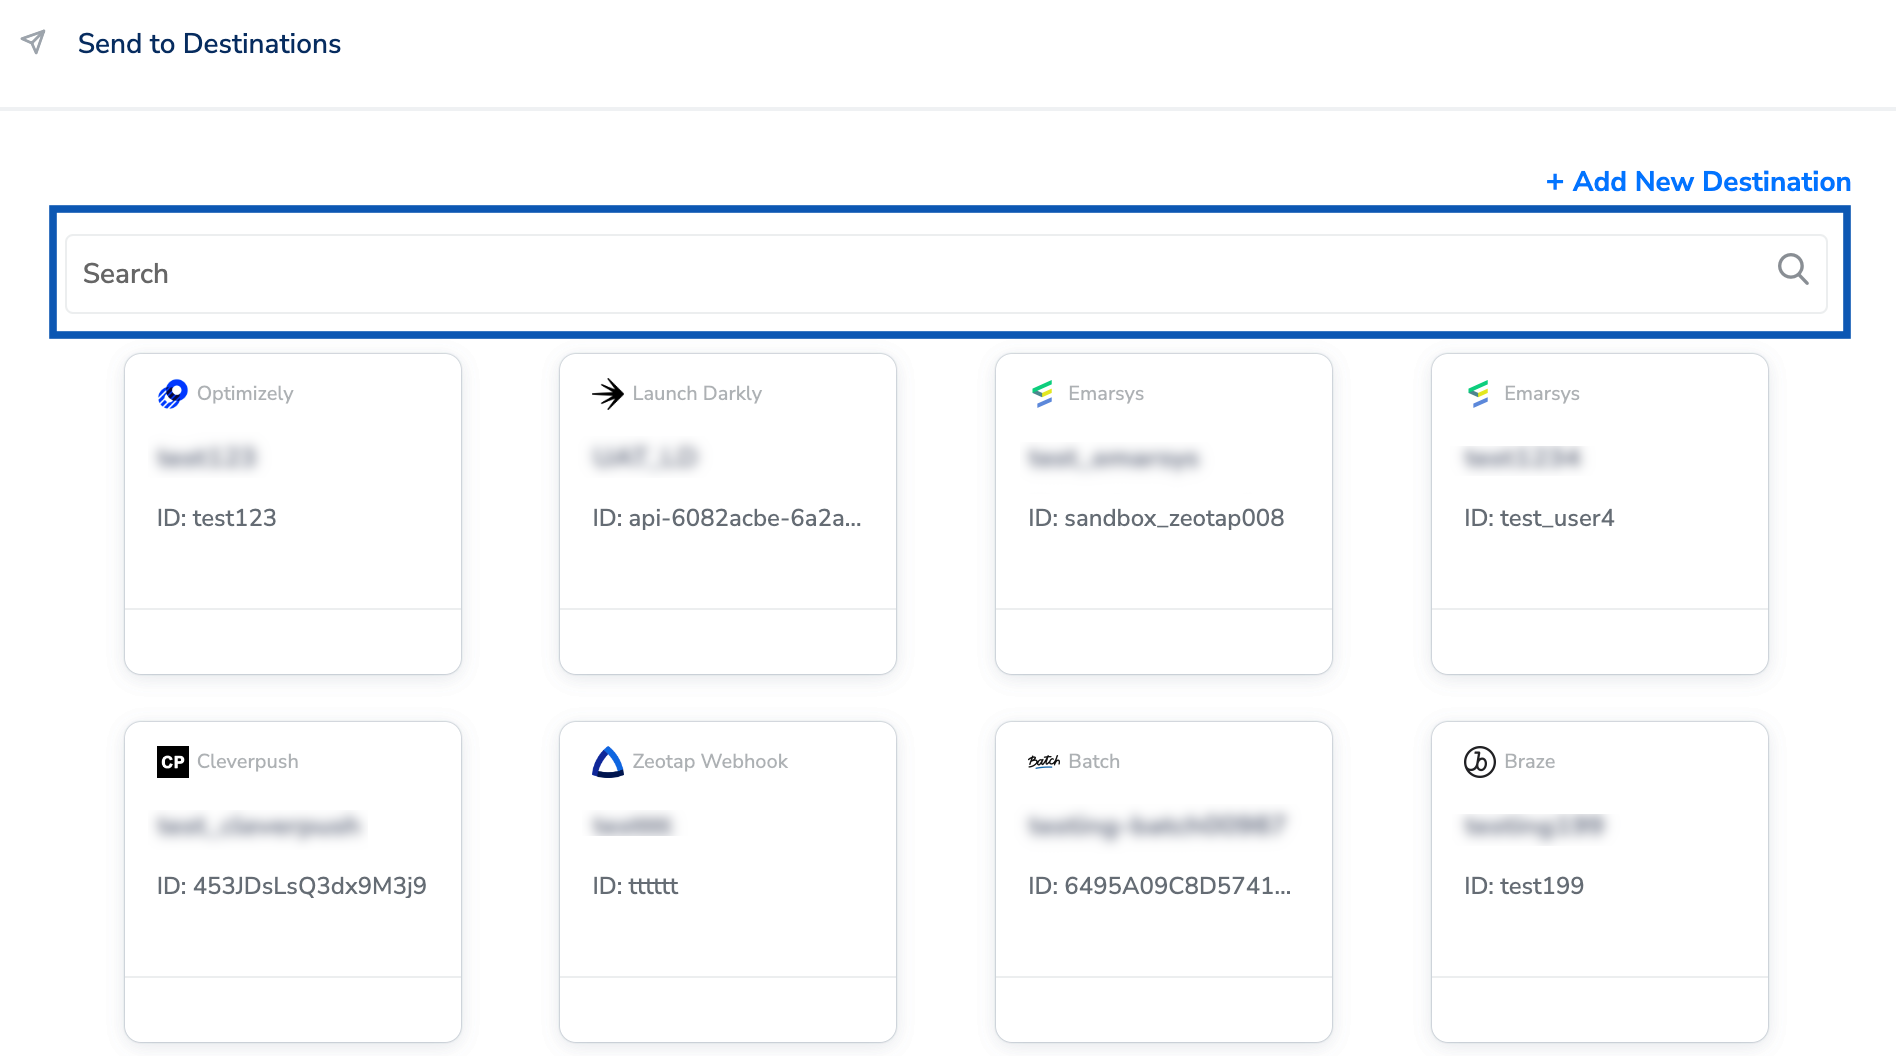
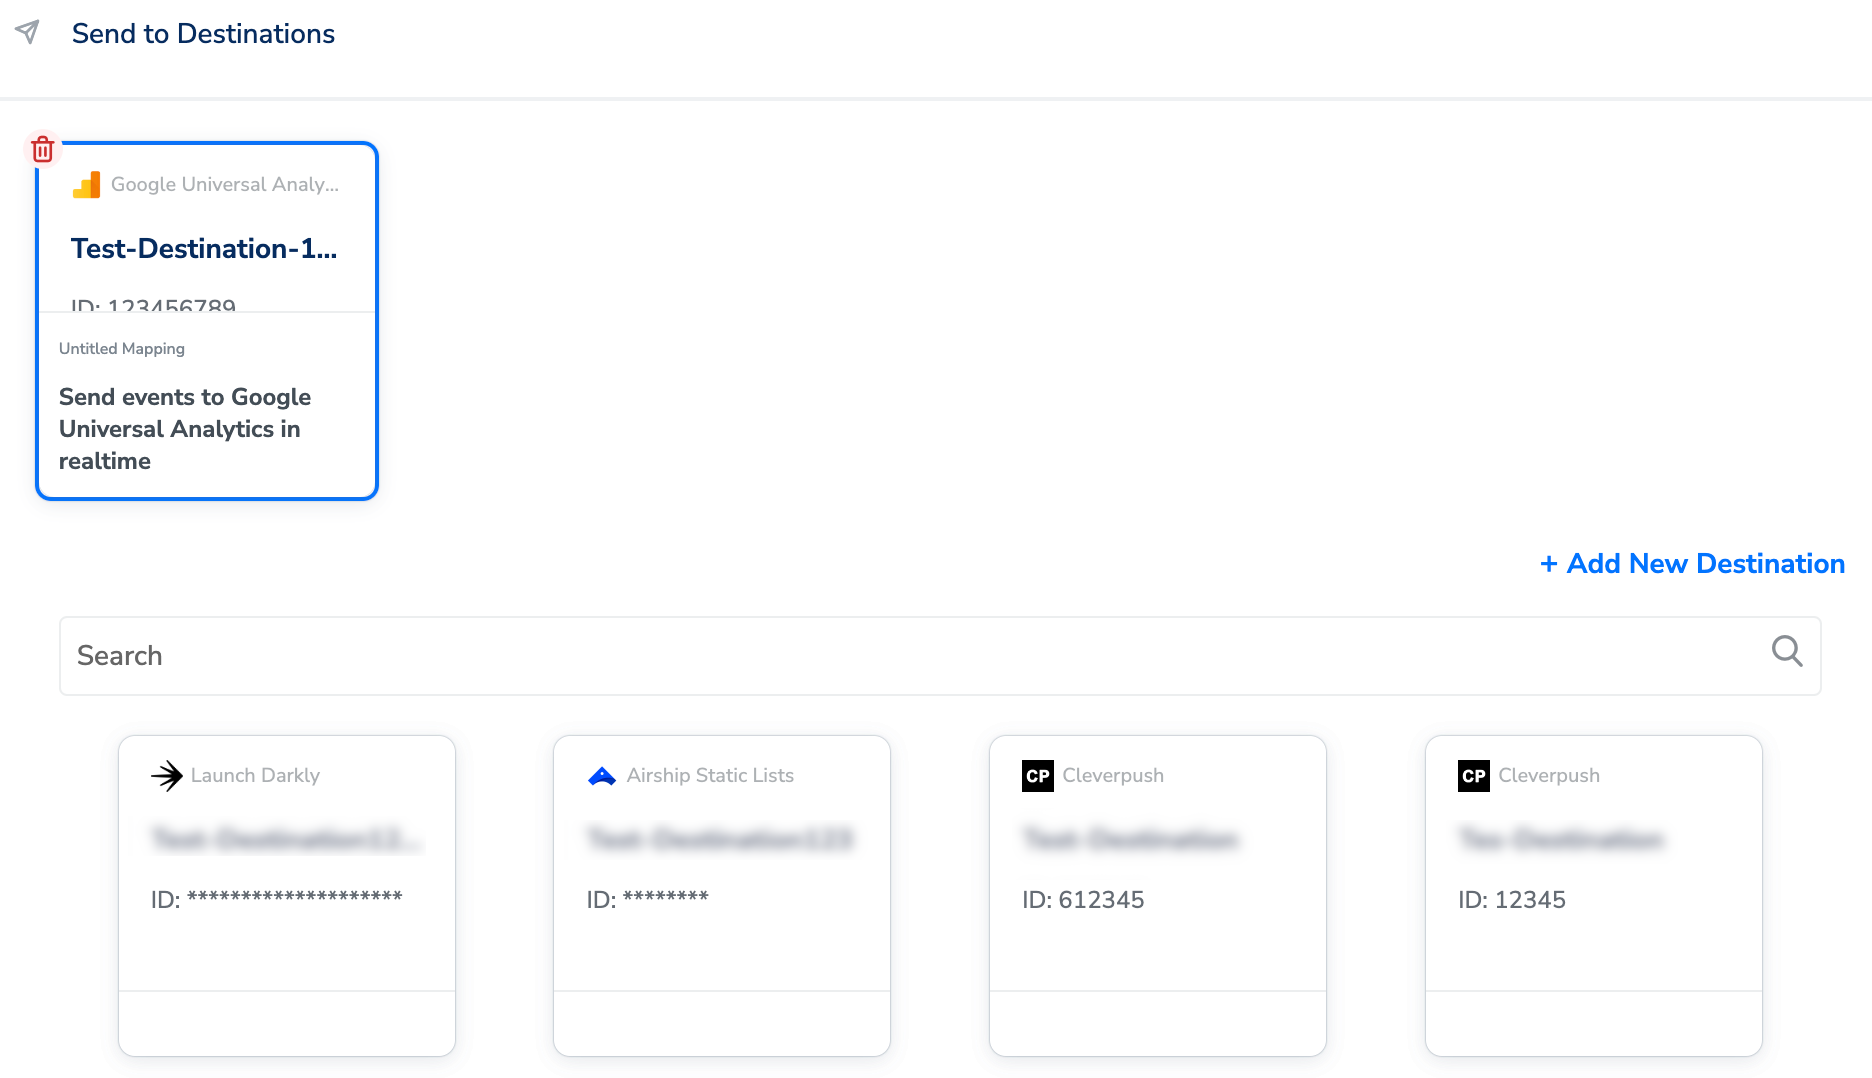
 Choose the destination from the list of available destinations by using the search feature.
 Under the **Destination Details** tab, the **Tracking ID** is automatically populates based on the value that you had entered while creating the destination. However, in the **Audience Name** field, enter a name to categorise your users.
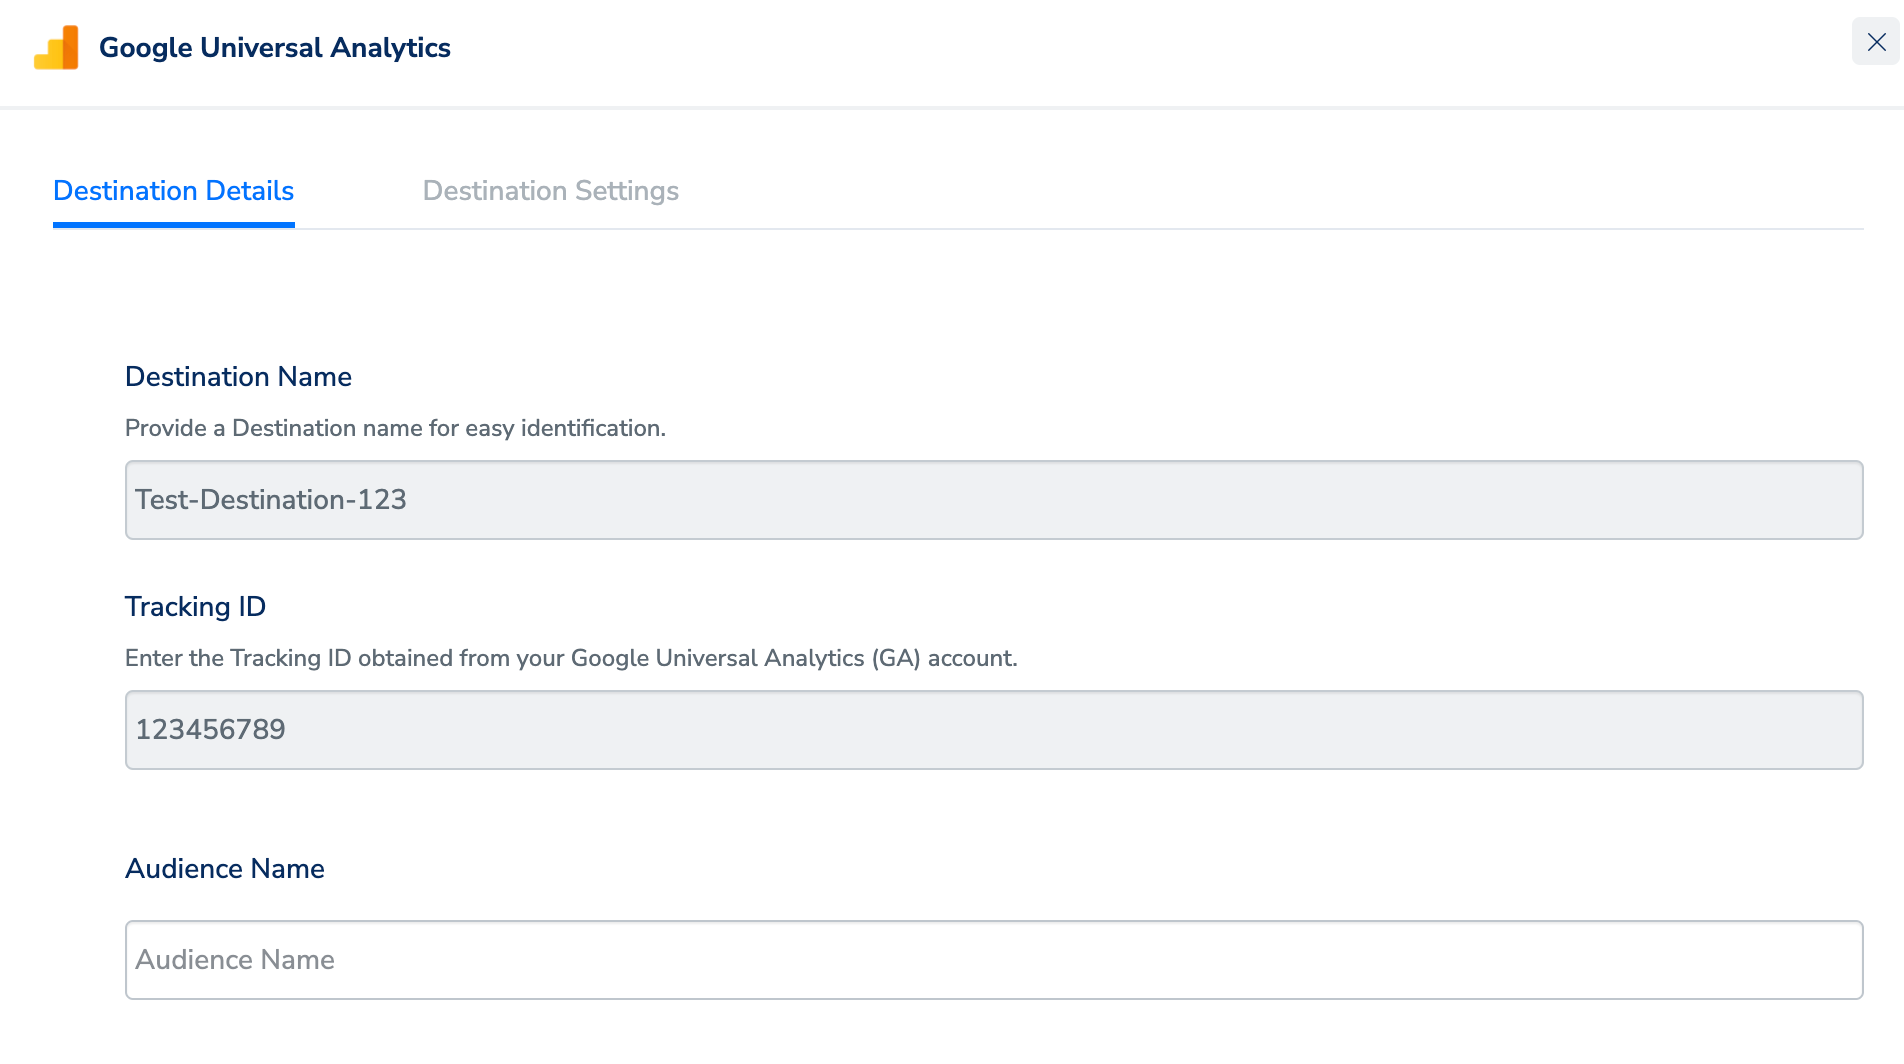 Under the **Destination Settings** tab, choose the Action and mapping as per your requirement.
 Upon clicking **Save Destination**. The destination is attached as shown in the image below.
 ## Data Flow to Google Analytics
Zeotap sends the data to Google Analytics using the Measurement Protocol API as Event parameters.
A sample API request looks as follows:
```text theme={null}
tid=UA-XXXXX-Y&cid=1220954604.1657797468&t=event&ec=audience&ea=add&el=Active Subscribers&ni=1&cd1=Gold
```
| **Field Name** | **Field Details** | **Comments** |
| :------------- | :-------------------- | :-------------------------------------------------------------------------------------------------------------------------------------------------------------------------------- |
| tid | Tracking ID | This is the Tracking ID of the property where the user wants to send the data. |
| cid | GA Client Id | GA client id is the user identifier. It needs to be sent to Zeotap through its Web/GTM implementation. |
| t | Hit Type | All the requests are sent as event hit type. |
| ec | Event Category | It is hard coded to audience |
| ea | Event Action | This can be added/removed based on whether user needs to be added to the audience or removed. |
| el | Event Label | This is the name of the Audience defined by the user as a node level input. |
| ni | Non Interaction Event | This is set to true as the events do not indicate a user performing an action. Non-interaction events are not taken into account when GA calculates bounces and session duration. |
| cd1 | Custom Dimension 1 | This is the user defined Custom Dimensions at GA.Ensure that these are correctly mapped in Zeotap. |
## Data Flow to Google Analytics
Zeotap sends the data to Google Analytics using the Measurement Protocol API as Event parameters.
A sample API request looks as follows:
```text theme={null}
tid=UA-XXXXX-Y&cid=1220954604.1657797468&t=event&ec=audience&ea=add&el=Active Subscribers&ni=1&cd1=Gold
```
| **Field Name** | **Field Details** | **Comments** |
| :------------- | :-------------------- | :-------------------------------------------------------------------------------------------------------------------------------------------------------------------------------- |
| tid | Tracking ID | This is the Tracking ID of the property where the user wants to send the data. |
| cid | GA Client Id | GA client id is the user identifier. It needs to be sent to Zeotap through its Web/GTM implementation. |
| t | Hit Type | All the requests are sent as event hit type. |
| ec | Event Category | It is hard coded to audience |
| ea | Event Action | This can be added/removed based on whether user needs to be added to the audience or removed. |
| el | Event Label | This is the name of the Audience defined by the user as a node level input. |
| ni | Non Interaction Event | This is set to true as the events do not indicate a user performing an action. Non-interaction events are not taken into account when GA calculates bounces and session duration. |
| cd1 | Custom Dimension 1 | This is the user defined Custom Dimensions at GA.Ensure that these are correctly mapped in Zeotap. |
 ## Audience set up in Optimize 360
Perform the following steps to set up audience in Optimize 360 -
Link Optimize 360 to Google Analytics by following the instructions mentioned [here](https://support.google.com/optimize/answer/7008374?hl=en). This is a one-time setup activity.
Go to Google Analytics, select the **Admin** tab and navigate to the **PROPERTY** created as mentioned under the [Google Analytics - One-time Set up of a New Property](https://zeotap.atlassian.net/wiki/spaces/DES/pages/2953937111/Internal+Content+for+Google+Analytics#Google-Analytics---One-time-Set-up-of-a-New-Property) section above.
Under the **Property** column select **Audience Definitions** -> **Audiences**.
## Audience set up in Optimize 360
Perform the following steps to set up audience in Optimize 360 -
Link Optimize 360 to Google Analytics by following the instructions mentioned [here](https://support.google.com/optimize/answer/7008374?hl=en). This is a one-time setup activity.
Go to Google Analytics, select the **Admin** tab and navigate to the **PROPERTY** created as mentioned under the [Google Analytics - One-time Set up of a New Property](https://zeotap.atlassian.net/wiki/spaces/DES/pages/2953937111/Internal+Content+for+Google+Analytics#Google-Analytics---One-time-Set-up-of-a-New-Property) section above.
Under the **Property** column select **Audience Definitions** -> **Audiences**.
 Select **Audience Source** -> **All Website Data** -> **Next Step** -> **Audience Definition** -> **Create New**.
Navigate to **Advanced** -> **Sequences** -> **Filter: Include Users** -> **Select Dimension**.
Select **Audience Source** -> **All Website Data** -> **Next Step** -> **Audience Definition** -> **Create New**.
Navigate to **Advanced** -> **Sequences** -> **Filter: Include Users** -> **Select Dimension**.
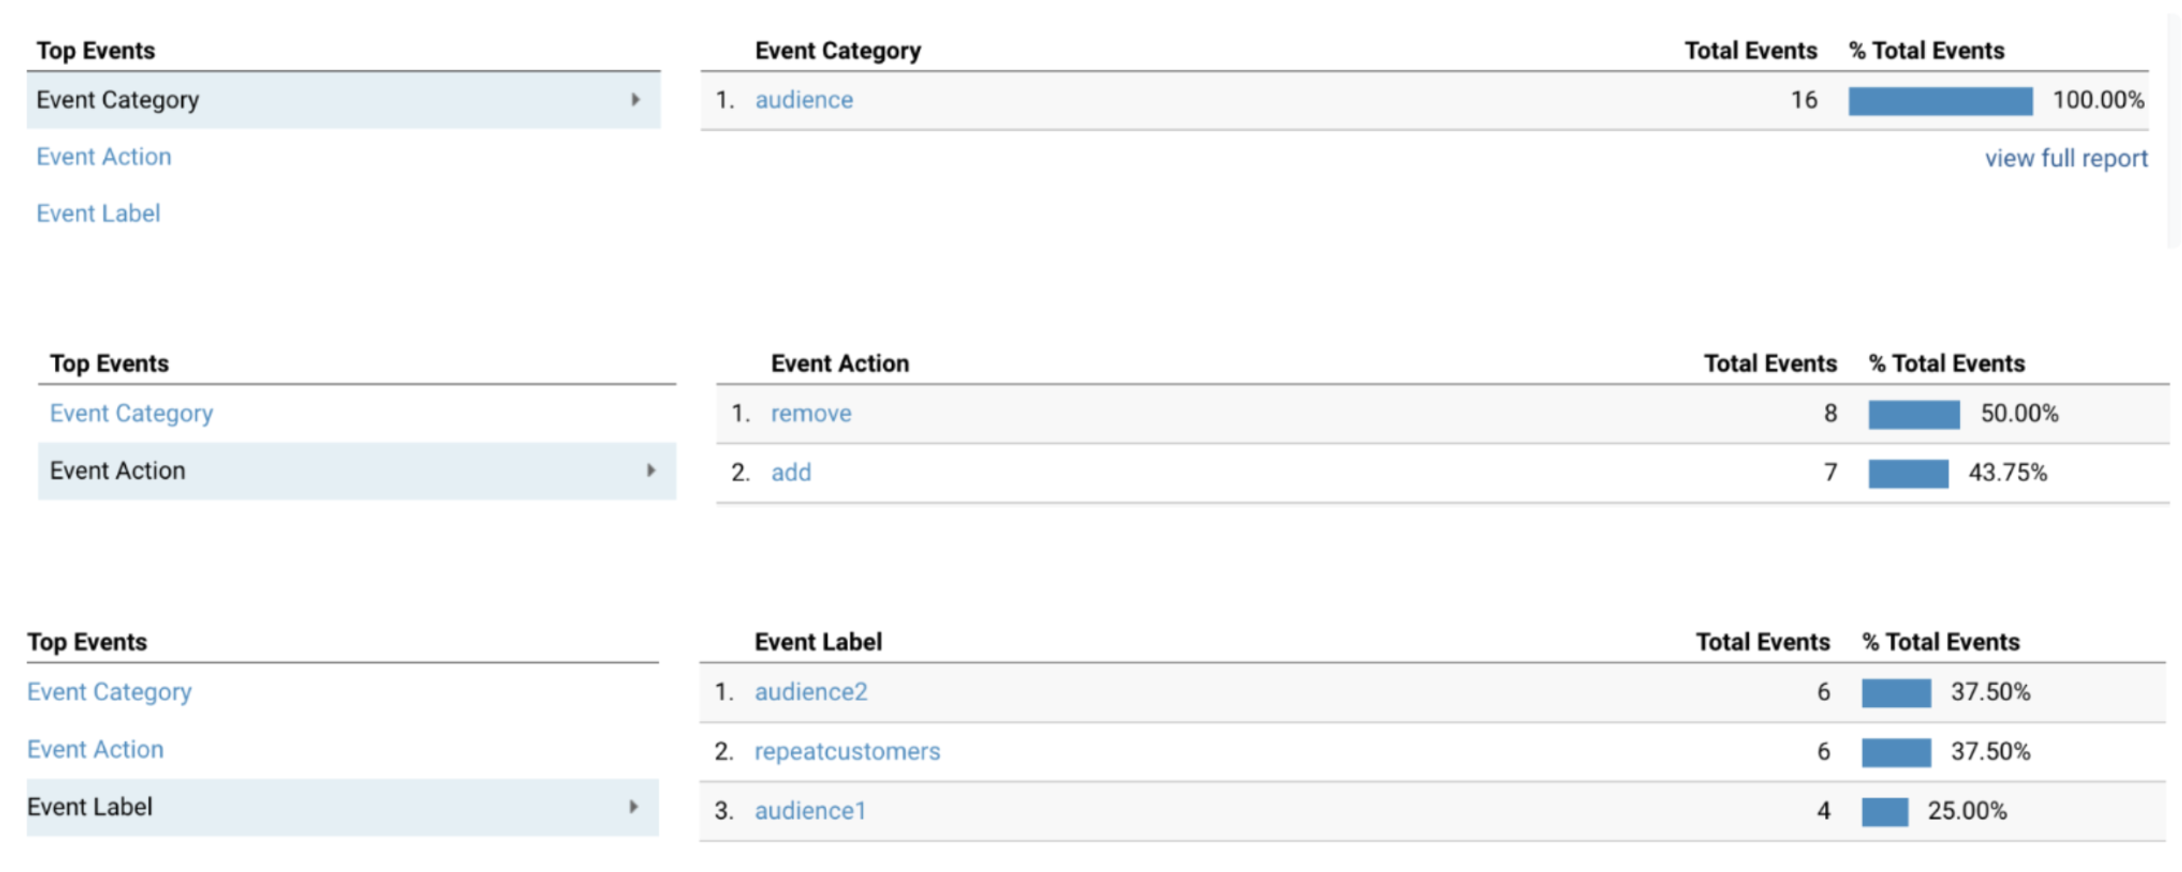
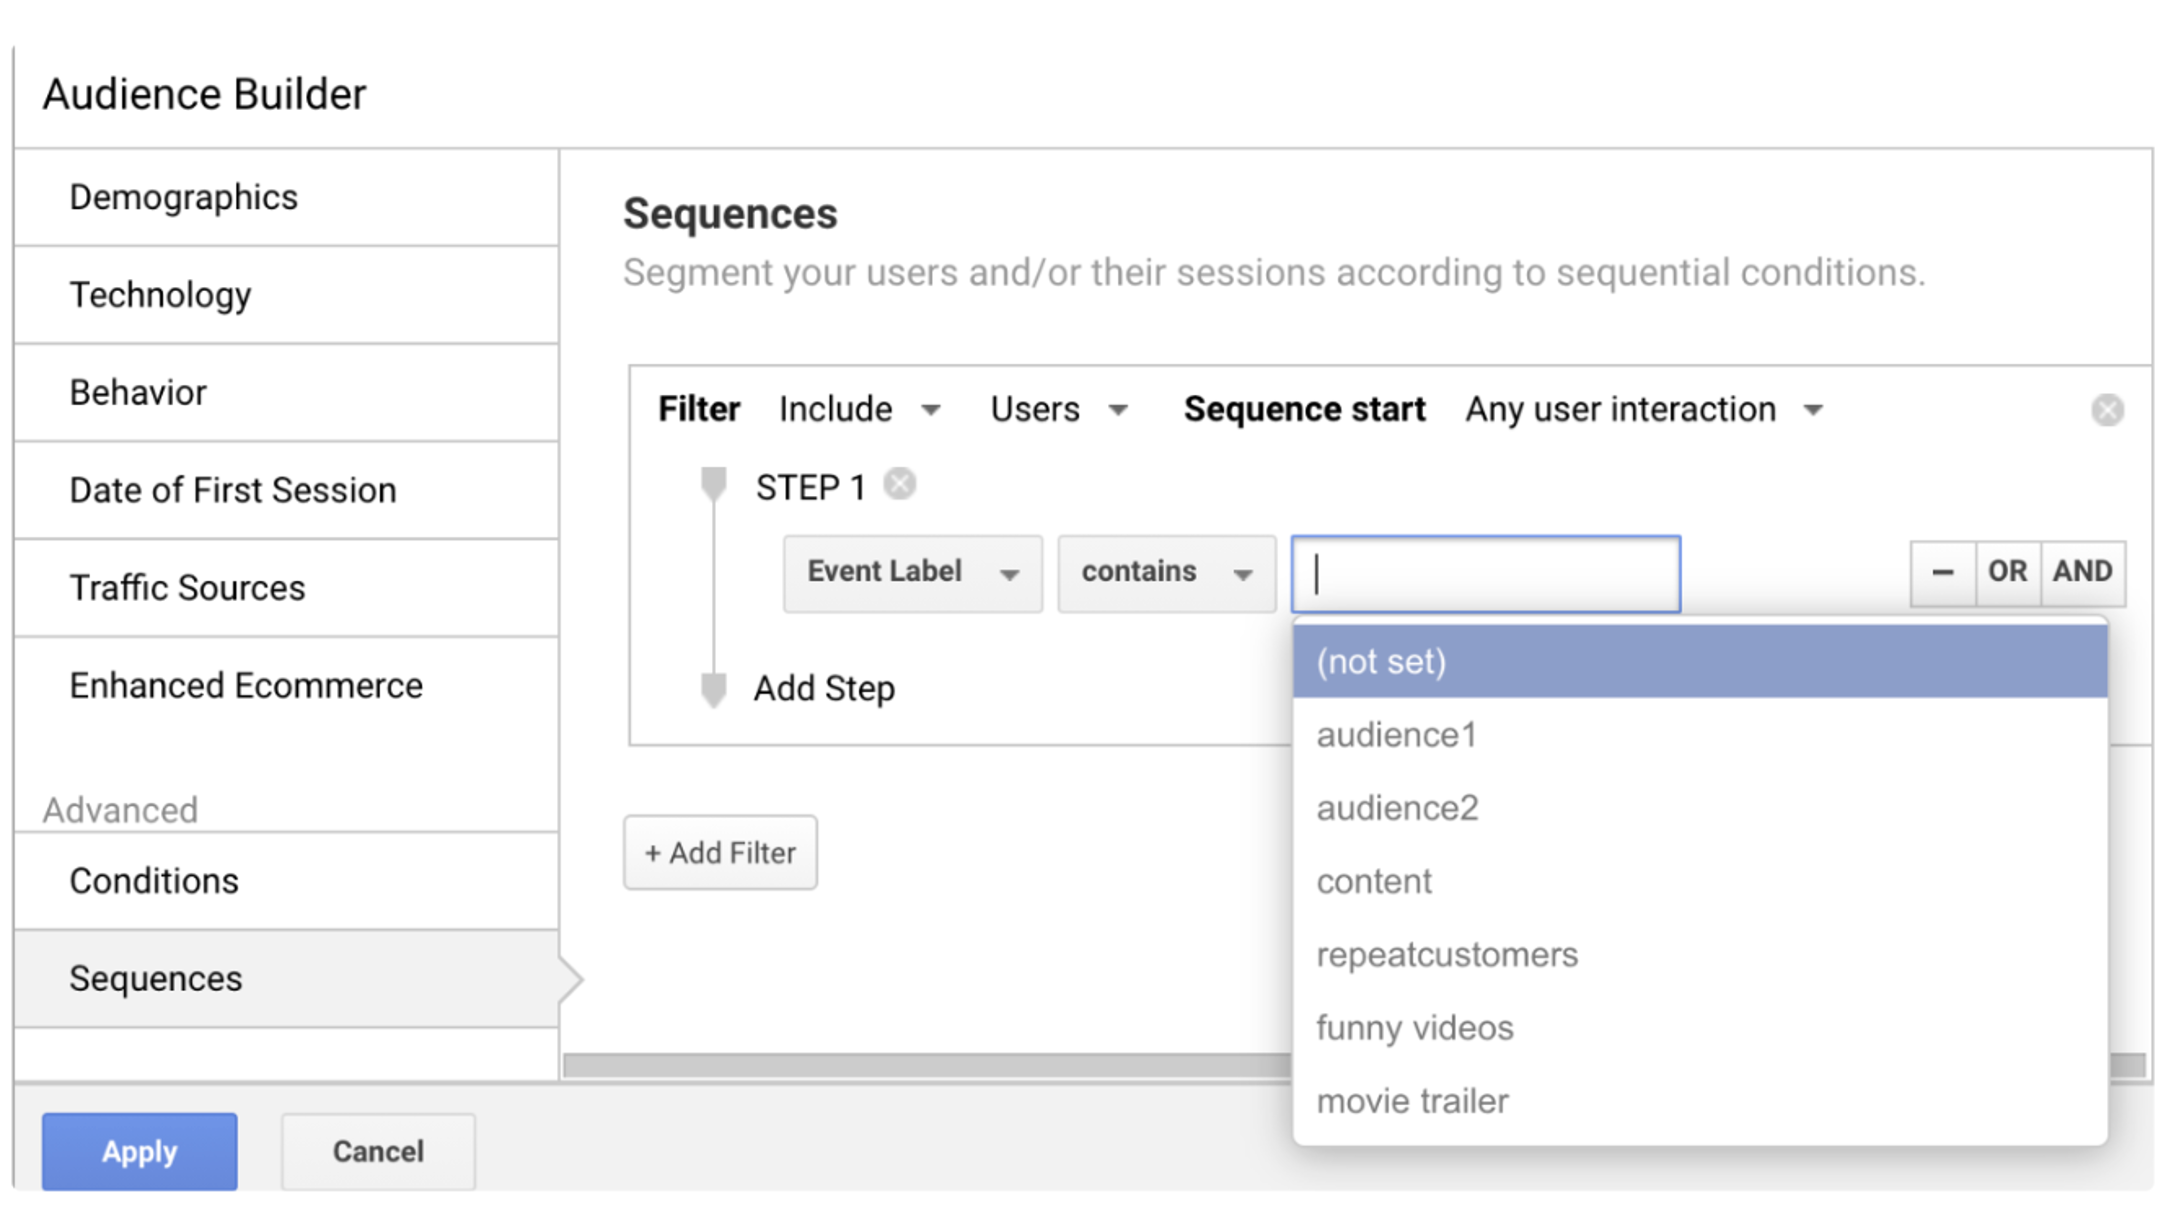 Create filtering criterias using Event Category(audience), Event Action(add), Event Label(Audience Name), Custom dimensions.
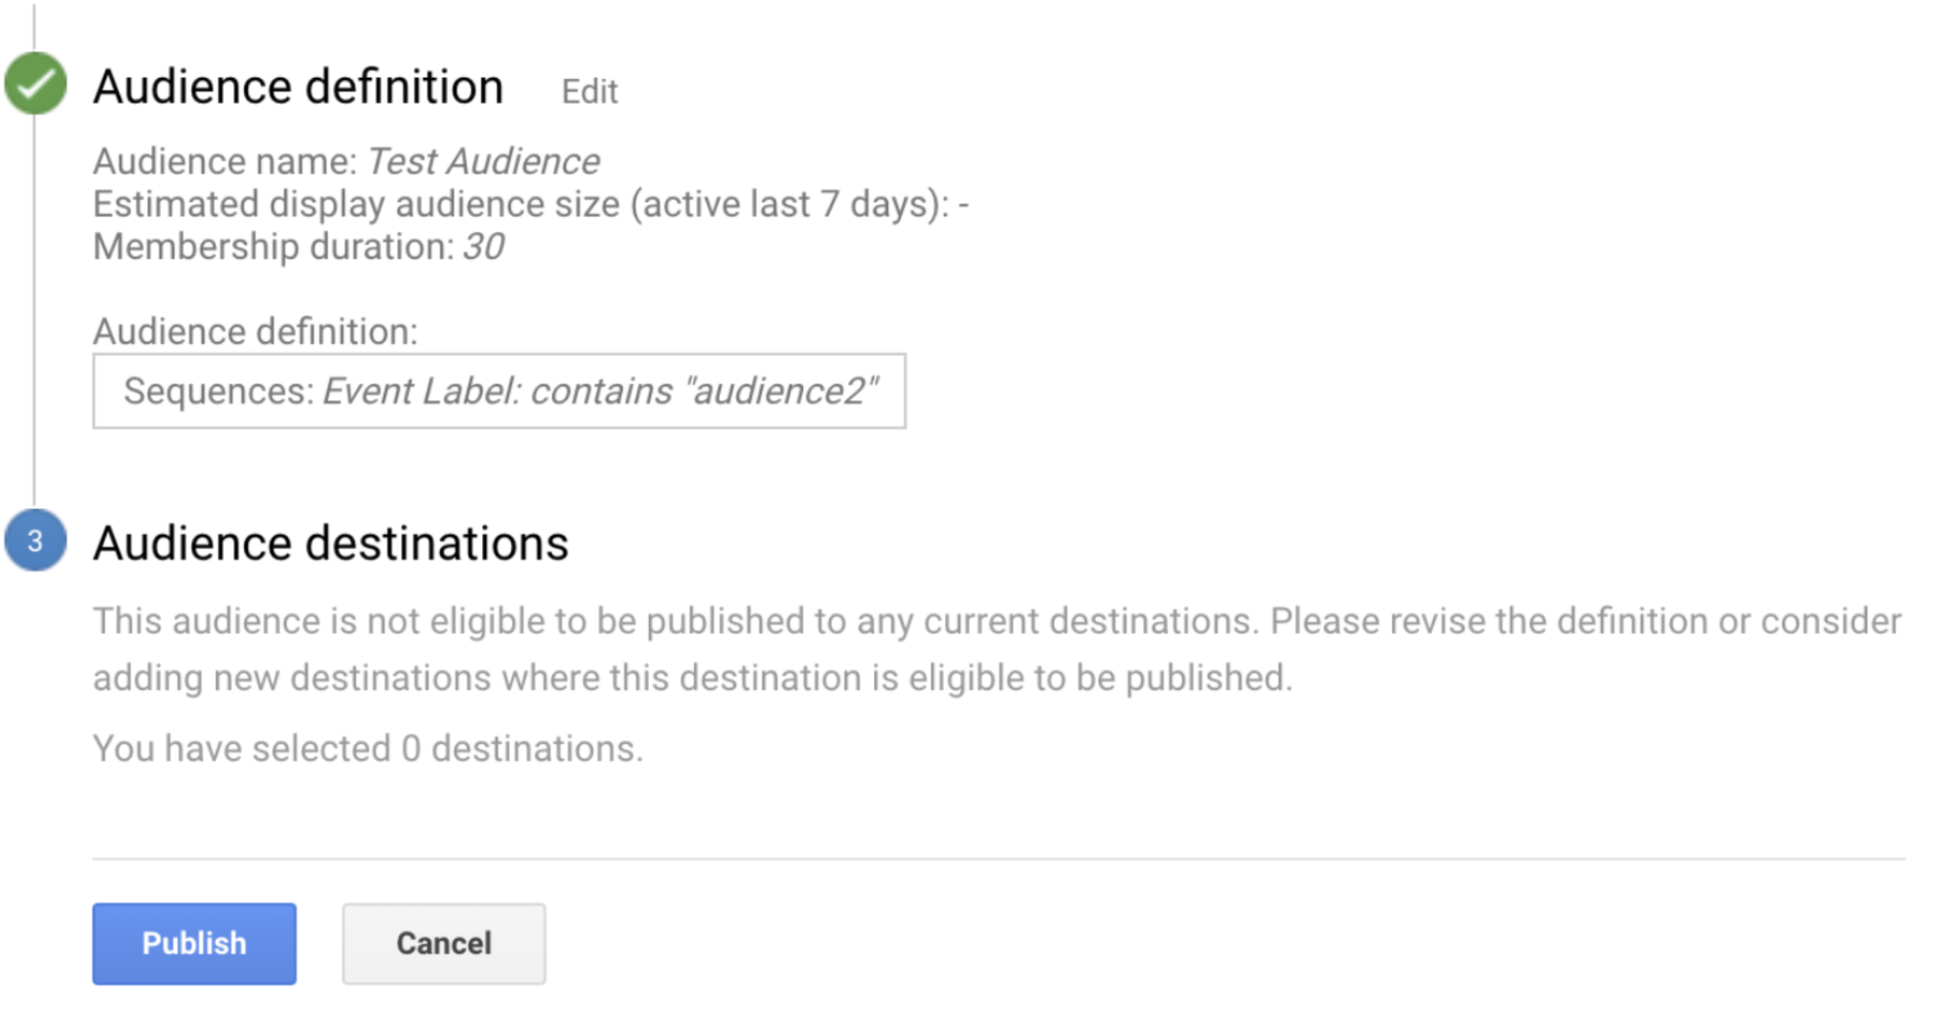
Provide an **Audience Name**-> **Next** -> **Audience Destinations**. Your Optimize 360 account appears here.
Select **Destination** and click **Publish**. Instructions on how to use the audience within Optimize are available [here](https://support.google.com/optimize/answer/6283435) (Target an Audience on Optimize 360).
## GA Limits
* It can take up to 24-48 hours by GA to process the data. The latency is variable and depends on the type of account (paid or free), amount of data etc. If you are a paid customer (Analytics 360), the data limits are increased and latency is reduced. Find more details [here](https://support.google.com/analytics/answer/1070983?hl=en#zippy=%2Cin-this-article).
* There are 20 indices available for different custom dimensions and 20 indices for custom metrics in each property. 360 accounts have 200 indices available for custom dimensions and 200 for custom metrics. Currently, we support 20 custom dimensions and 20 custom metrics to be sent to GA. Find more details [here](https://support.google.com/analytics/answer/2709828?hl=en#zippy=%2Cin-this-article).
* Audiences exported to Google Optimize are updated on a daily basis. Find more details [here](https://support.google.com/analytics/answer/2611404?hl=en#zippy=%2Cin-this-article).
Create filtering criterias using Event Category(audience), Event Action(add), Event Label(Audience Name), Custom dimensions.
Provide an **Audience Name**-> **Next** -> **Audience Destinations**. Your Optimize 360 account appears here.
Select **Destination** and click **Publish**. Instructions on how to use the audience within Optimize are available [here](https://support.google.com/optimize/answer/6283435) (Target an Audience on Optimize 360).
## GA Limits
* It can take up to 24-48 hours by GA to process the data. The latency is variable and depends on the type of account (paid or free), amount of data etc. If you are a paid customer (Analytics 360), the data limits are increased and latency is reduced. Find more details [here](https://support.google.com/analytics/answer/1070983?hl=en#zippy=%2Cin-this-article).
* There are 20 indices available for different custom dimensions and 20 indices for custom metrics in each property. 360 accounts have 200 indices available for custom dimensions and 200 for custom metrics. Currently, we support 20 custom dimensions and 20 custom metrics to be sent to GA. Find more details [here](https://support.google.com/analytics/answer/2709828?hl=en#zippy=%2Cin-this-article).
* Audiences exported to Google Optimize are updated on a daily basis. Find more details [here](https://support.google.com/analytics/answer/2611404?hl=en#zippy=%2Cin-this-article).