> ## Documentation Index
> Fetch the complete documentation index at: https://docs.zeotap.com/llms.txt
> Use this file to discover all available pages before exploring further.
# Getting Emarsys Credentials
## **Prerequisites**
Before using this API, ensure the following conditions are met:
* **Active Emarsys Account:** You must have an active Emarsys account with administrative privileges.
* **API User Credentials:** You must have already created an API user within the Emarsys platform and have access to its username and secret (API Key).
* **Correct Permissions:** The API user must be granted the appropriate permissions for all endpoints listed in this documentation. This is configured in the Emarsys UI under Management > Security Settings > API Users.
* **Existing Data:** The Emarsys account should have existing contacts, contact lists, and configured external events to ensure the API calls return meaningful data.
## **Creating API Credentials (OAuth 2.0 Method)**
To interact with the Emarsys v3 API, your application must first authenticate itself and obtain a temporary access token.
### **Step 1: Create the API Credentials in Emarsys**
These are the permanent, long-term credentials for your application that must be stored securely.
* **Action:**
Log in to the Emarsys application as an Account Owner.
Navigate to **Management > Security Settings**.
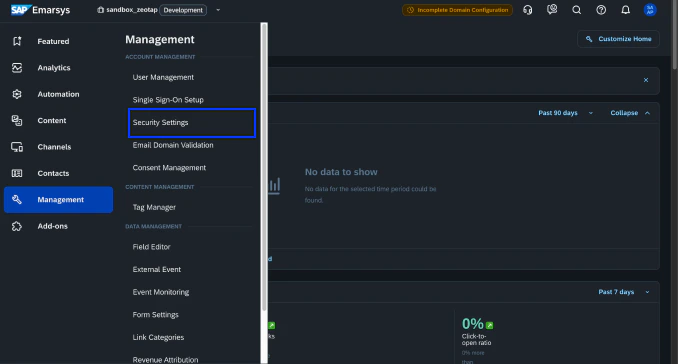 Go to the **API Credentials** tab and click **Create API Credential**.
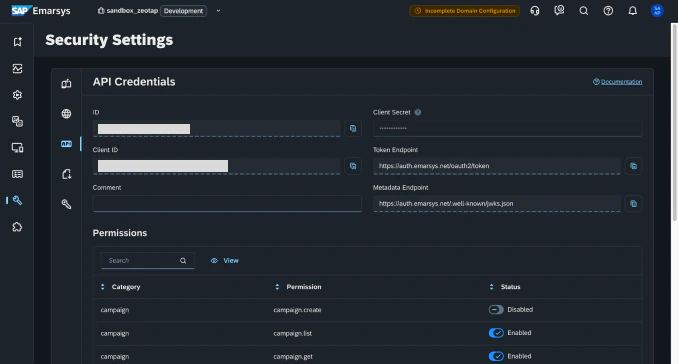
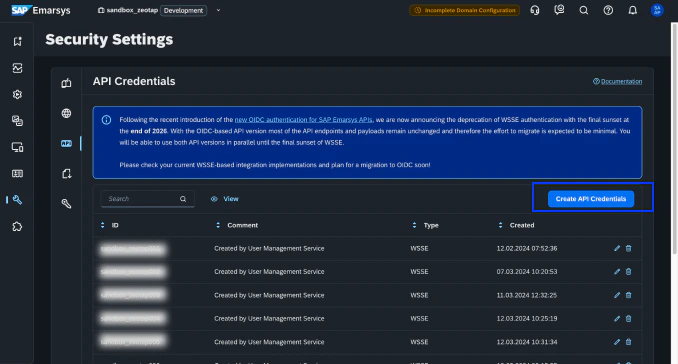 The system will generate a **Client ID** and a **Client secret**.
 **Critical Warning**
The Client secret is displayed only once upon creation. You must copy and save it to a secure location immediately. If you lose the secret, you cannot retrieve it and will need to generate a new set of credentials.
Below you can find all the permissions that needs to be enabled for this particular source:
**Critical Warning**
The Client secret is displayed only once upon creation. You must copy and save it to a secure location immediately. If you lose the secret, you cannot retrieve it and will need to generate a new set of credentials.
Below you can find all the permissions that needs to be enabled for this particular source:

