> ## Documentation Index
> Fetch the complete documentation index at: https://docs.zeotap.com/llms.txt
> Use this file to discover all available pages before exploring further.
# Facebook Enhanced Conversions API (Send Offline data)
## Overview
Facebook Enhanced Conversions API (CAPI) improves conversion tracking accuracy for Meta (Facebook) Ads. It allows you to securely send offline conversions data to Meta, enabling better measurement, attribution, and optimisation of ad campaigns.
By integrating Facebook Enhanced CAPI with Zeotap CDP, you can seamlessly activate offline event data for Meta Ads. Zeotap CDP ensures that conversion data is securely collected, transformed, and transmitted in compliance with data privacy regulations.
This integration helps you:
* Improve campaign performance with accurate conversion tracking.
* Optimize audience targeting and bidding strategies.
* Maintain compliance while sharing first-party data with Meta.
### Sample Use Cases
#### Retail Offline Purchase Attribution
If you run physical store promotions via Facebook Ads, you may want to track in-store purchases attributed to these ads. By using Facebook Enhanced CAPI, you can send hashed customer identifiers and purchase details to Meta through Zeotap, improving attribution accuracy and optimizing your ad spend.
#### Lead Generation for Services
If you collect leads offline (for example, at events, call centers), you can ensure accurate attribution by sending hashed lead data to Meta via Enhanced CAPI, even when cookies are restricted.
## Supported Identifiers
This integration supports the following identifiers for matching:
* Hashed Email Address (SHA256)
* Hashed Phone Number (SHA256)
* Hashed First Name & Last Name (SHA256)
* Mobile Advertiser ID (not hashed)
* External User ID (not hashed)
It also supports sending attributes such as Date of birth, Gender, City and so on.
## Available Actions
* **Send Offline data to FB Enhanced CAPI**– Enables sending offline event data for better attribution and optimisation in Meta Ads.
## Prerequisites
Ensure you have the following in place before setting up Facebook Conversions API:
* A Meta Business Manager account.
* A Meta Pixel linked to your Business Manager.
* A dataset configured to store conversion data.
* A system user with the required permissions.
* OAuth credentials or a system user access token.
* App Review approval with Ads Management permissions.
## Components of Facebook Conversions API
Before creating a destination in Zeotap CDP, ensure you have the following details:
* Meta Pixel ID – Required to associate conversion data with your Meta Ads account.
* Event Name – Specifies the type of event (for example, "Purchase", "Lead").
* Event Time – Unix timestamp of when the event occurred.
* User Data – At least one identifier (email, phone, name, madid, or external\_id) is required for matching.
* Custom Data (for Journeys only) – If sending purchase data, currency and value are mandatory.
**Note**
*To learn how to obtain these components, refer to this [documentation](/articles/integrate-customer/facebook-enhanced-conversions-api-capi#components-of-facebook-conversions-api).*
## Create a Destination for Facebook Conversions API
Perform the following steps to create a Destination for Facebook Conversions API:
Log into the Zeotap CDP App and go to the **DESTINATIONS** application.
Click **+ Create Destination**.
.png?fit=max&auto=format&n=OFEzw22E9lo2DHYT&q=85&s=816d7f247d590bc7bb09fff1e0b92a3d) Under the **All Destinations** section, search for **Facebook Conversions API**.
Under the **All Destinations** section, search for **Facebook Conversions API**.
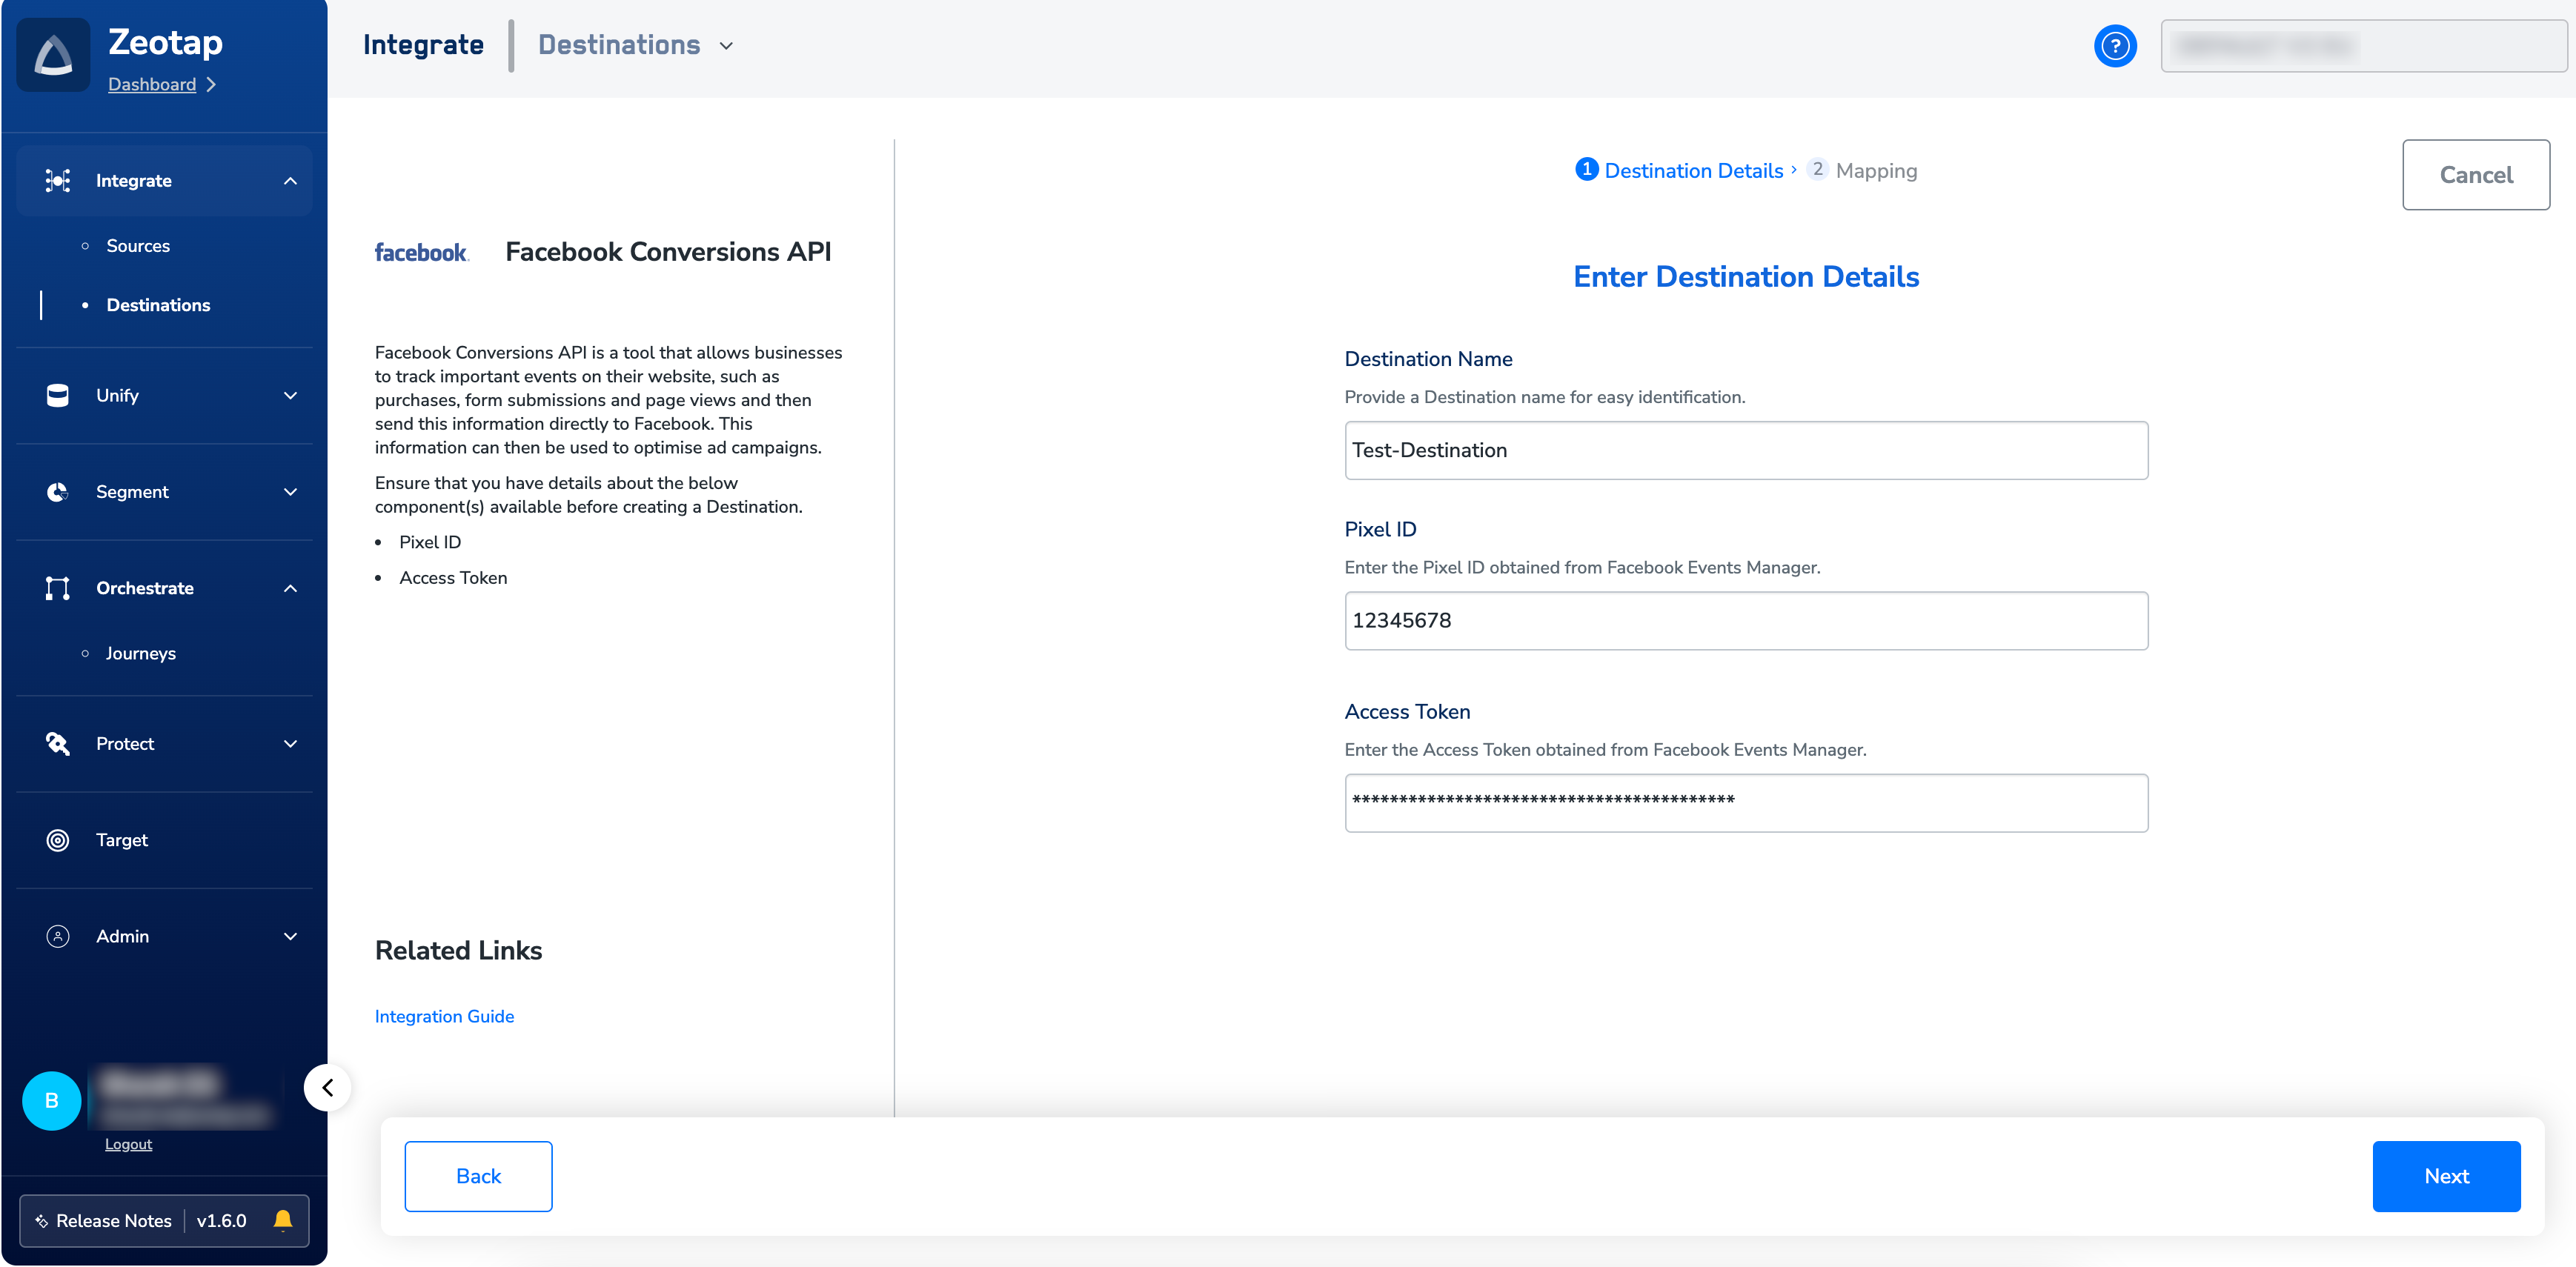
.png?fit=max&auto=format&n=OFEzw22E9lo2DHYT&q=85&s=9cca1024dea8e775f5b0ad6aa1d68a75) Click **Facebook Conversions API**. A screen appears displaying details about the particular destination towards the left. On the right-hand side of the screen find a list of fields that are required for the integration to be established. Enter the required details as mentioned in the following steps:
a. Enter a name for the Destination.
Click **Facebook Conversions API**. A screen appears displaying details about the particular destination towards the left. On the right-hand side of the screen find a list of fields that are required for the integration to be established. Enter the required details as mentioned in the following steps:
a. Enter a name for the Destination.
b. Add the **Pixel ID**and**Access Token** that you have obtained as explained [here](/articles/integrate-customer/facebook-enhanced-conversions-api-capi#components-of-facebook-conversions-api).
c. Review all the values entered above and then click **Next** to proceed.
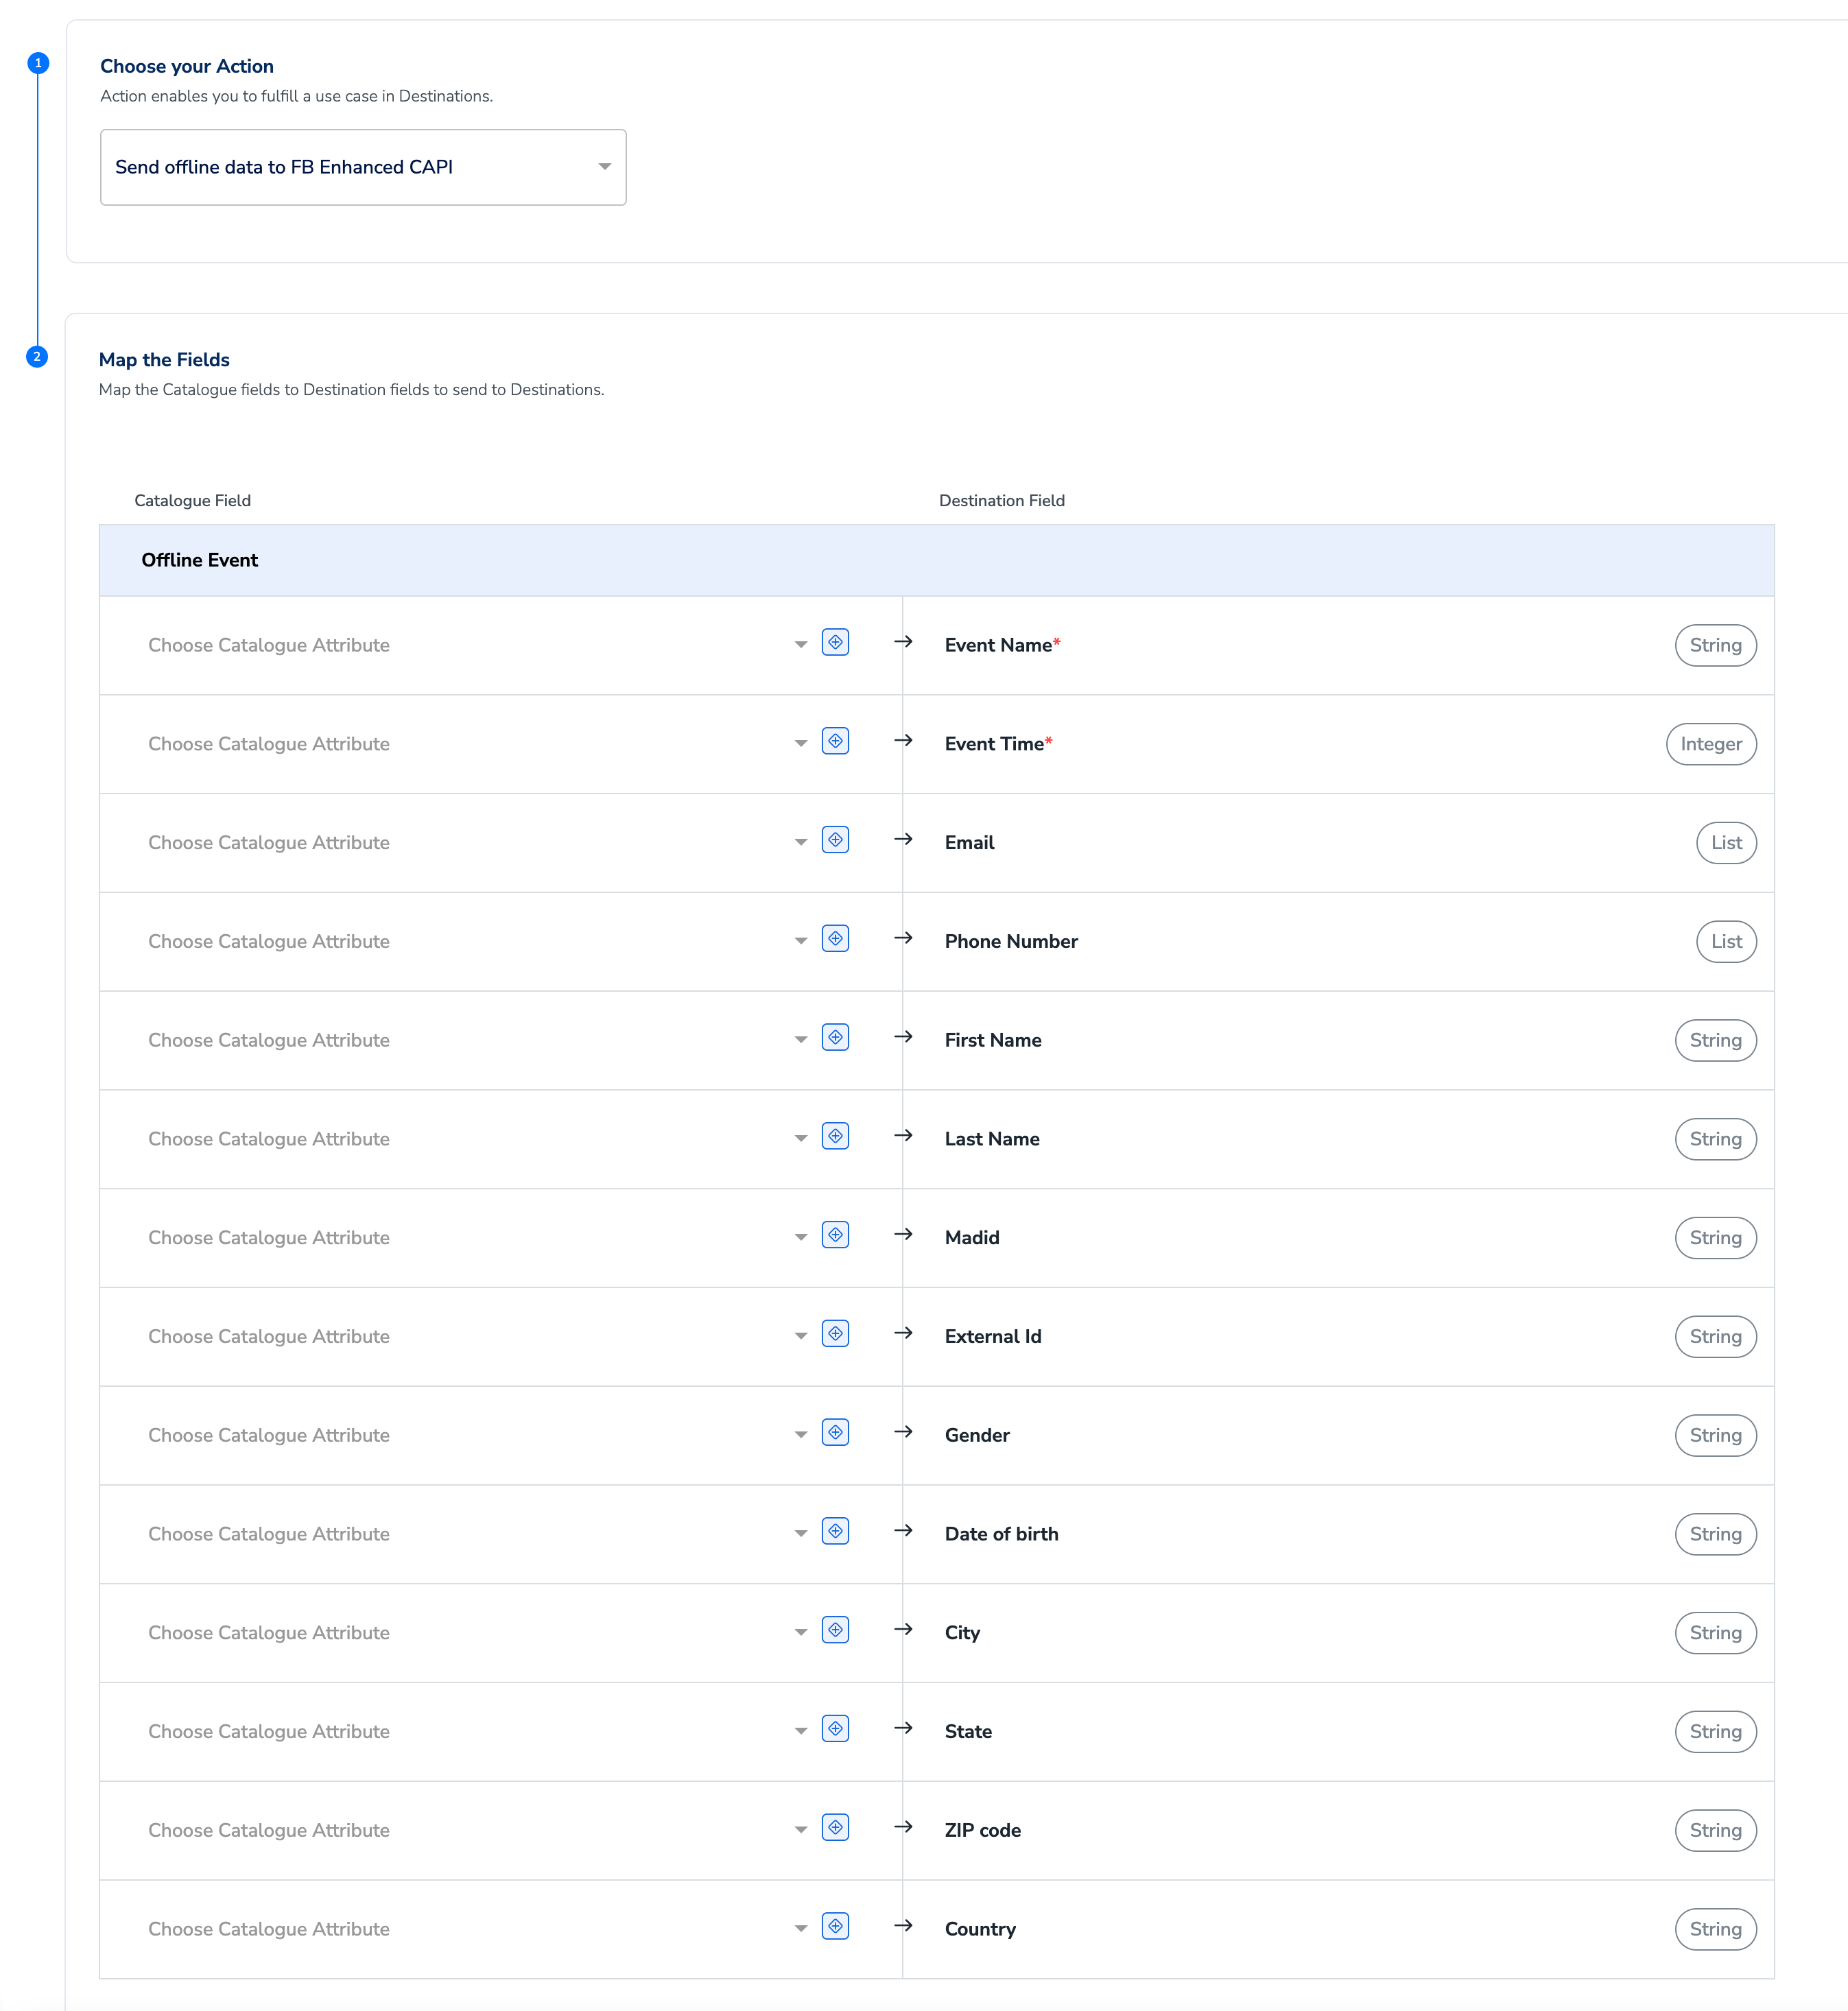
 In the new screen that appears, under **Choose your Action**, choose **Send offline data to Facebook Enhanced CAPI** as the action for activating your audience (segment) on the *Audiences module*. This auto-populates Event Name, Event Time, Email, Phone number, Name and more under **Map the Fields**, as shown in the image below. Map the required Catalogues fields to the corresponding Destination fields. Note that mapping **Event Name** and **Event Time** is mandatory. Otherwise, the destination fails.
 Click **Create Destination**. The created Destination gets listed in the **Audiences** application, which can be linked to an audience/segment.
## Link an Audience to the Facebook Conversions API Destination
For information about how to link an audience or segment to the created Destination in Audiences application, refer [here](/articles/integrate-customer/link-an-audience-to-the-destination#activate-in-audiences).
**Note**
The terms Audiences and Segments are used interchangeably to refer to customer cohorts belonging to a specific category. For example, an Audience or a segment could be a specific group of customers who are over 18 years of age and who have performed an `addToCart` event within the last 30 days.Your View
## View Facebook Conversions API Data in Meta Ads
Perform the following steps to view the Facebook Conversions API data sent from Zeotap CDP in Meta Ads:
Log in to Meta Events Manager.
Select the Pixel ID associated with the integration.
Navigate to **Data Sources** > **Offline Event Data**.
Review the uploaded conversion events and analyse performance insights.
## Need Support?
For further assistance, refer to Meta’s official [Conversions API Documentation](https://developers.facebook.com/docs/marketing-api/conversions-api) or reach out to Zeotap support at [support@zeotap.com](mailto:support@zeotap.com).
Click **Create Destination**. The created Destination gets listed in the **Audiences** application, which can be linked to an audience/segment.
## Link an Audience to the Facebook Conversions API Destination
For information about how to link an audience or segment to the created Destination in Audiences application, refer [here](/articles/integrate-customer/link-an-audience-to-the-destination#activate-in-audiences).
**Note**
The terms Audiences and Segments are used interchangeably to refer to customer cohorts belonging to a specific category. For example, an Audience or a segment could be a specific group of customers who are over 18 years of age and who have performed an `addToCart` event within the last 30 days.Your View
## View Facebook Conversions API Data in Meta Ads
Perform the following steps to view the Facebook Conversions API data sent from Zeotap CDP in Meta Ads:
Log in to Meta Events Manager.
Select the Pixel ID associated with the integration.
Navigate to **Data Sources** > **Offline Event Data**.
Review the uploaded conversion events and analyse performance insights.
## Need Support?
For further assistance, refer to Meta’s official [Conversions API Documentation](https://developers.facebook.com/docs/marketing-api/conversions-api) or reach out to Zeotap support at [support@zeotap.com](mailto:support@zeotap.com).