> ## Documentation Index
> Fetch the complete documentation index at: https://docs.zeotap.com/llms.txt
> Use this file to discover all available pages before exploring further.
# Eloqua
> Trigger pre-built Oracle Eloqua email assets in real time from a Zeotap journey. Maps a Zeotap profile attribute (holding the Eloqua contactId) to Eloqua's Email Deployment API for transactional, event-driven, and journey-based email sends.
## Overview
Oracle Eloqua is a B2B marketing automation platform that enables marketers to create, manage, and execute sophisticated cross-channel campaigns including email, display advertising, and landing pages. It provides advanced tools for lead management, campaign orchestration, and real-time email triggering, helping marketers deliver personalised experiences at scale. The platform offers an **Email Deployment API** to trigger individual email sends to specific contacts in real time, making it well suited for event-driven, transactional, and journey-based communication. Integrated with Zeotap, it helps marketers deliver contextually relevant email experiences driven by unified first-party customer data.
## Available Actions and Supported Features
The following table lists the available action types for the integration and the supported features for each action type:
| Action Name | [ID EXTENSION](/articles/segment-customer/extend-your-audience#id-extension) | [DELETE](https://docs.zeotap.com/articles/#!integrate-customer/delta-upload-and-delete-functions) | [DELTA UPLOAD](https://docs.zeotap.com/articles/#!integrate-customer/delta-upload-and-delete-functions) |
| ------------------------ | :--------------------------------------------------------------------------: | :-----------------------------------------------------------------------------------------------: | :-----------------------------------------------------------------------------------------------------: |
| Trigger Emails in Eloqua | — | — | — |
## Prerequisites
Before pushing data to Eloqua, ensure that you have completed the setup as mentioned below.
* Create an Eloqua account with **REST API access** enabled and obtain your **Company Name**, **Username**, and **Password**.
* Identify the **POD** your Eloqua instance is hosted on (e.g., `p03`) from the login URL, or use `GET https://login.eloqua.com/id` to resolve it programmatically.
* Pre-build the email asset you want to trigger inside Eloqua and note down its **Email Asset ID**.
* Ensure the Eloqua internal `contactId` is available on the Zeotap customer profile.
## Create a Destination for Eloqua
Once you have obtained the prerequisites mentioned above, perform the following steps to create a destination for Eloqua:
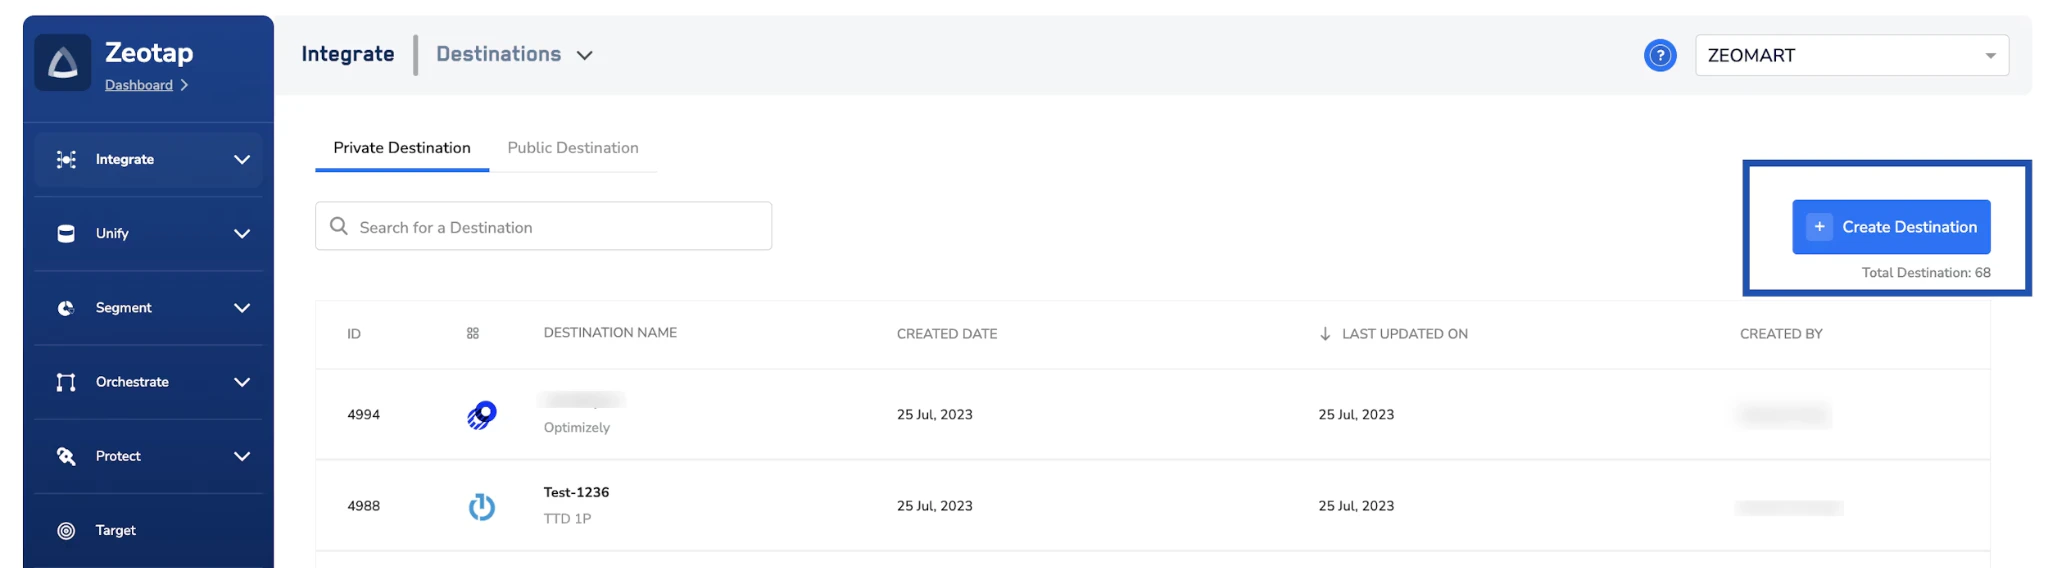
Log in to the Zeotap CDP app and go to the **Destinations** application.
On the Destinations landing page, click **+ Create Destination** in the top right.
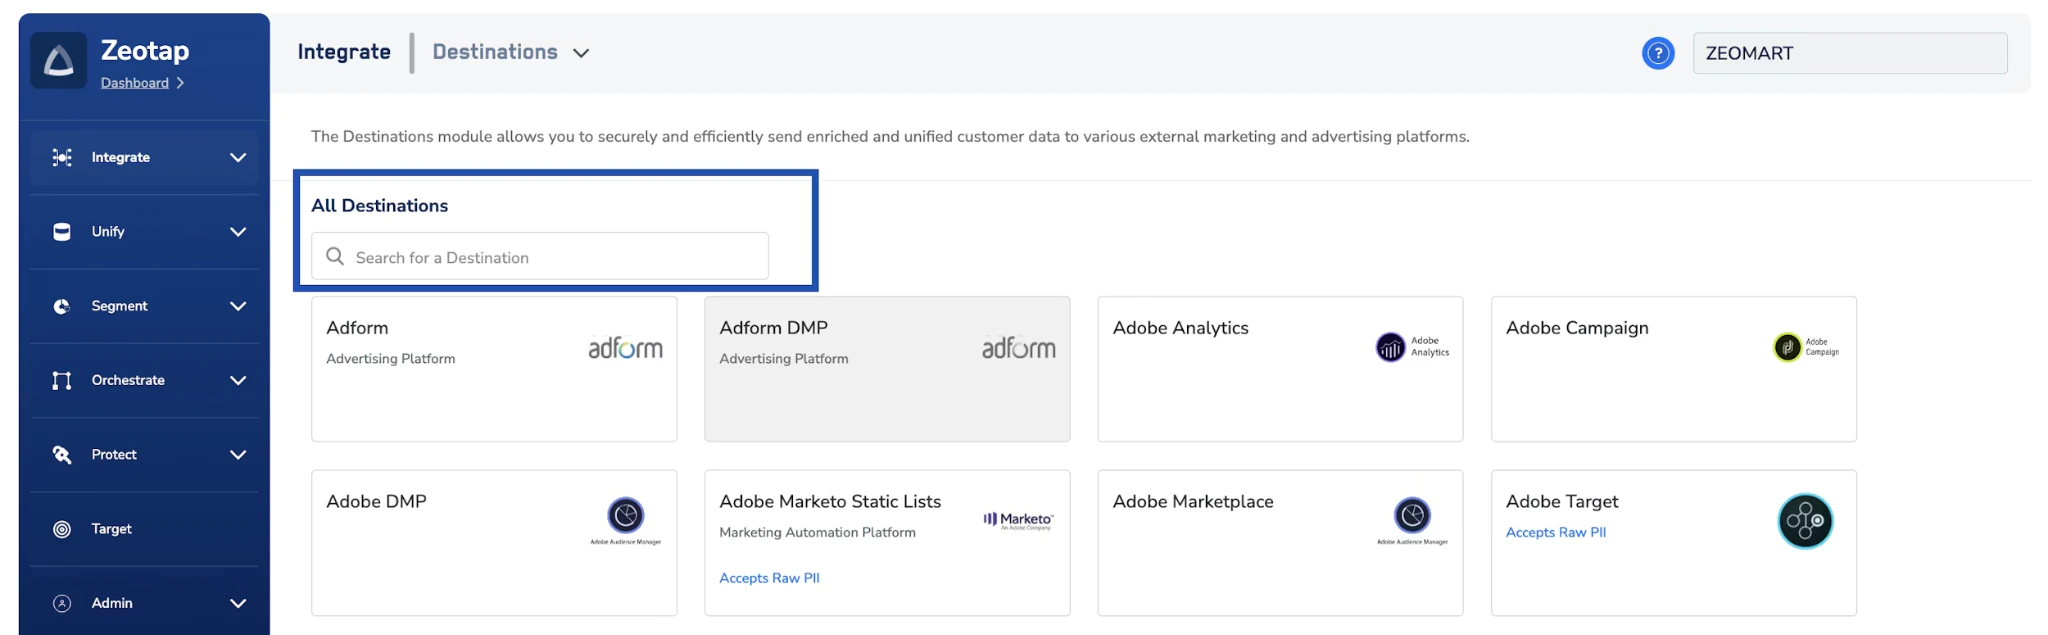
 Under **All Destinations**, search for **Eloqua** and select the **Eloqua** card.
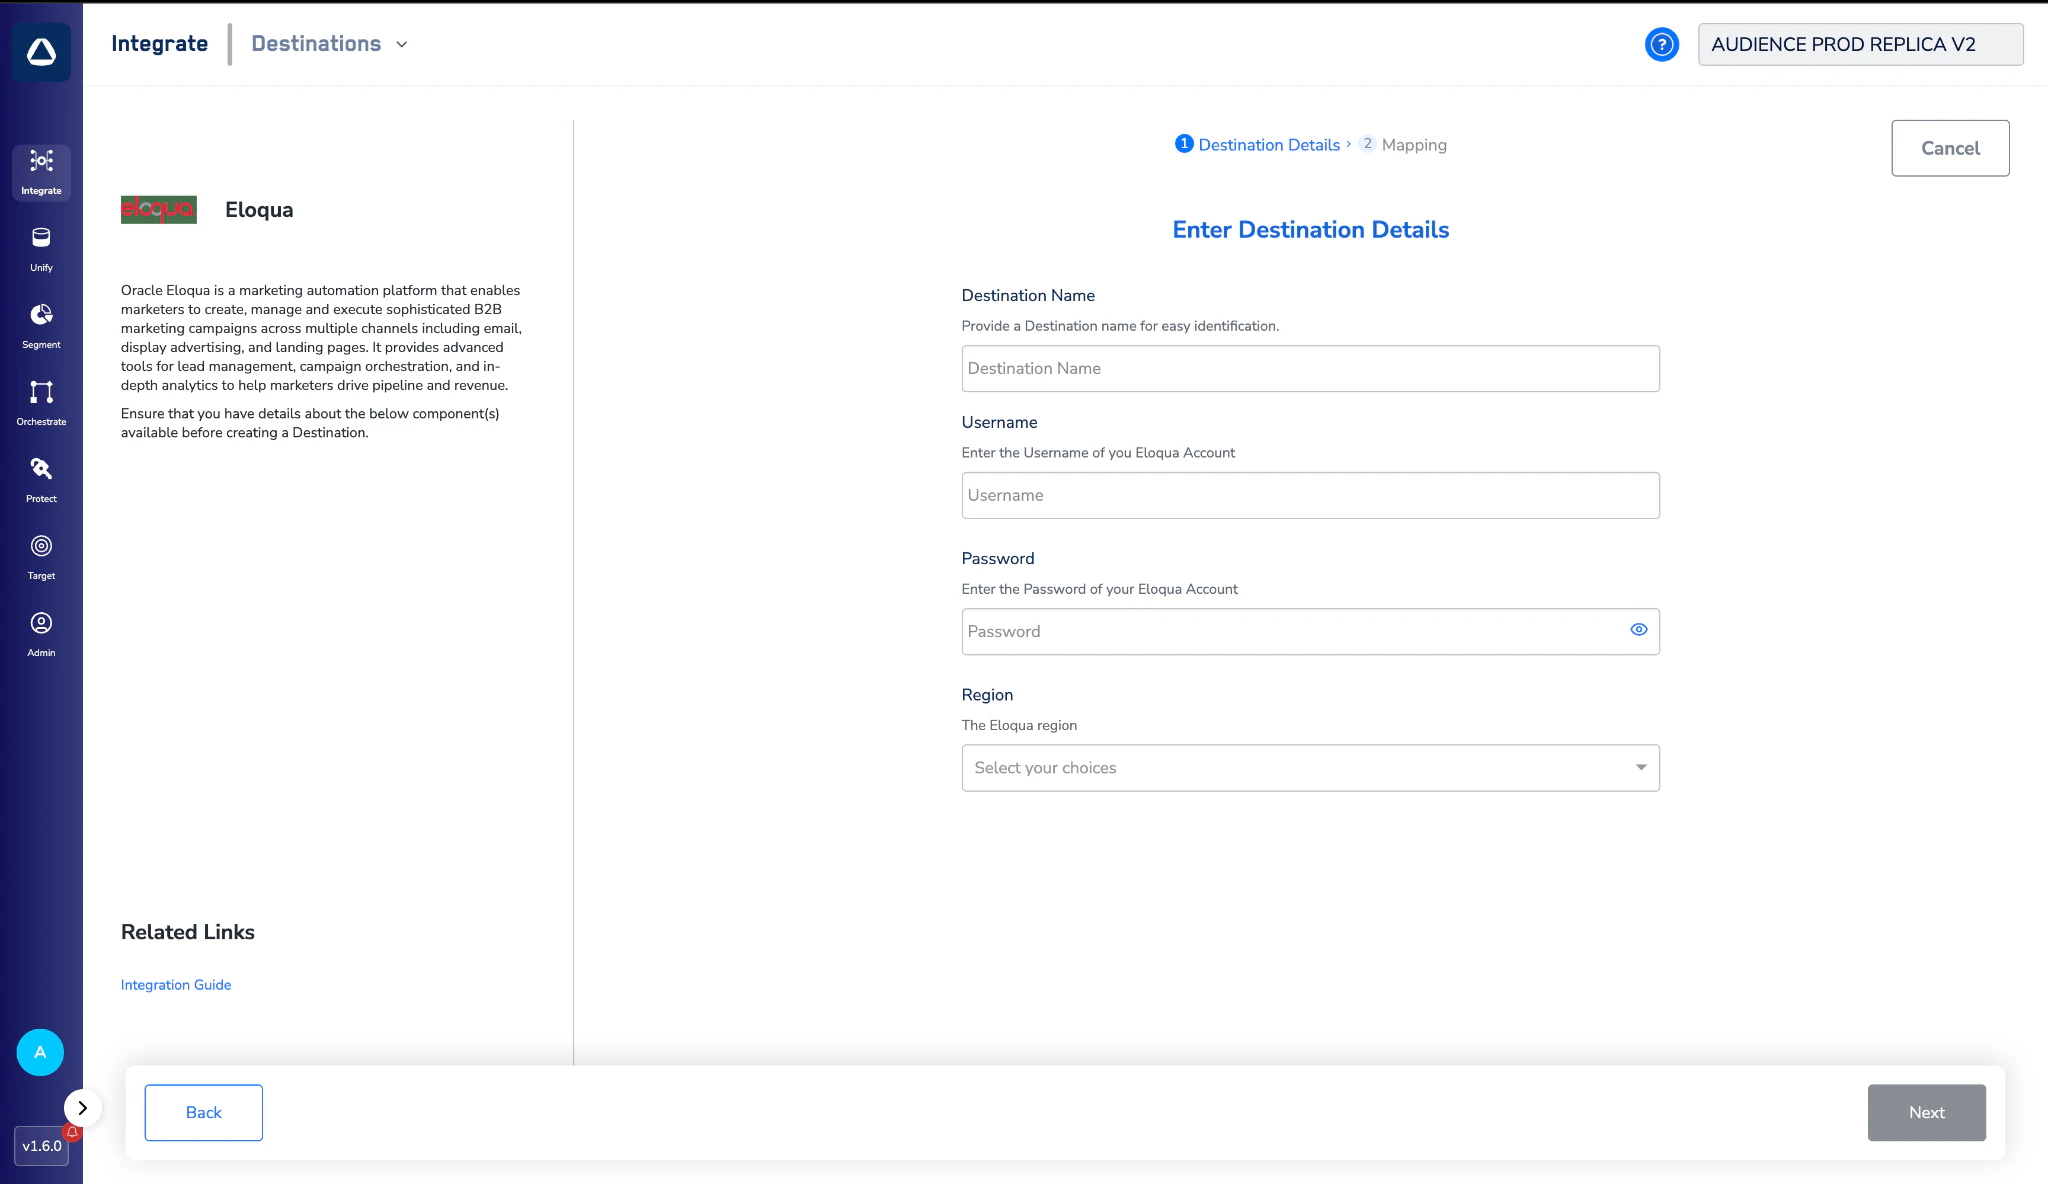
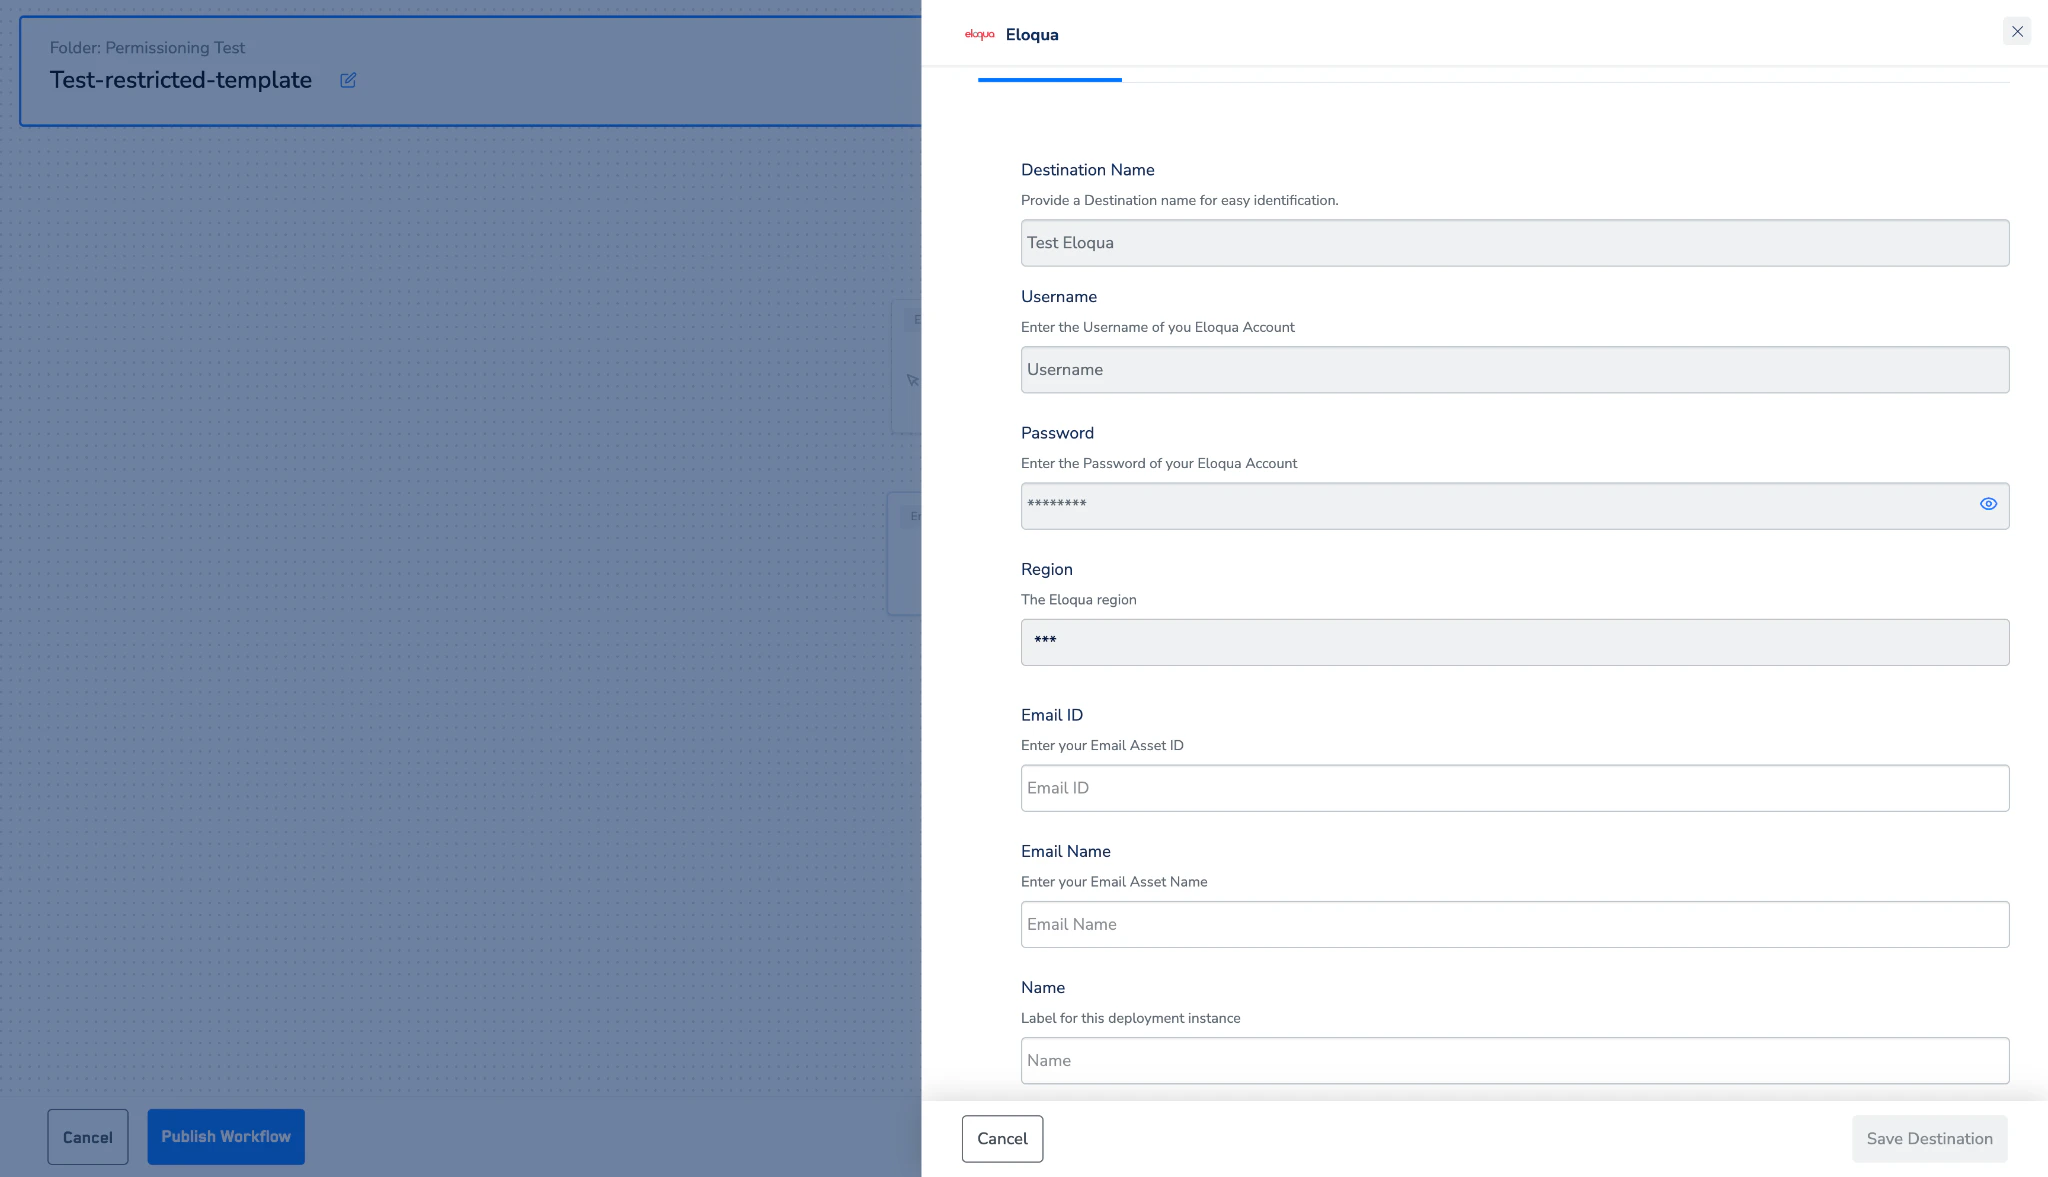
 On the **Enter Destination Details** screen, fill in the required fields:
* **Destination Name** — a descriptive label (e.g., `Eloqua — Production`).
* **Username** — the Eloqua username, prefixed with your **Company Name** separated by a backslash.
* **Password** — the password for your Eloqua account.
* **Region** — select the **POD** your Eloqua instance is hosted on.
The **Username** field must be entered as your **Company Name** and **Username** separated by a single backslash. For example, if your company is `Acme` and your username is `jdoe`, enter:
```
Acme\jdoe
```
On the **Enter Destination Details** screen, fill in the required fields:
* **Destination Name** — a descriptive label (e.g., `Eloqua — Production`).
* **Username** — the Eloqua username, prefixed with your **Company Name** separated by a backslash.
* **Password** — the password for your Eloqua account.
* **Region** — select the **POD** your Eloqua instance is hosted on.
The **Username** field must be entered as your **Company Name** and **Username** separated by a single backslash. For example, if your company is `Acme` and your username is `jdoe`, enter:
```
Acme\jdoe
```
 Review the values you have entered and click **Next** to proceed to mapping.
On the **Action and Mapping** screen:
1. Under **Choose your Action**, select **Trigger Emails in Eloqua** — this is the only action available for this destination.
2. Under **Map the Fields**, the **Contact Id** destination field is pre-populated. Against it, select the Zeotap profile attribute that holds the Eloqua internal `contactId`.
Review the values you have entered and click **Next** to proceed to mapping.
On the **Action and Mapping** screen:
1. Under **Choose your Action**, select **Trigger Emails in Eloqua** — this is the only action available for this destination.
2. Under **Map the Fields**, the **Contact Id** destination field is pre-populated. Against it, select the Zeotap profile attribute that holds the Eloqua internal `contactId`.
 Once the mapping is complete, click **Save Mapping**, then **Create Destination**. The created destination now appears in the **Journeys** application and can be linked from a Journey node.
## Activate the Destination on Journeys
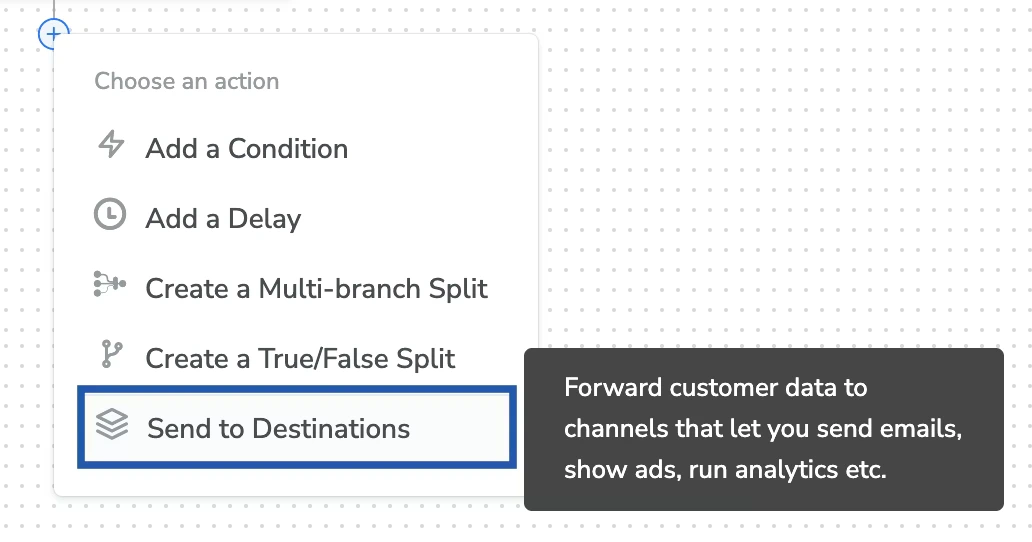
After creating the destination, link it inside the **Send to Destinations** node of a Journey workflow.
In the Journey workflow, click **+** at the point where the email should fire and choose **Send to Destinations**.
Once the mapping is complete, click **Save Mapping**, then **Create Destination**. The created destination now appears in the **Journeys** application and can be linked from a Journey node.
## Activate the Destination on Journeys
After creating the destination, link it inside the **Send to Destinations** node of a Journey workflow.
In the Journey workflow, click **+** at the point where the email should fire and choose **Send to Destinations**.
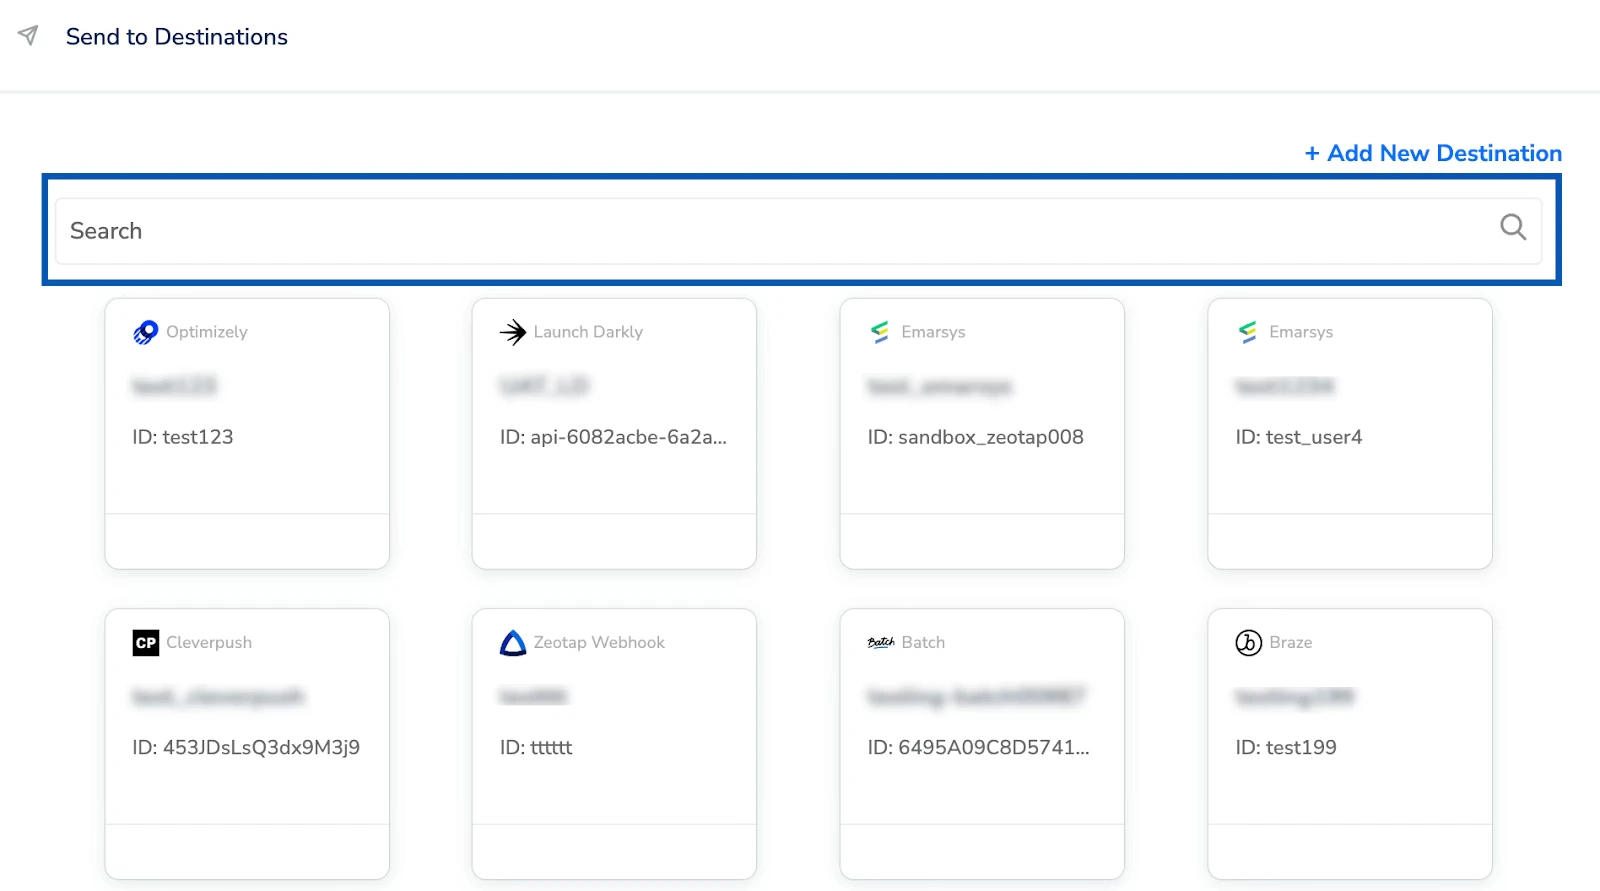
 Use the search field to locate the Eloqua destination you just created, then select its card.
 On the **Destination Details** tab, the connection fields populate automatically from the values you saved when creating the destination. Fill in the journey-specific email fields:
* **Email ID** — the **Email Asset ID** of the pre-built email in Eloqua. This is the unique numeric identifier of the email template you want to trigger; you can find it inside your Eloqua instance.
* **Email Name** — the email asset name as it appears in Eloqua. This is used for reference only and does not affect the delivery of the email.
* **Name** — a label for this deployment instance. This is an internal tracking identifier inside Eloqua and does not impact the email content or delivery.
On the **Destination Details** tab, the connection fields populate automatically from the values you saved when creating the destination. Fill in the journey-specific email fields:
* **Email ID** — the **Email Asset ID** of the pre-built email in Eloqua. This is the unique numeric identifier of the email template you want to trigger; you can find it inside your Eloqua instance.
* **Email Name** — the email asset name as it appears in Eloqua. This is used for reference only and does not affect the delivery of the email.
* **Name** — a label for this deployment instance. This is an internal tracking identifier inside Eloqua and does not impact the email content or delivery.
 Click **Save Destination**. The Eloqua destination is now attached to the Journey node and ready to fire emails on the journey's schedule.
