> ## Documentation Index
> Fetch the complete documentation index at: https://docs.zeotap.com/llms.txt
> Use this file to discover all available pages before exploring further.
# Dynamic Yield (RealTime)
## Overview
Dynamic Yield is a personalisation platform that builds actionable customer segments in real time, enabling marketers to increase revenue through personalisation, recommendations, automatic optimisation, and one-to-one messaging. This integration streams the **Journey ID** from Zeotap CDP to Dynamic Yield in real time as soon as a user qualifies for a Journey, so on-site experiences can be personalised based on the Journey the user is currently enrolled in.
## Supported Identifiers
This integration supports SHA256 Hashed email, MAIDs, and Journey ID. You can also send any custom identifier and attributes. However, ensure that you create them under **Data Feed** in Dynamic Yield as explained in the [Prerequisites](#prerequisites) section.
## Available Actions and Supported Features
The following table lists the available action types for the integration and the supported features for each action type:
| Action Name | [ID EXTENSION](https://docs.zeotap.com/articles/#!segment-customer/extend-your-audience/a/h2_1167151146) | [DELETE](https://docs.zeotap.com/articles/#!integrate-customer/delta-upload-and-delete-functions) | [DELTA UPLOAD](https://docs.zeotap.com/articles/#!integrate-customer/delta-upload-and-delete-functions) |
| :----------------------------------------------------------- | :------------------------------------------------------------------------------------------------------- | :------------------------------------------------------------------------------------------------ | :------------------------------------------------------------------------------------------------------ |
| Send attributes and identifiers to Dynamic Yield in RealTime | ✅ | - | - |
## Prerequisites
Before pushing audiences to Dynamic Yield, ensure that you have set up the User Data Feed as mentioned below.
1. Create a User Feed and obtain the Feed ID.
2. Choose a Unique User Identifier or create one.
3. Decide which attributes (columns) to pass in the API and set up the schema that determines where and how the information is stored in Dynamic Yield.
4. Create an API Key.
**Once the Data Feed is set up, you can start sending audiences and Journey enrolments from Zeotap CDP to Dynamic Yield.**
For more information, refer to the [Dynamic Yield documentation](https://support.dynamicyield.com/hc/en-us/articles/4409595248017-Update-Your-User-Profile-Data-by-API).
### Step 1 - Create a New User Feed and Obtain the Feed ID
In Dynamic Yield, a User Feed ID is a unique identifier for a set of user data feeds that drive personalised experiences across channels. A user feed can contain a variety of user data points such as browsing history, purchase history, and demographic information. To create a new User Feed and obtain the Feed ID, perform the following steps:
Log in to your Dynamic Yield account.
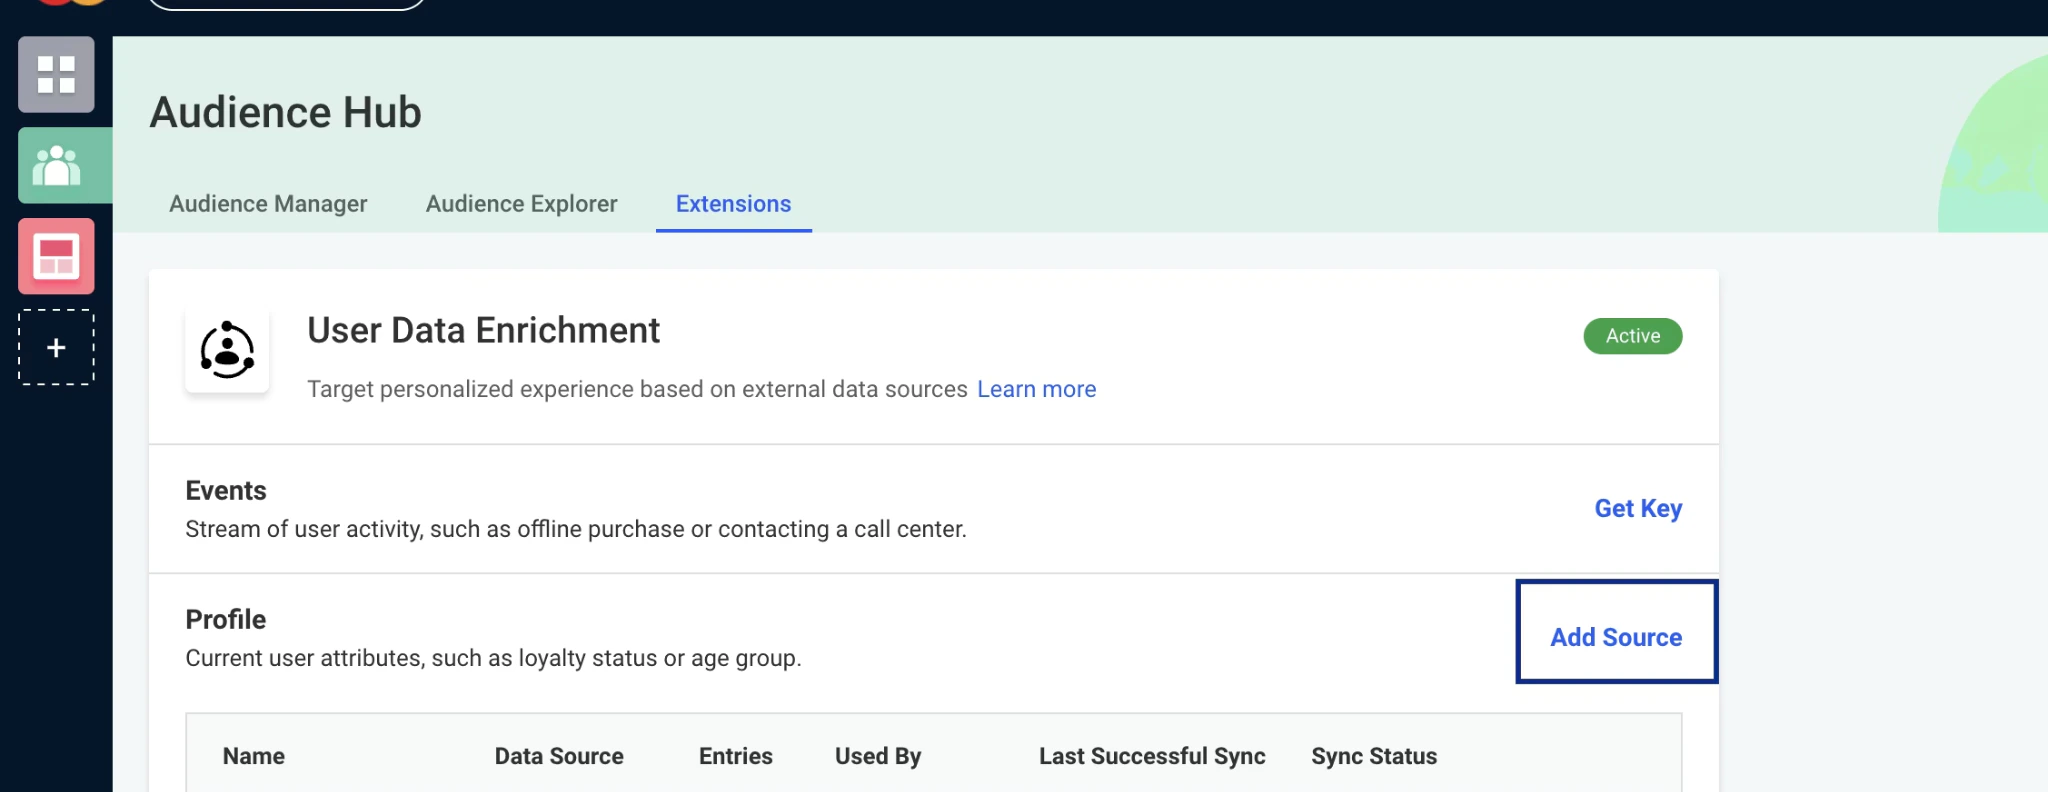
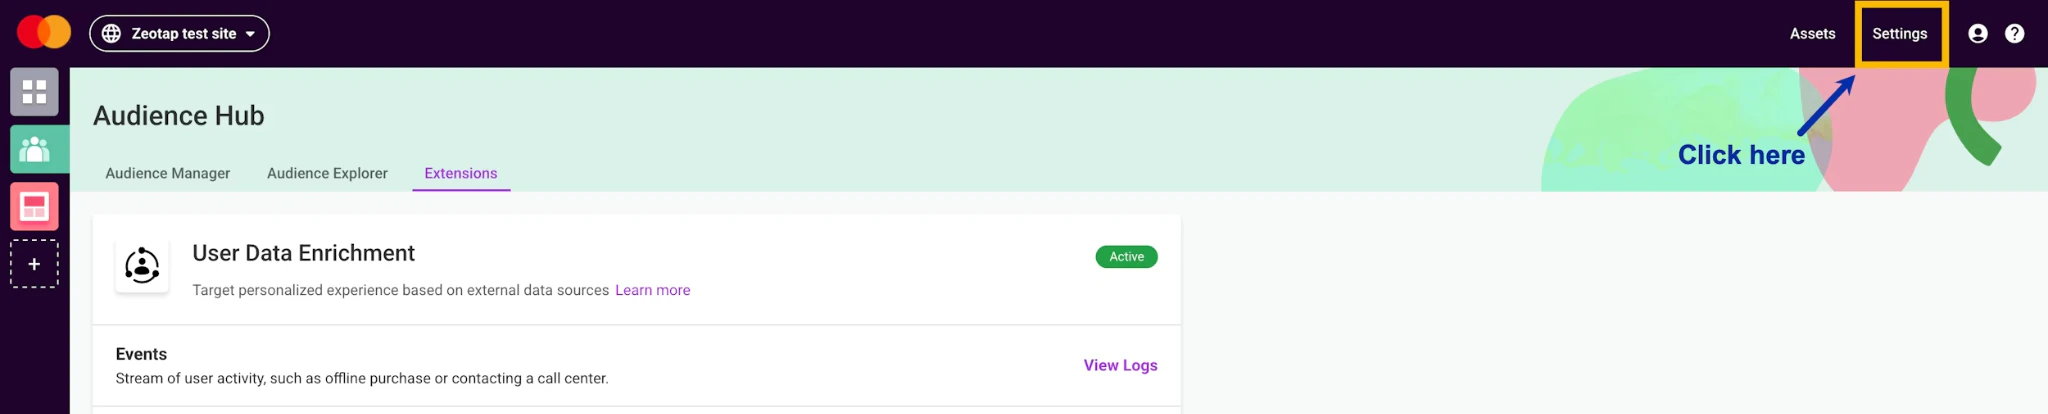
In the left navigation panel, click **Audience Hub**.
Under **Audience Hub**, navigate to the **Extensions** tab.
Under **Profile**, click **Add Source**.
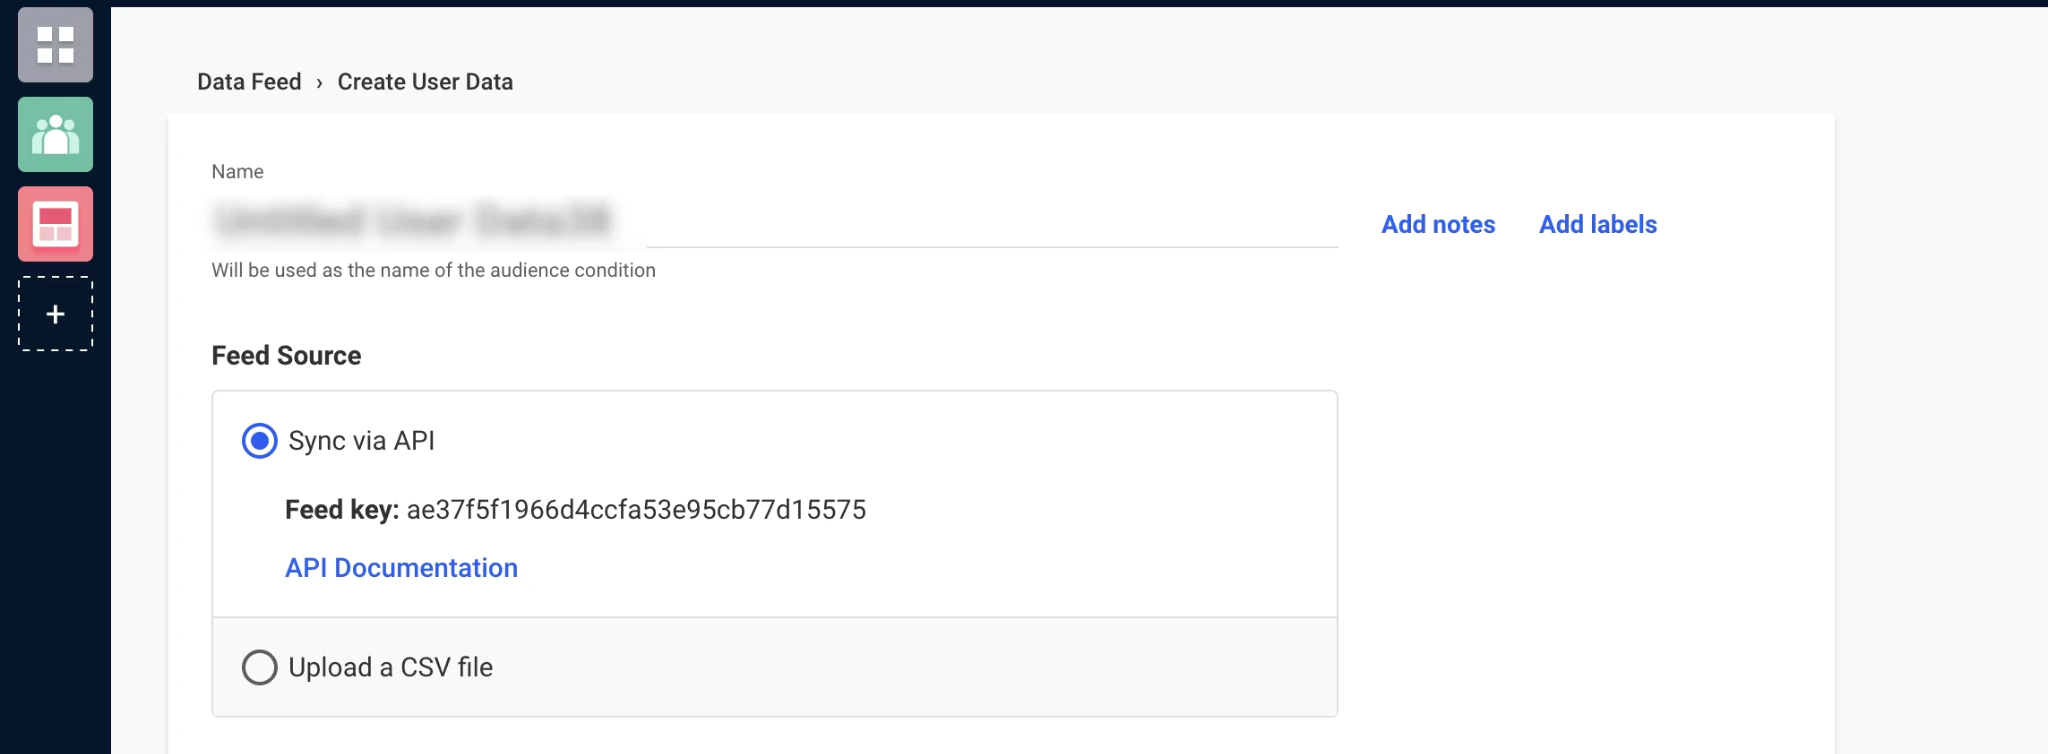
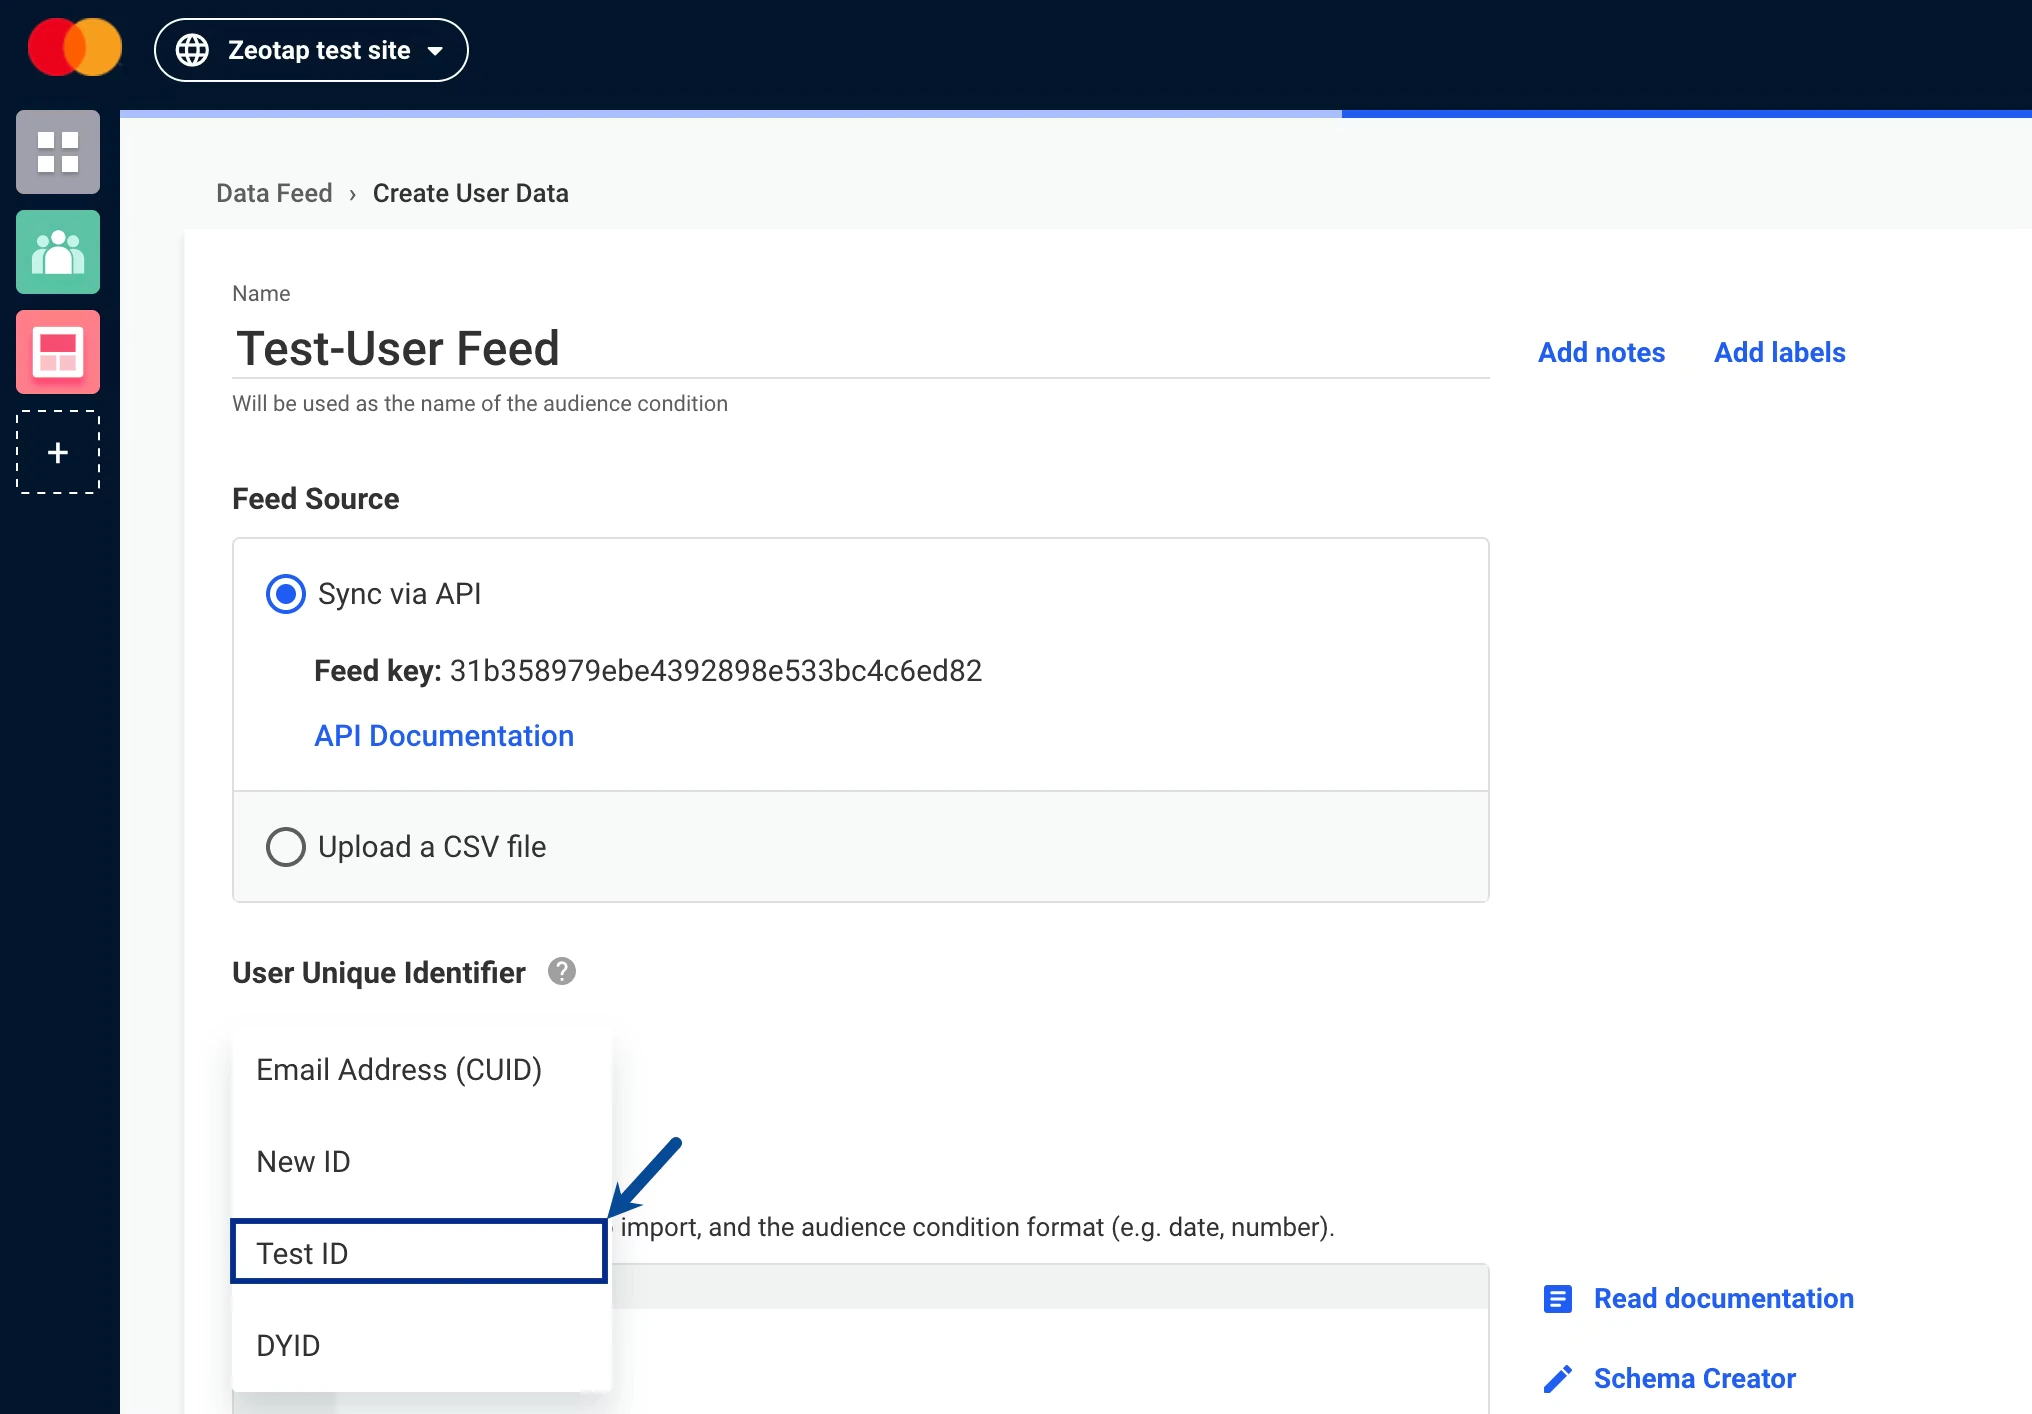
 On the new screen, under **Feed Source**, select **Sync via API** and copy the **Feed key** displayed below it — this is your **User Feed ID**. You will paste it into Zeotap CDP while creating the destination.
 ### Step 2 - Choose a Unique User Identifier or Create One
Under **Unique User Identifier**, you can choose **Email Address (CUID)** or **DYID** by default. To add a custom identifier, perform the following steps:
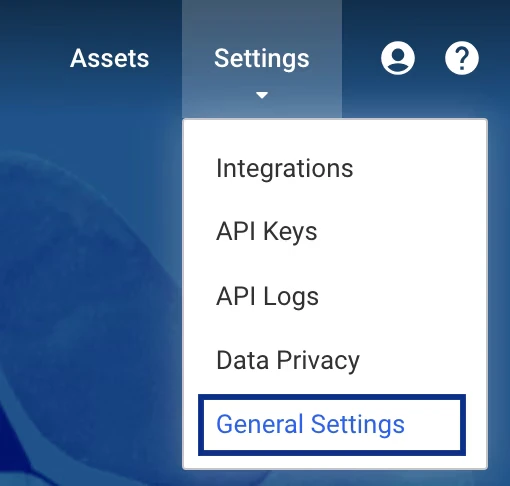
On the top bar, click **Settings > General Settings**.
### Step 2 - Choose a Unique User Identifier or Create One
Under **Unique User Identifier**, you can choose **Email Address (CUID)** or **DYID** by default. To add a custom identifier, perform the following steps:
On the top bar, click **Settings > General Settings**.
 Under **User Identifier Types**, click **Add Identifier Type** and choose **Phone Number** or **Other**. If you choose **Other**, you can name your custom identifier.
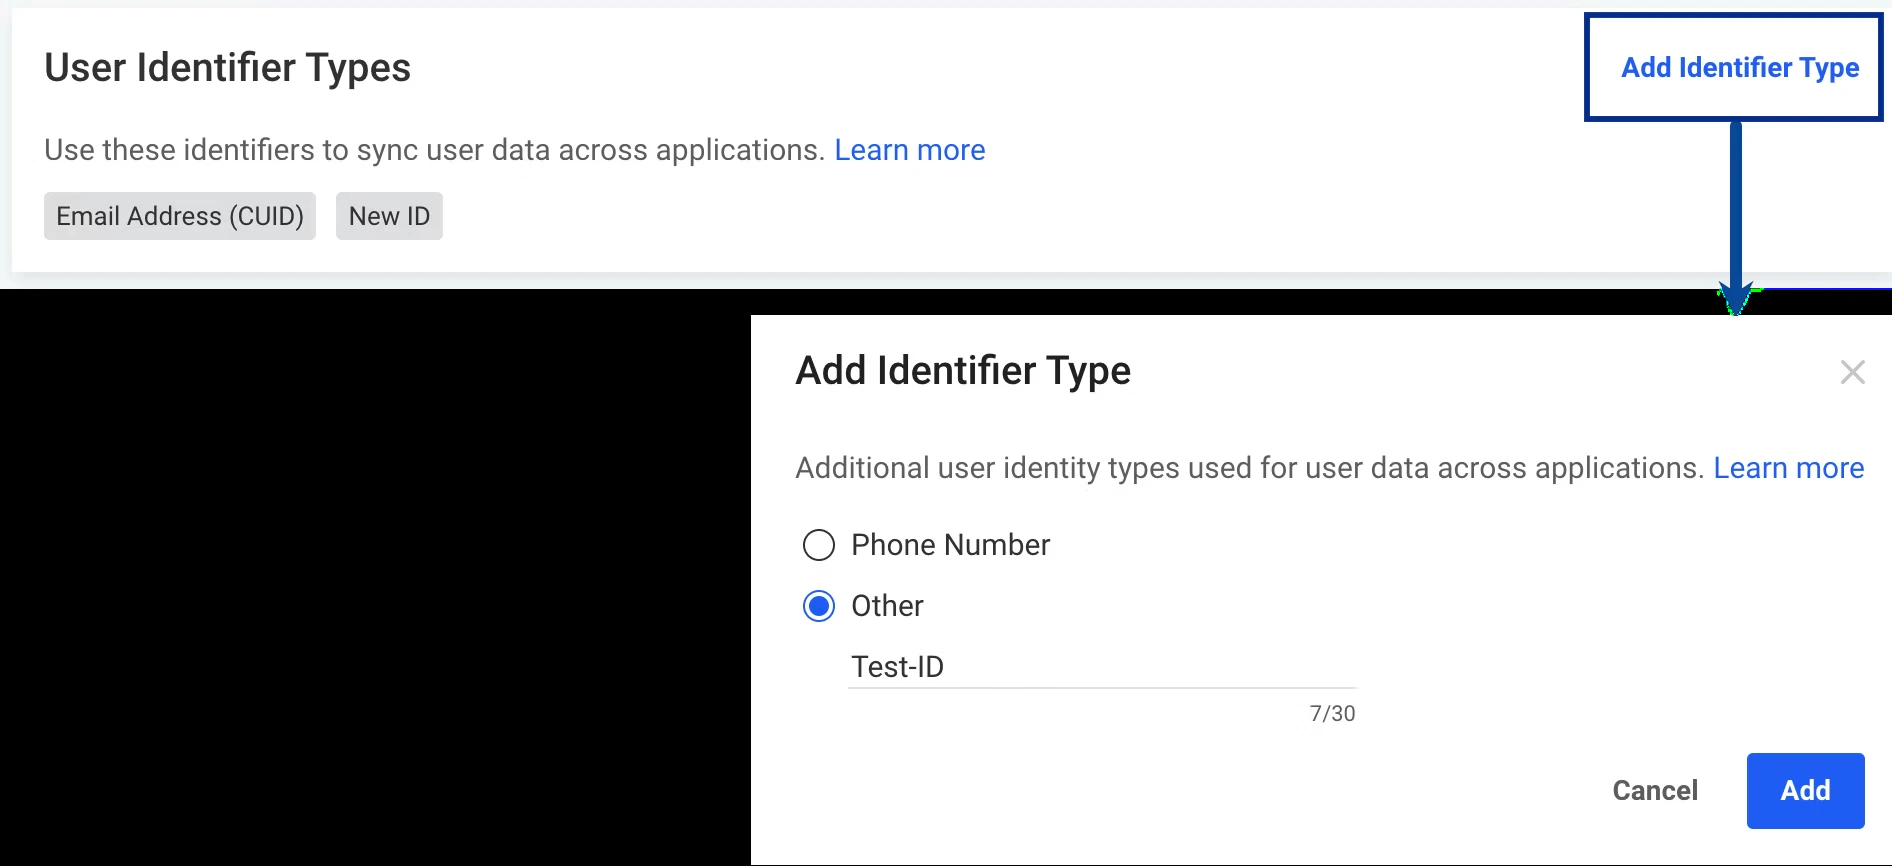 The newly created identifier appears under **User Unique Identifier** on the User Feed creation screen.
 ### Step 3 - Decide the Attributes to Send and Set up the Schema
Under **Data Schema**, define the identifiers and attributes you want to send to Dynamic Yield. Use the **Schema Creator** for an easier no-code experience.
### Step 3 - Decide the Attributes to Send and Set up the Schema
Under **Data Schema**, define the identifiers and attributes you want to send to Dynamic Yield. Use the **Schema Creator** for an easier no-code experience.
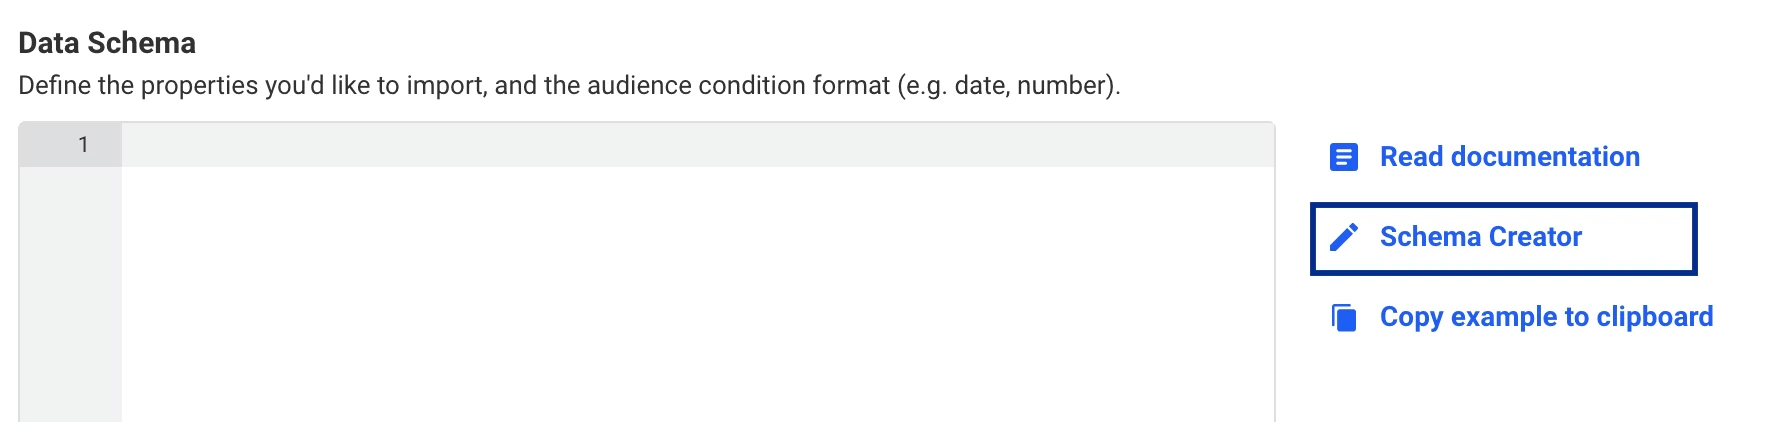 Click **Schema Creator**. You can either create a schema from scratch or modify an existing schema.
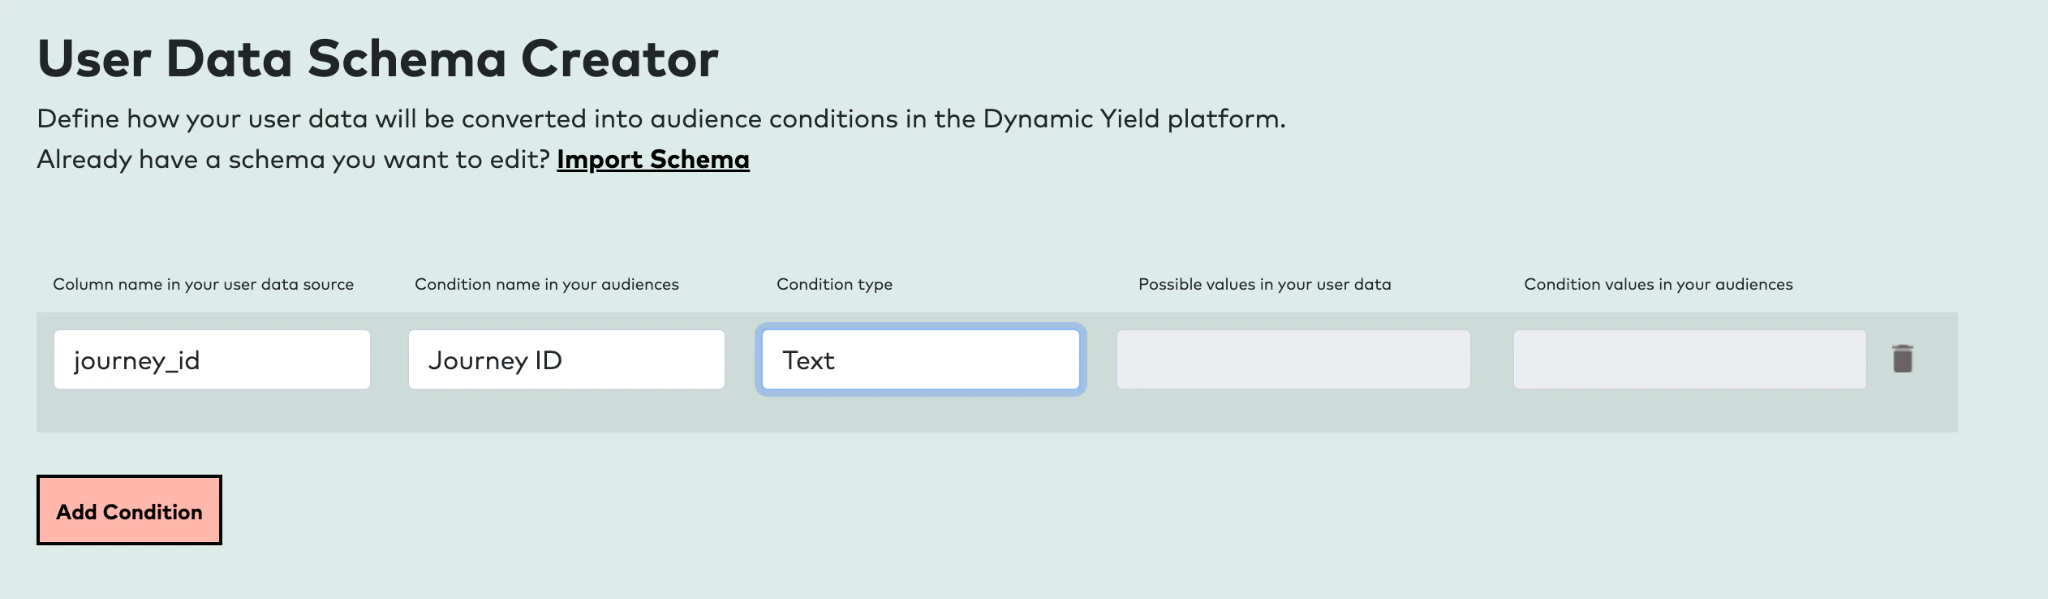
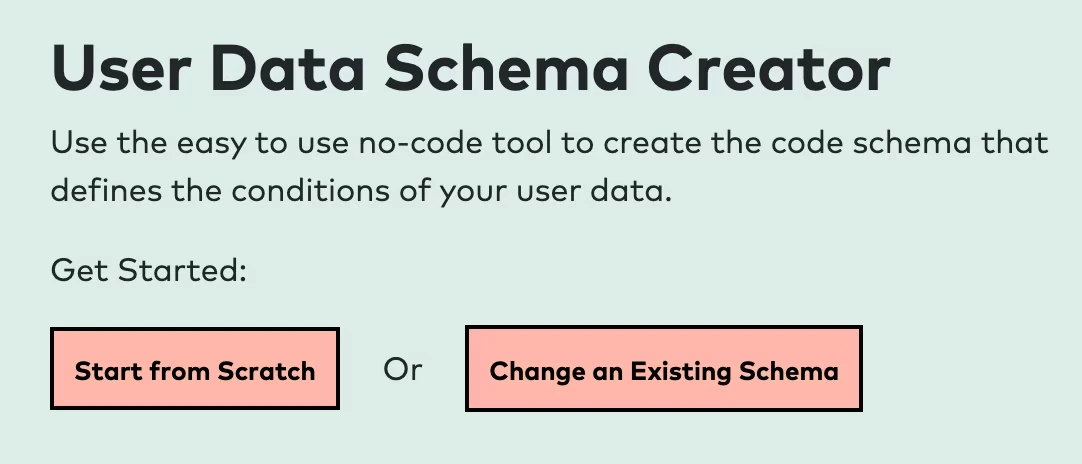 If you choose **Start from Scratch**, provide the following details:
a. Under **Column name in your user data source**, enter `journey_id`. Use this exact name in the **Destination** field on the mapping screen when creating the destination in Zeotap CDP.
The `journey_id` value is **case-sensitive**. It must match exactly between Dynamic Yield and the Zeotap CDP mapping screen.
b. Under **Condition name in your audiences**, enter the name as you would like it to appear in Audience conditions (for example, `Journey ID`).
c. Set the **Condition type** to **String** for the Journey ID field.
The Journey ID field must have its **Condition type** set to **String**.
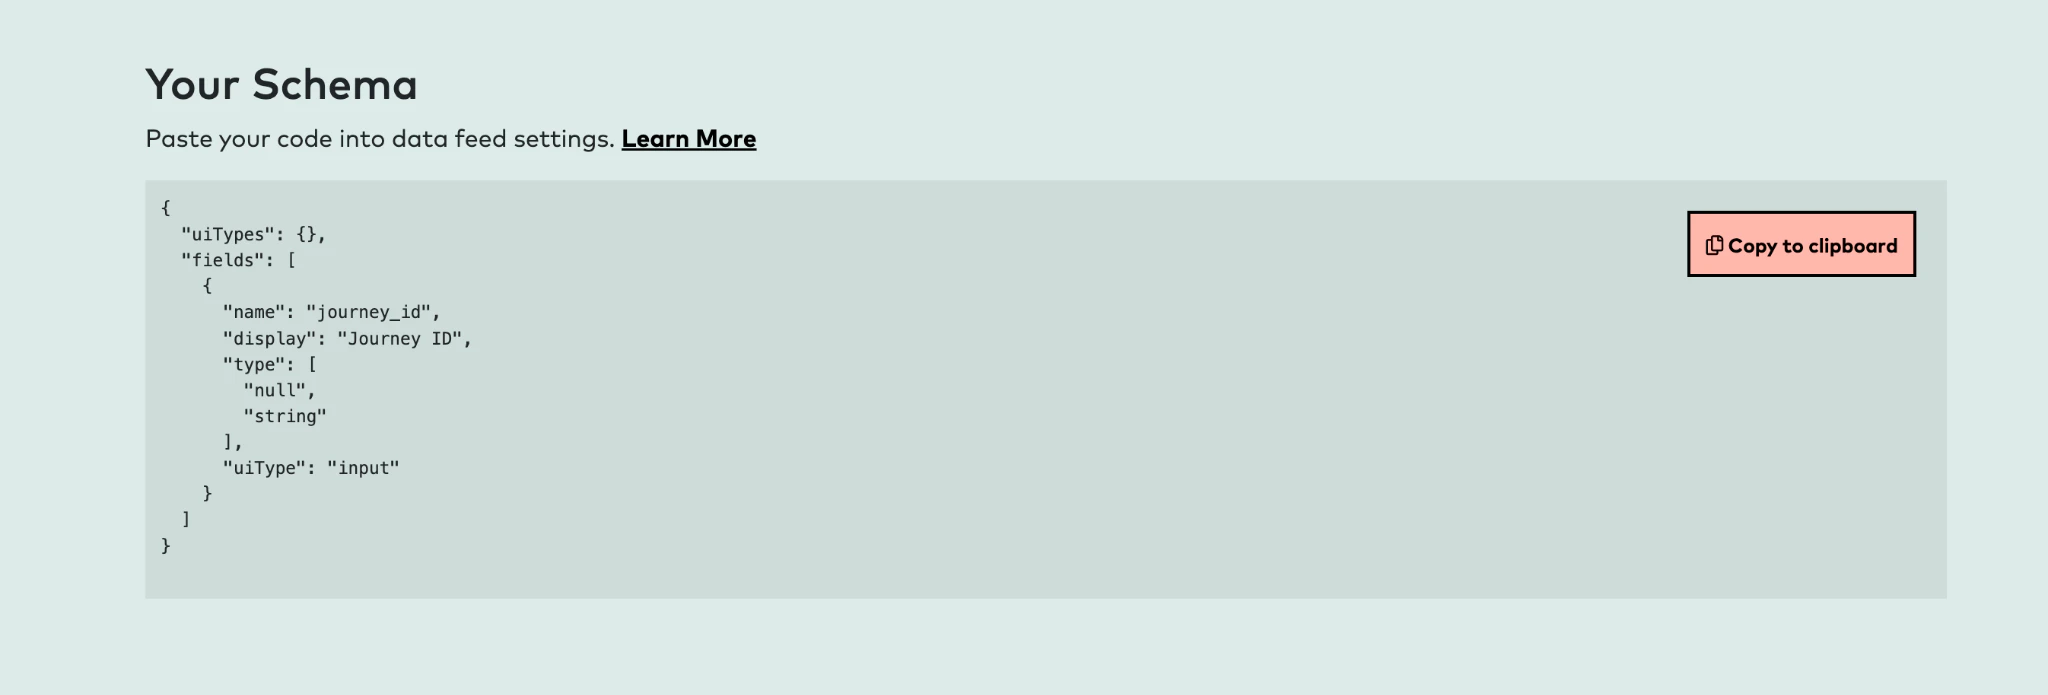
d. Once done, click **Copy to Clipboard** to copy the schema.
If you choose **Start from Scratch**, provide the following details:
a. Under **Column name in your user data source**, enter `journey_id`. Use this exact name in the **Destination** field on the mapping screen when creating the destination in Zeotap CDP.
The `journey_id` value is **case-sensitive**. It must match exactly between Dynamic Yield and the Zeotap CDP mapping screen.
b. Under **Condition name in your audiences**, enter the name as you would like it to appear in Audience conditions (for example, `Journey ID`).
c. Set the **Condition type** to **String** for the Journey ID field.
The Journey ID field must have its **Condition type** set to **String**.
d. Once done, click **Copy to Clipboard** to copy the schema.
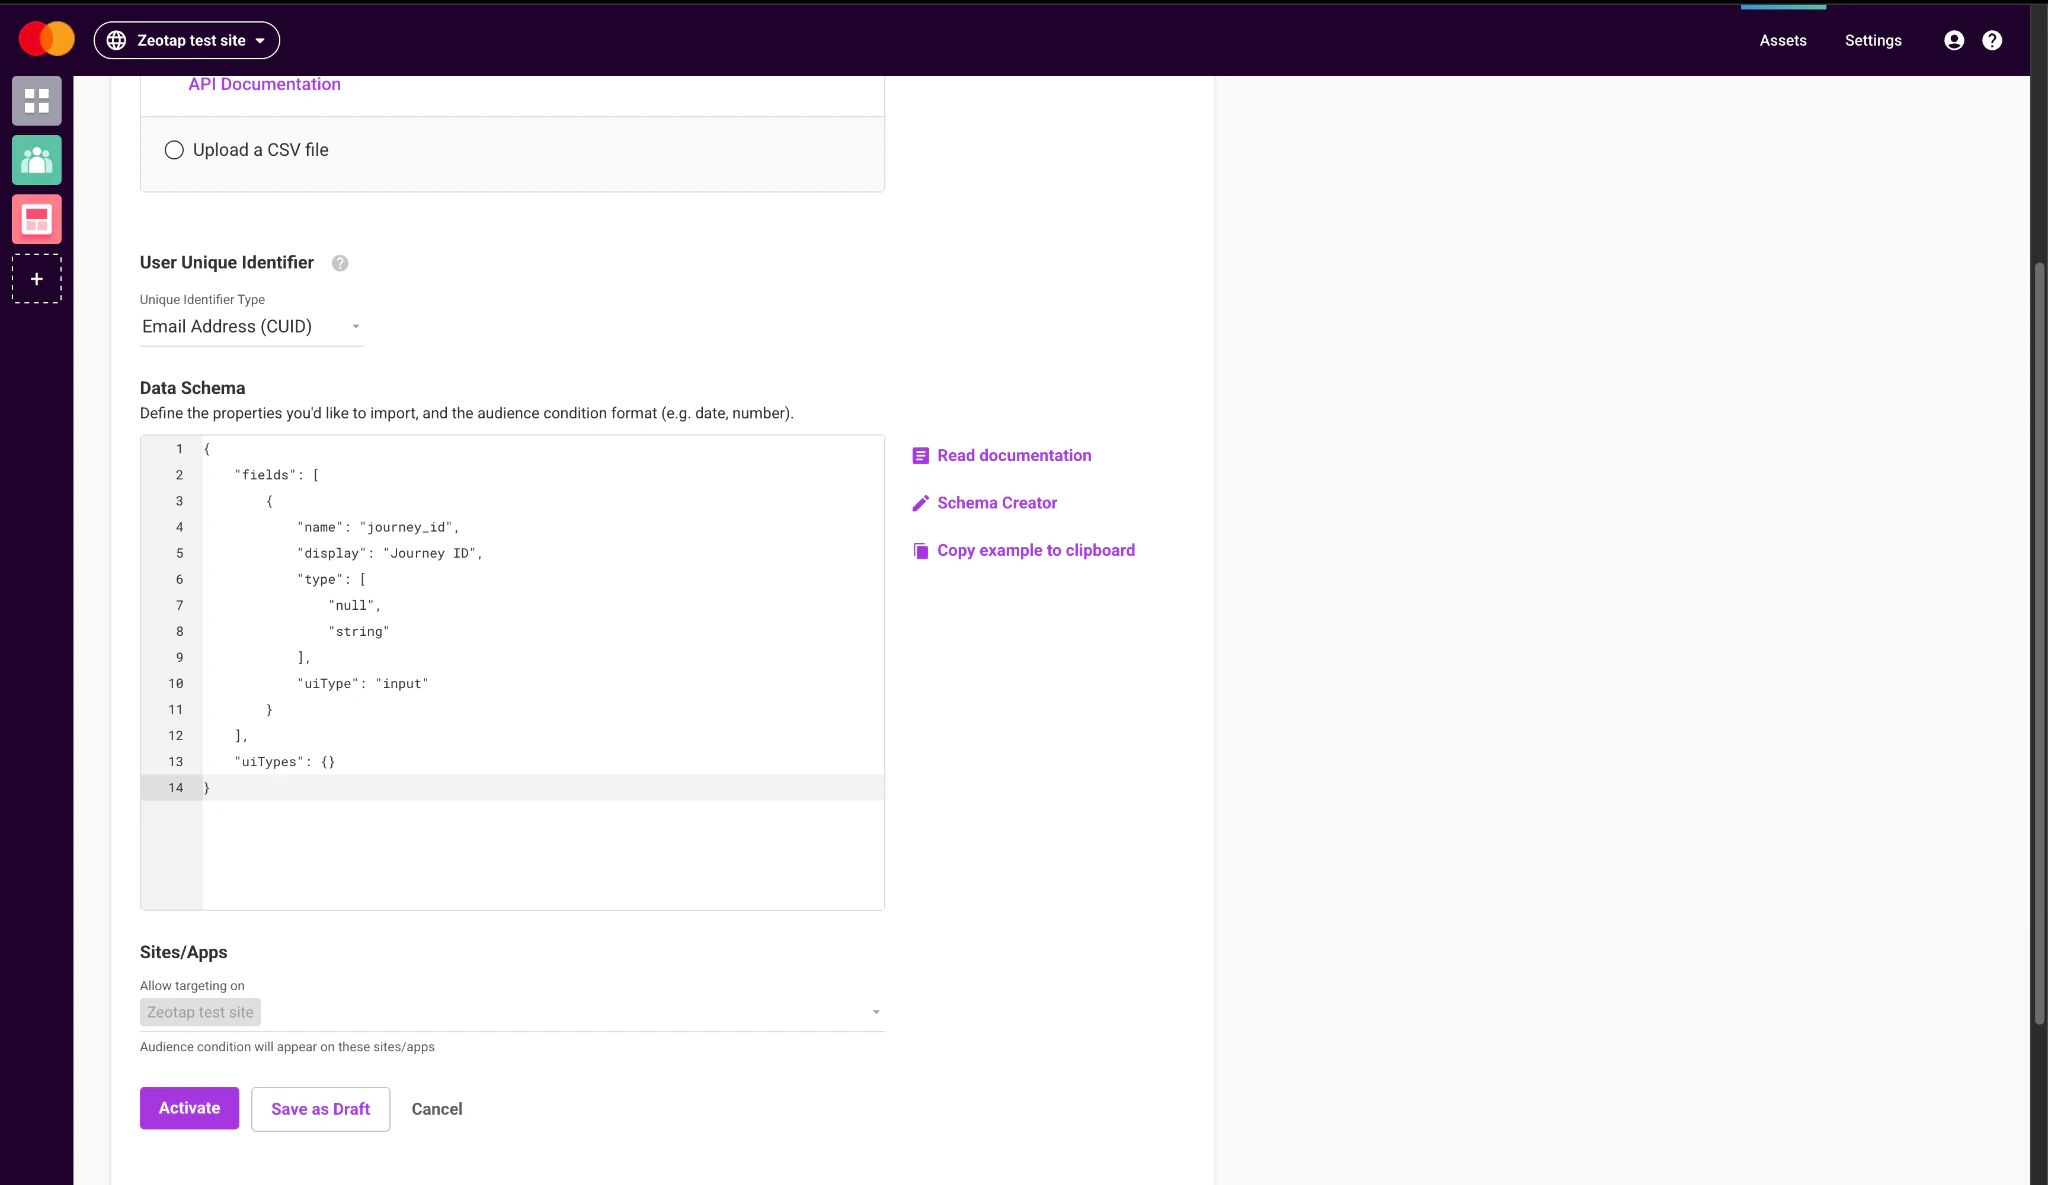
 Paste the copied schema into the space provided under **Data Schema**.
 At this stage, you may encounter an error such as `Illegal Character in: {Your Data Feed}`. If this occurs, remove any special characters (for example, hyphens or underscores) from the data feed name. If you are editing an existing data feed and adding a field, include `"default": null` after `"uiType": "input"` in the data schema before saving.
Click **Save & Activate**. The User Feed is now listed on the **Data Feeds** page.
At this stage, you may encounter an error such as `Illegal Character in: {Your Data Feed}`. If this occurs, remove any special characters (for example, hyphens or underscores) from the data feed name. If you are editing an existing data feed and adding a field, include `"default": null` after `"uiType": "input"` in the data schema before saving.
Click **Save & Activate**. The User Feed is now listed on the **Data Feeds** page.
 ### Step 4 - Create the API Access Token / API Key
You must create an API Key that you will paste into Zeotap CDP while creating the destination. To do so, perform the following steps:
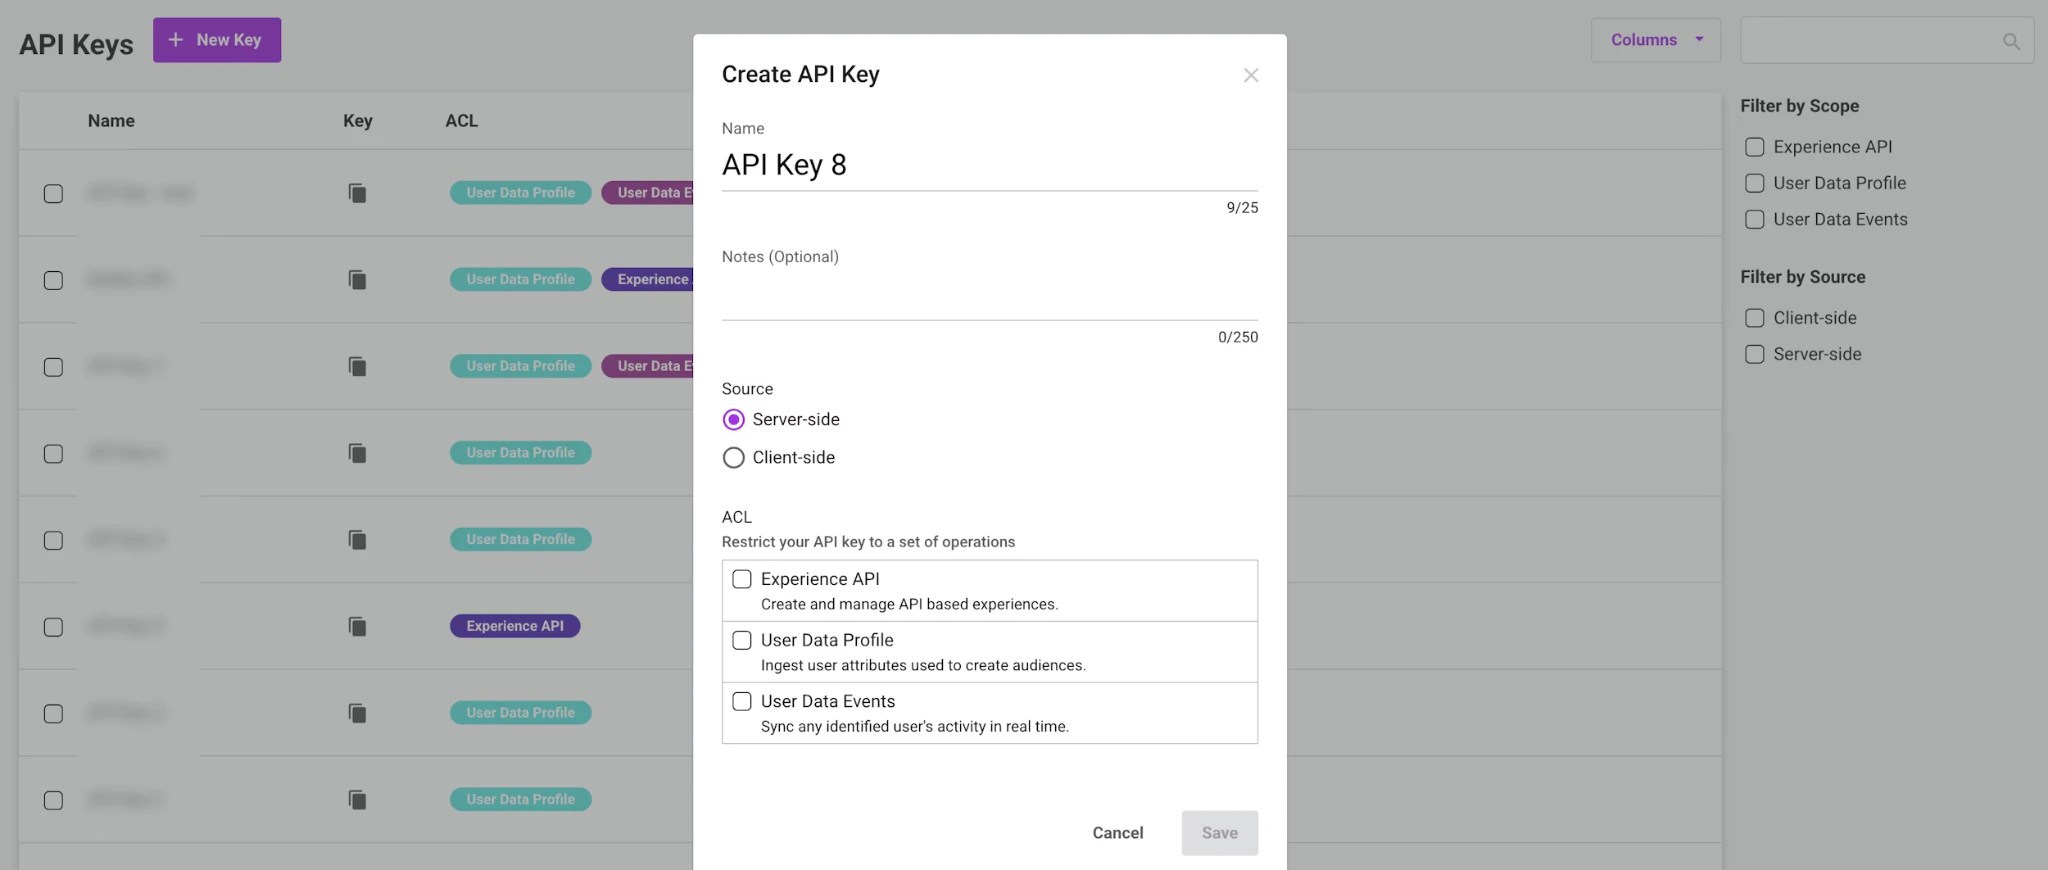
In the Dynamic Yield console, click **Settings > API Keys** and click **New Key**.
### Step 4 - Create the API Access Token / API Key
You must create an API Key that you will paste into Zeotap CDP while creating the destination. To do so, perform the following steps:
In the Dynamic Yield console, click **Settings > API Keys** and click **New Key**.
 In the window that appears:
a. Enter a **Name** and (optionally) internal notes.
b. Under **Source**, select **Server-side**.
c. Under **ACL**, select the **User Data Profile** permission.
d. Click **Save**.
In the window that appears:
a. Enter a **Name** and (optionally) internal notes.
b. Under **Source**, select **Server-side**.
c. Under **ACL**, select the **User Data Profile** permission.
d. Click **Save**.
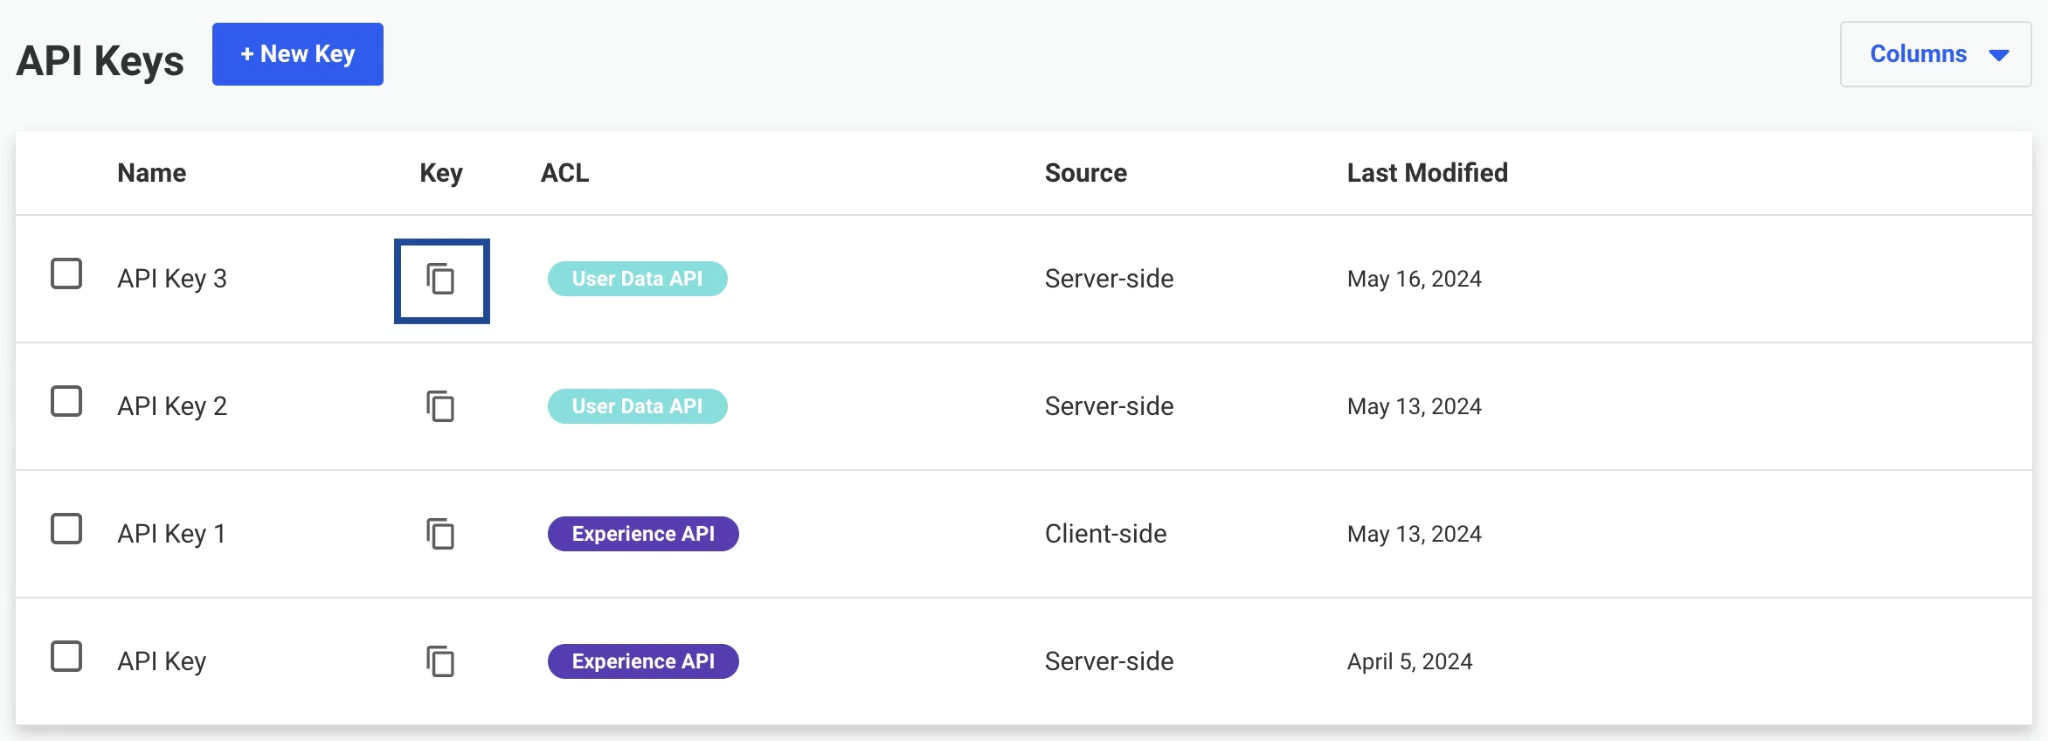
 The created API Key gets listed on the API Keys page. Copy it to use while creating the destination in Zeotap CDP.
 ## Create a Destination for Dynamic Yield (RealTime)
Once the prerequisites are in place, perform the following steps to create the destination in Zeotap CDP:
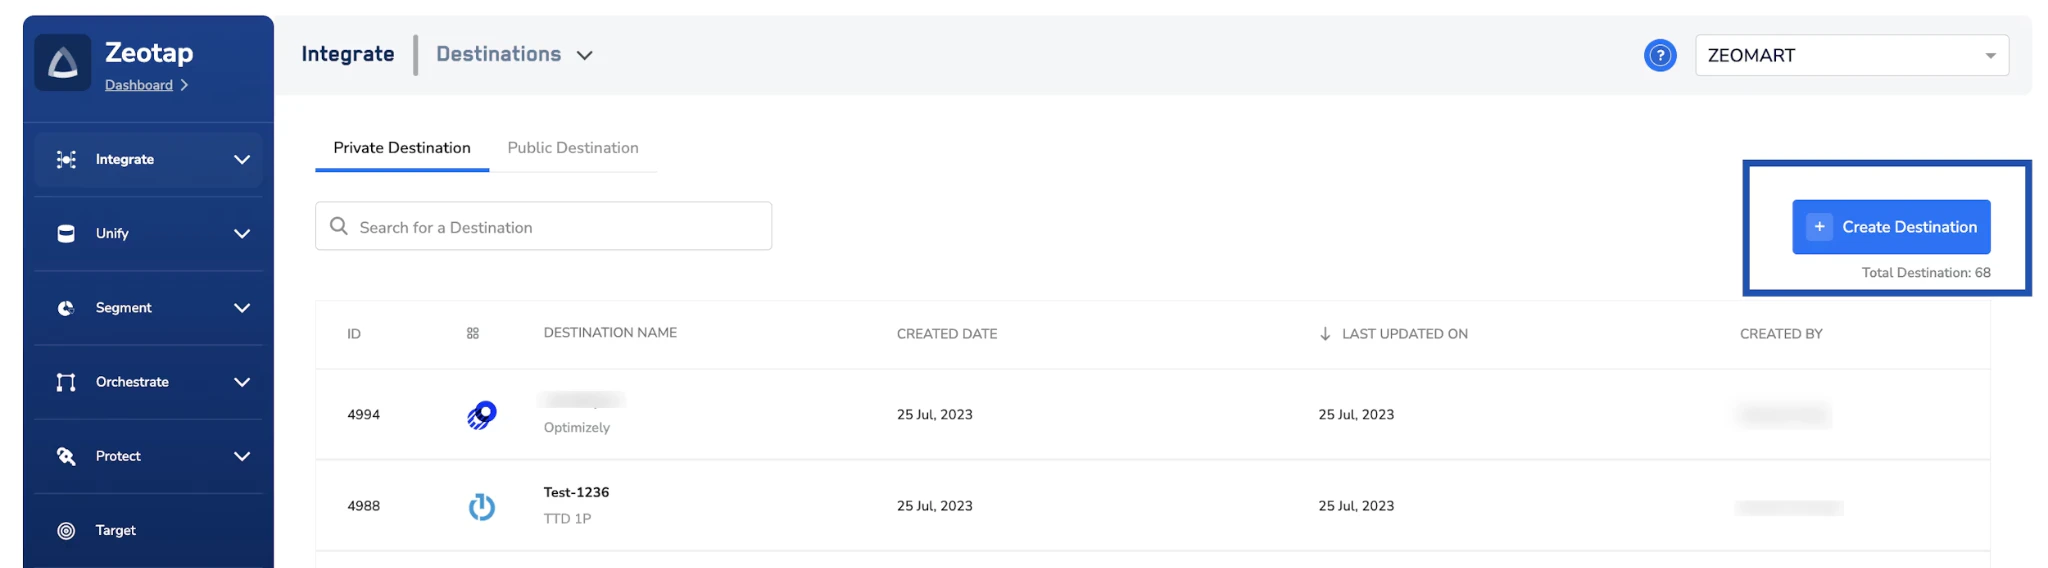
Log in to the **Zeotap CDP** app and go to the **Destinations** application.
Click **+ Create Destination**.
## Create a Destination for Dynamic Yield (RealTime)
Once the prerequisites are in place, perform the following steps to create the destination in Zeotap CDP:
Log in to the **Zeotap CDP** app and go to the **Destinations** application.
Click **+ Create Destination**.
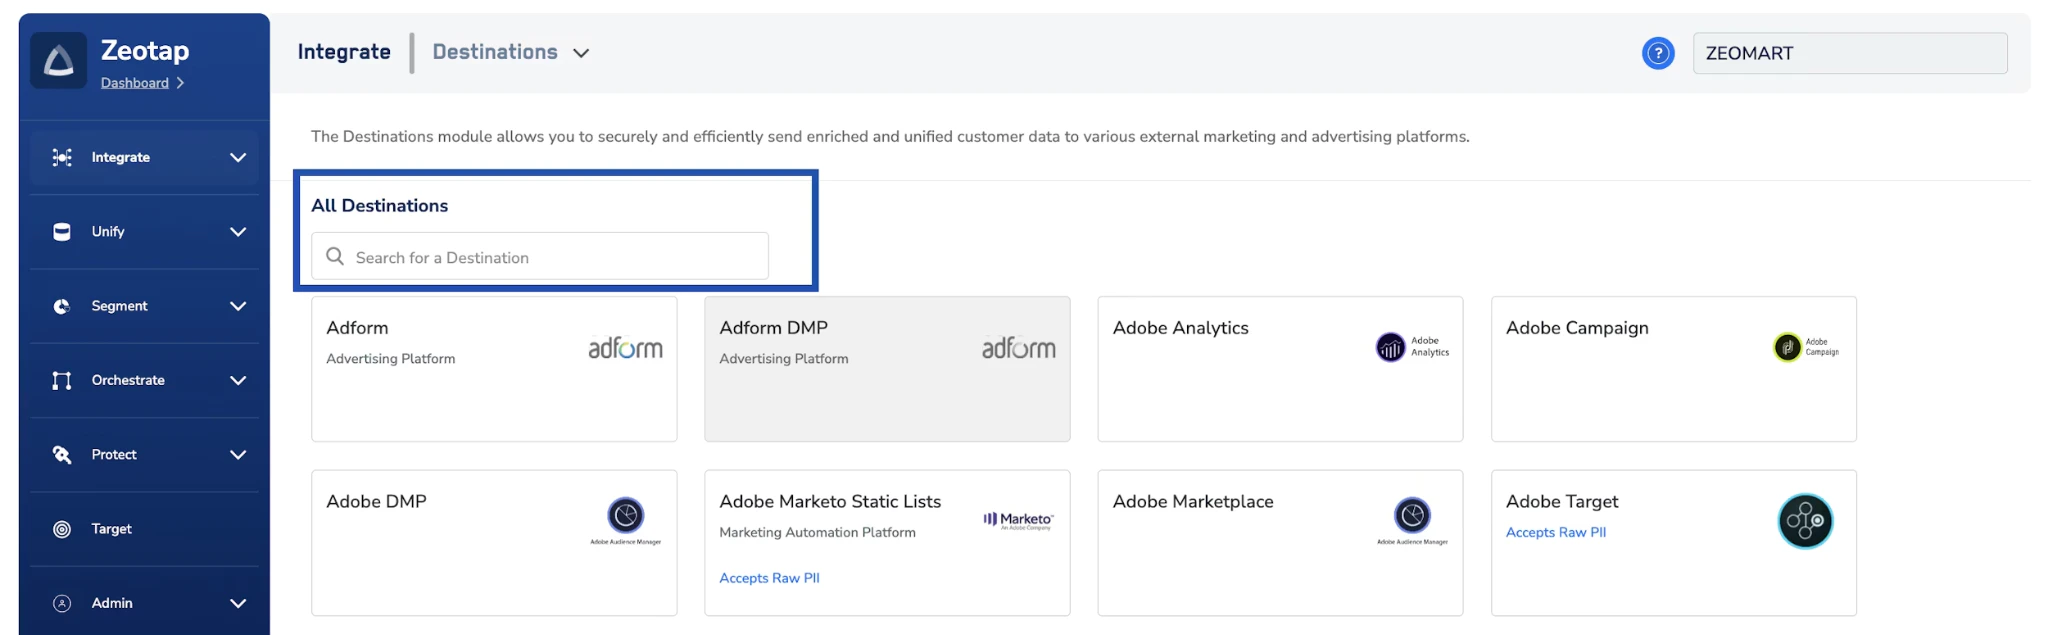
 Under **All Destinations**, search for **Dynamic Yield**.
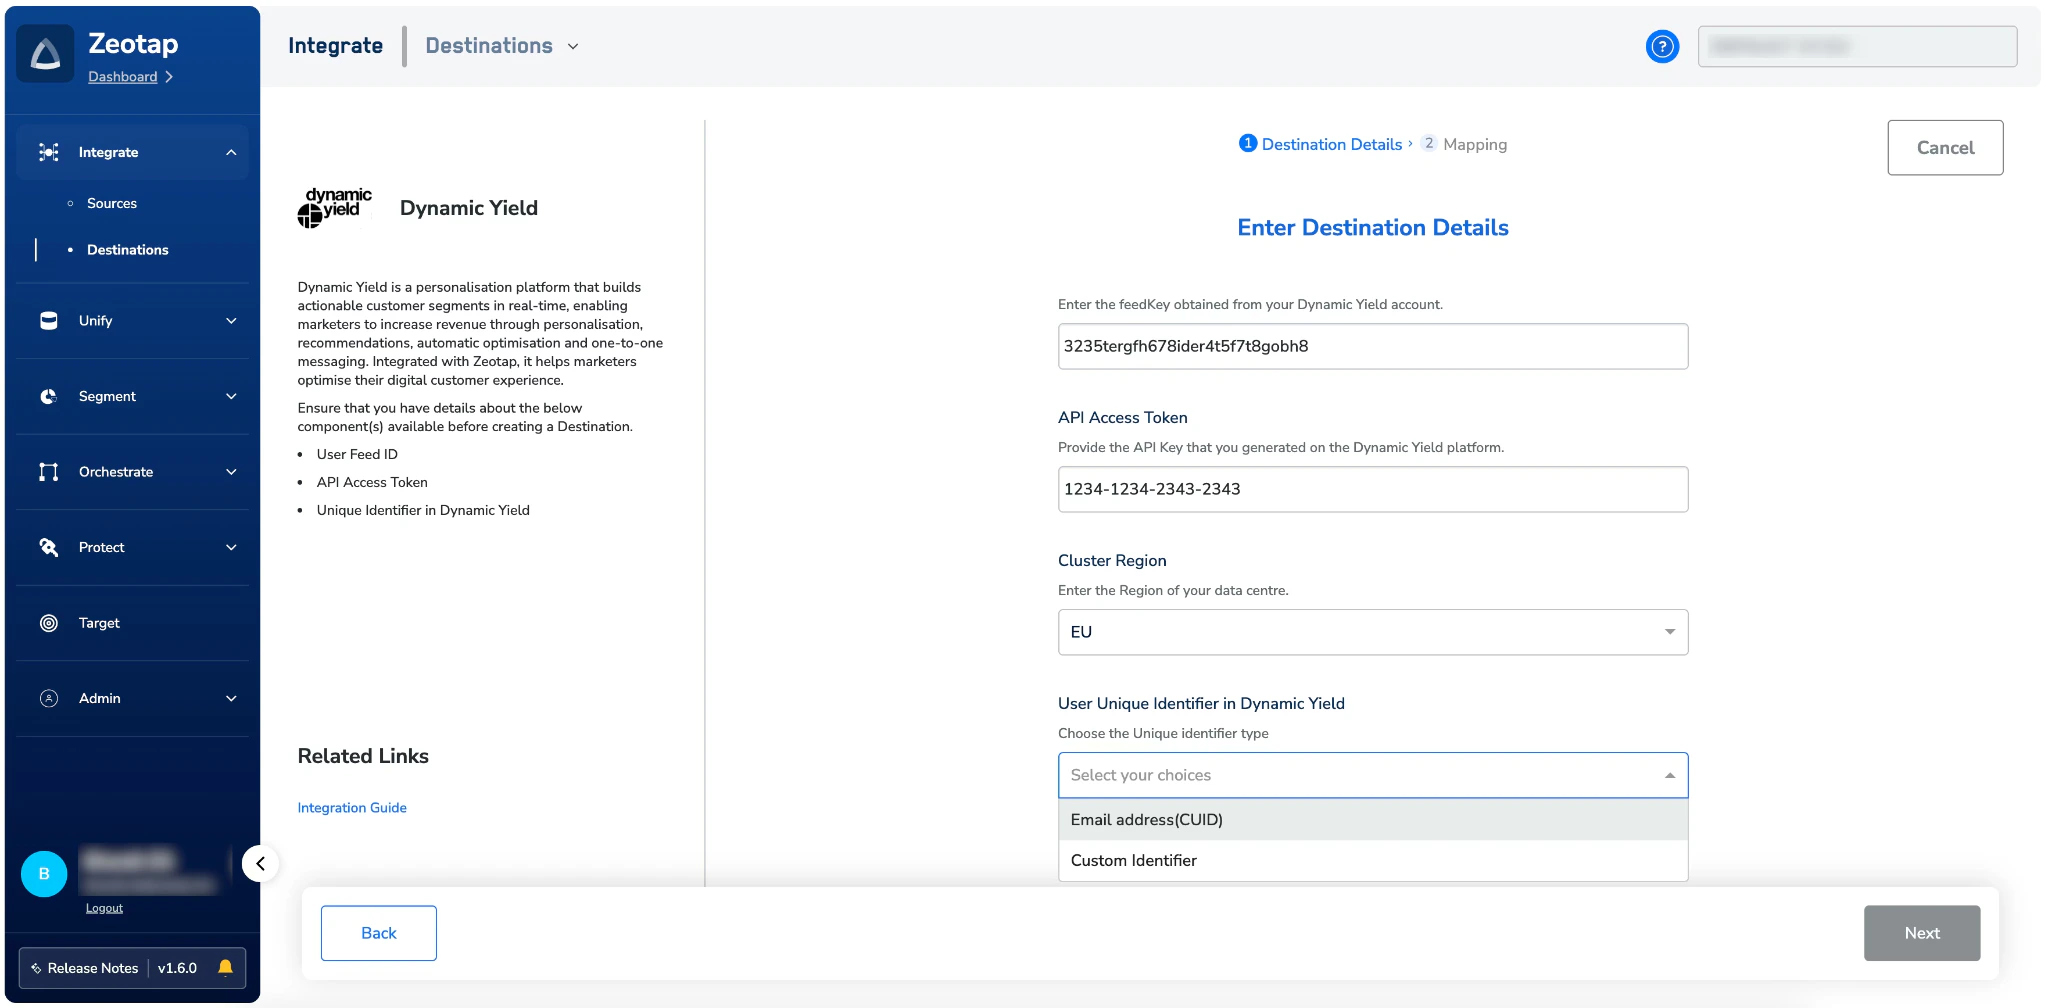
 Click **Dynamic Yield**. On the **Enter Destination Details** screen, the left panel describes the integration; enter your credentials on the right:
a. Enter a **Name** for the destination.
b. Enter the **User Feed ID** and **API Access Token** obtained from Dynamic Yield.
c. Under **Cluster Region**, choose the region of your Dynamic Yield data centre.
d. Under **User Unique Identifier in Dynamic Yield**, choose the unique identifier that matches what you selected when creating the User Data Feed in Dynamic Yield. You can choose **Hashed Email Address** or **Custom Identifier**.
* If you choose **Hashed Email Address**, the Unique Identifier for Email field is auto-populated with the value `ihe`.
* If you choose **Custom Identifier**, enter the exact identifier name as defined in Dynamic Yield. This name will also be used in the mapping screen, so ensure it matches your Dynamic Yield configuration precisely.
e. Review all values and click **Next** to proceed to mapping.
Click **Dynamic Yield**. On the **Enter Destination Details** screen, the left panel describes the integration; enter your credentials on the right:
a. Enter a **Name** for the destination.
b. Enter the **User Feed ID** and **API Access Token** obtained from Dynamic Yield.
c. Under **Cluster Region**, choose the region of your Dynamic Yield data centre.
d. Under **User Unique Identifier in Dynamic Yield**, choose the unique identifier that matches what you selected when creating the User Data Feed in Dynamic Yield. You can choose **Hashed Email Address** or **Custom Identifier**.
* If you choose **Hashed Email Address**, the Unique Identifier for Email field is auto-populated with the value `ihe`.
* If you choose **Custom Identifier**, enter the exact identifier name as defined in Dynamic Yield. This name will also be used in the mapping screen, so ensure it matches your Dynamic Yield configuration precisely.
e. Review all values and click **Next** to proceed to mapping.
 On the **Action and Mapping** screen, select **Send attributes and identifiers to Dynamic Yield in RealTime** as the action. The Destination fields are pre-populated — you only need to select the corresponding Catalogue fields on the left:
* **CUID (Customer Unique Identifier)** — Against the **CUID** destination field, select the identifier you configured during destination creation from the **Catalogue** dropdown (your hashed email address or your custom identifier).
* **Journey ID** — Against the **Journey ID** destination field, open the **Catalogue** dropdown and switch to the **Platform Attributes** tab. Select **Journey ID** from the list. When a user qualifies for a Journey in Zeotap, the corresponding Journey ID is automatically sent to Dynamic Yield in real time, enabling personalisation based on the Journey the user is currently enrolled in.
On the **Action and Mapping** screen, select **Send attributes and identifiers to Dynamic Yield in RealTime** as the action. The Destination fields are pre-populated — you only need to select the corresponding Catalogue fields on the left:
* **CUID (Customer Unique Identifier)** — Against the **CUID** destination field, select the identifier you configured during destination creation from the **Catalogue** dropdown (your hashed email address or your custom identifier).
* **Journey ID** — Against the **Journey ID** destination field, open the **Catalogue** dropdown and switch to the **Platform Attributes** tab. Select **Journey ID** from the list. When a user qualifies for a Journey in Zeotap, the corresponding Journey ID is automatically sent to Dynamic Yield in real time, enabling personalisation based on the Journey the user is currently enrolled in.
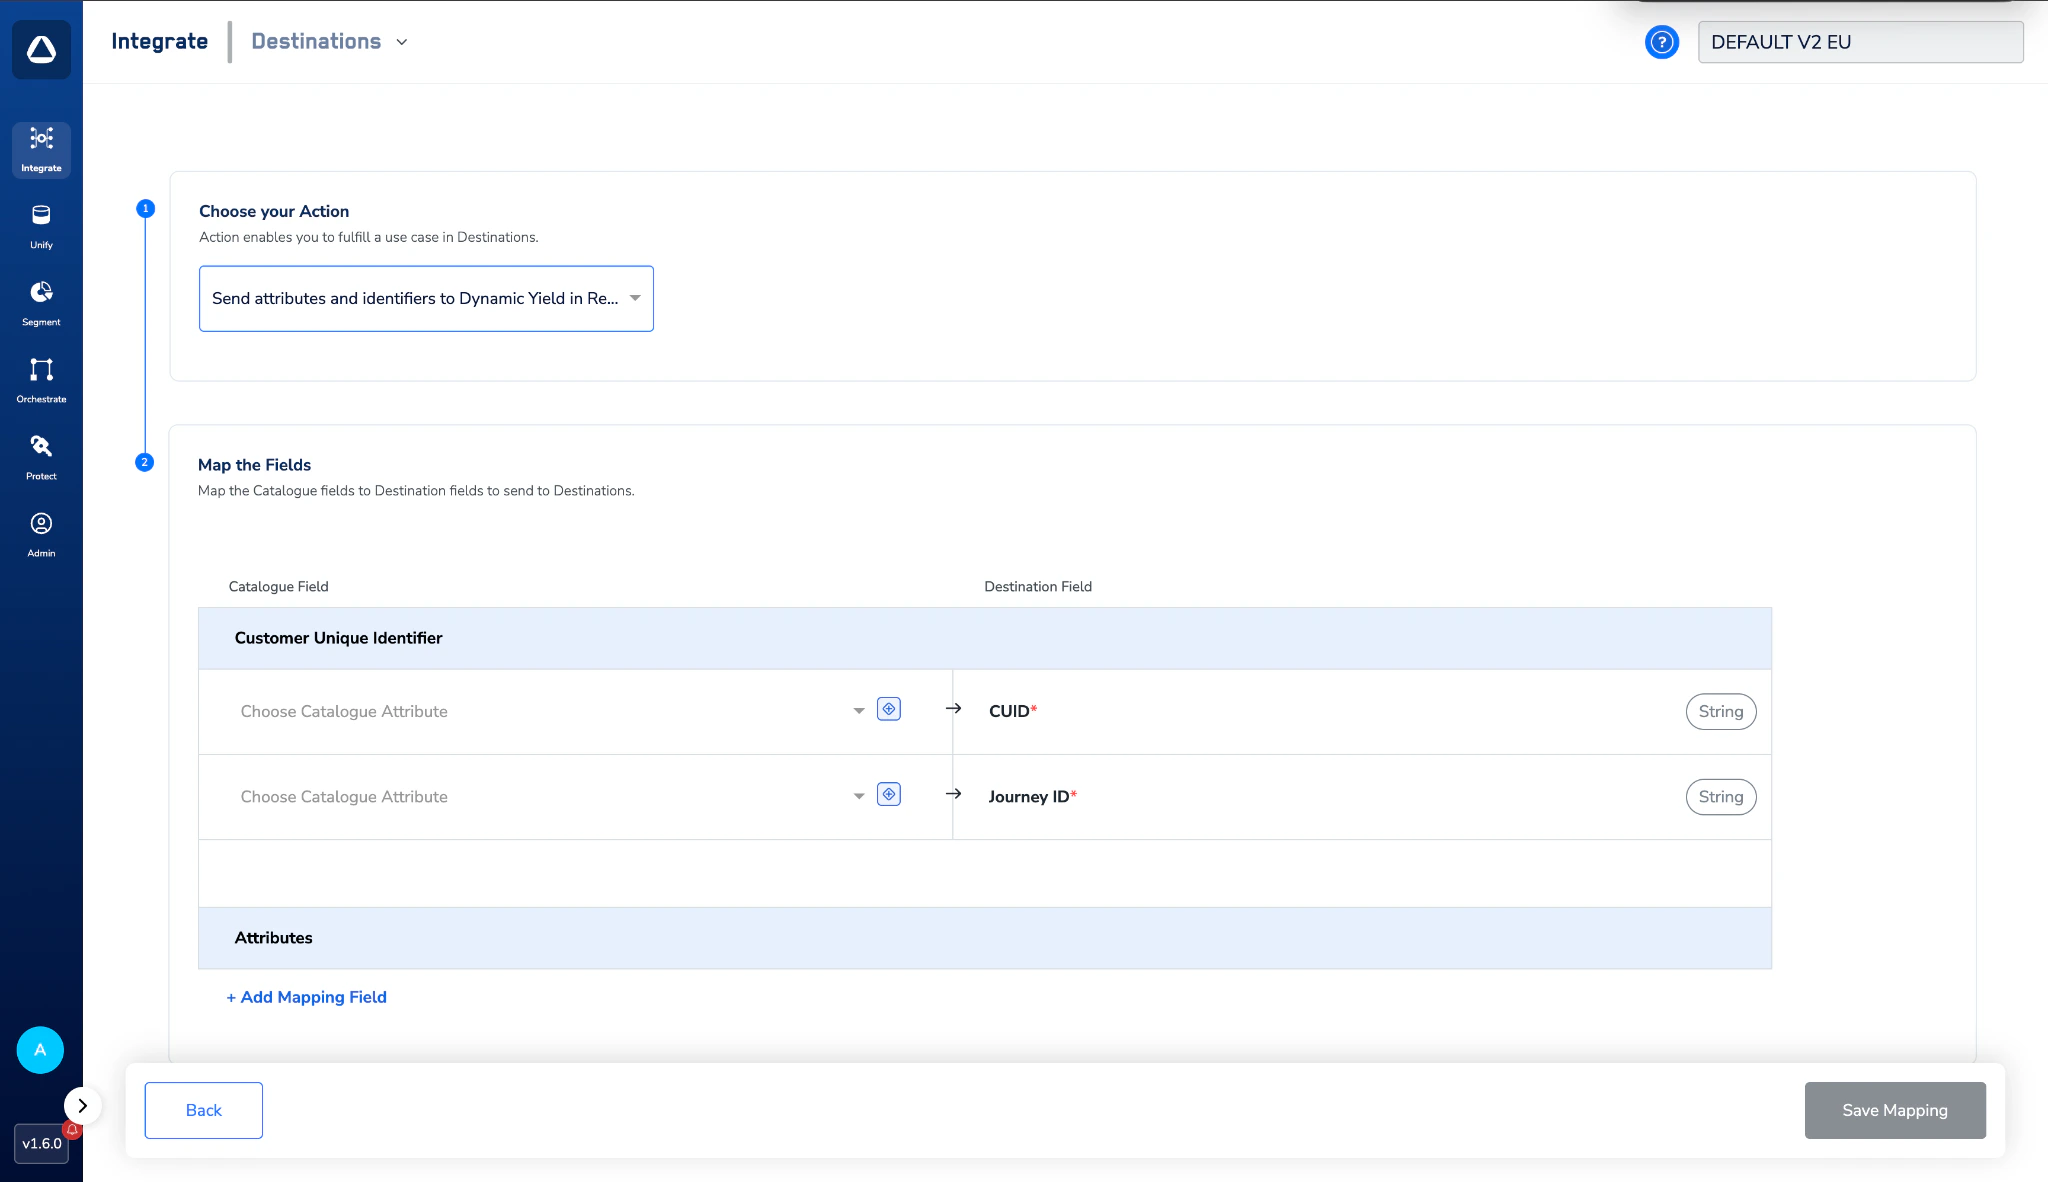 The custom CUID nomenclature entered here must be identical to the identifier you defined in Dynamic Yield and provided during the destination setup.
Once all mappings are complete, click **Create Destination**. The destination is now listed in the **Journeys** application and can be linked to a Journey.
## Activate the Destination on Journeys
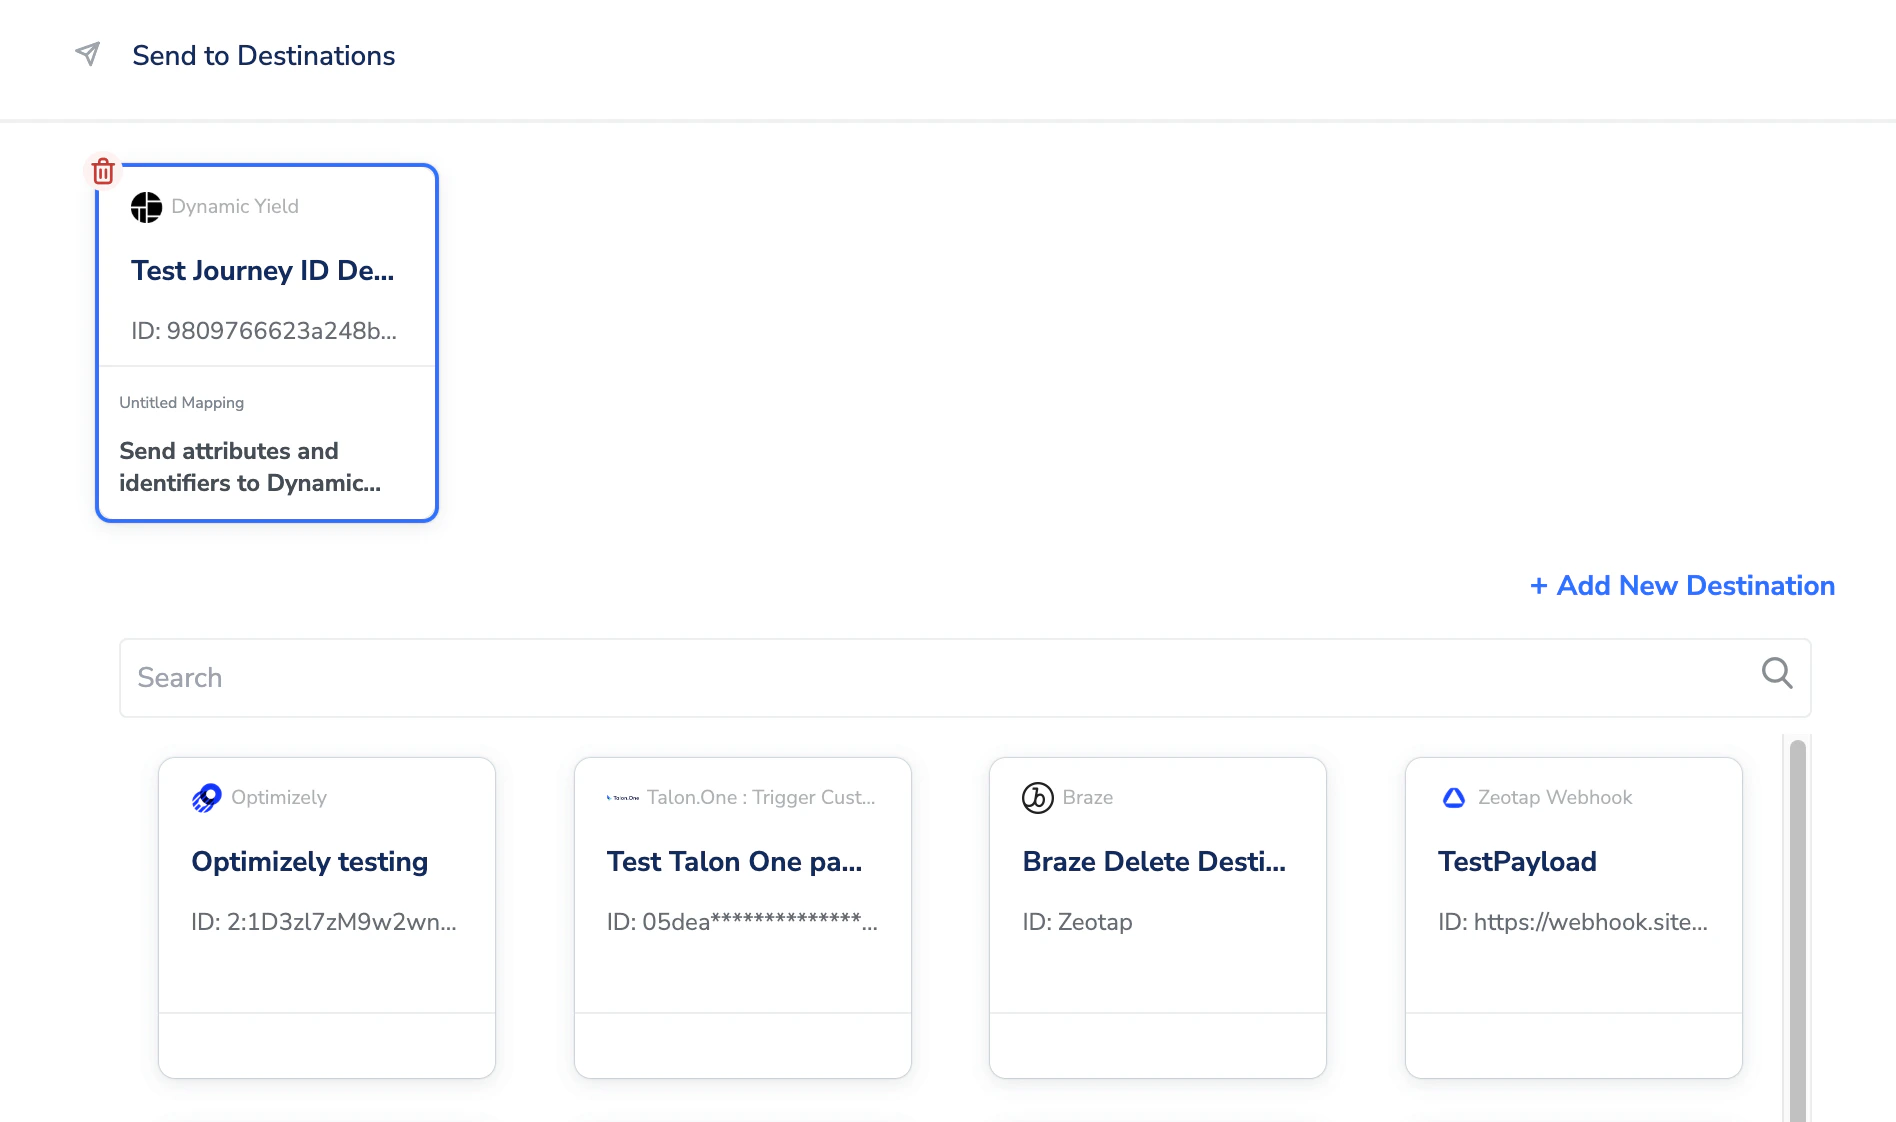
After creating the destination, link it inside the **Send to Destinations** node within a Journey workflow:
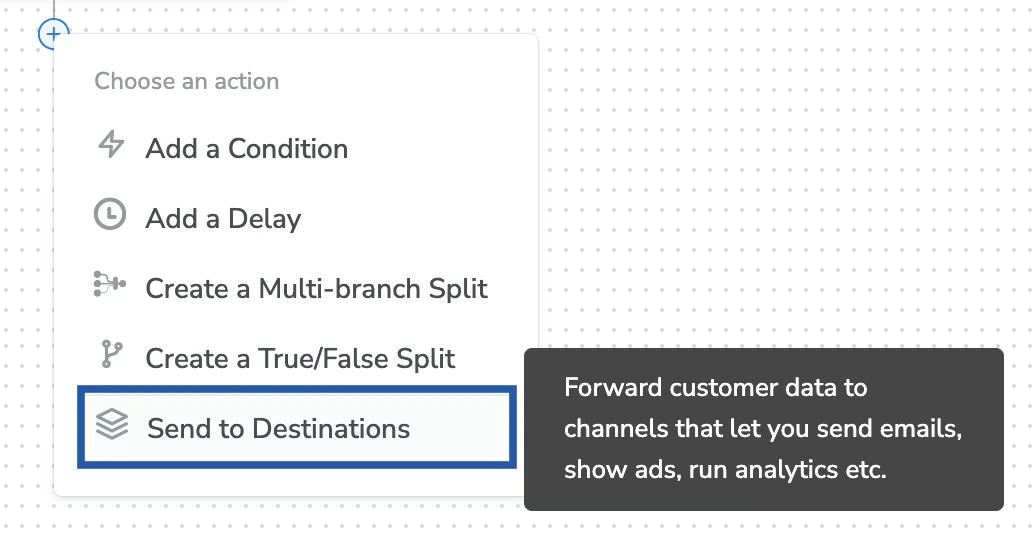
In the workflow, click **+** and choose **Send to Destinations**.
The custom CUID nomenclature entered here must be identical to the identifier you defined in Dynamic Yield and provided during the destination setup.
Once all mappings are complete, click **Create Destination**. The destination is now listed in the **Journeys** application and can be linked to a Journey.
## Activate the Destination on Journeys
After creating the destination, link it inside the **Send to Destinations** node within a Journey workflow:
In the workflow, click **+** and choose **Send to Destinations**.
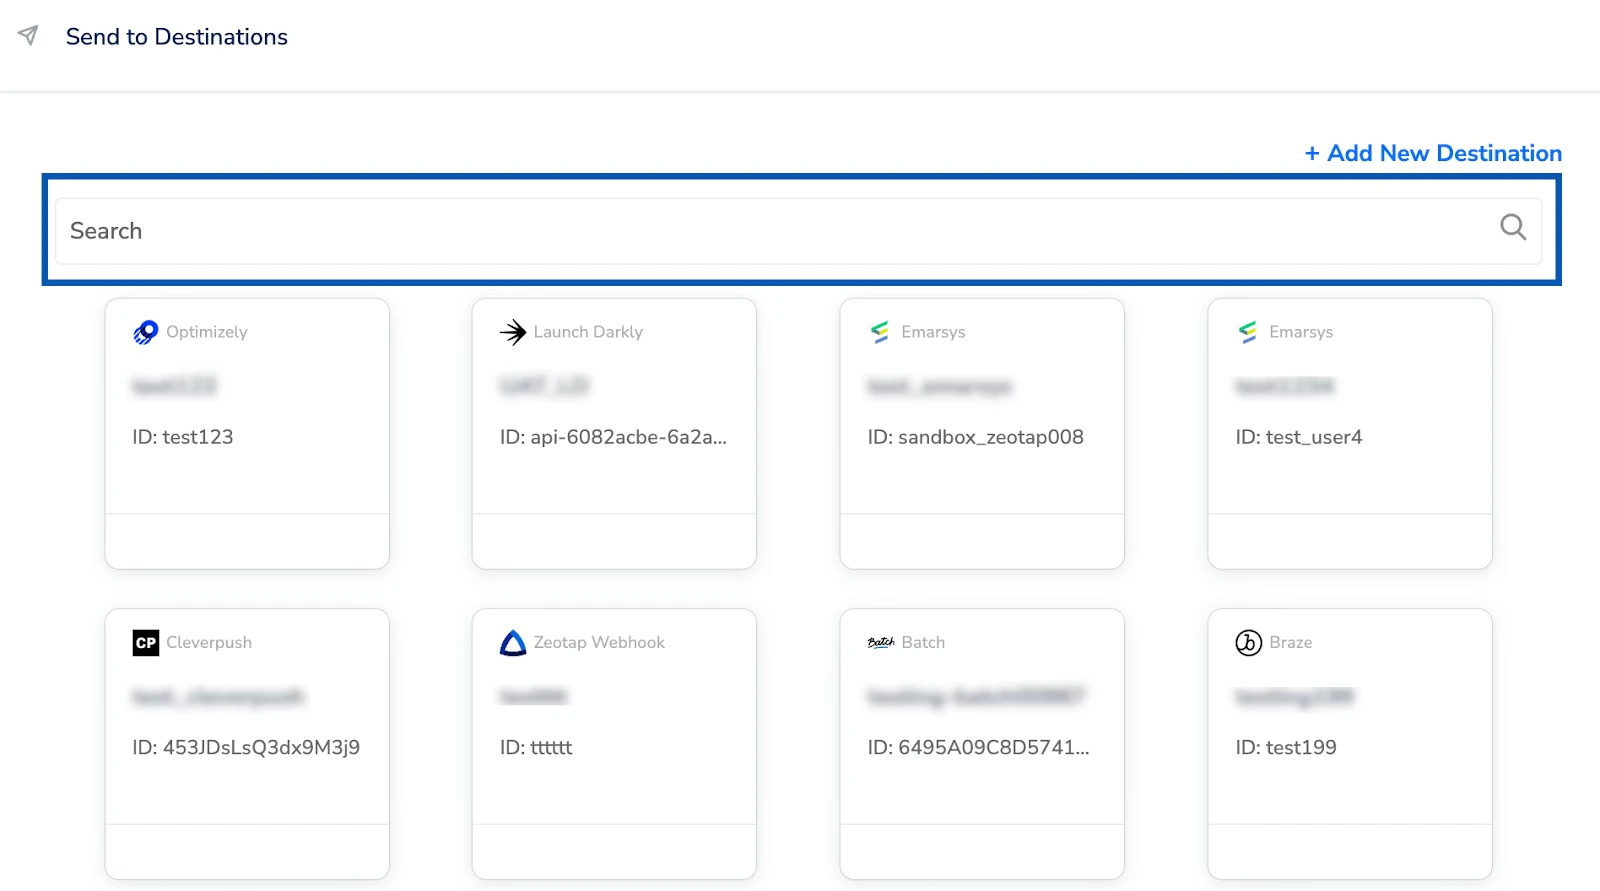
 Choose the Dynamic Yield destination from the list of available destinations using the search box.
 Under the **Destination Details** tab, the relevant fields are automatically populated based on the values entered while creating the destination.
Click **Save Destination**. The destination is now attached to the Journey node and will receive the Journey ID for every user who qualifies for that Journey in real time.
Under the **Destination Details** tab, the relevant fields are automatically populated based on the values entered while creating the destination.
Click **Save Destination**. The destination is now attached to the Journey node and will receive the Journey ID for every user who qualifies for that Journey in real time.
 The terms *Audiences* and *Segments* are used interchangeably to refer to customer cohorts belonging to a specific category. For example, an Audience or a segment can be a specific group of customers who are over 18 years of age and have performed an `addToCart` event within the last 30 days.
## Create Audiences and Campaigns in Dynamic Yield
To create audiences in Dynamic Yield using the Journey ID streamed from Zeotap, perform the following steps:
Log in to the Dynamic Yield UI with your credentials.
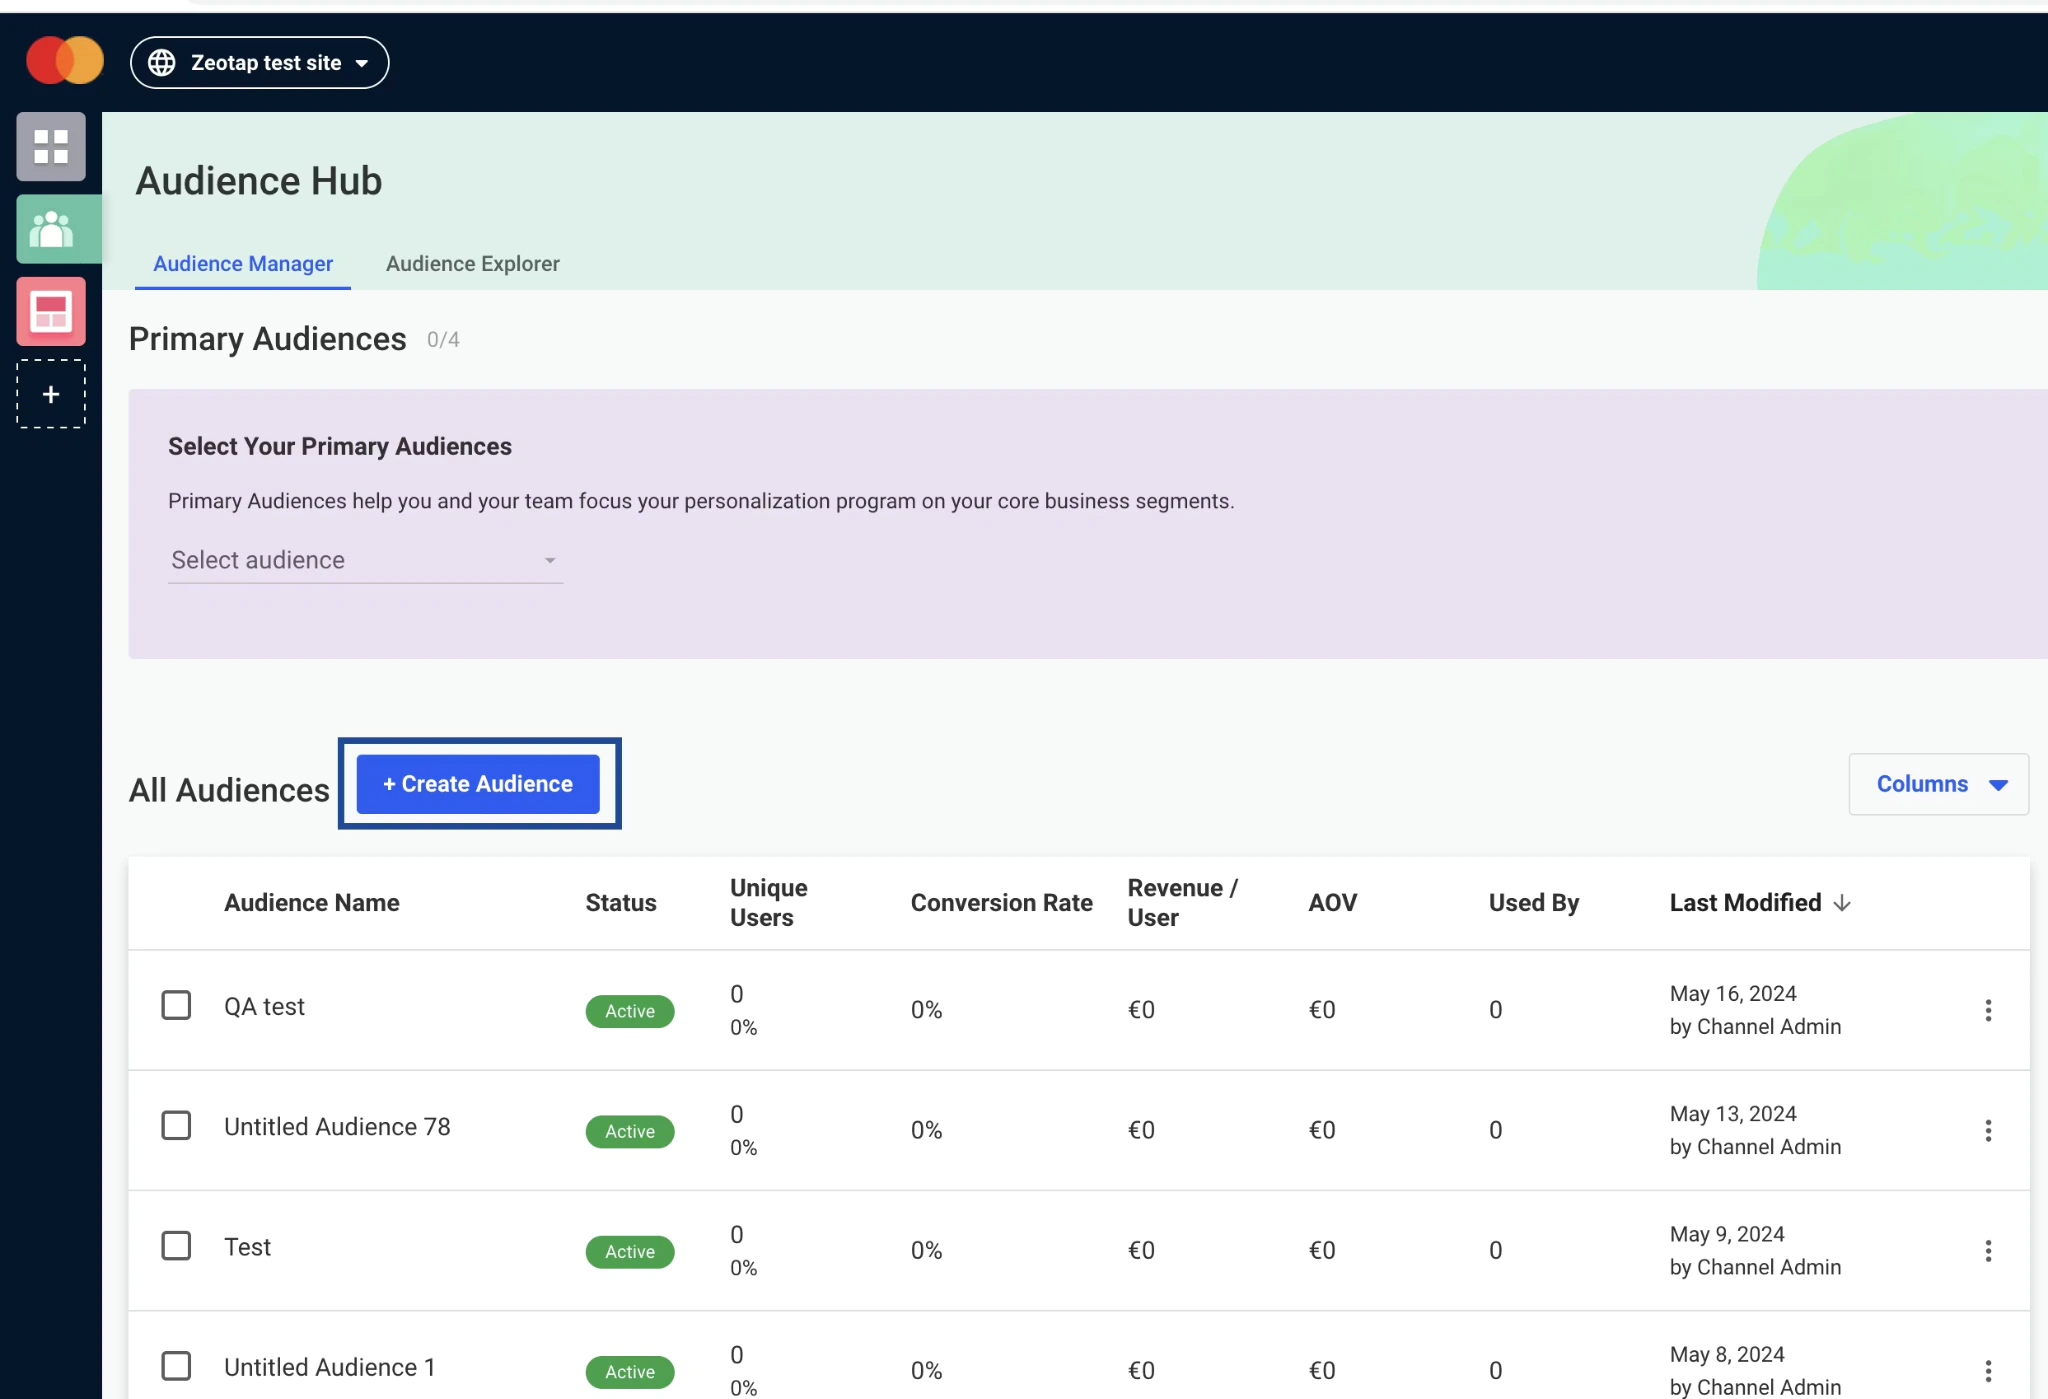
Under the **Audience** tab, go to **Audience Manager** and click **Create Audience**.
The terms *Audiences* and *Segments* are used interchangeably to refer to customer cohorts belonging to a specific category. For example, an Audience or a segment can be a specific group of customers who are over 18 years of age and have performed an `addToCart` event within the last 30 days.
## Create Audiences and Campaigns in Dynamic Yield
To create audiences in Dynamic Yield using the Journey ID streamed from Zeotap, perform the following steps:
Log in to the Dynamic Yield UI with your credentials.
Under the **Audience** tab, go to **Audience Manager** and click **Create Audience**.
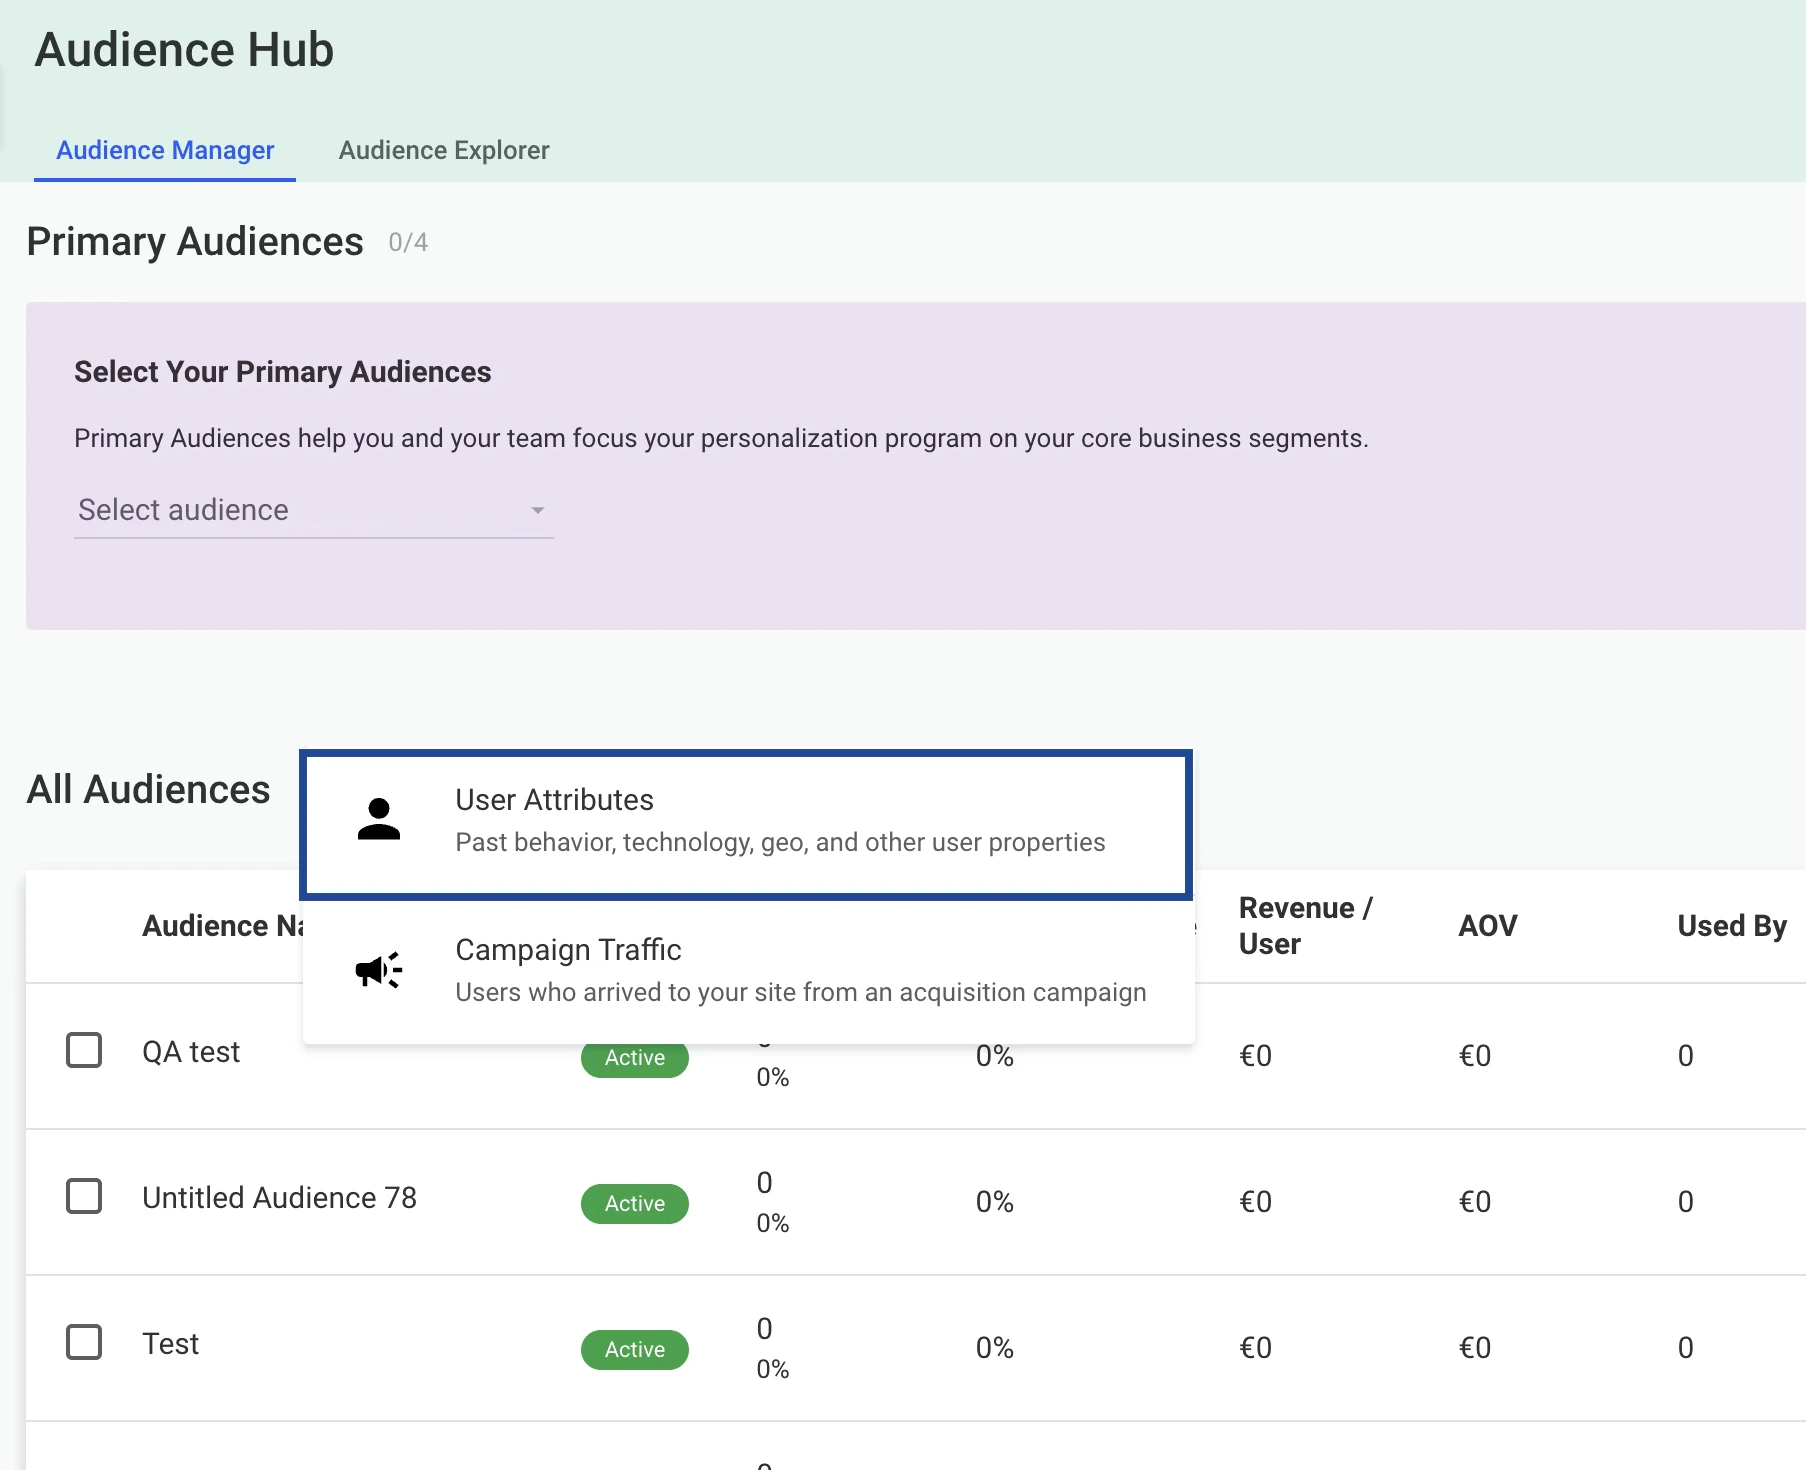
 From the options, select **User Attributes**.
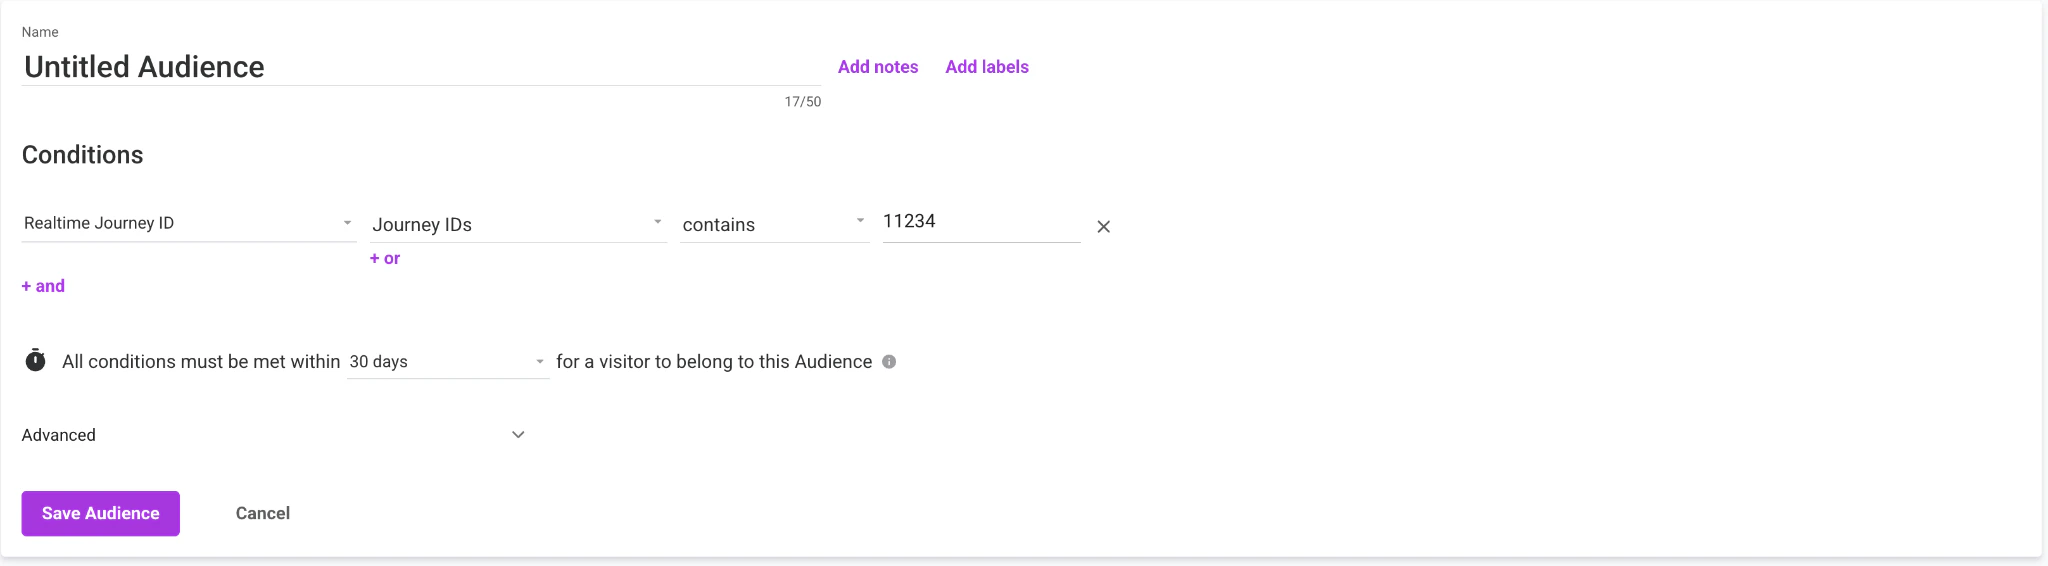
 Enter a name for the Audience.
Under **Conditions**, provide the following:
a. In the first field, choose the **User Data Feed** to include for this Audience.
b. In the second field, select **Realtime Journey ID** (or any other identifier or attribute you have sent from Zeotap). You can add any number of attributes by adding new conditions.
c. In the third field, choose the operator (for example, `Is`, `contains`, `equals`).
d. In the fourth field, choose the desired value from the dropdown — values populate based on the User Data Feed chosen.
e. Set the timeframe of the condition up to **30 days**. Options for 3 months or 1 year are available but cannot be selected — selecting them shows the error *"Projected performance is not supported for audience time frame over 30 days"*.
f. Once all the conditions are set, click **Save Audience**.
Enter a name for the Audience.
Under **Conditions**, provide the following:
a. In the first field, choose the **User Data Feed** to include for this Audience.
b. In the second field, select **Realtime Journey ID** (or any other identifier or attribute you have sent from Zeotap). You can add any number of attributes by adding new conditions.
c. In the third field, choose the operator (for example, `Is`, `contains`, `equals`).
d. In the fourth field, choose the desired value from the dropdown — values populate based on the User Data Feed chosen.
e. Set the timeframe of the condition up to **30 days**. Options for 3 months or 1 year are available but cannot be selected — selecting them shows the error *"Projected performance is not supported for audience time frame over 30 days"*.
f. Once all the conditions are set, click **Save Audience**.
 Under the **Projected Audience Performance** tab, you can view the projected audience size for the selected timeframe.
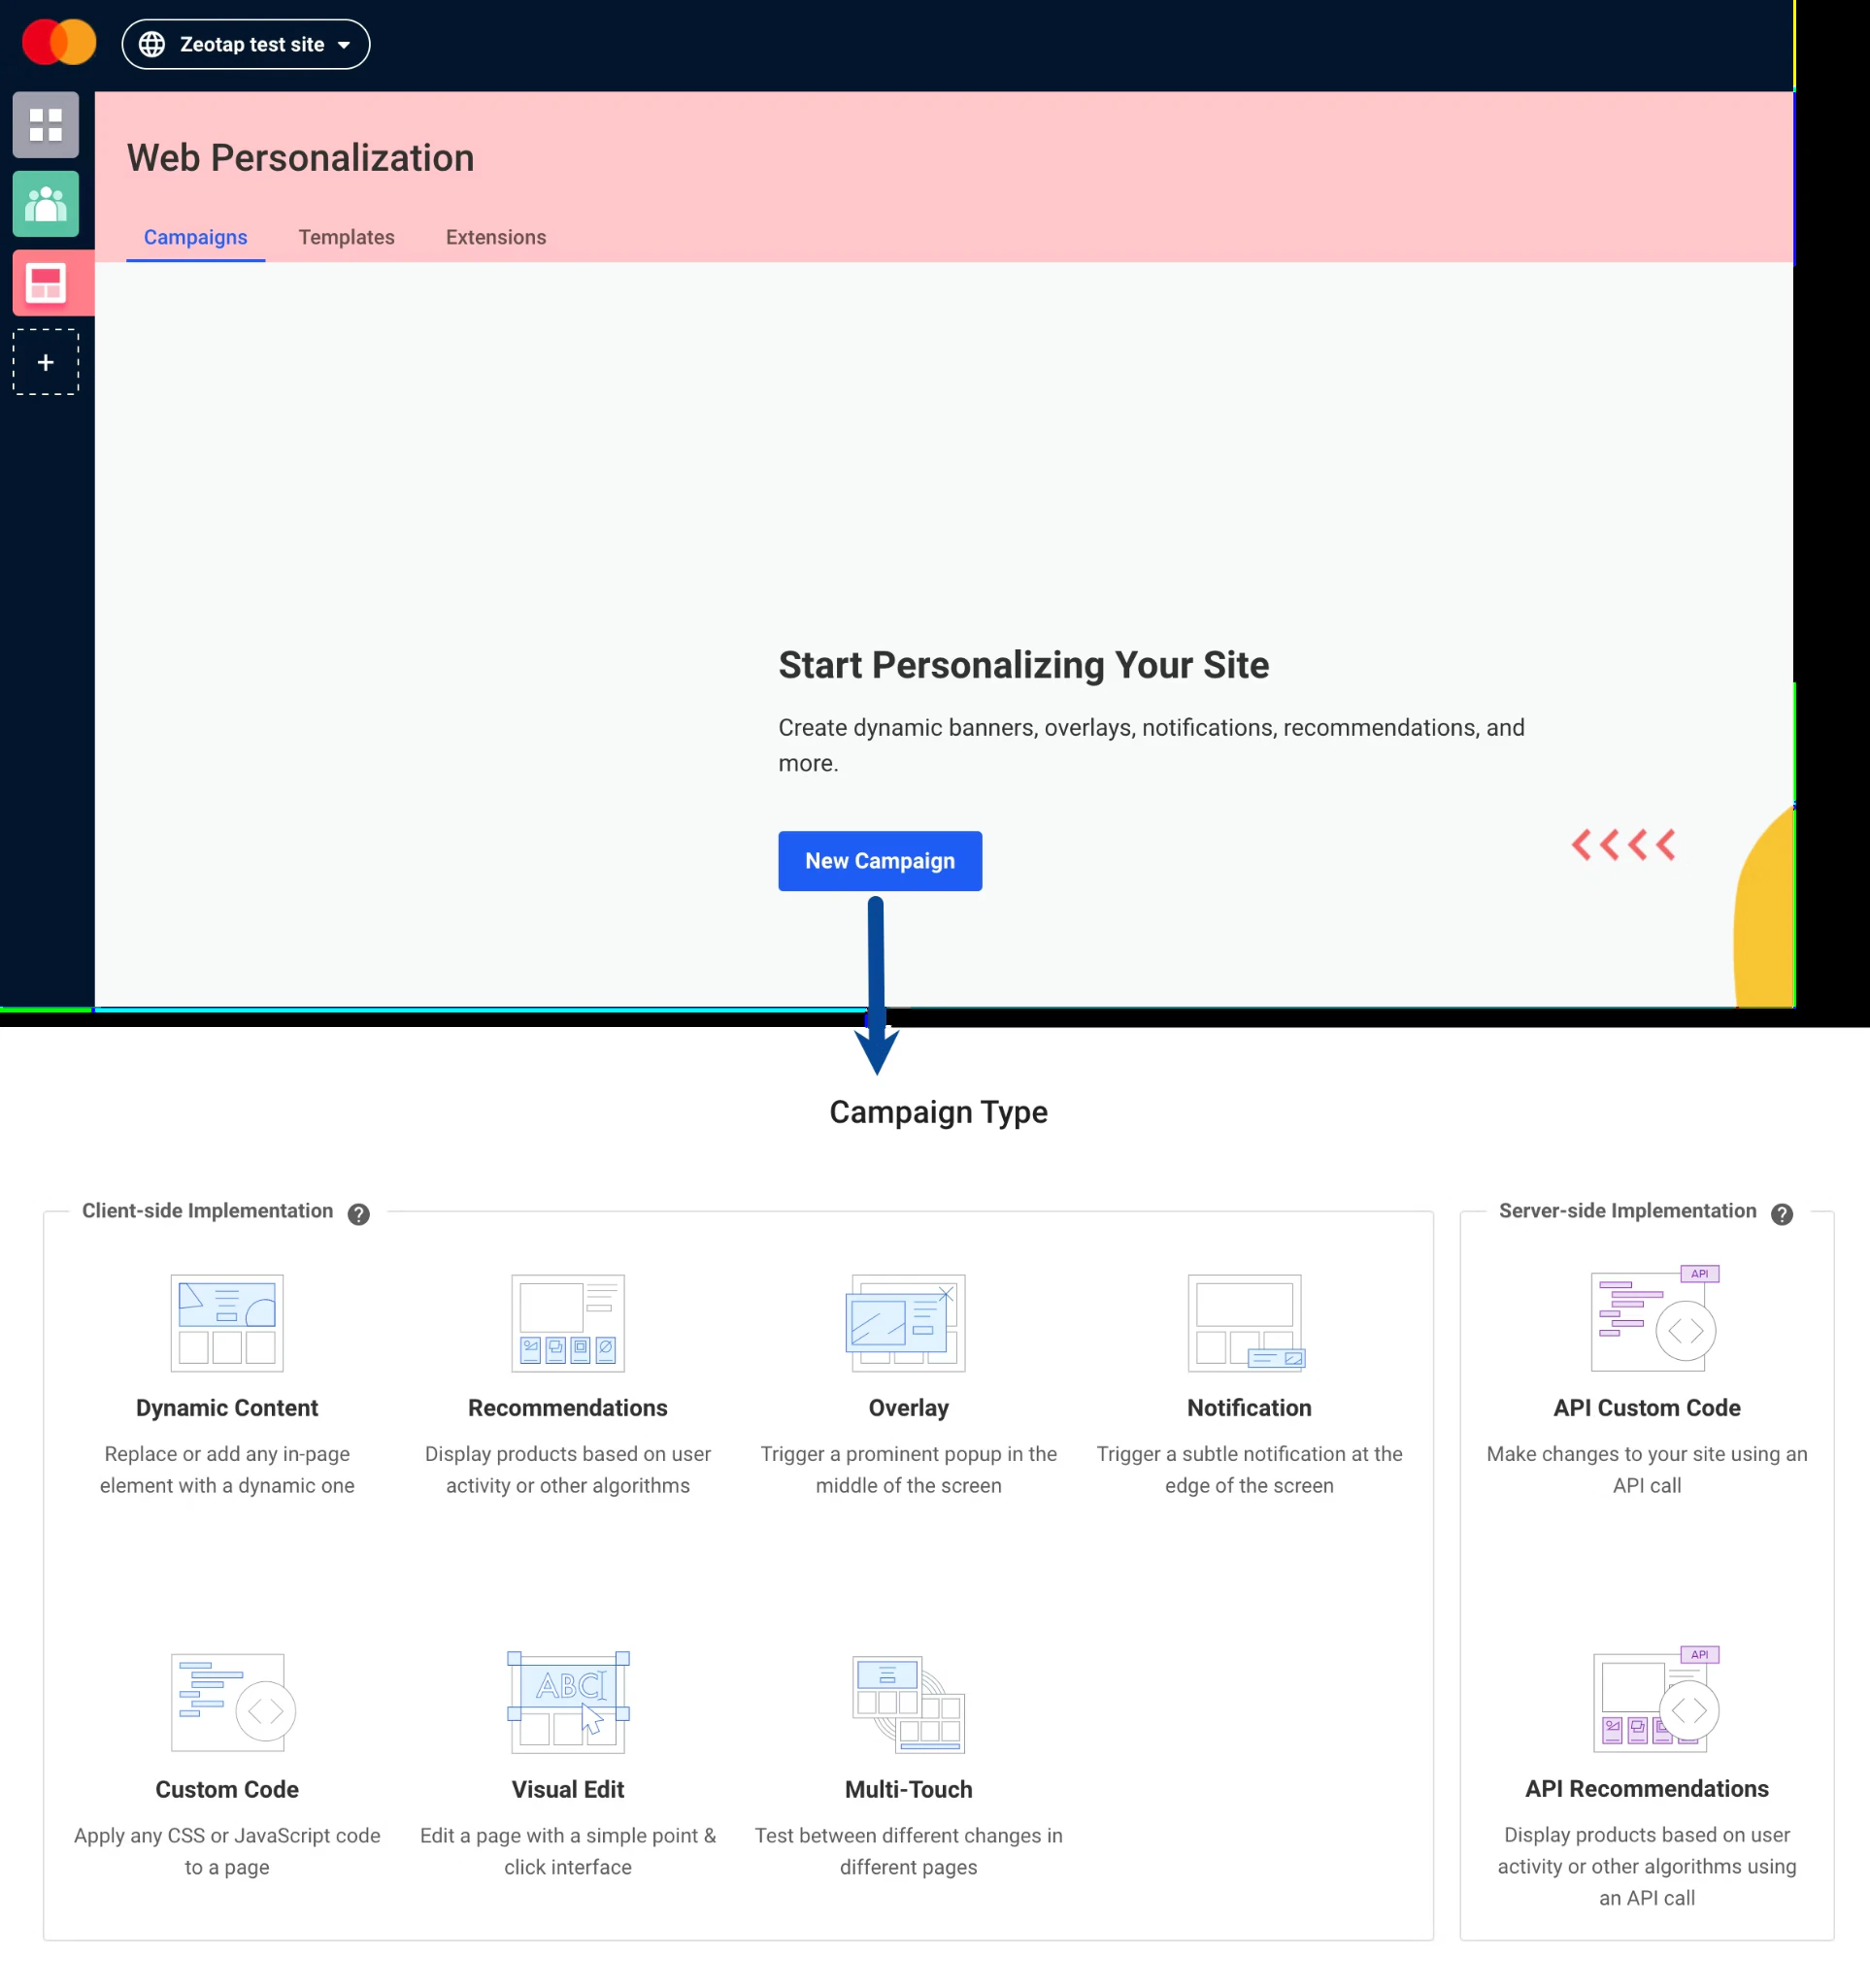
The audiences created here are used for building Campaigns under **Web Personalisation** in the Dynamic Yield interface.
Under the **Projected Audience Performance** tab, you can view the projected audience size for the selected timeframe.
The audiences created here are used for building Campaigns under **Web Personalisation** in the Dynamic Yield interface.