> ## Documentation Index
> Fetch the complete documentation index at: https://docs.zeotap.com/llms.txt
> Use this file to discover all available pages before exploring further.
# Dynamic Yield Events
## Overview
Dynamic Yield is a personalisation platform that builds actionable customer segments in real time, enabling marketers to increase revenue through personalisation, recommendations, automatic optimisation, and one-to-one messaging. The platform offers an **Events API** to capture and send real-time user interaction and behavioural data—such as page views, product views, add-to-cart actions, and purchases—into the system.
## Supported Identifiers
This integration supports SHA256 Hashed email, Phone Numbers and DYID.
## Prerequisites
Before pushing the segments to Dynamic Yield, ensure that you have set up the feed as mentioned below.
1. Create an API Key.
**Note:**
*For more information, refer to the [Dynamic Yield documentation](https://support.dynamicyield.com/hc/en-us/articles/4409595248017-Update-Your-User-Profile-Data-by-API#h_01HEQKN0GWZG127TJ14WAAJH77).*
### Step 1 - Choose Unique User Identifier or Create one
Under **Unique User Identifier**, by default, you can choose \*\*Email Address (CUID)\*\*or **DYID**. In case you want to add a custom identifier, you can do so by performing the following steps:
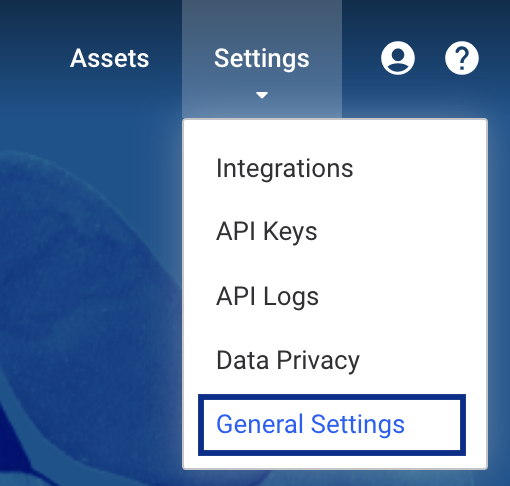
On the top bar, click **Settings** > **General Settings**.
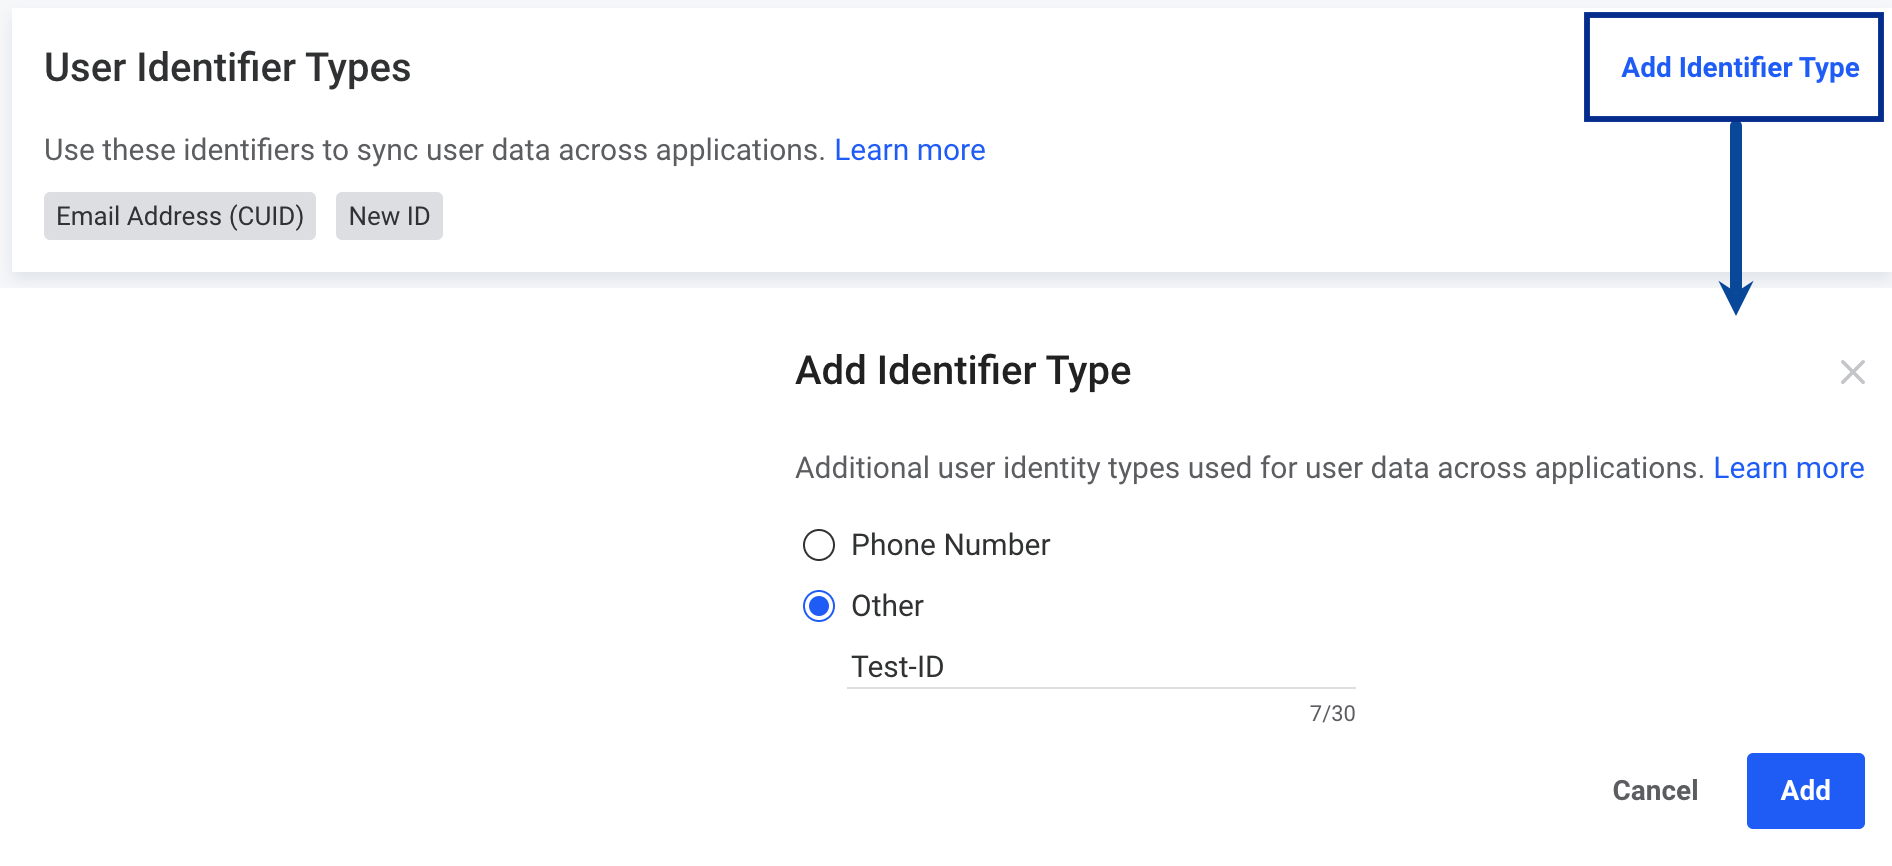
 Under **User Identifier Types**, click **Add Identifier Type**and choose either**Phone number**or \*\*Others.\*\*If you choose **Others**, then you can add a custom identifier in Dynamic Yield as shown below.
 ### Step 2: Create the API Access Token/API Key
You must create an API Key which needs to be entered while creating a destination in Zeotap CDP. To do so, perform the following steps:
In the Dynamic Yield console, click **Settings** > **API Keys**and click**New Key.**
### Step 2: Create the API Access Token/API Key
You must create an API Key which needs to be entered while creating a destination in Zeotap CDP. To do so, perform the following steps:
In the Dynamic Yield console, click **Settings** > **API Keys**and click**New Key.**
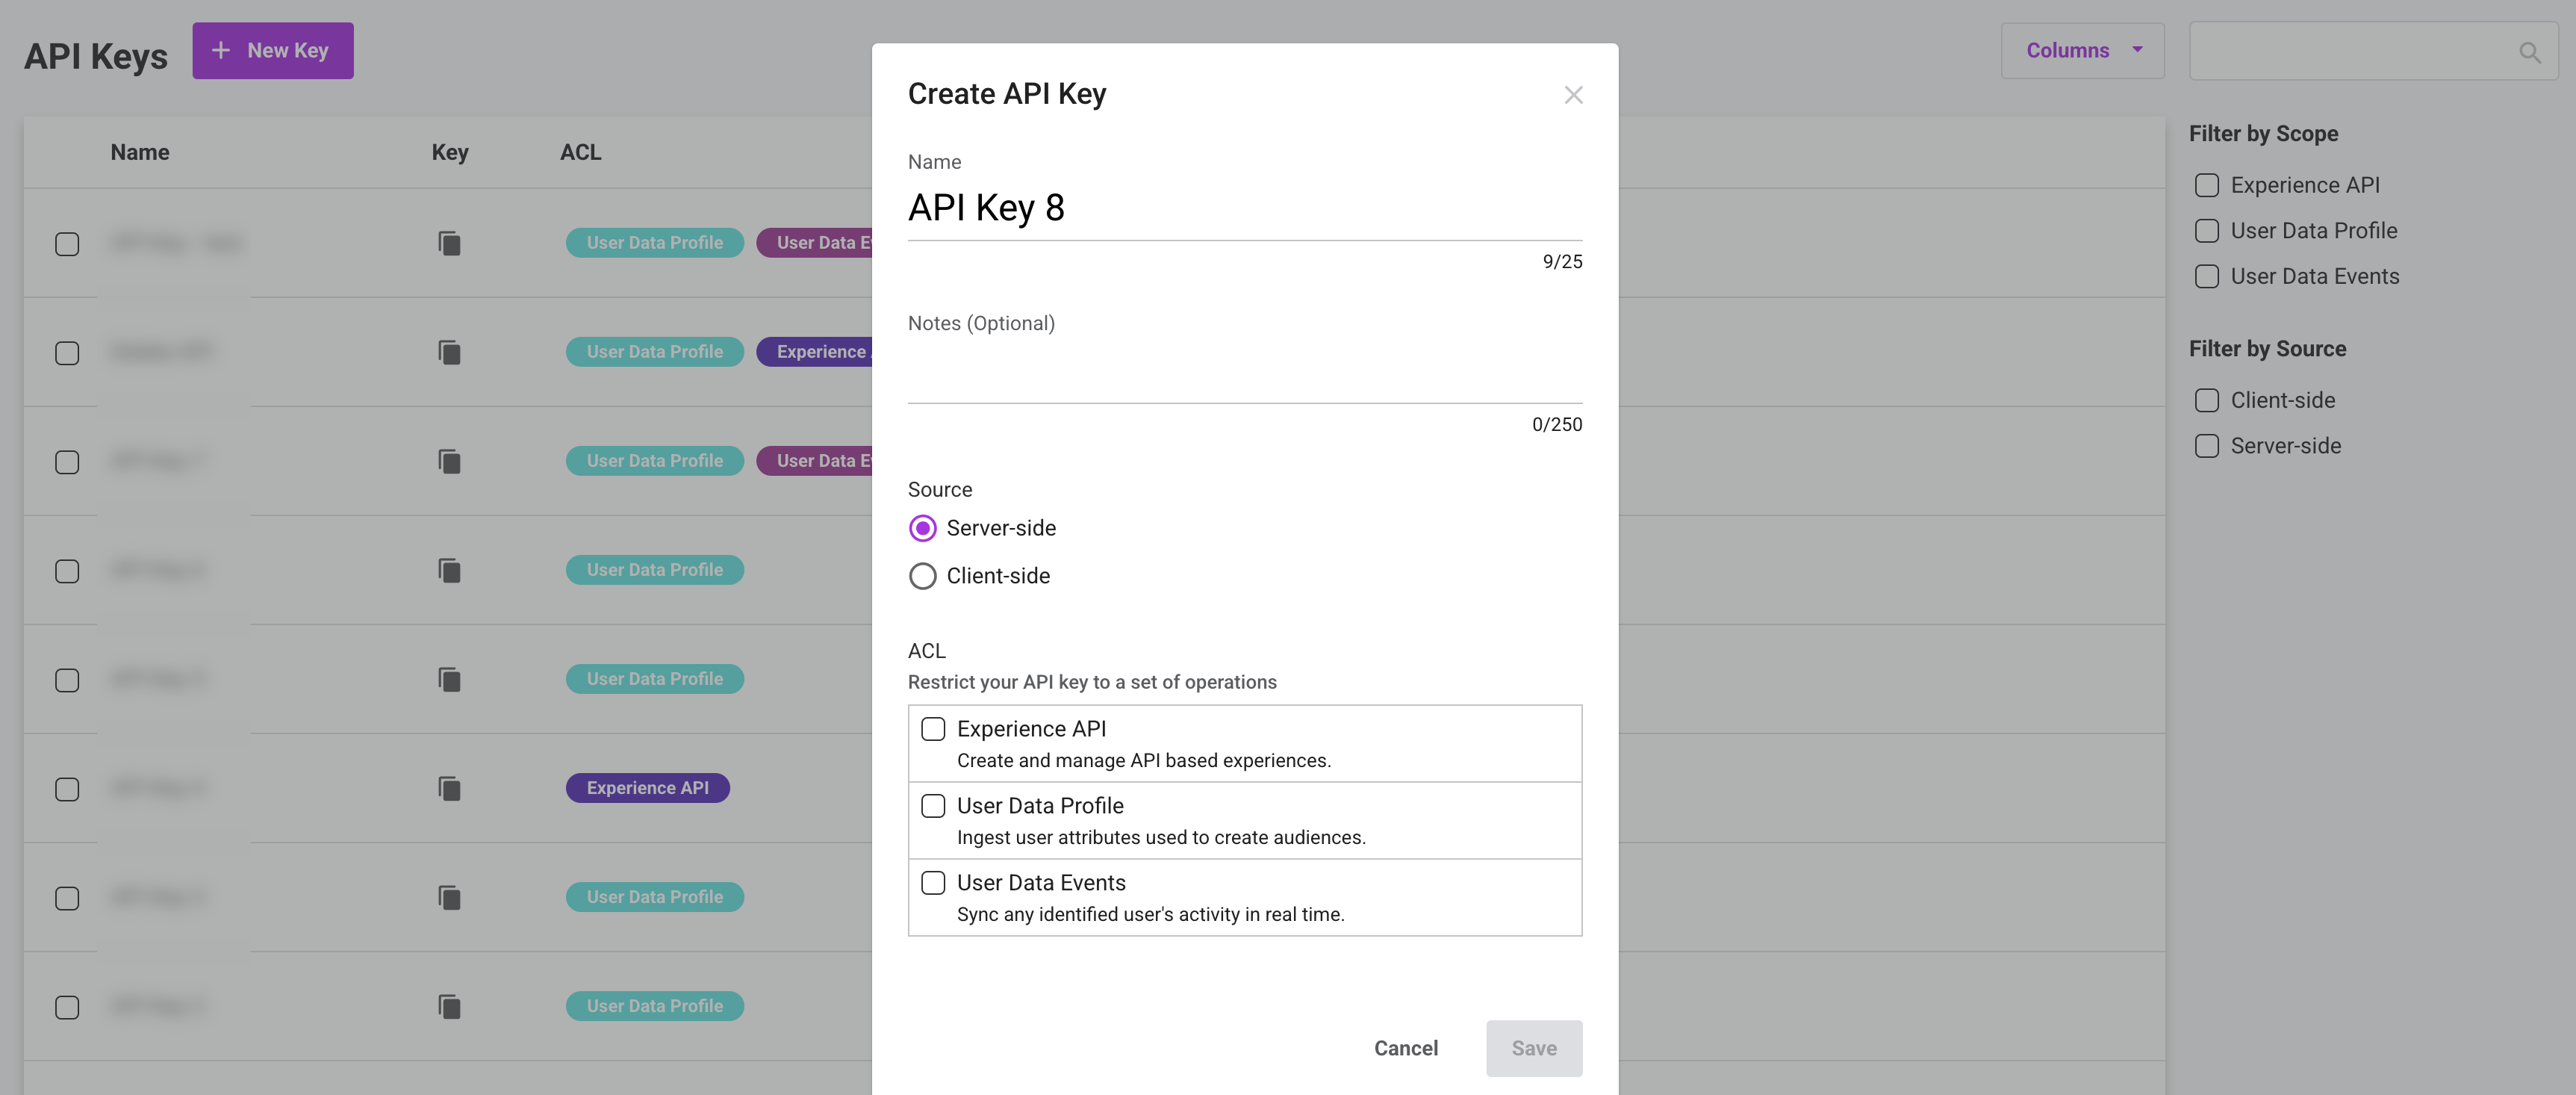
 In the window that appears, provide the following details:
a. Enter a name, and internal notes (optional).
b. For the source, select either **Server-side** or **Client-side**. Each type can be used only with its designated endpoint.
c. In the **ACL** section, use the checkbox to select the **Experience API**permission for the API Key.
d. Click **Save**.
In the window that appears, provide the following details:
a. Enter a name, and internal notes (optional).
b. For the source, select either **Server-side** or **Client-side**. Each type can be used only with its designated endpoint.
c. In the **ACL** section, use the checkbox to select the **Experience API**permission for the API Key.
d. Click **Save**.
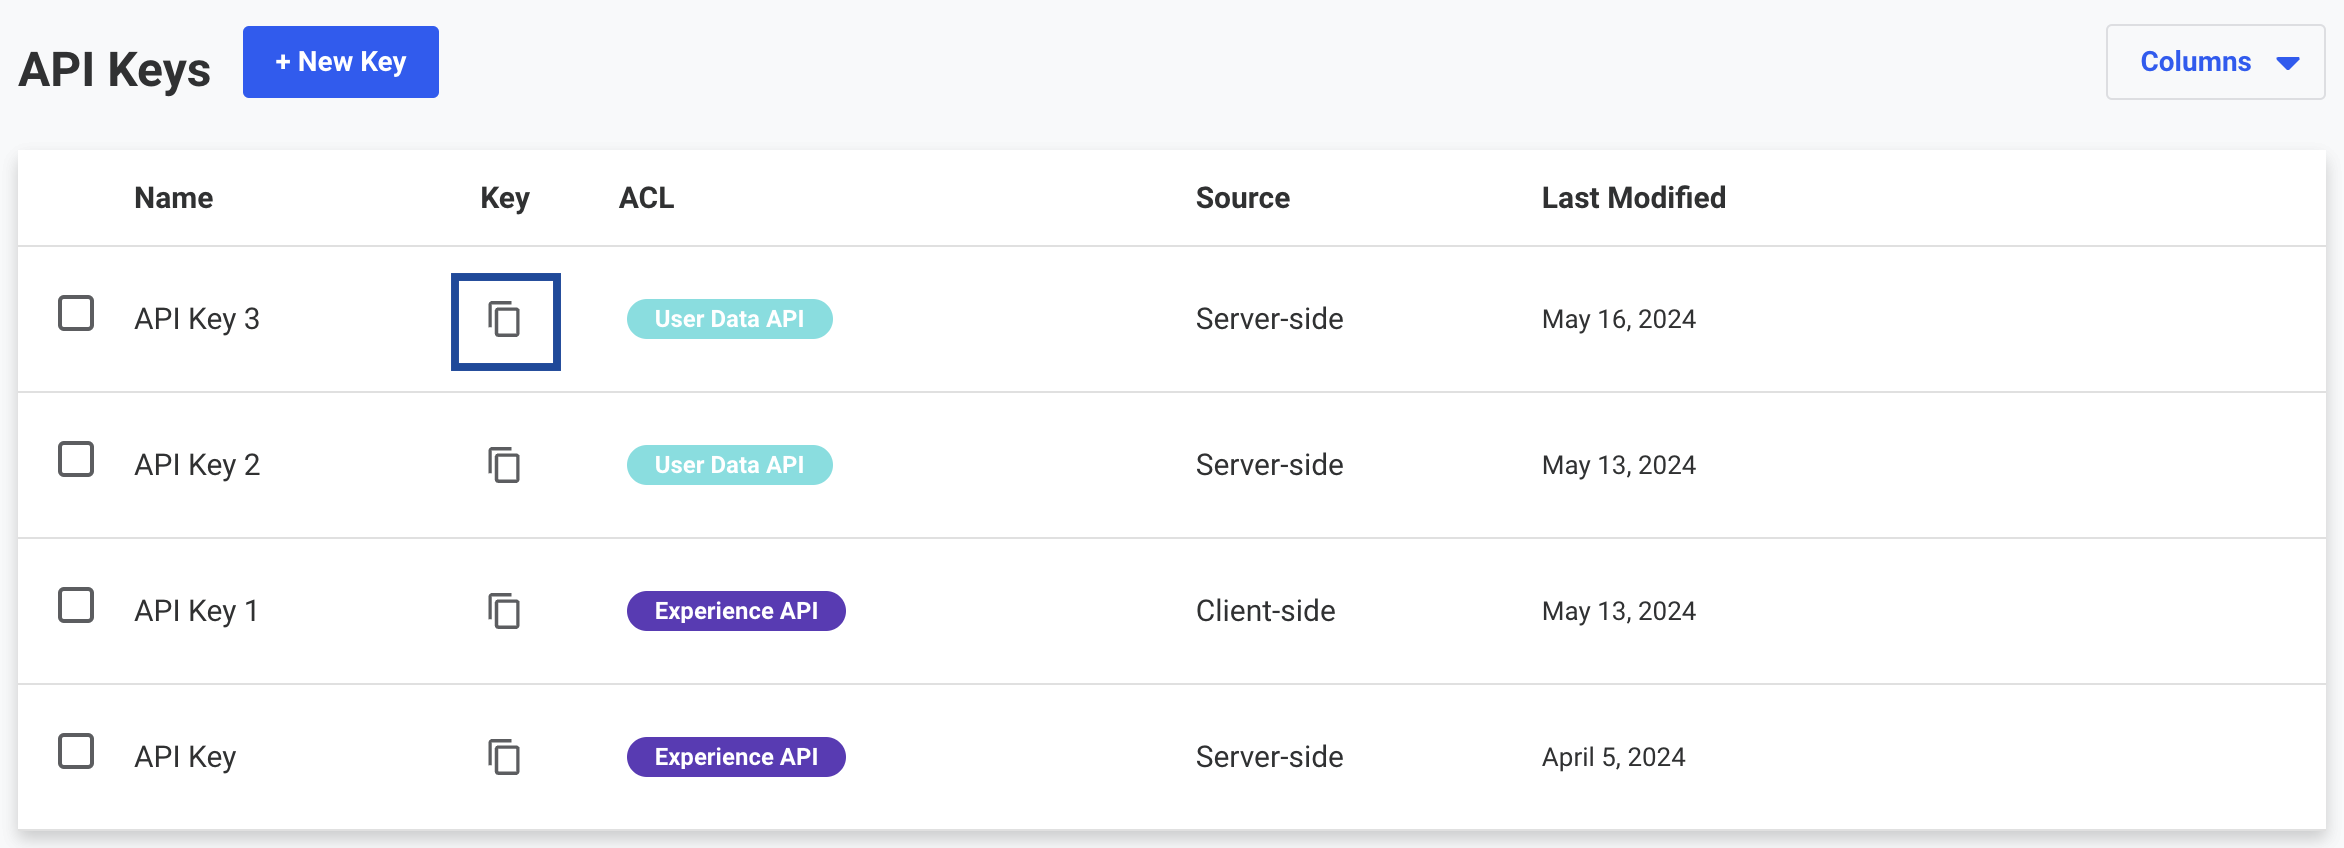
 The created API Key gets listed as shown below, from where you can copy it and use while creating a destination in Zeotap CDP, as explained in the next section.
 ## Create a Destination for Dynamic Yield Events
Once you have obtained the prerequisites mentioned in the above section, perform the following steps to create a Destination for Dynamic Yield Events:
Log into the Zeotap CDP App and go to the DESTINATIONS application.
Click **+ Create Destination**.
## Create a Destination for Dynamic Yield Events
Once you have obtained the prerequisites mentioned in the above section, perform the following steps to create a Destination for Dynamic Yield Events:
Log into the Zeotap CDP App and go to the DESTINATIONS application.
Click **+ Create Destination**.
 Under All Destinations, search for Dynamic Yield Events.
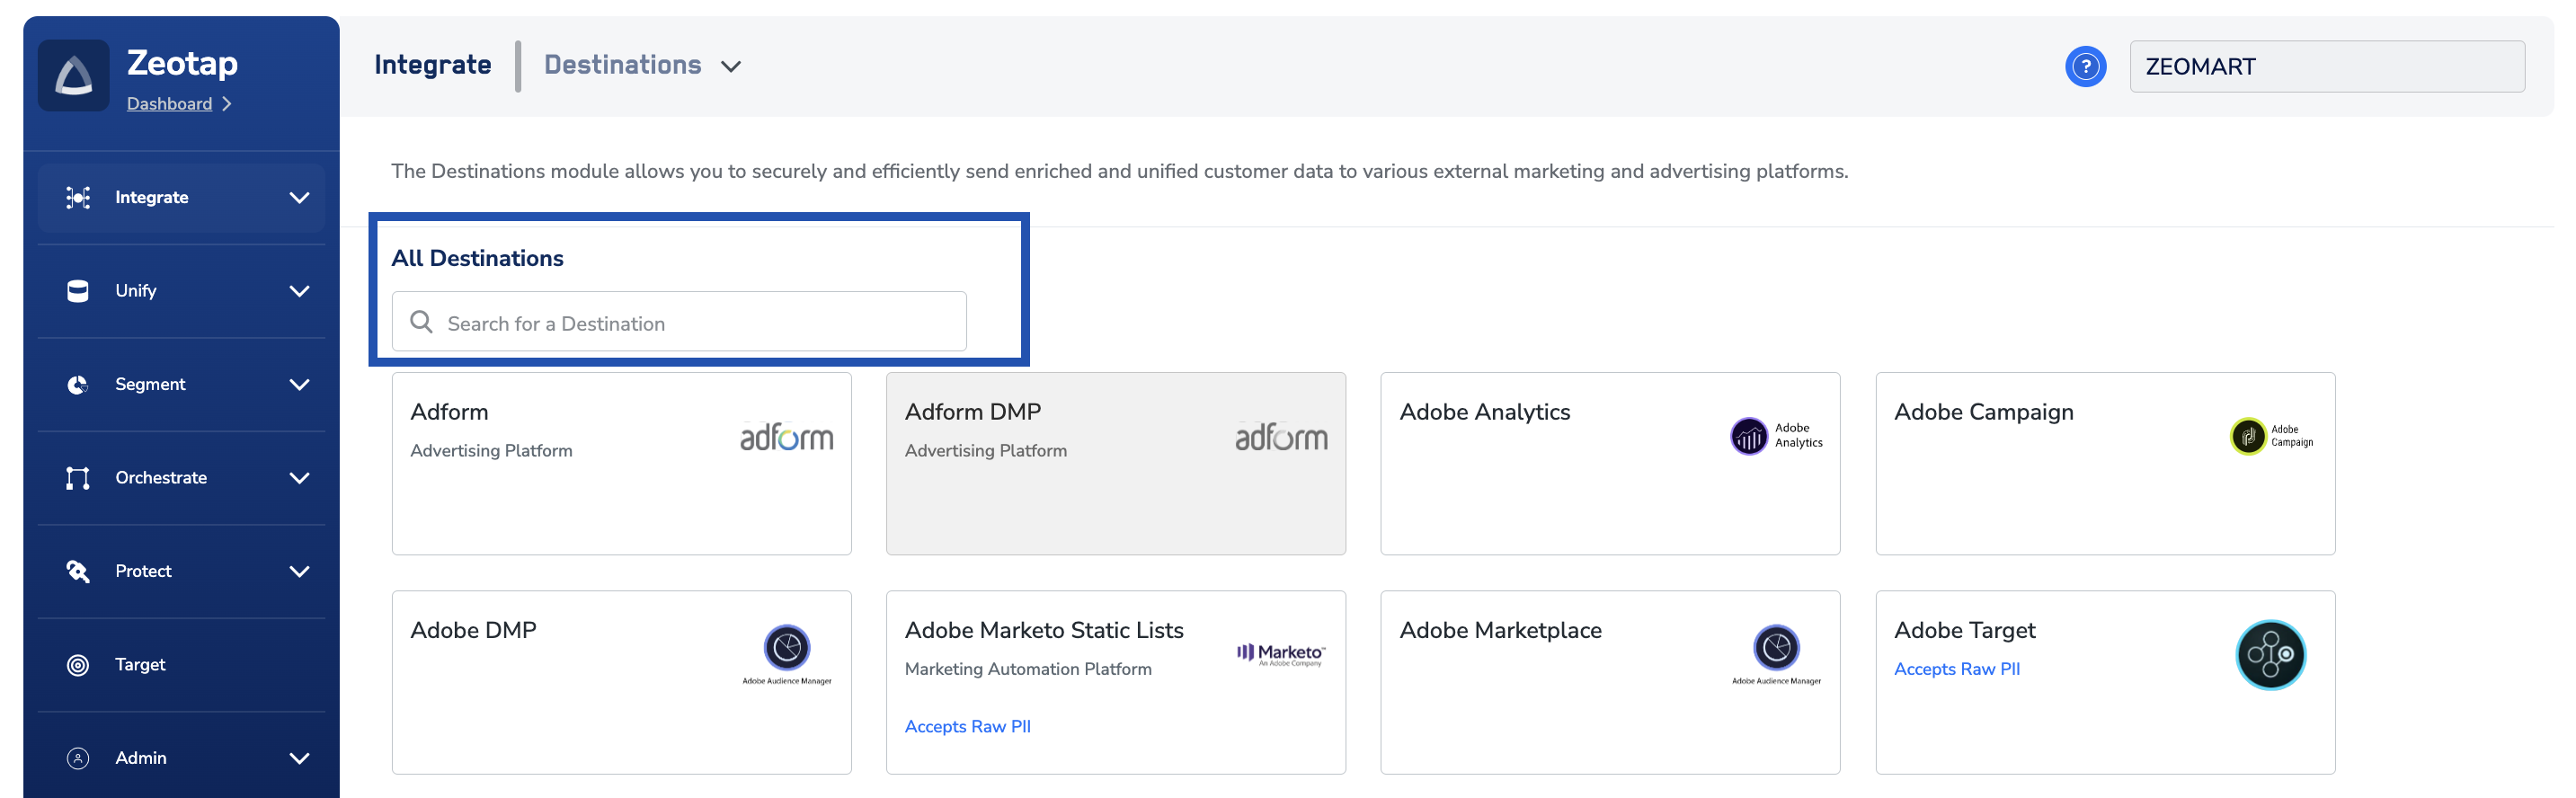 Click Dynamic Yield. A screen appears displaying details about the particular destination towards the left. On the right-hand side of the screen find a list of fields that are required for the integration to be established. Enter the required details as mentioned in the following steps:
a. Enter a name for the Destination.
b. Enter the**API Access Token**obtained from the Dynamic Yield. [Learn more](/articles/integrate-customer/dynamic-yield#h2_1256851356)
c. Under **User Unique Identifier in Dynamic Yield**, choose the unique Identifier, that is, the identifier type chosen while [creating a User Data Feed](https://support.dynamicyield.com/hc/en-us/articles/4409595248017-Update-Your-User-Data-Feed-by-API#h_01HEQMZW4H67TBP9ZYP4Z5N1V0) in Dynamic Yield. You can either choose **Hashed Email Address** or **Custom Identifier**.
i. If you choose **Hashed Email Address**, then a field called **Unique Identifier for Email**will be enabled with an auto populated value: **ihe**
ii. If you choose **Custom Identifier**, then you need to enter the customer identifier added in Dynamic Yield. For more information about selecting Unique Identifier, refer [here](/articles/integrate-customer/dynamic-yield#h3_893954803).
Click Dynamic Yield. A screen appears displaying details about the particular destination towards the left. On the right-hand side of the screen find a list of fields that are required for the integration to be established. Enter the required details as mentioned in the following steps:
a. Enter a name for the Destination.
b. Enter the**API Access Token**obtained from the Dynamic Yield. [Learn more](/articles/integrate-customer/dynamic-yield#h2_1256851356)
c. Under **User Unique Identifier in Dynamic Yield**, choose the unique Identifier, that is, the identifier type chosen while [creating a User Data Feed](https://support.dynamicyield.com/hc/en-us/articles/4409595248017-Update-Your-User-Data-Feed-by-API#h_01HEQMZW4H67TBP9ZYP4Z5N1V0) in Dynamic Yield. You can either choose **Hashed Email Address** or **Custom Identifier**.
i. If you choose **Hashed Email Address**, then a field called **Unique Identifier for Email**will be enabled with an auto populated value: **ihe**
ii. If you choose **Custom Identifier**, then you need to enter the customer identifier added in Dynamic Yield. For more information about selecting Unique Identifier, refer [here](/articles/integrate-customer/dynamic-yield#h3_893954803).
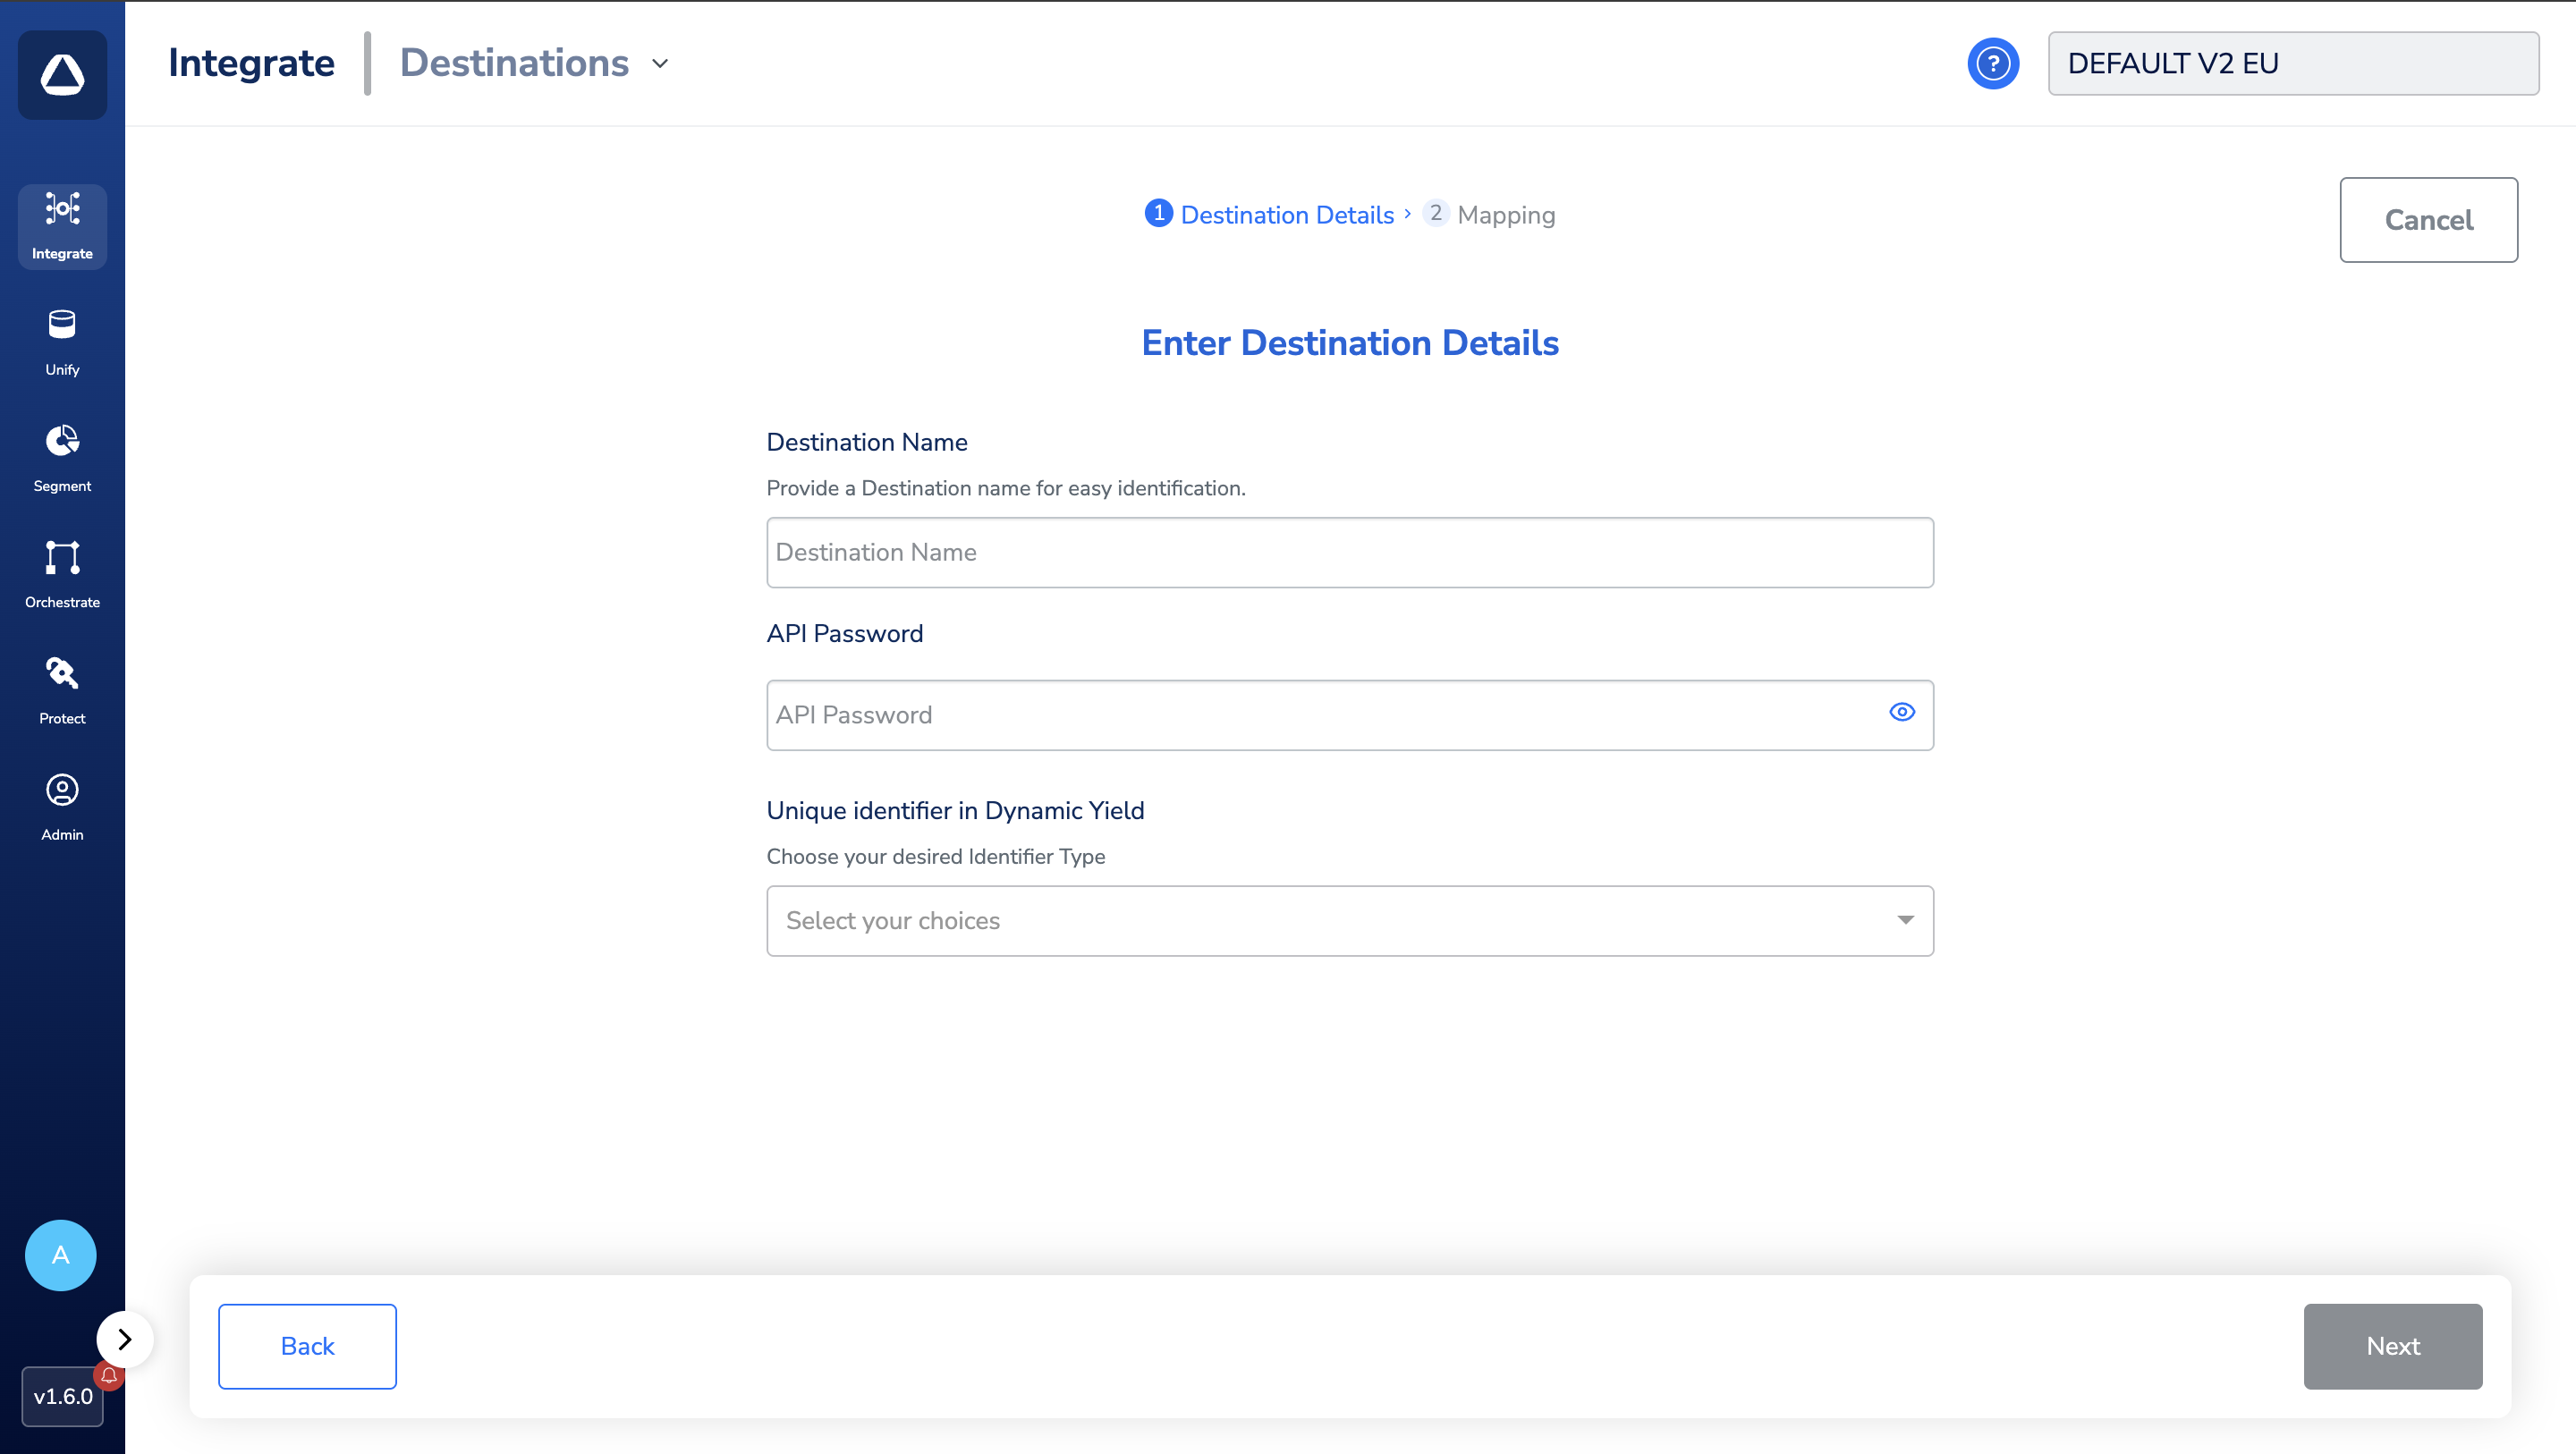 d. Review all the values entered above and then click **Next** to proceed to mapping.
On the **Action and Mapping** screen, select the action, based on the identifiers and attributes you want to send. Then, map the **Catalogue** and **Destination** fields accordingly.
d. Review all the values entered above and then click **Next** to proceed to mapping.
On the **Action and Mapping** screen, select the action, based on the identifiers and attributes you want to send. Then, map the **Catalogue** and **Destination** fields accordingly.
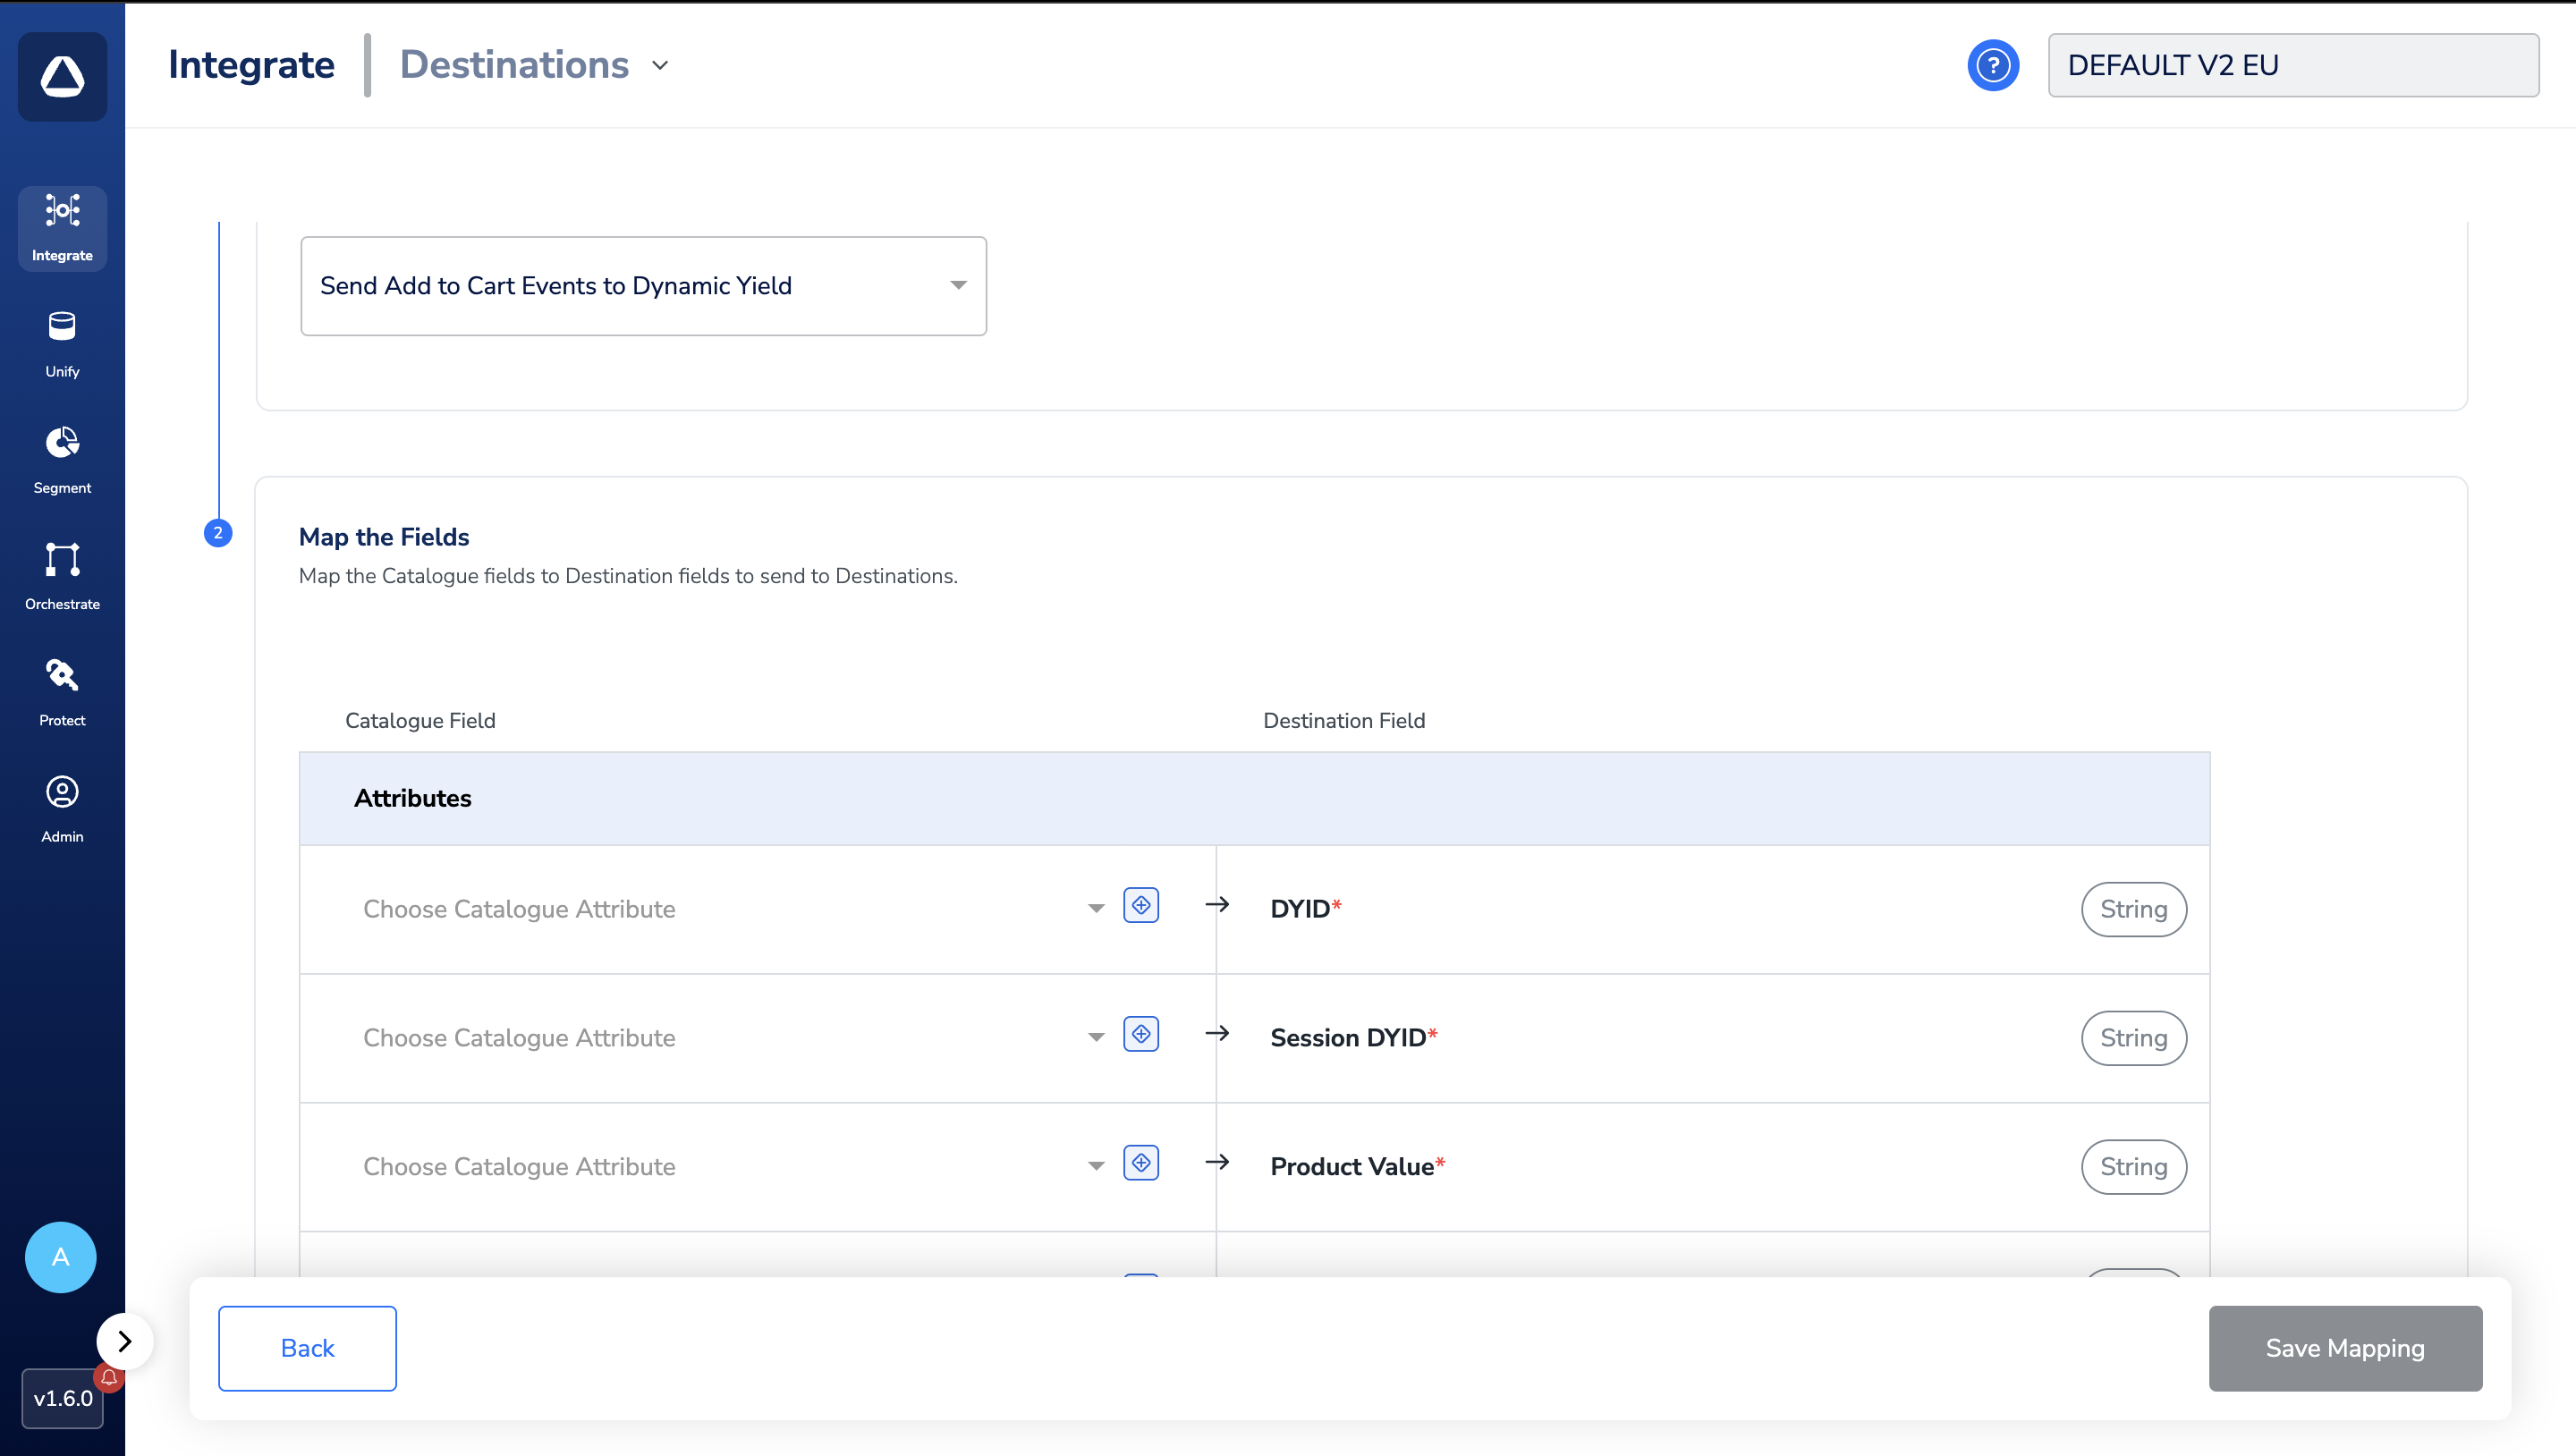 a. If you choose **Send Add to Cart Events to Dynamic Yield or Send Remove from Cart Events**
i. You can Map the following.
1. **DYID**
2. **Session DYID**
3. **Product Value**
4. **Product ID**
5. **Product Quantity**
b. If you choose **Send Login Events to Dynamic Yield / Send Signup Events to Dynamic Yield**
ii. You can Map the following.
1. **DYID**
2. **Session DYID**
3. **Custom Unique Identifier (Email/Phone number)**
c. If you choose **Send Purchase Events to Dynamic Yield**
i. You can Map the following.
1. **DYID**
2. **Session DYID**
3. **Product ID**
4. **Product Quantity**
5. **Item Price**
6. **Cart Value**
Once the mapping is complete, click **Create Destination**.
## Activate the Destination on Journeys
After creating a destination, next, you need to link it in the Send to Destination node within the workflow, as explained below.
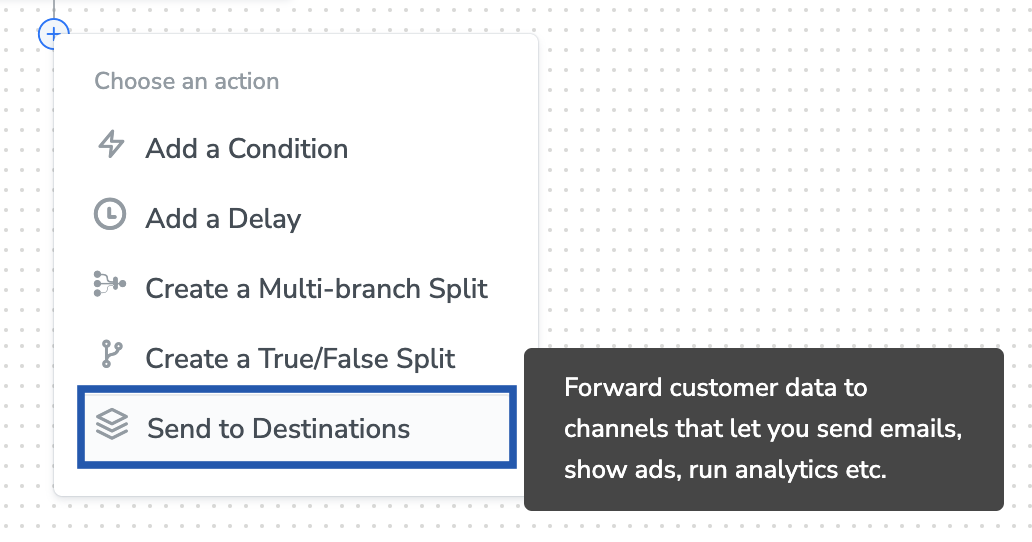
In the workflow, click + and choose Send to Destinations.
a. If you choose **Send Add to Cart Events to Dynamic Yield or Send Remove from Cart Events**
i. You can Map the following.
1. **DYID**
2. **Session DYID**
3. **Product Value**
4. **Product ID**
5. **Product Quantity**
b. If you choose **Send Login Events to Dynamic Yield / Send Signup Events to Dynamic Yield**
ii. You can Map the following.
1. **DYID**
2. **Session DYID**
3. **Custom Unique Identifier (Email/Phone number)**
c. If you choose **Send Purchase Events to Dynamic Yield**
i. You can Map the following.
1. **DYID**
2. **Session DYID**
3. **Product ID**
4. **Product Quantity**
5. **Item Price**
6. **Cart Value**
Once the mapping is complete, click **Create Destination**.
## Activate the Destination on Journeys
After creating a destination, next, you need to link it in the Send to Destination node within the workflow, as explained below.
In the workflow, click + and choose Send to Destinations.
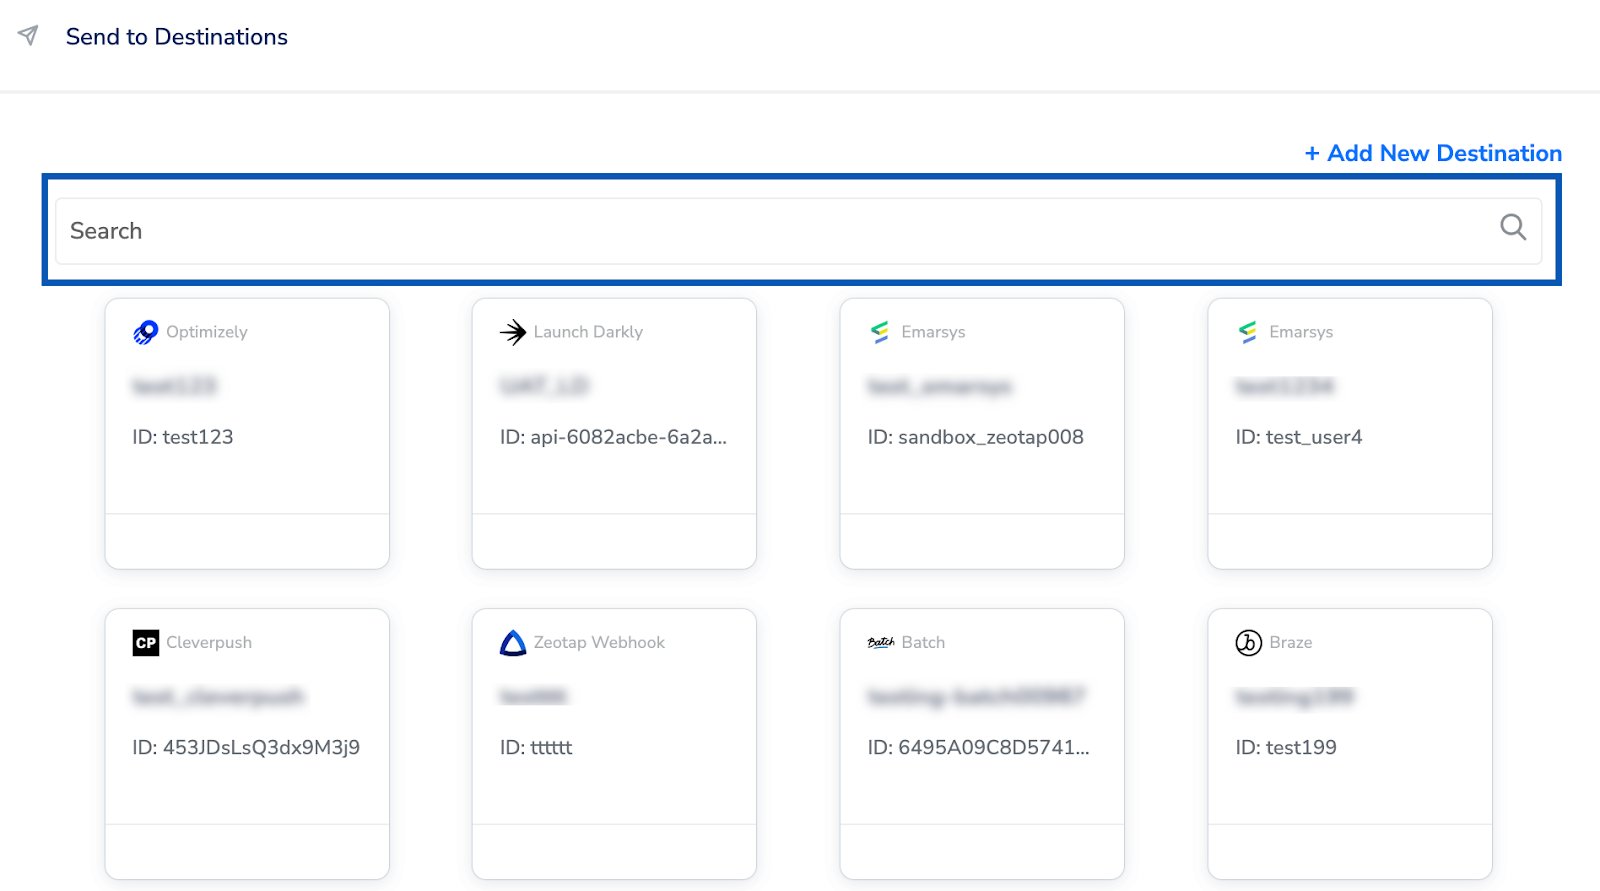
 Choose the destination from the list of available destinations by using the search feature.
 Under the Destination Details tab, the Feed ID and API Key fields are automatically populated based on the value that you have entered while creating the destination.
Under the Destination Settings tab, choose the Action and mapping as per your requirement.
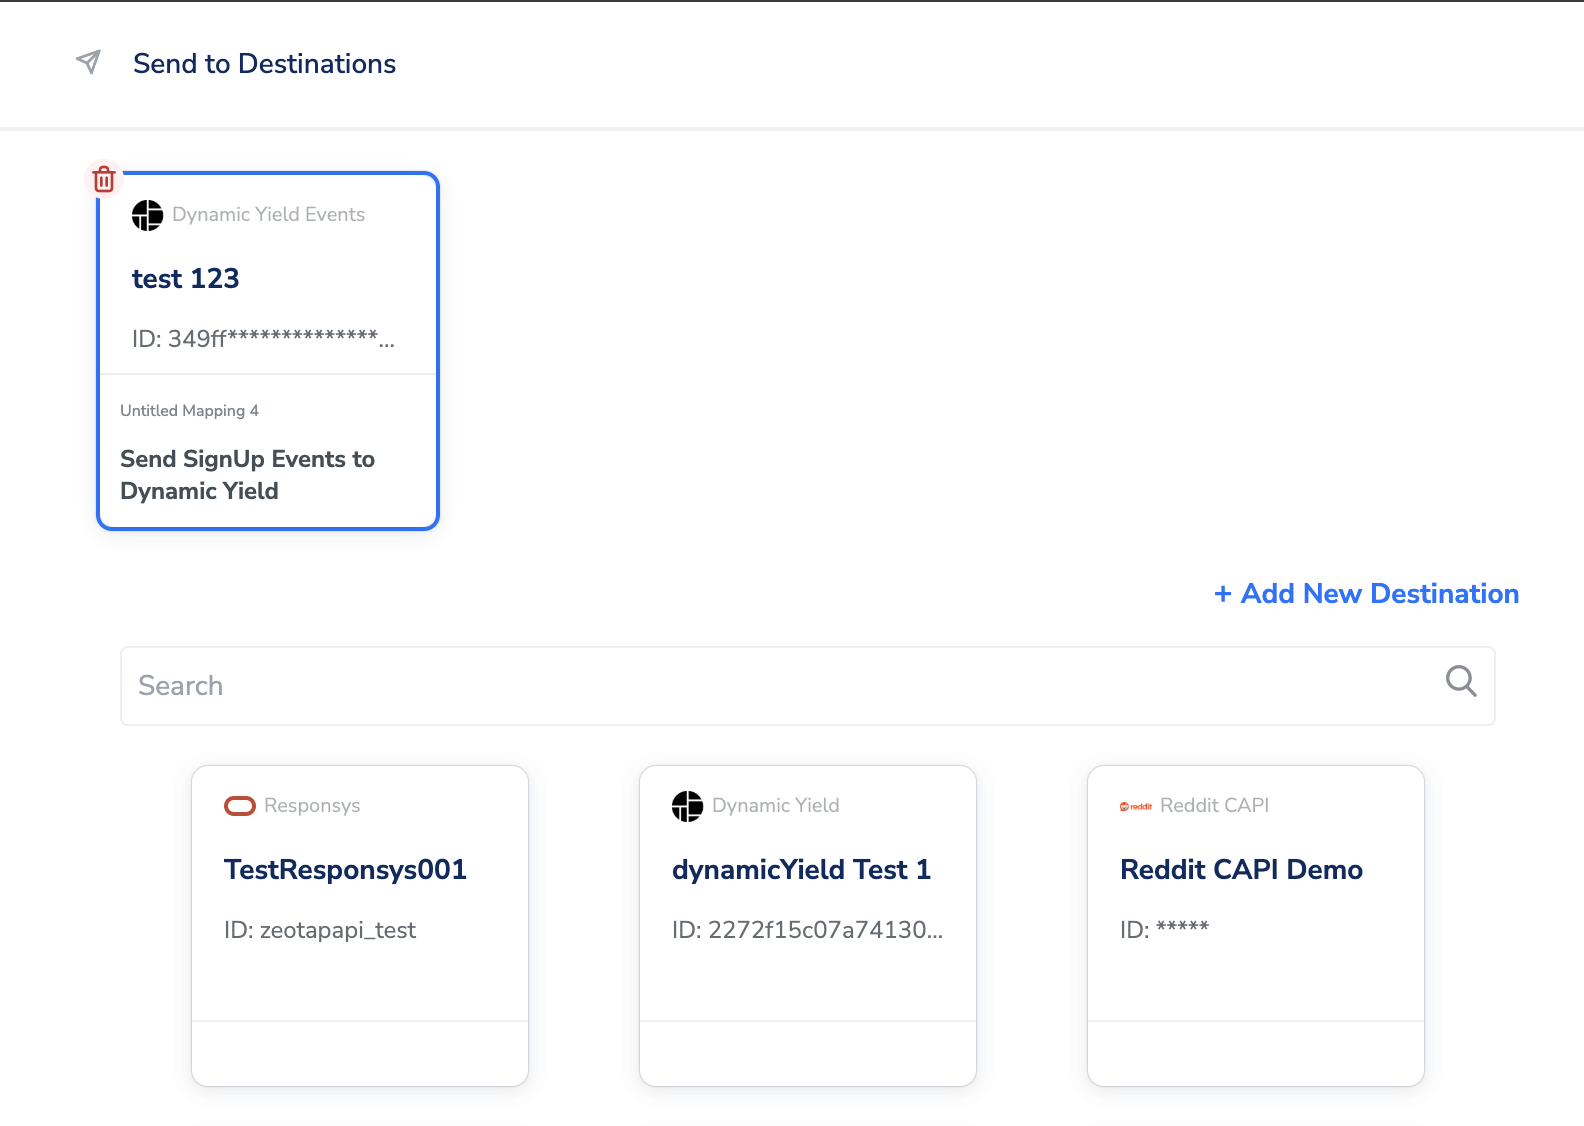
Upon clicking Save Destination. The destination is attached as shown in the image below.
Under the Destination Details tab, the Feed ID and API Key fields are automatically populated based on the value that you have entered while creating the destination.
Under the Destination Settings tab, choose the Action and mapping as per your requirement.
Upon clicking Save Destination. The destination is attached as shown in the image below.
 ## Where to View Events in Dynamic Yield
Perform the steps below to view events in Dynamic Yield:
Log into the Dynamic Yield UI with appropriate credentials.
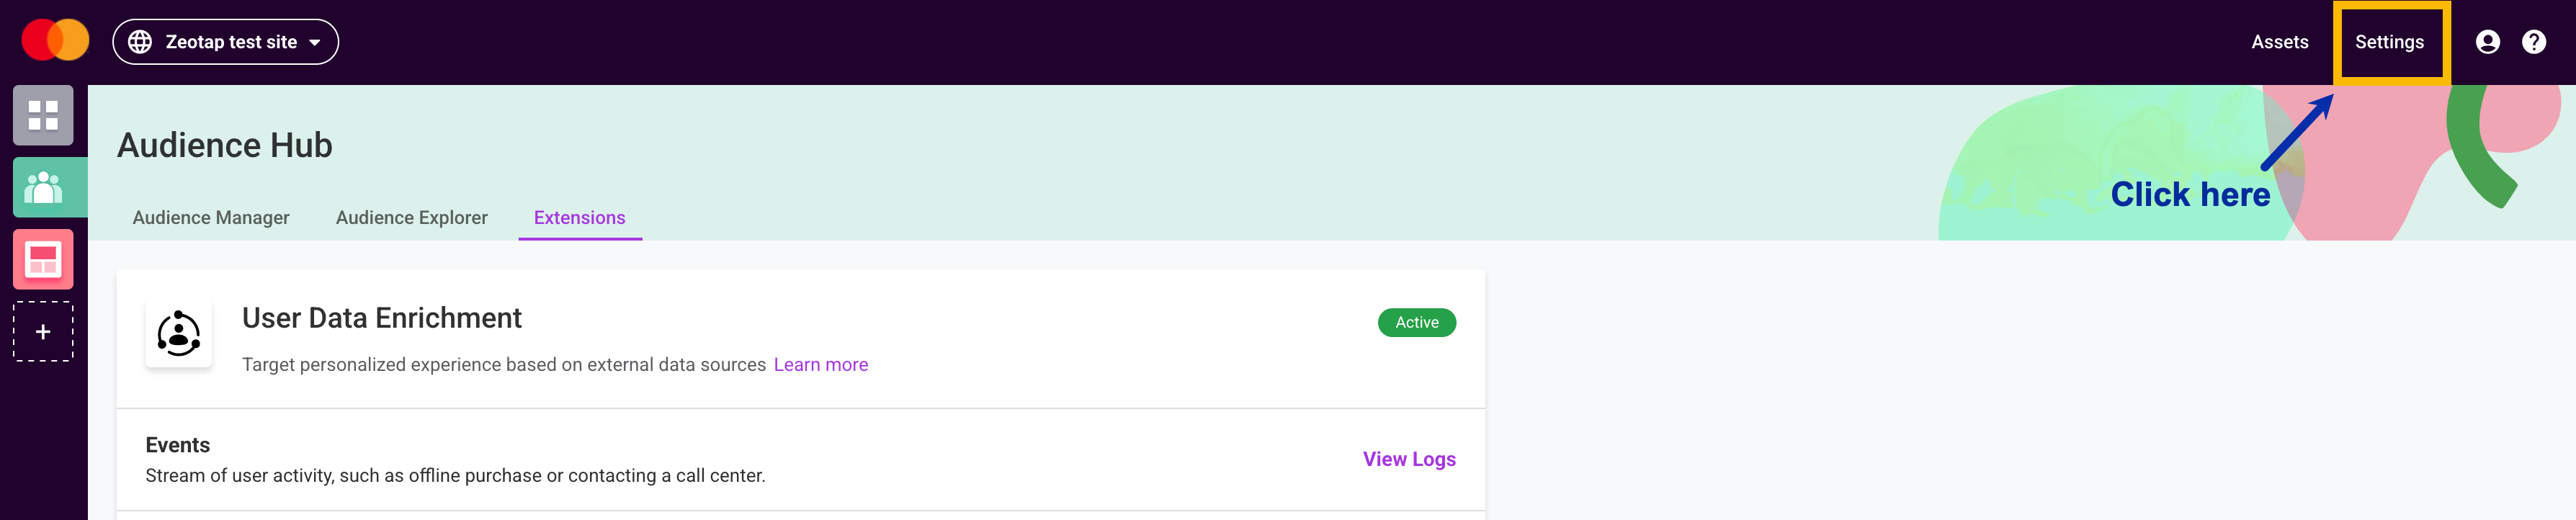
Under the **Audience** tab, go to **Extensions** and click **V** **iew Logs in Events**.
## Where to View Events in Dynamic Yield
Perform the steps below to view events in Dynamic Yield:
Log into the Dynamic Yield UI with appropriate credentials.
Under the **Audience** tab, go to **Extensions** and click **V** **iew Logs in Events**.
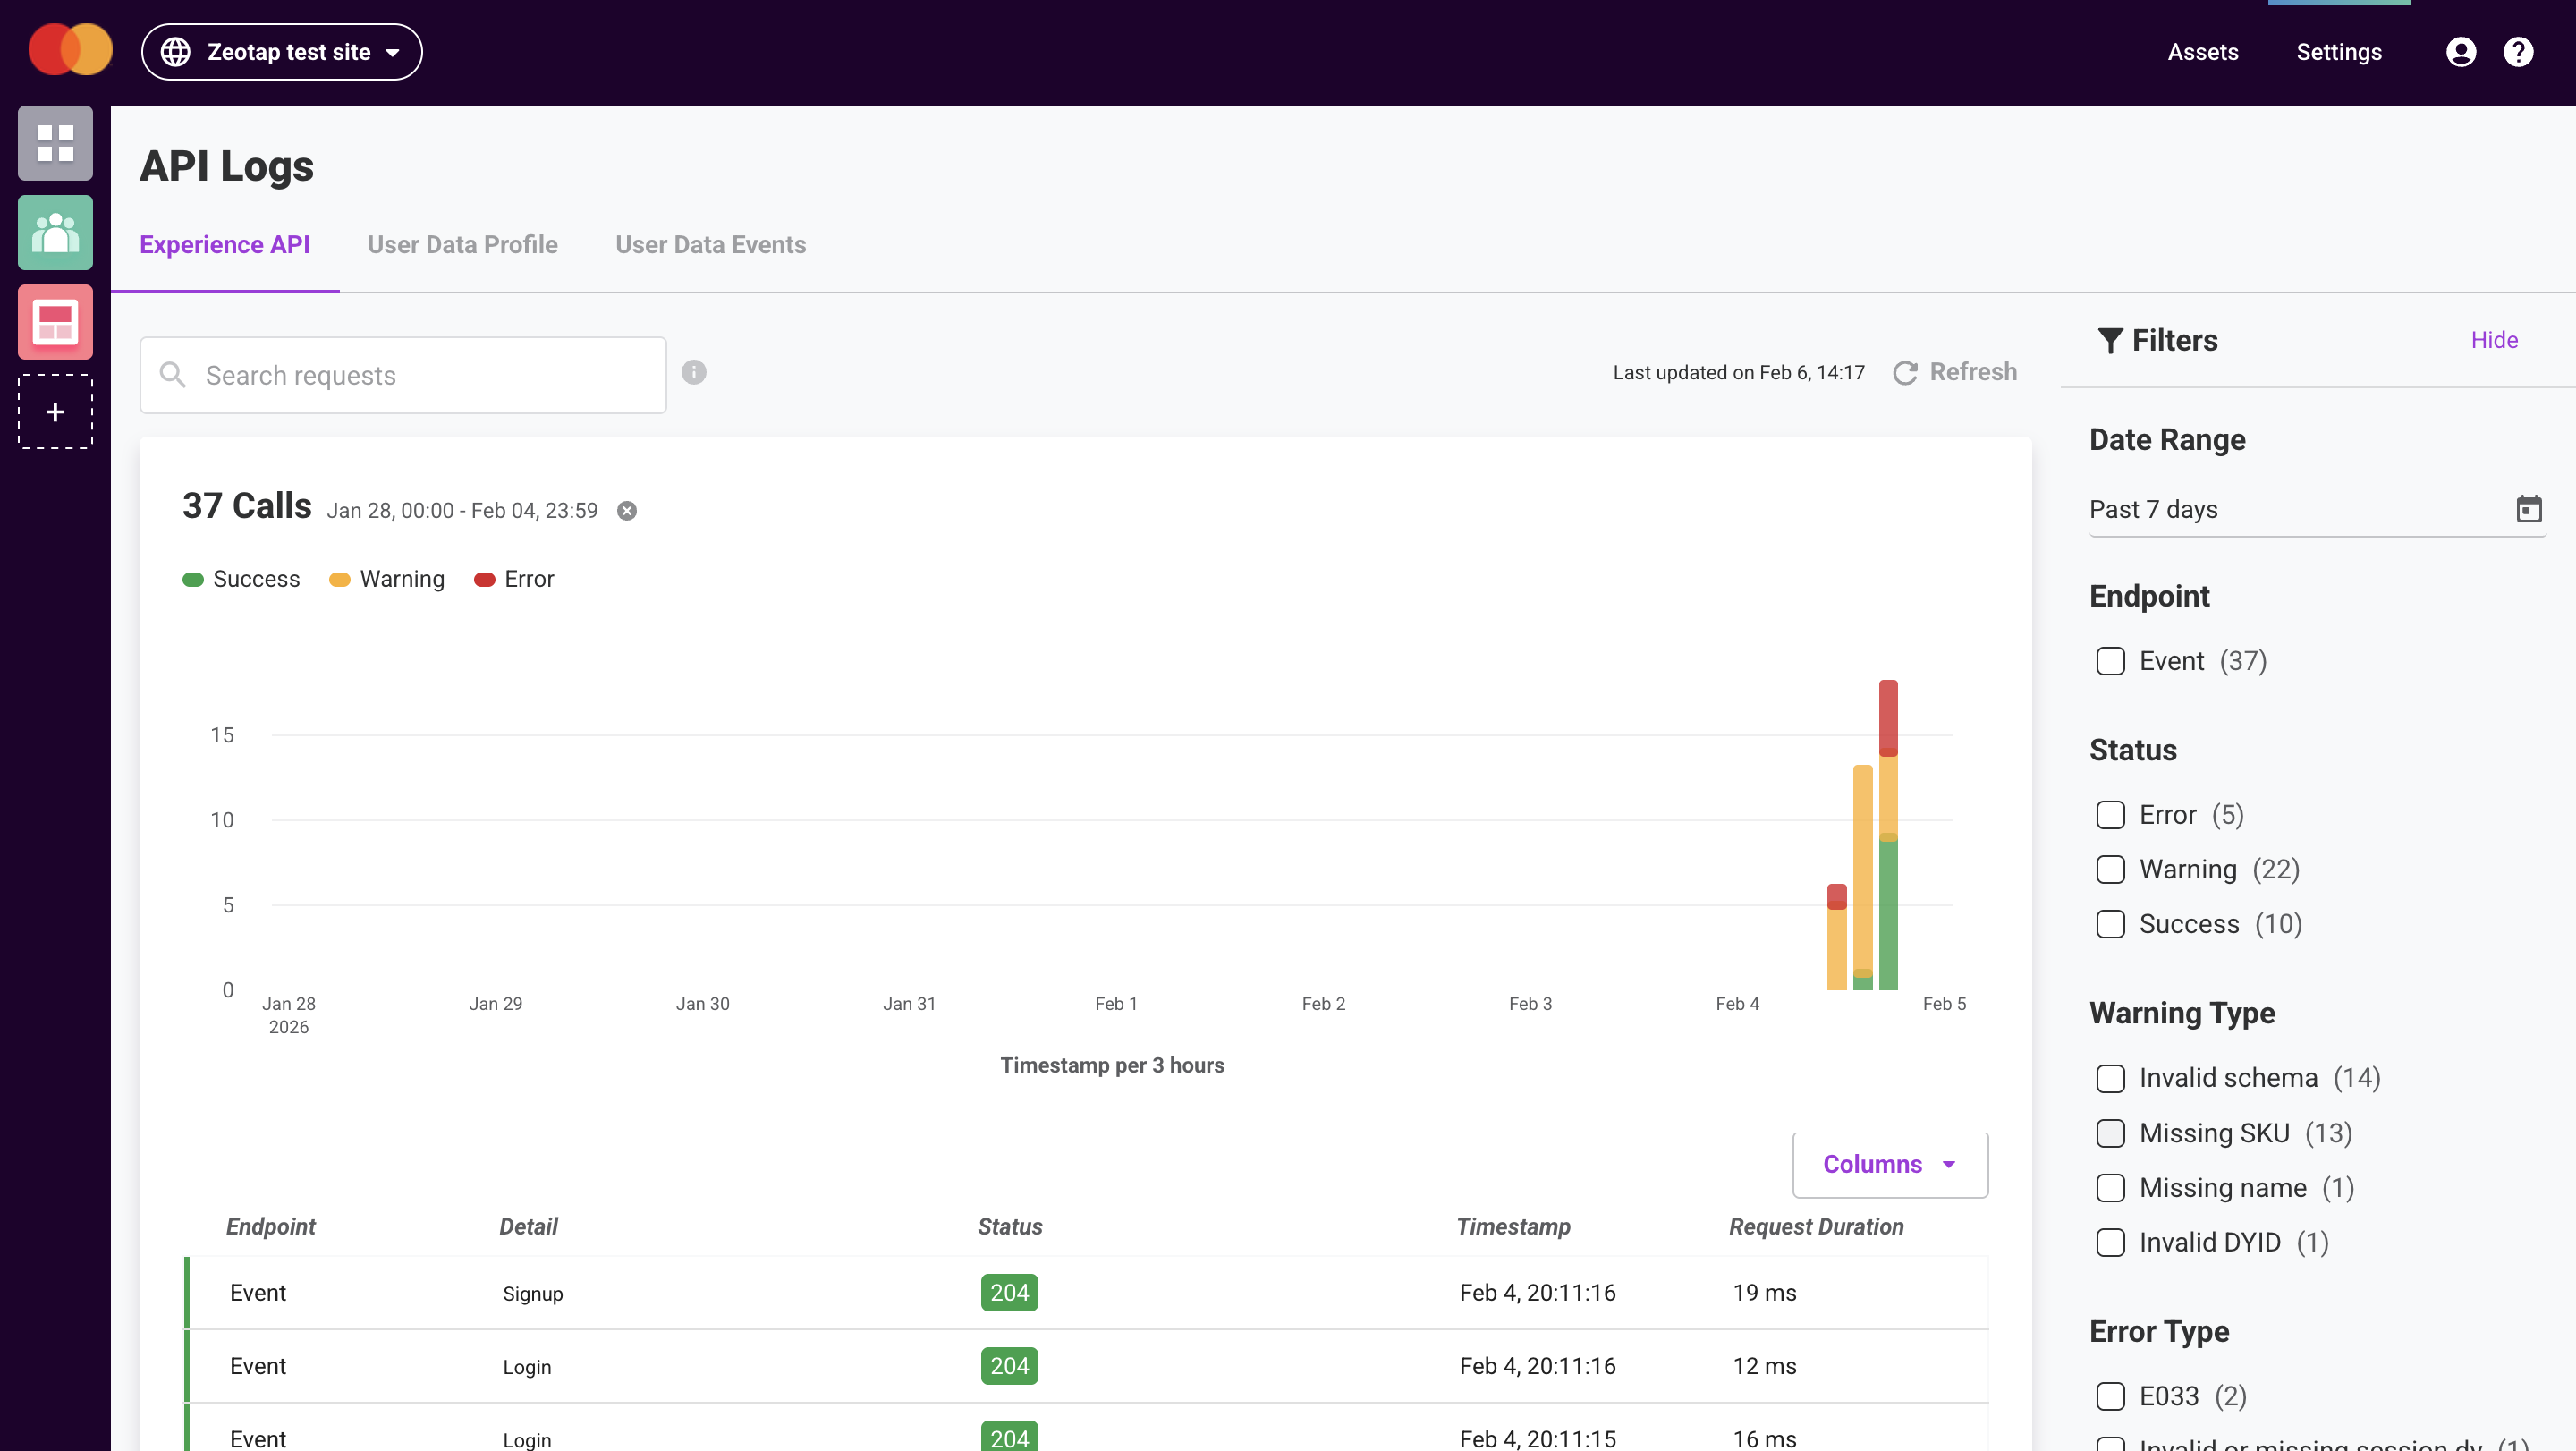
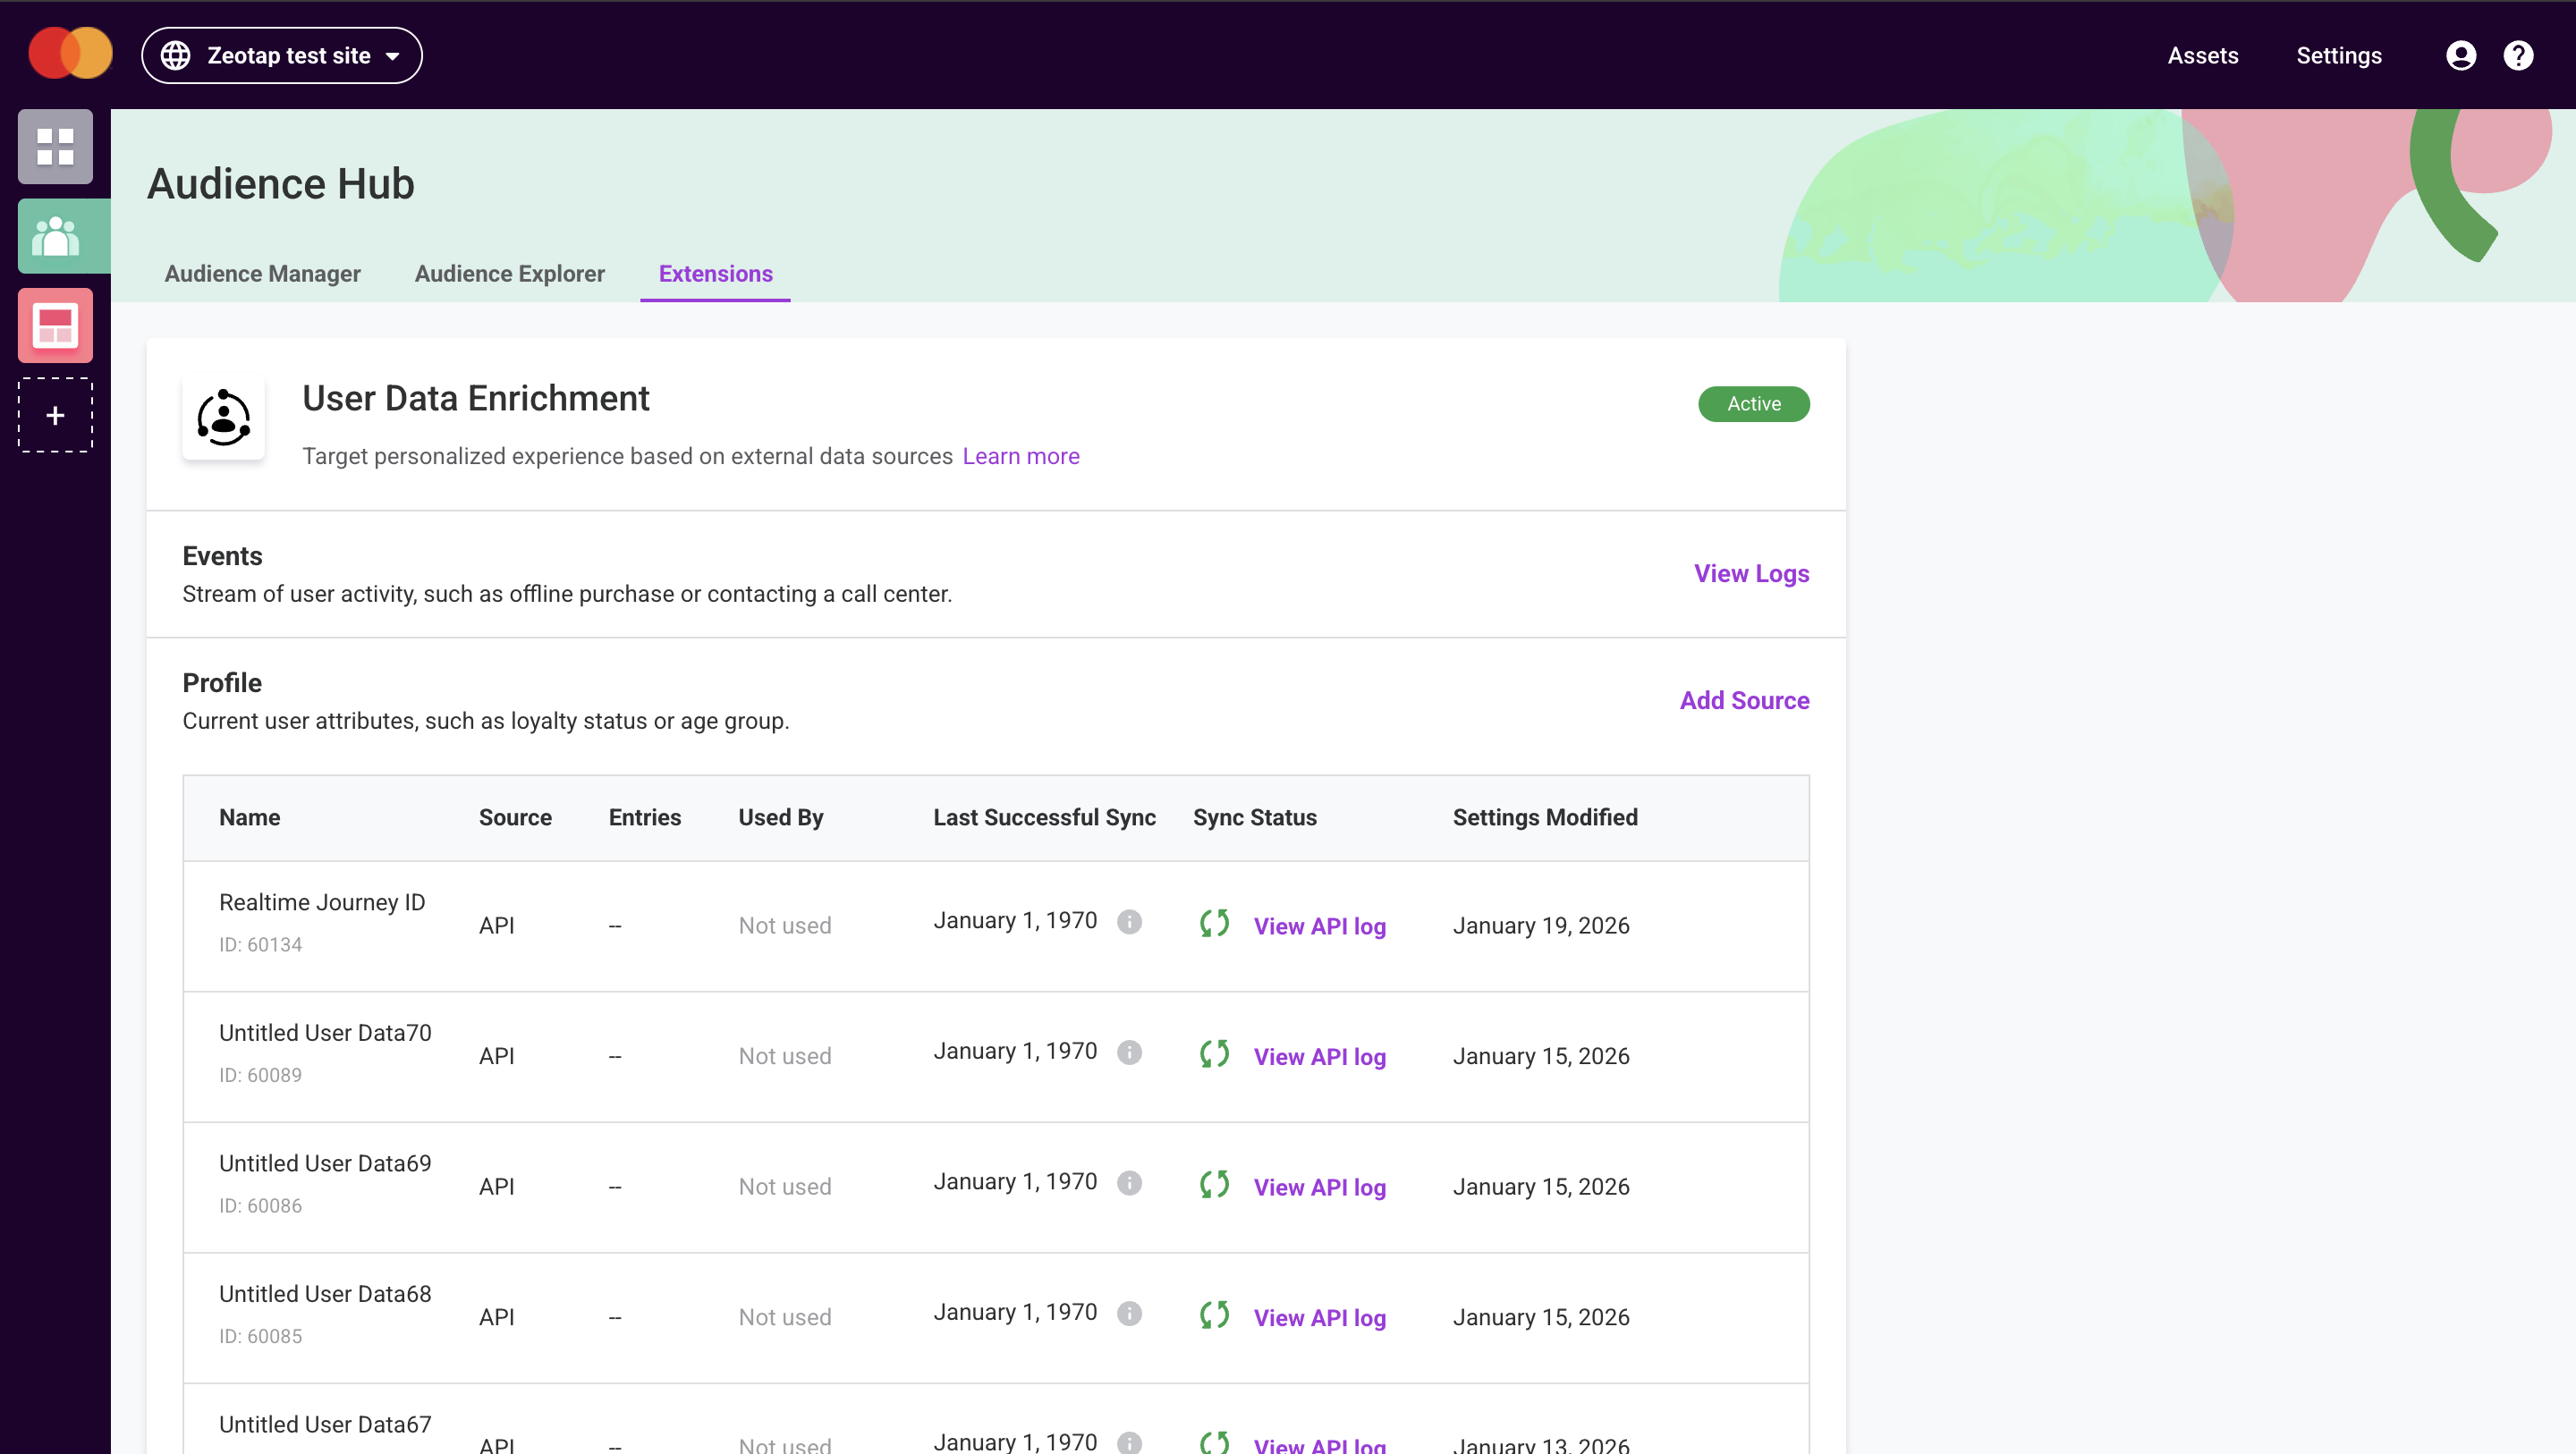 From the options, select **Experience API** to view your Events \*\*.