> ## Documentation Index
> Fetch the complete documentation index at: https://docs.zeotap.com/llms.txt
> Use this file to discover all available pages before exploring further.
# Decentriq
## Overview
This integration allows you to send audience data from Zeotap CDP directly into a Decentriq Data Clean Room, enabling privacy-safe data collaboration with partners and advertisers. By connecting the two platforms, you can securely share matching identifiers, audience segments, and demographic attributes — all encrypted before they leave your environment. This means your teams can unlock powerful insights and activation use cases without ever exposing raw customer data.
## How It Works
1. You create a dedicated **DataLab** inside Decentriq that will receive your audience data.
2. In Zeotap CDP, you set up Decentriq as a **destination** using the Integrate module and authenticate with an API Token.
3. When audience data — such as user IDs, segment memberships, and demographics — is ready in Zeotap, it is encrypted on your side and sent into the Decentriq DataLab as structured datasets.
4. Once the data lands in Decentriq, it is validated, provisioned, and made available inside the clean room for privacy-safe analysis and collaboration.
## Prerequisites
### In Decentriq
* An active Decentriq account with permission to create DataLabs and generate API tokens
* A **DataLab** created (or the ability to create one) that will receive the audience data
* Your **API Token** generated and copied from the Decentriq platform
* Your **DataLab ID** copied from the DataLab you want to send data into
* The **email address** associated with your Decentriq account (or service account)
### In Zeotap CDP
* Access to the **Integrate** module with permission to create new destinations
* Audience segments and/or demographic data ready to send
* A clear understanding of which **matching identifier** you will use (for example, hashed email or phone number)
## Create a Destination for Decentriq
### Part 1: Get Your Credentials from Decentriq
Follow these steps to gather the API Token and DataLab ID you will need.
Log in to your **Decentriq** account.
Click your profile icon or menu in the **top-right corner** of the screen.
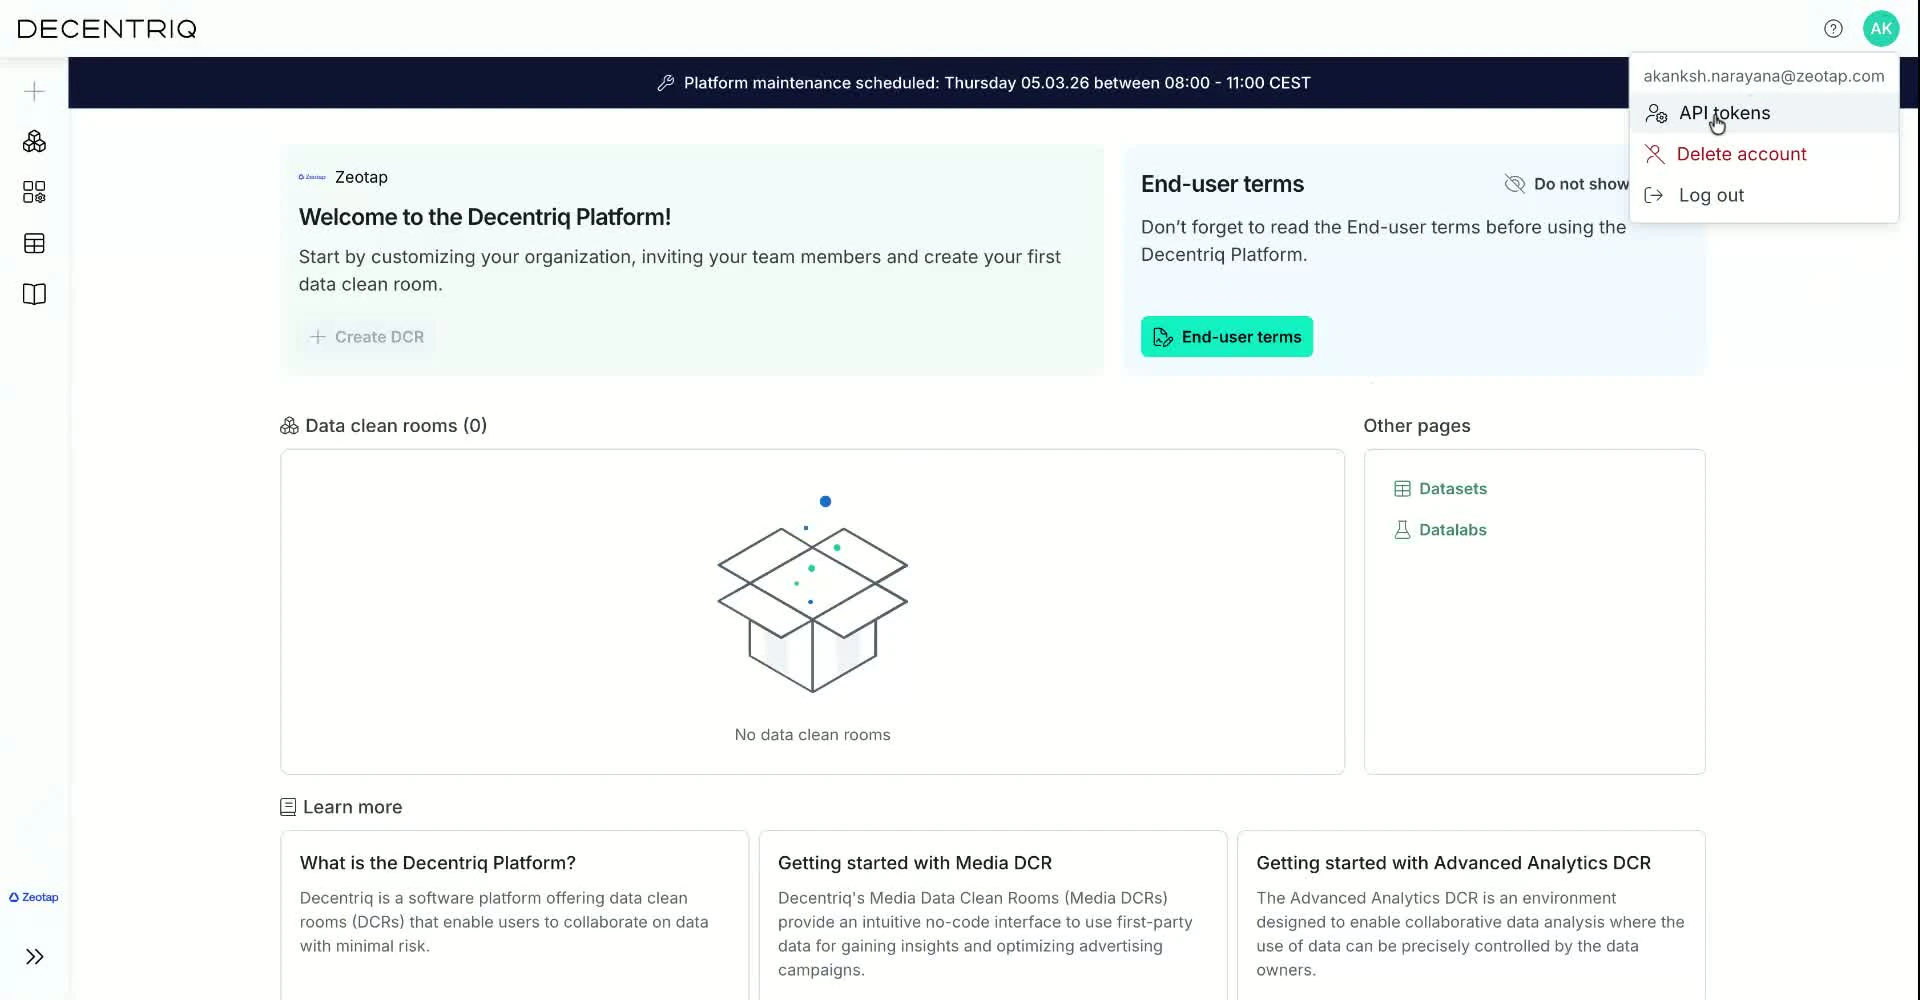 Select **API Tokens** from the dropdown menu.
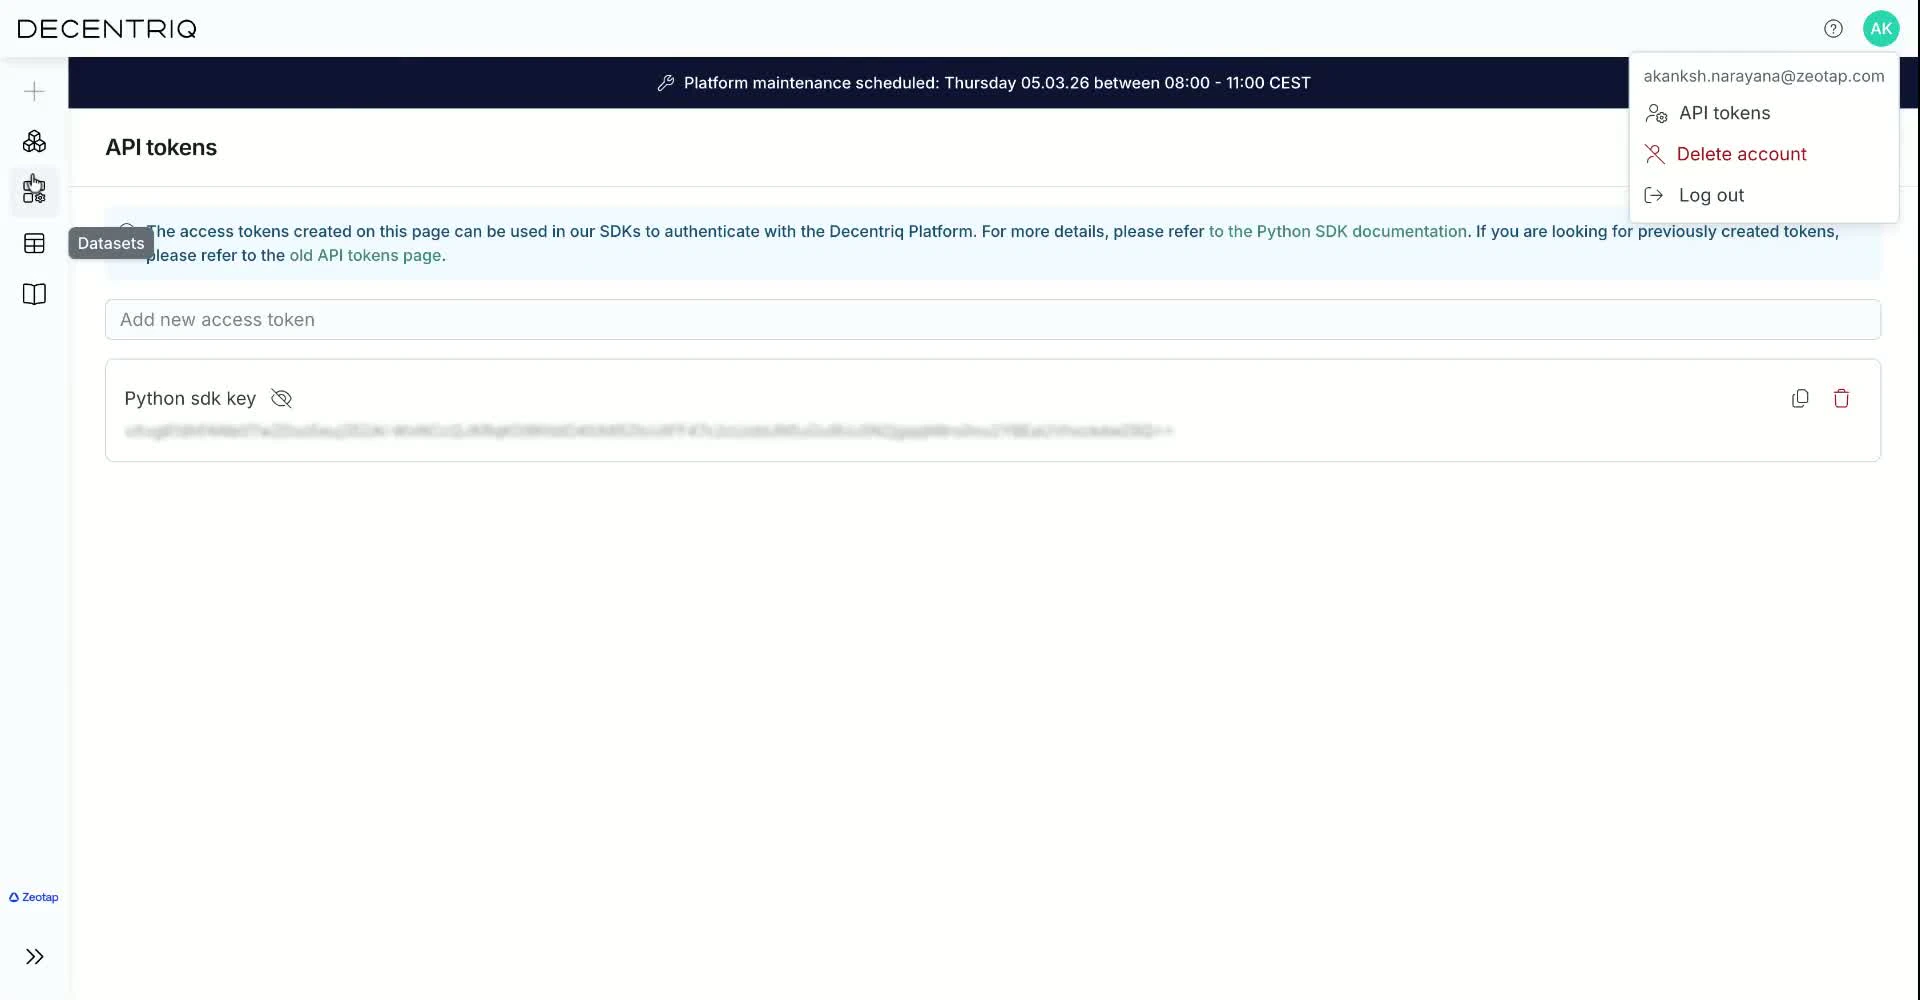 Generate a new token (if you have not already) or locate your existing long-lived API token.
Click **Copy** to copy the token to your clipboard. Save it somewhere secure — you will paste it into Zeotap shortly.
Navigate to the **DataLabs** section from the main menu.
Open the DataLab you want to use as the destination for your audience data, or create a new one if needed. The DataLab is where your matching data, segments, and demographics will be stored.
Generate a new token (if you have not already) or locate your existing long-lived API token.
Click **Copy** to copy the token to your clipboard. Save it somewhere secure — you will paste it into Zeotap shortly.
Navigate to the **DataLabs** section from the main menu.
Open the DataLab you want to use as the destination for your audience data, or create a new one if needed. The DataLab is where your matching data, segments, and demographics will be stored.
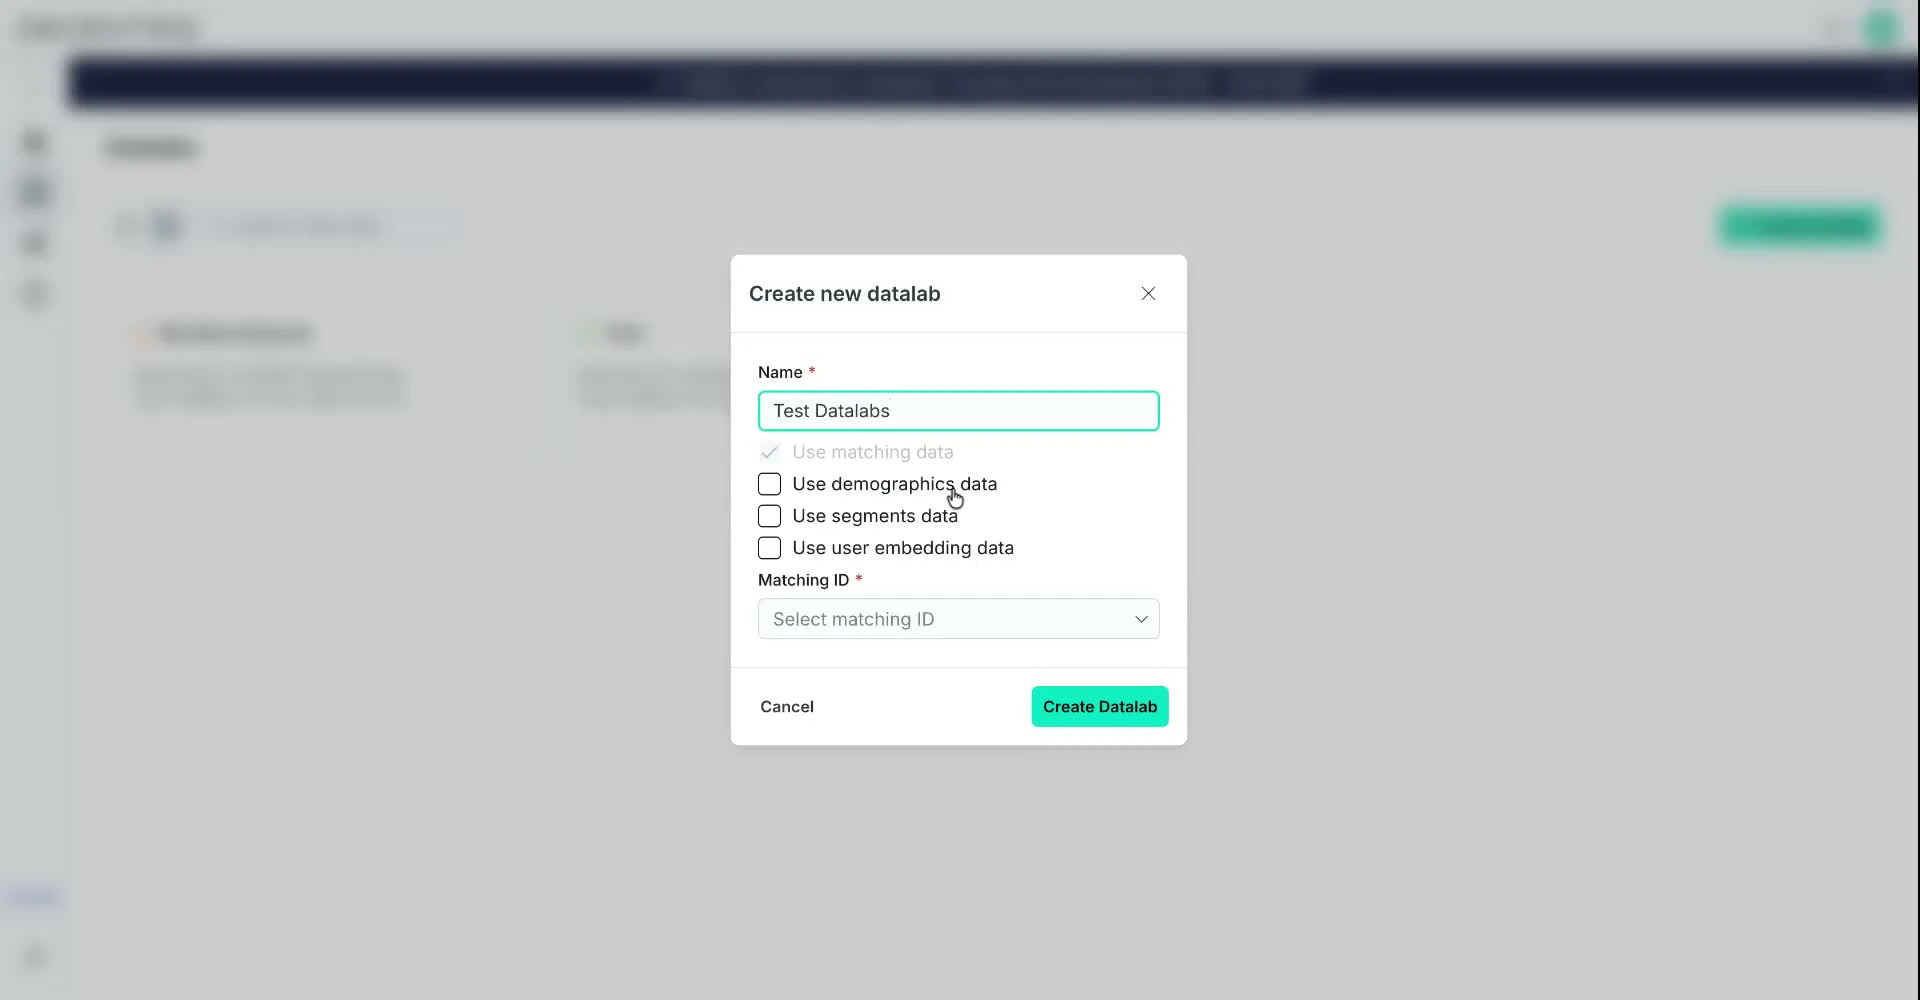 Copy the **DataLab ID** displayed on the DataLab detail page. Save it alongside your API Token.
You should now have three pieces of information ready:
* Your Decentriq **email address**
* Your **API Token**
* Your **DataLab ID**
### Part 2: Set Up the Connection in Zeotap CDP
Now head over to Zeotap to create the destination.
Log in to **Zeotap CDP**.
Navigate to the **Integrate** module from the main navigation menu.
Select **Destination** from the menu bar.
Click the button to **Create a new destination**.
Copy the **DataLab ID** displayed on the DataLab detail page. Save it alongside your API Token.
You should now have three pieces of information ready:
* Your Decentriq **email address**
* Your **API Token**
* Your **DataLab ID**
### Part 2: Set Up the Connection in Zeotap CDP
Now head over to Zeotap to create the destination.
Log in to **Zeotap CDP**.
Navigate to the **Integrate** module from the main navigation menu.
Select **Destination** from the menu bar.
Click the button to **Create a new destination**.
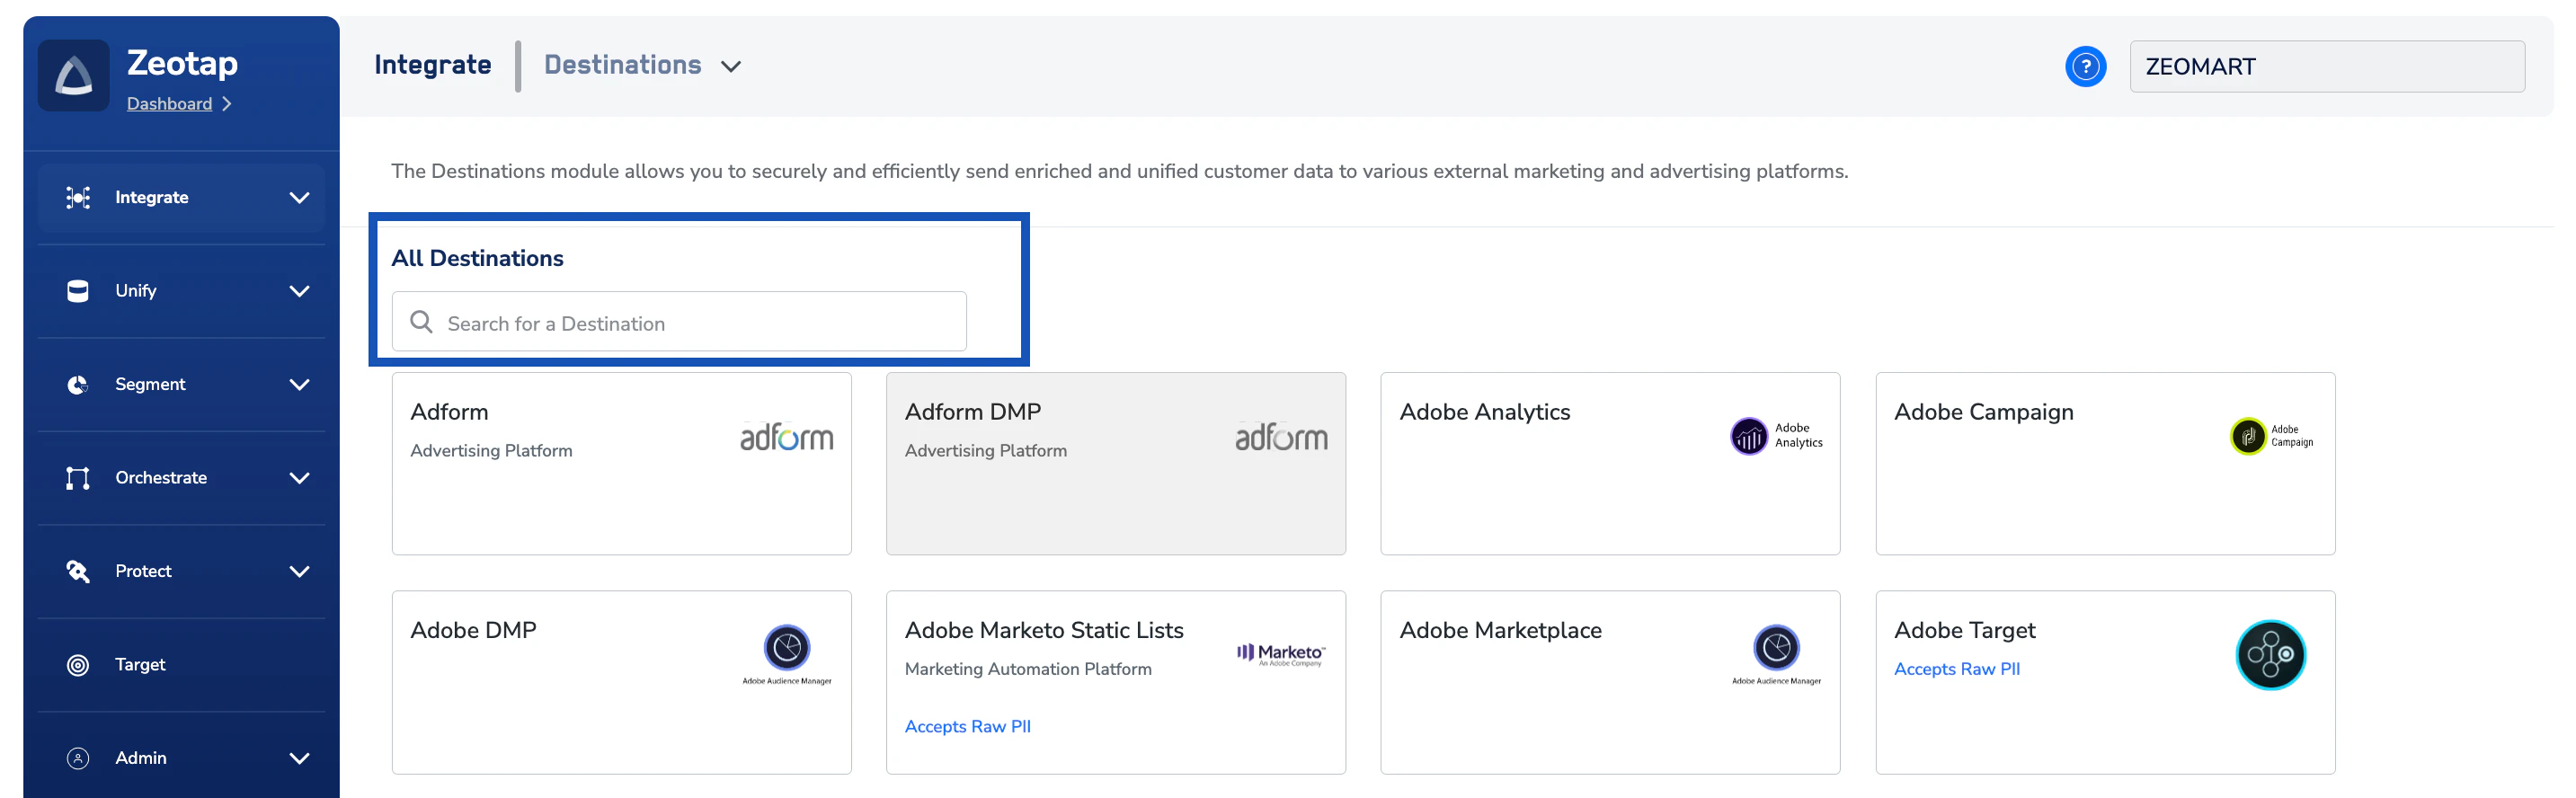
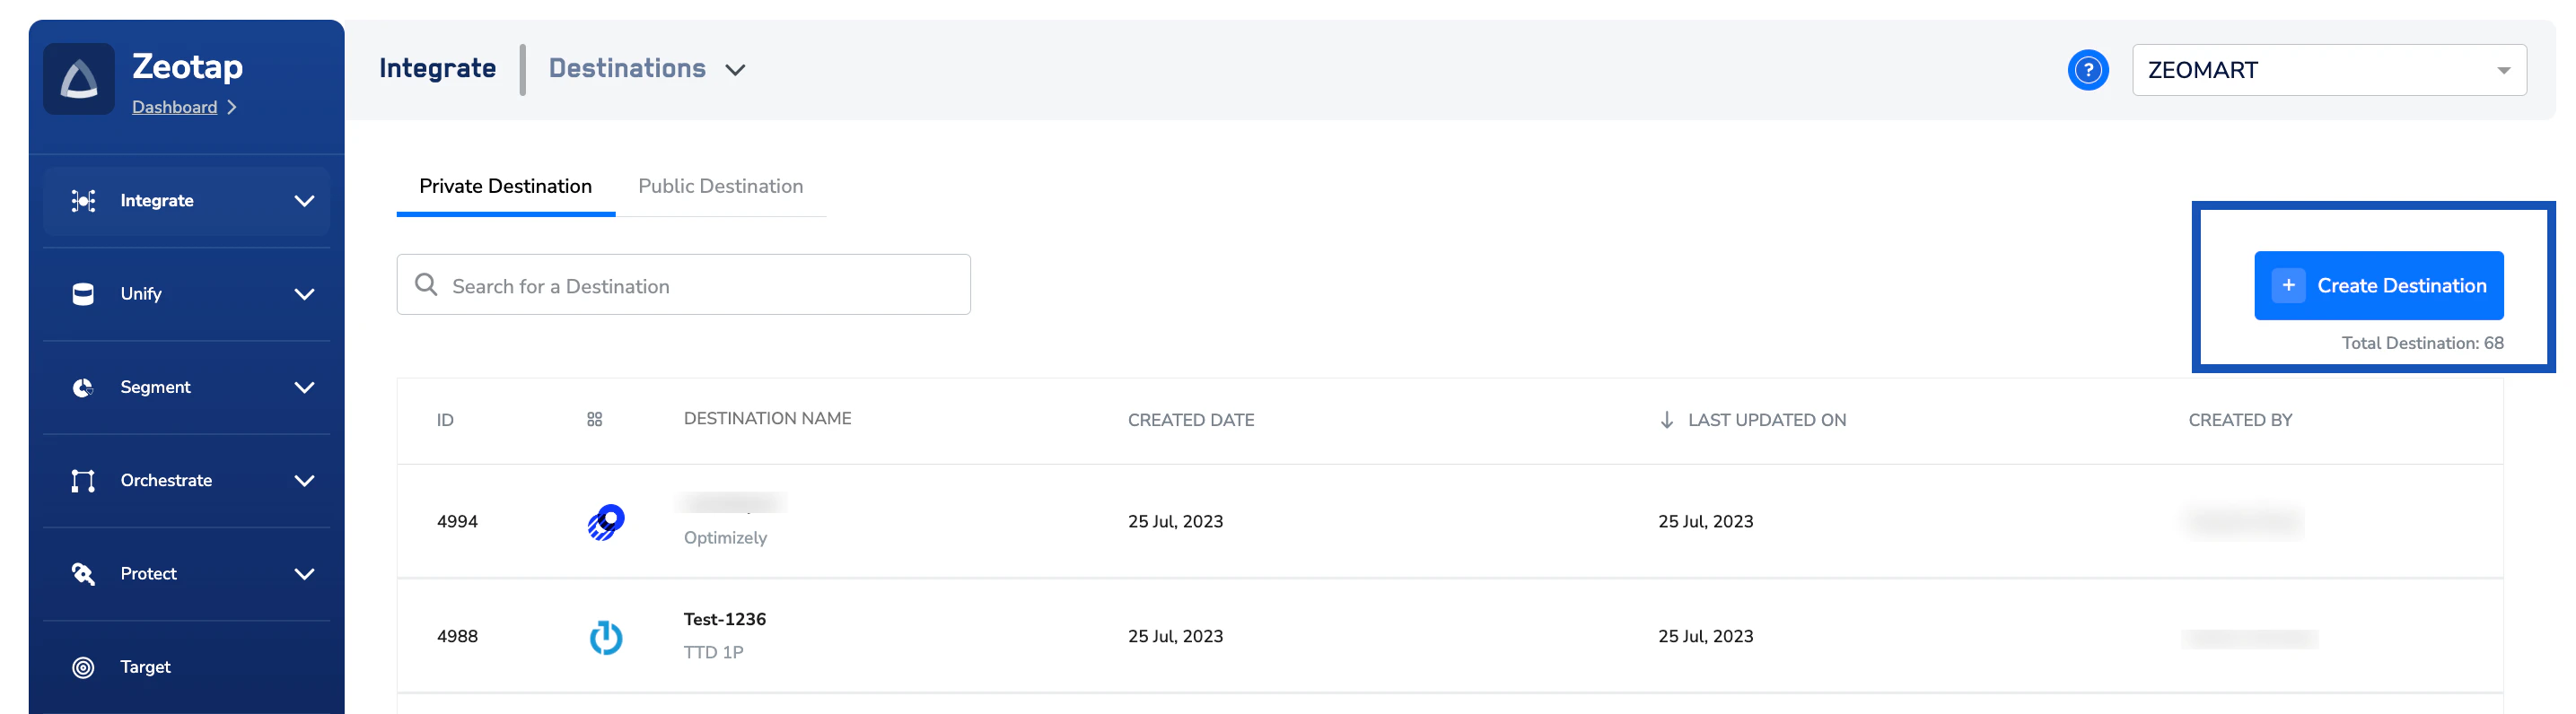 In the search bar, type **Decentriq** and select the **Decentriq integration card** from the results.
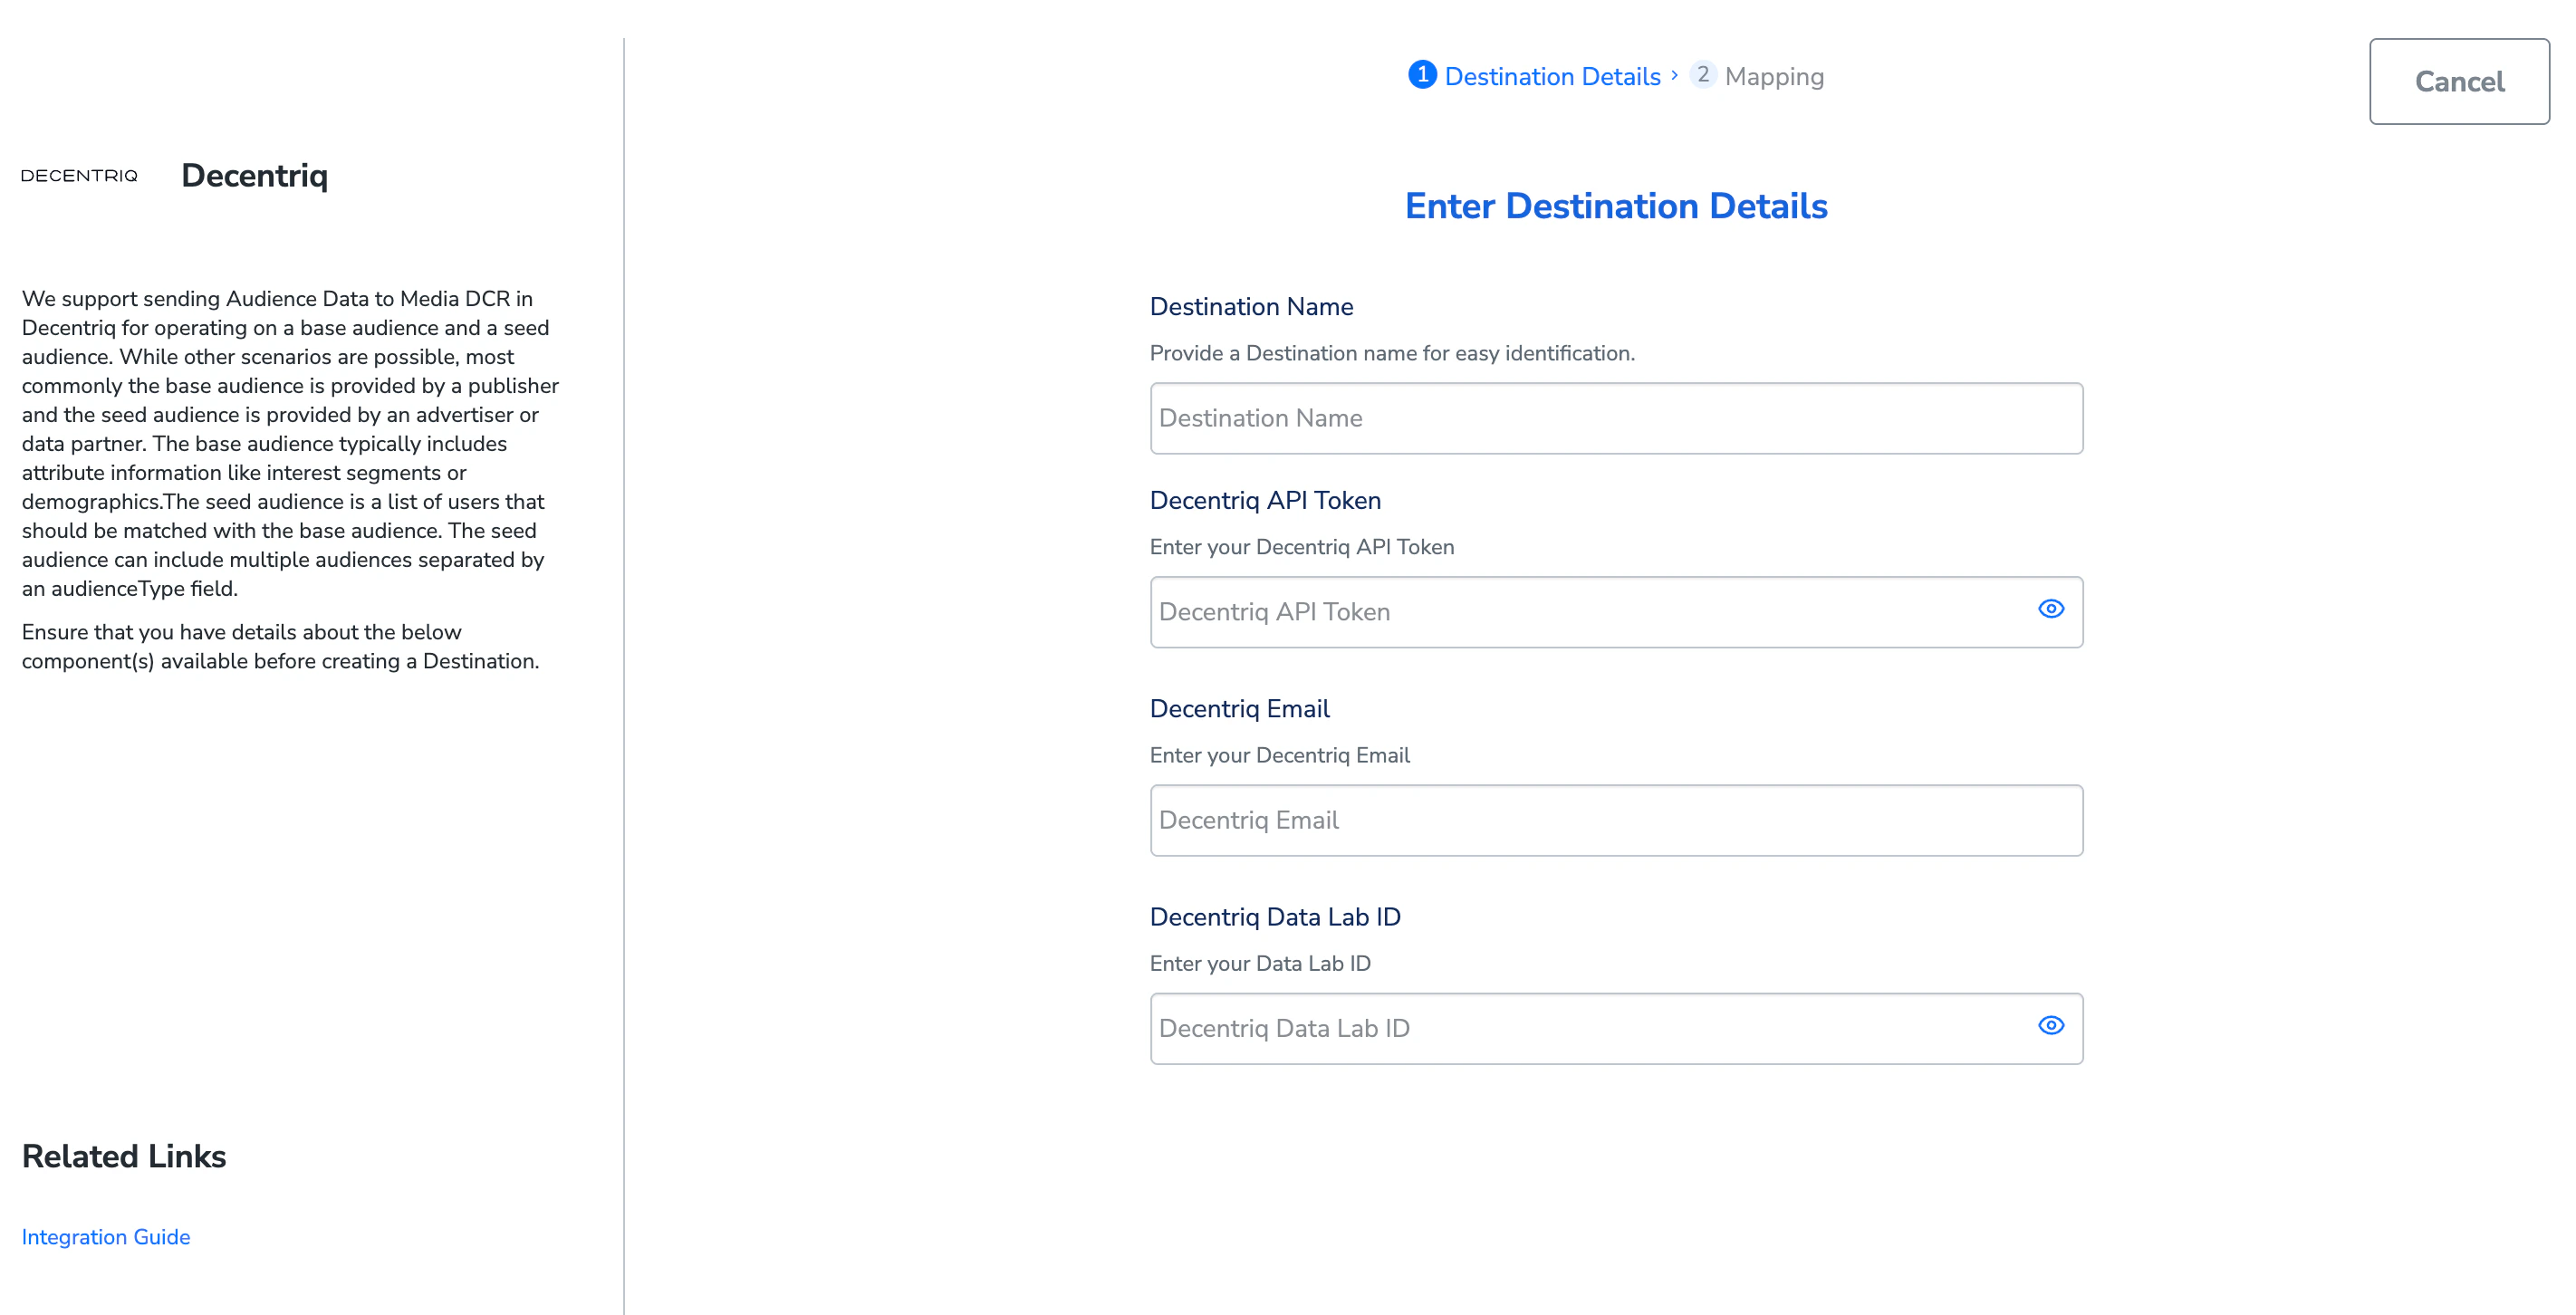
 Fill in the required fields:
a. **Destination Name** — Enter a descriptive name (for example, "Decentriq - Q1 Audience Sync").
b. **API Token** — Paste the API Token you copied from Decentriq.
c. **Email ID** — Enter the email address associated with your Decentriq account.
d. **DataLab ID** — Paste the DataLab ID you copied from Decentriq.
Fill in the required fields:
a. **Destination Name** — Enter a descriptive name (for example, "Decentriq - Q1 Audience Sync").
b. **API Token** — Paste the API Token you copied from Decentriq.
c. **Email ID** — Enter the email address associated with your Decentriq account.
d. **DataLab ID** — Paste the DataLab ID you copied from Decentriq.
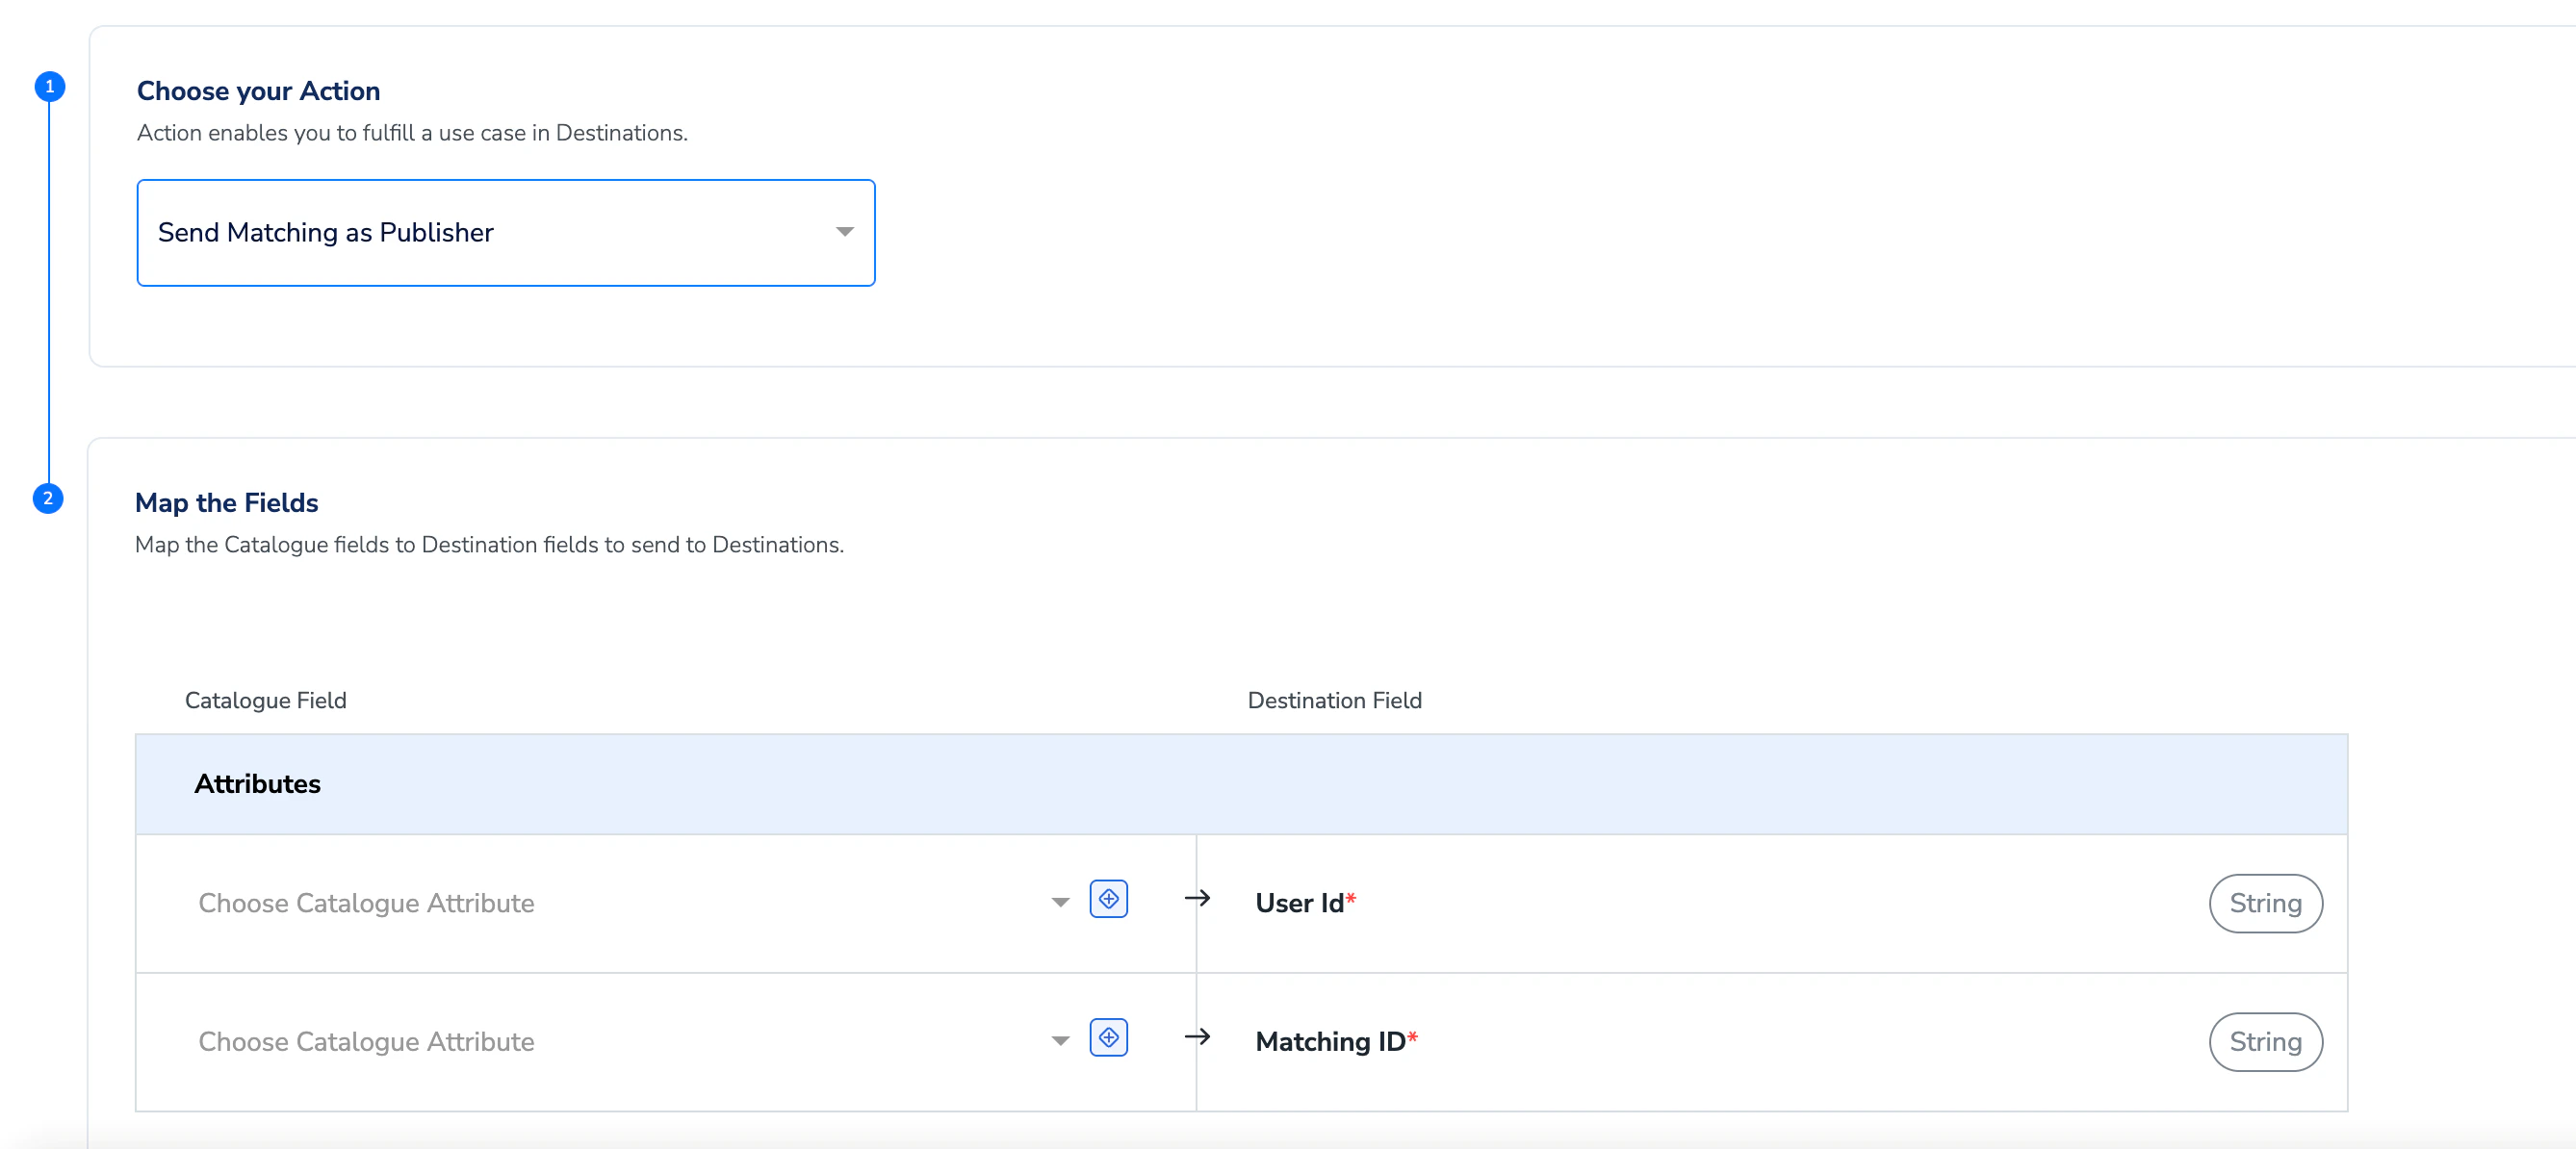
 Under **Data Types to Send**, select the datasets you want to include:
a. **Matching Data** — This is **mandatory** and must always be selected.
Under **Data Types to Send**, select the datasets you want to include:
a. **Matching Data** — This is **mandatory** and must always be selected.
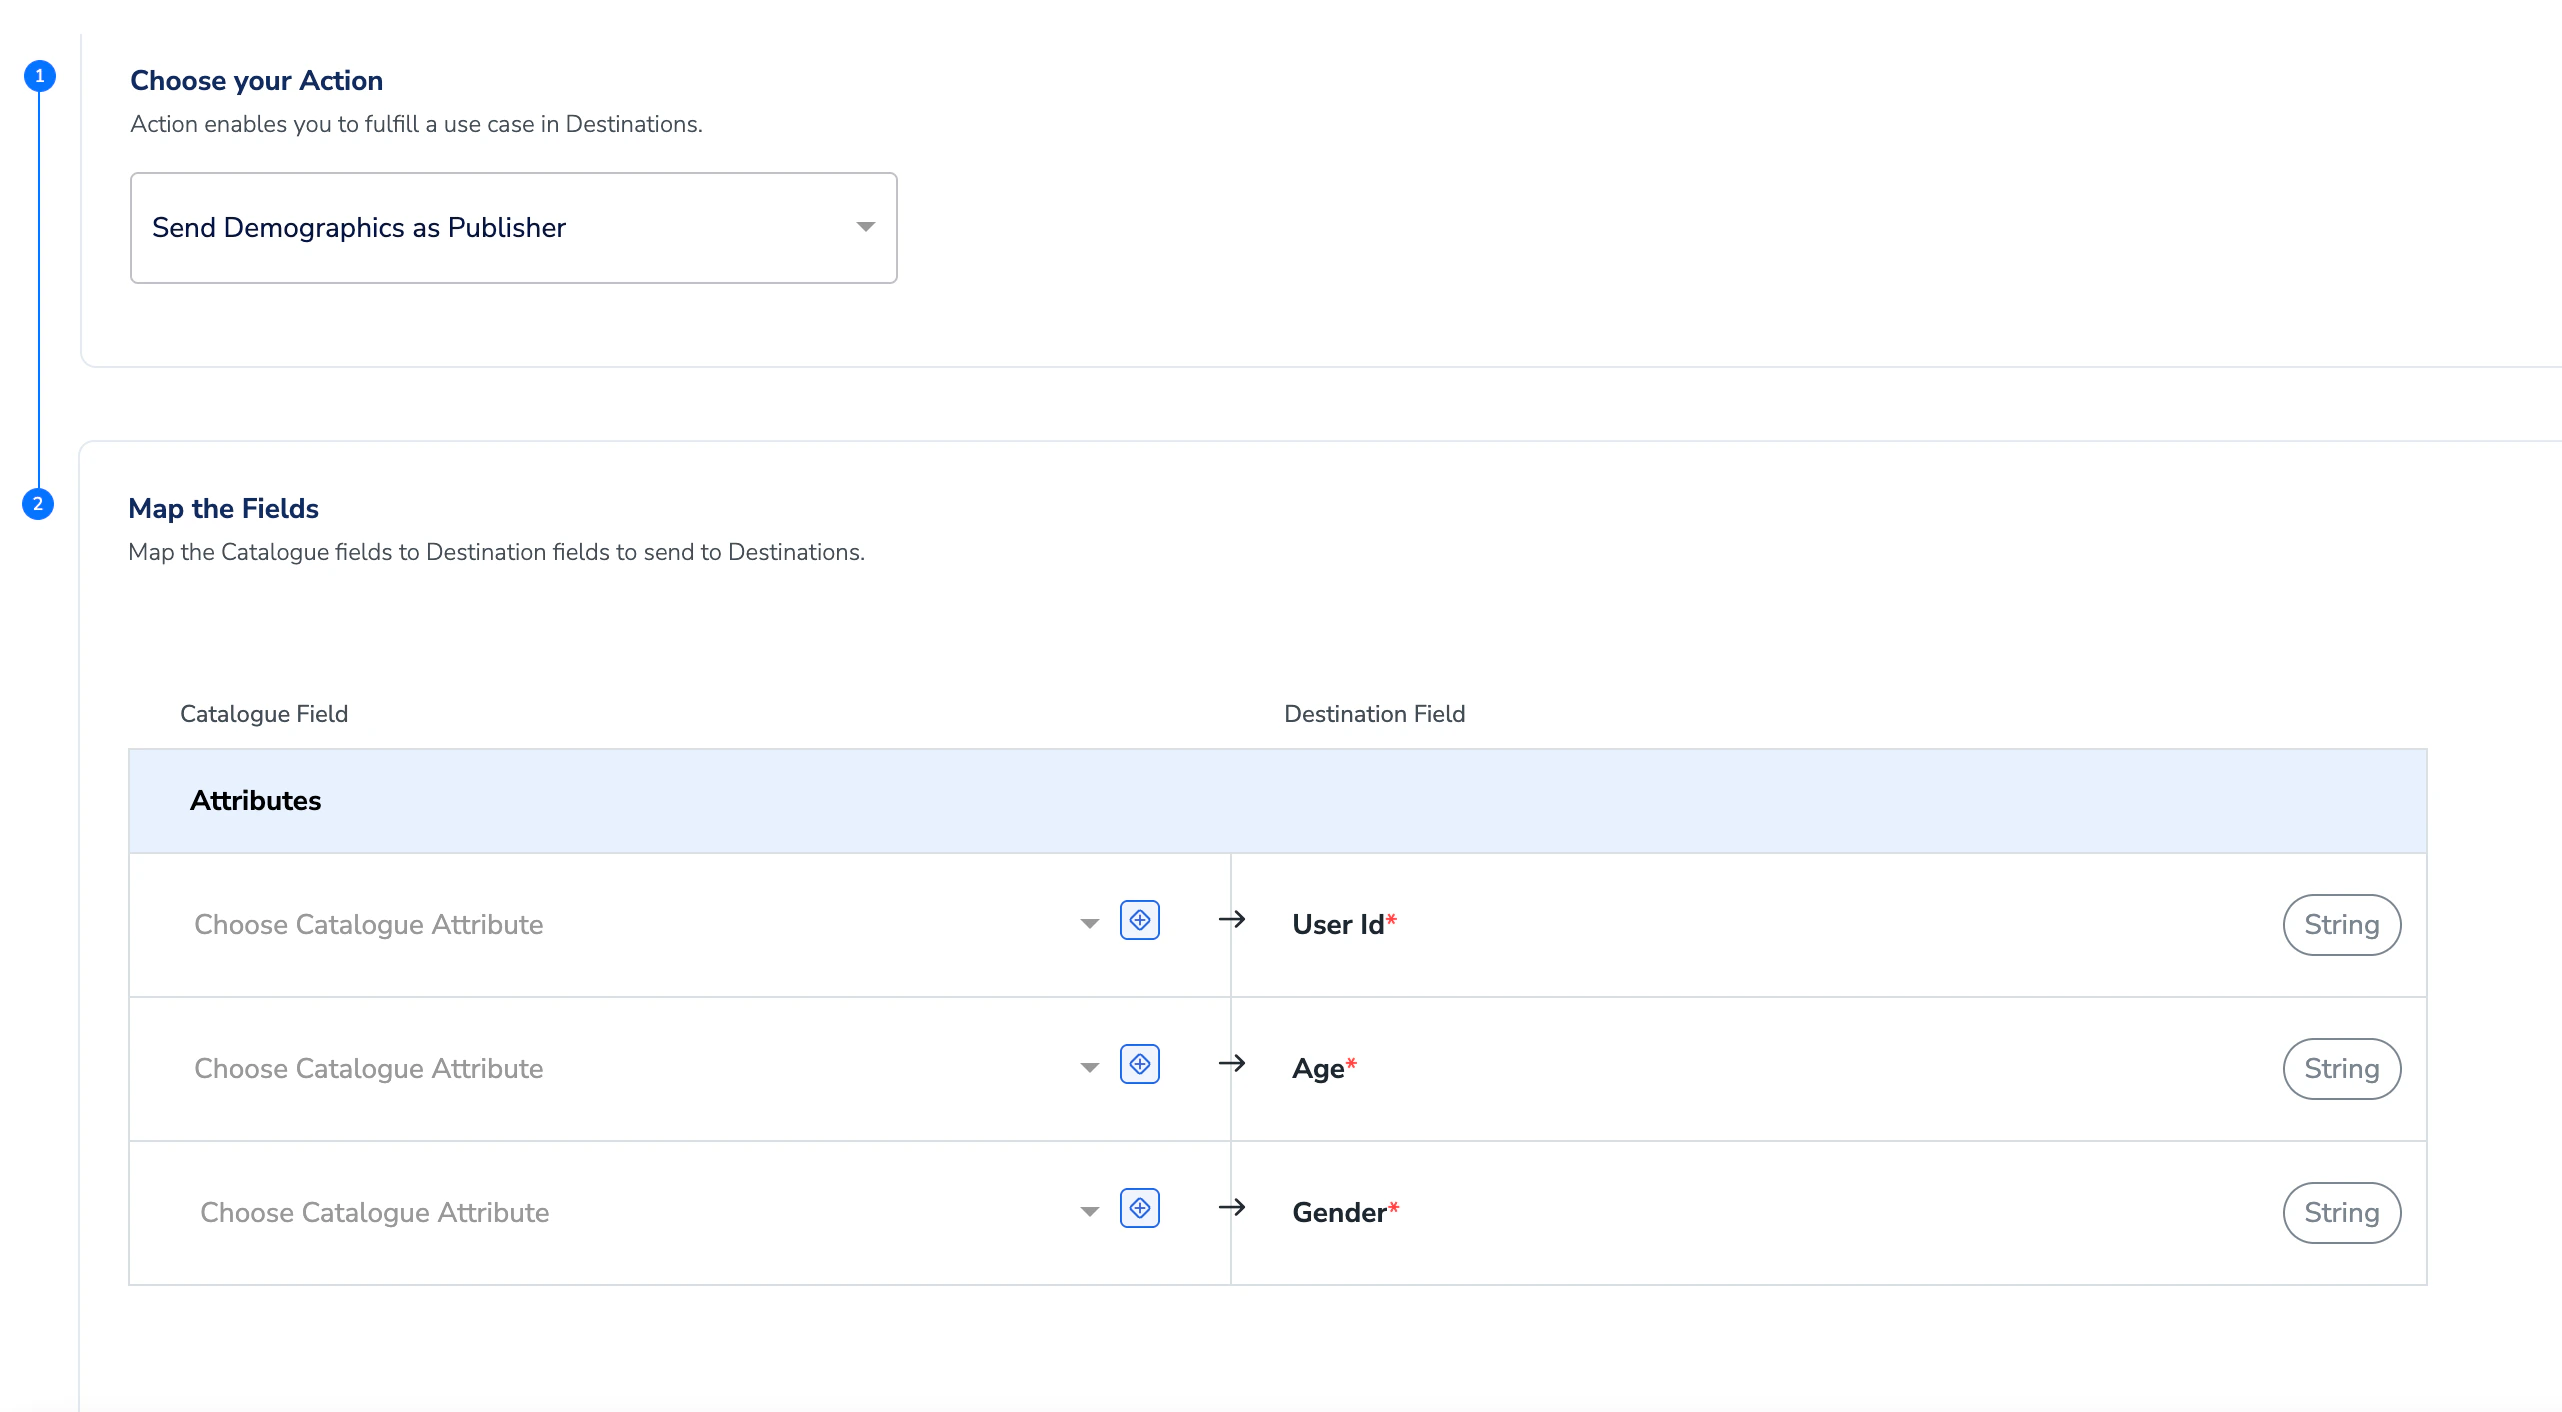
 b. **Demographics Data** — Optional. Select this if you want to send age and gender attributes.
 c. **Segments Data** — Select this to send audience segment memberships.
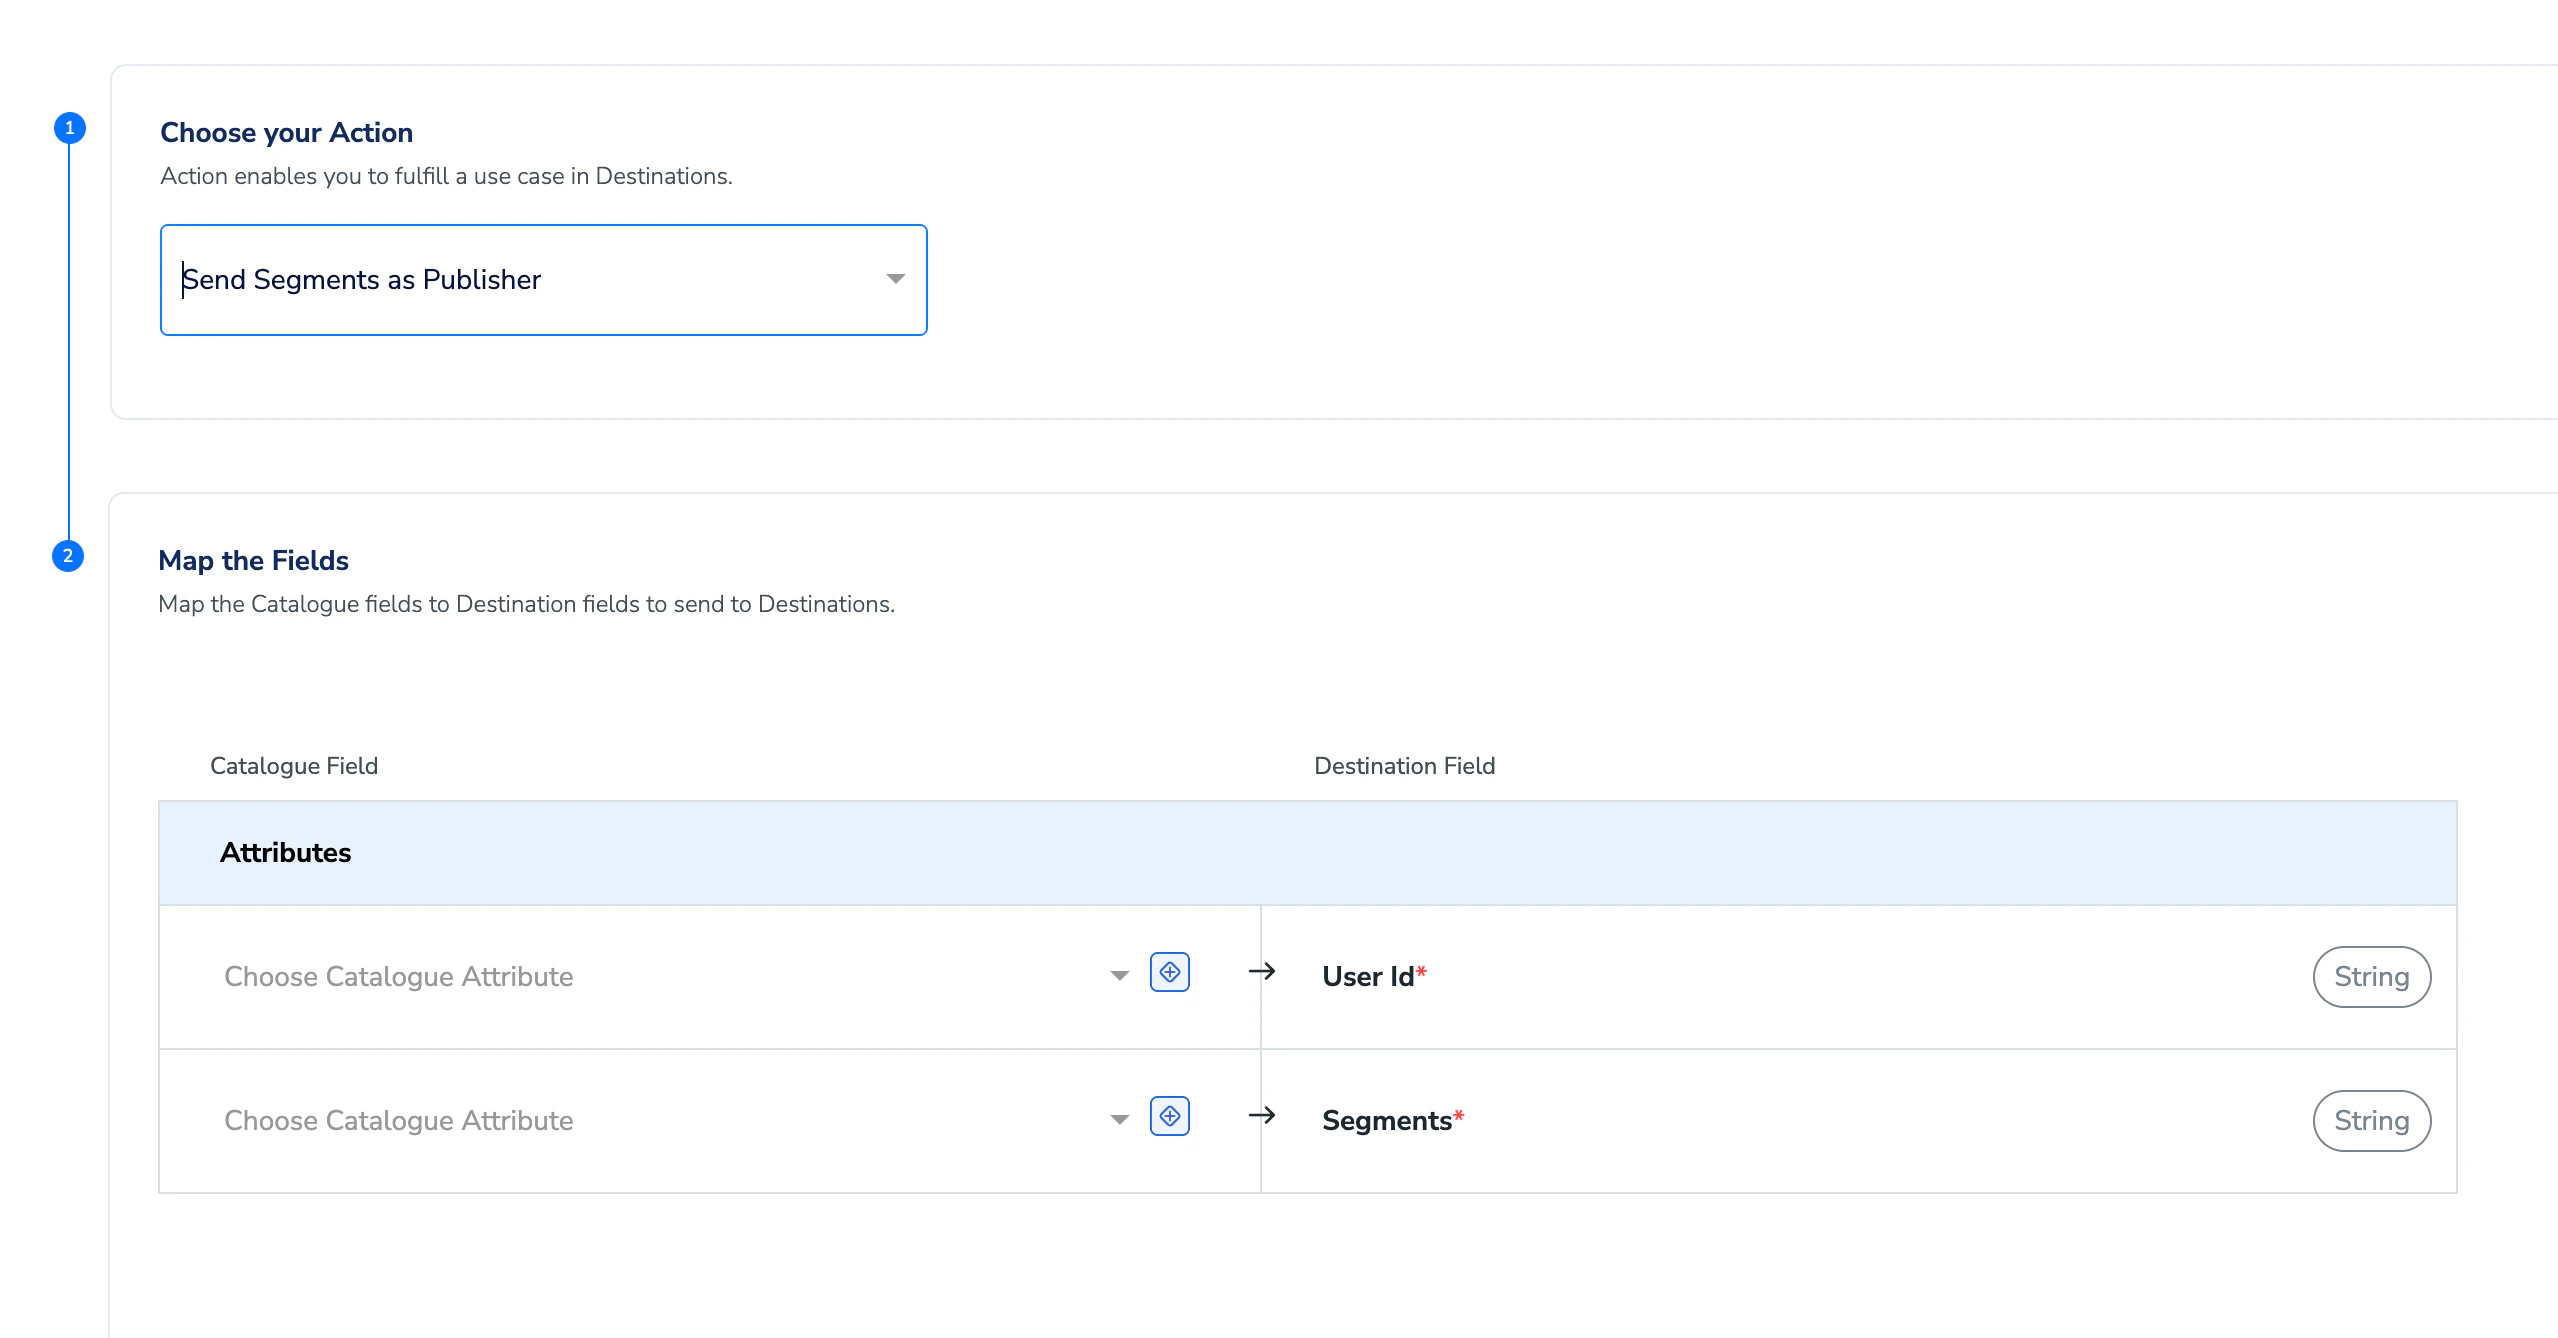 **Note:**
Embeddings data is **not supported** in this integration. Do not select it.
In the **Matching ID** configuration, enter your User ID and select the matching identifier you will use (for example, hashed email).
Review all fields for accuracy, then click **Create** to save the destination.
## Field Mapping
The data you send from Zeotap CDP will arrive in Decentriq as structured datasets. Below is how fields map across the two systems.
### Matching Dataset (Required)
| Zeotap CDP Field | Maps to (Decentriq) | Required / Optional | Notes |
| :---------------------------------------------- | :------------------ | :------------------ | :----------------------------------------------------------------------------------------------------------------------------------------------------------------------------------------- |
| User ID | `userId` | Required | Internal user identifier. Must be consistent across all datasets. Cannot be null. |
| Matching Identifier (for example, hashed email) | `matchingId` | Required | The ID used for matching with partners. Must be unique per row. Supported types include SHA-256 hashed email, phone number, hashed phone number, OneID, Utiq, netID, First-id, and RampID. |
### Segments Dataset (Optional)
| Zeotap CDP Field | Maps to (Decentriq) | Required / Optional | Notes |
| :--------------- | :------------------ | :------------------ | :--------------------------------------------------------------------------------------------------------------------------------------- |
| User ID | `userId` | Required | Same internal user ID as above. A single user can appear in multiple rows (one per segment). |
| Segment Name | `segment` | Required | Human-readable segment label (for example, "Tech Enthusiasts"). Must be consistently spelled. Minimum 10 unique segments, maximum 2,000. |
### Demographics Dataset (Optional)
| Zeotap CDP Field | Maps to (Decentriq) | Required / Optional | Notes |
| :--------------- | :------------------ | :------------------ | :------------------------------------------------------------------------------------------------------------------------------------------------------- |
| User ID | `userId` | Required | Same internal user ID. Must be unique in this table (one row per user). |
| Age | `age` | Optional | Age bracket as a string (for example, "18-25", "26-35"). A maximum of 10 age buckets is recommended. |
| Gender | `gender` | Optional | Gender value as a string. Must be consistently spelled — "M" and "Male" will be treated as separate values. A maximum of 5 gender values is recommended. |
**Important**
The `userId` value must match across all three dataset tables. If a user's ID is "user\_12345" in the Matching dataset, it must be exactly "user\_12345" in the Segments and Demographics datasets as well.
## Activating and Testing the Integration
Once your destination is created, follow these steps to verify everything is working.
In Zeotap CDP, trigger a data send to your new Decentriq destination by selecting the relevant audience segments and initiating the export.
Wait for the data transfer to complete. Zeotap will process and encrypt the data before sending it to Decentriq.
Log in to **Decentriq** and navigate to the **DataLab** you configured as the destination.
Check that the ingested files have been **validated and provisioned** to the DataLab. You should see your datasets (Matching, Segments, and optionally Demographics) listed and available.
**Note:**
Embeddings data is **not supported** in this integration. Do not select it.
In the **Matching ID** configuration, enter your User ID and select the matching identifier you will use (for example, hashed email).
Review all fields for accuracy, then click **Create** to save the destination.
## Field Mapping
The data you send from Zeotap CDP will arrive in Decentriq as structured datasets. Below is how fields map across the two systems.
### Matching Dataset (Required)
| Zeotap CDP Field | Maps to (Decentriq) | Required / Optional | Notes |
| :---------------------------------------------- | :------------------ | :------------------ | :----------------------------------------------------------------------------------------------------------------------------------------------------------------------------------------- |
| User ID | `userId` | Required | Internal user identifier. Must be consistent across all datasets. Cannot be null. |
| Matching Identifier (for example, hashed email) | `matchingId` | Required | The ID used for matching with partners. Must be unique per row. Supported types include SHA-256 hashed email, phone number, hashed phone number, OneID, Utiq, netID, First-id, and RampID. |
### Segments Dataset (Optional)
| Zeotap CDP Field | Maps to (Decentriq) | Required / Optional | Notes |
| :--------------- | :------------------ | :------------------ | :--------------------------------------------------------------------------------------------------------------------------------------- |
| User ID | `userId` | Required | Same internal user ID as above. A single user can appear in multiple rows (one per segment). |
| Segment Name | `segment` | Required | Human-readable segment label (for example, "Tech Enthusiasts"). Must be consistently spelled. Minimum 10 unique segments, maximum 2,000. |
### Demographics Dataset (Optional)
| Zeotap CDP Field | Maps to (Decentriq) | Required / Optional | Notes |
| :--------------- | :------------------ | :------------------ | :------------------------------------------------------------------------------------------------------------------------------------------------------- |
| User ID | `userId` | Required | Same internal user ID. Must be unique in this table (one row per user). |
| Age | `age` | Optional | Age bracket as a string (for example, "18-25", "26-35"). A maximum of 10 age buckets is recommended. |
| Gender | `gender` | Optional | Gender value as a string. Must be consistently spelled — "M" and "Male" will be treated as separate values. A maximum of 5 gender values is recommended. |
**Important**
The `userId` value must match across all three dataset tables. If a user's ID is "user\_12345" in the Matching dataset, it must be exactly "user\_12345" in the Segments and Demographics datasets as well.
## Activating and Testing the Integration
Once your destination is created, follow these steps to verify everything is working.
In Zeotap CDP, trigger a data send to your new Decentriq destination by selecting the relevant audience segments and initiating the export.
Wait for the data transfer to complete. Zeotap will process and encrypt the data before sending it to Decentriq.
Log in to **Decentriq** and navigate to the **DataLab** you configured as the destination.
Check that the ingested files have been **validated and provisioned** to the DataLab. You should see your datasets (Matching, Segments, and optionally Demographics) listed and available.
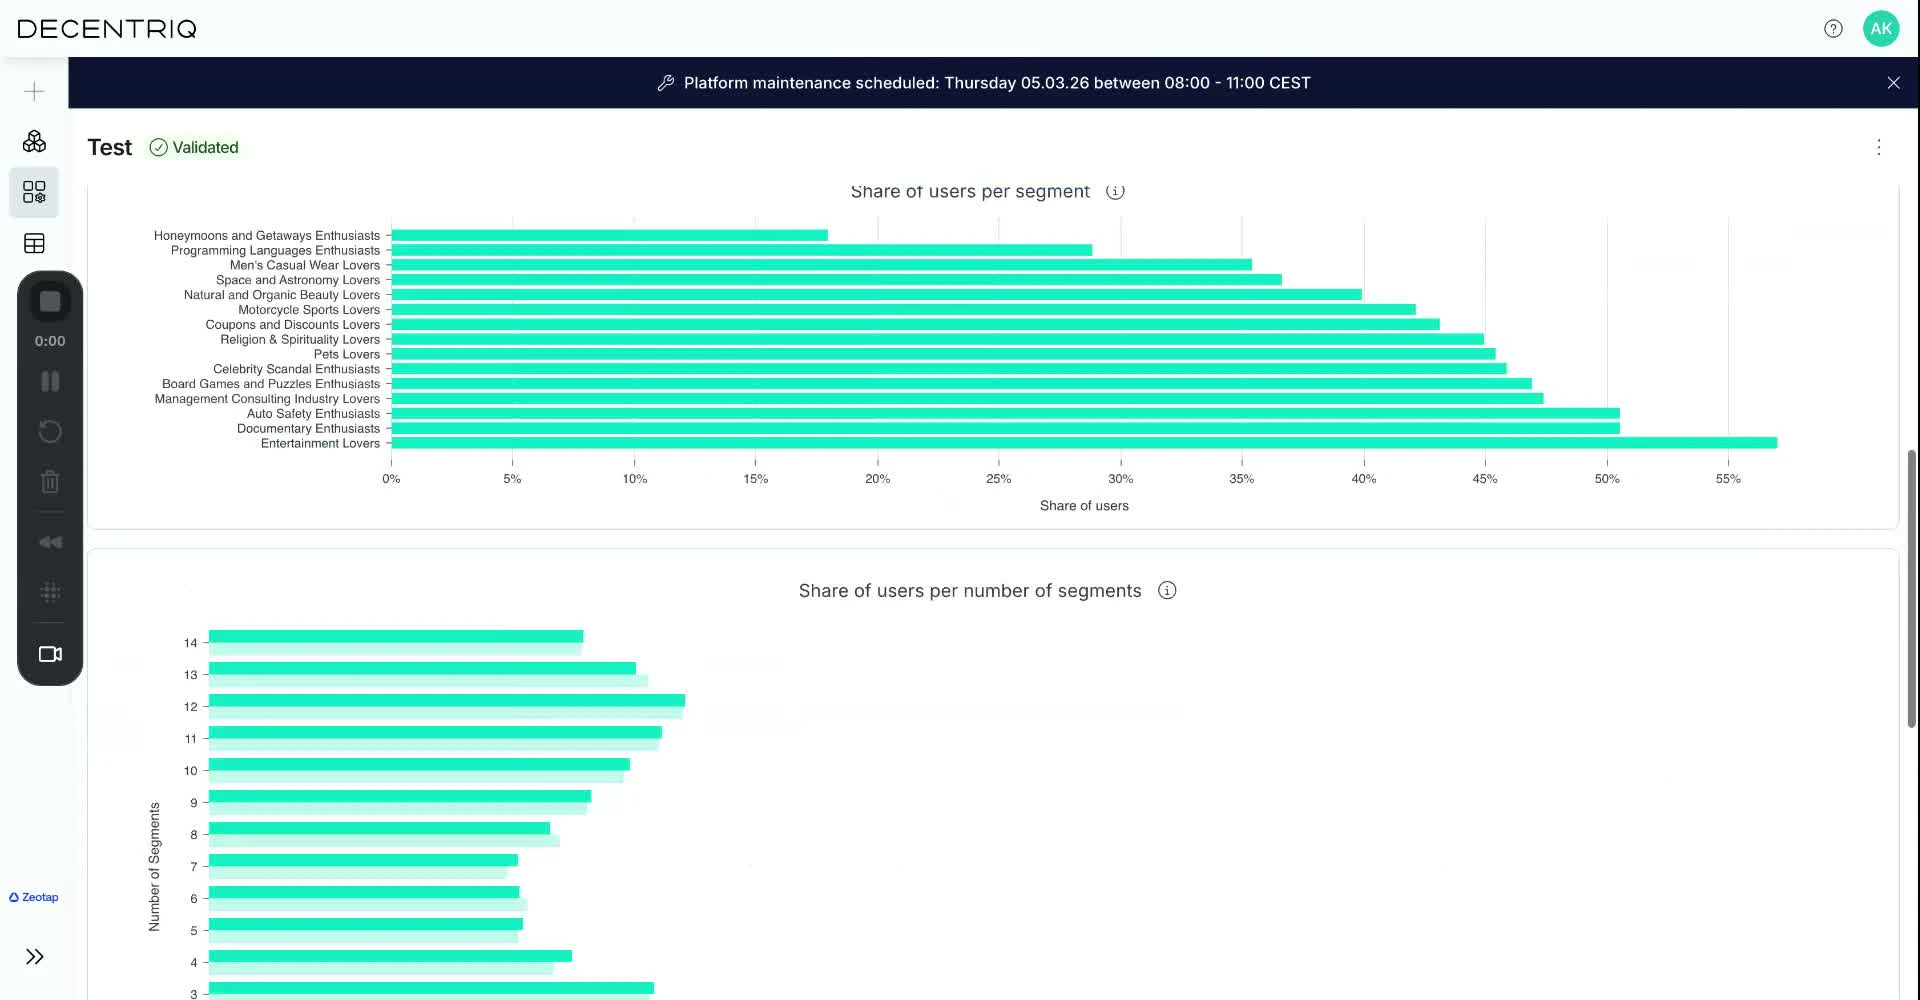 Open each dataset to confirm the data looks correct — verify that user IDs, segment names, and demographic values appear as expected.
A successful integration looks like this: your datasets appear inside the Decentriq DataLab with a **validated** status, and the row counts and field values match what you sent from Zeotap.
## Link an Audience to the Decentriq Destination
For information about how to link an Audience or segment to the created Destination in the **Audiences** and **Target** applications, refer [here](/articles/integrate-customer/link-an-audience-to-the-destination).
## Important Notes and Limitations
**Note:**
* Embeddings data is **not supported** in this integration. Do not attempt to send embeddings datasets — only Matching, Segments, and Demographics are available.
* All data is **encrypted on the client side** before it is uploaded to Decentriq. This ensures your audience data remains protected in transit.
* The `matchingId` field in the Matching dataset must contain **unique values only**. Duplicate matching IDs will cause validation errors.
* Segment labels and gender values must be **consistently spelled** across your data. For example, "Male" and "M" will be treated as two different values, which can skew your analysis in the clean room.
* Double-check your **API Token** and **DataLab ID** for accuracy before saving the destination. Incorrect credentials will prevent the connection from working.
Open each dataset to confirm the data looks correct — verify that user IDs, segment names, and demographic values appear as expected.
A successful integration looks like this: your datasets appear inside the Decentriq DataLab with a **validated** status, and the row counts and field values match what you sent from Zeotap.
## Link an Audience to the Decentriq Destination
For information about how to link an Audience or segment to the created Destination in the **Audiences** and **Target** applications, refer [here](/articles/integrate-customer/link-an-audience-to-the-destination).
## Important Notes and Limitations
**Note:**
* Embeddings data is **not supported** in this integration. Do not attempt to send embeddings datasets — only Matching, Segments, and Demographics are available.
* All data is **encrypted on the client side** before it is uploaded to Decentriq. This ensures your audience data remains protected in transit.
* The `matchingId` field in the Matching dataset must contain **unique values only**. Duplicate matching IDs will cause validation errors.
* Segment labels and gender values must be **consistently spelled** across your data. For example, "Male" and "M" will be treated as two different values, which can skew your analysis in the clean room.
* Double-check your **API Token** and **DataLab ID** for accuracy before saving the destination. Incorrect credentials will prevent the connection from working.