> ## Documentation Index
> Fetch the complete documentation index at: https://docs.zeotap.com/llms.txt
> Use this file to discover all available pages before exploring further.
# Create an Airship (Batch) Source
**Note:**
Refer to [Airship (Batch) source](/articles/integrate-customer/airship-batch-source) to know about this source.
## Prerequisites
Ensure that you take care of the following prerequisites before creating an Airship (Batch) source:
* **Bearer Token (Access Token)** – A bearer token in Airship is a unique string of characters that authenticates a user or application to access a resource. It grants limited access to a user or application for a specific period, allowing them to perform actions on behalf of the user who generated the token. Perform the following steps to create a Bearer Token in Airship.
Log into the Airship console and navigate to **Settings**.
Under **Settings**, select **Project Configuration** and click **Manage** for Tokens.
Click **Create Token**.
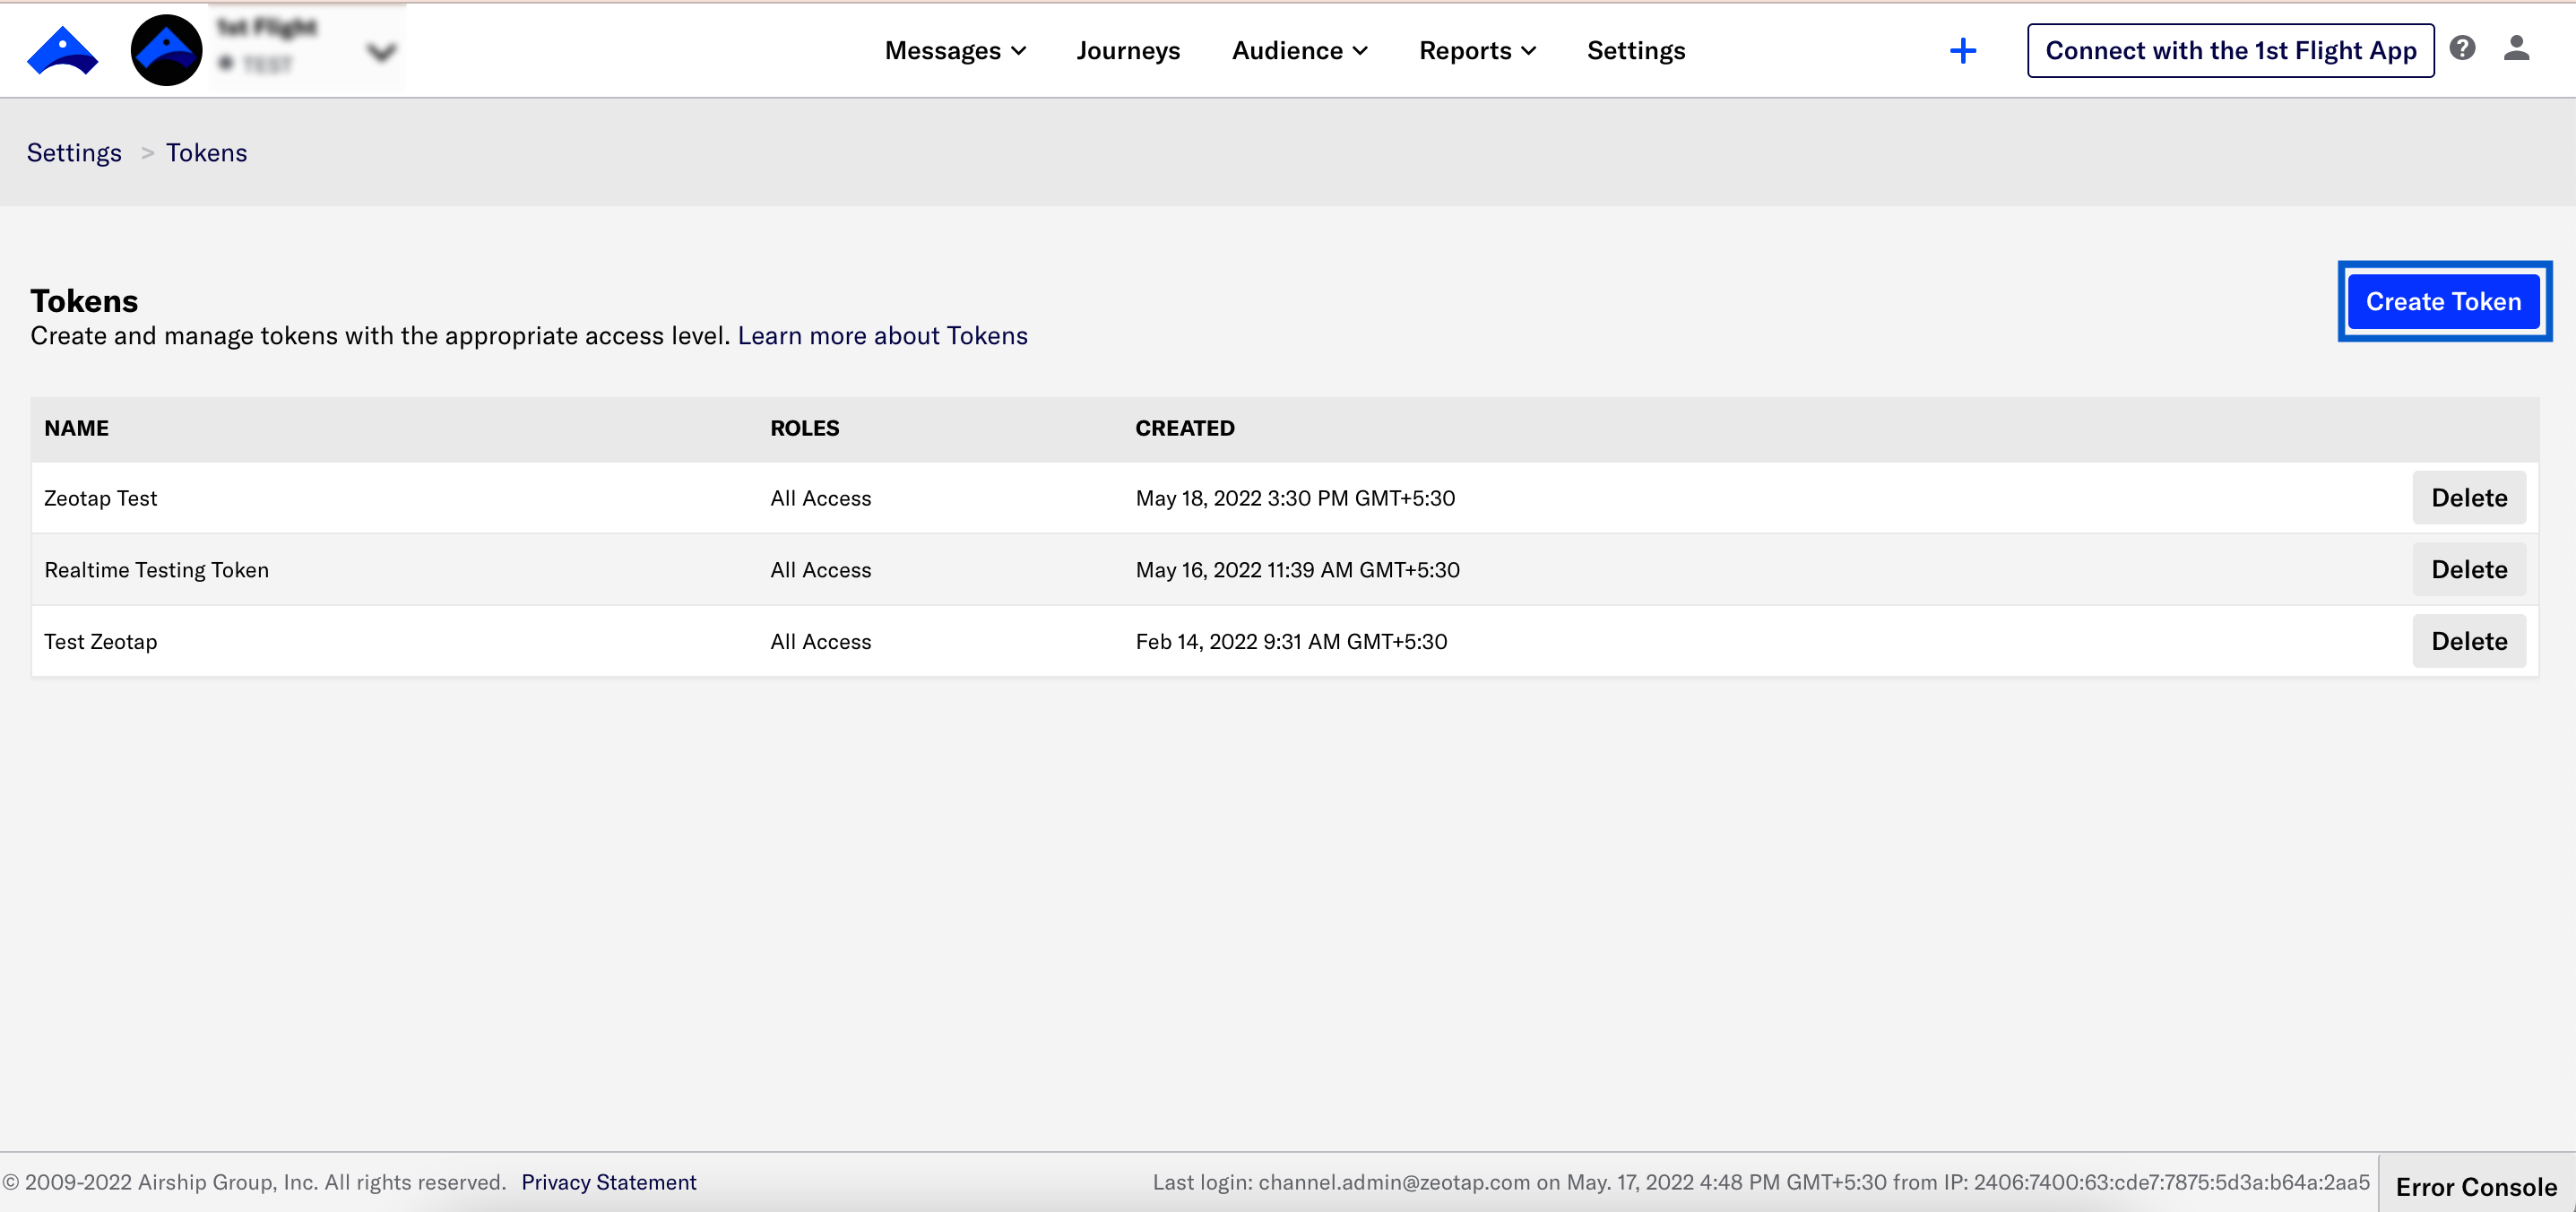 Enter a token name. This is just a friendly name to help you recognise your tokens in Airship.
Select the **Role** you want to grant for this token. For additional information, see [Airship API Security](https://docs.airship.com/guides/messaging/user-guide/admin/security/api-security/).
* **Audience Modification:** Grants read and write permission to audience APIs, including channels, named users, segments, lists and so on. Use this permission for users sending custom events into Airship.
* **All Access:** Grants full access to your Airship project, except Acoustic integrations. You must use this permission when creating a token for an inbound message handling web-hook.
Click **Create Token**.
Enter a token name. This is just a friendly name to help you recognise your tokens in Airship.
Select the **Role** you want to grant for this token. For additional information, see [Airship API Security](https://docs.airship.com/guides/messaging/user-guide/admin/security/api-security/).
* **Audience Modification:** Grants read and write permission to audience APIs, including channels, named users, segments, lists and so on. Use this permission for users sending custom events into Airship.
* **All Access:** Grants full access to your Airship project, except Acoustic integrations. You must use this permission when creating a token for an inbound message handling web-hook.
Click **Create Token**.
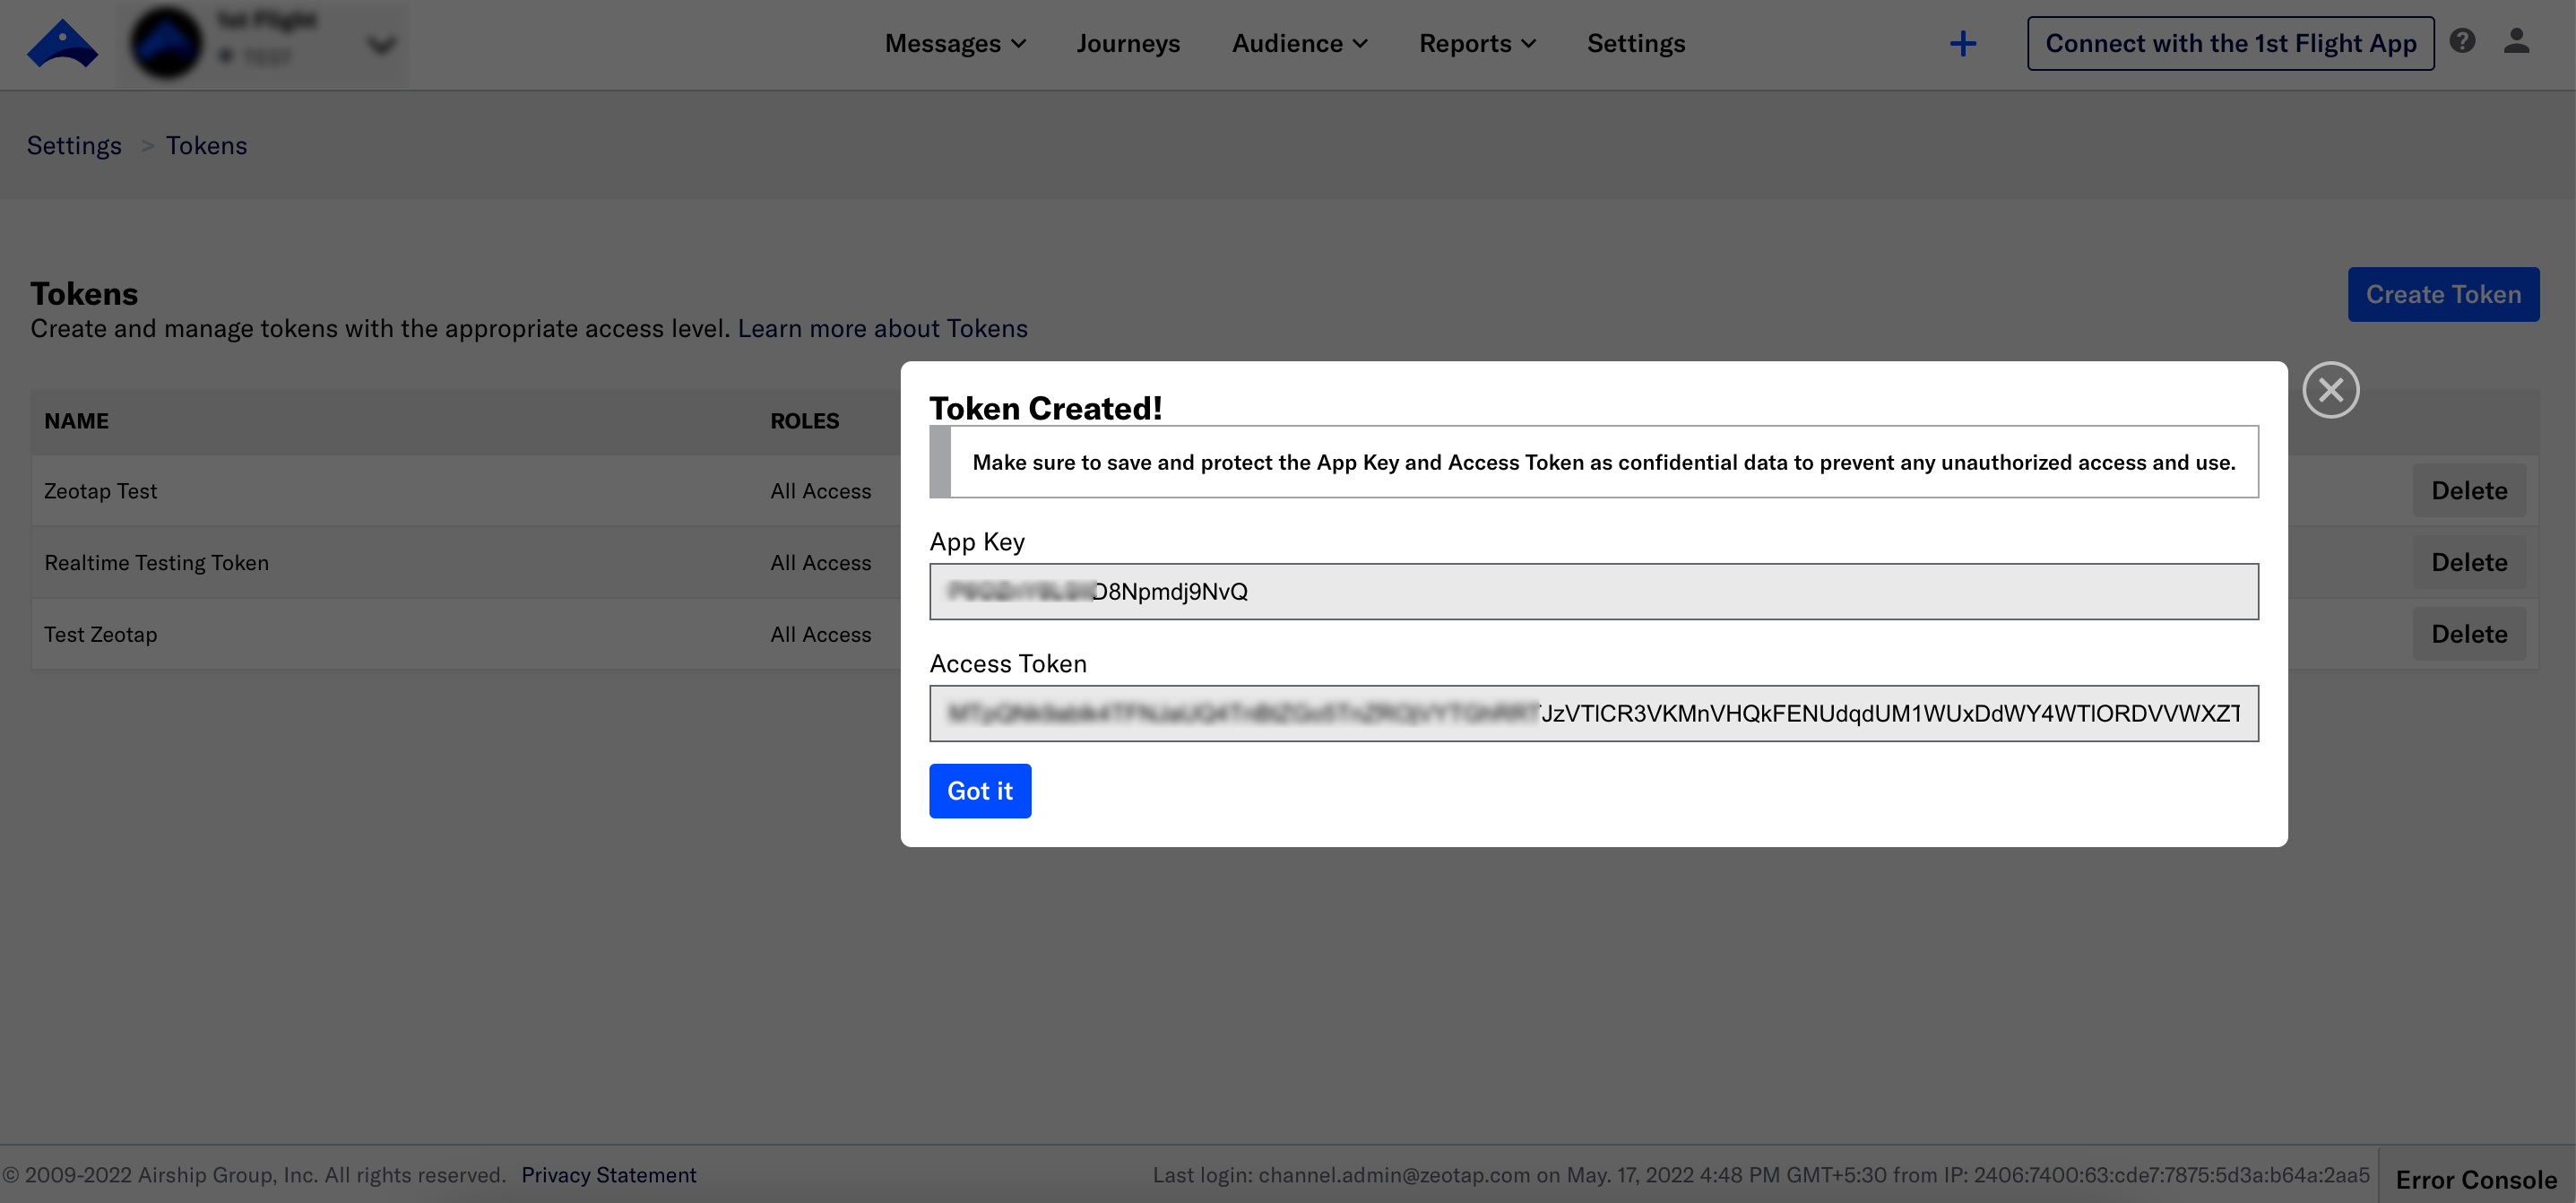
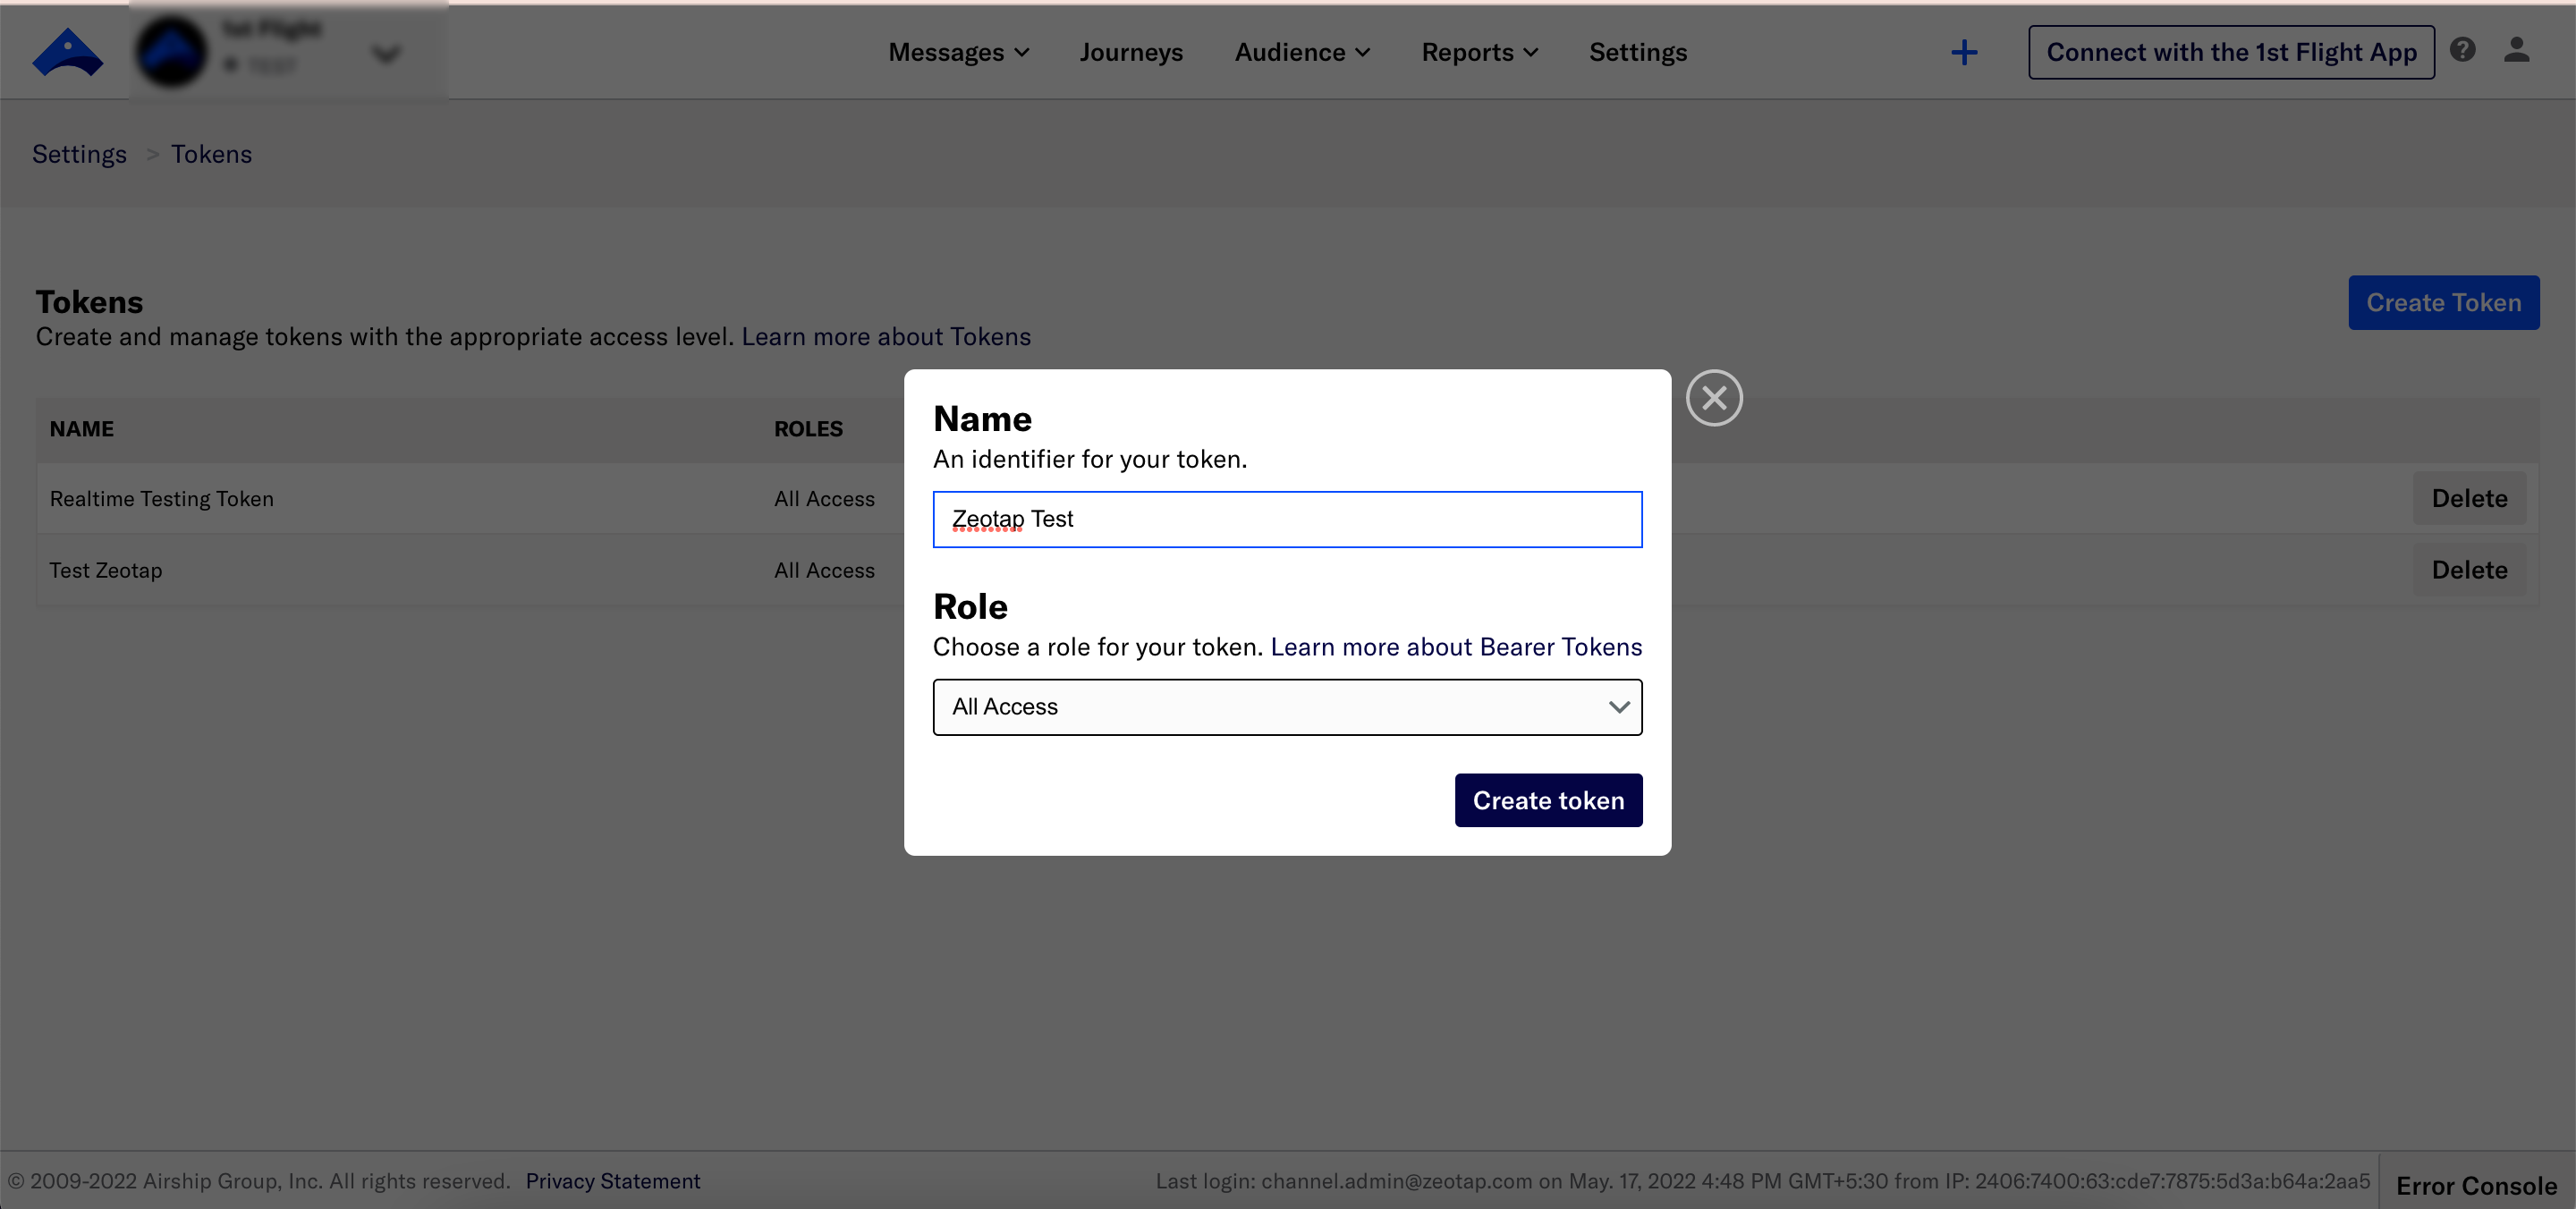 Copy the **Access Token** value, then click **Got it** to close the window.
 * **Named Users –** A Named User is a proprietary identifier that maps customer-chosen IDs. In other words, Named User is an individual consumer who can have more than one mobile device registered with your app. For example, Named User john\_doe\_123 can have a personal Android phone and an iPad, on both of which he has opted in for push notifications. If you want to reach John on both devices, associate the Channel (device) identifiers for each device to the Named User john\_doe\_123, and push to the Named User. This sends out notifications to both associated devices.
* **Match the Airship Channel ID to Zeotap attribute** - In addition to the Named Users, you can also match the Airship channel ID with the Zeotap attribute to enhance customer profiles in the Zeotap system. The following get method can be used to retrieve the Airship channel ID through our SDK from the Airship SDK:
```javascript Code theme={null}
UA.then(sdk => {
sdk.getChannel().then(channel => {
zeotap.setUserIdentities("Airship_Channel_id" : channel.id)
})
})
```
**Note:**
For more information about how to fetch the custom identities through Zeotap's SDKs, refer [here](/articles/sdks/web-js/api-reference#custom-identities).
## Create a Source
Once you have all the necessary information mentioned above, perform the following steps to create a Airship (Batch) source:
Navigate to the **Sources** application under **Integrate**, in the Zeotap CDP App.
Click **CREATE SOURCE**.
Choose **Customer Engagement Channels** as the Category.
* **Named Users –** A Named User is a proprietary identifier that maps customer-chosen IDs. In other words, Named User is an individual consumer who can have more than one mobile device registered with your app. For example, Named User john\_doe\_123 can have a personal Android phone and an iPad, on both of which he has opted in for push notifications. If you want to reach John on both devices, associate the Channel (device) identifiers for each device to the Named User john\_doe\_123, and push to the Named User. This sends out notifications to both associated devices.
* **Match the Airship Channel ID to Zeotap attribute** - In addition to the Named Users, you can also match the Airship channel ID with the Zeotap attribute to enhance customer profiles in the Zeotap system. The following get method can be used to retrieve the Airship channel ID through our SDK from the Airship SDK:
```javascript Code theme={null}
UA.then(sdk => {
sdk.getChannel().then(channel => {
zeotap.setUserIdentities("Airship_Channel_id" : channel.id)
})
})
```
**Note:**
For more information about how to fetch the custom identities through Zeotap's SDKs, refer [here](/articles/sdks/web-js/api-reference#custom-identities).
## Create a Source
Once you have all the necessary information mentioned above, perform the following steps to create a Airship (Batch) source:
Navigate to the **Sources** application under **Integrate**, in the Zeotap CDP App.
Click **CREATE SOURCE**.
Choose **Customer Engagement Channels** as the Category.
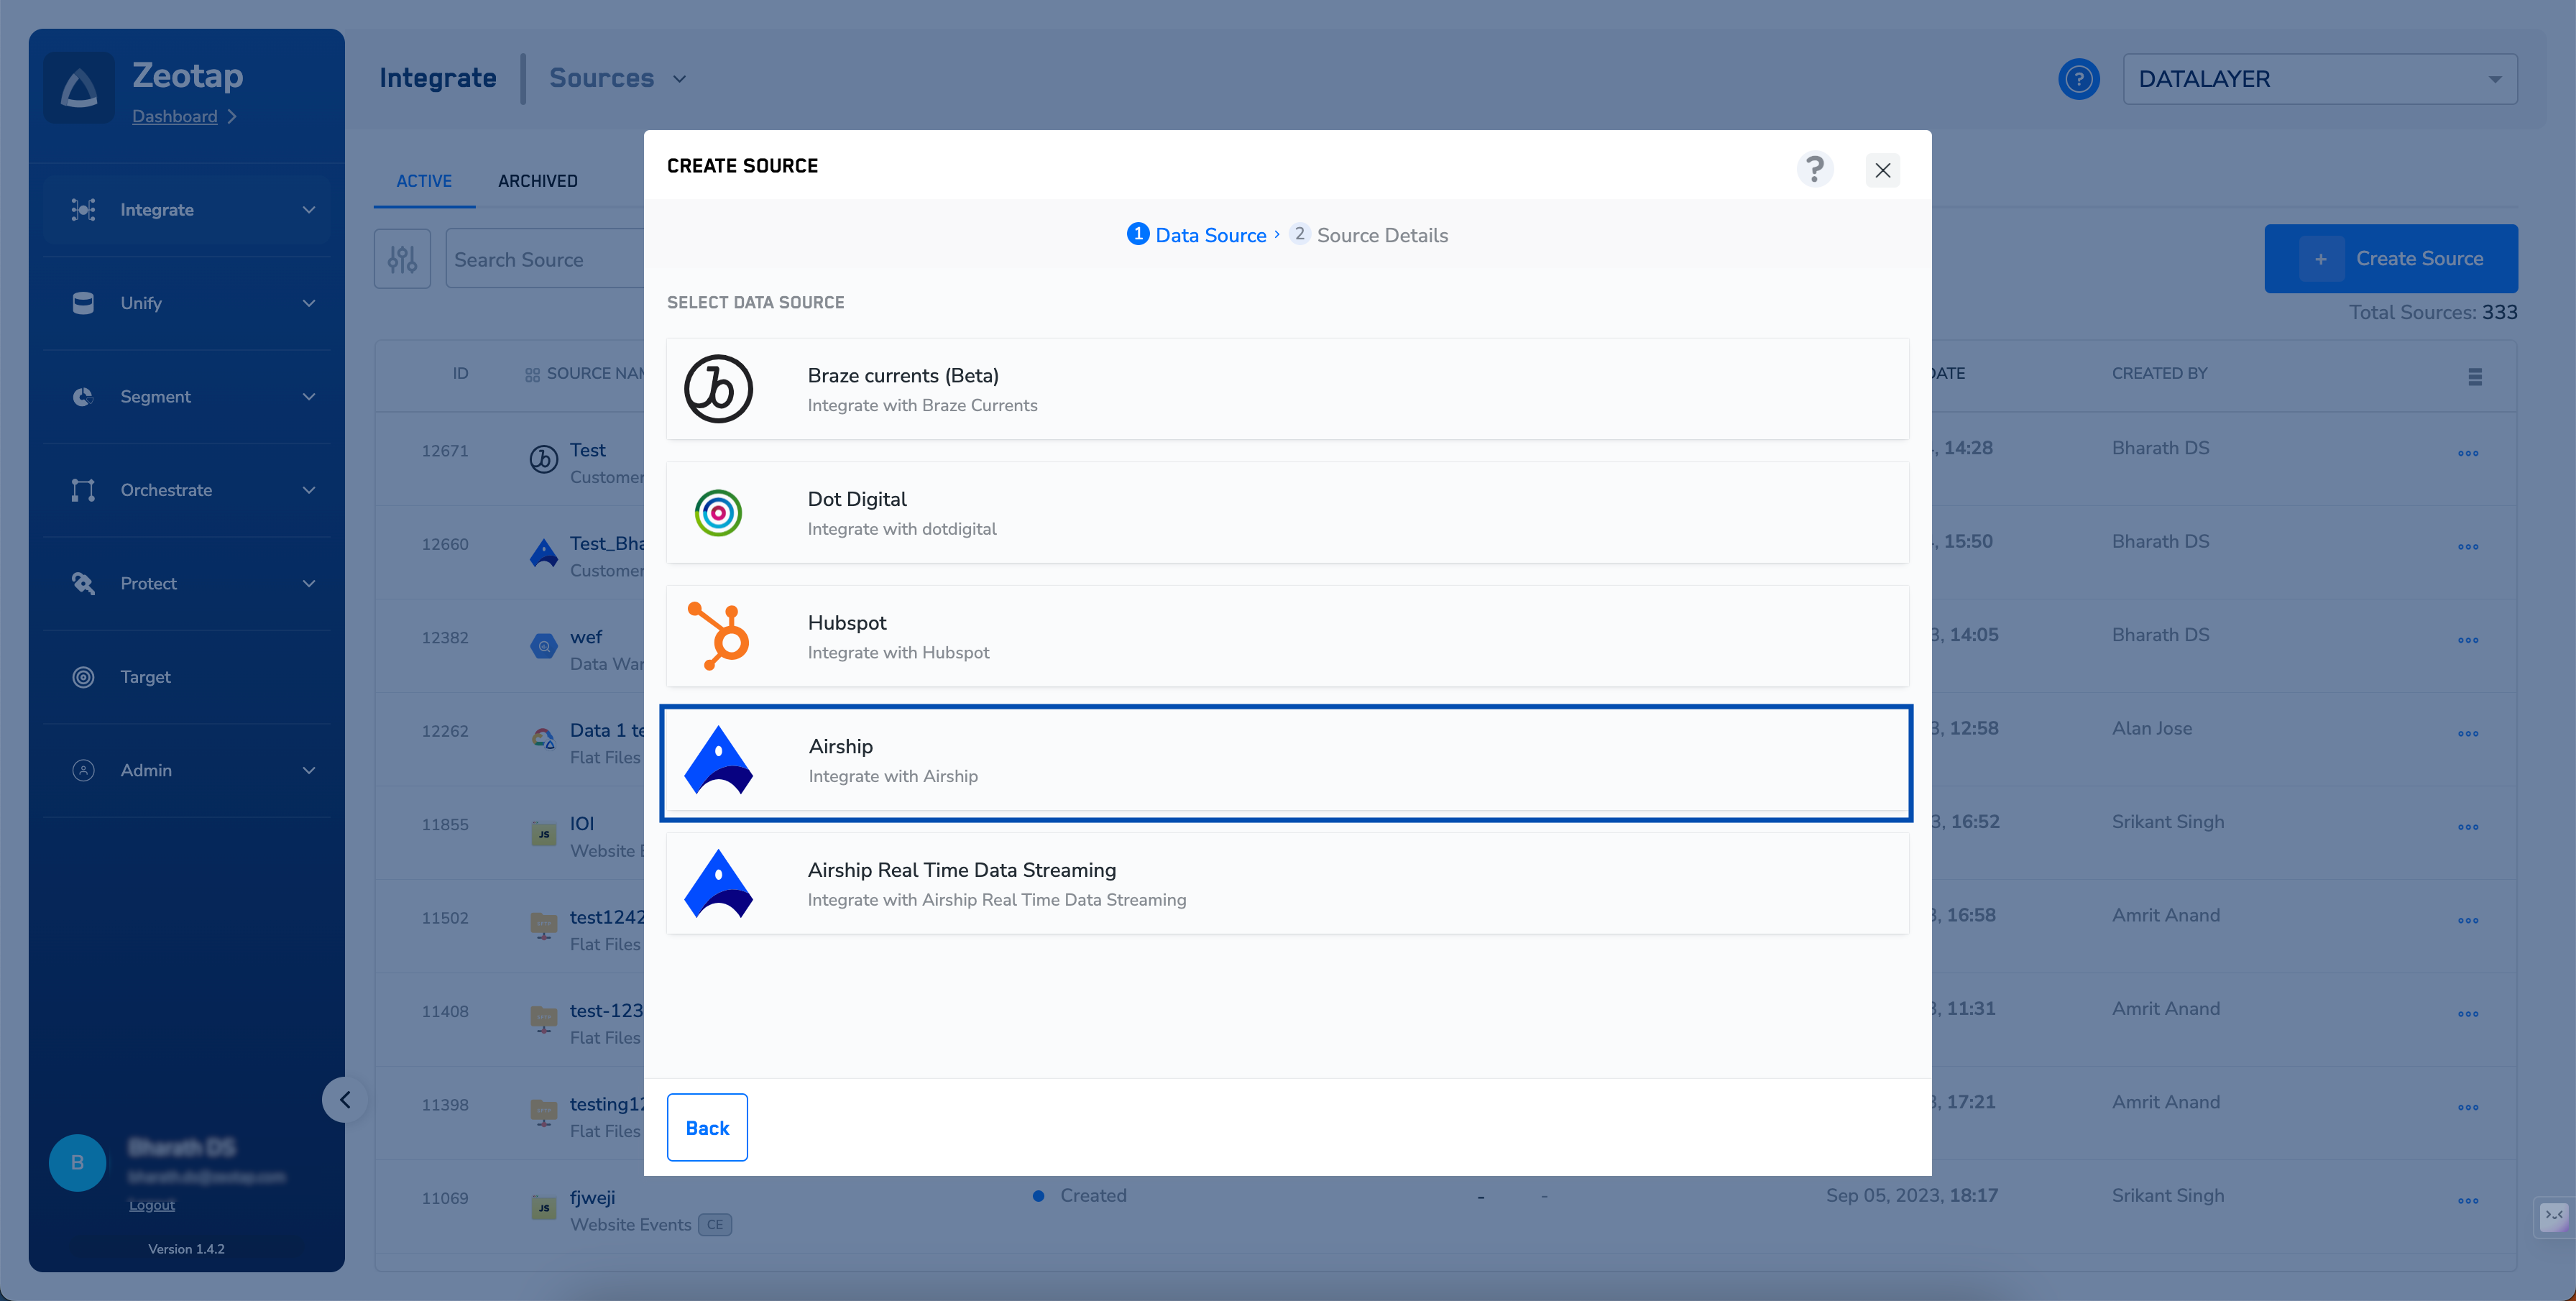
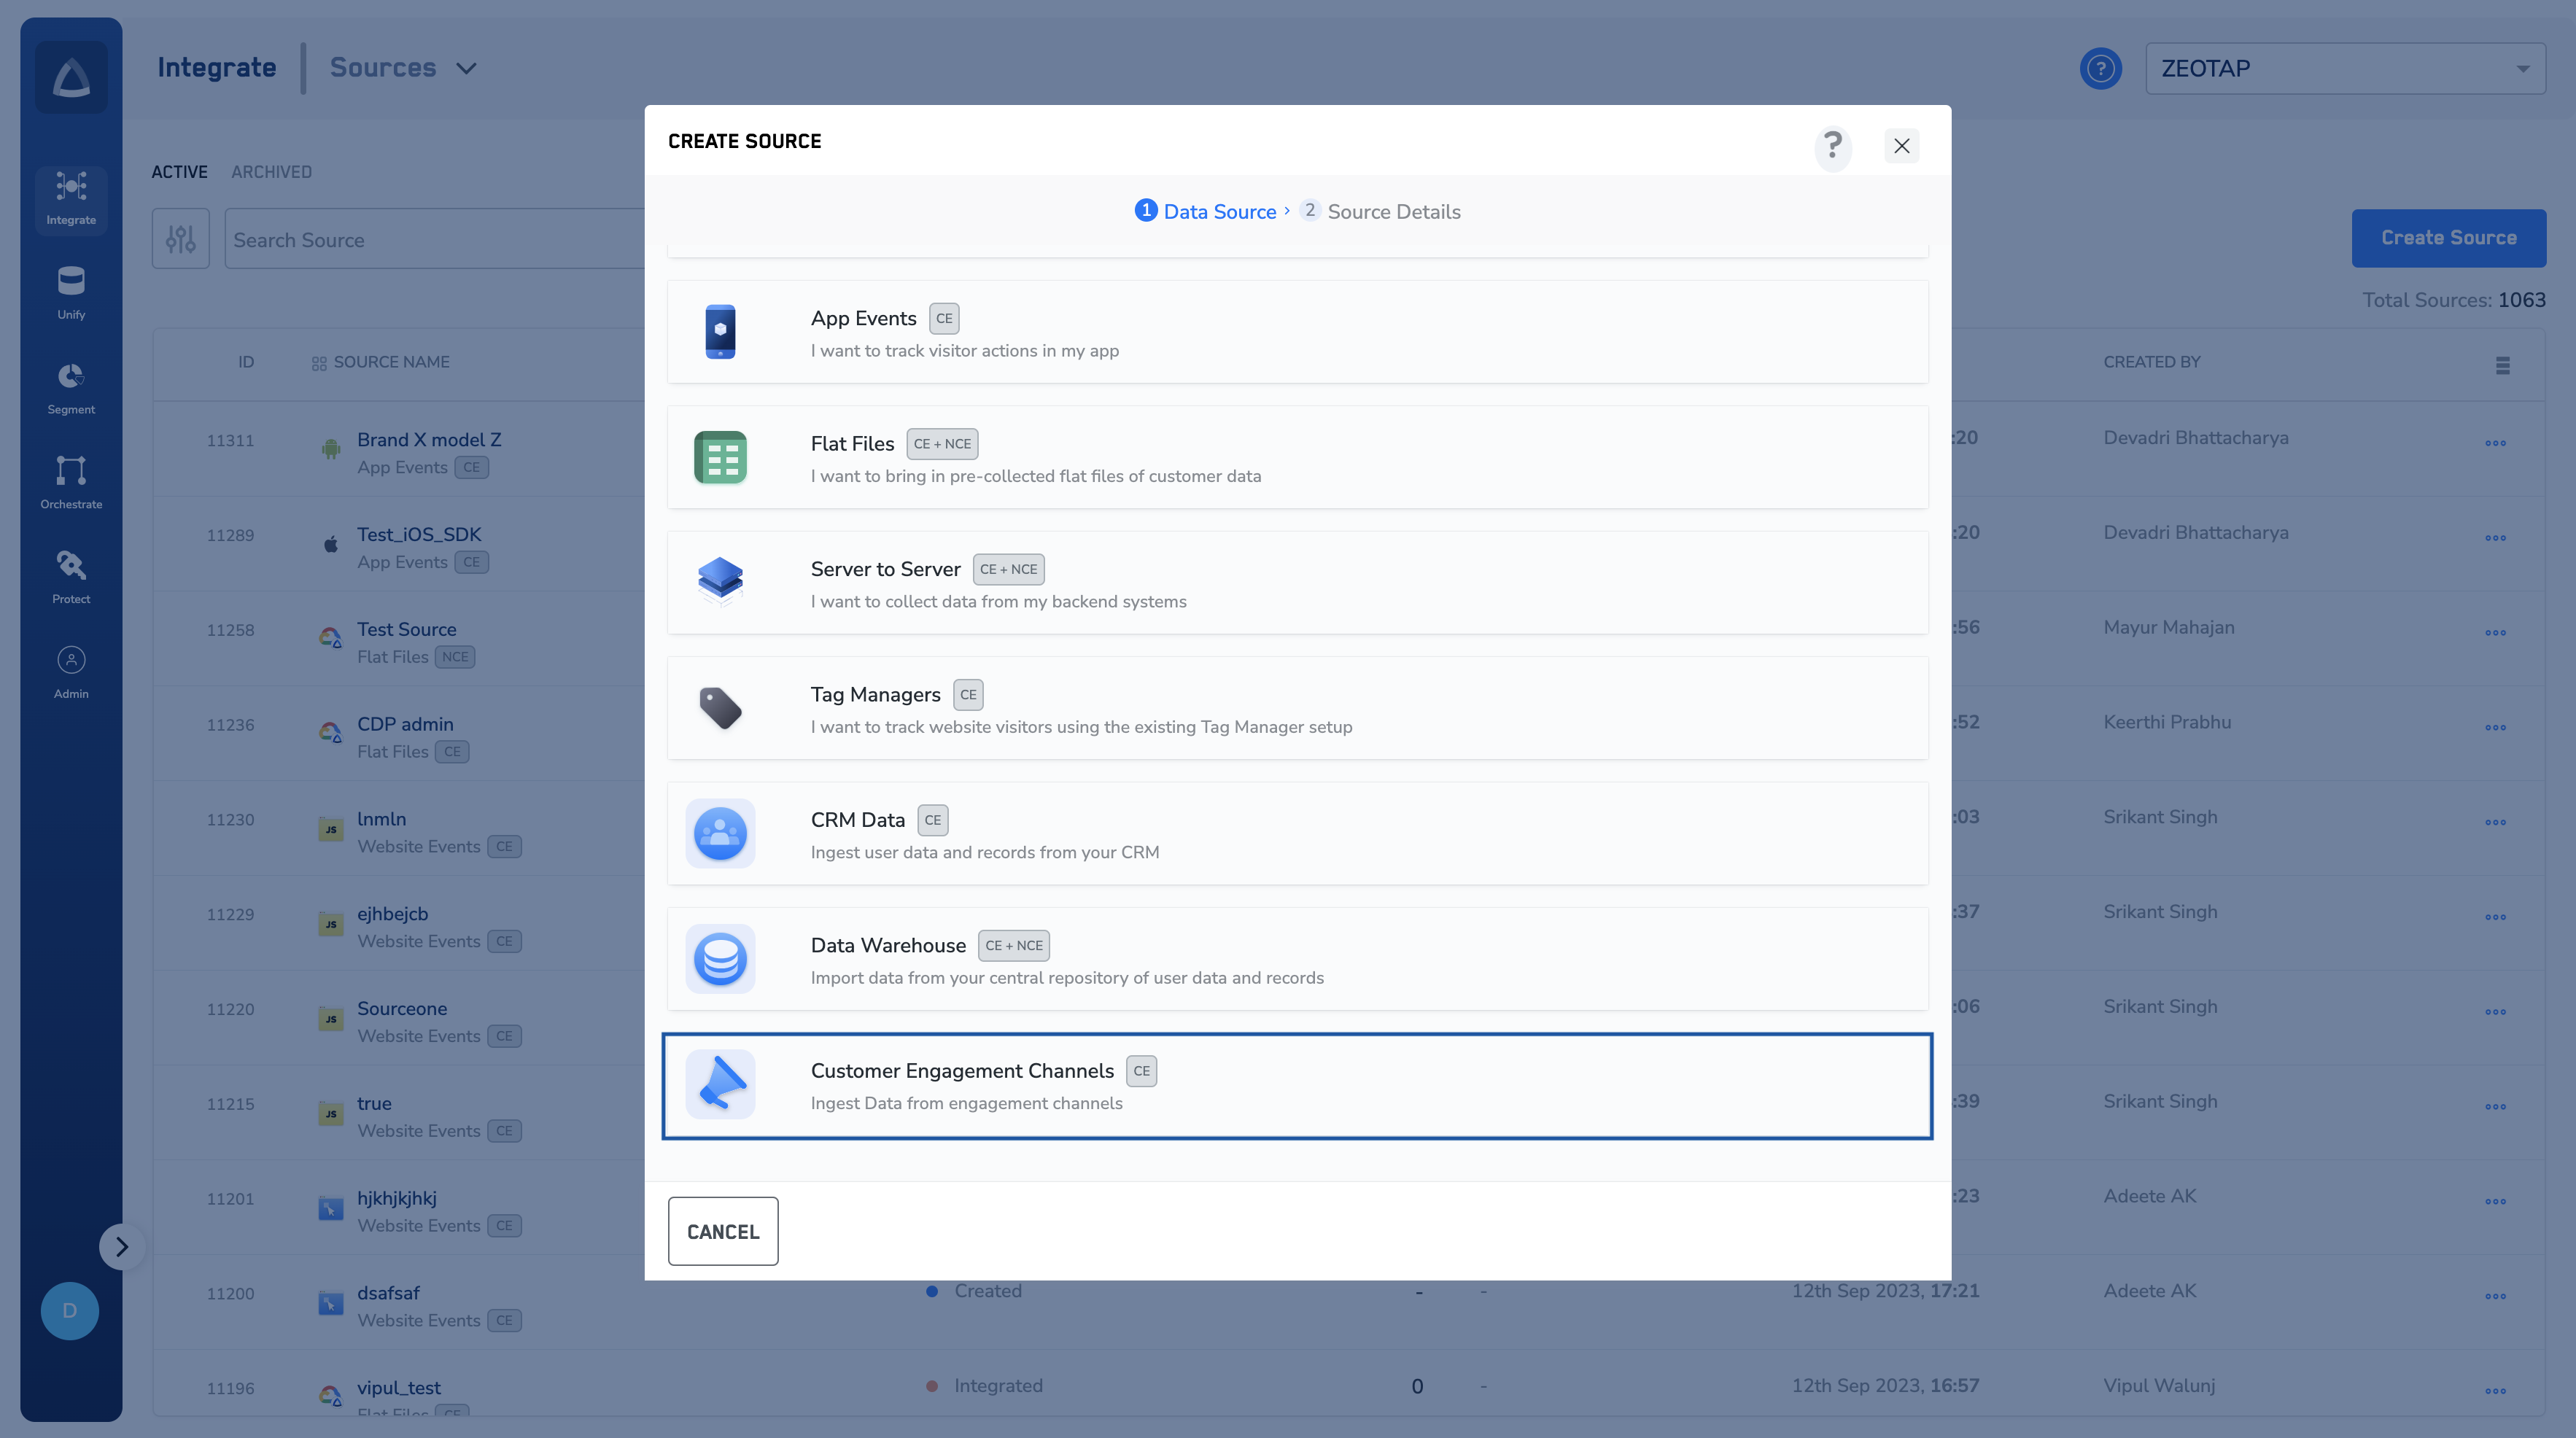 Click **Airship** at the Data Source.
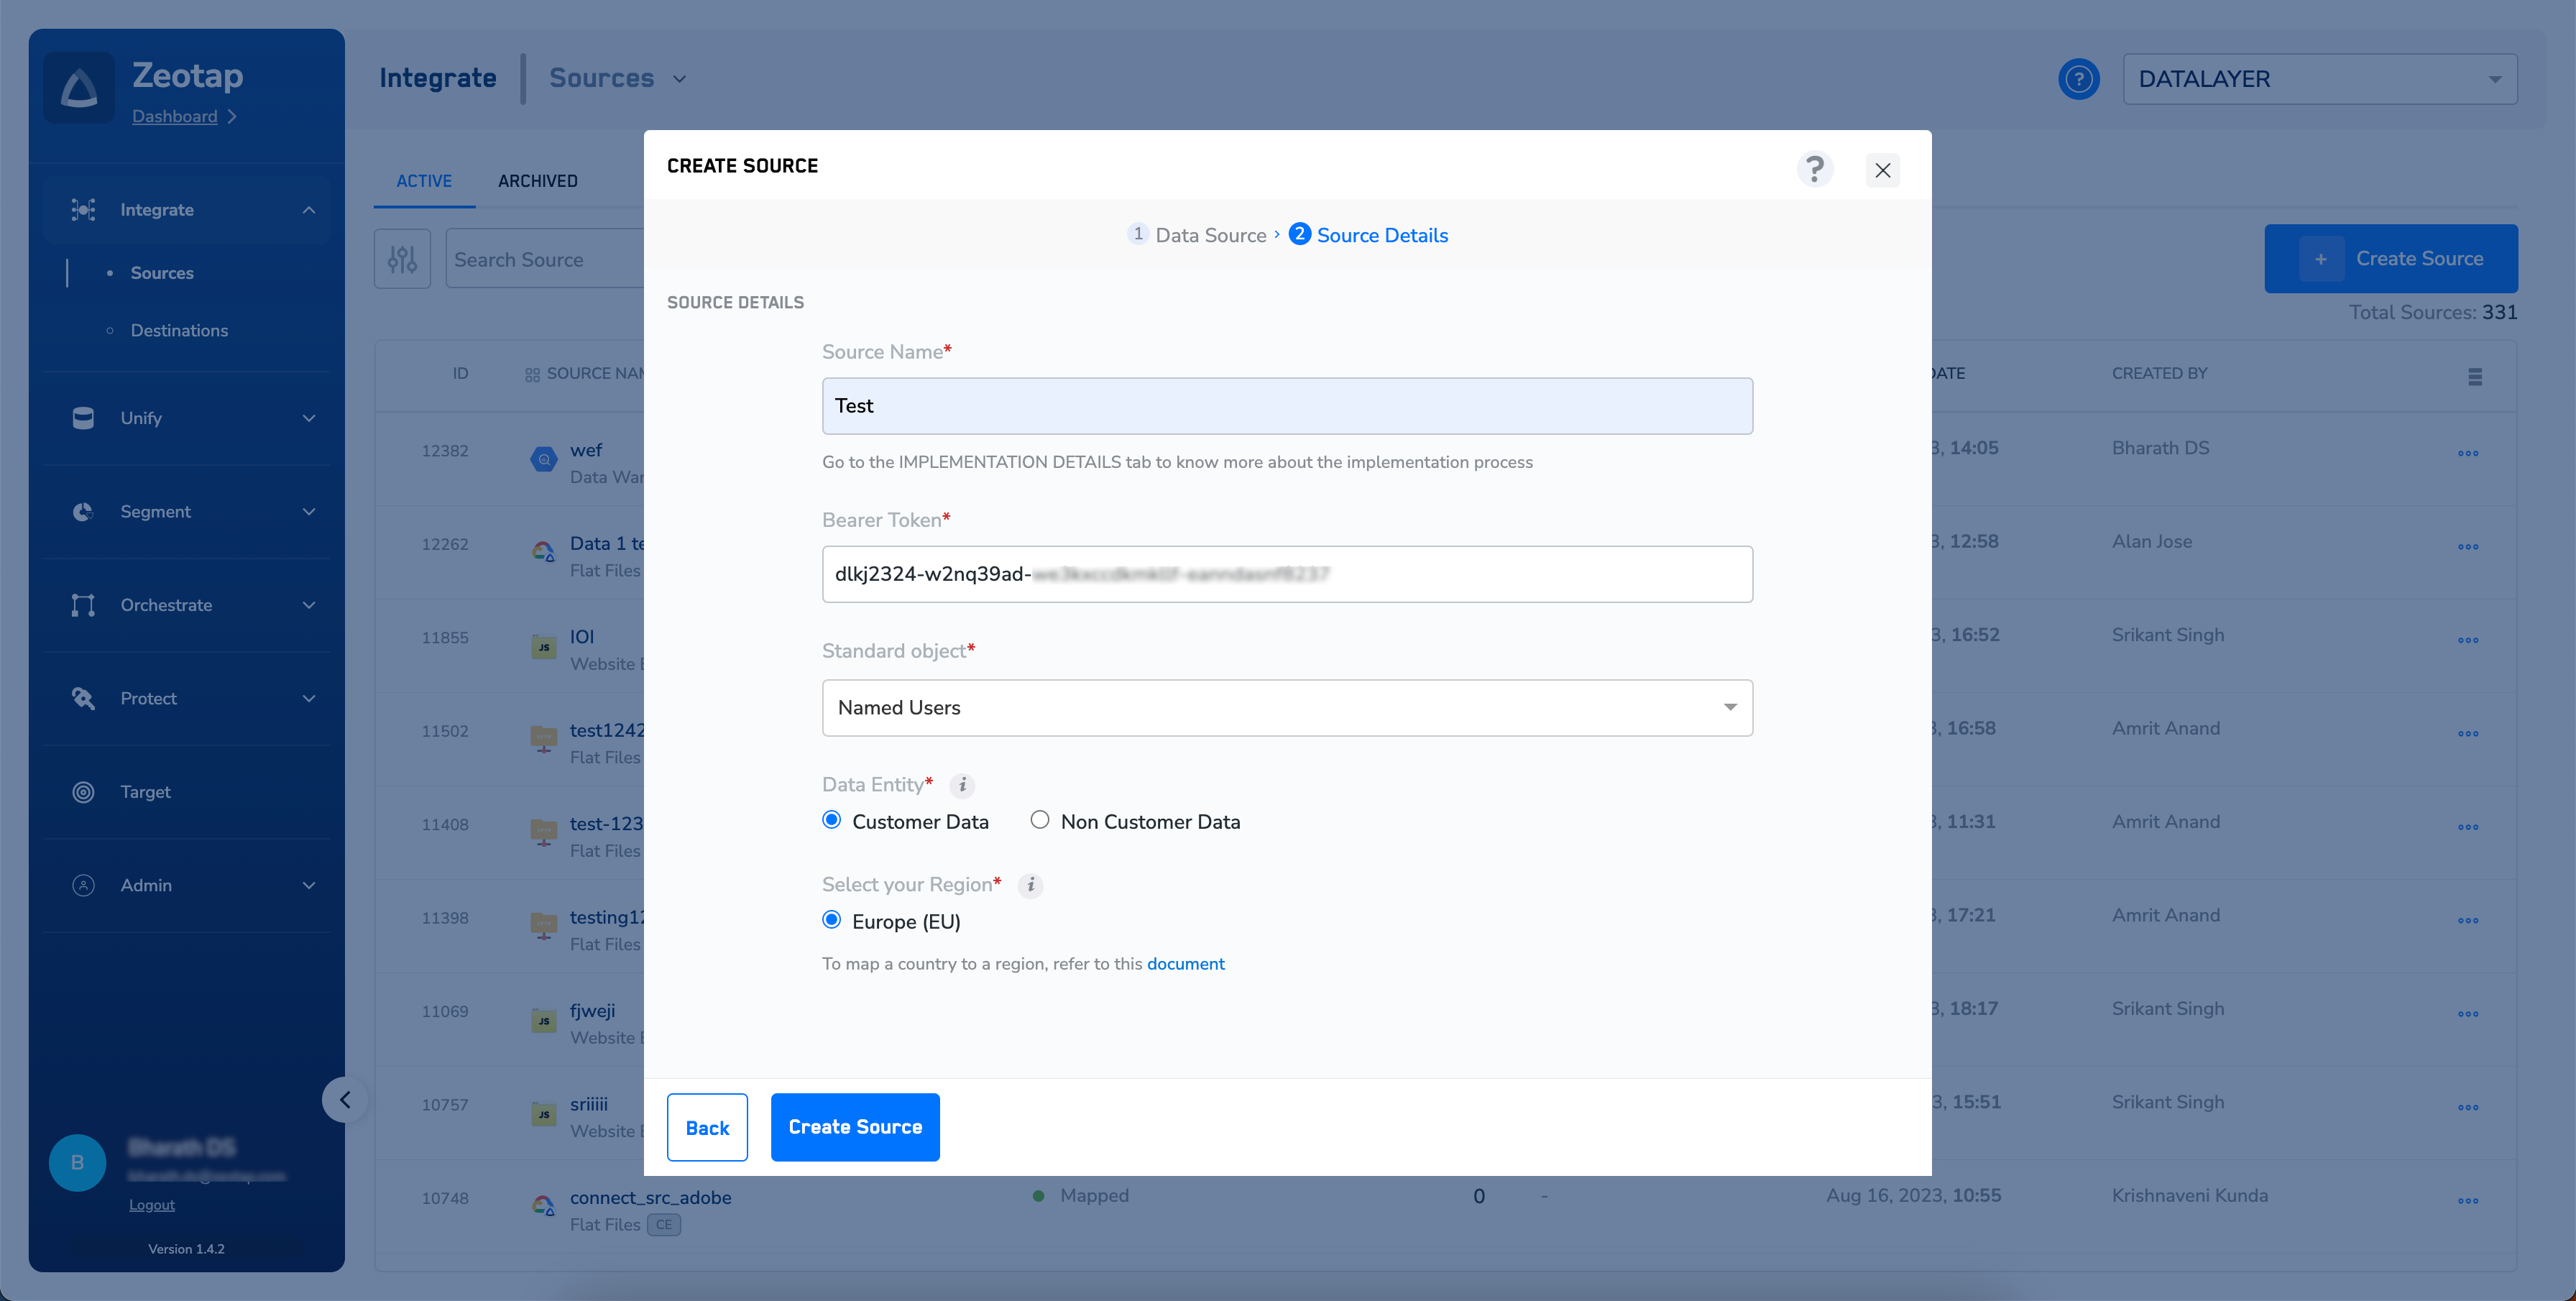
 Enter a short and descriptive name for the Source.
Enter the **Bearer Token**. For more information about how to obtain your Bearer Token in Airship, refer [here](https://developers.hubspot.com/docs/api/private-apps#make-api-calls-with-your-app-s-access-token).
Under **Data Entity**, depending on the type of data that you want to ingest, choose either **Customer Data** or **Non Customer Data** and proceed with the source creation. To know more about Customer Data and Non Customer Data, refer [here](https://docs.zeotap.com/smart/project-unify/supported-data-entities).
Select the **Region** of upload.
Click **CREATE SOURCE**.
Enter a short and descriptive name for the Source.
Enter the **Bearer Token**. For more information about how to obtain your Bearer Token in Airship, refer [here](https://developers.hubspot.com/docs/api/private-apps#make-api-calls-with-your-app-s-access-token).
Under **Data Entity**, depending on the type of data that you want to ingest, choose either **Customer Data** or **Non Customer Data** and proceed with the source creation. To know more about Customer Data and Non Customer Data, refer [here](https://docs.zeotap.com/smart/project-unify/supported-data-entities).
Select the **Region** of upload.
Click **CREATE SOURCE**.
 Upon successfully creating the source, it appears on the **SOURCES** listing page. You can open the created source and find essential details about the created source such as Bearer token, Created by, Created on information and more under the **IMPLEMENTATION DETAILS** tab.
**Note:**
Once the connection between Zeotap and Airship is successfully established, you can view the data flowing into the system under the **[PREVIEW DATA](/articles/integrate-customer/knowing-the-fields-on-the-preview-data-tab)** tab.
Upon successfully creating the source, it appears on the **SOURCES** listing page. You can open the created source and find essential details about the created source such as Bearer token, Created by, Created on information and more under the **IMPLEMENTATION DETAILS** tab.
**Note:**
Once the connection between Zeotap and Airship is successfully established, you can view the data flowing into the system under the **[PREVIEW DATA](/articles/integrate-customer/knowing-the-fields-on-the-preview-data-tab)** tab.