> ## Documentation Index
> Fetch the complete documentation index at: https://docs.zeotap.com/llms.txt
> Use this file to discover all available pages before exploring further.
# Create a Snowflake Source and Load Data
## Before you Begin
Before you create a Snowflake source in the **Sources** module, ensure that you have an account with Snowflake and the data available that needs to be imported to Zeotap CDP in that account.
**Note:**
* The sandbox environment does not support deltas, but they are available in production.
* The sandbox supports only a daily refresh, which occurs once every 24 hours. It does not support intraday refresh.
For that account, ensure that you have the following information readily available:
### Username
This is username used to log into your [Snowflake account](https://app.snowflake.com/).
### Password
This is the password for the above user.
### Account Name
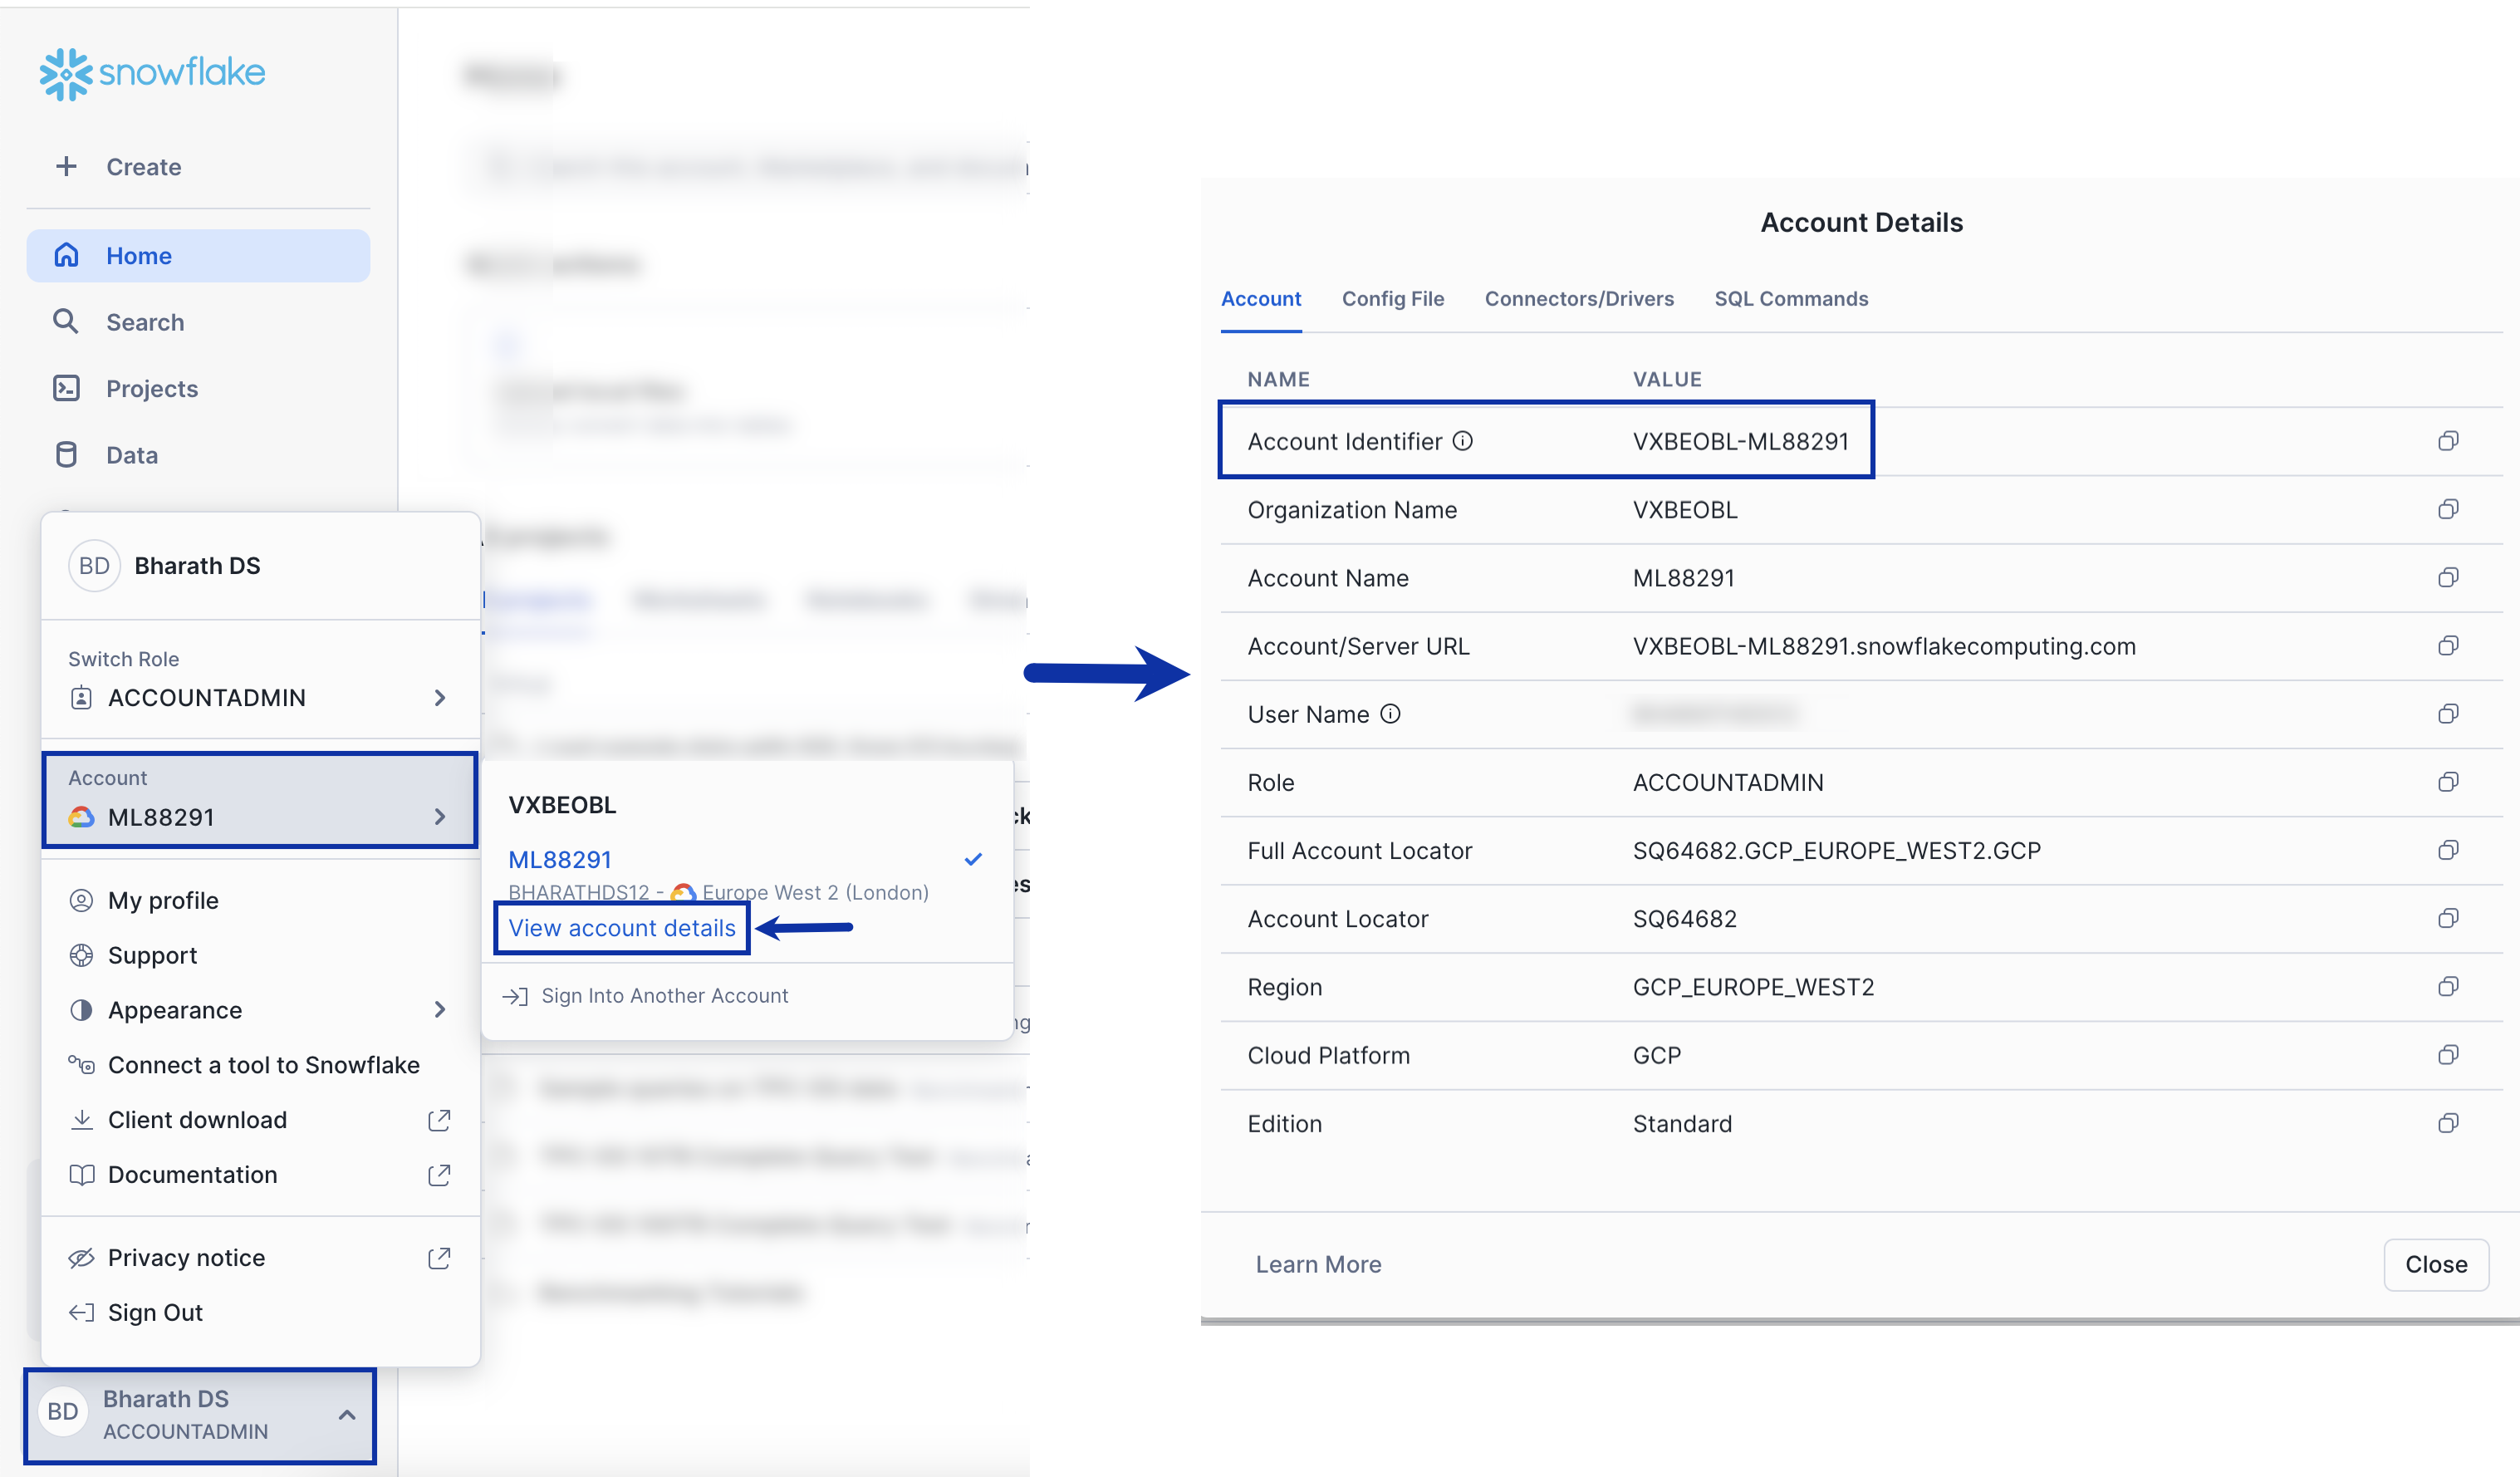
This is the account ID of your cluster, which is a combination of your *Organization name* and *Account name* on Snowflake. Perform the following steps to obtain it:
Select your profile in the lower-left corner of the Snowflake screen. Navigate to **Account**, and then click **View Account Details** under your account.
Copy the **Account Identifier** displayed under the **Account** tab, which is your **Account Name** in Zeotap CDP.
 ### Warehouse
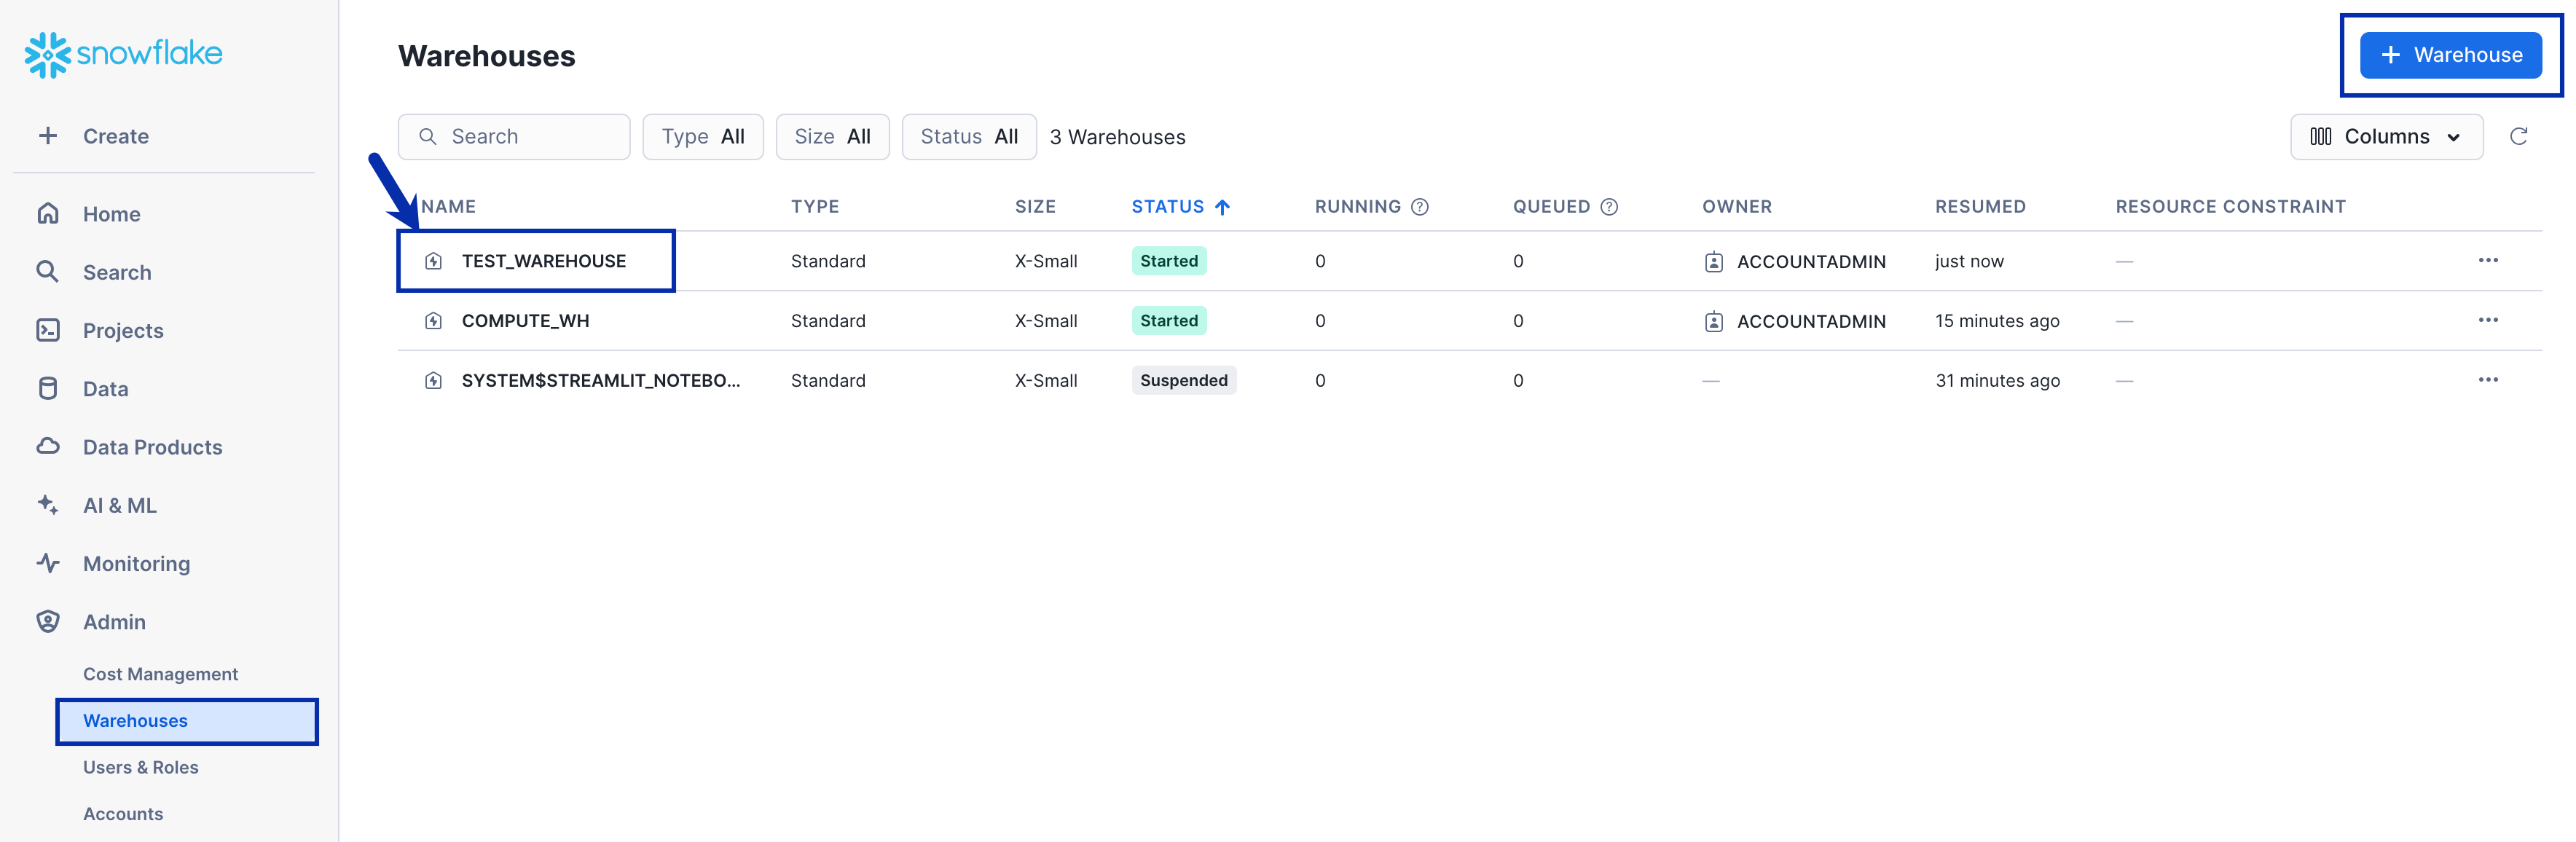
A [virtual warehouse](https://docs.snowflake.com/en/user-guide/warehouses), often referred to simply as a "warehouse," is a cluster of compute resources in Snowflake. Ensure that the warehouse you use is in **Started** (Active) status when integrating with Zeotap CDP.
To obtain the warehouse details, perform the following steps:
Navigate to **Admin** > **Warehouses**.
Copy the **Warehouse Name** as shown in the image below.
To create a new warehouse, click **+ Warehouse** in the top-right corner of the screen.
### Warehouse
A [virtual warehouse](https://docs.snowflake.com/en/user-guide/warehouses), often referred to simply as a "warehouse," is a cluster of compute resources in Snowflake. Ensure that the warehouse you use is in **Started** (Active) status when integrating with Zeotap CDP.
To obtain the warehouse details, perform the following steps:
Navigate to **Admin** > **Warehouses**.
Copy the **Warehouse Name** as shown in the image below.
To create a new warehouse, click **+ Warehouse** in the top-right corner of the screen.
 **Note:**
You can resume a suspended (that is, inactive) warehouse by using the following the steps provided in the [Snowflake documentation](https://docs.snowflake.com/en/user-guide/warehouses-tasks#starting-or-resuming-a-warehouse).
### Database
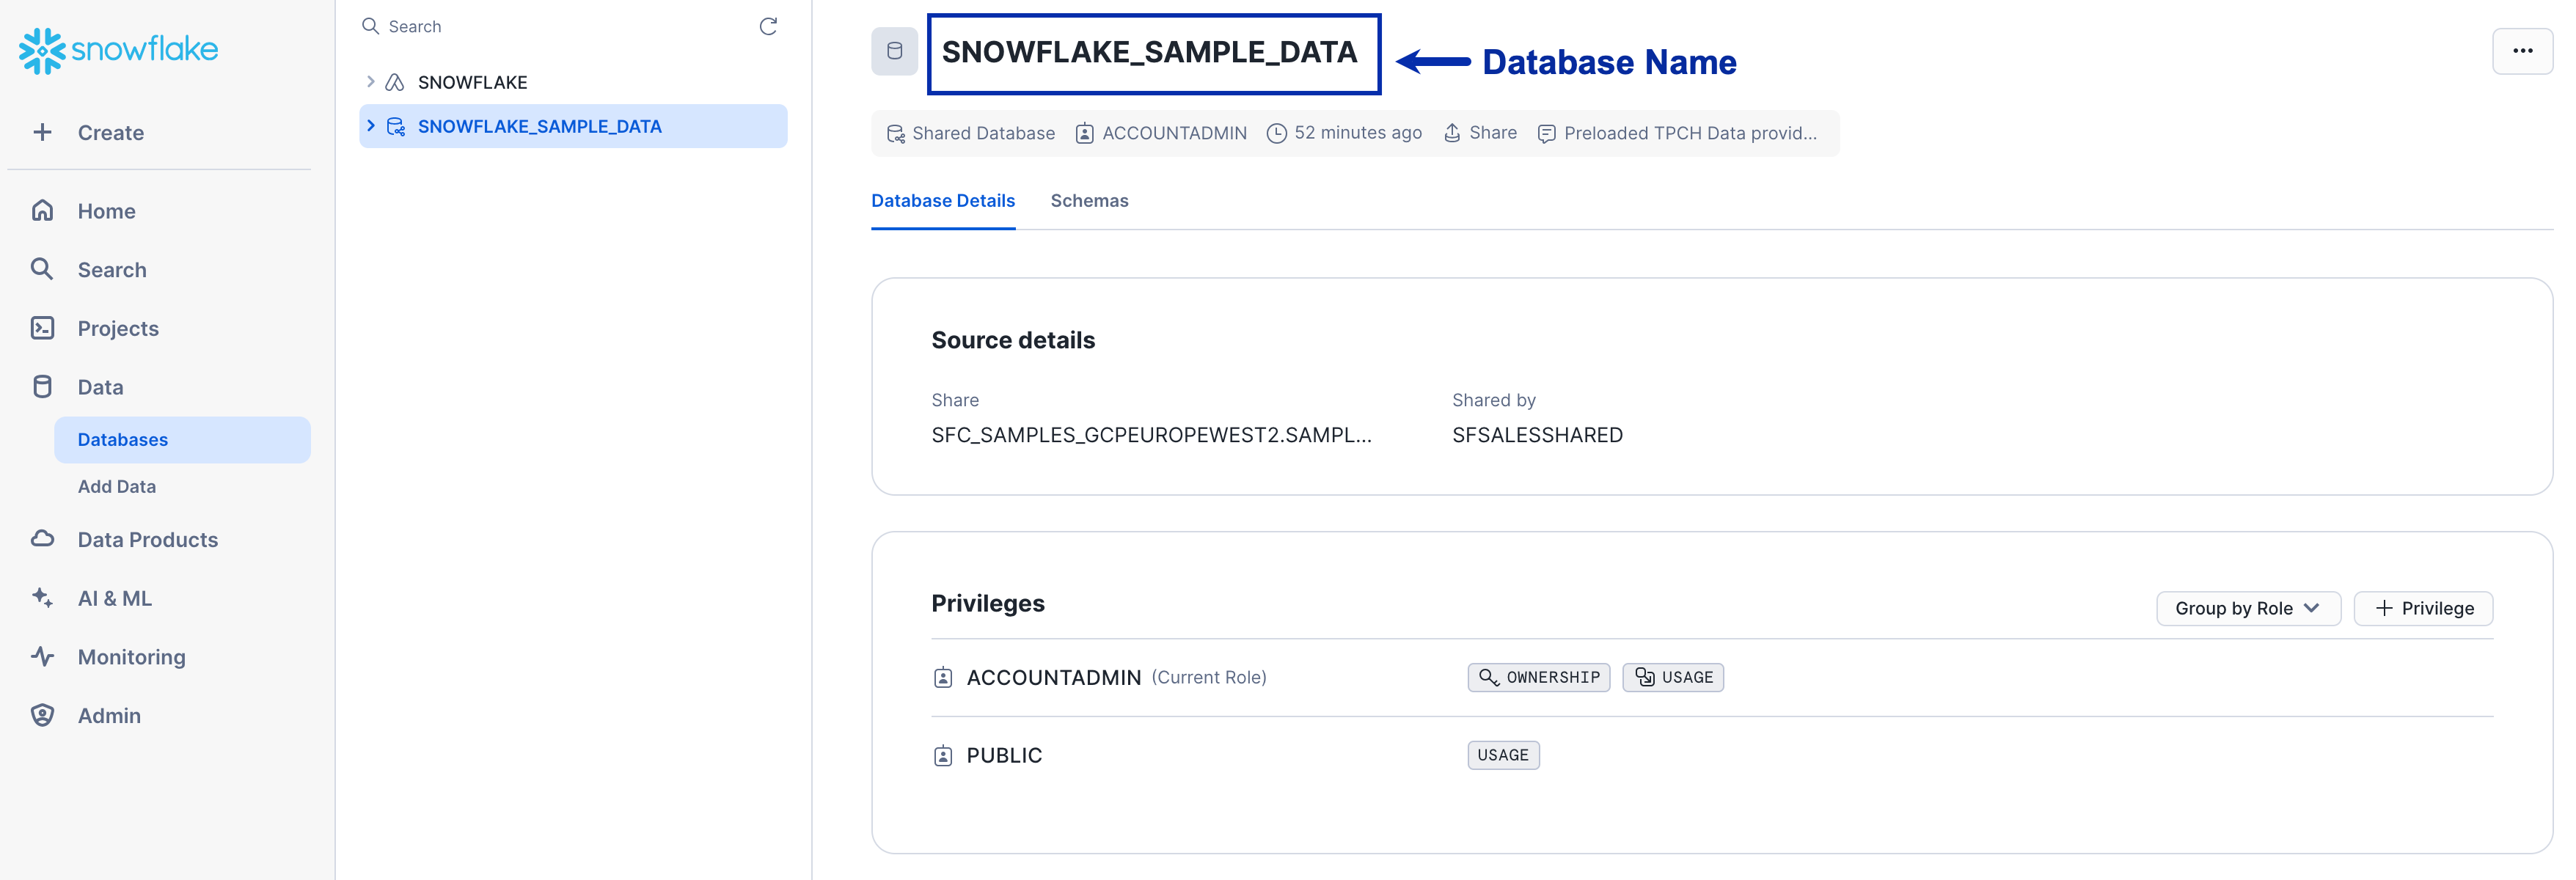
All data in Snowflake is maintained in databases. Each database consists of one or more schemas, which are logical groupings of database objects, such as tables and views. To obtain the **Database** details from Snowflake, navigate to **Databases** under **Data** > **Click the desired Database** and copy the **Database Name** as shown in the image below.
**Note that each source creates its own schemas and tables, so we recommend to create a new database for this purpose to avoid name conflicts with existing data**. To learn how to create a new database, refer [here](https://docs.snowflake.com/en/sql-reference/sql/create-database).
**Note:**
You can resume a suspended (that is, inactive) warehouse by using the following the steps provided in the [Snowflake documentation](https://docs.snowflake.com/en/user-guide/warehouses-tasks#starting-or-resuming-a-warehouse).
### Database
All data in Snowflake is maintained in databases. Each database consists of one or more schemas, which are logical groupings of database objects, such as tables and views. To obtain the **Database** details from Snowflake, navigate to **Databases** under **Data** > **Click the desired Database** and copy the **Database Name** as shown in the image below.
**Note that each source creates its own schemas and tables, so we recommend to create a new database for this purpose to avoid name conflicts with existing data**. To learn how to create a new database, refer [here](https://docs.snowflake.com/en/sql-reference/sql/create-database).
 ### Schema
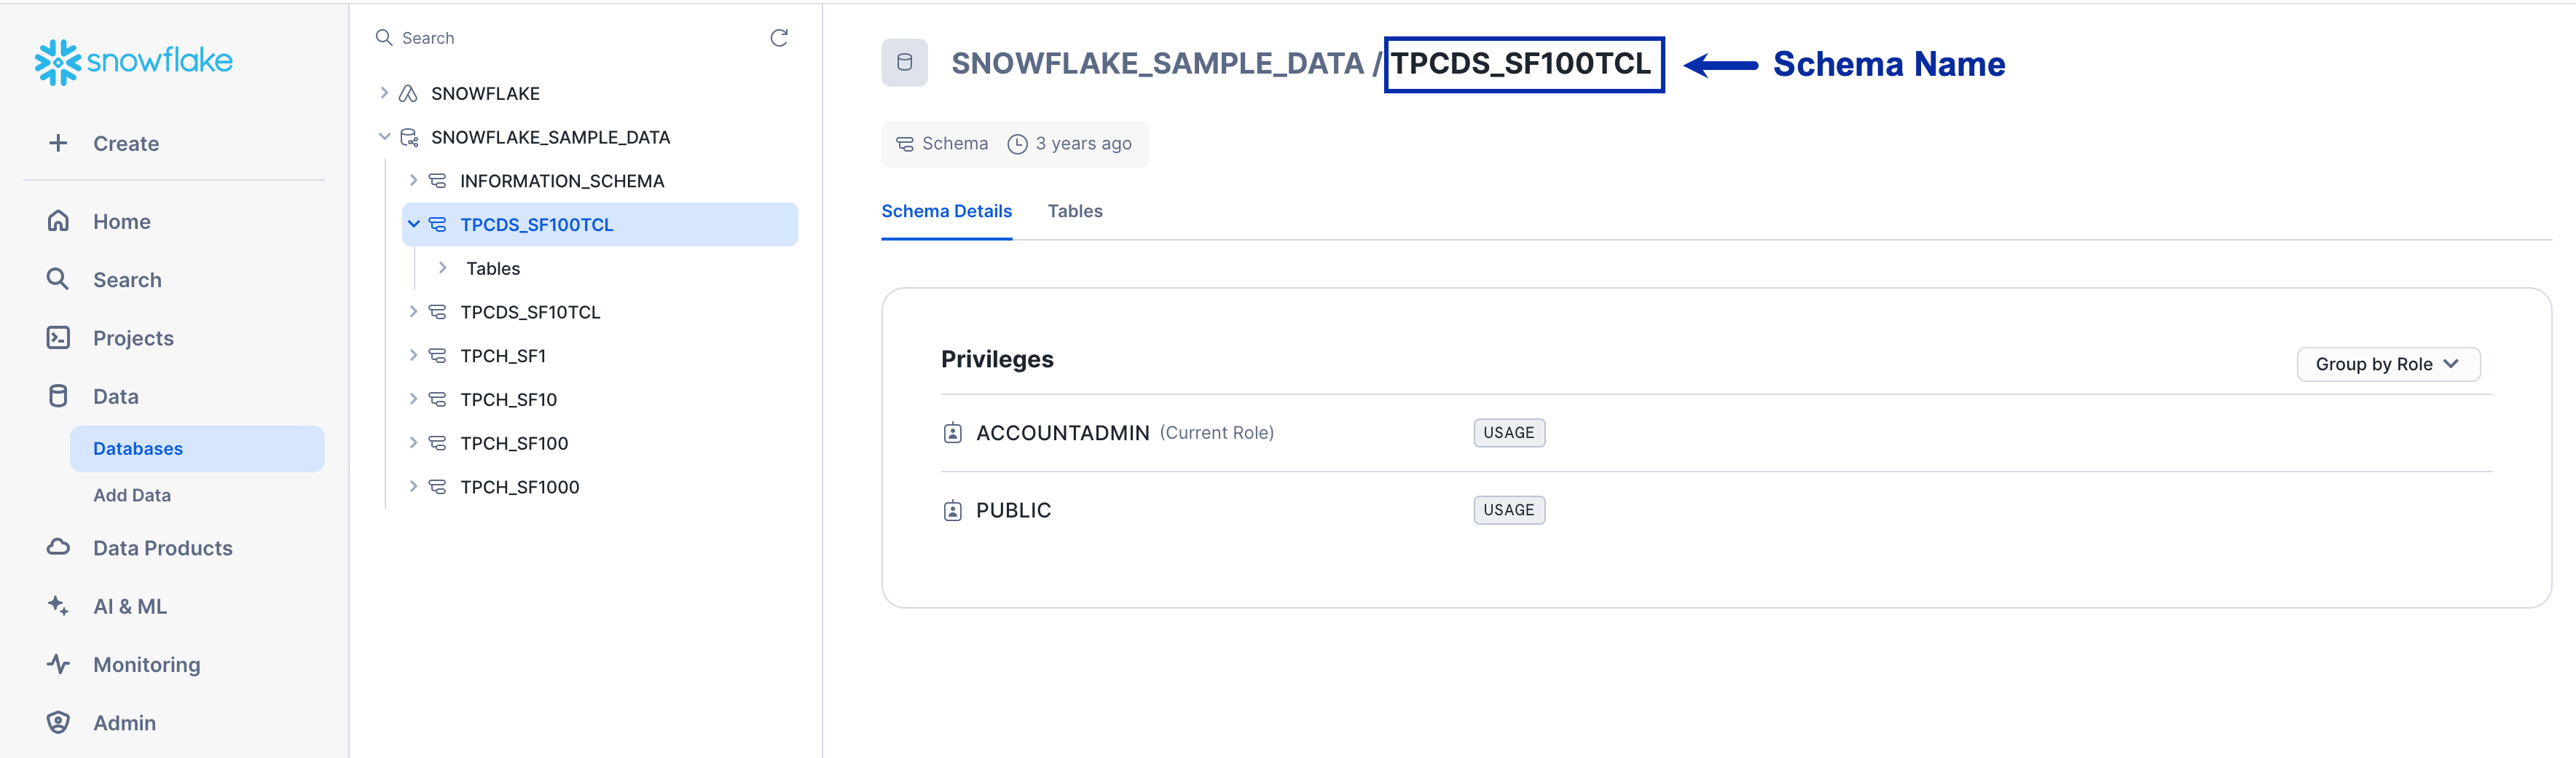
Schema is a container for all objects such as tables, views and stored procedures in the same logical namespace. To obtain the schema details from Snowflake, navigate to **Databases** under **Data** > under the desired Database > click the **Schemas** tab and copy the **Schema Name** as shown in the image below.
### Schema
Schema is a container for all objects such as tables, views and stored procedures in the same logical namespace. To obtain the schema details from Snowflake, navigate to **Databases** under **Data** > under the desired Database > click the **Schemas** tab and copy the **Schema Name** as shown in the image below.
 ### Table
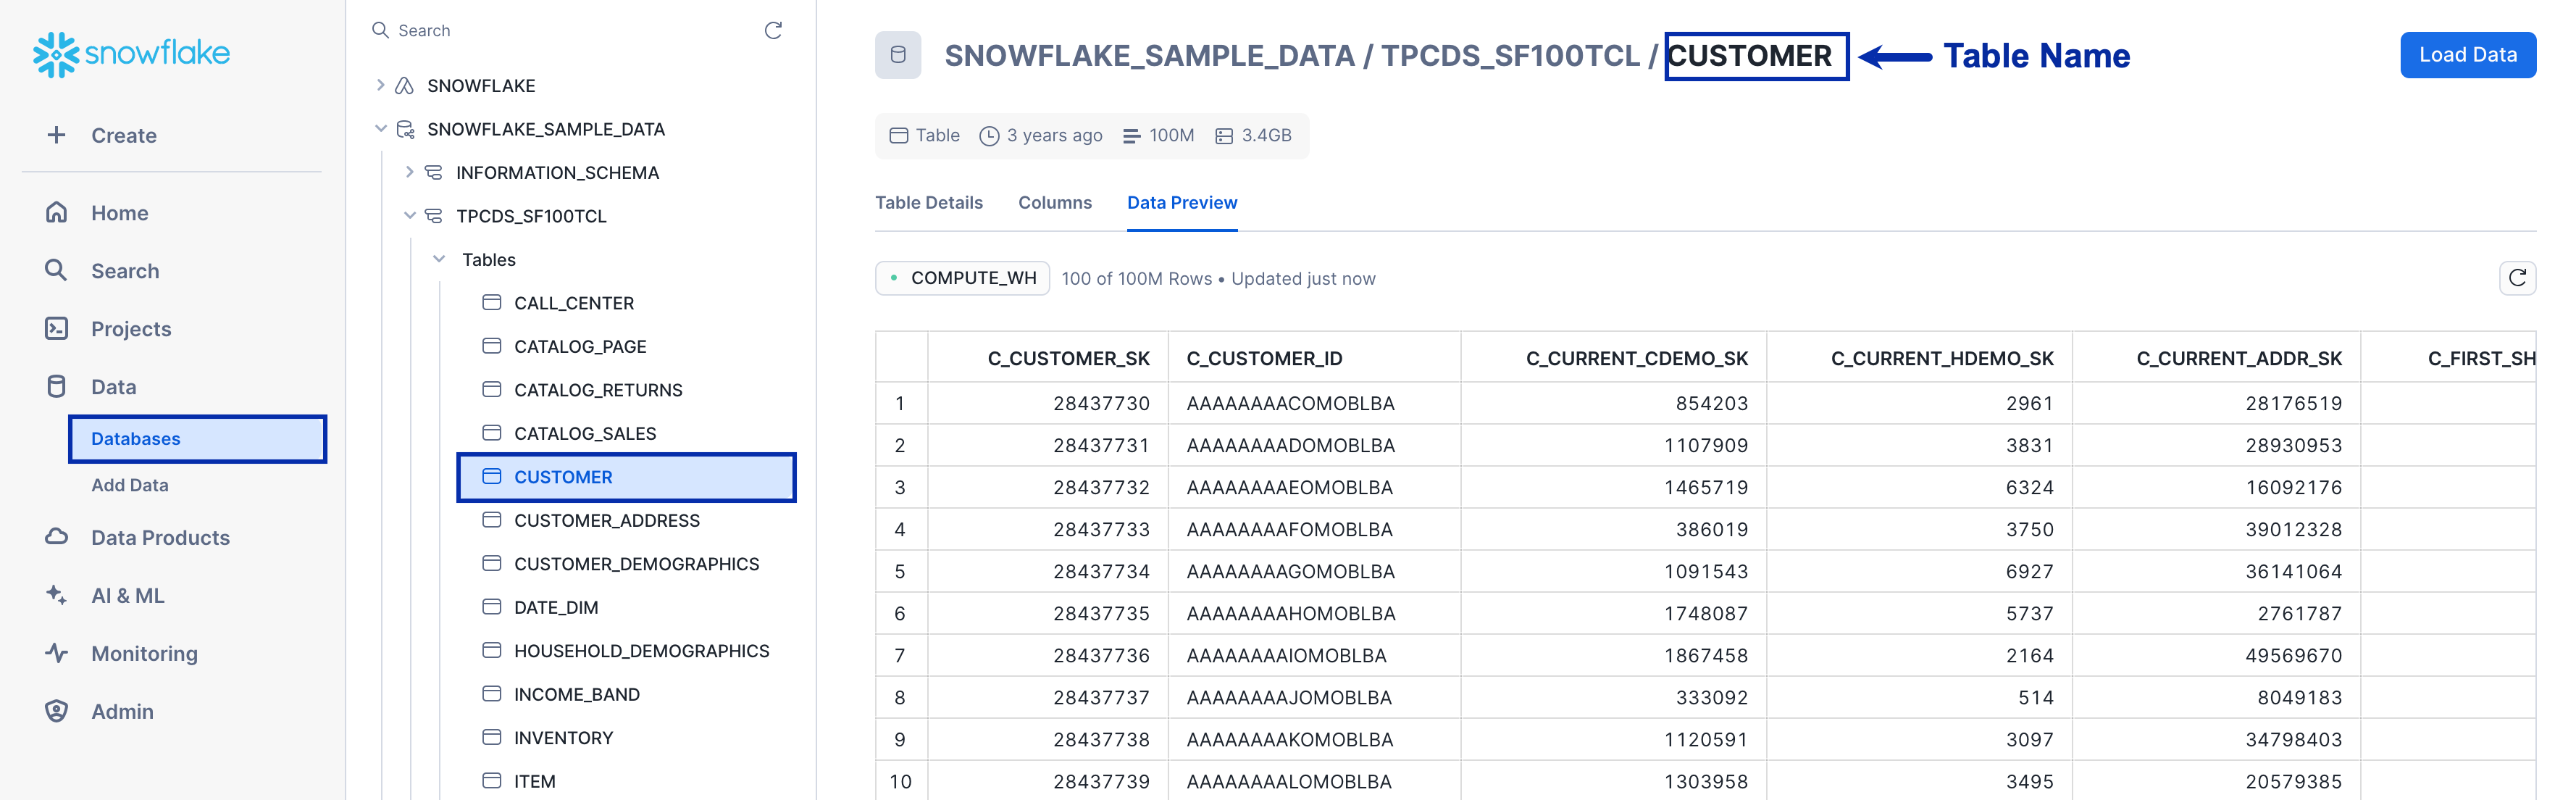
A table is a container for rows of data organised and described by columns, which can be used for data storage, analysis and querying. To obtain the **Table** details from Snowflake, navigate to **Databases** under **Data** > under the desired Database > click the desired Schema **>** click **Tables** and copy the desired **Table Name** as shown in the image below.
### Table
A table is a container for rows of data organised and described by columns, which can be used for data storage, analysis and querying. To obtain the **Table** details from Snowflake, navigate to **Databases** under **Data** > under the desired Database > click the desired Schema **>** click **Tables** and copy the desired **Table Name** as shown in the image below.
 ## Create a Snowflake Source
Once you have obtained the above details from Snowflake, perform the following steps to create a Snowflake Source in the Zeotap CDP App:
In the Zeotap CDP App, navigate to **Integrate** > **Sources**.
Click **CREATE SOURCE**.
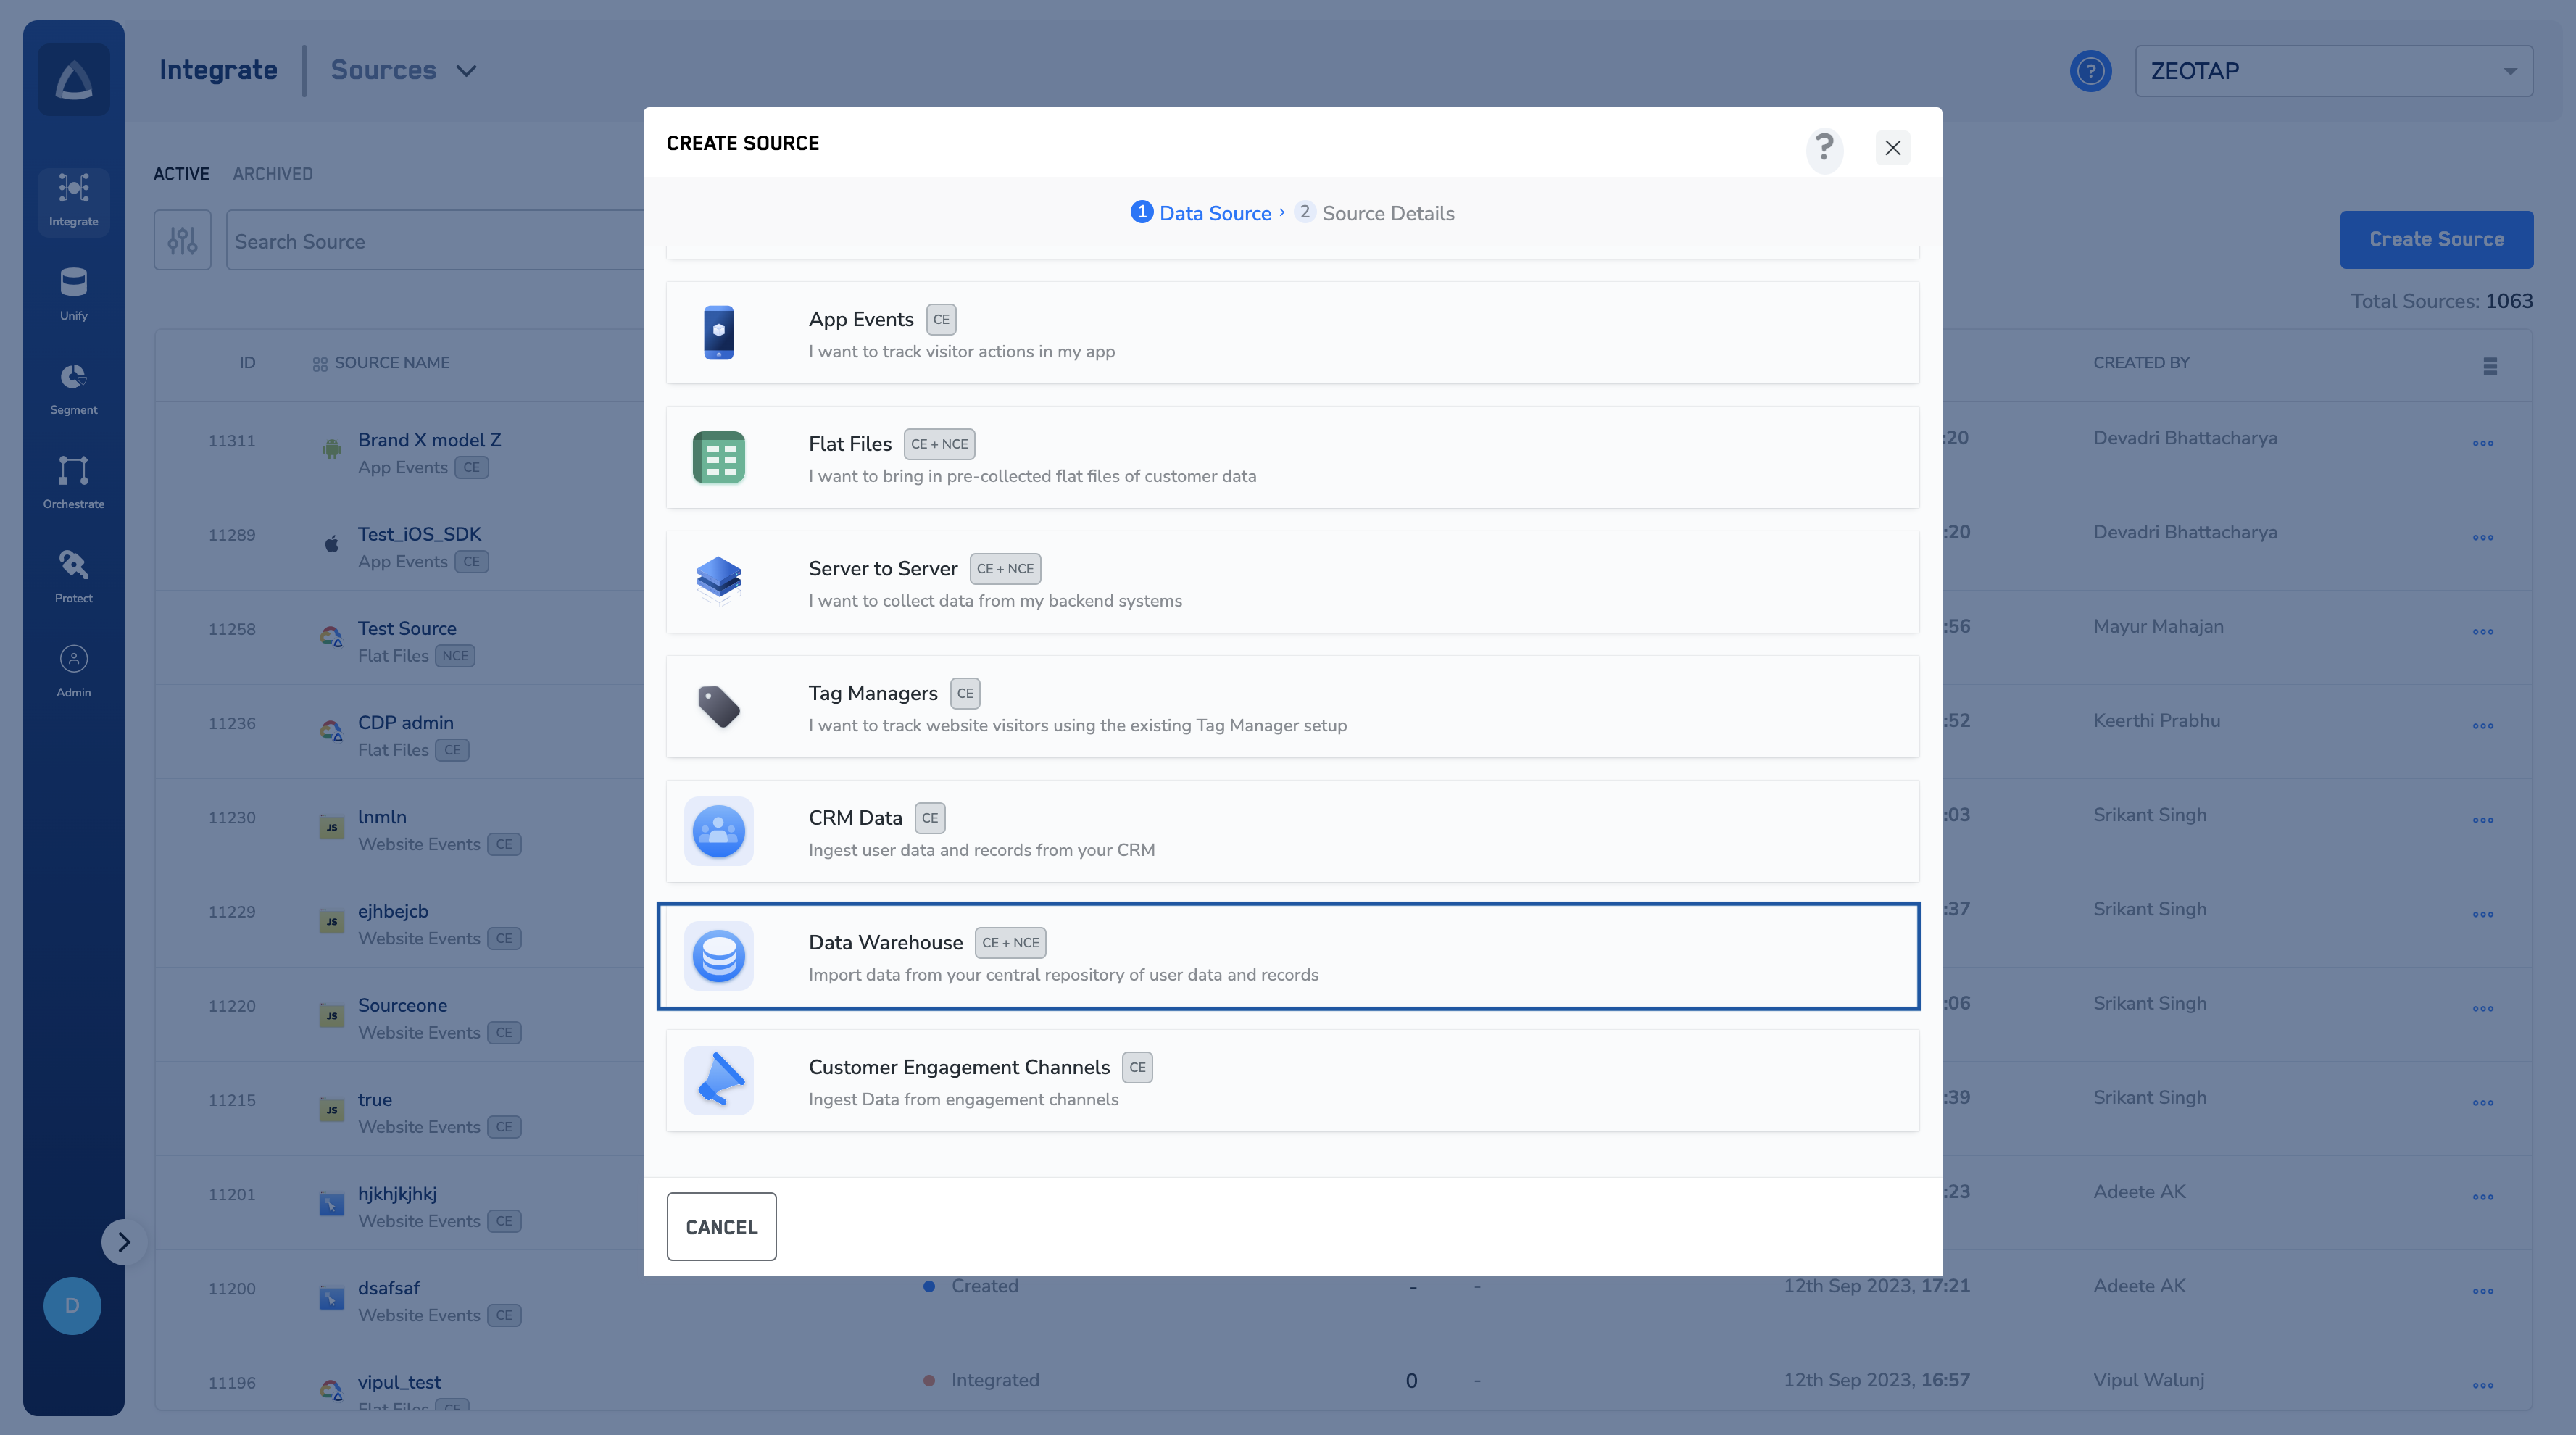
Choose **Data Warehouse** as the **Category**.
## Create a Snowflake Source
Once you have obtained the above details from Snowflake, perform the following steps to create a Snowflake Source in the Zeotap CDP App:
In the Zeotap CDP App, navigate to **Integrate** > **Sources**.
Click **CREATE SOURCE**.
Choose **Data Warehouse** as the **Category**.
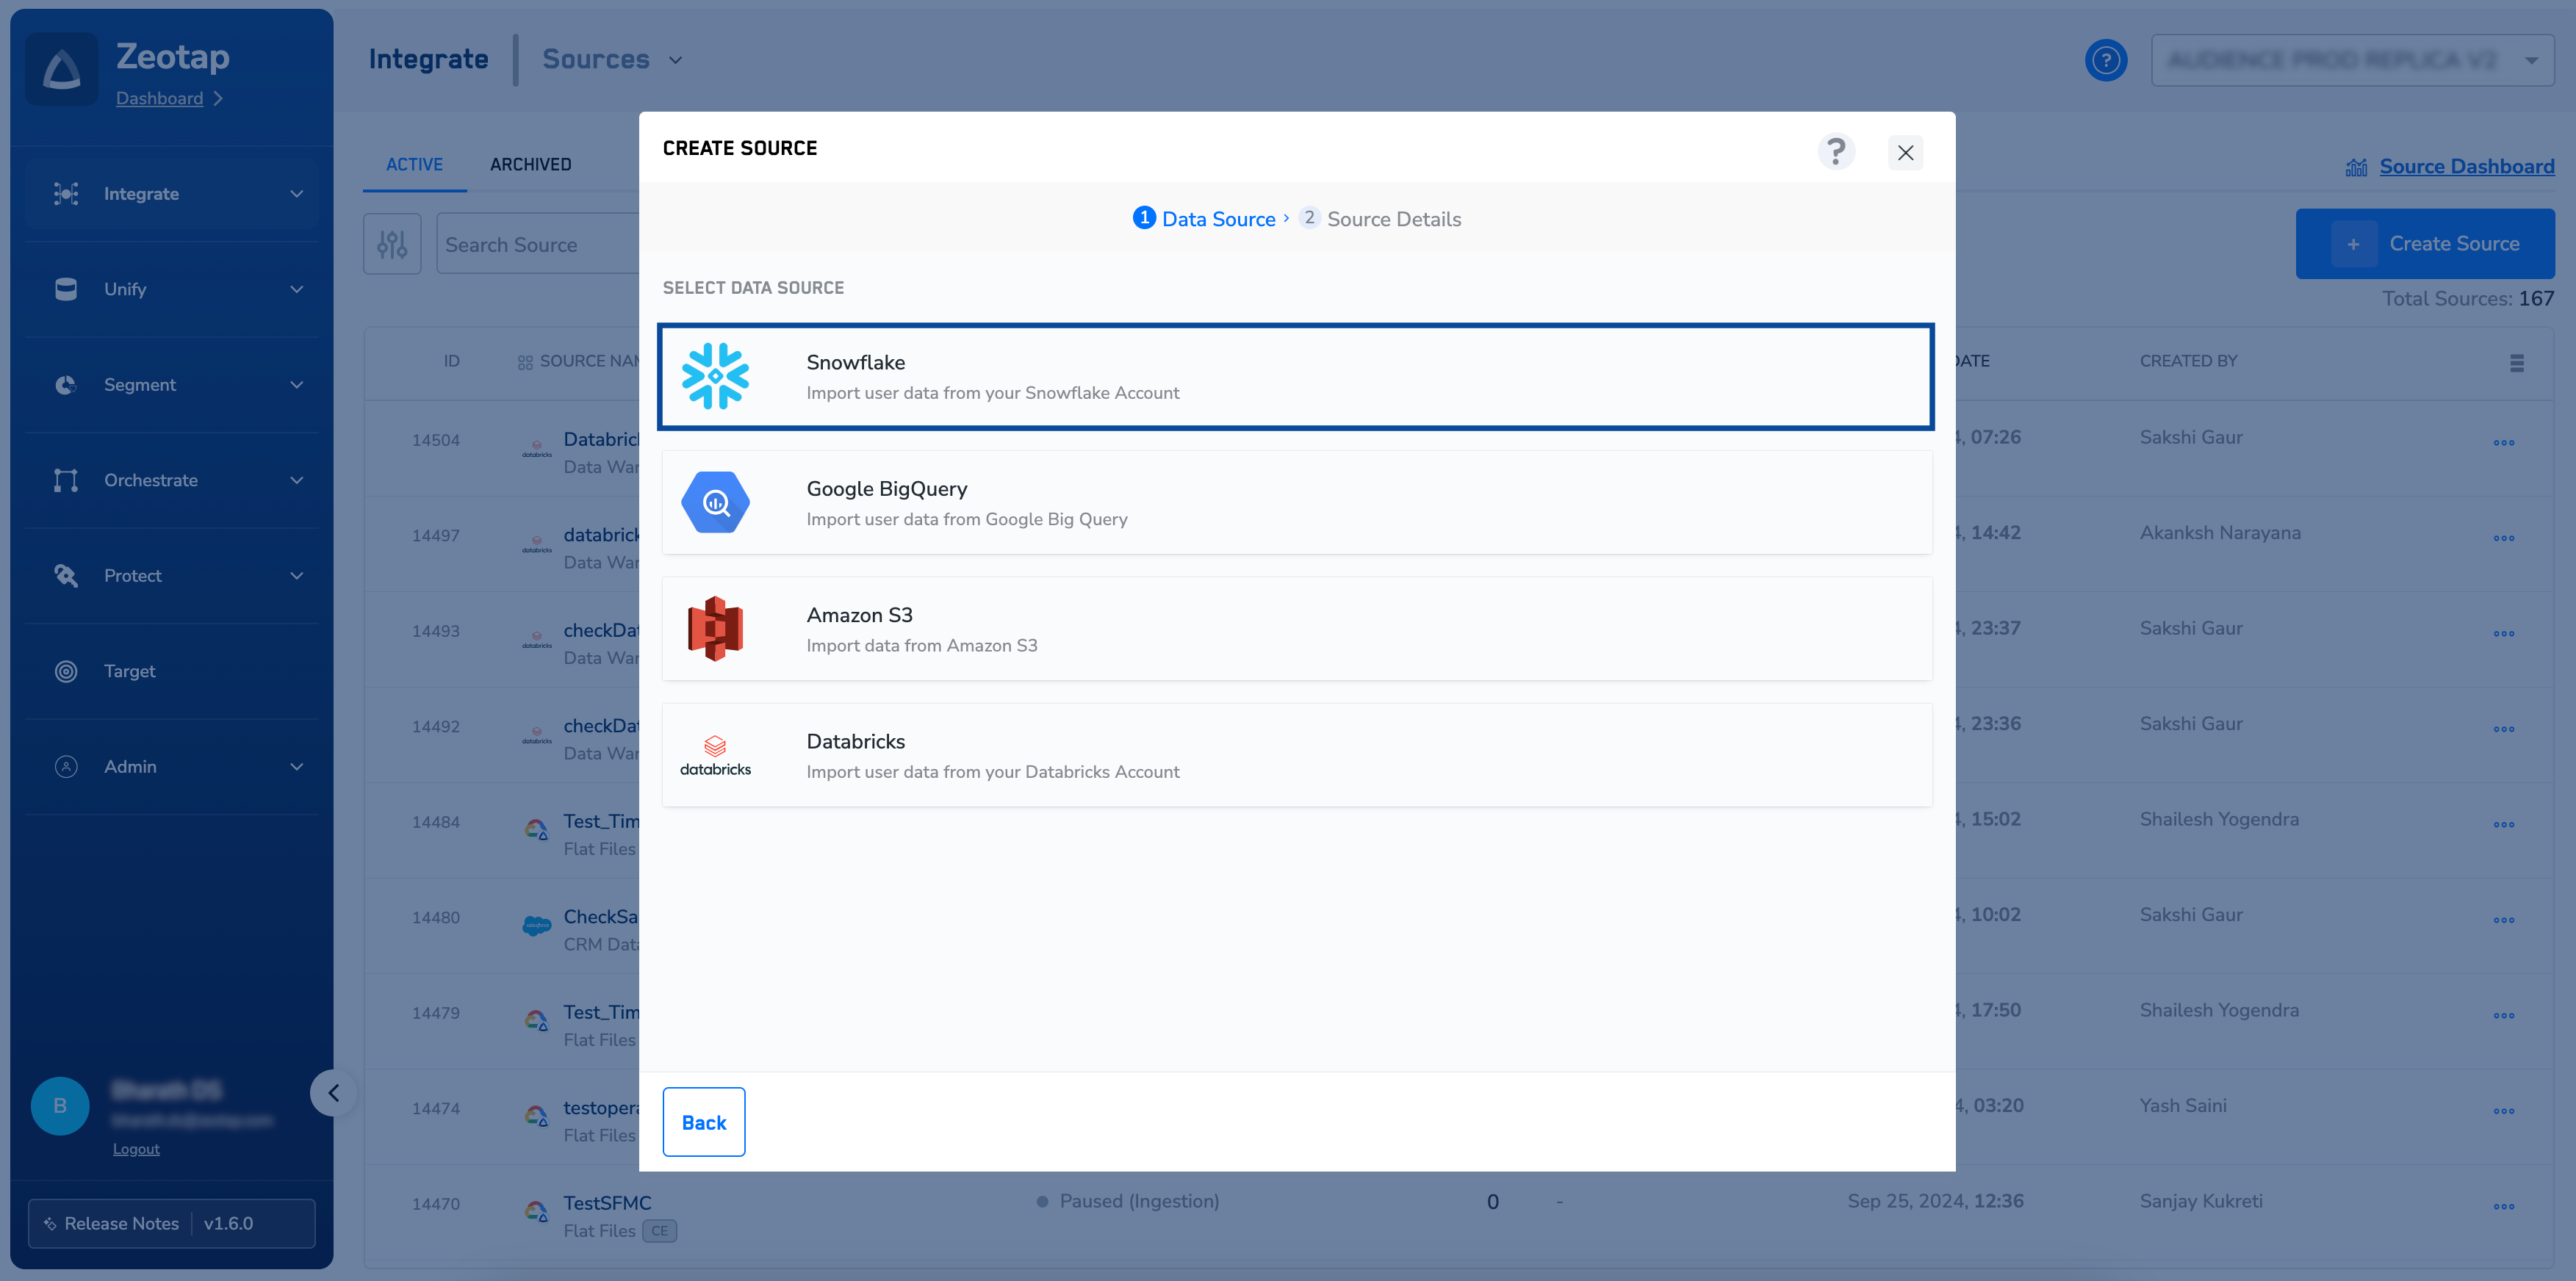
 Click **Snowflake** as the **Data Source**.
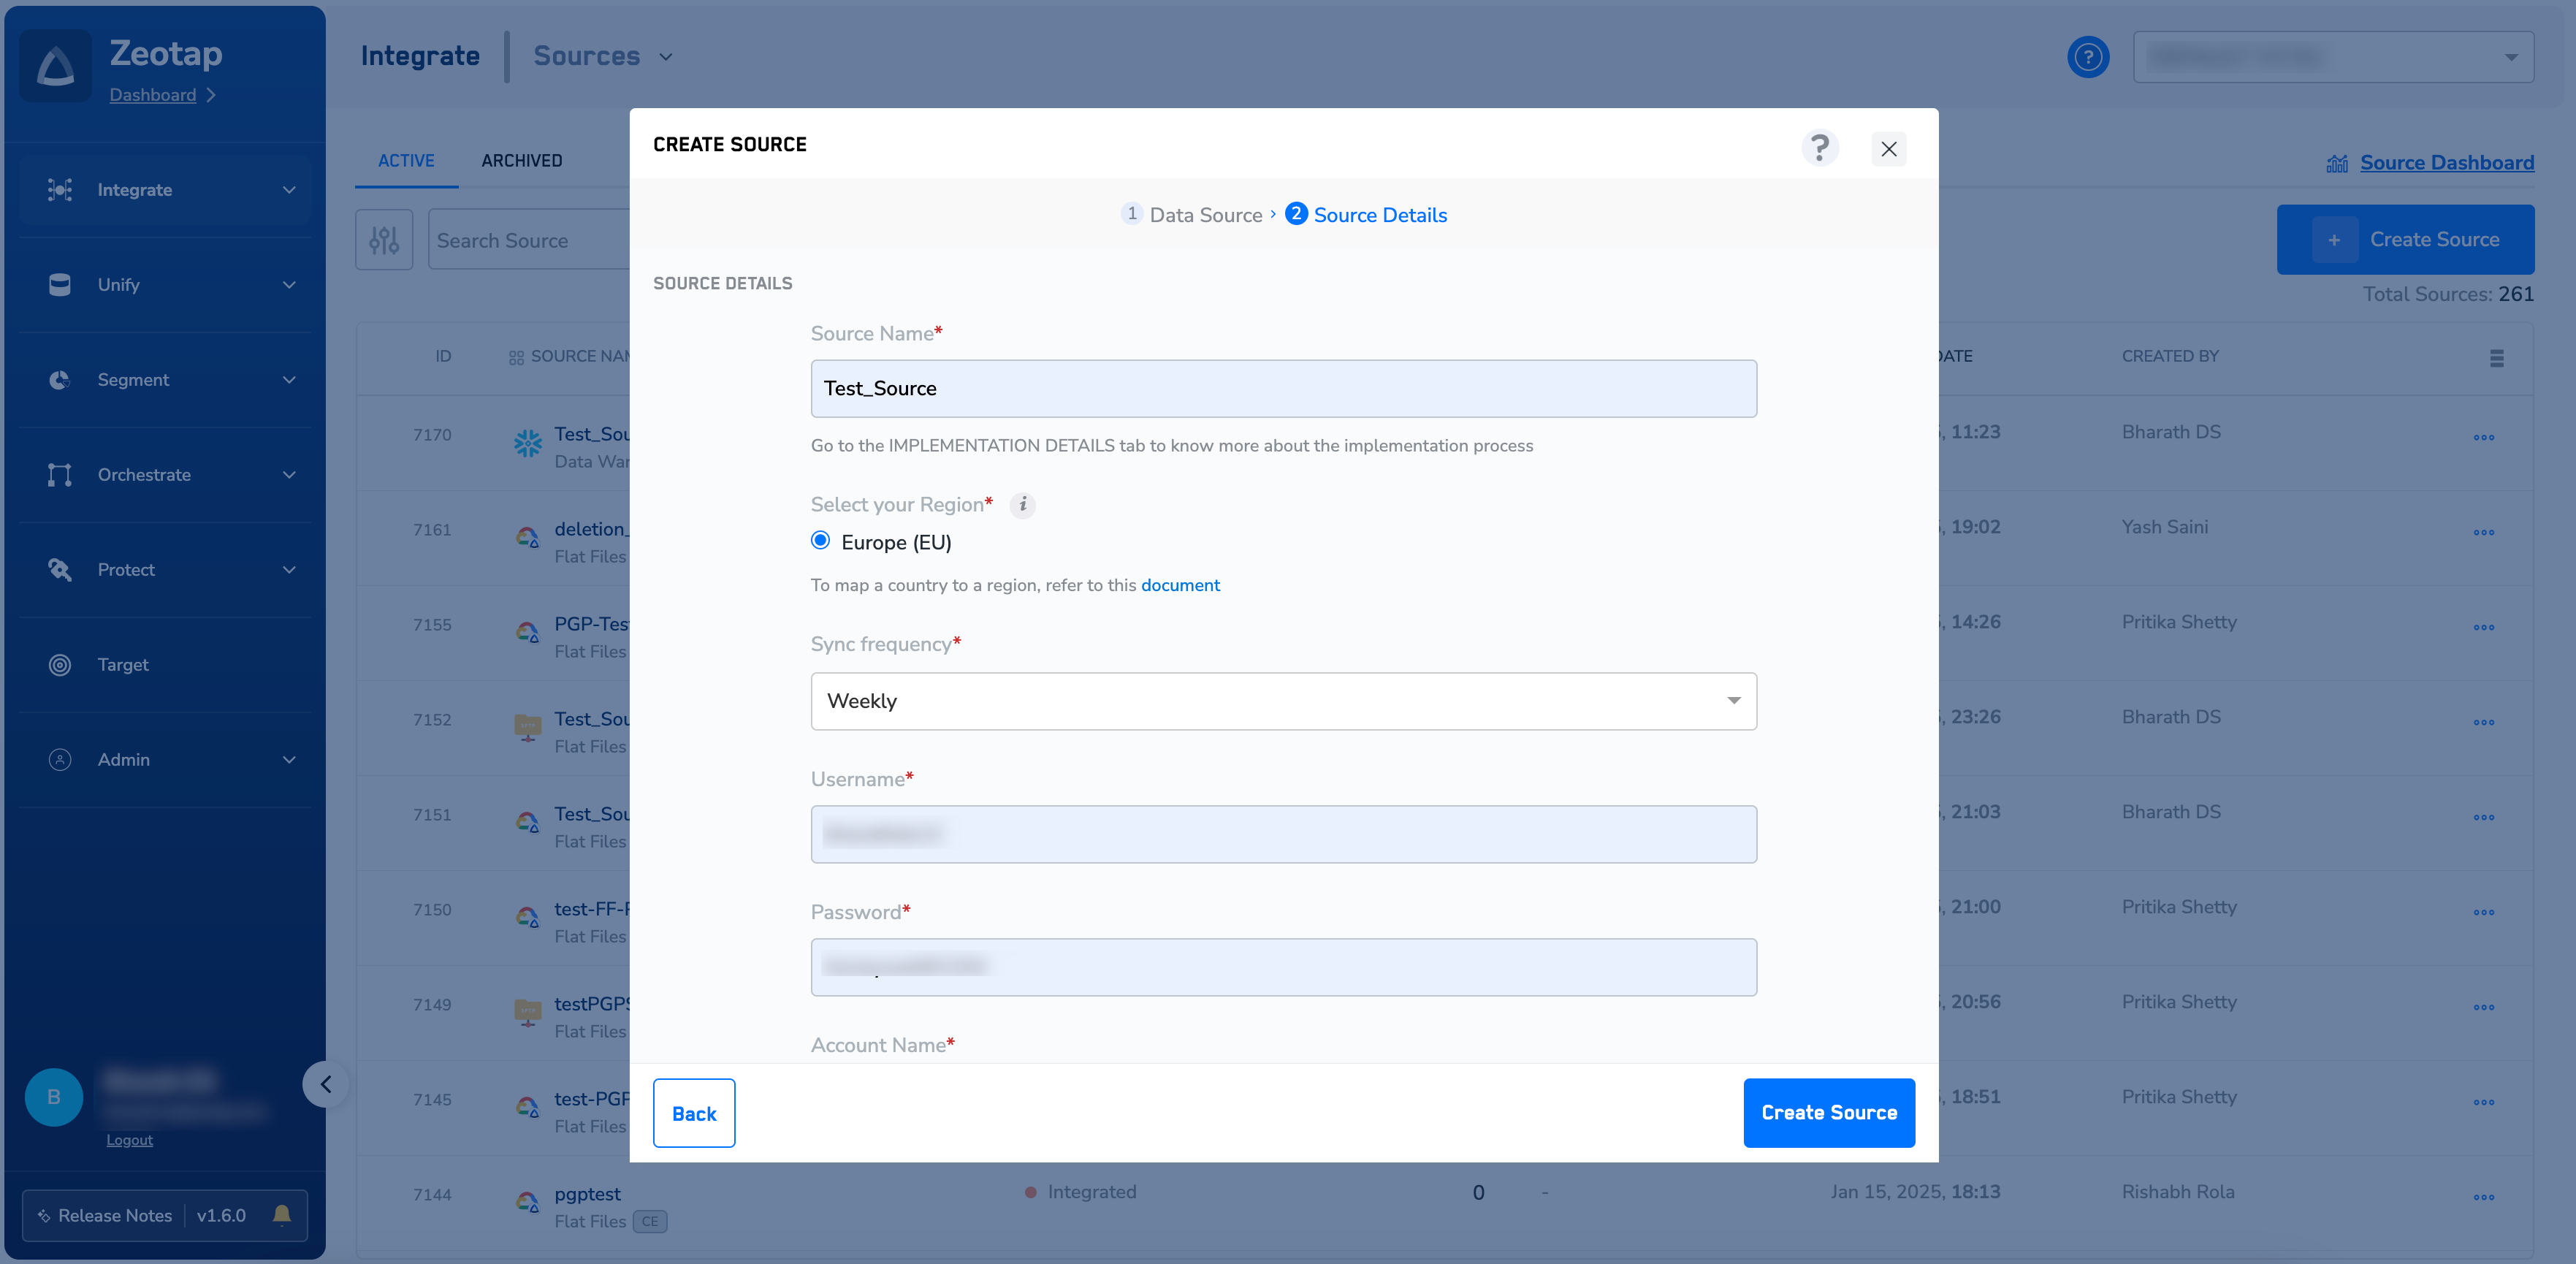
 Enter the below information based on your Snowflake account. For more information about how to obtain these from Snowflake, refer to the [Before you Begin](#before-you-begin) section.
a. Under **Source name,** enter a descriptive name for your Source.
b. Select the **region** of upload as per your requirement.
c. Choose the desired **Sync Frequency** using the drop-down. The first data sync takes place once you create the source. However, the subsequent syncs occur based on the sync frequency that you chose. Currently, we support the following sync frequencies:
* **Daily**
* **Weekly**
* **Monthly**
* **Hourly**
* **Thirty Minutes**
* **Fifteen Minutes**
d. You can provide the **Username**, **Password**, **Account name**, **Warehouse**, **Database**, **Schema**, and **Table** details that you have obtained from your Snowflake account. For more information about how to obtain them, refer to the [Before you Begin](#before-you-begin) section.
Enter the below information based on your Snowflake account. For more information about how to obtain these from Snowflake, refer to the [Before you Begin](#before-you-begin) section.
a. Under **Source name,** enter a descriptive name for your Source.
b. Select the **region** of upload as per your requirement.
c. Choose the desired **Sync Frequency** using the drop-down. The first data sync takes place once you create the source. However, the subsequent syncs occur based on the sync frequency that you chose. Currently, we support the following sync frequencies:
* **Daily**
* **Weekly**
* **Monthly**
* **Hourly**
* **Thirty Minutes**
* **Fifteen Minutes**
d. You can provide the **Username**, **Password**, **Account name**, **Warehouse**, **Database**, **Schema**, and **Table** details that you have obtained from your Snowflake account. For more information about how to obtain them, refer to the [Before you Begin](#before-you-begin) section.
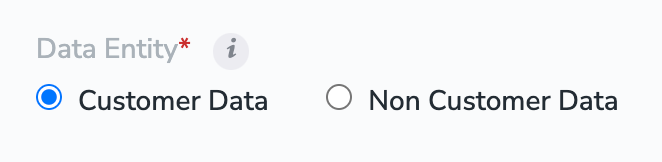
 e. Under **Data Entity**, depending on the type of data that you want to ingest, choose either **[Customer Data](https://docs.zeotap.com/articles/unify-customer/customer-data)** or **[Non Customer Data](https://docs.zeotap.com/articles/unify-customer/non-customer-entity-data).**
 f. Under **Delta Queries** **Selection**, you can choose whether or not you want to consider deltas (data additions/changes) in a table. Based on your requirement, select either **true** or **false**.
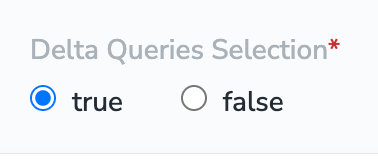 i. If you select **true**, Zeotap CDP exclusively gathers incremental updates (deltas) as per the sync frequency configured.
ii. If you select **false**, then Zeotap CDP retrieves and transfers the entire dataset during each subsequent synchronisation, regardless of any changes made. This process ensures the full dataset is updated at each sync frequency.
**Note:**
**If you wish to use the Delta Query Selection, then ensure that before creating the Snowflake source, you perform the steps mentioned** [here](#data-loading-on-snowflake).
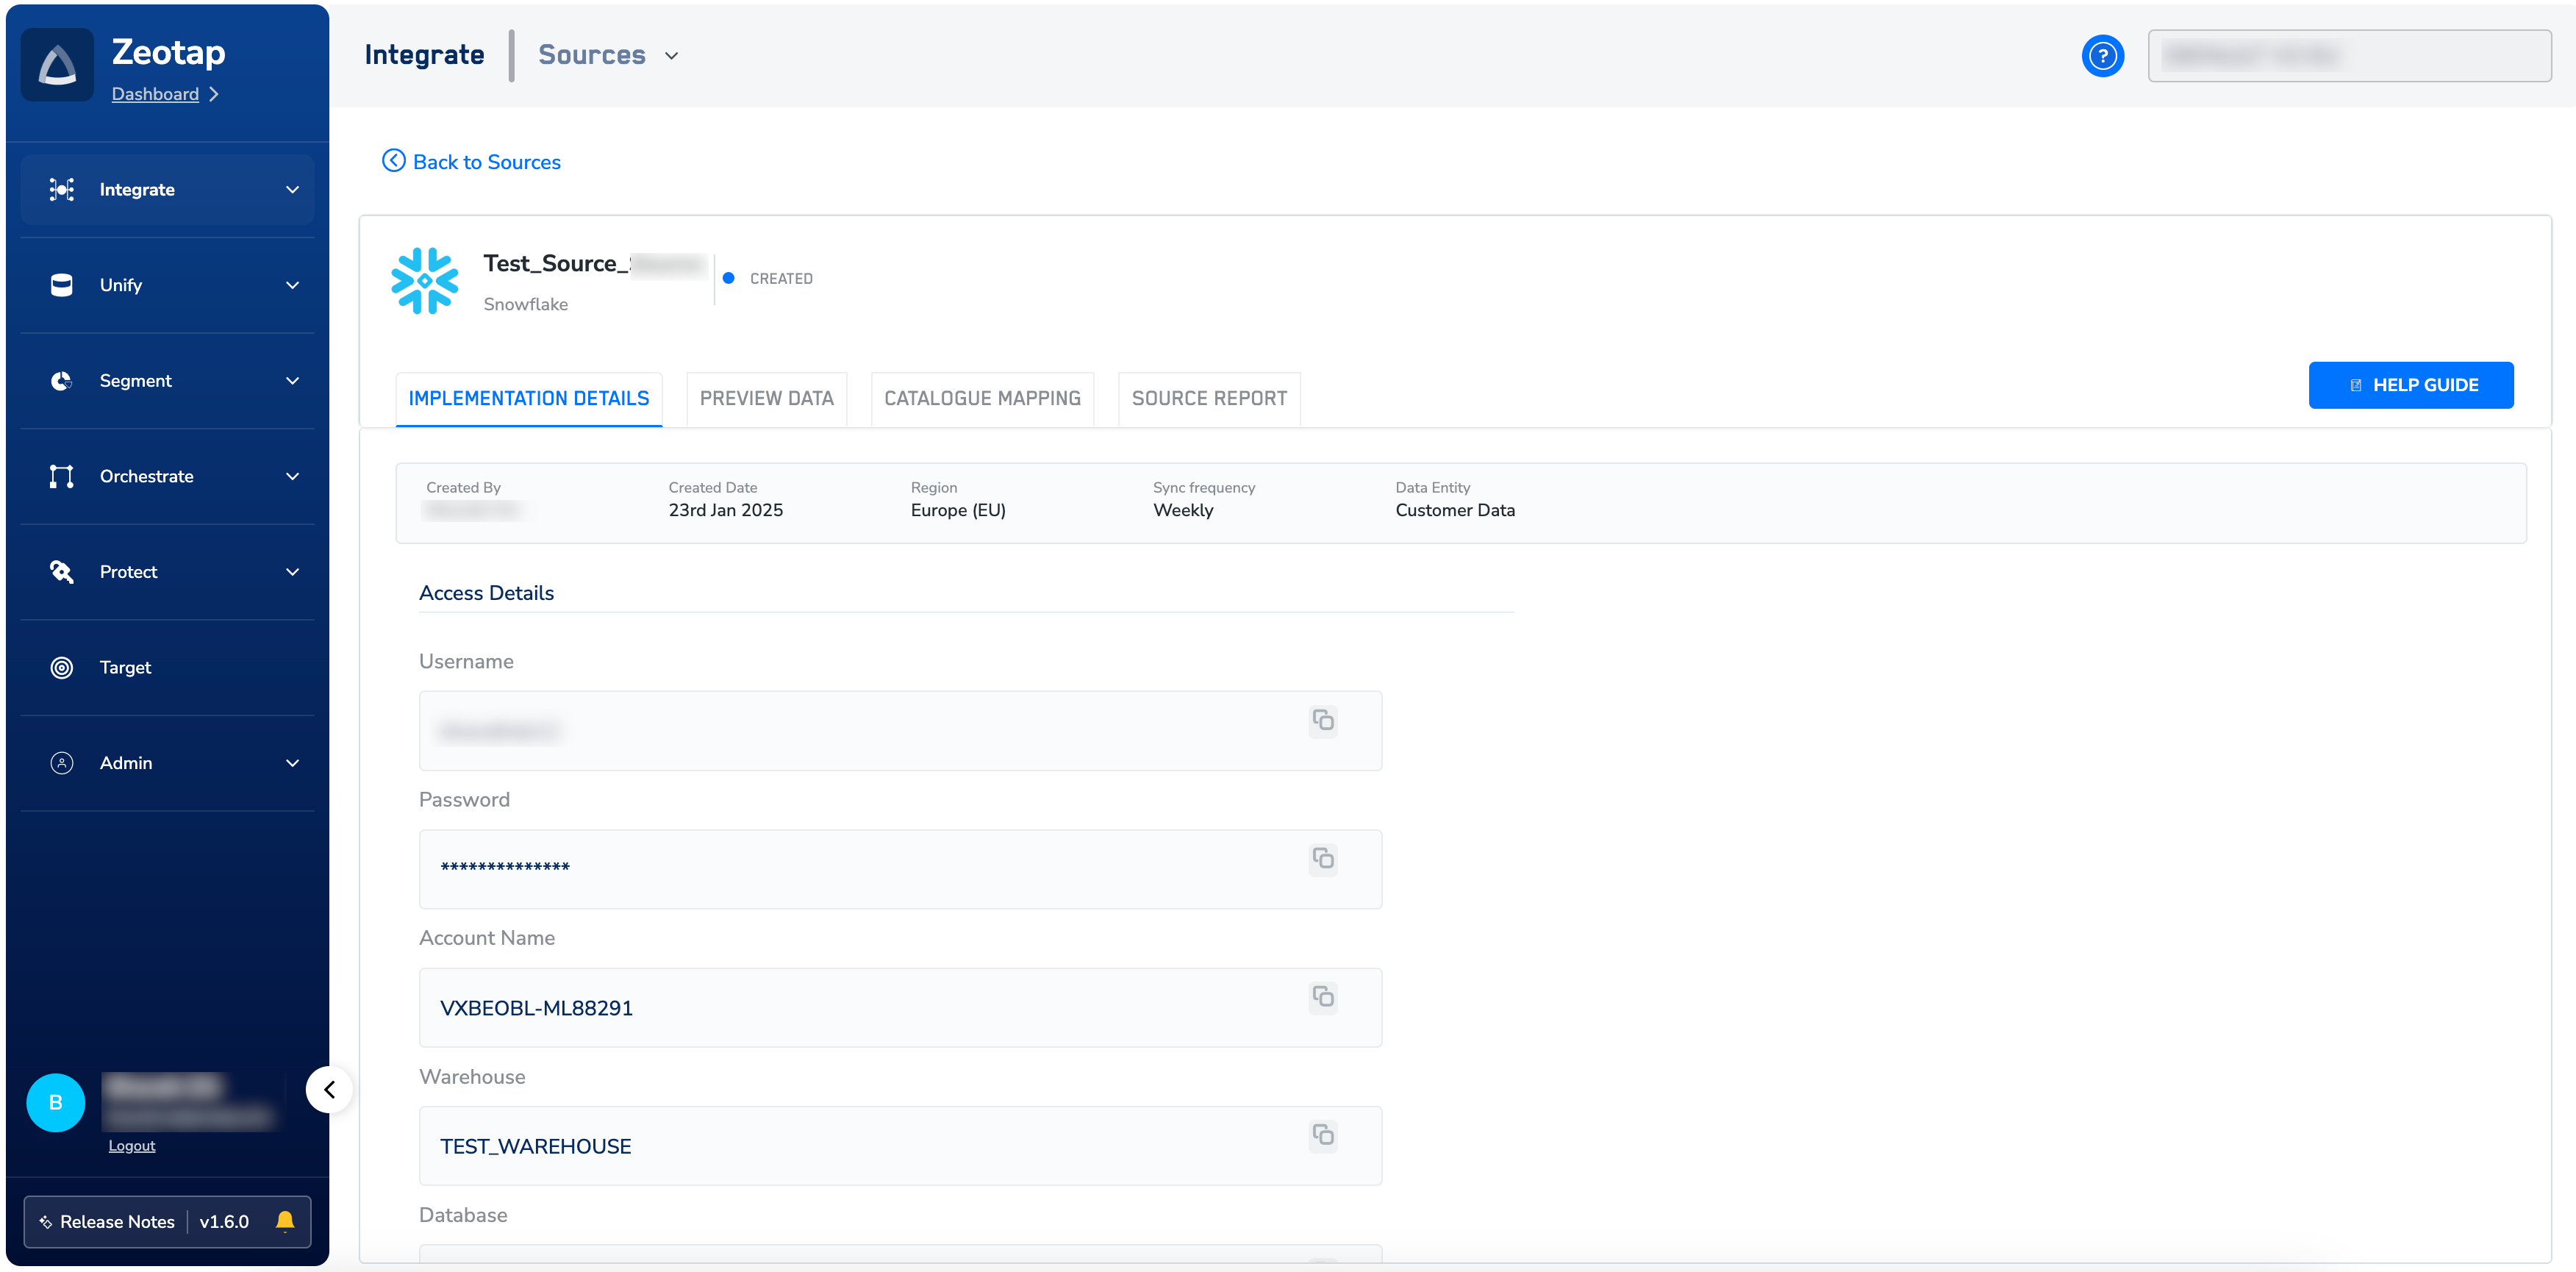
Review all the fields entered and click **Create Source**. The newly created source will be listed on the **[Source Listing](/articles/integrate-customer/components-of-the-source-listing-page)** page. You can verify the details of the created source in the **Implementation Details** tab, as shown below.
 **Note:**
You can create a maximum of five Non-Customer Entity Data (NCE) sources in an account. This default limit applies to both archived and active NCE sources within an organisation. To increase the limit, reach out to your Zeotap POC.
## Data Loading on Snowflake
After successfully creating a Snowflake source in Zeotap CDP by providing details such as User name, Password, Warehouse, Database, Schema, Table and more, you can start loading the data from your Snowflake account to Zeotap CDP. To do so, perform the following steps:
Log into your [Snowflake account](https://app.snowflake.com/).
Ensure that the **Warehouse** name matches the Warehouse name provided while the source in Zeotap CDP by navigating to your account details.
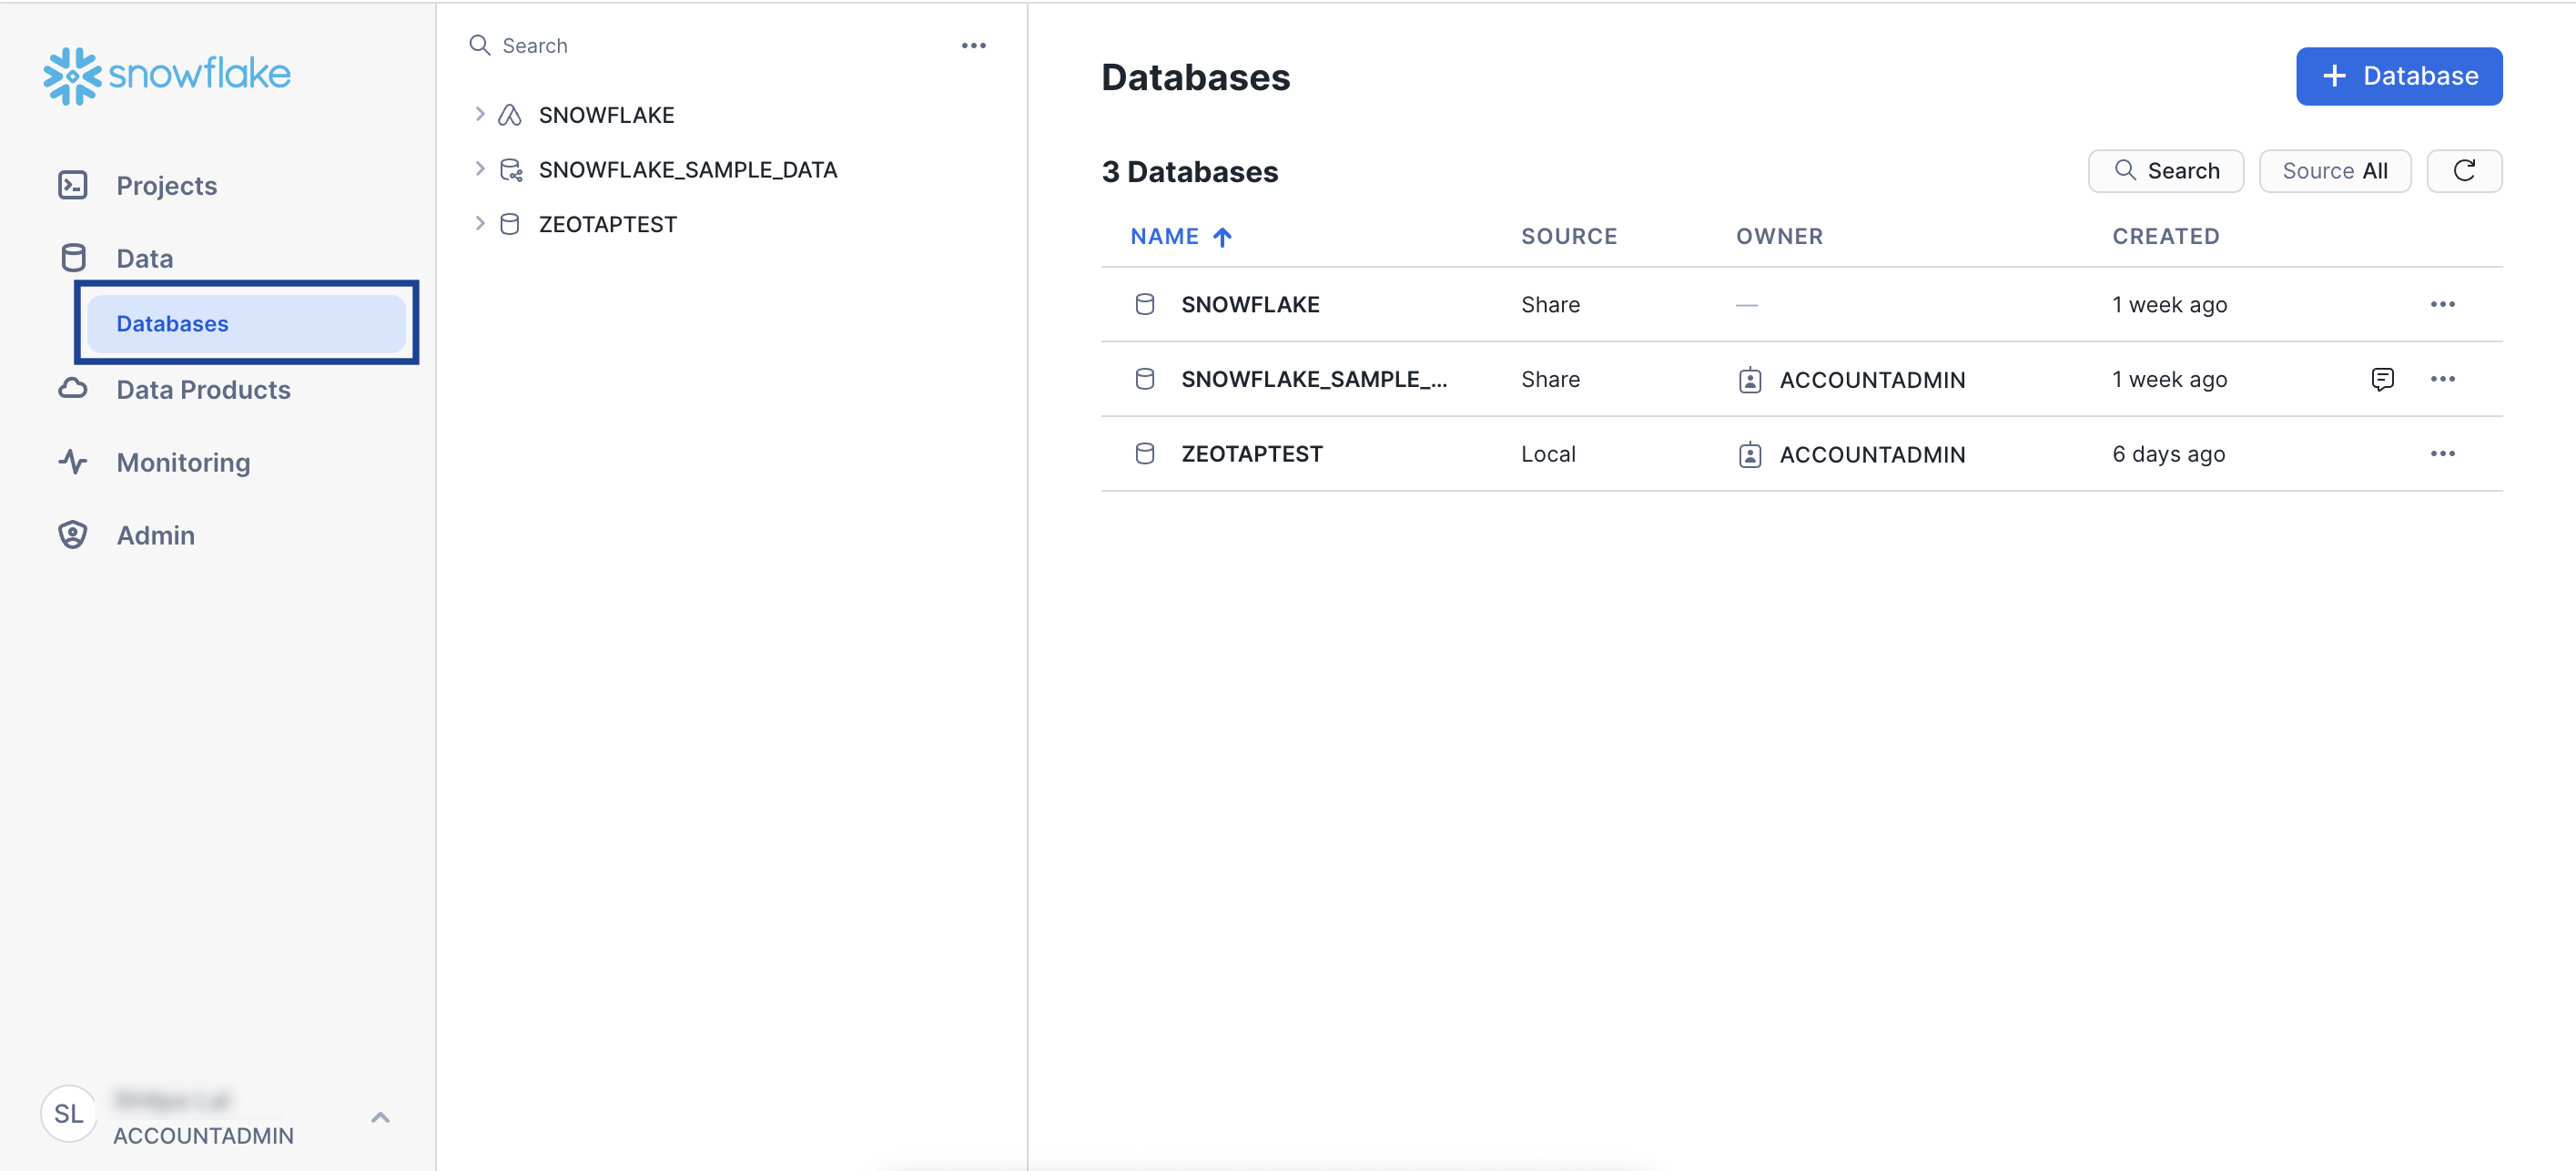
In the left navigation panel, click **Databases** under **Data.** A list of databases appears.
**Note:**
You can create a maximum of five Non-Customer Entity Data (NCE) sources in an account. This default limit applies to both archived and active NCE sources within an organisation. To increase the limit, reach out to your Zeotap POC.
## Data Loading on Snowflake
After successfully creating a Snowflake source in Zeotap CDP by providing details such as User name, Password, Warehouse, Database, Schema, Table and more, you can start loading the data from your Snowflake account to Zeotap CDP. To do so, perform the following steps:
Log into your [Snowflake account](https://app.snowflake.com/).
Ensure that the **Warehouse** name matches the Warehouse name provided while the source in Zeotap CDP by navigating to your account details.
In the left navigation panel, click **Databases** under **Data.** A list of databases appears.
 Click the **Database** that you have provided while creating the source in Zeotap CDP.
Under the chosen Database, click **Schemas.**
Click the **Database** that you have provided while creating the source in Zeotap CDP.
Under the chosen Database, click **Schemas.**
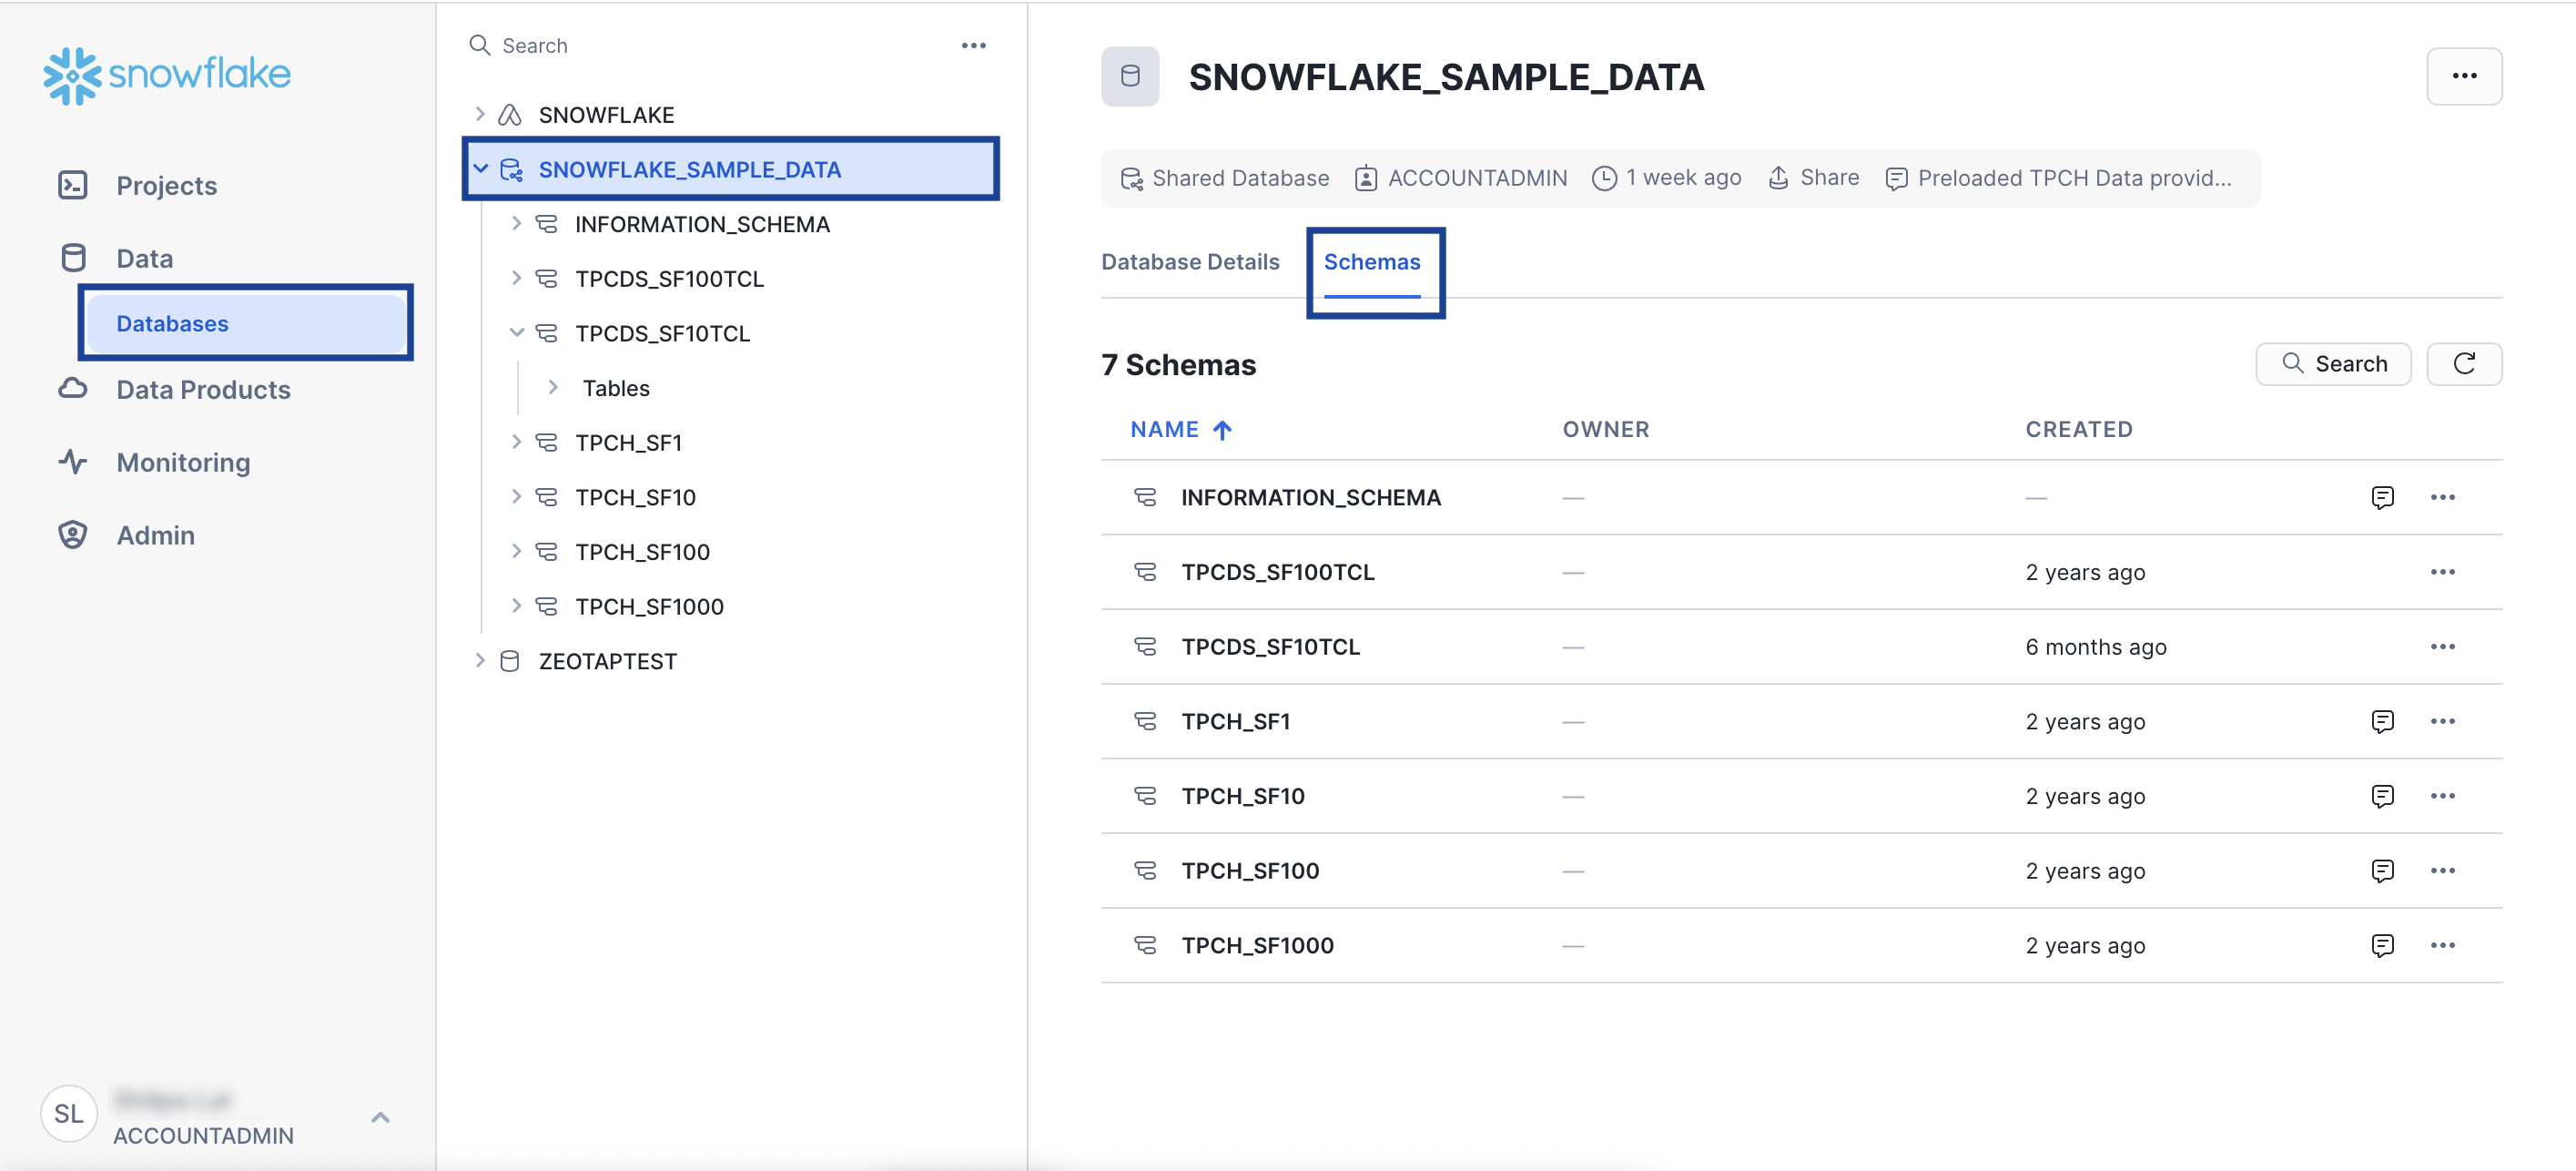 In the list of Schemas that appears, click the Schema provided while creating the source in Zeotap CDP and go to the **Tables** tab.
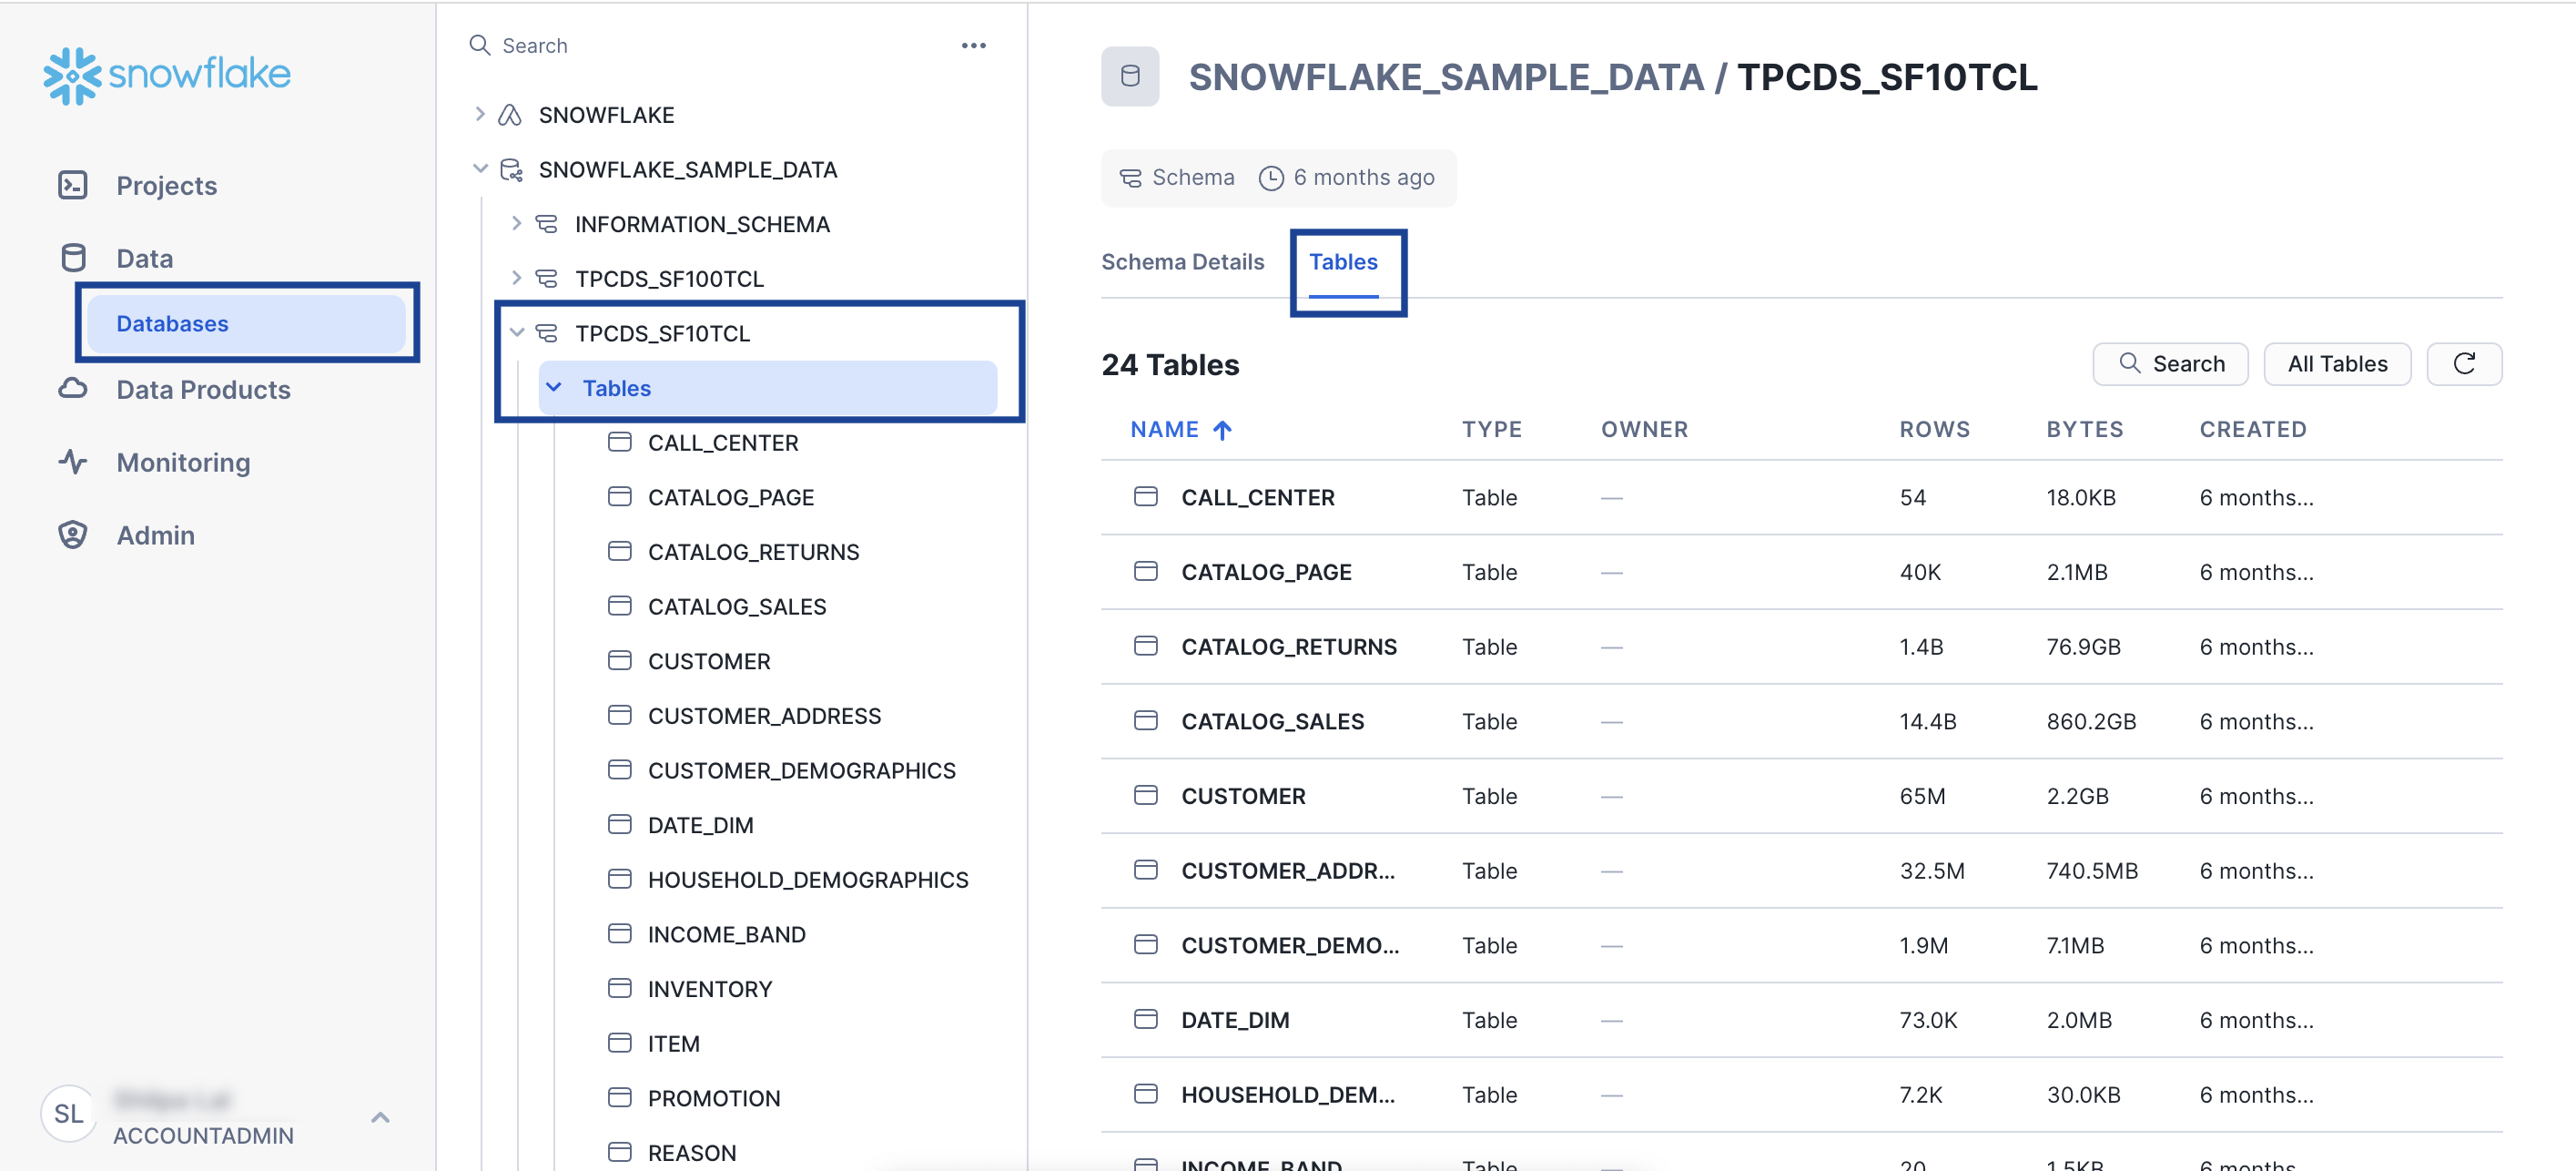 In the list of tables, click the table that you have provided while creating the source in Zeotap CDP and click **Load Data**. If you encounter a privileges error, click [here](https://docs.snowflake.com/en/user-guide/security-access-control-privileges#label-table-privileges) to learn more about the required privileges and contact your Snowflake account administrator.
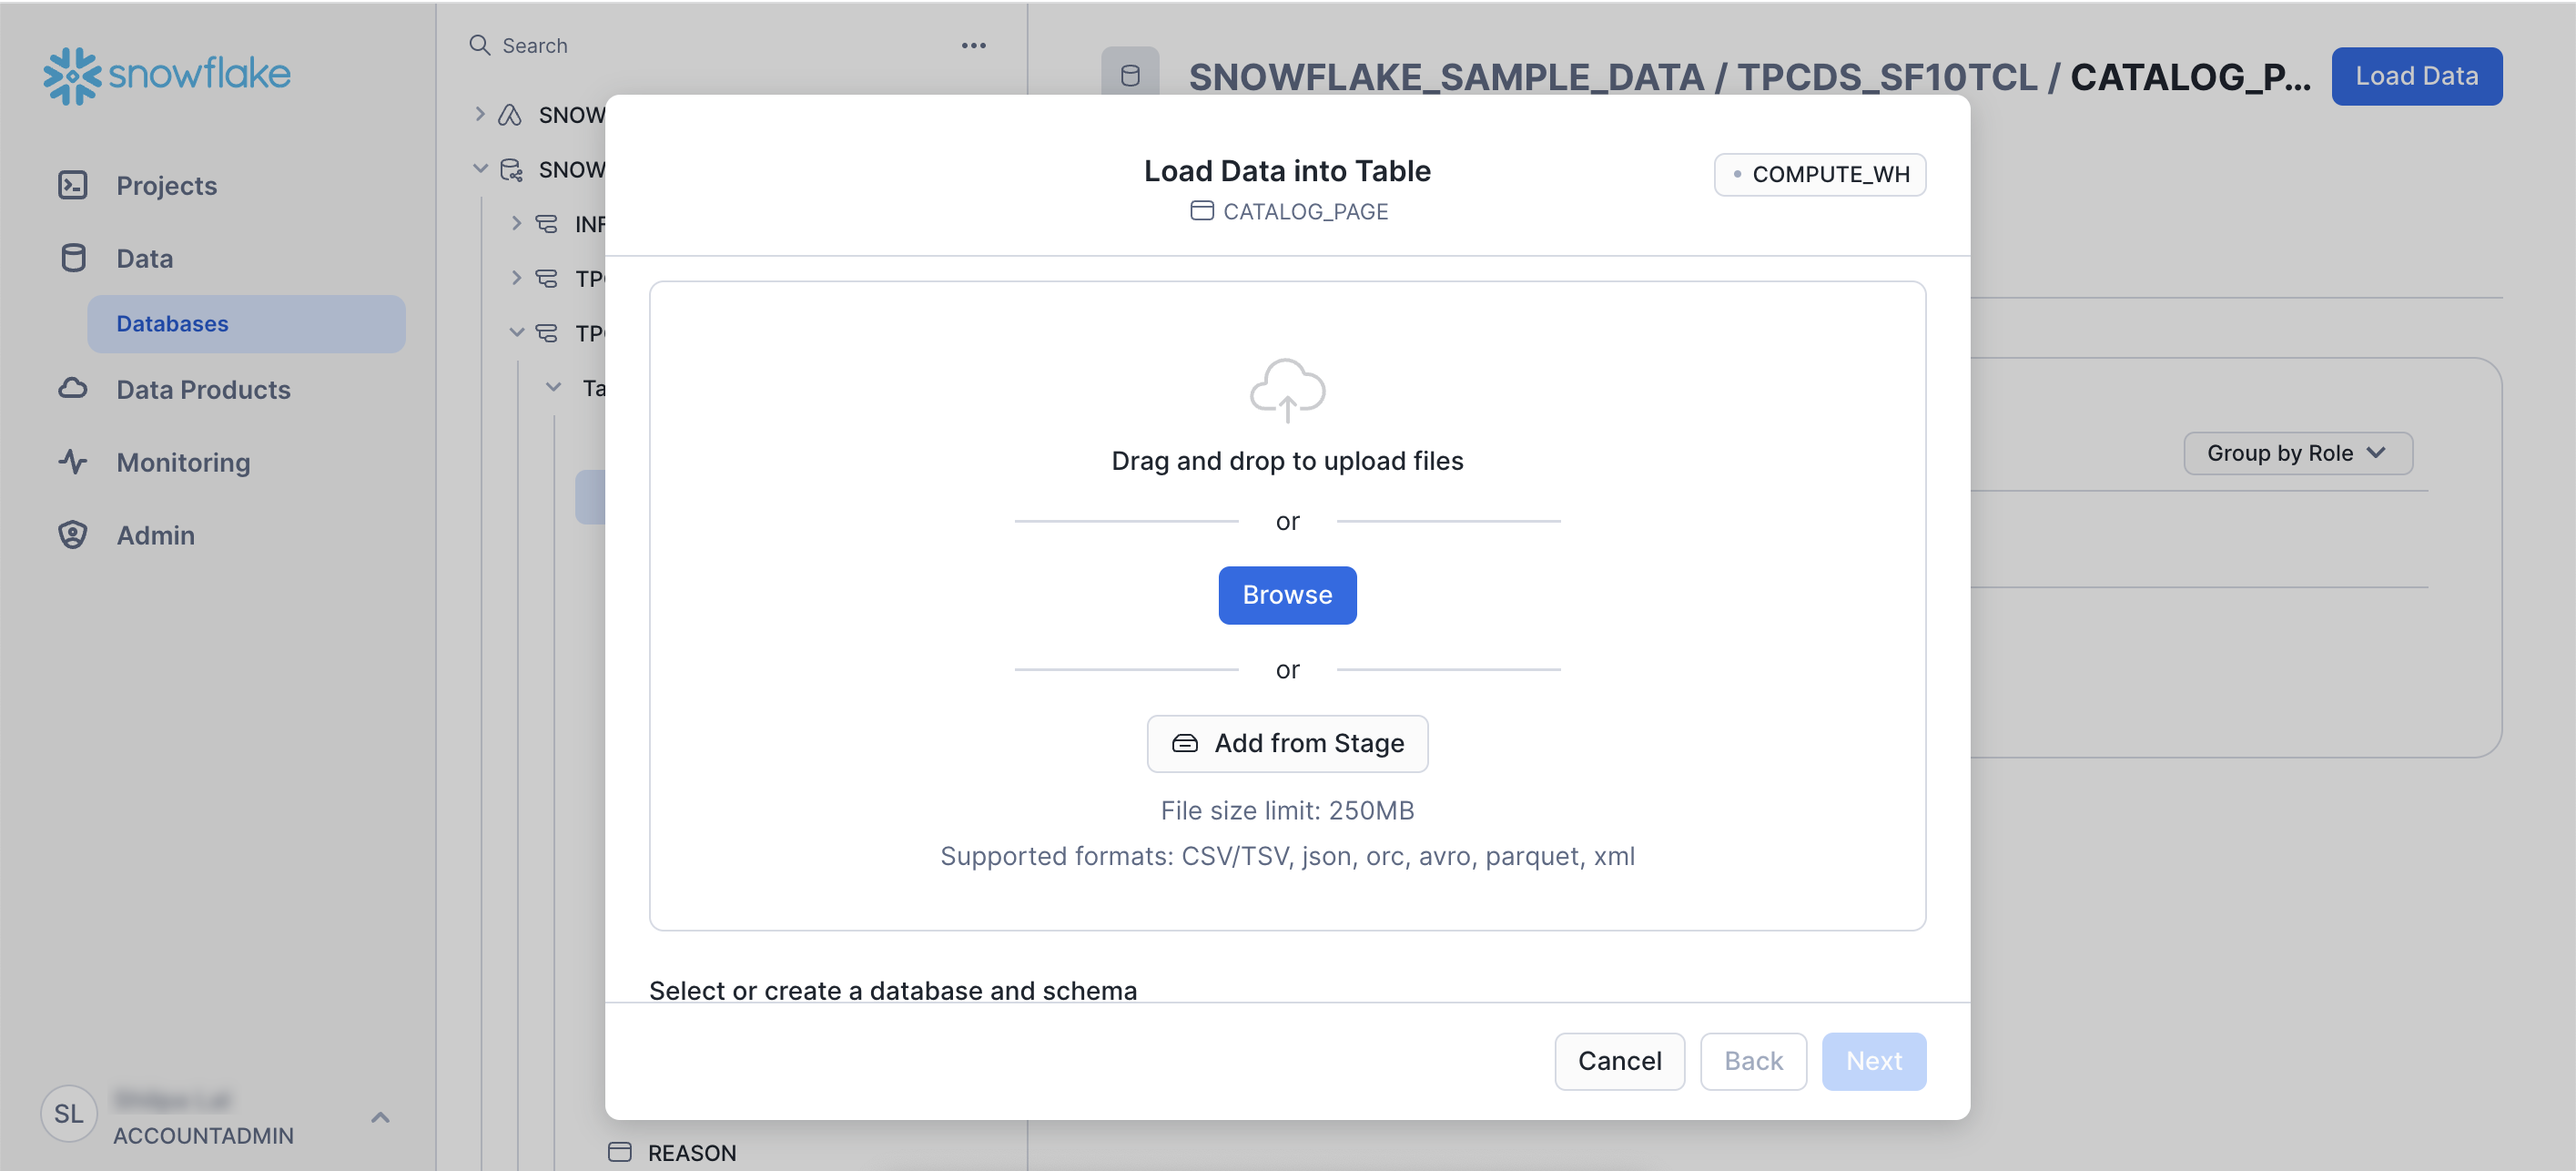
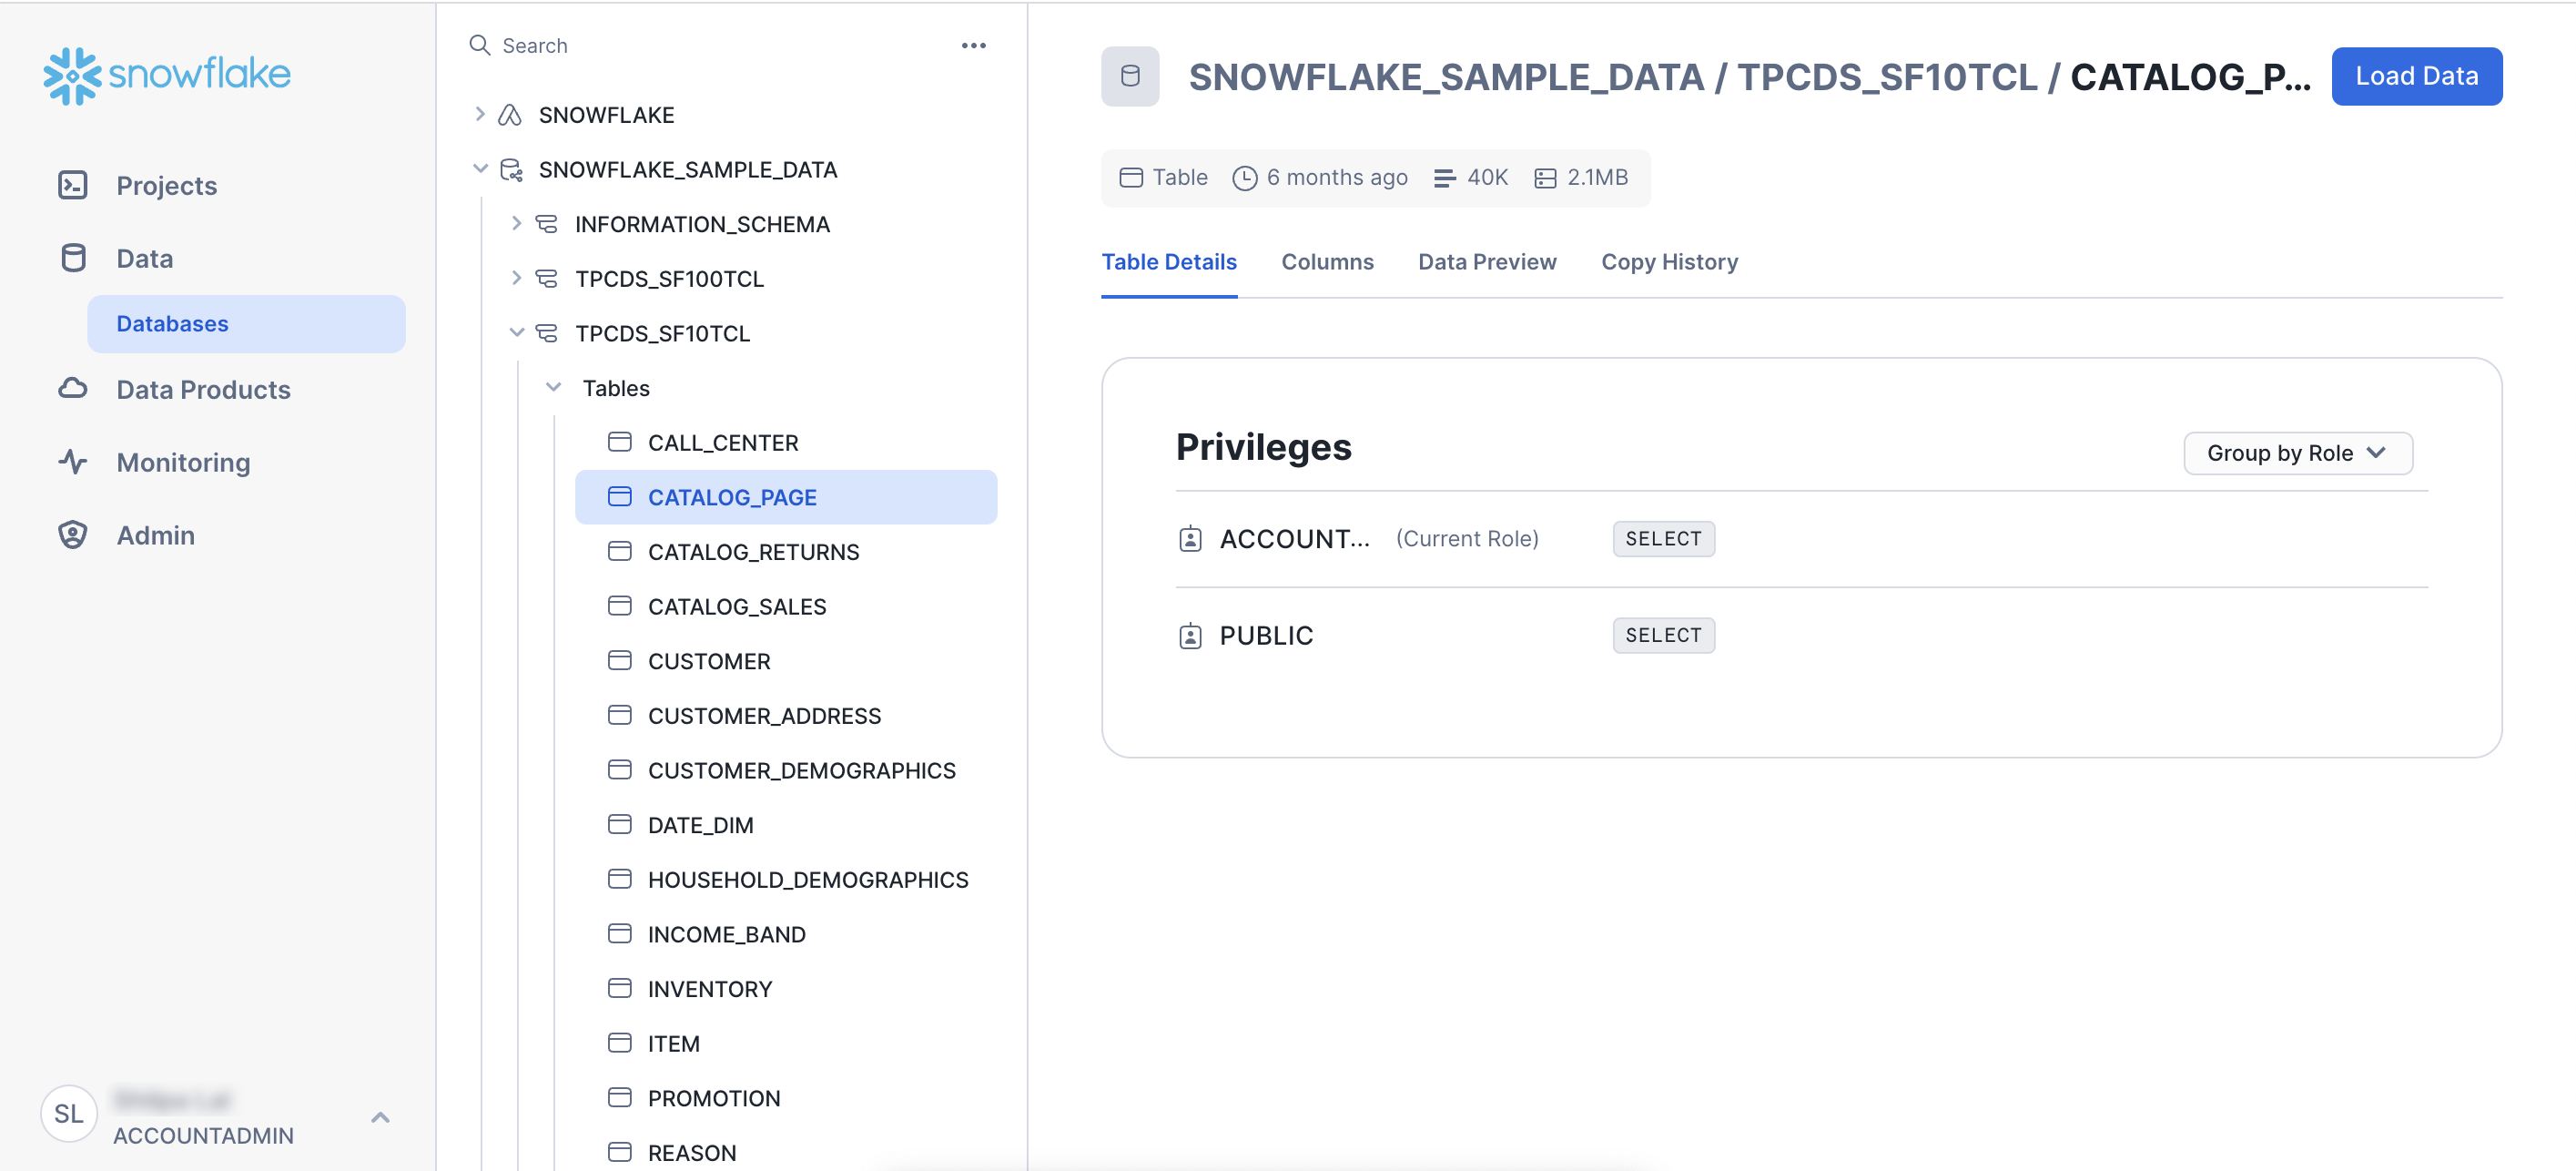 Use the **Load Data into Table** window that appears to load the data files in one of the following formats:
`CSV/TSV, JSON, ORC, AVRO, PARQUET, or XML`.
Use the **Load Data into Table** window that appears to load the data files in one of the following formats:
`CSV/TSV, JSON, ORC, AVRO, PARQUET, or XML`.
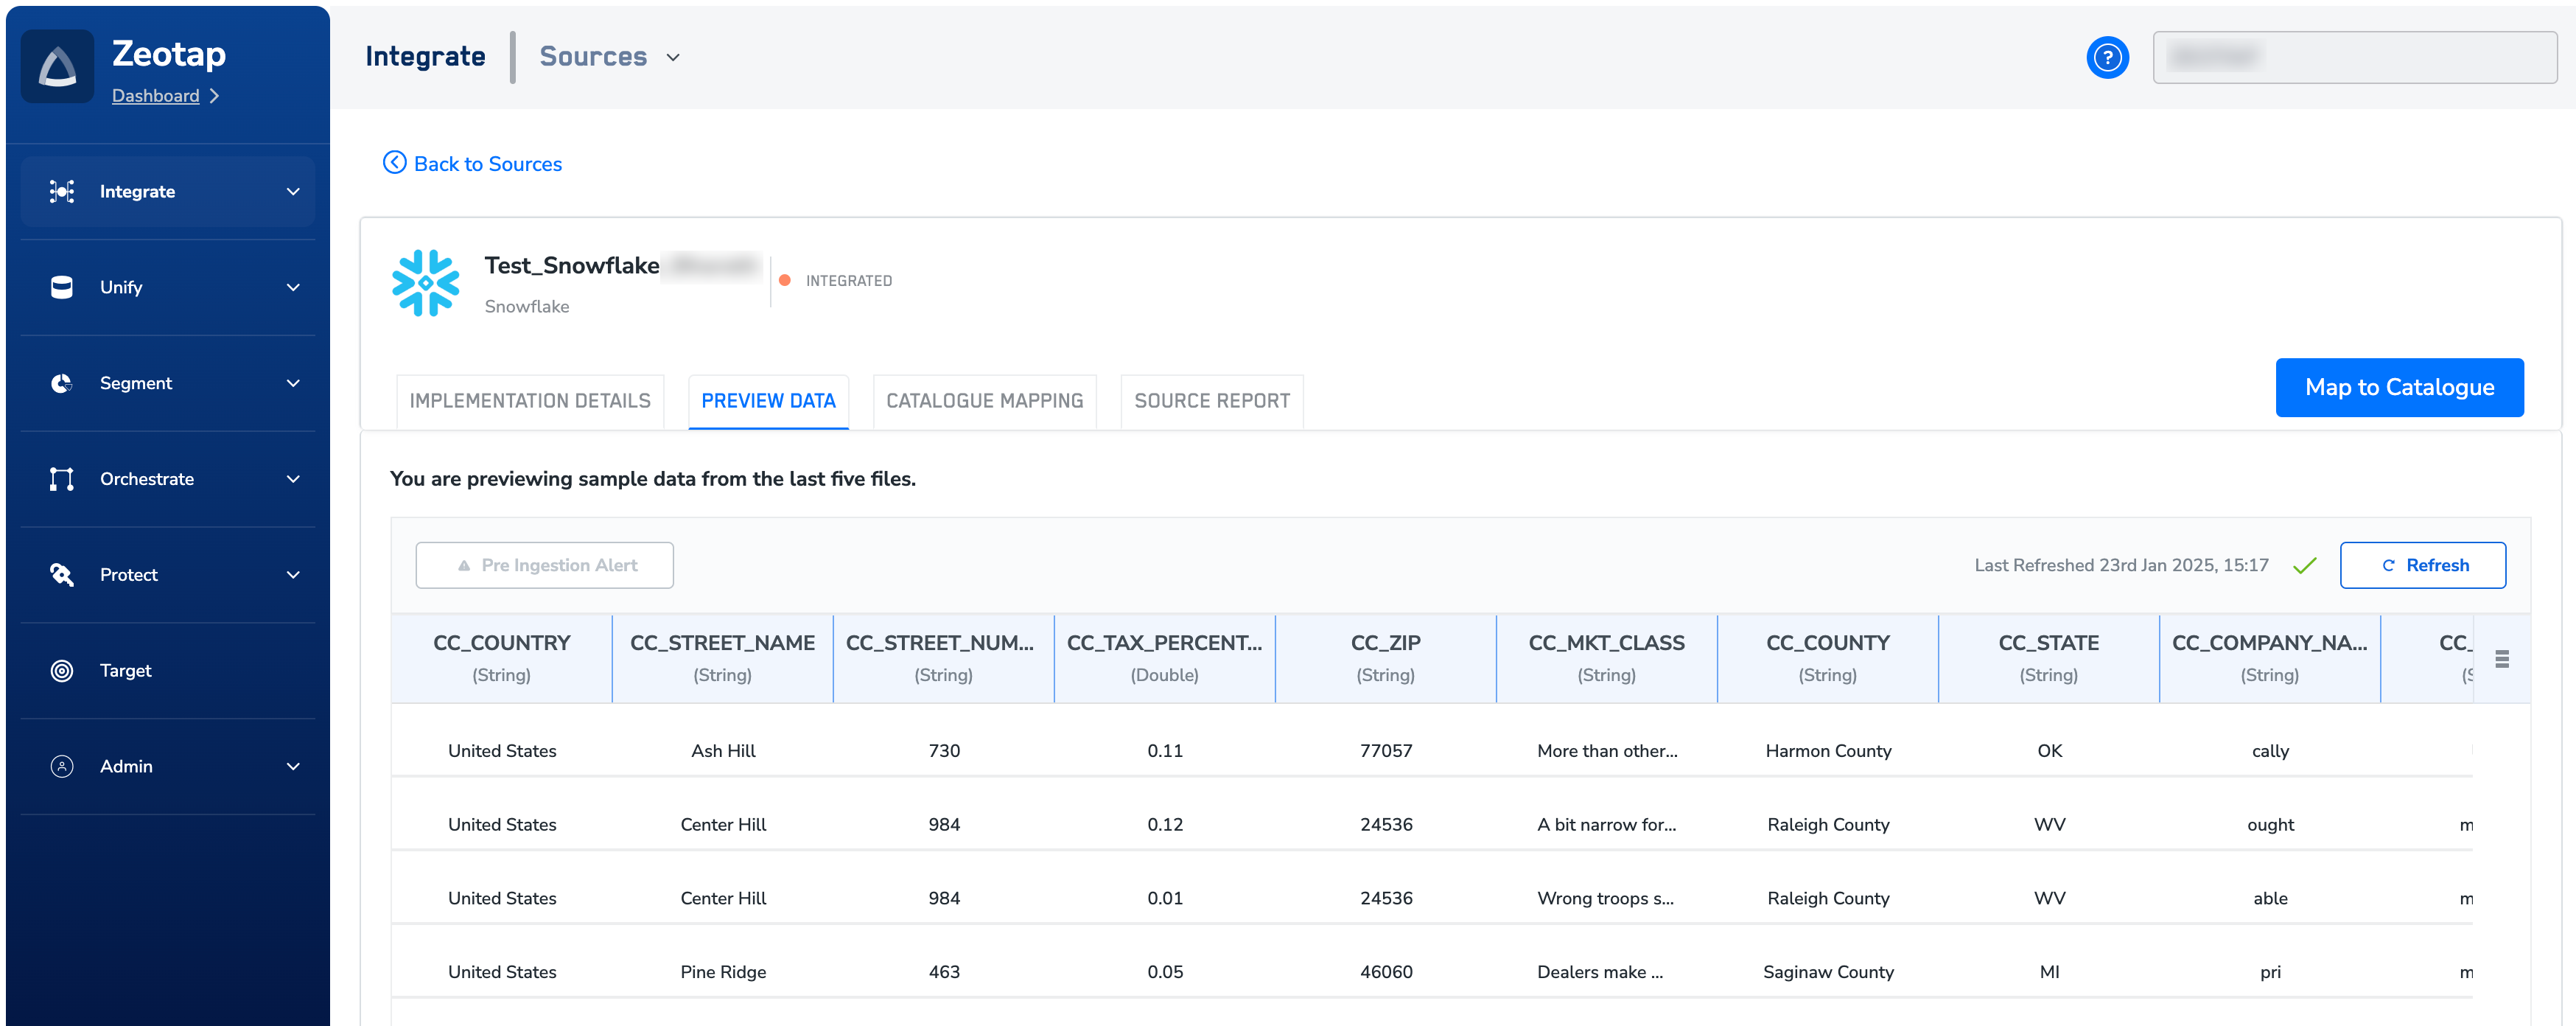
 Upon completing this process, you can verify the data flowing into your Snowflake source in Zeotap CDP under the **Preview Data** tab. At this stage, the status of the source changes from **CREATED** to **INTEGRATED**.
 **Note:**
*On the Preview tab, if you see the message "**No data has been received. Ensure to implement the source correctly and check again later**", then reach out to our support team at [support@zeotap.com](mailto:support@zeotap.com).*
## Steps to Enable Delta Fetch in Snowflake
To enable delta fetch on the desired table, perform the following steps:
In the Snowflake console, navigate to **Projects** > **Worksheets.**
Click **create New SQL** worksheet.
**Note:**
*On the Preview tab, if you see the message "**No data has been received. Ensure to implement the source correctly and check again later**", then reach out to our support team at [support@zeotap.com](mailto:support@zeotap.com).*
## Steps to Enable Delta Fetch in Snowflake
To enable delta fetch on the desired table, perform the following steps:
In the Snowflake console, navigate to **Projects** > **Worksheets.**
Click **create New SQL** worksheet.
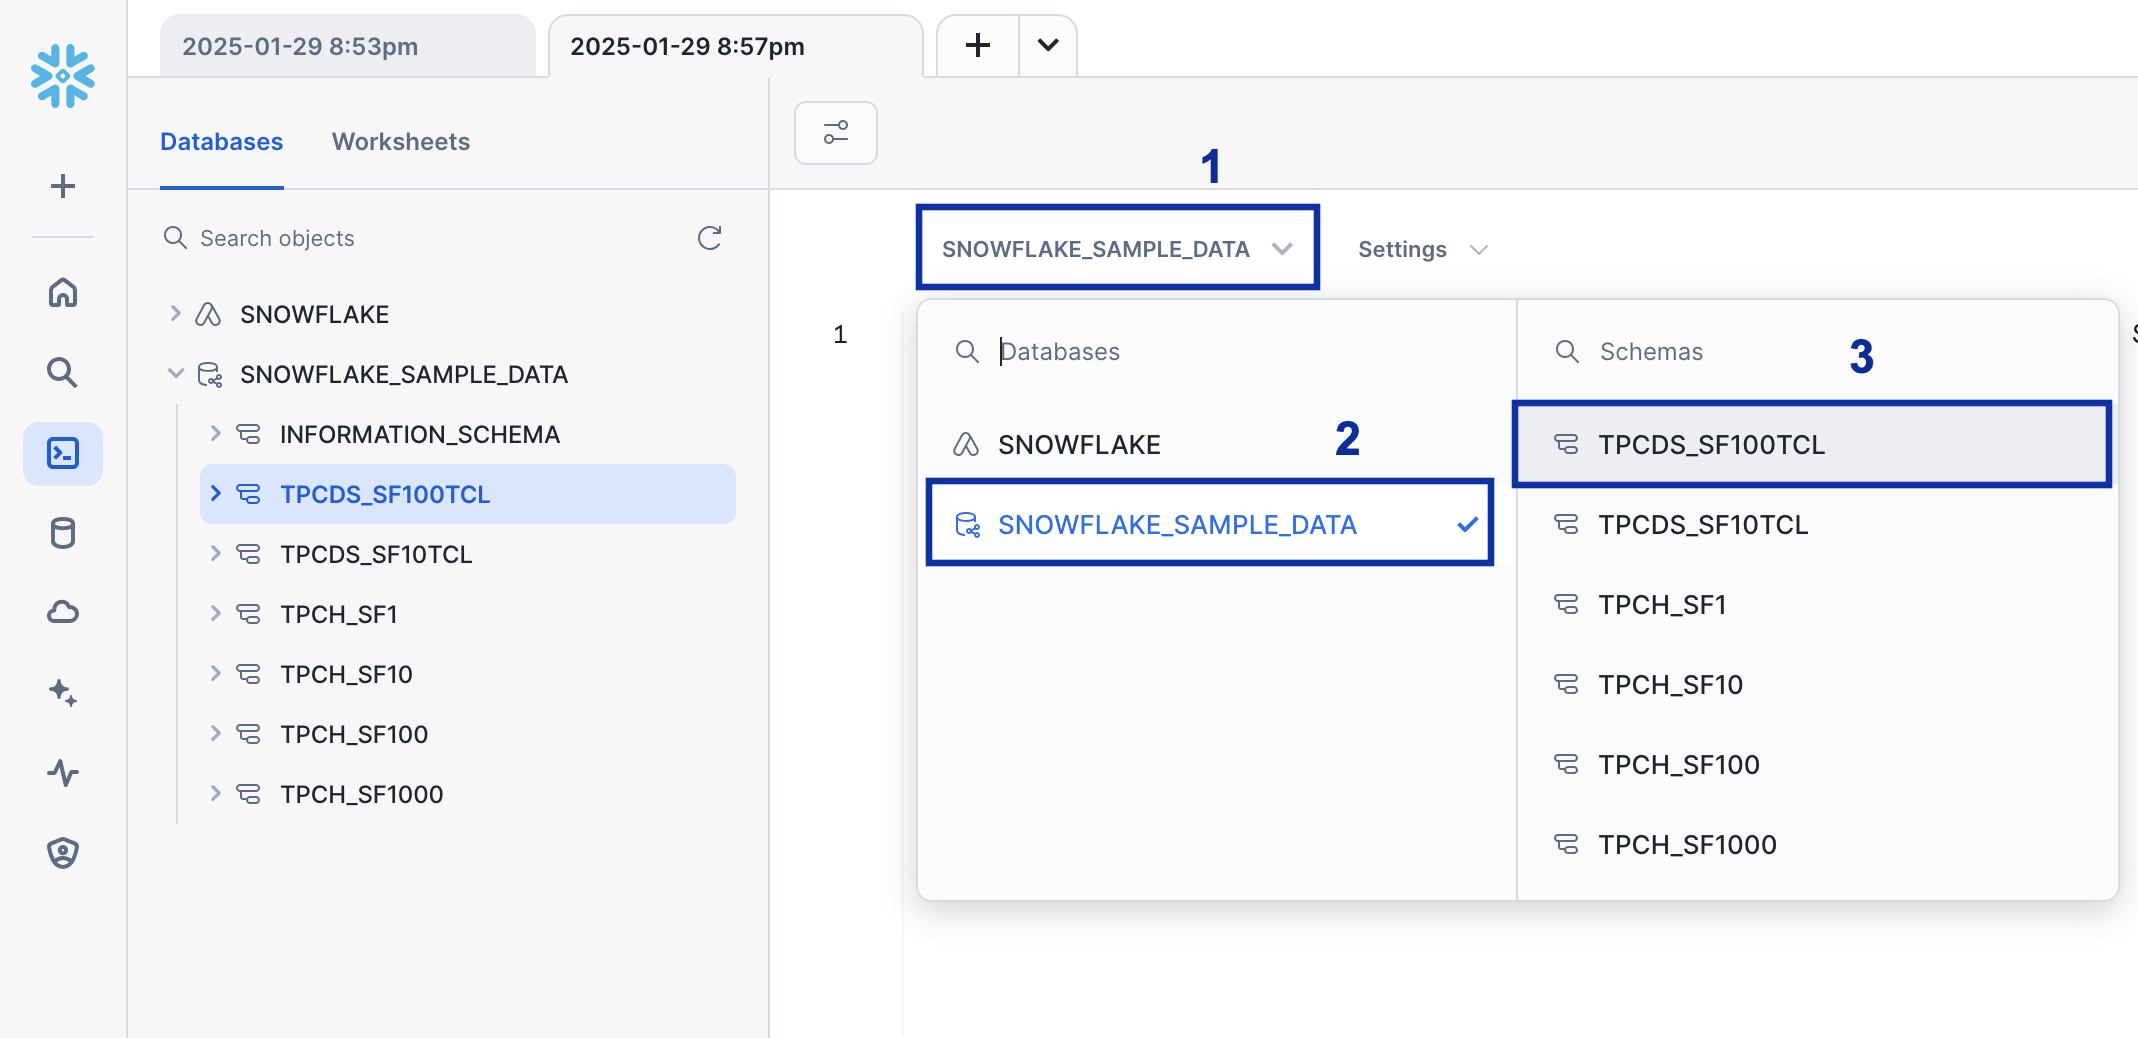
 Choose the **Database** and **Schema**, where you want to sent the data to, as shown below.
 Enter the command `ALTER TABLE ${TABLE_NAME} SET CHANGE_TRACKING = TRUE;` in the right hand side of the screen.
Replace `${TABLE_NAME}` with the actual table name and click the **Run** button.
Enter the command `ALTER TABLE ${TABLE_NAME} SET CHANGE_TRACKING = TRUE;` in the right hand side of the screen.
Replace `${TABLE_NAME}` with the actual table name and click the **Run** button.
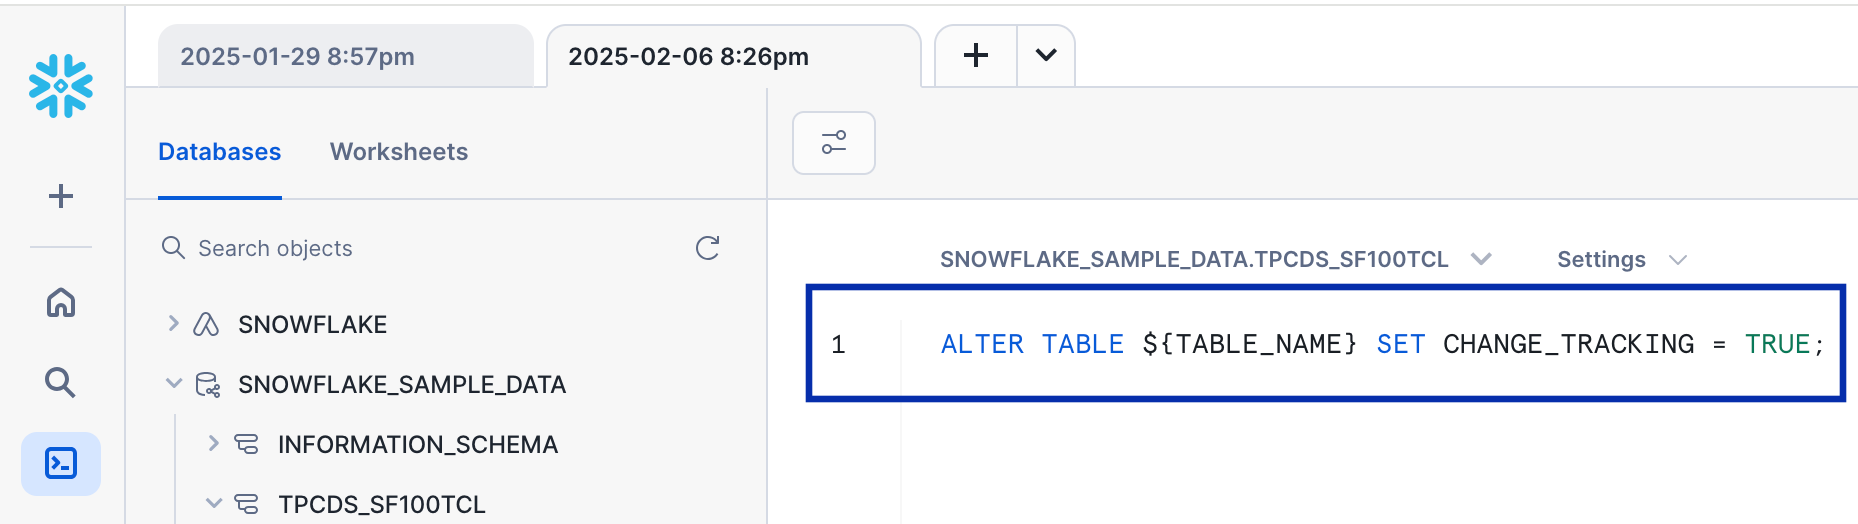 Once this process is complete, the selected table will be configured to support delta fetches.
## Related Topics
Once this process is complete, the selected table will be configured to support delta fetches.
## Related Topics